Introduction
About this tutorial
This tutorial is free and open source, and all code uses the MIT license - so you are free to do with it as you like. My hope is that you will enjoy the tutorial, and make great games!
If you enjoy this and would like me to keep writing, please consider supporting my Patreon.

Every year, the fine fellows over at r/roguelikedev run a Tutorial Tuesday series - encouraging new programmers to join the ranks of roguelike developers. Most languages end up being represented, and this year (2019) I decided that I'd use it as an excuse to learn Rust. I didn't really want to use libtcod, the default engine - so I created my own, RLTK. My initial entry into the series isn't very good, but I learned a lot from it - you can find it here, if you are curious.
The series always points people towards an excellent series of tutorials, using Python and libtcod. You can find it here. Section 1 of this tutorial mirrors the structure of this tutorial - and tries to take you from zero (how do I open a console to say Hello Rust) to hero (equipping items to fight foes in a multi-level dungeon). I'm hoping to continue to extend the series.
I also really wanted to use an Entity Component System. Rust has an excellent one called Specs, so I went with it. I've used ECS-based setups in previous games, so it felt natural to me to use it. It's also a cause of continual confusion on the subreddit, so hopefully this tutorial can shine some light on its benefits and why you might want to use one.
I've had a blast writing this - and hope to continue writing. Please feel free to contact me (I'm @herberticus on Twitter) if you have any questions, ideas for improvements, or things you'd like me to add. Also, sorry about all the Patreon spam - hopefully someone will find this sufficiently useful to feel like throwing a coffee or two my way. :-)
Copyright (C) 2019, Herbert Wolverson.
Building for the Web (WASM)
About this tutorial
This tutorial is free and open source, and all code uses the MIT license - so you are free to do with it as you like. My hope is that you will enjoy the tutorial, and make great games!
If you enjoy this and would like me to keep writing, please consider supporting my Patreon.
Web Assembly is a cool system that lets you run code compiled from non-web-based languages and run them in the browser. It comes with a few limitations:
- You are sandboxed, so you can't access much in the way of files on the user's computer.
- Threads work differently in WASM, so normal multi-threading code may not work without help.
- Your rendering back-end is going to be OpenGL, at least until WebGL is finished.
- I haven't written code to access files from the web, so you have to embed your resources. The tutorial chapters do this with the various
rltk::embedded_resource!calls. At the very least, you need to useinclude_bytes!or similar to store the resource in the executable. (Or you can help me write a file reader!)
WASM is the tool used to make the playable chapter demos work in your browser.
Building for the Web
The process for making a WASM version of your game is a little more involved than I'd like, but it works. I typically throw it into a batch file (or shell script) to automate the process.
The Tools You Need
First of all, Rust needs to have the "target" installed to handle compilation to web assembly (WASM). The target name is wasm32-unknown-unknown. Assuming that you setup Rust with rustup, you can install it by typing:
rustup target add wasm32-unknown-unknown
You also need a tool called wasm-bindgen. This is a pretty impressive tool that can scan your web assembly and build the bits and pieces need to make the code run on the web. I use the command-line version (there are ways to integrate it into your system - hopefully that will be the topic of a future chapter). You can install the tool with:
cargo install wasm-bindgen-cli
Note: You'll have to reinstall wasm-bindgen when you update your Rust toolchain.
Step 1: Compile the program for WASM
I recommend performing a release build for WASM. The debug versions can be huge, and nobody wants to wait while an enormous program downloads. Navigate to the root of your project, and type:
cargo build --release --target wasm32-unknown-unknown
The first time you do this, it will take a while. It has to recompile all the libraries you are using for web assembly! This creates files in the target/wasm32-unknown-unknown/release/ folder. There will be several folders of build information and similar, and the important files: yourproject.d (debug information) and yourproject.wasm - the actual WASM target. (Replace yourproject with the name of your project)
Step 2: Determine where to put the files
For the sake of simplicity, I'm going to use a target folder named wasm. You can use whatever you like, but you'll need to change the names in the rest of these instructions. Create the folder inside your root project folder. For example, mkdir wasm.
Step 3: Assemble web files
Now you need to use wasm-bindgen to build the web infrastructure required to integrate with the browser.
wasm-bindgen target\wasm32-unknown-unknown\release\yourproject.wasm --out-dir wasm --no-modules --no-typescript
If you look inside the wasm folder, you will see two files:
yourproject.js- JavaScript bindings for your projectyourproject_bg.wasm- A modified version of thewasmoutput including the bindings required by the JavaScript file.
I typically rename these files to myblob.js and myblob_bg.wasm. You don't have to do that, but it lets me use the same template HTML each time.
Step 4: Create some boilerplate HTML
In your wasm folder, you need to make an HTML page to host/launch your application. I use the same boilerplate each time:
<html>
  <head>
    <meta content="text/html;charset=utf-8" http-equiv="Content-Type" />
  </head>
  <body>
    <canvas id="canvas" width="640" height="480"></canvas>
    <script src="./myblob.js"></script>
    <script>
      window.addEventListener("load", async () => {
        await wasm_bindgen("./myblob_bg.wasm");
      });
    </script>
  </body>
</html>
Step 5: Host it!
You can't run WASM from a local file source (presumably for security reasons). You need to put it into a web server, and run it from there. If you have web hosting, copy your wasm folder to wherever you want it. You can then open the web server URL in a browser, and your game runs.
If you don't have web hosting, you need to install a local webserver, and serve it from there.
Help Wanted!
I'd love to integrate this into cargo web or similar, to provide a simple process for compiling and serving your games. I haven't made this work yet. If anyone would like to help, please head over to My Github and get in touch with me!
Chapter 1 : Hello Rust
About this tutorial
This tutorial is free and open source, and all code uses the MIT license - so you are free to do with it as you like. My hope is that you will enjoy the tutorial, and make great games!
If you enjoy this and would like me to keep writing, please consider supporting my Patreon.
This tutorial is primarily about learning to make roguelikes (and by extension other games), but it should also help you get used to Rust and RLTK - The Roguelike Tool Kit we'll be using to provide input/output. Even if you don't want to use Rust, my hope is that you can benefit from the structure, ideas and general game development advice.
Why Rust?
Rust first appeared in 2010, but has only relatively recently hit "stable" status - that is, code you write is pretty unlikely to stop working when the language changes now. Development is very much ongoing, with whole new sections of the language (such as the asynchronous system) still appearing/stabilizing. This tutorial will stay away from the bleeding edge of development - it should be stable.
Rust was designed to be a "better systems language" - that is, low-level like C++, but with far fewer opportunities to shoot yourself in the foot, a focus on avoiding the many "gotchas" that make C++ development difficult, and a massive focus on memory and thread safety: it's designed to be really difficult to write a program that corrupts its memory, or suffers from race conditions (it's not impossible, but you have to try!). It is rapidly gaining traction, with everyone from Mozilla to Microsoft showing interest - and an ever expanding number of tools being written in it.
Rust is also designed to have a better ecosystem than C++. Cargo provides a complete package manager (so do vcpkg, conan, etc. in C++ land, but cargo is well-integrated), a complete build system (similar to cmake, make, meson, etc. - but standardized). It doesn't run on as many platforms as C or C++, but the list is ever-growing.
I tried Rust (after urging from friends), and found that while it doesn't replace C++ in my daily toolbox - there are times that it really helped get a project out of the door. It's syntax takes a bit of getting used to, but it really does drop in nicely to existing infrastructure.
Learning Rust
If you've used other programming languages, then there's a lot of help available!
- The Rust Programming Language Book provides an excellent top-down introduction to the language.
- Learn Rust by Example is closer to my preferred way of learning (I'm already experienced in a number of languages), providing common usage examples for most of the topics you are likely to encounter.
- 24 Days of Rust provides a somewhat web-focused 24-day course on learning Rust.
- Rust's Ownership Model for JavaScript Developers should be helpful if you are coming from JS or another very-high-level language.
If you find that you need something that isn't in there, it's quite likely that someone has written a crate ("package" in every other language, but cargo deals with crates...) to help. Once you have a working environment, you can type cargo search <my term> to look for crates that help. You can also head to crates.io to see a full list of crates that are on offer in Cargo - complete with documentation and examples.
If you are completely new to programming, then a piece of bad news: Rust is a relatively young language, so there isn't a lot of "learn programming from scratch with Rust" material out there - yet. You may find it easier to start with a higher-level language, and then move "down" (closer to the metal, as it were) to Rust. The tutorials/guides linked above should get you started if you decide to take the plunge, however.
Getting Rust
On most platforms, rustup is enough to get you a working Rust toolchain. On Windows, it's an easy download - and you get a working Rust environment when it is done. On Unix-derived systems (such as Linux, and OS X) it provides some command-line instructions to install the environment.
Once it is installed, verify that it is working by typing cargo --version on your command line. You should see something like cargo 1.36.0 (c4fcfb725 2019-05-15) (the version will change over time).
Getting comfortable with a development environment
You want to make a directory/folder for your development work (I personally use users/herbert/dev/rust - but that's a personal choice. It really can be anywhere you like!). You'll also want a text editor. I'm a fan of Visual Studio Code, but you can use whatever you are comfortable with. If you do use Visual Studio Code, I recommend the following extensions:
Better TOML: makes reading toml files nice; Rust uses them a lotC/C++: uses the C++ debugger system to debug Rust codeRust (rls): not the fastest, but thorough syntax highlighting and error checking as you go.
Once you've picked your environment, open up an editor and navigate to your new folder (in VS Code, File -> Open Folder and choose the folder).
Creating a project
Now that you are in your chosen folder, you want to open a terminal/console window there. In VS Code, this is Terminal -> New Terminal. Otherwise, open a command line as normal and cd to your folder.
Rust has a built-in package manager called cargo. Cargo can make project templates for you! So to create your new project, type cargo init hellorust. After a moment, a new folder has appeared in your project - titled hellorust.
It will contain the following files and directories:
src\main.rs
Cargo.toml
.gitignore
These are:
- The
.gitignoreis handy if you are using git - it stops you from accidentally putting files into the git repository that don't need to be there. If you aren't using git, you can ignore it. src\main.rsis a simple Rust "hello world" program source.Cargo.tomldefines your project, and how it should be built.
Quick Rust Introduction - The Anatomy of Hello World
The auto-generated main.rs file looks like this:
fn main() {
    println!("Hello, world!");
}
If you've used other programming languages, this should look somewhat familiar - but the syntax/keywords are probably different. Rust started out as a mashup between ML and C, with the intent to create a flexible "systems" language (meaning: you can write bare-metal code for your CPU without needing a virtual machine like Java or C# do). Along the way, it inherited a lot of syntax from the two languages. I found the syntax looked awful for the first week of using it, and came quite naturally after that. Just like a human language, it takes a while for your brain to key into the syntax and layout.
So what does this all mean?
fnis Rust's keyword for function. In JavaScript or Java, this would readfunction main(). In C, it would readvoid main()(even thoughmainis meant to return anintin C). In C#, it would bestatic void Main(...).mainis the name of the function. In this case, the name is a special case: the operating system needs to know what to run first when it loads a program into memory - and Rust will do the extra work to markmainas the first function. You generally need amainfunction if you want your program to do anything, unless you are making a library (a collection of functions for other programs to use).- The
()is the function arguments or parameters. In this case, there aren't any - so we just use empty opening and closing parentheses. - The
{indicates the start of a block. In this case, the block is the body of the function. Everything within the{and}is the content of the function: instructions for it to run, in turn. Blocks also denote scope - so anything you declare inside the function has its access limited to that function. In other words, if you make a variable inside a function calledcheese- it won't be visible from inside a function calledmouse(and vice versa). There are ways around this, and we'll cover them as we build our game. println!is a macro. You can tell Rust macros because they have an!after their name. You can learn all about macros here; for now, you just need to know that they are special functions that are parsed into other code during compilation. Printing to the screen can be quite complicated - you might want to say more than "hello world" - and theprintln!macro covers a lot of formatting cases. (If you are familiar with C++, it's equivalent tostd::fmt. Most languages have their own string formatting system, since programmers tend to have to output a lot of text!)- The final
}closes the block started in4.
Go ahead and type cargo run. After some compilation, if everything is working you will be greeted with "Hello World" on your terminal.
Useful cargo commands
Cargo is quite the tool! You can learn a bit about it from the Learn Rust book, and everything about it from The Cargo Book if you are interested.
You'll be interacting with cargo a lot while you work in Rust. If you initialize your program with cargo init, your program is a cargo crate. Compilation, testing, running, updating - Cargo can help you with all of it. It even sets up git for you by default.
You may find the following cargo features handy:
cargo initcreates a new project. That's what you used to make the hello world program. If you really don't want to be usinggit, you can typecargo init --vcs none (projectname).cargo builddownloads all dependencies for a project and compiles them, and then compiles your program. It doesn't actually run your program - but this is a good way to quickly find compiler errors.cargo updatewill fetch new versions of the crates you listed in yourcargo.tomlfile (see below).cargo cleancan be used to delete all of the intermediate work files for your project, freeing up a bunch of disk space. They will automatically download and recompile the next time you run/build your project. Occasionally, acargo cleancan help when things aren't working properly - particularly IDE integration.cargo verify-projectwill tell you if your Cargo settings are correct.cargo installcan be used to install programs via Cargo. This is helpful for installing tools that you need.
Cargo also supports extensions - that is, plugins that make it do even more. There are some that you may find particularly useful:
- Cargo can reformat all your source code to look like standard Rust from the Rust manuals. You need to type
rustup component add rustfmtonce to install the tool. After that's done, you can typecargo fmtto format your code at any time. - If you'd like to work with the
mdbookformat - used for this book! - cargo can help with that, too. Just once, you need to runcargo install mdbookto add the tools to your system. After that,mdbook buildwill build a book project,mdbook initwill make a new one, andmdbook servewill give you a local webserver to view your work! You can learn all aboutmdbookon their documentation page. - Cargo can also integrate with a "linter" - called
Clippy. Clippy is a little pedantic (just like his Microsoft Office namesake!). Just the once, runrustup component add clippy. You can now typecargo clippyat any time to see suggestions for what may be wrong with your code!
Making a new project
Lets modify the newly created "hello world" project to make use of RLTK - the Roguelike Toolkit.
Setup Cargo.toml
The auto-generated Cargo file will look like this:
[package]
name = "helloworld"
version = "0.1.0"
authors = ["Your name if it knows it"]
edition = "2018"

# See more keys and their definitions at https://doc.rust-lang.org/cargo/reference/manifest.html

[dependencies]
Go ahead and make sure that your name is correct! Next, we're going to ask Cargo to use RLTK - the Roguelike toolkit library. Rust makes this very easy. Adjust the dependencies section to look like this:
[dependencies]
rltk = { version = "0.8.0" }
We're telling it that the package is named rltk, and is available in Cargo - so we just have to give it a version. You can do cargo search rltk to see the latest version at any time, or go to the crate webpage.
It's a good idea to occasionally run cargo update - this will update the libraries used by your program.
Hello Rust - RLTK Style!
Go ahead and replace the contents of src\main.rs with:
use rltk::{Rltk, GameState};

struct State {}
impl GameState for State {
    fn tick(&mut self, ctx : &mut Rltk) {
        ctx.cls();
        ctx.print(1, 1, "Hello Rust World");
    }
}

fn main() -> rltk::BError {
    use rltk::RltkBuilder;
    let context = RltkBuilder::simple80x50()
        .with_title("Roguelike Tutorial")
        .build()?;
    let gs = State{ };
    rltk::main_loop(context, gs)
}
Now create a new folder called resources. RLTK needs a few files to run, and this is where we put them. Download resources.zip, and unzip it into this folder. Be careful to have resources/backing.fs (etc.) and not resources/resources/backing.fs.
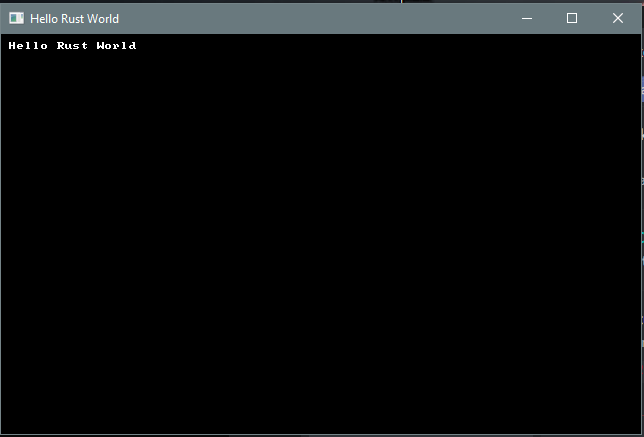
Save, and go back to the terminal. Type cargo run, and you will be greeted with a console window showing Hello Rust.
If you're new to Rust, you are probably wondering what exactly the Hello Rust code does, and why it is there - so we'll take a moment to go through it.
- The first line is equivalent to C++'s
#includeor C#'susing. It simply tells the compiler that we are going to requireRltkandGameStatetypes from the namespacerltk. You used to need an additionalextern crateline here, but the most recent version of Rust can now figure it out for you. - With
struct State{}, we are creating a newstructure. Structures are like Records in Pascal, or Classes in many other languages: you can store a bunch of data inside them, and you can also attach "methods" (functions) to them. In this case, we don't actually need any data - we just need a place to attach code. If you'd like to learn more about Structs, this is the Rust Book chapter on the topic impl GameState for Stateis quite a mouthful! We're telling Rust that ourStatestructure implements the traitGameState. Traits are like interfaces or base classes in other languages: they setup a structure for you to implement in your own code, which can then interact with the library that provides them - without that library having to know anything else about your code. In this case,GameStateis a trait provided by RLTK. RLTK requires that you have one - it uses it to call into your program on each frame. You can learn about traits in this chapter of the Rust book.fn tick(&mut self, ctx : &mut Rltk)is a function definition. We're inside the trait implementation scope, so we are implementing the function for the trait - so it has to match the type required by the trait. Functions are a basic building block of Rust, I recommend the Rust book chapter on the topic.- In this case,
fn tickmeans "make a function, called tick" (it's called "tick" because it "ticks" with each frame that is rendered; it's common in game programming to refer to each iteration as a tick). - It doesn't end with an
-> type, so it is equivalent to avoidfunction in C - it doesn't return any data once called. The parameters can also benefit from a little explanation. &mut selfmeans "this function requires access to the parent structure, and may change it" (themutis short for "mutable" - meaning it can change variables inside the structure - "state"). You can also have functions in a structure that just have&self- meaning, we can see the content of the structure, but can't change it. If you omit the&selfaltogether, the function can't see the structure at all - but can be called as if the structure was a namespace (you see this a lot with functions callednew- they make a new copy of the structure for you).ctx: &mut Rltkmeans "pass in a variable calledctx" (ctxis an abbreviation for "context"). The colon indicates that we're specifying what type of variable it must be.&means "pass a reference" - which is a pointer to an existing copy of the variable. The variable isn't copied, you are working on the version that was passed in; if you make a change, you are changing the original. The Rust Book explains this better than I can.mutonce again indicates that this is a "mutable" reference: you are allowed to make changes to the context.- Finally
Rltkis the type of the variable you are receiving. In this case, it's astructdefined inside theRLTKlibrary that provides various things you can do to the screen.
- In this case,
ctx.cls();says "call theclsfunction provided by the variablectx.clsis a common abbreviation for "clear the screen" - we're telling our context that it should clear the virtual terminal. It's a good idea to do this at the beginning of a frame, unless you specifically don't want to.ctx.print(1, 1, "Hello Rust World");is asking the context to print "Hello Rust World" at the location (1,1).- Now we get to
fn main(). Every program has amainfunction: it tells the operating system where to start the program. -
is an example of calling a function from inside ause rltk::RltkBuilder; let context = RltkBuilder::simple80x50() .with_title("Roguelike Tutorial") .build()?;struct- where that struct doesn't take a "self" function. In other languages, this would be called a constructor. We're calling the functionsimple80x50(which is a builder provided by RLTK to make a terminal 80 characters wide by 50 characters high. The window title is "Roguelike Tutorial". let gs = State{ };is an example of a variable assignment (see The Rust Book). We're making a new variable calledgs(short for "game state"), and setting it to be a copy of theStatestruct we defined above.rltk::main_loop(context, gs)calls into therltknamespace, activating a function calledmain_loop. It needs both thecontextand theGameStatewe made earlier - so we pass those along. RLTK tries to take some of the complexity of running a GUI/game application away, and provides this wrapper. The function now takes over control of the program, and will call yourtickfunction (see above) every time the program "ticks" - that is, finishes one cycle and moves to the next. This can happen 60 or more times per second!
Hopefully that made some sense!
Playing with the tutorials
You'd probably like to play with the tutorial code without having to type it all in! The good news is that it is up on GitHub for your perusal. You need to have git installed (RustUp should have helped you with that). Choose where you would like to have the tutorials, and open a terminal:
cd <path to tutorials>
git clone https://github.com/thebracket/rustrogueliketutorial .
After a while, this will download the complete tutorial (including the source code for this book!). It is laid out as follows (this isn't complete!):
───book
├───chapter-01-hellorust
├───chapter-02-helloecs
├───chapter-03-walkmap
├───chapter-04-newmap
├───chapter-05-fov
├───resources
├───src
What's here?
- The
bookfolder contains the source code for this book. You can ignore it, unless you feel like correcting my spelling! - Each chapter's example code is contained in
chapter-xy-namefolders; for example,chapter-01-hellorust. - The
srcfolder contains a simple script to remind you to change to a chapter folder before running anything. resourceshas the contents of the ZIP file you downloaded for this example. All the chapter folders are preconfigured to use this.Cargo.tomlis setup to include all of the tutorials as "workspace entries" - they share dependencies, so it won't eat your whole drive re-downloading everything each time you use it.
To run an example, open your terminal and:
cd <where you put the tutorials>
cd chapter-01-hellorust
cargo run
If you are using Visual Studio Code, you can instead use File -> Open Folder to open the whole directory that you checked out. Using the inbuilt terminal, you can simply cd to each example and cargo run it.
Accessing Tutorial Source Code
You can get to the source code for all of the tutorials at https://github.com/thebracket/rustrogueliketutorial.
Updating the Tutorial
I update this tutorial a lot - adding chapters, fixing issues, etc. You will periodically want to open the tutorial directory, and type git pull. This tells git (the source control manager) to go to the Github repository and look for what's new. It will then download everything that has changed, and you once again have up-to-date tutorials.
Updating Your Project
You may find that rltk_rs or another package has updated, and you would like the latest version. From your project's folder, you can type cargo update to update everything. You can type cargo update --dryrun to see what it would like to update, and not change anything (people update their crates a lot - so this can be a big list!).
Updating Rust Itself
I don't recommend running this from inside Visual Studio Code or another IDE, but if you'd like to ensure that you have the most recent release of Rust (and associated tools), you can type rustup self update. This updates the Rust update tools (I know that sounds rather recursive). You can then type rustup update and install the latest versions of all of the tools.
Getting Help
There's a number of ways to get help:
- Feel free to contact me (I'm
@herberticuson Twitter) if you have any questions, ideas for improvements, or things you'd like me to add. - The fine people on /r/rust are VERY helpful with Rust language issues.
- The awesome people of /r/roguelikedev are VERY helpful when it comes to Roguelike issues. Their Discord is pretty active, too.
Run this chapter's example with web assembly, in your browser (WebGL2 required)
Copyright (C) 2019, Herbert Wolverson.
Chapter 2 - Entities and Components
About this tutorial
This tutorial is free and open source, and all code uses the MIT license - so you are free to do with it as you like. My hope is that you will enjoy the tutorial, and make great games!
If you enjoy this and would like me to keep writing, please consider supporting my Patreon.
This chapter will introduce the entire of an Entity Component System (ECS), which will form the backbone of the rest of this tutorial. Rust has a very good ECS, called Specs - and this tutorial will show you how to use it, and try to demonstrate some of the early benefits of using it.
About Entities and Components
If you've worked on games before, you may well be used to an object oriented design (this is very common, even in the original Python libtcod tutorial that inspired this one). There's nothing really wrong with an object-oriented (OOP) design - but game developers have moved away from it, mostly because it can become quite confusing when you start to expand your game beyond your original design ideas.
You've probably seen a "class hierarchy" such as this simplified one:
BaseEntity
    Monster
        MeleeMob
            OrcWarrior
        ArcherMob
            OrcArcher
You'd probably have something more complicated than that, but it works as an illustration. BaseEntity would contain code/data required to appear on the map as an entity, Monster indicates that it's a bad guy, MeleeMob would hold the logic for finding melee targets, closing in, and killing them. Likewise, ArcherMob would try to maintain the optimal range and use their ranged weapon to fire from a safe distance. The problem with a taxonomy like this is that it can be restrictive, and before you know it - you are starting to write separate classes for more complicated combinations. For example, what if we come up with an orc that can do both melee and archery - and may become friendly if you've completed the Friends With The Greenskins quest? You might well end up combining logic from all of them into one special case class. It works - and plenty of games have published doing just that - but what if there were an easier way?
Entity Component based design tries to eliminate the hierarchy, and instead implement a set of "components" that describe what you want. An "entity" is a thing - anything, really. An orc, a wolf, a potion, an Ethereal hard-drive formatting ghost - whatever you want. It's also really simple: little more than an identification number. The magic comes from entities being able to have as many components as you want to add. Components are just data, grouped by whatever properties you want to give an entity.
For example, you could build the same set of mobs with components for: Position, Renderable, Hostile, MeleeAI, RangedAI, and some sort of CombatStats component (to tell you about their weaponry, hit points, etc.). An Orc Warrior would need a position so you know where they are, a renderable so you know how to draw them. It's Hostile, so you mark it as such. Give it a MeleeAI and a set of game stats, and you have everything you need to make it approach the player and try to hit them. An Archer might be the same thing, but replacing MeleeAI with RangedAI. A hybrid could keep all the components, but either have both AIs or an additional one if you want custom behavior. If your orc becomes friendly, you could remove the Hostile component - and add a Friendly one.
In other words: components are just like your inheritance tree, but instead of inheriting traits you compose them by adding components until it does what you want. This is often called "composition".
The "S" in ECS stands for "Systems". A System is a piece of code that gathers data from the entity/components list and does something with it. It's actually quite similar to an inheritance model, but in some ways it's "backwards". For example, drawing in an OOP system is often: For each BaseEntity, call that entity's Draw command. In an ECS system, it would be Get all entities with a position and a renderable component, and use that data to draw them.
For small games, an ECS often feels like it's adding a bit of extra typing to your code. It is. You take the additional work up front, to make life easier later.
That's a lot to digest, so we'll look at a simple example of how an ECS can make your life a bit easier.
It's important to know that ECS is just one way of handling composition. There are many others, and there really is no right answer. With a bit of searching, you can find a bunch of different ways to approach ECS. There's plenty of object-oriented approaches. There are plenty of "free function" approaches. They all have merit, and can work for you. I've gone with the Entity-Component approach in this book, but there are many other ways to skin the cat. As you gain experience, you'll find one that's comfortable for you! My advice: if anyone tells you that a particular method is the "right" one, ignore them - programming is the art of making something that works, rather than a quest for purity!
Including Specs in the project
To start, we want to tell Cargo that we're going to use Specs. Open your Cargo.toml file, and change the dependencies section to look like this:
[dependencies]
rltk = { version = "0.8.0" }
specs = "0.16.1"
specs-derive = "0.4.1"
This is pretty straightforward: we're telling Rust that we still want to use RLTK, and we're also asking for specs (the version number is current at the time of writing; you can check for new ones by typing cargo search specs). We're also adding specs-derive - which provides some helper code to reduce the amount of boilerplate typing you have to do.
At the top of main.rs we add a few lines of code:
#![allow(unused)]
fn main() {
use rltk::{GameState, Rltk, RGB, VirtualKeyCode};
use specs::prelude::*;
use std::cmp::{max, min};
use specs_derive::Component;
}
use rltk:: is shorthand; you can type rltk::Console every time you want a console; this tells Rust that we'd like to just type Console instead. Likewise the use specs::prelude::* line is there so we aren't continually typing specs::prelude::World when we just want World.
Old Rust required a scary looking
macro_usecall. You don't need that anymore: you can just directly use the macro.
We need the derivations from Specs' derive component: so we add use specs_derive::Component;.
Defining a position component
We're going to build a little demo that uses an ECS to put characters on the screen and move them around. A basic part of this is to define a position - so that entities know where they are. We'll keep it simple: positions are just an X and Y coordinate on the screen.
So, we define a struct (these are like structs in C, records in Pascal, etc. - a group of data stored together. See the Rust Book chapter on Structures):
#![allow(unused)]
fn main() {
struct Position {
    x: i32,
    y: i32,
}
}
Very simple! A Position component has an x and y coordinate, as 32-bit integers. Our Position structure is what is known as a POD - short for "plain old data". That is, it is just data, and doesn't have any logic of its own. This is a common theme with "pure" ECS (Entity Component System) components: they are just data, with no associated logic. The logic will be implemented elsewhere. There are two reasons to use this model: it keeps all of your code that does something in "systems" (that is, code that runs across components and entities), and performance - it's very fast to keep all of the positions next to each other in memory with no redirects.
At this point, you could use Positions, but there's very little to help you store them or assign them to anyone - so we need to tell Specs that this is a component. Specs provides a lot of options for this, but we want to keep it simple. The long-form (no specs-derive help) would look like this:
#![allow(unused)]
fn main() {
struct Position {
    x: i32,
    y: i32,
}

impl Component for Position {
    type Storage = VecStorage<Self>;
}
}
You will probably have a lot of components by the time your game is done - so that's a lot of typing. Not only that, but it's lots of typing the same thing over and over - with the potential to get confusing. Fortunately, specs-derive provides an easier way. You can replace the previous code with:
#![allow(unused)]
fn main() {
#[derive(Component)]
struct Position {
    x: i32,
    y: i32,
}
}
What does this do? #[derive(x)] is a macro that says "from my basic data, please derive the boilerplate needed for x"; in this case, the x is a Component. The macro generates the additional code for you, so you don't have to type it in for every component. It makes it nice and easy to use components! The #[macro_use] use specs_derive::Component; from earlier is making use of this; derive macros are a special type of macro that implements additional functionality for a structure on your behalf - saving lots of typing.
Defining a renderable component
A second part of putting a character on the screen is what character should we draw, and in what color? To handle this, we'll create a second component - Renderable. It will contain a foreground, background, and glyph (such as @) to render. So we'll create a second component structure:
#![allow(unused)]
fn main() {
#[derive(Component)]
struct Renderable {
    glyph: rltk::FontCharType,
    fg: RGB,
    bg: RGB,
}
}
RGB comes from RLTK, and represents a color. That's why we have the use rltk::{... RGB} statement - otherwise, we'd be typing rltk::RGB every time there - saving keystrokes. Once again, this is a plain old data structure, and we are using the derive macro to add the component storage information without having to type it all out.
Worlds and Registration
So now we have two component types, but that's not very useful without somewhere to put them! Specs requires that you register your components at start-up. What do you register it with? A World!
A World is an ECS, provided by the Rust crate Specs. You can have more than one if you want, but we won't go there yet. We'll extend our State structure to have a place to store the world:
#![allow(unused)]
fn main() {
struct State {
    ecs: World
}
}
And now in main, when we create the world - we'll put an ECS into it:
#![allow(unused)]
fn main() {
let mut gs = State {
    ecs: World::new()
};
}
Notice that World::new() is another constructor - it's a method inside the World type, but without a reference to self. So it doesn't work on existing World objects - it can only make new ones. This is a pattern used everywhere in Rust, so it's a good idea to be familiar with it. The Rust Book has a section on the topic.
The next thing to do is to tell the ECS about the components we have created. We do this right after we create the world:
#![allow(unused)]
fn main() {
gs.ecs.register::<Position>();
gs.ecs.register::<Renderable>();
}
What this does is it tells our World to take a look at the types we are giving it, and do some internal magic to create storage systems for each of them. Specs has made this easy; so long as it implements Component, you can put anything you like in as a component!
Creating entities
Now we've got a World that knows how to store Position and Renderable components. Having these components simply exist doesn't help us, beyond providing an indication of structure. In order to use them, they need to be attached to something in the game. In the ECS world, that something is called an entity. Entities are quite simple; they are little more than an identification number, telling the ECS that an entity exists. They can have any combination of components attached to them. In this case, we're going to make an entity that knows where it is on the screen, and knows how it should be represented on the screen.
We can create an entity with both a Renderable and a Position component like this:
#![allow(unused)]
fn main() {
gs.ecs
    .create_entity()
    .with(Position { x: 40, y: 25 })
    .with(Renderable {
        glyph: rltk::to_cp437('@'),
        fg: RGB::named(rltk::YELLOW),
        bg: RGB::named(rltk::BLACK),
    })
    .build();
}
What this does, is it tells our World (ecs in gs - our game state) that we'd like a new entity. That entity should have a position (we've picked the middle of the console), and we'd like it to be renderable with an @ symbol in yellow on black. That's very simple; we aren't even storing the entity (we could if we wanted to) - we're just telling the world that it's there!
Notice that we are using an interesting layout: lots of functions that don't end in an ; to separate out the end of the statement, but instead lots of . calls to another function. This is called the builder pattern, and is very common in Rust. Combining functions in this fashion is called method chaining (a method is a function inside a structure). It works because each function returns a copy of itself - so each function runs in turn, passing itself as the holder for the next method in the chain. So in this example, we start with a create_entity call - which returns a new, empty, entity. On that entity, we call with - which attaches a component to it. That in turn returns the partially built entity - so we can call with again to add the Renderable component. Finally, .build() takes the assembled entity and does the hard part - actually putting together all of the disparate parts into the right parts of the ECS for you.
You could easily add a bunch more entities, if you want. Lets do just that:
#![allow(unused)]
fn main() {
for i in 0..10 {
    gs.ecs
    .create_entity()
    .with(Position { x: i * 7, y: 20 })
    .with(Renderable {
        glyph: rltk::to_cp437('☺'),
        fg: RGB::named(rltk::RED),
        bg: RGB::named(rltk::BLACK),
    })
    .build();
}
}
This is the first time we've called a for loop in the tutorial! If you've used other programming languages, the concept will be familiar: run the loop with i set to every value from 0 to 9. Wait - 9, you say? Rust ranges are exclusive - they don't include the very last number in the range! This is for familiarity with languages like C which normally write for (i=0; i<10; ++i). If you actually want to go all the way to the end of the range (so 0 to 10), you would write the rather cryptic for i in 0..=10. The Rust Book provides a great primer for understanding control flow in Rust.
You'll notice that we're putting them at different positions (every 7 characters, 10 times), and we've changed the @ to an ☺ - a smiley face (to_cp437 is a helper RLTK provides to let you type/paste Unicode and get the equivalent member of the old DOS/CP437 character set. You could replace the to_cp437('☺') with a 1 for the same thing). You can find the glyphs available here.
Iterating entities - a generic render system
So we now have 11 entities, with differing render characteristics and positions. It would be a great idea to do something with that data! In our tick function, we replace the call to draw "Hello Rust" with the following:
#![allow(unused)]
fn main() {
let positions = self.ecs.read_storage::<Position>();
let renderables = self.ecs.read_storage::<Renderable>();

for (pos, render) in (&positions, &renderables).join() {
    ctx.set(pos.x, pos.y, render.fg, render.bg, render.glyph);
}
}
What does this do? let positions = self.ecs.read_storage::<Position>(); asks the ECS for read access to the container it is using to store Position components. Likewise, we ask for read access to the Renderable storage. It only makes sense to draw a character if it has both of these - you need a Position to know where to draw, and Renderable to know what to draw! You can learn more about these stores in The Specs Book. The important part is read_storage - we're asking for read-only access to the structure used to store components of each type.
Fortunately, Specs has our back:
#![allow(unused)]
fn main() {
for (pos, render) in (&positions, &renderables).join() {
}
This line says join positions and renderables; like a database join, it only returns entities that have both. It then uses Rust's "destructuring" to place each result (one result per entity that has both components). So for each iteration of the for loop - you get both components belonging to the same entity. That's enough to draw it!
The join function returns an iterator. The Rust Book has a great section on iterators. In C++, iterators provide a begin, next and end function - and you can move between elements in collections with them. Rust extends the same concept, only on steroids: just about anything can be made into an iterator if you put your mind to it. Iterators work very well with for loops - you can provide any iterator as the target in for x in iterator loops. The 0..10 we discussed earlier really is a range - and offers an iterator for Rust to navigate.
The other interesting thing here are the parentheses. In Rust, when you wrap variables in brackets you are making a tuple. These are just a collection of variables, grouped together - but without needing to go and make a structure just for this case. You can access them individually via numeric access (mytuple.0, mytuple.1, etc.) to get to each field, or you can destructure them. (one, two) = (1, 2) sets the variable one to 1, and the variable two to 2. That's what we're doing here: the join iterator is returning tuples containing a Position and a Renderable component as .0 and .1. Since typing that is ugly and unclear, we destructure them into the named variables pos and render. This can be confusing at first, so if you are struggling I recommend Rust By Example's section on Tuples.
#![allow(unused)]
fn main() {
ctx.set(pos.x, pos.y, render.fg, render.bg, render.glyph);
}
We're running this for every entity that has both a Position and a Renderable component. The join method is passing us both, guaranteed to belong to the same enitity. Any entities that have one or the other - but not both - simply won't be included in the data returned to us.
ctx is the instance of RLTK passed to us when tick runs. It offers a function called set, that sets a single terminal character to the glyph/colors of your choice. So we pass it the data from pos (the Position component for that entity), and the colors/glyph from render (the Renderable component for that entity).
With that in place, any entity that has both a Position and a Renderable will be rendered to the screen! You could add as many as you like, and they will render. Remove one component or the other, and they won't be rendered (for example, if an item is picked up you might remove its Position component - and add another indicating that it's in your backpack; more on that in later tutorials)
Rendering - complete code
If you've typed all of that in correctly, your main.rs now looks like this:
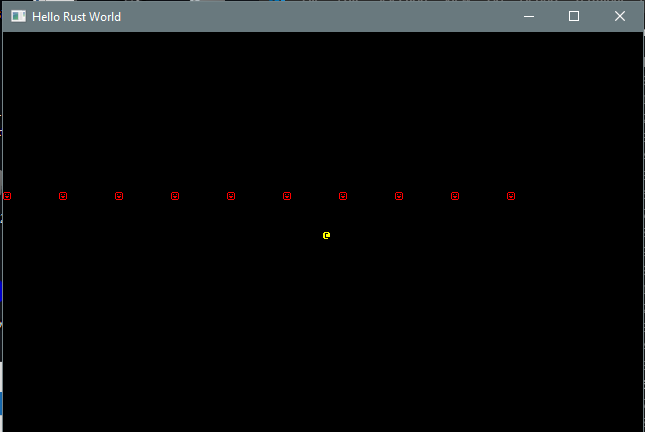
use rltk::{GameState, Rltk, RGB};
use specs::prelude::*;
use std::cmp::{max, min};
use specs_derive::Component;

#[derive(Component)]
struct Position {
    x: i32,
    y: i32,
}

#[derive(Component)]
struct Renderable {
    glyph: rltk::FontCharType,
    fg: RGB,
    bg: RGB,
}

struct State {
    ecs: World
}

impl GameState for State {
    fn tick(&mut self, ctx : &mut Rltk) {
        ctx.cls();
        let positions = self.ecs.read_storage::<Position>();
        let renderables = self.ecs.read_storage::<Renderable>();

        for (pos, render) in (&positions, &renderables).join() {
            ctx.set(pos.x, pos.y, render.fg, render.bg, render.glyph);
        }
    }
}

fn main() -> rltk::BError {
    use rltk::RltkBuilder;
    let context = RltkBuilder::simple80x50()
        .with_title("Roguelike Tutorial")
        .build()?;
    let mut gs = State {
        ecs: World::new()
    };
    gs.ecs.register::<Position>();
    gs.ecs.register::<Renderable>();

    gs.ecs
        .create_entity()
        .with(Position { x: 40, y: 25 })
        .with(Renderable {
            glyph: rltk::to_cp437('@'),
            fg: RGB::named(rltk::YELLOW),
            bg: RGB::named(rltk::BLACK),
        })
        .build();

    for i in 0..10 {
        gs.ecs
        .create_entity()
        .with(Position { x: i * 7, y: 20 })
        .with(Renderable {
            glyph: rltk::to_cp437('☺'),
            fg: RGB::named(rltk::RED),
            bg: RGB::named(rltk::BLACK),
        })
        .build();
    }

    rltk::main_loop(context, gs)
}
Running it (with cargo run) will give you the following:
An example system - random movement
This example showed you how an ECS can get a disparate bag of entities to render. Go ahead and play around with the entity creation - you can do a lot with this! Unfortunately, it's pretty boring - nothing is moving! Lets rectify that a bit, and make a shooting gallery type look.
First, we'll create a new component called LeftMover. Entities that have this component are indicating that they really like going to the left. The component definition is very simple; a component with no data like this is called a "tag component". We'll put it up with our other component definitions:
#![allow(unused)]
fn main() {
#[derive(Component)]
struct LeftMover {}
}
Now we have to tell the ECS to use the type. With our other register calls, we add:
#![allow(unused)]
fn main() {
gs.ecs.register::<LeftMover>();
}
Now, lets only make the red smiley faces left movers. So their definition grows to:
#![allow(unused)]
fn main() {
for i in 0..10 {
    gs.ecs
    .create_entity()
    .with(Position { x: i * 7, y: 20 })
    .with(Renderable {
        glyph: rltk::to_cp437('☺'),
        fg: RGB::named(rltk::RED),
        bg: RGB::named(rltk::BLACK),
    })
    .with(LeftMover{})
    .build();
}
}
Notice how we've added one line: .with(LeftMover{}) - that's all it takes to add one more component to these entities (and not the yellow @).
Now to actually make them move. We're going to define our first system. Systems are a way to contain entity/component logic together, and have them run independently. There's lots of complex flexibility available, but we're going to keep it simple. Here's everything required for our LeftWalker system:
#![allow(unused)]
fn main() {
struct LeftWalker {}

impl<'a> System<'a> for LeftWalker {
    type SystemData = (ReadStorage<'a, LeftMover>,
                        WriteStorage<'a, Position>);

    fn run(&mut self, (lefty, mut pos) : Self::SystemData) {
        for (_lefty,pos) in (&lefty, &mut pos).join() {
            pos.x -= 1;
            if pos.x < 0 { pos.x = 79; }
        }
    }
}
}
This isn't as nice/simple as I'd like, but it does make sense when you understand it. Lets go through it a piece at a time:
struct LeftWalker {}just defines an empty structure - somewhere to attach the logic.impl<'a> System<'a> for LeftWalkermeans we are implementing Specs'Systemtrait for ourLeftWalkerstructure. The'aare lifetime specifiers: the system is saying that the components it uses must exist long enough for the system to run. For now, it's not worth worrying too much about it. If you are interested, the Rust Book can clarify a bit.type SystemDatais defining a type to tell Specs what the system requires. In this case, read access toLeftMovercomponents, and write access (since it updates them) toPositioncomponents. You can mix and match whatever you need in here, as we'll see in later chapters.fn runis the actual trait implementation, required by theimpl System. It takes itself, and theSystemDatawe defined.- The for loop is system shorthand for the same iteration we did in the rendering system: it will run once for each entity that has both a
LeftMoverand aPosition. Note that we're putting an underscore before theLeftMovervariable name: we never actually use it, we just require that the entity has one. The underscore tells Rust "we know we aren't using it, this isn't a bug!" and stops it from warning us every time we compile. - The meat of the loop is very simple: we subtract one from the position component, and if it is less than zero we scoot back to the right of the screen.
Notice that this is very similar to how we wrote the rendering code - but instead of calling in to the ECS, the ECS system is calling into our function/system. It can be a tough judgment call on which to use. If your system just needs data from the ECS, then a system is the right place to put it. If it also needs access to other parts of your program, it is probably better implemented on the outside - calling in.
Now that we've written our system, we need to be able to use it. We'll add a run_systems function to our State:
#![allow(unused)]
fn main() {
impl State {
    fn run_systems(&mut self) {
        let mut lw = LeftWalker{};
        lw.run_now(&self.ecs);
        self.ecs.maintain();
    }
}
}
This is relatively straightforward:
impl Statemeans we would like to implement functionality forState.fn run_systems(&mut self)means we are defining a function, and it needs mutable (i.e. it is allowed to change things) access to self; this means it can access the data in its instance ofStatewith theself.keyword.let mut lw = LeftWalker{}makes a new (changeable) instance of theLeftWalkersystem.lw.run_now(&self.ecs)tells the system to run, and tells it how to find the ECS.self.ecs.maintain()tells Specs that if any changes were queued up by the systems, they should apply to the world now.
Finally, we actually want to run our systems. In the tick function, we add:
#![allow(unused)]
fn main() {
self.run_systems();
}
The nice thing is that this will run all systems we register into our dispatcher; so as we add more, we don't have to worry about calling them (or even calling them in the right order). You still sometimes need more access than the dispatcher has; our renderer isn't a system because it needs the Context from RLTK (we'll improve that in a future chapter).
So your code now looks like this:
use rltk::{GameState, Rltk, RGB};
use specs::prelude::*;
use std::cmp::{max, min};
use specs_derive::Component;

#[derive(Component)]
struct Position {
    x: i32,
    y: i32,
}

#[derive(Component)]
struct Renderable {
    glyph: rltk::FontCharType,
    fg: RGB,
    bg: RGB,
}

#[derive(Component)]
struct LeftMover {}

struct State {
    ecs: World,
}

impl GameState for State {
    fn tick(&mut self, ctx : &mut Rltk) {
        ctx.cls();

        self.run_systems();

        let positions = self.ecs.read_storage::<Position>();
        let renderables = self.ecs.read_storage::<Renderable>();

        for (pos, render) in (&positions, &renderables).join() {
            ctx.set(pos.x, pos.y, render.fg, render.bg, render.glyph);
        }
    }
}

struct LeftWalker {}

impl<'a> System<'a> for LeftWalker {
    type SystemData = (ReadStorage<'a, LeftMover>,
                        WriteStorage<'a, Position>);

    fn run(&mut self, (lefty, mut pos) : Self::SystemData) {
        for (_lefty,pos) in (&lefty, &mut pos).join() {
            pos.x -= 1;
            if pos.x < 0 { pos.x = 79; }
        }
    }
}

impl State {
    fn run_systems(&mut self) {
        let mut lw = LeftWalker{};
        lw.run_now(&self.ecs);
        self.ecs.maintain();
    }
}

fn main() -> rltk::BError {
    use rltk::RltkBuilder;
    let context = RltkBuilder::simple80x50()
        .with_title("Roguelike Tutorial")
        .build()?;
    let mut gs = State {
        ecs: World::new()
    };
    gs.ecs.register::<Position>();
    gs.ecs.register::<Renderable>();
    gs.ecs.register::<LeftMover>();

    gs.ecs
        .create_entity()
        .with(Position { x: 40, y: 25 })
        .with(Renderable {
            glyph: rltk::to_cp437('@'),
            fg: RGB::named(rltk::YELLOW),
            bg: RGB::named(rltk::BLACK),
        })
        .build();

    for i in 0..10 {
        gs.ecs
        .create_entity()
        .with(Position { x: i * 7, y: 20 })
        .with(Renderable {
            glyph: rltk::to_cp437('☺'),
            fg: RGB::named(rltk::RED),
            bg: RGB::named(rltk::BLACK),
        })
        .with(LeftMover{})
        .build();
    }

    rltk::main_loop(context, gs)
}
If you run it (with cargo run), the red smiley faces zoom to the left, while the @ watches.
Moving the player
Finally, lets make the @ move with keyboard controls. So we know which entity is the player, we'll make a new tag component:
#![allow(unused)]
fn main() {
#[derive(Component, Debug)]
struct Player {}
}
We'll add it to registration:
#![allow(unused)]
fn main() {
gs.ecs.register::<Player>();
}
And we'll add it to the player's entity:
#![allow(unused)]
fn main() {
gs.ecs
    .create_entity()
    .with(Position { x: 40, y: 25 })
    .with(Renderable {
        glyph: rltk::to_cp437('@'),
        fg: RGB::named(rltk::YELLOW),
        bg: RGB::named(rltk::BLACK),
    })
    .with(Player{})
    .build();
}
Now we implement a new function, try_move_player:
#![allow(unused)]
fn main() {
fn try_move_player(delta_x: i32, delta_y: i32, ecs: &mut World) {
    let mut positions = ecs.write_storage::<Position>();
    let mut players = ecs.write_storage::<Player>();

    for (_player, pos) in (&mut players, &mut positions).join() {
        pos.x = min(79 , max(0, pos.x + delta_x));
        pos.y = min(49, max(0, pos.y + delta_y));
    }
}
}
Drawing on our previous experience, we can see that this gains write access to Player and Position. It then joins the two, ensuring that it will only work on entities that have both component types - in this case, just the player. It then adds delta_x to x and delta_y to y - and does some checks to make sure that you haven't tried to leave the screen.
We'll add a second function to read the keyboard information provided by RLTK:
#![allow(unused)]
fn main() {
fn player_input(gs: &mut State, ctx: &mut Rltk) {
    // Player movement
    match ctx.key {
        None => {} // Nothing happened
        Some(key) => match key {
            VirtualKeyCode::Left => try_move_player(-1, 0, &mut gs.ecs),
            VirtualKeyCode::Right => try_move_player(1, 0, &mut gs.ecs),
            VirtualKeyCode::Up => try_move_player(0, -1, &mut gs.ecs),
            VirtualKeyCode::Down => try_move_player(0, 1, &mut gs.ecs),
            _ => {}
        },
    }
}
}
There's quite a bit of functionality here that we haven't seen before! The context is providing information about a key - but the user may or may not be pressing one! Rust provides a feature for this, called Option types. Option types have two possible value: None (no data), or Some(x) - indicating that there is data here, held inside.
The context provides a key variable. It is an enumeration - that is, a variable that can hold a value from a set of pre-defined values (in this case, keys on the keyboard). Rust enumerations are really powerful, and can actually hold values as well - but we won't use that yet.
So to get the data out of an Option, we need to unwrap it. There's a function called unwrap - but if you call it when there isn't any data, your program will crash! So we'll use Rust's match command to peek inside. Matching is one of Rust's strongest benefits, and I highly recommend the Rust book chapter on it, or the Rust by Example section if you prefer learning by examples.
So we call match ctx.key - and Rust expects us to provide a list of possibles matches. In the case of ctx.key, there are only two possible values: Some or None. The None => {} line says "match the case in which ctx.key has no data" - and runs an empty block. Some(key) is the other option; there is some data - and we'll ask Rust to give it to us as a variable named key (you can name it whatever you like).
We then match again, this time on the key. We have a line for each eventuality we want to handle: VirtualKeyCode::Left => try_move_player(-1, 0, &mut gs.ecs) says that if key equals VirtualKeyCode::Left (VirtualKeyCode is the name of the enumeration type), we should call our try_move_player function with (-1, 0). We repeat that for all four directions. The _ => {} is rather odd looking; _ means anything else. So we're telling Rust that any other key code can be ignored here. Rust is rather pedantic: if you don't specify every possible enumeration, it will give a compiler error! By including the default, we don't have to type every possible keystroke.
This function takes the current game state and context, looks at the key variable in the context, and calls the appropriate move command if the relevant movement key is pressed. Lastly, we add it into tick:
#![allow(unused)]
fn main() {
player_input(self, ctx);
}
If you run your program (with cargo run), you now have a keyboard controlled @ symbol, while the smiley faces zoom to the left!
The final code for chapter 2
The source code for this completed example may be found ready-to-run in chapter-02-helloecs. It looks like this:
use rltk::{GameState, Rltk, RGB, VirtualKeyCode};
use specs::prelude::*;
use std::cmp::{max, min};
use specs_derive::Component;


#[derive(Component)]
struct Position {
    x: i32,
    y: i32,
}

#[derive(Component)]
struct Renderable {
    glyph: rltk::FontCharType,
    fg: RGB,
    bg: RGB,
}

#[derive(Component)]
struct LeftMover {}

#[derive(Component, Debug)]
struct Player {}

struct State {
    ecs: World
}

fn try_move_player(delta_x: i32, delta_y: i32, ecs: &mut World) {
    let mut positions = ecs.write_storage::<Position>();
    let mut players = ecs.write_storage::<Player>();

    for (_player, pos) in (&mut players, &mut positions).join() {
        pos.x = min(79 , max(0, pos.x + delta_x));
        pos.y = min(49, max(0, pos.y + delta_y));
    }
}

fn player_input(gs: &mut State, ctx: &mut Rltk) {
    // Player movement
    match ctx.key {
        None => {} // Nothing happened
        Some(key) => match key {
            VirtualKeyCode::Left => try_move_player(-1, 0, &mut gs.ecs),
            VirtualKeyCode::Right => try_move_player(1, 0, &mut gs.ecs),
            VirtualKeyCode::Up => try_move_player(0, -1, &mut gs.ecs),
            VirtualKeyCode::Down => try_move_player(0, 1, &mut gs.ecs),
            _ => {}
        },
    }
}

impl GameState for State {
    fn tick(&mut self, ctx : &mut Rltk) {
        ctx.cls();

        player_input(self, ctx);
        self.run_systems();

        let positions = self.ecs.read_storage::<Position>();
        let renderables = self.ecs.read_storage::<Renderable>();

        for (pos, render) in (&positions, &renderables).join() {
            ctx.set(pos.x, pos.y, render.fg, render.bg, render.glyph);
        }
    }
}

struct LeftWalker {}

impl<'a> System<'a> for LeftWalker {
    type SystemData = (ReadStorage<'a, LeftMover>,
                        WriteStorage<'a, Position>);

    fn run(&mut self, (lefty, mut pos) : Self::SystemData) {
        for (_lefty,pos) in (&lefty, &mut pos).join() {
            pos.x -= 1;
            if pos.x < 0 { pos.x = 79; }
        }
    }
}

impl State {
    fn run_systems(&mut self) {
        let mut lw = LeftWalker{};
        lw.run_now(&self.ecs);
        self.ecs.maintain();
    }
}

fn main() -> rltk::BError {
    use rltk::RltkBuilder;
    let context = RltkBuilder::simple80x50()
        .with_title("Roguelike Tutorial")
        .build()?;
    let mut gs = State {
        ecs: World::new()
    };
    gs.ecs.register::<Position>();
    gs.ecs.register::<Renderable>();
    gs.ecs.register::<LeftMover>();
    gs.ecs.register::<Player>();

    gs.ecs
        .create_entity()
        .with(Position { x: 40, y: 25 })
        .with(Renderable {
            glyph: rltk::to_cp437('@'),
            fg: RGB::named(rltk::YELLOW),
            bg: RGB::named(rltk::BLACK),
        })
        .with(Player{})
        .build();

    for i in 0..10 {
        gs.ecs
        .create_entity()
        .with(Position { x: i * 7, y: 20 })
        .with(Renderable {
            glyph: rltk::to_cp437('☺'),
            fg: RGB::named(rltk::RED),
            bg: RGB::named(rltk::BLACK),
        })
        .with(LeftMover{})
        .build();
    }

    rltk::main_loop(context, gs)
}
This chapter was a lot to digest, but provides a really solid base on which to build. The great part is: you've now got further than many aspiring developers! You have entities on the screen, and can move around with the keyboard.
The source code for this chapter may be found here
Run this chapter's example with web assembly, in your browser (WebGL2 required)
Copyright (C) 2019, Herbert Wolverson.
Chapter 3 - Walking a Map
About this tutorial
This tutorial is free and open source, and all code uses the MIT license - so you are free to do with it as you like. My hope is that you will enjoy the tutorial, and make great games!
If you enjoy this and would like me to keep writing, please consider supporting my Patreon.
The remainder of this tutorial will be dedicated to making a Roguelike. [Rogue](https://en.wikipedia.org/wiki/Rogue_(video_game) appeared in 1980, as a text-mode dungeon exploration game. It has spawned an entire genre of "roguelikes": procedurally generated maps, hunting an objective over multiple levels and "permadeath" (restart when you die). The definition is the source of many online fights; I'd rather avoid that!
A Roguelike without a map to explore is a bit pointless, so in this chapter we'll put together a basic map, draw it, and let your player walk around a bit. We're starting with the code from chapter 2, but with the red smiley faces (and their leftward tendencies) removed.
Defining the map tiles
We'll start by allowing two tile types: walls and floors. We can represent this with an enum (to learn more about enumerations, The Rust Book has a large section on them):
#![allow(unused)]
fn main() {
#[derive(PartialEq, Copy, Clone)]
enum TileType {
    Wall, Floor
}
}
Notice that we've included some derived features (more usage of derive macros, this time built into Rust itself): Copy and Clone. Clone adds a .clone() method to the type, allowing a copy to be made programmatically. Copy changes the default from moving the object on assignment to making a copy - so tile1 = tile2 leaves both values valid and not in a "moved from" state.
PartialEq allows us to use == to see if two tile types match. If we didn't derive these features, if tile_type == TileType::Wall would fail to compile!
Building a simple map
Now we'll make a function that returns a vec (vector) of tiles, representing a simple map. We'll use a vector sized to the whole map, which means we need a way to figure out which array index is at a given x/y position. So first, we make a new function xy_idx:
#![allow(unused)]
fn main() {
pub fn xy_idx(x: i32, y: i32) -> usize {
    (y as usize * 80) + x as usize
}
}
This is simple: it multiplies the y position by the map width (80), and adds x. This guarantees one tile per location, and efficiently maps it in memory for left-to-right reading.
We're using a Rust function shorthand here. Notice that the function returns a usize (equivalent to size_t in C/C++ - whatever the basic size type used for a platform is) - and the function body lacks a ; at the end? Any function that ends with a statement that lacks a semicolon treats that line as a return statement. So it's the same as typing return (y as usize * 80) + x as usize. This comes from the Rust author's other favorite language, ML - which uses the same shorthand. It's considered "Rustacean" (canonical Rust; I always picture a Rust Monster with cute little claws and shell) to use this style, so we've adopted it for the tutorial.
Then we write a constructor function to make a map:
#![allow(unused)]
fn main() {
fn new_map() -> Vec<TileType> {
    let mut map = vec![TileType::Floor; 80*50];

    // Make the boundaries walls
    for x in 0..80 {
        map[xy_idx(x, 0)] = TileType::Wall;
        map[xy_idx(x, 49)] = TileType::Wall;
    }
    for y in 0..50 {
        map[xy_idx(0, y)] = TileType::Wall;
        map[xy_idx(79, y)] = TileType::Wall;
    }

    // Now we'll randomly splat a bunch of walls. It won't be pretty, but it's a decent illustration.
    // First, obtain the thread-local RNG:
    let mut rng = rltk::RandomNumberGenerator::new();

    for _i in 0..400 {
        let x = rng.roll_dice(1, 79);
        let y = rng.roll_dice(1, 49);
        let idx = xy_idx(x, y);
        if idx != xy_idx(40, 25) {
            map[idx] = TileType::Wall;
        }
    }

    map
}
}
There's a fair amount of syntax that we haven't encountered before here, so lets break this down:
fn new_map() -> Vec<TileType>species a function namednew_map. It doesn't take any parameters, so it can be called from anywhere.- It returns a
Vec.Vecis a Rust Vector (if you're familiar with C++, it's pretty much exactly the same as a C++std::vector). A vector is like an array (see this Rust by Example chapter), which lets you put a bunch of data into a list and access each element. Unlike an array, aVecdoesn't have a size limit - and the size can change while the program runs. So you canpush(add) new items, andremovethem as you go. Rust by Example has a great chapter on Vectors; it's a good idea to learn about them - they are used everywhere. let mut map = vec![TileType::Floor; 80*50];is a confusing looking statement! Lets break it down:let mut mapis saying "make a new variable" (let), "let me change it" (mut) and call it "map".vec!is a macro, another one build into the Rust standard library. The exclamation mark is Rust's way of saying "this is a procedural macro" (as opposed to a derive macro, like we've seen before). Procedural macros run like a function - they define a procedure, they just greatly reduce your typing.- The
vec!macro takes its parameters in square brackets. - The first parameter is the value for each element of the new vector. In this case, we're setting every entry we create to be a
Floor(from theTileTypeenumeration). - The second parameter is how many tiles we should create. They will all be set to the value we set above. In this case, our map is 80x50 tiles (4,000 tiles - but we'll let the compiler do the math for us!). So we need to make 4,000 tiles.
- You could have replaced the
vec!call withfor _i in 0..4000 { map.push(TileType::Floor); }. In fact, that's pretty much what the macro did for you - but it's definitely less typing to have the macro do it for you!
for x in 0..80 {is afor loop(see here), just like we used in the previous example. In this case, we're iteratingxfrom 0 to 79.map[xy_idx(x, 0)] = TileType::Wall;first calls thexy_idxfunction we defined above to get the vector index forx, 0. It then indexes the vector, telling it to set the vector entry at that position to be a wall. We do this again forx,49.- We do the same thing, but looping
yfrom 0..49 - and setting the vertical walls on our map. let mut rng = rltk::RandomNumberGenerator::new();calls theRandomNumberGeneratortype inRLTK'snewfunction, and assigns it to a variable calledrng. We are asking RLTK to give us a new dice roller.for _i in 0..400 {is the same as otherforloops, but notice the_beforei. We aren't actually looking at the value ofi- we just want the loop to run 400 times. Rust will give you a warning if you have a variable you don't use; adding the underscore prefix tells Rust that it's ok, we meant to do that.let x = rng.roll_dice(1, 79);calls therngwe grabbed in 7, and asks it for a random number from 1 to 79. RLTK does not go with an exclusive range, because it is trying to mirror the old D&D convention of dice being1d20or similar. In this case, we should be glad that computers don't care about the geometric difficulty of inventing a 79-sided dice! We also obtain ayvalue between 1 and 49. We've rolled imaginary dice, and found a random location on the map.- We set the variable
idx(short for "index") to the vector index (viaxy_idxwe defined earlier) for the coordinates we rolled. if idx != xy_idx(40, 25) {checks thatidxisn't the exact middle (we'll be starting there, so we don't want to start inside a wall!).- If it isn't the middle, we set the randomly rolled location to be a wall.
It's pretty simple: it places walls around the outer edges of the map, and then adds 400 random walls anywhere that isn't the player's starting point.
Making the map visible to the world
Specs includes a concept of "resources" - shared data the whole ECS can use. So in our main function, we add a randomly generated map to the world:
#![allow(unused)]
fn main() {
gs.ecs.insert(new_map());
}
The map is now available from anywhere the ECS can see! Now inside your code, you can access the map with the rather unwieldy let map = self.ecs.get_mut::<Vec<TileType>>();; it's available to systems in an easier fashion. There's actually several ways to get the value of map, including ecs.get, ecs.fetch. get_mut obtains a "mutable" (you can change it) reference to the map - wrapped in an optional (in case the map isn't there). fetch skips the Option type and gives you a map directly. You can learn more about this in the Specs Book.
Draw the map
Now that we have a map available, we should put it on the screen! The complete code for the new draw_map function looks like this:
#![allow(unused)]
fn main() {
fn draw_map(map: &[TileType], ctx : &mut Rltk) {
    let mut y = 0;
    let mut x = 0;
    for tile in map.iter() {
        // Render a tile depending upon the tile type
        match tile {
            TileType::Floor => {
                ctx.set(x, y, RGB::from_f32(0.5, 0.5, 0.5), RGB::from_f32(0., 0., 0.), rltk::to_cp437('.'));
            }
            TileType::Wall => {
                ctx.set(x, y, RGB::from_f32(0.0, 1.0, 0.0), RGB::from_f32(0., 0., 0.), rltk::to_cp437('#'));
            }
        }

        // Move the coordinates
        x += 1;
        if x > 79 {
            x = 0;
            y += 1;
        }
    }
}
}
This is mostly straightforward, and uses concepts we've already visited. In the declaration, we pass the map as &[TileType] rather than &Vec<TileType>; this allows us to pass in "slices" (parts of) a map if we so choose. We won't do that yet, but it may be useful later. It's also considered a more "rustic" (that is: idiomatic Rust) way to do things, and the linter (clippy) warns about it. The Rust Book can teach you about slices, if you are interested.
Otherwise, it takes advantage of the way we are storing our map - rows together, one after the other. So it iterates through the entire map structure, adding 1 to the x position for each tile. If it hits the map width, it zeroes x and adds one to y. This way we aren't repeatedly reading all over the array - which can get slow. The actual rendering is very simple: we match the tile type, and draw either a period or a hash for walls/floors.
We should also call the function! In our tick function, add:
#![allow(unused)]
fn main() {
let map = self.ecs.fetch::<Vec<TileType>>();
draw_map(&map, ctx);
}
The fetch call is new (we mentioned it above). fetch requires that you promise that you know that the resource you are requesting really does exist - and will crash if it doesn't. It doesn't quite return a reference - it's a shred type, which acts like a reference most of the time but occasionally needs a bit of coercing to be one. We'll worry about that bridge when it comes time to cross it, but consider yourself warned!
Making walls solid
So now if you run the program (cargo run), you'll have a green and grey map with a yellow @ who can move around. Unfortunately, you'll quickly notice that the player can walk through walls! Fortunately, that's pretty easy to rectify.
To accomplish this, we modify the try_move_player to read the map and check that the destination is open:
#![allow(unused)]
fn main() {
fn try_move_player(delta_x: i32, delta_y: i32, ecs: &mut World) {
    let mut positions = ecs.write_storage::<Position>();
    let mut players = ecs.write_storage::<Player>();
    let map = ecs.fetch::<Vec<TileType>>();

    for (_player, pos) in (&mut players, &mut positions).join() {
        let destination_idx = xy_idx(pos.x + delta_x, pos.y + delta_y);
        if map[destination_idx] != TileType::Wall {
            pos.x = min(79 , max(0, pos.x + delta_x));
            pos.y = min(49, max(0, pos.y + delta_y));
        }
    }
}
}
The new parts are the let map = ... part, which uses fetch just the same way as the main loop (this is the advantage of storing it in the ECS - you can get to it everywhere without trying to coerce Rust into letting you use global variables!). We calculate the cell index of the player's destination with let destination_idx = xy_idx(pos.x + delta_x, pos.y + delta_y); - and if it isn't a wall, we move as normal.
Run the program (cargo run) now, and you have a player in a map - and can move around, properly obstructed by walls.
The full program now looks like this:
use rltk::{GameState, Rltk, RGB, VirtualKeyCode};
use specs::prelude::*;
use std::cmp::{max, min};
use specs_derive::*;


#[derive(Component)]
struct Position {
    x: i32,
    y: i32,
}

#[derive(Component)]
struct Renderable {
    glyph: rltk::FontCharType,
    fg: RGB,
    bg: RGB,
}

#[derive(Component, Debug)]
struct Player {}

#[derive(PartialEq, Copy, Clone)]
enum TileType {
    Wall, Floor
}

struct State {
    ecs: World
}

pub fn xy_idx(x: i32, y: i32) -> usize {
    (y as usize * 80) + x as usize
}

fn new_map() -> Vec<TileType> {
    let mut map = vec![TileType::Floor; 80*50];

    // Make the boundaries walls
    for x in 0..80 {
        map[xy_idx(x, 0)] = TileType::Wall;
        map[xy_idx(x, 49)] = TileType::Wall;
    }
    for y in 0..50 {
        map[xy_idx(0, y)] = TileType::Wall;
        map[xy_idx(79, y)] = TileType::Wall;
    }

    // Now we'll randomly splat a bunch of walls. It won't be pretty, but it's a decent illustration.
    // First, obtain the thread-local RNG:
    let mut rng = rltk::RandomNumberGenerator::new();

    for _i in 0..400 {
        let x = rng.roll_dice(1, 79);
        let y = rng.roll_dice(1, 49);
        let idx = xy_idx(x, y);
        if idx != xy_idx(40, 25) {
            map[idx] = TileType::Wall;
        }
    }

    map
}

fn try_move_player(delta_x: i32, delta_y: i32, ecs: &mut World) {
    let mut positions = ecs.write_storage::<Position>();
    let mut players = ecs.write_storage::<Player>();
    let map = ecs.fetch::<Vec<TileType>>();

    for (_player, pos) in (&mut players, &mut positions).join() {
        let destination_idx = xy_idx(pos.x + delta_x, pos.y + delta_y);
        if map[destination_idx] != TileType::Wall {
            pos.x = min(79 , max(0, pos.x + delta_x));
            pos.y = min(49, max(0, pos.y + delta_y));
        }
    }
}

fn player_input(gs: &mut State, ctx: &mut Rltk) {
    // Player movement
    match ctx.key {
        None => {} // Nothing happened
        Some(key) => match key {
            VirtualKeyCode::Left => try_move_player(-1, 0, &mut gs.ecs),
            VirtualKeyCode::Right => try_move_player(1, 0, &mut gs.ecs),
            VirtualKeyCode::Up => try_move_player(0, -1, &mut gs.ecs),
            VirtualKeyCode::Down => try_move_player(0, 1, &mut gs.ecs),
            _ => {}
        },
    }
}

fn draw_map(map: &[TileType], ctx : &mut Rltk) {
    let mut y = 0;
    let mut x = 0;
    for tile in map.iter() {
        // Render a tile depending upon the tile type
        match tile {
            TileType::Floor => {
                ctx.set(x, y, RGB::from_f32(0.5, 0.5, 0.5), RGB::from_f32(0., 0., 0.), rltk::to_cp437('.'));
            }
            TileType::Wall => {
                ctx.set(x, y, RGB::from_f32(0.0, 1.0, 0.0), RGB::from_f32(0., 0., 0.), rltk::to_cp437('#'));
            }
        }

        // Move the coordinates
        x += 1;
        if x > 79 {
            x = 0;
            y += 1;
        }
    }
}

impl GameState for State {
    fn tick(&mut self, ctx : &mut Rltk) {
        ctx.cls();

        player_input(self, ctx);
        self.run_systems();

        let map = self.ecs.fetch::<Vec<TileType>>();
        draw_map(&map, ctx);

        let positions = self.ecs.read_storage::<Position>();
        let renderables = self.ecs.read_storage::<Renderable>();

        for (pos, render) in (&positions, &renderables).join() {
            ctx.set(pos.x, pos.y, render.fg, render.bg, render.glyph);
        }
    }
}

impl State {
    fn run_systems(&mut self) {
        self.ecs.maintain();
    }
}

fn main() -> rltk::BError {
    use rltk::RltkBuilder;
    let context = RltkBuilder::simple80x50()
        .with_title("Roguelike Tutorial")
        .build()?;
    let mut gs = State {
        ecs: World::new()
    };
    gs.ecs.register::<Position>();
    gs.ecs.register::<Renderable>();
    gs.ecs.register::<Player>();

    gs.ecs.insert(new_map());

    gs.ecs
        .create_entity()
        .with(Position { x: 40, y: 25 })
        .with(Renderable {
            glyph: rltk::to_cp437('@'),
            fg: RGB::named(rltk::YELLOW),
            bg: RGB::named(rltk::BLACK),
        })
        .with(Player{})
        .build();

    rltk::main_loop(context, gs)
}
The source code for this chapter may be found here
Run this chapter's example with web assembly, in your browser (WebGL2 required)
Copyright (C) 2019, Herbert Wolverson.
Chapter 4 - A More Interesting Map
About this tutorial
This tutorial is free and open source, and all code uses the MIT license - so you are free to do with it as you like. My hope is that you will enjoy the tutorial, and make great games!
If you enjoy this and would like me to keep writing, please consider supporting my Patreon.
In this chapter, we'll make a more interesting map. It will be room-based, and look a bit like many of the earlier roguelikes such as Moria - but with less complexity. It will also provide a great starting point for placing monsters!
Cleaning up
We're going to start by cleaning up our code a bit, and utilizing separate files. As projects gain in complexity/size, it's a good idea to start keeping them as a clean set of files/modules, so we can quickly find what we're looking for (and improve compilation times, sometimes).
If you look at the source code for this chapter, you'll see that we've broken out a lot of functionality into individual files. When you make a new file in Rust, it automatically becomes a module. You then have to tell Rust to use these modules, so main.rs has gained a few mod map and similar, followed by pub use map::*. This says "import the module map, and then use - and make available to other modules - its public contents".
We've also made a bunch of struct into pub struct, and added pub to their members. If you don't do this, then the structure remains internal to that module only - and you can't use it in other parts of the code. This is the same as putting a public: C++ line in a class definition, and exporting the type in the header. Rust makes it a bit cleaner, and no need to write things twice!
Making a more interesting map
We'll start by renaming new_map (now in map.rs) to new_map_test. We'll stop using it, but keep it around for a bit - it's a decent way to test our map code! We'll also use Rust's documentation tags to publish what this function does, in case we forget later:
#![allow(unused)]
fn main() {
/// Makes a map with solid boundaries and 400 randomly placed walls. No guarantees that it won't
/// look awful.
pub fn new_map_test() -> Vec<TileType> {
    ...
}
}
In canonical Rust, if you prefix a function with comments starting with ///, it makes it into a function comment. Your IDE will then show you your comment text when you hover the mouse over the function header, and you can use Cargo's documentation features to make pretty documentation pages for the system you are writing. It's mostly handy if you plan on sharing your code, or working with others - but it's nice to have!
So now, in the spirit of the original libtcod tutorial, we'll start making a map. Our goal is to randomly place rooms, and join them together with corridors.
Making a couple of rectangular rooms
We'll start with a new function:
#![allow(unused)]
fn main() {
pub fn new_map_rooms_and_corridors() -> Vec<TileType> {
    let mut map = vec![TileType::Wall; 80*50];

    map
}
}
This makes a solid 80x50 map, with walls on all tiles - you can't move! We've kept the function signature, so changing the map we want to use in main.rs just requires changing gs.ecs.insert(new_map_test()); to gs.ecs.insert(new_map_rooms_and_corridors());. Once again we're using the vec! macro to make our life easier - see the previous chapter for a discussion of how that works.
Since this algorithm makes heavy use of rectangles, and a Rect type - we'll start by making one in rect.rs. We'll include some utility functions that will be useful later on in this chapter:
#![allow(unused)]
fn main() {
pub struct Rect {
    pub x1 : i32,
    pub x2 : i32,
    pub y1 : i32,
    pub y2 : i32
}

impl Rect {
    pub fn new(x:i32, y: i32, w:i32, h:i32) -> Rect {
        Rect{x1:x, y1:y, x2:x+w, y2:y+h}
    }

    // Returns true if this overlaps with other
    pub fn intersect(&self, other:&Rect) -> bool {
        self.x1 <= other.x2 && self.x2 >= other.x1 && self.y1 <= other.y2 && self.y2 >= other.y1
    }

    pub fn center(&self) -> (i32, i32) {
        ((self.x1 + self.x2)/2, (self.y1 + self.y2)/2)
    }
}
}
There's nothing really new here, but lets break it down a bit:
- We define a
structcalledRect. We added thepubtag to make it public - it's available outside of this module (by putting it into a new file, we automatically created a code module; that's a built-in Rust way to compartmentalize your code). Over inmain.rs, we can addpub mod Rectto say "we useRect, and because we put apubin front of it anything can getRectfrom us assuper::rect::Rect. That's not very ergonomic to type, so a second lineuse rect::Rectshortens that tosuper::Rect. - We make a new constructor, entitled
new. It uses the return shorthand and returns a rectangle based on thex,y,widthandheightwe pass in. - We define a member method,
intersect. It has an&self, meaning it can see into theRectto which it is attached - but can't modify it (it's a "pure" function). It returns a bool:trueif the two rectangles overlap,falseotherwise. - We define
center, also as a pure member method. It simply returns the coordinates of the middle of the rectangle, as a tuple ofxandyinval.0andval.1.
We'll also make a new function to apply a room to a map:
#![allow(unused)]
fn main() {
fn apply_room_to_map(room : &Rect, map: &mut [TileType]) {
    for y in room.y1 +1 ..= room.y2 {
        for x in room.x1 + 1 ..= room.x2 {
            map[xy_idx(x, y)] = TileType::Floor;
        }
    }
}
}
Notice that we are using for y in room.y1 +1 ..= room.y2 - that's an inclusive range. We want to go all the way to the value of y2, and not y2-1! Otherwise, it's relatively straightforward: use two for loops to visit every tile inside the room's rectangle, and set that tile to be a Floor.
With these two bits of code, we can create a new rectangle anywhere with Rect::new(x, y, width, height). We can add it to the map as floors with apply_room_to_map(rect, map). That's enough to add a couple of test rooms. Our map function now looks like this:
#![allow(unused)]
fn main() {
pub fn new_map_rooms_and_corridors() -> Vec<TileType> {
    let mut map = vec![TileType::Wall; 80*50];

    let room1 = Rect::new(20, 15, 10, 15);
    let room2 = Rect::new(35, 15, 10, 15);

    apply_room_to_map(&room1, &mut map);
    apply_room_to_map(&room2, &mut map);

    map
}
}
If you cargo run your project, you'll see that we now have two rooms - not linked together.
Making a corridor
Two disconnected rooms isn't much fun, so lets add a corridor between them. We're going to need some comparison functions, so we have to tell Rust to import them (at the top of map.rs): use std::cmp::{max, min};. min and max do what they say: they return the minimum or maximum of two values. You could use if statements to do the same thing, but some computers will optimize this into a simple (FAST) call for you; we let Rust figure that out!
Then we make two functions, for horizontal and vertical tunnels:
#![allow(unused)]
fn main() {
fn apply_horizontal_tunnel(map: &mut [TileType], x1:i32, x2:i32, y:i32) {
    for x in min(x1,x2) ..= max(x1,x2) {
        let idx = xy_idx(x, y);
        if idx > 0 && idx < 80*50 {
            map[idx as usize] = TileType::Floor;
        }
    }
}

fn apply_vertical_tunnel(map: &mut [TileType], y1:i32, y2:i32, x:i32) {
    for y in min(y1,y2) ..= max(y1,y2) {
        let idx = xy_idx(x, y);
        if idx > 0 && idx < 80*50 {
            map[idx as usize] = TileType::Floor;
        }
    }
}
}
Then we add a call, apply_horizontal_tunnel(&mut map, 25, 40, 23); to our map making function, and voila! We have a tunnel between the two rooms! If you run (cargo run) the project, you can walk between the two rooms - and not into walls. So our previous code is still working, but now it looks a bit more like a roguelike.
Making a simple dungeon
Now we can use that to make a random dungeon. We'll modify our function as follows:
#![allow(unused)]
fn main() {
pub fn new_map_rooms_and_corridors() -> Vec<TileType> {
    let mut map = vec![TileType::Wall; 80*50];

    let mut rooms : Vec<Rect> = Vec::new();
    const MAX_ROOMS : i32 = 30;
    const MIN_SIZE : i32 = 6;
    const MAX_SIZE : i32 = 10;

    let mut rng = RandomNumberGenerator::new();

    for _ in 0..MAX_ROOMS {
        let w = rng.range(MIN_SIZE, MAX_SIZE);
        let h = rng.range(MIN_SIZE, MAX_SIZE);
        let x = rng.roll_dice(1, 80 - w - 1) - 1;
        let y = rng.roll_dice(1, 50 - h - 1) - 1;
        let new_room = Rect::new(x, y, w, h);
        let mut ok = true;
        for other_room in rooms.iter() {
            if new_room.intersect(other_room) { ok = false }
        }
        if ok {
            apply_room_to_map(&new_room, &mut map);
            rooms.push(new_room);
        }
    }

    map
}
}
There's quite a bit changed there:
- We've added
constconstants for the maximum number of rooms to make, and the minimum and maximum size of the rooms. This is the first time we've encounteredconst: it just says "setup this value at the beginning, and it can never change". It's the only easy way to have global variables in Rust; since they can never change, they often don't even exist and get baked into the functions where you use them. If they do exist, because they can't change there are no concerns when multiple threads access them. It's often cleaner to setup a named constant than to use a "magic number" - that is, a hard-coded value with no real clue as to why you picked that value. - We acquire a
RandomNumberGeneratorfrom RLTK (which required that we add to theusestatement at the top ofmap.rs) - We're randomly building a width and height.
- We're then placing the room randomly so that
xandyare greater than 0 and less than the maximum map size minus one. - We iterate through existing rooms, rejecting the new room if it overlaps with one we've already placed.
- If its ok, we apply it to the room.
- We're keeping rooms in a vector, although we aren't using it yet.
Running the project (cargo run) at this point will give you a selection of random rooms, with no corridors between them.
Joining the rooms together
We now need to join the rooms together, with corridors. We'll add this to the if ok section of the map generator:
#![allow(unused)]
fn main() {
if ok {
    apply_room_to_map(&new_room, &mut map);

    if !rooms.is_empty() {
        let (new_x, new_y) = new_room.center();
        let (prev_x, prev_y) = rooms[rooms.len()-1].center();
        if rng.range(0,2) == 1 {
            apply_horizontal_tunnel(&mut map, prev_x, new_x, prev_y);
            apply_vertical_tunnel(&mut map, prev_y, new_y, new_x);
        } else {
            apply_vertical_tunnel(&mut map, prev_y, new_y, prev_x);
            apply_horizontal_tunnel(&mut map, prev_x, new_x, new_y);
        }
    }

    rooms.push(new_room);
}
}
- So what does this do? It starts by looking to see if the
roomslist is empty. If it is, then there is no previous room to join to - so we ignore it. - It gets the room's center, and stores it as
new_xandnew_y. - It gets the previous room in the vector's center, and stores it as
prev_xandprev_y. - It rolls a dice, and half the time it draws a horizontal and then vertical tunnel - and half the time, the other way around.
Try cargo run now. It's really starting to look like a roguelike!
Placing the player
Currently, the player always starts in the center of the map - which with the new generator, may not be a valid starting point! We could simply move the player to the center of the first room, but it's likely that our generator will need to know where all the rooms are - so we can put things in them - rather than just the player's location. So we'll modify our new_map_rooms_and_corridors function to also return the room list. So we change the method signature to: pub fn new_map_rooms_and_corridors() -> (Vec<Rect>, Vec<TileType>) {, and the return statement to (rooms, map)
Our main.rs file also requires adjustments, to accept the new format. We change our main function in main.rs to:
fn main() -> rltk::BError {
    use rltk::RltkBuilder;
    let context = RltkBuilder::simple80x50()
        .with_title("Roguelike Tutorial")
        .build()?;
    let mut gs = State {
        ecs: World::new()
    };
    gs.ecs.register::<Position>();
    gs.ecs.register::<Renderable>();
    gs.ecs.register::<Player>();

    let (rooms, map) = new_map_rooms_and_corridors();
    gs.ecs.insert(map);
    let (player_x, player_y) = rooms[0].center();

    gs.ecs
        .create_entity()
        .with(Position { x: player_x, y: player_y })
        .with(Renderable {
            glyph: rltk::to_cp437('@'),
            fg: RGB::named(rltk::YELLOW),
            bg: RGB::named(rltk::BLACK),
        })
        .with(Player{})
        .build();

    rltk::main_loop(context, gs)
}
This is mostly the same, but we are receiving both the rooms list and the map from new_map_rooms_and_corridors. We then place the player in the center of the first room.
Wrapping Up - and supporting the numpad, and Vi keys
Now you have a map that looks like a roguelike, places the player in the first room, and lets you explore with the cursor keys. Not every keyboard has cursor keys that are readily accessible (some laptops require interesting key combinations for them). Lots of players like to steer with the numpad, but not every keyboard has one of those either - so we also support the directional keys from the text editor vi. This makes both hardcore UNIX users happy, and makes regular players happier.
We're not going to worry about diagonal movement yet. In player.rs, we change player_input to look like this:
#![allow(unused)]
fn main() {
pub fn player_input(gs: &mut State, ctx: &mut Rltk) {
    // Player movement
    match ctx.key {
        None => {} // Nothing happened
        Some(key) => match key {
            VirtualKeyCode::Left |
            VirtualKeyCode::Numpad4 |
            VirtualKeyCode::H => try_move_player(-1, 0, &mut gs.ecs),

            VirtualKeyCode::Right |
            VirtualKeyCode::Numpad6 |
            VirtualKeyCode::L => try_move_player(1, 0, &mut gs.ecs),

            VirtualKeyCode::Up |
            VirtualKeyCode::Numpad8 |
            VirtualKeyCode::K => try_move_player(0, -1, &mut gs.ecs),

            VirtualKeyCode::Down |
            VirtualKeyCode::Numpad2 |
            VirtualKeyCode::J => try_move_player(0, 1, &mut gs.ecs),

            _ => {}
        },
    }
}
}
You should now get something like this when you cargo run your project:
The source code for this chapter may be found here
Run this chapter's example with web assembly, in your browser (WebGL2 required)
Copyright (C) 2019, Herbert Wolverson.
Chapter 5 - Field of View
About this tutorial
This tutorial is free and open source, and all code uses the MIT license - so you are free to do with it as you like. My hope is that you will enjoy the tutorial, and make great games!
If you enjoy this and would like me to keep writing, please consider supporting my Patreon.
We have a nicely drawn map, but it shows the whole dungeon! That reduces the usefulness of exploration - if we already know where everything is, why bother exploring? This chapter will add "field of view", and adjust rendering to show the parts of the map we've already discovered. It will also refactor the map into its own structure, rather than just a vector of tiles.
This chapter starts with the code from chapter 4.
Map refactor
We'll keep map-related functions and data together, to keep things clear as we make an ever-more-complicated game. The bulk of this is creating a new Map structure, and moving our helper functions to its implementation.
#![allow(unused)]
fn main() {
use rltk::{ RGB, Rltk, RandomNumberGenerator };
use super::{Rect};
use std::cmp::{max, min};

#[derive(PartialEq, Copy, Clone)]
pub enum TileType {
    Wall, Floor
}

pub struct Map {
    pub tiles : Vec<TileType>,
    pub rooms : Vec<Rect>,
    pub width : i32,
    pub height : i32
}

impl Map {
    pub fn xy_idx(&self, x: i32, y: i32) -> usize {
        (y as usize * self.width as usize) + x as usize
    }

    fn apply_room_to_map(&mut self, room : &Rect) {
        for y in room.y1 +1 ..= room.y2 {
            for x in room.x1 + 1 ..= room.x2 {
                let idx = self.xy_idx(x, y);
                self.tiles[idx] = TileType::Floor;
            }
        }
    }

    fn apply_horizontal_tunnel(&mut self, x1:i32, x2:i32, y:i32) {
        for x in min(x1,x2) ..= max(x1,x2) {
            let idx = self.xy_idx(x, y);
            if idx > 0 && idx < self.width as usize * self.height as usize {
                self.tiles[idx as usize] = TileType::Floor;
            }
        }
    }

    fn apply_vertical_tunnel(&mut self, y1:i32, y2:i32, x:i32) {
        for y in min(y1,y2) ..= max(y1,y2) {
            let idx = self.xy_idx(x, y);
            if idx > 0 && idx < self.width as usize * self.height as usize {
                self.tiles[idx as usize] = TileType::Floor;
            }
        }
    }

    /// Makes a new map using the algorithm from http://rogueliketutorials.com/tutorials/tcod/part-3/
    /// This gives a handful of random rooms and corridors joining them together.
    pub fn new_map_rooms_and_corridors() -> Map {
        let mut map = Map{
            tiles : vec![TileType::Wall; 80*50],
            rooms : Vec::new(),
            width : 80,
            height: 50
        };

        const MAX_ROOMS : i32 = 30;
        const MIN_SIZE : i32 = 6;
        const MAX_SIZE : i32 = 10;

        let mut rng = RandomNumberGenerator::new();

        for i in 0..MAX_ROOMS {
            let w = rng.range(MIN_SIZE, MAX_SIZE);
            let h = rng.range(MIN_SIZE, MAX_SIZE);
            let x = rng.roll_dice(1, map.width - w - 1) - 1;
            let y = rng.roll_dice(1, map.height - h - 1) - 1;
            let new_room = Rect::new(x, y, w, h);
            let mut ok = true;
            for other_room in map.rooms.iter() {
                if new_room.intersect(other_room) { ok = false }
            }
            if ok {
                map.apply_room_to_map(&new_room);

                if !map.rooms.is_empty() {
                    let (new_x, new_y) = new_room.center();
                    let (prev_x, prev_y) = map.rooms[map.rooms.len()-1].center();
                    if rng.range(0,2) == 1 {
                        map.apply_horizontal_tunnel(prev_x, new_x, prev_y);
                        map.apply_vertical_tunnel(prev_y, new_y, new_x);
                    } else {
                        map.apply_vertical_tunnel(prev_y, new_y, prev_x);
                        map.apply_horizontal_tunnel(prev_x, new_x, new_y);
                    }
                }

                map.rooms.push(new_room);
            }
        }

        map
    }
}
}
There's changes in main and player, too - see the example source for all the details. This has cleaned up our code quite a bit - we can pass a Map around, instead of a vector. If we want to teach Map to do more things - we have a place to do so.
The field-of-view component
Not just the player has limited visibility! Eventually, we'll want monsters to consider what they can see, too. So, since its reusable code, we'll make a Viewshed component. (I like the word viewshed; it comes from the cartography world - literally "what can I see from here?" - and perfectly describes our problem). We'll give each entity that has a Viewshed a list of tile indices they can see. In components.rs we add:
#![allow(unused)]
fn main() {
#[derive(Component)]
pub struct Viewshed {
    pub visible_tiles : Vec<rltk::Point>,
    pub range : i32
}
}
In main.rs, we tell the system about the new component:
#![allow(unused)]
fn main() {
gs.ecs.register::<Viewshed>();
}
Lastly, also in main.rs we'll give the Player a Viewshed component:
#![allow(unused)]
fn main() {
gs.ecs
    .create_entity()
    .with(Position { x: player_x, y: player_y })
    .with(Renderable {
        glyph: rltk::to_cp437('@'),
        fg: RGB::named(rltk::YELLOW),
        bg: RGB::named(rltk::BLACK),
    })
    .with(Player{})
    .with(Viewshed{ visible_tiles : Vec::new(), range : 8 })
    .build();
}
Player is getting quite complicated now - that's good, it shows what an ECS is good for!
A new system: generic viewsheds
We'll start by defining a system to take care of this for us. We want this to be generic, so it works for anything that can benefit from knowing what it can see. We create a new file, visibility_system.rs:
#![allow(unused)]
fn main() {
use specs::prelude::*;
use super::{Viewshed, Position};

pub struct VisibilitySystem {}

impl<'a> System<'a> for VisibilitySystem {
    type SystemData = ( WriteStorage<'a, Viewshed>,
                        WriteStorage<'a, Position>);

    fn run(&mut self, (mut viewshed, pos) : Self::SystemData) {
        for (viewshed,pos) in (&mut viewshed, &pos).join() {
        }
    }
}
}
Now we have to adjust run_systems in main.rs to actually call the system:
#![allow(unused)]
fn main() {
impl State {
    fn run_systems(&mut self) {
        let mut vis = VisibilitySystem{};
        vis.run_now(&self.ecs);
        self.ecs.maintain();
    }
}
}
We also have to tell main.rs to use the new module:
#![allow(unused)]
fn main() {
mod visibility_system;
use visibility_system::VisibilitySystem;
}
This doesn't actually do anything, yet - but we've added a system into the dispatcher, and as soon as we flesh out the code to actually plot the visibility, it will apply to every entity that has both a Viewshed and a Position component.
Asking RLTK for a Viewshed: Trait Implementation
RLTK is written to not care about how you've chosen to lay out your map: I want it to be useful for anyone, and not everyone does maps the way this tutorial does. To act as a bridge between our map implementation and RLTK, it provides some traits for us to support. For this example, we need BaseMap and Algorithm2D. Don't worry, they are simple enough to implement.
In our map.rs file, we add the following:
#![allow(unused)]
fn main() {
impl Algorithm2D for Map {
    fn dimensions(&self) -> Point {
        Point::new(self.width, self.height)
    }
}
}
RLTK is able to figure out a lot of other traits from the dimensions function: point indexing (and it's reciprocal), bounds-checks, and similar. We use return the dimensions we're already using, self.width and self.height.
We also need to support BaseMap. We don't need all of it yet, so we're going to let it use defaults. In map.rs:
#![allow(unused)]
fn main() {
impl BaseMap for Map {
    fn is_opaque(&self, idx:usize) -> bool {
        self.tiles[idx as usize] == TileType::Wall
    }
}
}
is_opaque simply returns true if the tile is a wall, and false otherwise. This will have to be expanded if/when we add more types of tile, but works for now. We'll leave the rest of the trait on defaults for now (so no need to enter anything else).
Asking RLTK for a Viewshed: The System
So going back to visibility_system.rs, we now have what we need to request a viewshed from RLTK. We extend our visibility_system.rs file to look like this:
#![allow(unused)]
fn main() {
use specs::prelude::*;
use super::{Viewshed, Position, Map};
use rltk::{field_of_view, Point};

pub struct VisibilitySystem {}

impl<'a> System<'a> for VisibilitySystem {
    type SystemData = ( ReadExpect<'a, Map>,
                        WriteStorage<'a, Viewshed>,
                        WriteStorage<'a, Position>);

    fn run(&mut self, data : Self::SystemData) {
        let (map, mut viewshed, pos) = data;

        for (viewshed,pos) in (&mut viewshed, &pos).join() {
            viewshed.visible_tiles.clear();
            viewshed.visible_tiles = field_of_view(Point::new(pos.x, pos.y), viewshed.range, &*map);
            viewshed.visible_tiles.retain(|p| p.x >= 0 && p.x < map.width && p.y >= 0 && p.y < map.height );
        }
    }
}
}
There's quite a bit here, and the viewshed is actually the simplest part:
- We've added a
ReadExpect<'a, Map>- meaning that the system should be passed ourMapfor use. We usedReadExpect, because not having a map is a failure. - In the loop, we first clear the list of visible tiles.
- Then we call RLTK's
field_of_viewfunction, providing the starting point (the location of the entity, frompos), the range (from the viewshed), and a slightly convoluted "dereference, then get a reference" to unwrapMapfrom the ECS. - Finally we use the vector's
retainmethod to delete any entries that don't meet the criteria we specify. This is a lambda or closure - it iterates over the vector, passingpas a parameter. If p is inside the map boundaries, we keep it. This prevents other functions from trying to access a tile outside of the working map area.
This will now run every frame (which is overkill, more on that later) - and store a list of visible tiles.
Rendering visibility - badly!
As a first try, we'll change our draw_map function to retrieve the map, and the player's viewshed. It will only draw tiles present in the viewshed:
#![allow(unused)]
fn main() {
pub fn draw_map(ecs: &World, ctx : &mut Rltk) {
    let mut viewsheds = ecs.write_storage::<Viewshed>();
    let mut players = ecs.write_storage::<Player>();
    let map = ecs.fetch::<Map>();

    for (_player, viewshed) in (&mut players, &mut viewsheds).join() {
        let mut y = 0;
        let mut x = 0;
        for tile in map.tiles.iter() {
            // Render a tile depending upon the tile type
            let pt = Point::new(x,y);
            if viewshed.visible_tiles.contains(&pt) {
                match tile {
                    TileType::Floor => {
                        ctx.set(x, y, RGB::from_f32(0.5, 0.5, 0.5), RGB::from_f32(0., 0., 0.), rltk::to_cp437('.'));
                    }
                    TileType::Wall => {
                        ctx.set(x, y, RGB::from_f32(0.0, 1.0, 0.0), RGB::from_f32(0., 0., 0.), rltk::to_cp437('#'));
                    }
                }
            }

            // Move the coordinates
            x += 1;
            if x > 79 {
                x = 0;
                y += 1;
            }
        }
    }
}
}
If you run the example now (cargo run), it will show you just what the player can see. There's no memory, and performance is quite awful - but it's there and about right.
It's clear that we're on the right track, but we need a more efficient way to do things. It would be nice if the player could remember the map as they see it, too.
Expanding map to include revealed tiles
To simulate map memory, we'll extend our Map class to include a revealed_tiles structure. It's just a bool for each tile on the map - if true, then we know what's there. Our Map definition now looks like this:
#![allow(unused)]
fn main() {
#[derive(Default)]
pub struct Map {
    pub tiles : Vec<TileType>,
    pub rooms : Vec<Rect>,
    pub width : i32,
    pub height : i32,
    pub revealed_tiles : Vec<bool>
}
}
We also need to extend the function that fills the map to include the new type. In new_rooms_and_corridors, we extend the Map creation to:
#![allow(unused)]
fn main() {
let mut map = Map{
    tiles : vec![TileType::Wall; 80*50],
    rooms : Vec::new(),
    width : 80,
    height: 50,
    revealed_tiles : vec![false; 80*50]
};
}
That adds a false value for every tile.
We change the draw_map to look at this value, rather than iterating the component each time. The function now looks like this:
#![allow(unused)]
fn main() {
pub fn draw_map(ecs: &World, ctx : &mut Rltk) {
    let map = ecs.fetch::<Map>();

    let mut y = 0;
    let mut x = 0;
    for (idx,tile) in map.tiles.iter().enumerate() {
        // Render a tile depending upon the tile type
        if map.revealed_tiles[idx] {
            match tile {
                TileType::Floor => {
                    ctx.set(x, y, RGB::from_f32(0.5, 0.5, 0.5), RGB::from_f32(0., 0., 0.), rltk::to_cp437('.'));
                }
                TileType::Wall => {
                    ctx.set(x, y, RGB::from_f32(0.0, 1.0, 0.0), RGB::from_f32(0., 0., 0.), rltk::to_cp437('#'));
                }
            }
        }

        // Move the coordinates
        x += 1;
        if x > 79 {
            x = 0;
            y += 1;
        }
    }
}
}
This will render a black screen, because we're never setting any tiles to be revealed! So now we extend the VisibilitySystem to know how to mark tiles as revealed. To do this, it has to check to see if an entity is the player - and if it is, it updates the map's revealed status:
#![allow(unused)]
fn main() {
use specs::prelude::*;
use super::{Viewshed, Position, Map, Player};
use rltk::{field_of_view, Point};

pub struct VisibilitySystem {}

impl<'a> System<'a> for VisibilitySystem {
    type SystemData = ( WriteExpect<'a, Map>,
                        Entities<'a>,
                        WriteStorage<'a, Viewshed>,
                        WriteStorage<'a, Position>,
                        ReadStorage<'a, Player>);

    fn run(&mut self, data : Self::SystemData) {
        let (mut map, entities, mut viewshed, pos, player) = data;

        for (ent,viewshed,pos) in (&entities, &mut viewshed, &pos).join() {
            viewshed.visible_tiles.clear();
            viewshed.visible_tiles = field_of_view(Point::new(pos.x, pos.y), viewshed.range, &*map);
            viewshed.visible_tiles.retain(|p| p.x >= 0 && p.x < map.width && p.y >= 0 && p.y < map.height );

            // If this is the player, reveal what they can see
            let p : Option<&Player> = player.get(ent);
            if let Some(p) = p {
                for vis in viewshed.visible_tiles.iter() {
                    let idx = map.xy_idx(vis.x, vis.y);
                    map.revealed_tiles[idx] = true;
                }
            }
        }
    }
}
}
The main changes here are that we're getting the Entities list along with components, and obtaining read-only access to the Players storage. We add those to the list of things to iterate in the list, and add a let p : Option<&Player> = player.get(ent); to see if this is the player. The rather cryptic if let Some(p) = p runs only if there is a Player component. Then we calculate the index, and mark it revealed.
If you run (cargo run) the project now, it is MASSIVELY faster than the previous version, and remembers where you've been.
Speeding it up even more - recalculating visibility when we need to
It's still not as efficient as it could be! Lets only update viewsheds when we need to. Lets add a dirty flag to our Viewshed component:
#![allow(unused)]
fn main() {
#[derive(Component)]
pub struct Viewshed {
    pub visible_tiles : Vec<rltk::Point>,
    pub range : i32,
    pub dirty : bool
}
}
We'll also update the initialization in main.rs to say that the viewshed is, in fact, dirty: .with(Viewshed{ visible_tiles : Vec::new(), range: 8, dirty: true }).
Our system can be extended to check if the dirty flag is true, and only recalculate if it is - and set the dirty flag to false when it is done. Now we need to set the flag when the player moves - because what they can see has changed! We update try_move_player in player.rs:
#![allow(unused)]
fn main() {
pub fn try_move_player(delta_x: i32, delta_y: i32, ecs: &mut World) {
    let mut positions = ecs.write_storage::<Position>();
    let mut players = ecs.write_storage::<Player>();
    let mut viewsheds = ecs.write_storage::<Viewshed>();
    let map = ecs.fetch::<Map>();

    for (_player, pos, viewshed) in (&mut players, &mut positions, &mut viewsheds).join() {
        let destination_idx = map.xy_idx(pos.x + delta_x, pos.y + delta_y);
        if map.tiles[destination_idx] != TileType::Wall {
            pos.x = min(79 , max(0, pos.x + delta_x));
            pos.y = min(49, max(0, pos.y + delta_y));

            viewshed.dirty = true;
        }
    }
}
}
This should be pretty familiar by now: we've added viewsheds to get write storage, and included it in the list of component types we are iterating. Then one call sets the flag to true after a move.
The game now runs very fast once more, if you type cargo run.
Greying out what we remember, but can't see
One more extension: we'd like to render the parts of the map we know are there but can't currently see. So we add a list of what tiles are currently visible to Map:
#![allow(unused)]
fn main() {
#[derive(Default)]
pub struct Map {
    pub tiles : Vec<TileType>,
    pub rooms : Vec<Rect>,
    pub width : i32,
    pub height : i32,
    pub revealed_tiles : Vec<bool>,
    pub visible_tiles : Vec<bool>
}
}
Our creation method also needs to know to add all false to it, just like before: visible_tiles : vec![false; 80*50]. Next, in our VisibilitySystem we clear the list of visible tiles before we begin iterating - and mark currently visible tiles as we find them. So our code to run when updating the viewshed looks like this:
#![allow(unused)]
fn main() {
if viewshed.dirty {
    viewshed.dirty = false;
    viewshed.visible_tiles.clear();
    viewshed.visible_tiles = field_of_view(Point::new(pos.x, pos.y), viewshed.range, &*map);
    viewshed.visible_tiles.retain(|p| p.x >= 0 && p.x < map.width && p.y >= 0 && p.y < map.height );

    // If this is the player, reveal what they can see
    let _p : Option<&Player> = player.get(ent);
    if let Some(_p) = _p {
        for t in map.visible_tiles.iter_mut() { *t = false };
        for vis in viewshed.visible_tiles.iter() {
            let idx = map.xy_idx(vis.x, vis.y);
            map.revealed_tiles[idx] = true;
            map.visible_tiles[idx] = true;
        }
    }
}
}
Now we adjust the draw_map function to handle revealed but not currently visible tiles differently. The new draw_map function looks like this:
#![allow(unused)]
fn main() {
pub fn draw_map(ecs: &World, ctx : &mut Rltk) {
    let map = ecs.fetch::<Map>();

    let mut y = 0;
    let mut x = 0;
    for (idx,tile) in map.tiles.iter().enumerate() {
        // Render a tile depending upon the tile type

        if map.revealed_tiles[idx] {
            let glyph;
            let mut fg;
            match tile {
                TileType::Floor => {
                    glyph = rltk::to_cp437('.');
                    fg = RGB::from_f32(0.0, 0.5, 0.5);
                }
                TileType::Wall => {
                    glyph = rltk::to_cp437('#');
                    fg = RGB::from_f32(0., 1.0, 0.);
                }
            }
            if !map.visible_tiles[idx] { fg = fg.to_greyscale() }
            ctx.set(x, y, fg, RGB::from_f32(0., 0., 0.), glyph);
        }

        // Move the coordinates
        x += 1;
        if x > 79 {
            x = 0;
            y += 1;
        }
    }
}
}
If you cargo run your project, you will now have visible tiles as slightly cyan floors and green walls - and grey as they move out of view. Performance should be great! Congratulations - you now have a nice, working field-of-view system.
The source code for this chapter may be found here
Run this chapter's example with web assembly, in your browser (WebGL2 required)
Copyright (C) 2019, Herbert Wolverson.
Chapter 6 - Monsters
About this tutorial
This tutorial is free and open source, and all code uses the MIT license - so you are free to do with it as you like. My hope is that you will enjoy the tutorial, and make great games!
If you enjoy this and would like me to keep writing, please consider supporting my Patreon.
A roguelike with no monsters is quite unusual, so lets add some! The good news is that we've already done some of the work for this: we can render them, and we can calculate what they can see. We'll build on the source from the previous chapter, and get some harmless monsters into play.
Rendering a monster in the center of each room
We can simply add a Renderable component for each monster (we'll also add a Viewshed since we'll use it later). In our main function (in main.rs), add the following:
#![allow(unused)]
fn main() {
for room in map.rooms.iter().skip(1) {
    let (x,y) = room.center();
    gs.ecs.create_entity()
        .with(Position{ x, y })
        .with(Renderable{
            glyph: rltk::to_cp437('g'),
            fg: RGB::named(rltk::RED),
            bg: RGB::named(rltk::BLACK),
        })
        .with(Viewshed{ visible_tiles : Vec::new(), range: 8, dirty: true })
        .build();
}

gs.ecs.insert(map);
}
Notice the skip(1) to ignore the first room - we don't want the player starting with a mob on top of him/her/it! Running this (with cargo run) produces something like this:
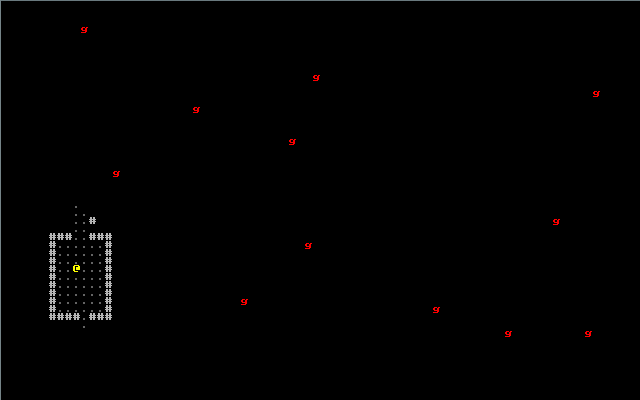
That's a really good start! However, we're rendering monsters even if we can't see them. We probably only want to render the ones we can see. We can do this by modifying our render loop:
#![allow(unused)]
fn main() {
let positions = self.ecs.read_storage::<Position>();
let renderables = self.ecs.read_storage::<Renderable>();
let map = self.ecs.fetch::<Map>();

for (pos, render) in (&positions, &renderables).join() {
    let idx = map.xy_idx(pos.x, pos.y);
    if map.visible_tiles[idx] { ctx.set(pos.x, pos.y, render.fg, render.bg, render.glyph) }
}
}
We get the map from the ECS, and use it to obtain an index - and check if the tile is visible. If it is - we render the renderable. There's no need for a special case for the player - since they can generally be expected to see themselves! The result is pretty good:
Add some monster variety
It's rather dull to only have one monster type, so we'll amend our monster spawner to be able to create goblins and orcs.
Here's the spawner code:
#![allow(unused)]
fn main() {
let mut rng = rltk::RandomNumberGenerator::new();
for room in map.rooms.iter().skip(1) {
    let (x,y) = room.center();

    let glyph : rltk::FontCharType;
    let roll = rng.roll_dice(1, 2);
    match roll {
        1 => { glyph = rltk::to_cp437('g') }
        _ => { glyph = rltk::to_cp437('o') }
    }

    gs.ecs.create_entity()
        .with(Position{ x, y })
        .with(Renderable{
            glyph: glyph,
            fg: RGB::named(rltk::RED),
            bg: RGB::named(rltk::BLACK),
        })
        .with(Viewshed{ visible_tiles : Vec::new(), range: 8, dirty: true })
        .build();
}
}
Obviously, when we start adding in combat we'll want more variety - but it's a good start. Run the program (cargo run), and you'll see a roughly 50/50 split between orcs and goblins.
Making the monsters think
Now to start making the monsters think! For now, they won't actually do much, beyond pondering their lonely existence. We should start by adding a tag component to indicate that an entity is a monster. In components.rs we add a simple struct:
#![allow(unused)]
fn main() {
#[derive(Component, Debug)]
pub struct Monster {}
}
Of course, we need to register it in main.rs: gs.ecs.register::<Monster>();. We should also amend our spawning code to apply it to monsters:
#![allow(unused)]
fn main() {
gs.ecs.create_entity()
    .with(Position{ x, y })
    .with(Renderable{
        glyph: glyph,
        fg: RGB::named(rltk::RED),
        bg: RGB::named(rltk::BLACK),
    })
    .with(Viewshed{ visible_tiles : Vec::new(), range: 8, dirty: true })
    .with(Monster{})
    .build();
}
Now we make a system for monster thought. We'll make a new file, monster_ai_system.rs. We'll give it some basically non-existent intelligence:
#![allow(unused)]
fn main() {
use specs::prelude::*;
use super::{Viewshed, Position, Map, Monster};
use rltk::{field_of_view, Point, console};

pub struct MonsterAI {}

impl<'a> System<'a> for MonsterAI {
    type SystemData = ( ReadStorage<'a, Viewshed>,
                        ReadStorage<'a, Position>,
                        ReadStorage<'a, Monster>);

    fn run(&mut self, data : Self::SystemData) {
        let (viewshed, pos, monster) = data;

        for (viewshed,pos,_monster) in (&viewshed, &pos, &monster).join() {
            console::log("Monster considers their own existence");
        }
    }
}
}
Note that we're importing console from rltk - and printing with console::log. This is a helper provided by RLTK that detects if you are compiling to a regular program or a Web Assembly; if you are using a regular program, it calls println! and outputs to the console. If you are in WASM, it outputs to the browser console.
We'll also extend the system runner in main.rs to call it:
#![allow(unused)]
fn main() {
impl State {
    fn run_systems(&mut self) {
        let mut vis = VisibilitySystem{};
        vis.run_now(&self.ecs);
        let mut mob = MonsterAI{};
        mob.run_now(&self.ecs);
        self.ecs.maintain();
    }
}
}
If you cargo run your project now, it will be very slow - and your console will fill up with "Monster considers their own existence". The AI is running - but it's running every tick!
Turn-based game, in a tick-based world
To prevent this - and make a turn-based game - we introduce a new concept to the game state. The game is either "running" or "waiting for input" - so we make an enum to handle this:
#![allow(unused)]
fn main() {
#[derive(PartialEq, Copy, Clone)]
pub enum RunState { Paused, Running }
}
Notice the derive macro! Derivation is a way to ask Rust (and crates) to add code to your structure for you, to cut down on typing boilerplate. In this case, the enum needs a few extra features. PartialEq allows you to compare the RunState with other RunState variables to determine if they are the same (or different). Copy marks it as a "copy" type - it can safely be copied in memory (meaning it has no pointers that will be messed up doing this). Clone quietly adds a .clone() function to it, allowing you to make a memory copy that way.
Next, we need to add it into the State structure:
#![allow(unused)]
fn main() {
pub struct State {
    pub ecs: World,
    pub runstate : RunState
}
}
In turn, we need to amend our State creator to include a runstate: RunState::Running:
#![allow(unused)]
fn main() {
let mut gs = State {
    ecs: World::new(),
    runstate : RunState::Running
};
}
Now, we change our tick function to only run the simulation when the game isn't paused - and otherwise to ask for user input:
#![allow(unused)]
fn main() {
if self.runstate == RunState::Running {
    self.run_systems();
    self.runstate = RunState::Paused;
} else {
    self.runstate = player_input(self, ctx);
}
}
As you can see, player_input now returns a state. Here's the new code for it:
#![allow(unused)]
fn main() {
pub fn player_input(gs: &mut State, ctx: &mut Rltk) -> RunState {
    // Player movement
    match ctx.key {
        None => { return RunState::Paused } // Nothing happened
        Some(key) => match key {
            VirtualKeyCode::Left |
            VirtualKeyCode::Numpad4 |
            VirtualKeyCode::H => try_move_player(-1, 0, &mut gs.ecs),

            VirtualKeyCode::Right |
            VirtualKeyCode::Numpad6 |
            VirtualKeyCode::L => try_move_player(1, 0, &mut gs.ecs),

            VirtualKeyCode::Up |
            VirtualKeyCode::Numpad8 |
            VirtualKeyCode::K => try_move_player(0, -1, &mut gs.ecs),

            VirtualKeyCode::Down |
            VirtualKeyCode::Numpad2 |
            VirtualKeyCode::J => try_move_player(0, 1, &mut gs.ecs),

            _ => { return RunState::Paused }
        },
    }
    RunState::Running
}
}
If you launch cargo run now, the game is back up to speed - and the monsters only think about what to do when you move. That's a basic turn-based tick loop!
Quiet monsters until they see you
You could let monsters think every time anything moves (and you probably will when you get into deeper simulation), but for now lets quiet them down a bit - and have them react if they can see the player.
It's highly likely that systems will often want to know where the player is - so lets add that as a resource. In main.rs, one line puts it in (I don't recommend doing this for non-player entities; there are only so many resources available - but the player is one we use over and over again):
#![allow(unused)]
fn main() {
gs.ecs.insert(Point::new(player_x, player_y));
}
In player.rs, try_move_player(), update the resource when the player moves:
#![allow(unused)]
fn main() {
let mut ppos = ecs.write_resource::<Point>();
ppos.x = pos.x;
ppos.y = pos.y;
}
We can then use that in our monster_ai_system. Here's a working version:
#![allow(unused)]
fn main() {
use specs::prelude::*;
use super::{Viewshed, Monster};
use rltk::{Point, console};

pub struct MonsterAI {}

impl<'a> System<'a> for MonsterAI {
    type SystemData = ( ReadExpect<'a, Point>,
                        ReadStorage<'a, Viewshed>,
                        ReadStorage<'a, Monster>);

    fn run(&mut self, data : Self::SystemData) {
        let (player_pos, viewshed, monster) = data;

        for (viewshed,_monster) in (&viewshed, &monster).join() {
            if viewshed.visible_tiles.contains(&*player_pos) {
                console::log(format!("Monster shouts insults"));
            }
        }
    }
}
}
If you cargo run this, you'll be able to move around - and your console will gain "Monster shouts insults" from time to time when a monster can see you.
Differentiating our monsters
Monsters should have names, so we know who is yelling at us! So we create a new component, Name. In components.rs, we add:
#![allow(unused)]
fn main() {
#[derive(Component, Debug)]
pub struct Name {
    pub name : String
}
}
We also register it in main.rs, which you should be comfortable with by now! We'll also add some commands to add names to our monsters and the player. So our monster spawner looks like this:
#![allow(unused)]
fn main() {
for (i,room) in map.rooms.iter().skip(1).enumerate() {
    let (x,y) = room.center();

    let glyph : rltk::FontCharType;
    let name : String;
    let roll = rng.roll_dice(1, 2);
    match roll {
        1 => { glyph = rltk::to_cp437('g'); name = "Goblin".to_string(); }
        _ => { glyph = rltk::to_cp437('o'); name = "Orc".to_string(); }
    }

    gs.ecs.create_entity()
        .with(Position{ x, y })
        .with(Renderable{
            glyph: glyph,
            fg: RGB::named(rltk::RED),
            bg: RGB::named(rltk::BLACK),
        })
        .with(Viewshed{ visible_tiles : Vec::new(), range: 8, dirty: true })
        .with(Monster{})
        .with(Name{ name: format!("{} #{}", &name, i) })
        .build();
}
}
Now we adjust the monster_ai_system to include the monster's name. The new AI looks like this:
#![allow(unused)]
fn main() {
use specs::prelude::*;
use super::{Viewshed, Monster, Name};
use rltk::{Point};

pub struct MonsterAI {}

impl<'a> System<'a> for MonsterAI {
    type SystemData = ( ReadExpect<'a, Point>,
                        ReadStorage<'a, Viewshed>,
                        ReadStorage<'a, Monster>,
                        ReadStorage<'a, Name>);

    fn run(&mut self, data : Self::SystemData) {
        let (player_pos, viewshed, monster, name) = data;

        for (viewshed,_monster,name) in (&viewshed, &monster, &name).join() {
            if viewshed.visible_tiles.contains(&*player_pos) {
                console::log(&format!("{} shouts insults", name.name));
            }
        }
    }
}
}
We also need to give the player a name; we've explicitly included names in the AI's join, so we better be sure that the player has one! Otherwise, the AI will ignore the player altogether. In main.rs, we'll include one in the Player creation:
#![allow(unused)]
fn main() {
gs.ecs
    .create_entity()
    .with(Position { x: player_x, y: player_y })
    .with(Renderable {
        glyph: rltk::to_cp437('@'),
        fg: RGB::named(rltk::YELLOW),
        bg: RGB::named(rltk::BLACK),
    })
    .with(Player{})
    .with(Viewshed{ visible_tiles : Vec::new(), range: 8, dirty: true })
    .with(Name{name: "Player".to_string() })
    .build();
}
If you cargo run the project, you now see things like Goblin #9 shouts insults - so you can tell who is shouting.
And that's a wrap for chapter 6; we've added a variety of foul-mouthed monsters to hurl insults at your fragile ego! In this chapter, we've begun to see some of the benefits of using an Entity Component System: it was really easy to add newly rendered monsters, with a bit of variety, and start storing names for things. The Viewshed code we wrote earlier worked with minimal modification to give visibility to monsters - and our new monster AI was able to take advantage of what we've already built to quite efficiently say bad things to the player.
The source code for this chapter may be found here
Run this chapter's example with web assembly, in your browser (WebGL2 required)
Copyright (C) 2019, Herbert Wolverson.
Dealing Damage (and taking some!)
About this tutorial
This tutorial is free and open source, and all code uses the MIT license - so you are free to do with it as you like. My hope is that you will enjoy the tutorial, and make great games!
If you enjoy this and would like me to keep writing, please consider supporting my Patreon.
Now that we have monsters, we want them to be more interesting than just yelling at you on the console! This chapter will make them chase you, and introduce some basic game stats to let you fight your way through the hordes.
Chasing the Player
The first thing we need to do is finish implementing BaseMap for our Map class. In particular, we need to support get_available_exits - which is used by the pathfinding.
In our Map implementation, we'll need a helper function:
#![allow(unused)]
fn main() {
fn is_exit_valid(&self, x:i32, y:i32) -> bool {
    if x < 1 || x > self.width-1 || y < 1 || y > self.height-1 { return false; }
    let idx = self.xy_idx(x, y);
    self.tiles[idx as usize] != TileType::Wall
}
}
This takes an index, and calculates if it can be entered.
We then implement the trait, using this helper:
#![allow(unused)]
fn main() {
fn get_available_exits(&self, idx:usize) -> rltk::SmallVec<[(usize, f32); 10]> {
    let mut exits = rltk::SmallVec::new();
    let x = idx as i32 % self.width;
    let y = idx as i32 / self.width;
    let w = self.width as usize;

    // Cardinal directions
    if self.is_exit_valid(x-1, y) { exits.push((idx-1, 1.0)) };
    if self.is_exit_valid(x+1, y) { exits.push((idx+1, 1.0)) };
    if self.is_exit_valid(x, y-1) { exits.push((idx-w, 1.0)) };
    if self.is_exit_valid(x, y+1) { exits.push((idx+w, 1.0)) };

    exits
}
}
Providing exits without a distance heuristic will lead to some horrible behaviour (and a crash on future versions of RLTK). So also implement that for your map:
#![allow(unused)]
fn main() {
impl BaseMap for Map {
    ...
    fn get_pathing_distance(&self, idx1:usize, idx2:usize) -> f32 {
        let w = self.width as usize;
        let p1 = Point::new(idx1 % w, idx1 / w);
        let p2 = Point::new(idx2 % w, idx2 / w);
        rltk::DistanceAlg::Pythagoras.distance2d(p1, p2)
    }
}
Pretty straight-forward: we evaluate each possible exit, and add it to the exits vector if it can be taken. Next, we modify the main loop in monster_ai_system:
#![allow(unused)]
fn main() {
use specs::prelude::*;
use super::{Viewshed, Monster, Name, Map, Position};
use rltk::{Point, console};

pub struct MonsterAI {}

impl<'a> System<'a> for MonsterAI {
    #[allow(clippy::type_complexity)]
    type SystemData = ( WriteExpect<'a, Map>,
                        ReadExpect<'a, Point>,
                        WriteStorage<'a, Viewshed>,
                        ReadStorage<'a, Monster>,
                        ReadStorage<'a, Name>,
                        WriteStorage<'a, Position>);

    fn run(&mut self, data : Self::SystemData) {
        let (mut map, player_pos, mut viewshed, monster, name, mut position) = data;

        for (mut viewshed,_monster,name,mut pos) in (&mut viewshed, &monster, &name, &mut position).join() {
            if viewshed.visible_tiles.contains(&*player_pos) {
                console::log(&format!("{} shouts insults", name.name));
                let path = rltk::a_star_search(
                    map.xy_idx(pos.x, pos.y) as i32,
                    map.xy_idx(player_pos.x, player_pos.y) as i32,
                    &mut *map
                );
                if path.success && path.steps.len()>1 {
                    pos.x = path.steps[1] as i32 % map.width;
                    pos.y = path.steps[1] as i32 / map.width;
                    viewshed.dirty = true;
                }
            }
        }
    }
}
}
We've changed a few things to allow write access, requested access to the map. We've also added an #[allow...] to tell the linter that we really did mean to use quite so much in one type! The meat is the a_star_search call; RLTK includes a high-performance A* implementation, so we're asking it for a path from the monster's position to the player. Then we check that the path succeeded, and has more than 2 steps (step 0 is always the current location). If it does, then we move the monster to that point - and set their viewshed to be dirty.
If you cargo run the project, monsters will now chase the player - and stop if they lose line-of-sight. We're not preventing monsters from standing on each other - or you - and we're not having them do anything other than yell at your console - but it's a good start. It wasn't too hard to get chase mechanics in!
Blocking access
We don't want monsters to walk on top of each other, nor do we want them to get stuck in a traffic jam hoping to find the player; we'd rather they are willing to try and flank the player! We'll accompany this by keeping track of what parts of the map are blocked.
First, we'll add another vector of bools to our Map:
#![allow(unused)]
fn main() {
#[derive(Default)]
pub struct Map {
    pub tiles : Vec<TileType>,
    pub rooms : Vec<Rect>,
    pub width : i32,
    pub height : i32,
    pub revealed_tiles : Vec<bool>,
    pub visible_tiles : Vec<bool>,
    pub blocked : Vec<bool>
}
}
We'll also initialize it, just like the other vectors:
#![allow(unused)]
fn main() {
let mut map = Map{
    tiles : vec![TileType::Wall; 80*50],
    rooms : Vec::new(),
    width : 80,
    height: 50,
    revealed_tiles : vec![false; 80*50],
    visible_tiles : vec![false; 80*50],
    blocked : vec![false; 80*50]
};
}
Lets introduce a new function to populate whether or not a tile is blocked. In the Map implementation:
#![allow(unused)]
fn main() {
pub fn populate_blocked(&mut self) {
    for (i,tile) in self.tiles.iter_mut().enumerate() {
        self.blocked[i] = *tile == TileType::Wall;
    }
}
}
This function is very simple: it sets blocked for a tile to true if its a wall, false otherwise (we'll expand it when we add more tile types). While we're working with Map, lets adjust is_exit_valid to use this data:
#![allow(unused)]
fn main() {
fn is_exit_valid(&self, x:i32, y:i32) -> bool {
    if x < 1 || x > self.width-1 || y < 1 || y > self.height-1 { return false; }
    let idx = self.xy_idx(x, y);
    !self.blocked[idx]
}
}
This is quite straightforward: it checks that x and y are within the map, returning false if the exit is outside of the map (this type of bounds checking is worth doing, it prevents your program from crashing because you tried to read outside of the the valid memory area). It then checks the index of the tiles array for the specified coordinates, and returns the inverse of blocked (the ! is the same as not in most languages - so read it as "not blocked at idx").
Now we'll make a new component, BlocksTile. You should know the drill by now; in Components.rs:
#![allow(unused)]
fn main() {
#[derive(Component, Debug)]
pub struct BlocksTile {}
}
Then register it in main.rs: gs.ecs.register::<BlocksTile>();
We should apply BlocksTile to NPCs - so our NPC creation code becomes:
#![allow(unused)]
fn main() {
gs.ecs.create_entity()
    .with(Position{ x, y })
    .with(Renderable{
        glyph,
        fg: RGB::named(rltk::RED),
        bg: RGB::named(rltk::BLACK),
    })
    .with(Viewshed{ visible_tiles : Vec::new(), range: 8, dirty: true })
    .with(Monster{})
    .with(Name{ name: format!("{} #{}", &name, i) })
    .with(BlocksTile{})
    .build();
}
Lastly, we need to populate the blocked list. We'll probably extend this system later, so we'll go with a nice generic name map_indexing_system.rs:
#![allow(unused)]
fn main() {
use specs::prelude::*;
use super::{Map, Position, BlocksTile};

pub struct MapIndexingSystem {}

impl<'a> System<'a> for MapIndexingSystem {
    type SystemData = ( WriteExpect<'a, Map>,
                        ReadStorage<'a, Position>,
                        ReadStorage<'a, BlocksTile>);

    fn run(&mut self, data : Self::SystemData) {
        let (mut map, position, blockers) = data;

        map.populate_blocked();
        for (position, _blocks) in (&position, &blockers).join() {
            let idx = map.xy_idx(position.x, position.y);
            map.blocked[idx] = true;
        }
    }
}
}
This tells the map to setup blocking from the terrain, and then iterates all entities with a BlocksTile component, and applies them to the blocked list. We need to register it with run_systems; in main.rs:
#![allow(unused)]
fn main() {
impl State {
    fn run_systems(&mut self) {
        let mut vis = VisibilitySystem{};
        vis.run_now(&self.ecs);
        let mut mob = MonsterAI{};
        mob.run_now(&self.ecs);
        let mut mapindex = MapIndexingSystem{};
        mapindex.run_now(&self.ecs);
        self.ecs.maintain();
    }
}
}
If you cargo run now, monsters no longer end up on top of each other - but they do end up on top of the player. We should fix that. We can make the monster only yell when it is adjacent to the player. In monster_ai_system.rs, add this above the visibility test:
#![allow(unused)]
fn main() {
let distance = rltk::DistanceAlg::Pythagoras.distance2d(Point::new(pos.x, pos.y), *player_pos);
if distance < 1.5 {
    // Attack goes here
    console::log(&format!("{} shouts insults", name.name));
    return;
}
}
Lastly, we want to stop the player from walking over monsters. In player.rs, we replace the if statement that looks for walls with:
#![allow(unused)]
fn main() {
if !map.blocked[destination_idx] {
}
Since we already put walls into the blocked list, this should take care of the issue for now. cargo run shows that monsters now block the player. They block them perfectly - so a monster that wants to be in your way is an unpassable obstacle!
Allowing Diagonal Movement
It would be nice to be able to bypass the monsters - and diagonal movement is a mainstay of roguelikes. So lets go ahead and support it. In map.rs's get_available_exits function, we add them:
#![allow(unused)]
fn main() {
fn get_available_exits(&self, idx:usize) -> rltk::SmallVec<[(usize, f32); 10]> {
    let mut exits = rltk::SmallVec::new();
    let x = idx as i32 % self.width;
    let y = idx as i32 / self.width;
    let w = self.width as usize;

    // Cardinal directions
    if self.is_exit_valid(x-1, y) { exits.push((idx-1, 1.0)) };
    if self.is_exit_valid(x+1, y) { exits.push((idx+1, 1.0)) };
    if self.is_exit_valid(x, y-1) { exits.push((idx-w, 1.0)) };
    if self.is_exit_valid(x, y+1) { exits.push((idx+w, 1.0)) };

    // Diagonals
    if self.is_exit_valid(x-1, y-1) { exits.push(((idx-w)-1, 1.45)); }
    if self.is_exit_valid(x+1, y-1) { exits.push(((idx-w)+1, 1.45)); }
    if self.is_exit_valid(x-1, y+1) { exits.push(((idx+w)-1, 1.45)); }
    if self.is_exit_valid(x+1, y+1) { exits.push(((idx+w)+1, 1.45)); }

    exits
}
}
We also modify the player.rs input code:
#![allow(unused)]
fn main() {
pub fn player_input(gs: &mut State, ctx: &mut Rltk) -> RunState {
    // Player movement
    match ctx.key {
        None => { return RunState::Paused } // Nothing happened
        Some(key) => match key {
            VirtualKeyCode::Left |
            VirtualKeyCode::Numpad4 |
            VirtualKeyCode::H => try_move_player(-1, 0, &mut gs.ecs),

            VirtualKeyCode::Right |
            VirtualKeyCode::Numpad6 |
            VirtualKeyCode::L => try_move_player(1, 0, &mut gs.ecs),

            VirtualKeyCode::Up |
            VirtualKeyCode::Numpad8 |
            VirtualKeyCode::K => try_move_player(0, -1, &mut gs.ecs),

            VirtualKeyCode::Down |
            VirtualKeyCode::Numpad2 |
            VirtualKeyCode::J => try_move_player(0, 1, &mut gs.ecs),

            // Diagonals
            VirtualKeyCode::Numpad9 |
            VirtualKeyCode::Y => try_move_player(1, -1, &mut gs.ecs),

            VirtualKeyCode::Numpad7 |
            VirtualKeyCode::U => try_move_player(-1, -1, &mut gs.ecs),

            VirtualKeyCode::Numpad3 |
            VirtualKeyCode::N => try_move_player(1, 1, &mut gs.ecs),

            VirtualKeyCode::Numpad1 |
            VirtualKeyCode::B => try_move_player(-1, 1, &mut gs.ecs),

            _ => { return RunState::Paused }
        },
    }
    RunState::Running
}
}
You can now diagonally dodge around monsters - and they can move/attack diagonally.
Giving monsters and the player some combat stats
You probably guessed by now that the way to add stats to entities is with another component! In components.rs, we add CombatStats. Here's a simple definition:
#![allow(unused)]
fn main() {
#[derive(Component, Debug)]
pub struct CombatStats {
    pub max_hp : i32,
    pub hp : i32,
    pub defense : i32,
    pub power : i32
}
}
As usual, don't forget to register it in main.rs!
We'll give the Player 30 hit points, 2 defense, and 5 power:
#![allow(unused)]
fn main() {
.with(CombatStats{ max_hp: 30, hp: 30, defense: 2, power: 5 })
}
Likewise, we'll give the monsters a weaker set of stats (we'll worry about monster differentiation later):
#![allow(unused)]
fn main() {
.with(CombatStats{ max_hp: 16, hp: 16, defense: 1, power: 4 })
}
Indexing what is where
When traveling the map - as a player or a monster - it's really handy to know what is in a tile. You can combine it with the visibility system to make intelligent choices with what can be seen, you can use it to see if you are trying to walk into an enemy's space (and attack them), and so on. One way to do it would be to iterate the Position components and see if we hit anything; for low numbers of entities that would be plenty fast. We'll take a different approach, and make the map_indexing_system help us. We'll start by adding a field to the map:
#![allow(unused)]
fn main() {
#[derive(Default)]
pub struct Map {
    pub tiles : Vec<TileType>,
    pub rooms : Vec<Rect>,
    pub width : i32,
    pub height : i32,
    pub revealed_tiles : Vec<bool>,
    pub visible_tiles : Vec<bool>,
    pub blocked : Vec<bool>,
    pub tile_content : Vec<Vec<Entity>>
}
}
And we'll add a basic initializer to the new map code:
#![allow(unused)]
fn main() {
tile_content : vec![Vec::new(); 80*50]
}
While we're in map, there's one more function we are going to need:
#![allow(unused)]
fn main() {
pub fn clear_content_index(&mut self) {
    for content in self.tile_content.iter_mut() {
        content.clear();
    }
}
}
This is also quite simple: it iterates (visits) every vector in the tile_content list, mutably (the iter_mut obtains a mutable iterator). It then tells each vector to clear itself - remove all content (it doesn't actually guarantee that it will free up the memory; vectors can keep empty sections ready for more data. This is actually a good thing, because acquiring new memory is one of the slowest things a program can do - so it helps keep things running fast).
Then we'll upgrade the indexing system to index all entities by tile:
#![allow(unused)]
fn main() {
use specs::prelude::*;
use super::{Map, Position, BlocksTile};

pub struct MapIndexingSystem {}

impl<'a> System<'a> for MapIndexingSystem {
    type SystemData = ( WriteExpect<'a, Map>,
                        ReadStorage<'a, Position>,
                        ReadStorage<'a, BlocksTile>,
                        Entities<'a>,);

    fn run(&mut self, data : Self::SystemData) {
        let (mut map, position, blockers, entities) = data;

        map.populate_blocked();
        map.clear_content_index();
        for (entity, position) in (&entities, &position).join() {
            let idx = map.xy_idx(position.x, position.y);

            // If they block, update the blocking list
            let _p : Option<&BlocksTile> = blockers.get(entity);
            if let Some(_p) = _p {
                map.blocked[idx] = true;
            }

            // Push the entity to the appropriate index slot. It's a Copy
            // type, so we don't need to clone it (we want to avoid moving it out of the ECS!)
            map.tile_content[idx].push(entity);
        }
    }
}
}
Letting the player hit things
Most roguelike characters spend a lot of time hitting things, so let's implement that! Bump to attack (walking into the target) is the canonical way to do this. We want to expand try_move_player in player.rs to check to see if a tile we are trying to enter contains a target.
We'll add a reader for CombatStats to the list of data-stores, and put in a quick enemy detector:
#![allow(unused)]
fn main() {
let combat_stats = ecs.read_storage::<CombatStats>();
let map = ecs.fetch::<Map>();

for (_player, pos, viewshed) in (&mut players, &mut positions, &mut viewsheds).join() {
    let destination_idx = map.xy_idx(pos.x + delta_x, pos.y + delta_y);

    for potential_target in map.tile_content[destination_idx].iter() {
        let target = combat_stats.get(*potential_target);
        match target {
            None => {}
            Some(t) => {
                // Attack it
                console::log(&format!("From Hell's Heart, I stab thee!"));
                return; // So we don't move after attacking
            }
        }
    }
}
If you cargo run this, you'll see that you can walk up to a mob and try to move onto it. From Hell's Heart, I stab thee! appears on the console. So the detection works, and the attack is in the right place.
Player attacking and killing things
We're going to do this in an ECS way, so there's a bit of boilerplate. In components.rs, we add a component indicating an intent to attack:
#![allow(unused)]
fn main() {
#[derive(Component, Debug, ConvertSaveload, Clone)]
pub struct WantsToMelee {
    pub target : Entity
}
}
We also want to track incoming damage. It's possible that you will suffer damage from more than one source in a turn, and Specs doesn't like it at all when you try and have more than one component of the same type on an entity. There are two possible approaches here: make the damage an entity itself (and track the victim), or make damage a vector. The latter seems the easier approach; so we'll make a SufferDamage component to track the damage - and attach/implement a method to make using it easy:
#![allow(unused)]
fn main() {
#[derive(Component, Debug)]
pub struct SufferDamage {
    pub amount : Vec<i32>
}

impl SufferDamage {
    pub fn new_damage(store: &mut WriteStorage<SufferDamage>, victim: Entity, amount: i32) {
        if let Some(suffering) = store.get_mut(victim) {
            suffering.amount.push(amount);
        } else {
            let dmg = SufferDamage { amount : vec![amount] };
            store.insert(victim, dmg).expect("Unable to insert damage");
        }
    }
}
}
(Don't forget to register them in main.rs!). We modify the player's movement command to create a component indicating the intention to attack (attaching a wants_to_melee to the attacker):
#![allow(unused)]
fn main() {
let entities = ecs.entities();
let mut wants_to_melee = ecs.write_storage::<WantsToMelee>();

for (entity, _player, pos, viewshed) in (&entities, &players, &mut positions, &mut viewsheds).join() {
    if pos.x + delta_x < 1 || pos.x + delta_x > map.width-1 || pos.y + delta_y < 1 || pos.y + delta_y > map.height-1 { return; }
    let destination_idx = map.xy_idx(pos.x + delta_x, pos.y + delta_y);

    for potential_target in map.tile_content[destination_idx].iter() {
        let target = combat_stats.get(*potential_target);
        if let Some(_target) = target {
            wants_to_melee.insert(entity, WantsToMelee{ target: *potential_target }).expect("Add target failed");
            return;
        }
    }
}
}
We'll need a melee_combat_system to handle Melee. This uses the new_damage system we created to ensure that multiple sources of damage may be applied in one turn:
#![allow(unused)]
fn main() {
use specs::prelude::*;
use super::{CombatStats, WantsToMelee, Name, SufferDamage};

pub struct MeleeCombatSystem {}

impl<'a> System<'a> for MeleeCombatSystem {
    type SystemData = ( Entities<'a>,
                        WriteStorage<'a, WantsToMelee>,
                        ReadStorage<'a, Name>,
                        ReadStorage<'a, CombatStats>,
                        WriteStorage<'a, SufferDamage>
                      );

    fn run(&mut self, data : Self::SystemData) {
        let (entities, mut wants_melee, names, combat_stats, mut inflict_damage) = data;

        for (_entity, wants_melee, name, stats) in (&entities, &wants_melee, &names, &combat_stats).join() {
            if stats.hp > 0 {
                let target_stats = combat_stats.get(wants_melee.target).unwrap();
                if target_stats.hp > 0 {
                    let target_name = names.get(wants_melee.target).unwrap();

                    let damage = i32::max(0, stats.power - target_stats.defense);

                    if damage == 0 {
                        console::log(&format!("{} is unable to hurt {}", &name.name, &target_name.name));
                    } else {
                        console::log(&format!("{} hits {}, for {} hp.", &name.name, &target_name.name, damage));
                        SufferDamage::new_damage(&mut inflict_damage, wants_melee.target, damage);
                    }
                }
            }
        }

        wants_melee.clear();
    }
}
}
And we'll need a damage_system to apply the damage (we're separating it out, because damage could come from any number of sources!). We use an iterator to sum the damage, ensuring that it is all applied:
#![allow(unused)]
fn main() {
use specs::prelude::*;
use super::{CombatStats, SufferDamage};

pub struct DamageSystem {}

impl<'a> System<'a> for DamageSystem {
    type SystemData = ( WriteStorage<'a, CombatStats>,
                        WriteStorage<'a, SufferDamage> );

    fn run(&mut self, data : Self::SystemData) {
        let (mut stats, mut damage) = data;

        for (mut stats, damage) in (&mut stats, &damage).join() {
            stats.hp -= damage.amount.iter().sum::<i32>();
        }

        damage.clear();
    }
}
}
We'll also add a method to clean up dead entities:
#![allow(unused)]
fn main() {
pub fn delete_the_dead(ecs : &mut World) {
    let mut dead : Vec<Entity> = Vec::new();
    // Using a scope to make the borrow checker happy
    {
        let combat_stats = ecs.read_storage::<CombatStats>();
        let entities = ecs.entities();
        for (entity, stats) in (&entities, &combat_stats).join() {
            if stats.hp < 1 { dead.push(entity); }
        }
    }

    for victim in dead {
        ecs.delete_entity(victim).expect("Unable to delete");
    }
}
}
This is called from our tick command, after the systems run: damage_system::delete_the_dead(&mut self.ecs);.
If you cargo run now, you can run around the map hitting things - and they vanish when dead!
Letting the monsters hit you back
Since we've already written systems to handle attacking and damaging, it's relatively easy to use the same code with monsters - just add a WantsToMelee component and they can attack/kill the player.
We'll start off by making the player entity into a game resource, so it can be easily referenced. Like the player's position, it's something that we're likely to need all over the place - and since entity IDs are stable, we can rely on it existing. In main.rs, we change the create_entity for the player to return the entity object:
#![allow(unused)]
fn main() {
let player_entity = gs.ecs
    .create_entity()
    .with(Position { x: player_x, y: player_y })
    .with(Renderable {
        glyph: rltk::to_cp437('@'),
        fg: RGB::named(rltk::YELLOW),
        bg: RGB::named(rltk::BLACK),
    })
    .with(Player{})
    .with(Viewshed{ visible_tiles : Vec::new(), range: 8, dirty: true })
    .with(Name{name: "Player".to_string() })
    .with(CombatStats{ max_hp: 30, hp: 30, defense: 2, power: 5 })
    .build();
}
We then insert it into the world:
#![allow(unused)]
fn main() {
gs.ecs.insert(player_entity);
}
Now we modify the monster_ai_system. There's a bit of clean-up here, and the "hurl insults" code is completely replaced with a single component insert:
#![allow(unused)]
fn main() {
use specs::prelude::*;
use super::{Viewshed, Monster, Map, Position, WantsToMelee, RunState};
use rltk::{Point};

pub struct MonsterAI {}

impl<'a> System<'a> for MonsterAI {
    #[allow(clippy::type_complexity)]
    type SystemData = ( WriteExpect<'a, Map>,
                        ReadExpect<'a, Point>,
                        ReadExpect<'a, Entity>,
                        ReadExpect<'a, RunState>,
                        Entities<'a>,
                        WriteStorage<'a, Viewshed>,
                        ReadStorage<'a, Monster>,
                        WriteStorage<'a, Position>,
                        WriteStorage<'a, WantsToMelee>);

    fn run(&mut self, data : Self::SystemData) {
        let (mut map, player_pos, player_entity, runstate, entities, mut viewshed, monster, mut position, mut wants_to_melee) = data;

        for (entity, mut viewshed,_monster,mut pos) in (&entities, &mut viewshed, &monster, &mut position).join() {
            let distance = rltk::DistanceAlg::Pythagoras.distance2d(Point::new(pos.x, pos.y), *player_pos);
            if distance < 1.5 {
                wants_to_melee.insert(entity, WantsToMelee{ target: *player_entity }).expect("Unable to insert attack");
            }
            else if viewshed.visible_tiles.contains(&*player_pos) {
                // Path to the player
                let path = rltk::a_star_search(
                    map.xy_idx(pos.x, pos.y),
                    map.xy_idx(player_pos.x, player_pos.y),
                    &mut *map
                );
                if path.success && path.steps.len()>1 {
                    let mut idx = map.xy_idx(pos.x, pos.y);
                    map.blocked[idx] = false;
                    pos.x = path.steps[1] as i32 % map.width;
                    pos.y = path.steps[1] as i32 / map.width;
                    idx = map.xy_idx(pos.x, pos.y);
                    map.blocked[idx] = true;
                    viewshed.dirty = true;
                }
            }
        }
    }
}
}
If you cargo run now, you can kill monsters - and they can attack you. If a monster kills you - the game crashes! It crashes, because delete_the_dead has deleted the player. That's obviously not what we intended. Here's a non-crashing version of delete_the_dead:
#![allow(unused)]
fn main() {
pub fn delete_the_dead(ecs : &mut World) {
    let mut dead : Vec<Entity> = Vec::new();
    // Using a scope to make the borrow checker happy
    {
        let combat_stats = ecs.read_storage::<CombatStats>();
        let players = ecs.read_storage::<Player>();
        let entities = ecs.entities();
        for (entity, stats) in (&entities, &combat_stats).join() {
            if stats.hp < 1 {
                let player = players.get(entity);
                match player {
                    None => dead.push(entity),
                    Some(_) => console::log("You are dead")
                }
            }
        }
    }

    for victim in dead {
        ecs.delete_entity(victim).expect("Unable to delete");
    }
}
}
We'll worry about ending the game in a later chapter.
Expanding the turn system
If you look closely, you'll see that enemies can fight back even after they have taken fatal damage. While that fits with some Shakespearean dramas (they really should give a speech), it's not the kind of tactical play that roguelikes encourage. The problem is that our game state is just Running and Paused - and we aren't even running the systems when the player acts. Additionally, systems don't know what phase we are in - so they can't take that into account.
Let's replace RunState with something more descriptive of each phase:
#![allow(unused)]
fn main() {
#[derive(PartialEq, Copy, Clone)]
pub enum RunState { AwaitingInput, PreRun, PlayerTurn, MonsterTurn }
}
If you're running Visual Studio Code with RLS, half your project just turned red. That's ok, we'll refactor one step at a time. We're going to remove the RunState altogether from the main GameState:
#![allow(unused)]
fn main() {
pub struct State {
    pub ecs: World
}
}
This makes even more red appear! We're doing this, because we're going to make the RunState into a resource. So in main.rs where we insert other resources, we add:
#![allow(unused)]
fn main() {
gs.ecs.insert(RunState::PreRun);
}
Now to start refactoring Tick. Our new tick function looks like this:
#![allow(unused)]
fn main() {
fn tick(&mut self, ctx : &mut Rltk) {
        ctx.cls();
        let mut newrunstate;
        {
            let runstate = self.ecs.fetch::<RunState>();
            newrunstate = *runstate;
        }

        match newrunstate {
            RunState::PreRun => {
                self.run_systems();
                newrunstate = RunState::AwaitingInput;
            }
            RunState::AwaitingInput => {
                newrunstate = player_input(self, ctx);
            }
            RunState::PlayerTurn => {
                self.run_systems();
                newrunstate = RunState::MonsterTurn;
            }
            RunState::MonsterTurn => {
                self.run_systems();
                newrunstate = RunState::AwaitingInput;
            }
        }

        {
            let mut runwriter = self.ecs.write_resource::<RunState>();
            *runwriter = newrunstate;
        }
        damage_system::delete_the_dead(&mut self.ecs);

        draw_map(&self.ecs, ctx);

        let positions = self.ecs.read_storage::<Position>();
        let renderables = self.ecs.read_storage::<Renderable>();
        let map = self.ecs.fetch::<Map>();

        for (pos, render) in (&positions, &renderables).join() {
            let idx = map.xy_idx(pos.x, pos.y);
            if map.visible_tiles[idx] { ctx.set(pos.x, pos.y, render.fg, render.bg, render.glyph) }
        }
    }
}
}
Notice how we now have a state machine going, with a "pre-run" phase for starting the game! It's much cleaner, and quite obvious what's going on. There's a bit of scope magic in use to keep the borrow-checker happy: if you declare and use a variable inside a scope, it is dropped on scope exit (you can also manually drop things, but I think this is cleaner looking).
In player.rs we simply replace all Paused with AwaitingInput, and Running with PlayerTurn.
Lastly, we modify monster_ai_system to only run if the state is MonsterTurn (snippet):
#![allow(unused)]
fn main() {
impl<'a> System<'a> for MonsterAI {
    #[allow(clippy::type_complexity)]
    type SystemData = ( WriteExpect<'a, Map>,
                        ReadExpect<'a, Point>,
                        ReadExpect<'a, Entity>,
                        ReadExpect<'a, RunState>,
                        Entities<'a>,
                        WriteStorage<'a, Viewshed>,
                        ReadStorage<'a, Monster>,
                        WriteStorage<'a, Position>,
                        WriteStorage<'a, WantsToMelee>);

    fn run(&mut self, data : Self::SystemData) {
        let (mut map, player_pos, player_entity, runstate, entities, mut viewshed, monster, mut position, mut wants_to_melee) = data;

        if *runstate != RunState::MonsterTurn { return; }
}
Don't forget to make sure that all of the systems are now in run_systems (in main.rs):
#![allow(unused)]
fn main() {
impl State {
    fn run_systems(&mut self) {
        let mut vis = VisibilitySystem{};
        vis.run_now(&self.ecs);
        let mut mob = MonsterAI{};
        mob.run_now(&self.ecs);
        let mut mapindex = MapIndexingSystem{};
        mapindex.run_now(&self.ecs);
        let mut melee = MeleeCombatSystem{};
        melee.run_now(&self.ecs);
        let mut damage = DamageSystem{};
        damage.run_now(&self.ecs);
        self.ecs.maintain();
    }
}
}
If you cargo run the project, it now behaves as you'd expect: the player moves, and things he/she kills die before they can respond.
Wrapping Up
That was quite the chapter! We added in location indexing, damage, and killing things. The good news is that this is the hardest part; you now have a simple dungeon bash game! It's not particularly fun, and you will die (since there's no healing at all) - but the basics are there.
The source code for this chapter may be found here
Run this chapter's example with web assembly, in your browser (WebGL2 required)
Copyright (C) 2019, Herbert Wolverson.
User Interface
About this tutorial
This tutorial is free and open source, and all code uses the MIT license - so you are free to do with it as you like. My hope is that you will enjoy the tutorial, and make great games!
If you enjoy this and would like me to keep writing, please consider supporting my Patreon.
In this chapter, we'll add a user interface to the game.
Shrinking the map
We'll start off by going to map.rs, and adding some constants: MAPWIDTH, MAPHEIGHT and MAPCOUNT:
#![allow(unused)]
fn main() {
const MAPWIDTH : usize = 80;
const MAPHEIGHT : usize = 50;
const MAPCOUNT : usize = MAPHEIGHT * MAPWIDTH;
}
Then we'll go through and change every reference to 80*50 to MAPCOUNT, and references to the map size to use the constants. When this is done and running, we'll change the MAPHEIGHT to 43 - to give us room at the bottom of the screen for a user interface panel.
Some minimal GUI elements
We'll create a new file, gui.rs to hold our code. We'll go with a really minimal start:
#![allow(unused)]
fn main() {
use rltk::{ RGB, Rltk, Console };
use specs::prelude::*;

pub fn draw_ui(ecs: &World, ctx : &mut Rltk) {
    ctx.draw_box(0, 43, 79, 6, RGB::named(rltk::WHITE), RGB::named(rltk::BLACK));
}
}
We add a mod gui to the import block at the top of main.rs, and call it at the end of tick:
#![allow(unused)]
fn main() {
gui::draw_ui(&self.ecs, ctx);
}
If we cargo run now, we'll see that the map has shrunk - and we have a white box in place for the panel.
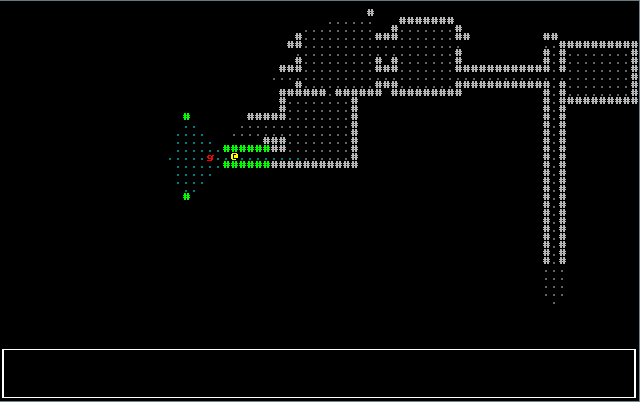
Adding a health bar
It would help the player out to know how much health they have left. Fortunately, RLTK provides a convenient helper for this. We'll need to obtain the player's health from the ECS, and render it. This is pretty easy, and you should be comfortable with it by now. The code looks like this:
#![allow(unused)]
fn main() {
use rltk::{ RGB, Rltk, Console };
use specs::prelude::*;
use super::{CombatStats, Player};

pub fn draw_ui(ecs: &World, ctx : &mut Rltk) {
    ctx.draw_box(0, 43, 79, 6, RGB::named(rltk::WHITE), RGB::named(rltk::BLACK));

    let combat_stats = ecs.read_storage::<CombatStats>();
    let players = ecs.read_storage::<Player>();
    for (_player, stats) in (&players, &combat_stats).join() {
        let health = format!(" HP: {} / {} ", stats.hp, stats.max_hp);
        ctx.print_color(12, 43, RGB::named(rltk::YELLOW), RGB::named(rltk::BLACK), &health);

        ctx.draw_bar_horizontal(28, 43, 51, stats.hp, stats.max_hp, RGB::named(rltk::RED), RGB::named(rltk::BLACK));
    }
}
}
Adding a message log
The game log makes sense as a resource: it's available to any system that wants to tell you something, and there's very little restriction as to what might want to tell you something. We'll start by modelling the log itself. Make a new file, gamelog.rs. We'll start very simply:
#![allow(unused)]
fn main() {
pub struct GameLog {
    pub entries : Vec<String>
}
}
In main.rs we add a mod gamelog; line, and insert it as a resource with gs.ecs.insert(gamelog::GameLog{ entries : vec!["Welcome to Rusty Roguelike".to_string()] });. We're inserting a line into the log file at the start, using the vec! macro for constructing vectors. That gives us something to display - so we'll start writing the log display code in gui.rs. In our GUI drawing function, we simply add:
#![allow(unused)]
fn main() {
let log = ecs.fetch::<GameLog>();

let mut y = 44;
for s in log.entries.iter().rev() {
    if y < 49 { ctx.print(2, y, s); }
    y += 1;
}
}
If you cargo run the project now, you'll see something like this:
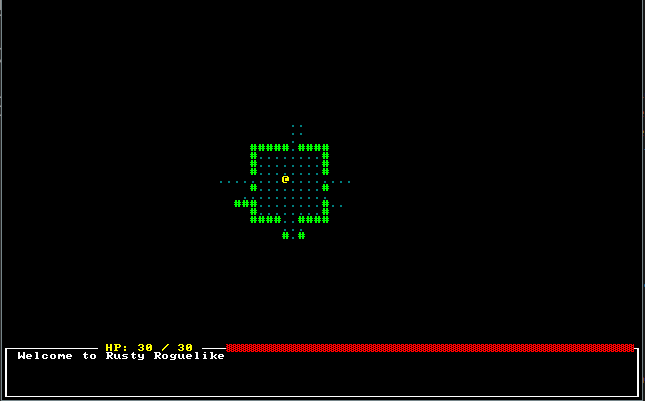
Logging attacks
In our melee_combat_system, we add gamelog::GameLog to our imports from super, add a read/write accessor for the log (WriteExpect<'a, GameLog>,), and extend the destructuring to include it: let (entities, mut log, mut wants_melee, names, combat_stats, mut inflict_damage) = data;. Then it's just a matter of replacing the print! macros with inserting into the game log. Here's the resultant code:
#![allow(unused)]
fn main() {
use specs::prelude::*;
use super::{CombatStats, WantsToMelee, Name, SufferDamage, gamelog::GameLog};

pub struct MeleeCombatSystem {}

impl<'a> System<'a> for MeleeCombatSystem {
    #[allow(clippy::type_complexity)]
    type SystemData = ( Entities<'a>,
                        WriteExpect<'a, GameLog>,
                        WriteStorage<'a, WantsToMelee>,
                        ReadStorage<'a, Name>,
                        ReadStorage<'a, CombatStats>,
                        WriteStorage<'a, SufferDamage>
                      );

    fn run(&mut self, data : Self::SystemData) {
        let (entities, mut log, mut wants_melee, names, combat_stats, mut inflict_damage) = data;

        for (_entity, wants_melee, name, stats) in (&entities, &wants_melee, &names, &combat_stats).join() {
            if stats.hp > 0 {
                let target_stats = combat_stats.get(wants_melee.target).unwrap();
                if target_stats.hp > 0 {
                    let target_name = names.get(wants_melee.target).unwrap();

                    let damage = i32::max(0, stats.power - target_stats.defense);

                    if damage == 0 {
                        log.entries.push(format!("{} is unable to hurt {}", &name.name, &target_name.name));
                    } else {
                        log.entries.push(format!("{} hits {}, for {} hp.", &name.name, &target_name.name, damage));
                        SufferDamage::new_damage(&mut inflict_damage, wants_melee.target, damage);
                    }
                }
            }
        }

        wants_melee.clear();
    }
}
}
Now if you run the game and play a bit (cargo run, playing is up to you!), you'll see combat messages in the log:
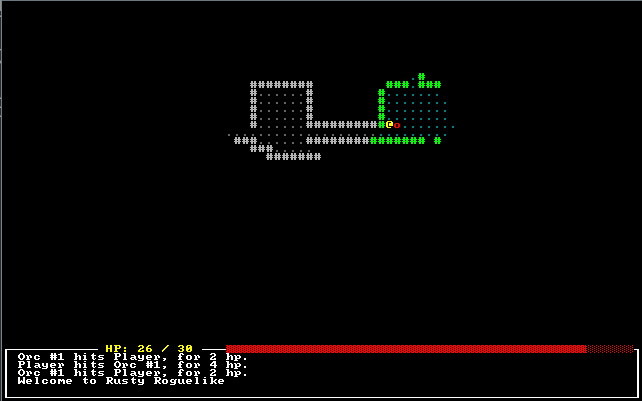
Notifying of deaths
We can do the same thing with delete_the_dead to notify of deaths. Here's the finished code:
#![allow(unused)]
fn main() {
pub fn delete_the_dead(ecs : &mut World) {
    let mut dead : Vec<Entity> = Vec::new();
    // Using a scope to make the borrow checker happy
    {
        let combat_stats = ecs.read_storage::<CombatStats>();
        let players = ecs.read_storage::<Player>();
        let names = ecs.read_storage::<Name>();
        let entities = ecs.entities();
        let mut log = ecs.write_resource::<GameLog>();
        for (entity, stats) in (&entities, &combat_stats).join() {
            if stats.hp < 1 {
                let player = players.get(entity);
                match player {
                    None => {
                        let victim_name = names.get(entity);
                        if let Some(victim_name) = victim_name {
                            log.entries.push(format!("{} is dead", &victim_name.name));
                        }
                        dead.push(entity)
                    }
                    Some(_) => console::log("You are dead")
                }
            }
        }
    }

    for victim in dead {
        ecs.delete_entity(victim).expect("Unable to delete");
    }
}
}
Mouse Support and Tooltips
Let's start by looking at how we obtain mouse information from RLTK. It's really easy; add the following at the bottom of your draw_ui function:
#![allow(unused)]
fn main() {
// Draw mouse cursor
let mouse_pos = ctx.mouse_pos();
ctx.set_bg(mouse_pos.0, mouse_pos.1, RGB::named(rltk::MAGENTA));
}
This sets the background of the cell at which the mouse is pointed to magenta. As you can see, mouse information arrives from RLTK as part of the context.
Now we'll introduce a new function, draw_tooltips and call it at the end of draw_ui. New new function looks like this:
#![allow(unused)]
fn main() {
fn draw_tooltips(ecs: &World, ctx : &mut Rltk) {
    let map = ecs.fetch::<Map>();
    let names = ecs.read_storage::<Name>();
    let positions = ecs.read_storage::<Position>();

    let mouse_pos = ctx.mouse_pos();
    if mouse_pos.0 >= map.width || mouse_pos.1 >= map.height { return; }
    let mut tooltip : Vec<String> = Vec::new();
    for (name, position) in (&names, &positions).join() {
        let idx = map.xy_idx(position.x, position.y);
        if position.x == mouse_pos.0 && position.y == mouse_pos.1 && map.visible_tiles[idx] {
            tooltip.push(name.name.to_string());
        }
    }

    if !tooltip.is_empty() {
        let mut width :i32 = 0;
        for s in tooltip.iter() {
            if width < s.len() as i32 { width = s.len() as i32; }
        }
        width += 3;

        if mouse_pos.0 > 40 {
            let arrow_pos = Point::new(mouse_pos.0 - 2, mouse_pos.1);
            let left_x = mouse_pos.0 - width;
            let mut y = mouse_pos.1;
            for s in tooltip.iter() {
                ctx.print_color(left_x, y, RGB::named(rltk::WHITE), RGB::named(rltk::GREY), s);
                let padding = (width - s.len() as i32)-1;
                for i in 0..padding {
                    ctx.print_color(arrow_pos.x - i, y, RGB::named(rltk::WHITE), RGB::named(rltk::GREY), &" ".to_string());
                }
                y += 1;
            }
            ctx.print_color(arrow_pos.x, arrow_pos.y, RGB::named(rltk::WHITE), RGB::named(rltk::GREY), &"->".to_string());
        } else {
            let arrow_pos = Point::new(mouse_pos.0 + 1, mouse_pos.1);
            let left_x = mouse_pos.0 +3;
            let mut y = mouse_pos.1;
            for s in tooltip.iter() {
                ctx.print_color(left_x + 1, y, RGB::named(rltk::WHITE), RGB::named(rltk::GREY), s);
                let padding = (width - s.len() as i32)-1;
                for i in 0..padding {
                    ctx.print_color(arrow_pos.x + 1 + i, y, RGB::named(rltk::WHITE), RGB::named(rltk::GREY), &" ".to_string());
                }
                y += 1;
            }
            ctx.print_color(arrow_pos.x, arrow_pos.y, RGB::named(rltk::WHITE), RGB::named(rltk::GREY), &"<-".to_string());
        }
    }
}
}
It starts by obtaining read access to the components we need for tooltips: names and positions. It also gets read access to the map itself. Then we check that mouse cursor is actually on the map, and bail out if it isn't - no point in trying to draw tooltips for something that can never have any!
The remainder says "if we have any tooltips, look at the mouse position" - if its on the left, we'll put the tooltip to the right, otherwise to the left.
If you cargo run your project now, it looks like this:
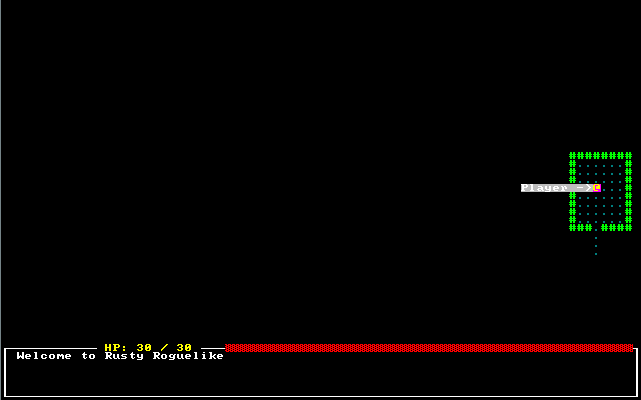
Optional post-processing for that truly retro feeling
Since we're on look and feel, lets consider enabling an RLTK feature: post-processing to give scanlines and screen burn, for that truly retro feel. It's entirely up to you if you want to use this! In main.rs, the initial setup simply replaced the first init command with:
#![allow(unused)]
fn main() {
use rltk::RltkBuilder;
    let mut context = RltkBuilder::simple80x50()
        .with_title("Roguelike Tutorial")
        .build()?;
context.with_post_scanlines(true);
}
If you choose to do this, the game looks a bit like the classic Caves of Qud:
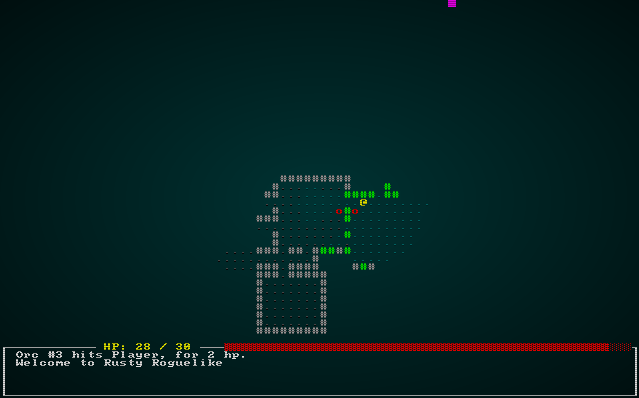
Wrap up
Now that we have a GUI, it's starting to look pretty good!
The source code for this chapter may be found here
Run this chapter's example with web assembly, in your browser (WebGL2 required)
Copyright (C) 2019, Herbert Wolverson.
Items and Inventory
About this tutorial
This tutorial is free and open source, and all code uses the MIT license - so you are free to do with it as you like. My hope is that you will enjoy the tutorial, and make great games!
If you enjoy this and would like me to keep writing, please consider supporting my Patreon.
So far, we have maps, monsters, and bashing things! No roguelike "murder hobo" experience would be complete without items to pick up along the way. This chapter will add some basic items to the game, along with User Interface elements required to pick them up, use them and drop them.
Thinking about composing items
A major difference between object-oriented and entity-component systems is that rather than thinking about something as being located on an inheritance tree, you think about how it composes from components. Ideally, you already have some of the components ready to use!
So... what makes up an item? Thinking about it, an item can be said to have the following properties:
- It has a
Renderable- a way to draw it. - If its on the ground, awaiting pickup - it has a
Position. - If its NOT on the ground - say in a backpack, it needs a way to indicate that it it is stored. We'll start with
InPack - It's an
item, which implies that it can be picked up. So it'll need anItemcomponent of some sort. - If it can be used, it will need some way to indicate that it can be used - and what to do with it.
Consistently random
Computers are actually really bad at random numbers. Computers are inherently deterministic - so (without getting into cryptographic stuff) when you ask for a "random" number, you are actually getting a "really hard to predict next number in a sequence". The sequence is controlled by a seed - with the same seed, you always get the same dice rolls!
Since we have an ever-increasing number of things that use randomness, lets go ahead and make the RNG (Random Number Generator) a resource.
In main.rs, we add:
#![allow(unused)]
fn main() {
gs.ecs.insert(rltk::RandomNumberGenerator::new());
}
We can now access the RNG whenever we need it, without having to pass one around. Since we're not creating a new one, we can start it with a seed (we'd use seeded instead of new, and provide a seed). We'll worry about that later; for now, it's just going to make our code cleaner!
Improved Spawning
One monster per room, always in the middle, makes for rather boring play. We also need to support spawning items as well as monsters!
To that end, we're going to make a new file spawner.rs:
#![allow(unused)]
fn main() {
use rltk::{ RGB, RandomNumberGenerator };
use specs::prelude::*;
use super::{CombatStats, Player, Renderable, Name, Position, Viewshed, Monster, BlocksTile};

/// Spawns the player and returns his/her entity object.
pub fn player(ecs : &mut World, player_x : i32, player_y : i32) -> Entity {
    ecs
        .create_entity()
        .with(Position { x: player_x, y: player_y })
        .with(Renderable {
            glyph: rltk::to_cp437('@'),
            fg: RGB::named(rltk::YELLOW),
            bg: RGB::named(rltk::BLACK),
        })
        .with(Player{})
        .with(Viewshed{ visible_tiles : Vec::new(), range: 8, dirty: true })
        .with(Name{name: "Player".to_string() })
        .with(CombatStats{ max_hp: 30, hp: 30, defense: 2, power: 5 })
        .build()
}

/// Spawns a random monster at a given location
pub fn random_monster(ecs: &mut World, x: i32, y: i32) {
    let roll :i32;
    {
        let mut rng = ecs.write_resource::<RandomNumberGenerator>();
        roll = rng.roll_dice(1, 2);
    }
    match roll {
        1 => { orc(ecs, x, y) }
        _ => { goblin(ecs, x, y) }
    }
}

fn orc(ecs: &mut World, x: i32, y: i32) { monster(ecs, x, y, rltk::to_cp437('o'), "Orc"); }
fn goblin(ecs: &mut World, x: i32, y: i32) { monster(ecs, x, y, rltk::to_cp437('g'), "Goblin"); }

fn monster<S : ToString>(ecs: &mut World, x: i32, y: i32, glyph : rltk::FontCharType, name : S) {
    ecs.create_entity()
        .with(Position{ x, y })
        .with(Renderable{
            glyph,
            fg: RGB::named(rltk::RED),
            bg: RGB::named(rltk::BLACK),
        })
        .with(Viewshed{ visible_tiles : Vec::new(), range: 8, dirty: true })
        .with(Monster{})
        .with(Name{ name : name.to_string() })
        .with(BlocksTile{})
        .with(CombatStats{ max_hp: 16, hp: 16, defense: 1, power: 4 })
        .build();
}
}
As you can see, we've taken the existing code in main.rs - and wrapped it up in functions in a different module. We don't have to do this - but it helps keep things tidy. Since we're going to be expanding our spawning, it's nice to keep things separated out. Now we modify main.rs to use it:
#![allow(unused)]
fn main() {
let player_entity = spawner::player(&mut gs.ecs, player_x, player_y);

gs.ecs.insert(rltk::RandomNumberGenerator::new());
for room in map.rooms.iter().skip(1) {
    let (x,y) = room.center();
    spawner::random_monster(&mut gs.ecs, x, y);
}
}
That's definitely tidier! cargo run will give you exactly what we had at the end of the previous chapter.
Spawn All The Things
We're going to extend the function to spawn multiple monsters per room, with 0 being an option. First we change the Map constants which we introduced in the previous chapter to be public in order to use them in spawner.rs:
#![allow(unused)]
fn main() {
pub const MAPWIDTH : usize = 80;
pub const MAPHEIGHT : usize = 43;
pub const MAPCOUNT : usize = MAPHEIGHT * MAPWIDTH;
}
We want to control how many things we spawn, monsters and items. We'd like more monsters than items, to avoid too much of a "Monty Haul" dungeon! Also in spawner.rs, we'll add these constants (they can go anywhere, next to the other constants makes sense):
#![allow(unused)]
fn main() {
const MAX_MONSTERS : i32 = 4;
const MAX_ITEMS : i32 = 2;
}
Still in spawner.rs, we create a new function - spawn_room that uses these constants:
#![allow(unused)]
fn main() {
/// Fills a room with stuff!
pub fn spawn_room(ecs: &mut World, room : &Rect) {
    let mut monster_spawn_points : Vec<usize> = Vec::new();

    // Scope to keep the borrow checker happy
    {
        let mut rng = ecs.write_resource::<RandomNumberGenerator>();
        let num_monsters = rng.roll_dice(1, MAX_MONSTERS + 2) - 3;

        for _i in 0 .. num_monsters {
            let mut added = false;
            while !added {
                let x = (room.x1 + rng.roll_dice(1, i32::abs(room.x2 - room.x1))) as usize;
                let y = (room.y1 + rng.roll_dice(1, i32::abs(room.y2 - room.y1))) as usize;
                let idx = (y * MAPWIDTH) + x;
                if !monster_spawn_points.contains(&idx) {
                    monster_spawn_points.push(idx);
                    added = true;
                }
            }
        }
    }

    // Actually spawn the monsters
    for idx in monster_spawn_points.iter() {
        let x = *idx % MAPWIDTH;
        let y = *idx / MAPWIDTH;
        random_monster(ecs, x as i32, y as i32);
    }
}
}
This obtains the RNG and the map, and rolls a dice for how many monsters it should spawn. It then keeps trying to add random positions that aren't already occupied, until sufficient monsters have been created. Each monster is then spawned at the determined location. The borrow checker isn't at all happy with the idea that we mutably access rng, and then pass the ECS itself along: so we introduce a scope to keep it happy (automatically dropping access to the RNG when we are done with it).
In main.rs, we then replace our monster spawner with:
#![allow(unused)]
fn main() {
for room in map.rooms.iter().skip(1) {
    spawner::spawn_room(&mut gs.ecs, room);
}
}
If you cargo run the project now, it will have between 0 and 4 monsters per room. It can get a little hairy!
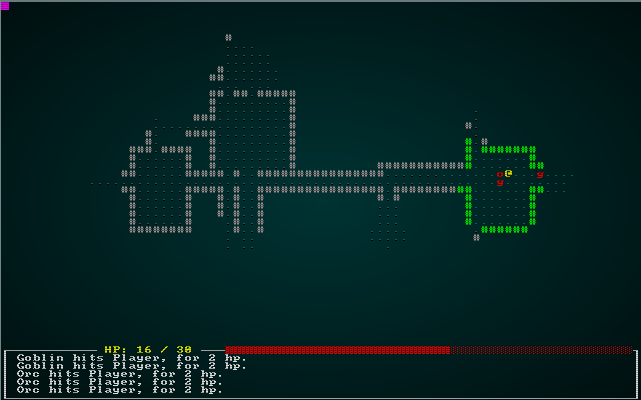
Health Potion Entities
We'll improve the chances of surviving for a bit by adding health potions to the game! We'll start off by adding some components to help define a potion. In components.rs:
#![allow(unused)]
fn main() {
#[derive(Component, Debug)]
pub struct Item {}

#[derive(Component, Debug)]
pub struct Potion {
    pub heal_amount : i32
}
}
We of course need to register these in main.rs:
#![allow(unused)]
fn main() {
gs.ecs.register::<Item>();
gs.ecs.register::<Potion>();
}
In spawner.rs, we'll add a new function: health_potion:
#![allow(unused)]
fn main() {
fn health_potion(ecs: &mut World, x: i32, y: i32) {
    ecs.create_entity()
        .with(Position{ x, y })
        .with(Renderable{
            glyph: rltk::to_cp437('¡'),
            fg: RGB::named(rltk::MAGENTA),
            bg: RGB::named(rltk::BLACK),
        })
        .with(Name{ name : "Health Potion".to_string() })
        .with(Item{})
        .with(Potion{ heal_amount: 8 })
        .build();
}
}
This is pretty straight-forward: we create an entity with a position, a renderable (we picked ¡ because it looks a bit like a potion, and my favorite game Dwarf Fortress uses it), a name, an Item component and a Potion component that specifies it heals 8 points of damage.
Now we can modify the spawner code to also have a chance to spawn between 0 and 2 items:
#![allow(unused)]
fn main() {
pub fn spawn_room(ecs: &mut World, room : &Rect) {
    let mut monster_spawn_points : Vec<usize> = Vec::new();
    let mut item_spawn_points : Vec<usize> = Vec::new();

    // Scope to keep the borrow checker happy
    {
        let mut rng = ecs.write_resource::<RandomNumberGenerator>();
        let num_monsters = rng.roll_dice(1, MAX_MONSTERS + 2) - 3;
        let num_items = rng.roll_dice(1, MAX_ITEMS + 2) - 3;

        for _i in 0 .. num_monsters {
            let mut added = false;
            while !added {
                let x = (room.x1 + rng.roll_dice(1, i32::abs(room.x2 - room.x1))) as usize;
                let y = (room.y1 + rng.roll_dice(1, i32::abs(room.y2 - room.y1))) as usize;
                let idx = (y * MAPWIDTH) + x;
                if !monster_spawn_points.contains(&idx) {
                    monster_spawn_points.push(idx);
                    added = true;
                }
            }
        }

        for _i in 0 .. num_items {
            let mut added = false;
            while !added {
                let x = (room.x1 + rng.roll_dice(1, i32::abs(room.x2 - room.x1))) as usize;
                let y = (room.y1 + rng.roll_dice(1, i32::abs(room.y2 - room.y1))) as usize;
                let idx = (y * MAPWIDTH) + x;
                if !item_spawn_points.contains(&idx) {
                    item_spawn_points.push(idx);
                    added = true;
                }
            }
        }
    }

    // Actually spawn the monsters
    for idx in monster_spawn_points.iter() {
        let x = *idx % MAPWIDTH;
        let y = *idx / MAPWIDTH;
        random_monster(ecs, x as i32, y as i32);
    }

    // Actually spawn the potions
    for idx in item_spawn_points.iter() {
        let x = *idx % MAPWIDTH;
        let y = *idx / MAPWIDTH;
        health_potion(ecs, x as i32, y as i32);
    }
}
}
If you cargo run the project now, rooms now sometimes contain health potions. Tooltips and rendering "just work" - because they have the components required to use them.
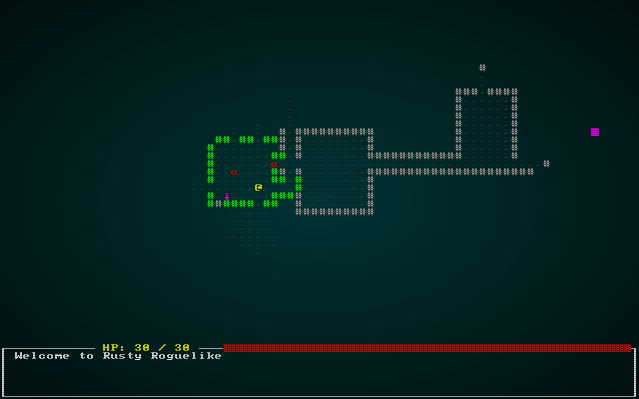
Picking Up Items
Having potions exist is a great start, but it would be helpful to be able to pick them up! We'll create a new component in components.rs (and register it in main.rs!), to represent an item being in someone's backpack:
#![allow(unused)]
fn main() {
#[derive(Component, Debug, Clone)]
pub struct InBackpack {
    pub owner : Entity
}
}
We also want to make item collection generic - that is, any entity can pick up an item. It would be pretty straightforward to just make it work for the player, but later on we might decide that monsters can pick up loot (introducing a whole new tactical element - bait!). So we'll also make a component indicating intent in components.rs (and register it in main.rs):
#![allow(unused)]
fn main() {
#[derive(Component, Debug, Clone)]
pub struct WantsToPickupItem {
    pub collected_by : Entity,
    pub item : Entity
}
}
Next, we'll put together a system to process WantsToPickupItem notices. We'll make a new file, inventory_system.rs:
#![allow(unused)]
fn main() {
use specs::prelude::*;
use super::{WantsToPickupItem, Name, InBackpack, Position, gamelog::GameLog};

pub struct ItemCollectionSystem {}

impl<'a> System<'a> for ItemCollectionSystem {
    #[allow(clippy::type_complexity)]
    type SystemData = ( ReadExpect<'a, Entity>,
                        WriteExpect<'a, GameLog>,
                        WriteStorage<'a, WantsToPickupItem>,
                        WriteStorage<'a, Position>,
                        ReadStorage<'a, Name>,
                        WriteStorage<'a, InBackpack>
                      );

    fn run(&mut self, data : Self::SystemData) {
        let (player_entity, mut gamelog, mut wants_pickup, mut positions, names, mut backpack) = data;

        for pickup in wants_pickup.join() {
            positions.remove(pickup.item);
            backpack.insert(pickup.item, InBackpack{ owner: pickup.collected_by }).expect("Unable to insert backpack entry");

            if pickup.collected_by == *player_entity {
                gamelog.entries.push(format!("You pick up the {}.", names.get(pickup.item).unwrap().name));
            }
        }

        wants_pickup.clear();
    }
}
}
This iterates the requests to pick up an item, removes their position component, and adds an InBackpack component assigned to the collector. Don't forget to add it to the systems list in main.rs:
#![allow(unused)]
fn main() {
let mut pickup = ItemCollectionSystem{};
pickup.run_now(&self.ecs);
}
The next step is to add an input command to pick up an item. g is a popular key for this, so we'll go with that (we can always change it!). In player.rs, in the ever-growing match statement of inputs, we add:
#![allow(unused)]
fn main() {
VirtualKeyCode::G => get_item(&mut gs.ecs),
}
As you probably guessed, the next step is to implement get_item:
#![allow(unused)]
fn main() {
fn get_item(ecs: &mut World) {
    let player_pos = ecs.fetch::<Point>();
    let player_entity = ecs.fetch::<Entity>();
    let entities = ecs.entities();
    let items = ecs.read_storage::<Item>();
    let positions = ecs.read_storage::<Position>();
    let mut gamelog = ecs.fetch_mut::<GameLog>();

    let mut target_item : Option<Entity> = None;
    for (item_entity, _item, position) in (&entities, &items, &positions).join() {
        if position.x == player_pos.x && position.y == player_pos.y {
            target_item = Some(item_entity);
        }
    }

    match target_item {
        None => gamelog.entries.push("There is nothing here to pick up.".to_string()),
        Some(item) => {
            let mut pickup = ecs.write_storage::<WantsToPickupItem>();
            pickup.insert(*player_entity, WantsToPickupItem{ collected_by: *player_entity, item }).expect("Unable to insert want to pickup");
        }
    }
}
}
This obtains a bunch of references/accessors from the ECS, and iterates all items with a position. If it matches the player's position, target_item is set. Then, if target_item is none - we tell the player that there is nothing to pick up. If it isn't, it adds a pickup request for the system we just added to use.
If you cargo run the project now, you can press g anywhere to be told that there's nothing to get. If you are standing on a potion, it will vanish when you press g! It's in our backpack - but we haven't any way to know that other than the log entry.
Listing your inventory
It's a good idea to be able to see your inventory list! This will be a game mode - that is, another state in which the game loop can find itself. So to start, we'll extend RunMode in main.rs to include it:
#![allow(unused)]
fn main() {
#[derive(PartialEq, Copy, Clone)]
pub enum RunState { AwaitingInput, PreRun, PlayerTurn, MonsterTurn, ShowInventory }
}
The i key is a popular choice for inventory (b is also popular!), so in player.rs we'll add the following to the player input code:
#![allow(unused)]
fn main() {
VirtualKeyCode::I => return RunState::ShowInventory,
}
In our tick function in main.rs, we'll add another matching:
#![allow(unused)]
fn main() {
RunState::ShowInventory => {
    if gui::show_inventory(self, ctx) == gui::ItemMenuResult::Cancel {
        newrunstate = RunState::AwaitingInput;
    }
}
}
That naturally leads to implementing show_inventory! In gui.rs, we add:
#![allow(unused)]
fn main() {
#[derive(PartialEq, Copy, Clone)]
pub enum ItemMenuResult { Cancel, NoResponse, Selected }

pub fn show_inventory(gs : &mut State, ctx : &mut Rltk) -> ItemMenuResult {
    let player_entity = gs.ecs.fetch::<Entity>();
    let names = gs.ecs.read_storage::<Name>();
    let backpack = gs.ecs.read_storage::<InBackpack>();

    let inventory = (&backpack, &names).join().filter(|item| item.0.owner == *player_entity );
    let count = inventory.count();

    let mut y = (25 - (count / 2)) as i32;
    ctx.draw_box(15, y-2, 31, (count+3) as i32, RGB::named(rltk::WHITE), RGB::named(rltk::BLACK));
    ctx.print_color(18, y-2, RGB::named(rltk::YELLOW), RGB::named(rltk::BLACK), "Inventory");
    ctx.print_color(18, y+count as i32+1, RGB::named(rltk::YELLOW), RGB::named(rltk::BLACK), "ESCAPE to cancel");

    let mut j = 0;
    for (_pack, name) in (&backpack, &names).join().filter(|item| item.0.owner == *player_entity ) {
        ctx.set(17, y, RGB::named(rltk::WHITE), RGB::named(rltk::BLACK), rltk::to_cp437('('));
        ctx.set(18, y, RGB::named(rltk::YELLOW), RGB::named(rltk::BLACK), 97+j as rltk::FontCharType);
        ctx.set(19, y, RGB::named(rltk::WHITE), RGB::named(rltk::BLACK), rltk::to_cp437(')'));

        ctx.print(21, y, &name.name.to_string());
        y += 1;
        j += 1;
    }

    match ctx.key {
        None => ItemMenuResult::NoResponse,
        Some(key) => {
            match key {
                VirtualKeyCode::Escape => { ItemMenuResult::Cancel }
                _ => ItemMenuResult::NoResponse
            }
        }
    }
}
}
This starts out by using the filter feature of Rust iterators to count all items in your backpack. It then draws an appropriately sized box, and decorates it with a title and instructions. Next, it iterates all matching items and renders them in a menu format. Finally, it waits for keyboard input - and if you pressed ESCAPE, indicates that it is time to close the menu.
If you cargo run your project now, you can see items that you have collected:
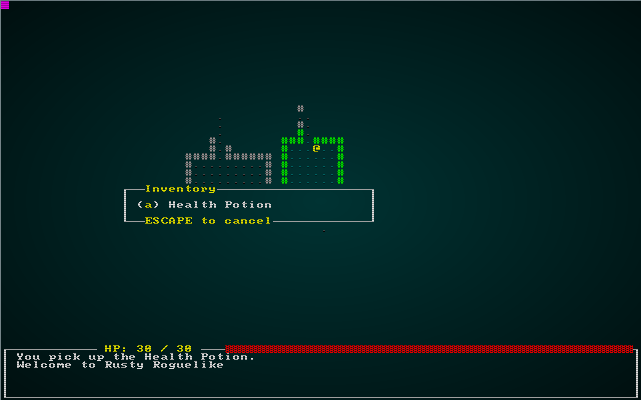
Using Items
Now that we can display our inventory, lets make selecting an item actually use it. We'll extend the menu to return both an item entity and a result:
#![allow(unused)]
fn main() {
pub fn show_inventory(gs : &mut State, ctx : &mut Rltk) -> (ItemMenuResult, Option<Entity>) {
    let player_entity = gs.ecs.fetch::<Entity>();
    let names = gs.ecs.read_storage::<Name>();
    let backpack = gs.ecs.read_storage::<InBackpack>();
    let entities = gs.ecs.entities();

    let inventory = (&backpack, &names).join().filter(|item| item.0.owner == *player_entity );
    let count = inventory.count();

    let mut y = (25 - (count / 2)) as i32;
    ctx.draw_box(15, y-2, 31, (count+3) as i32, RGB::named(rltk::WHITE), RGB::named(rltk::BLACK));
    ctx.print_color(18, y-2, RGB::named(rltk::YELLOW), RGB::named(rltk::BLACK), "Inventory");
    ctx.print_color(18, y+count as i32+1, RGB::named(rltk::YELLOW), RGB::named(rltk::BLACK), "ESCAPE to cancel");

    let mut equippable : Vec<Entity> = Vec::new();
    let mut j = 0;
    for (entity, _pack, name) in (&entities, &backpack, &names).join().filter(|item| item.1.owner == *player_entity ) {
        ctx.set(17, y, RGB::named(rltk::WHITE), RGB::named(rltk::BLACK), rltk::to_cp437('('));
        ctx.set(18, y, RGB::named(rltk::YELLOW), RGB::named(rltk::BLACK), 97+j as rltk::FontCharType);
        ctx.set(19, y, RGB::named(rltk::WHITE), RGB::named(rltk::BLACK), rltk::to_cp437(')'));

        ctx.print(21, y, &name.name.to_string());
        equippable.push(entity);
        y += 1;
        j += 1;
    }

    match ctx.key {
        None => (ItemMenuResult::NoResponse, None),
        Some(key) => {
            match key {
                VirtualKeyCode::Escape => { (ItemMenuResult::Cancel, None) }
                _ => {
                    let selection = rltk::letter_to_option(key);
                    if selection > -1 && selection < count as i32 {
                        return (ItemMenuResult::Selected, Some(equippable[selection as usize]));
                    }
                    (ItemMenuResult::NoResponse, None)
                }
            }
        }
    }
}
}
Our call to show_inventory in main.rs is now invalid, so we'll fix it up:
#![allow(unused)]
fn main() {
RunState::ShowInventory => {
    let result = gui::show_inventory(self, ctx);
    match result.0 {
        gui::ItemMenuResult::Cancel => newrunstate = RunState::AwaitingInput,
        gui::ItemMenuResult::NoResponse => {}
        gui::ItemMenuResult::Selected => {
            let item_entity = result.1.unwrap();
            let names = self.ecs.read_storage::<Name>();
            let mut gamelog = self.ecs.fetch_mut::<gamelog::GameLog>();
            gamelog.entries.push(format!("You try to use {}, but it isn't written yet", names.get(item_entity).unwrap().name));
            newrunstate = RunState::AwaitingInput;
        }
    }
}
}
If you try to use an item in your inventory now, you'll get a log entry that you try to use it, but we haven't written that bit of code yet. That's a start!
Once again, we want generic code - so that eventually monsters might use potions. We're going to cheat a little while all items are potions, and just make a potion system; we'll turn it into something more useful later. So we'll start by creating an "intent" component in components.rs (and registered in main.rs):
#![allow(unused)]
fn main() {
#[derive(Component, Debug)]
pub struct WantsToDrinkPotion {
    pub potion : Entity
}
}
Add the following to inventory_system.rs:
#![allow(unused)]
fn main() {
pub struct PotionUseSystem {}

impl<'a> System<'a> for PotionUseSystem {
    #[allow(clippy::type_complexity)]
    type SystemData = ( ReadExpect<'a, Entity>,
                        WriteExpect<'a, GameLog>,
                        Entities<'a>,
                        WriteStorage<'a, WantsToDrinkPotion>,
                        ReadStorage<'a, Name>,
                        ReadStorage<'a, Potion>,
                        WriteStorage<'a, CombatStats>
                      );

    fn run(&mut self, data : Self::SystemData) {
        let (player_entity, mut gamelog, entities, mut wants_drink, names, potions, mut combat_stats) = data;

        for (entity, drink, stats) in (&entities, &wants_drink, &mut combat_stats).join() {
            let potion = potions.get(drink.potion);
            match potion {
                None => {}
                Some(potion) => {
                    stats.hp = i32::min(stats.max_hp, stats.hp + potion.heal_amount);
                    if entity == *player_entity {
                        gamelog.entries.push(format!("You drink the {}, healing {} hp.", names.get(drink.potion).unwrap().name, potion.heal_amount));
                    }
                    entities.delete(drink.potion).expect("Delete failed");
                }
            }
        }

        wants_drink.clear();
    }
}
}
And register it in the list of systems to run:
#![allow(unused)]
fn main() {
let mut potions = PotionUseSystem{};
potions.run_now(&self.ecs);
}
Like other systems we've looked at, this iterates all of the WantsToDrinkPotion intent objects. It then heals up the drinker by the amount set in the Potion component, and deletes the potion. Since all of the placement information is attached to the potion itself, there's no need to chase around making sure it is removed from the appropriate backpack: the entity ceases to exist, and takes its components with it.
Testing this with cargo run gives a surprise: the potion isn't deleted after use! This is because the ECS simply marks entities as dead - it doesn't delete them in systems (so as to not mess up iterators and threading). So after every call to dispatch, we need to add a call to maintain. In main.ecs:
#![allow(unused)]
fn main() {
RunState::PreRun => {
    self.run_systems();
    self.ecs.maintain();
    newrunstate = RunState::AwaitingInput;
}
}
...
#![allow(unused)]
fn main() {
RunState::PlayerTurn => {
    self.run_systems();
    self.ecs.maintain();
    newrunstate = RunState::MonsterTurn;
}
RunState::MonsterTurn => {
    self.run_systems();
    self.ecs.maintain();
    newrunstate = RunState::AwaitingInput;
}
}
Finally we have to change the RunState::ShowInventory handling if an item was selected, we create a WantsToDrinkPotion intent:
#![allow(unused)]
fn main() {
RunState::ShowInventory => {
                let result = gui::show_inventory(self, ctx);
                match result.0 {
                    gui::ItemMenuResult::Cancel => newrunstate = RunState::AwaitingInput,
                    gui::ItemMenuResult::NoResponse => {}
                    gui::ItemMenuResult::Selected => {
                        let item_entity = result.1.unwrap();
                        let mut intent = self.ecs.write_storage::<WantsToDrinkPotion>();
                        intent.insert(*self.ecs.fetch::<Entity>(), WantsToDrinkPotion{ potion: item_entity }).expect("Unable to insert intent");
                        newrunstate = RunState::PlayerTurn;
                    }
                }
            }
}
NOW if you cargo run the project, you can pickup and drink health potions:
Dropping Items
You probably want to be able to drop items from your inventory, especially later when they can be used as bait. We'll follow a similar pattern for this section - create an intent component, a menu to select it, and a system to perform the drop.
So we create a component (in components.rs), and register it in main.rs:
#![allow(unused)]
fn main() {
#[derive(Component, Debug, ConvertSaveload, Clone)]
pub struct WantsToDropItem {
    pub item : Entity
}
}
We add another system to inventory_system.rs:
#![allow(unused)]
fn main() {
pub struct ItemDropSystem {}

impl<'a> System<'a> for ItemDropSystem {
    #[allow(clippy::type_complexity)]
    type SystemData = ( ReadExpect<'a, Entity>,
                        WriteExpect<'a, GameLog>,
                        Entities<'a>,
                        WriteStorage<'a, WantsToDropItem>,
                        ReadStorage<'a, Name>,
                        WriteStorage<'a, Position>,
                        WriteStorage<'a, InBackpack>
                      );

    fn run(&mut self, data : Self::SystemData) {
        let (player_entity, mut gamelog, entities, mut wants_drop, names, mut positions, mut backpack) = data;

        for (entity, to_drop) in (&entities, &wants_drop).join() {
            let mut dropper_pos : Position = Position{x:0, y:0};
            {
                let dropped_pos = positions.get(entity).unwrap();
                dropper_pos.x = dropped_pos.x;
                dropper_pos.y = dropped_pos.y;
            }
            positions.insert(to_drop.item, Position{ x : dropper_pos.x, y : dropper_pos.y }).expect("Unable to insert position");
            backpack.remove(to_drop.item);

            if entity == *player_entity {
                gamelog.entries.push(format!("You drop the {}.", names.get(to_drop.item).unwrap().name));
            }
        }

        wants_drop.clear();
    }
}
}
Register it in the dispatch builder in main.rs:
#![allow(unused)]
fn main() {
let mut drop_items = ItemDropSystem{};
drop_items.run_now(&self.ecs);
}
We'll add a new RunState in main.rs:
#![allow(unused)]
fn main() {
#[derive(PartialEq, Copy, Clone)]
pub enum RunState { AwaitingInput, PreRun, PlayerTurn, MonsterTurn, ShowInventory, ShowDropItem }
}
Now in player.rs, we add d for drop to the list of commands:
#![allow(unused)]
fn main() {
VirtualKeyCode::D => return RunState::ShowDropItem,
}
In gui.rs, we need another menu - this time for dropping items:
#![allow(unused)]
fn main() {
pub fn drop_item_menu(gs : &mut State, ctx : &mut Rltk) -> (ItemMenuResult, Option<Entity>) {
    let player_entity = gs.ecs.fetch::<Entity>();
    let names = gs.ecs.read_storage::<Name>();
    let backpack = gs.ecs.read_storage::<InBackpack>();
    let entities = gs.ecs.entities();

    let inventory = (&backpack, &names).join().filter(|item| item.0.owner == *player_entity );
    let count = inventory.count();

    let mut y = (25 - (count / 2)) as i32;
    ctx.draw_box(15, y-2, 31, (count+3) as i32, RGB::named(rltk::WHITE), RGB::named(rltk::BLACK));
    ctx.print_color(18, y-2, RGB::named(rltk::YELLOW), RGB::named(rltk::BLACK), "Drop Which Item?");
    ctx.print_color(18, y+count as i32+1, RGB::named(rltk::YELLOW), RGB::named(rltk::BLACK), "ESCAPE to cancel");

    let mut equippable : Vec<Entity> = Vec::new();
    let mut j = 0;
    for (entity, _pack, name) in (&entities, &backpack, &names).join().filter(|item| item.1.owner == *player_entity ) {
        ctx.set(17, y, RGB::named(rltk::WHITE), RGB::named(rltk::BLACK), rltk::to_cp437('('));
        ctx.set(18, y, RGB::named(rltk::YELLOW), RGB::named(rltk::BLACK), 97+j as rltk::FontCharType);
        ctx.set(19, y, RGB::named(rltk::WHITE), RGB::named(rltk::BLACK), rltk::to_cp437(')'));

        ctx.print(21, y, &name.name.to_string());
        equippable.push(entity);
        y += 1;
        j += 1;
    }

    match ctx.key {
        None => (ItemMenuResult::NoResponse, None),
        Some(key) => {
            match key {
                VirtualKeyCode::Escape => { (ItemMenuResult::Cancel, None) }
                _ => {
                    let selection = rltk::letter_to_option(key);
                    if selection > -1 && selection < count as i32 {
                        return (ItemMenuResult::Selected, Some(equippable[selection as usize]));
                    }
                    (ItemMenuResult::NoResponse, None)
                }
            }
        }
    }
}
}
We also need to extend the state handler in main.rs to use it:
#![allow(unused)]
fn main() {
RunState::ShowDropItem => {
    let result = gui::drop_item_menu(self, ctx);
    match result.0 {
        gui::ItemMenuResult::Cancel => newrunstate = RunState::AwaitingInput,
        gui::ItemMenuResult::NoResponse => {}
        gui::ItemMenuResult::Selected => {
            let item_entity = result.1.unwrap();
            let mut intent = self.ecs.write_storage::<WantsToDropItem>();
            intent.insert(*self.ecs.fetch::<Entity>(), WantsToDropItem{ item: item_entity }).expect("Unable to insert intent");
            newrunstate = RunState::PlayerTurn;
        }
    }
}
}
If you cargo run the project, you can now press d to drop items! Here's a shot of rather unwisely dropping a potion while being mobbed:
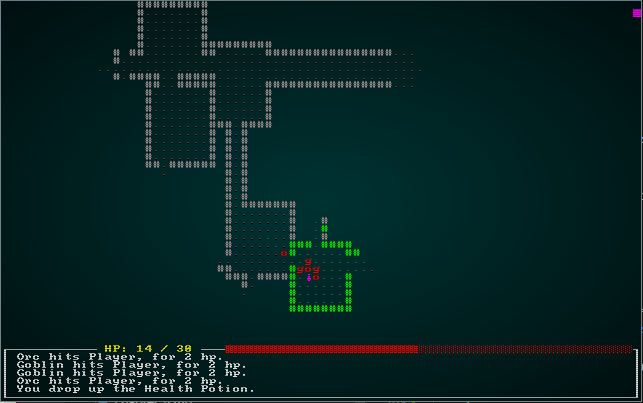
Render order
You've probably noticed by now that when you walk over a potion, it renders over the top of you - removing the context for your player completely! We'll fix that by adding a render_order field to Renderables:
#![allow(unused)]
fn main() {
#[derive(Component)]
pub struct Renderable {
    pub glyph: rltk::FontCharType,
    pub fg: RGB,
    pub bg: RGB,
    pub render_order : i32
}
}
Your IDE is probably now highlighting lots of errors for Renderable components that were created without this information. We'll add it to various places: the player is 0 (render first), monsters 1 (second) and items 2 (last). For example, in the Player spawner, the Renderable now looks like this:
#![allow(unused)]
fn main() {
.with(Renderable {
    glyph: rltk::to_cp437('@'),
    fg: RGB::named(rltk::YELLOW),
    bg: RGB::named(rltk::BLACK),
    render_order: 0
})
}
To make this do something, we go to our item rendering code in main.rs and add a sort to the iterators. We referenced the Book of Specs for how to do this! Basically, we obtain the joined set of Position and Renderable components, and collect them into a vector. We then sort that vector, and iterate it to render in the appropriate order. In main.rs, replace the previous entity rendering code with:
#![allow(unused)]
fn main() {
let mut data = (&positions, &renderables).join().collect::<Vec<_>>();
data.sort_by(|&a, &b| b.1.render_order.cmp(&a.1.render_order) );
for (pos, render) in data.iter() {
    let idx = map.xy_idx(pos.x, pos.y);
    if map.visible_tiles[idx] { ctx.set(pos.x, pos.y, render.fg, render.bg, render.glyph) }
}
}
Wrap Up
This chapter has shown a fair amount of the power of using an ECS: picking up, using and dropping entities is relatively simple - and once the player can do it, so can anything else (if you add it to their AI). We've also shown how to order ECS fetches, to maintain a sensible render order.
The source code for this chapter may be found here
Run this chapter's example with web assembly, in your browser (WebGL2 required)
Copyright (C) 2019, Herbert Wolverson.
Ranged Scrolls and Targeting
About this tutorial
This tutorial is free and open source, and all code uses the MIT license - so you are free to do with it as you like. My hope is that you will enjoy the tutorial, and make great games!
If you enjoy this and would like me to keep writing, please consider supporting my Patreon.
In the last chapter, we added items and inventory - and a single item type, a health potion. Now we'll add a second item type: a scroll of magic missile, that lets you zap an entity at range.
Using components to describe what an item does
In the last chapter, we pretty much wrote code to ensure that all items were healing potions. That got things going, but isn't very flexible. So we'll start by breaking down items into a few more component types. We'll start with a simple flag component, Consumable:
#![allow(unused)]
fn main() {
#[derive(Component, Debug)]
pub struct Consumable {}
}
Having this item indicates that using it destroys it (consumed on use). So we replace the always-called entities.delete(useitem.item).expect("Delete failed"); in our PotionUseSystem (which we rename ItemUseSystem!) with:
#![allow(unused)]
fn main() {
let consumable = consumables.get(useitem.item);
match consumable {
    None => {}
    Some(_) => {
        entities.delete(useitem.item).expect("Delete failed");
    }
}
}
This is quite simple: check if the component has a Consumable tag, and destroy it if it does. Likewise, we can replace the Potion section with a ProvidesHealing to indicate that this is what the potion actually does. In components.rs:
#![allow(unused)]
fn main() {
#[derive(Component, Debug)]
pub struct ProvidesHealing {
    pub heal_amount : i32
}
}
And in our ItemUseSystem:
#![allow(unused)]
fn main() {
let item_heals = healing.get(useitem.item);
match item_heals {
    None => {}
    Some(healer) => {
        stats.hp = i32::min(stats.max_hp, stats.hp + healer.heal_amount);
        if entity == *player_entity {
            gamelog.entries.push(format!("You drink the {}, healing {} hp.", names.get(useitem.item).unwrap().name, healer.heal_amount));
        }
    }
}
}
Drawing that together, our code for creating a potion (in spawner.rs) looks like this:
#![allow(unused)]
fn main() {
fn health_potion(ecs: &mut World, x: i32, y: i32) {
    ecs.create_entity()
        .with(Position{ x, y })
        .with(Renderable{
            glyph: rltk::to_cp437('¡'),
            fg: RGB::named(rltk::MAGENTA),
            bg: RGB::named(rltk::BLACK),
            render_order: 2
        })
        .with(Name{ name : "Health Potion".to_string() })
        .with(Item{})
        .with(Consumable{})
        .with(ProvidesHealing{ heal_amount: 8 })
        .build();
}
}
So we're describing where it is, what it looks like, its name, denoting that it is an item, consumed on use, and provides 8 points of healing. This is nice and descriptive - and future items can mix/match. As we add components, the item system will become more and more flexible.
Describing Ranged Magic Missile Scrolls
We'll want to add a few more components! In components.rs (and registered in main.rs):
#![allow(unused)]
fn main() {
#[derive(Component, Debug)]
pub struct Ranged {
    pub range : i32
}

#[derive(Component, Debug)]
pub struct InflictsDamage {
    pub damage : i32
}
}
This in turn lets us write a magic_missile_scroll function in spawner.rs, which effectively describes the scroll:
#![allow(unused)]
fn main() {
fn magic_missile_scroll(ecs: &mut World, x: i32, y: i32) {
    ecs.create_entity()
        .with(Position{ x, y })
        .with(Renderable{
            glyph: rltk::to_cp437(')'),
            fg: RGB::named(rltk::CYAN),
            bg: RGB::named(rltk::BLACK),
            render_order: 2
        })
        .with(Name{ name : "Magic Missile Scroll".to_string() })
        .with(Item{})
        .with(Consumable{})
        .with(Ranged{ range: 6 })
        .with(InflictsDamage{ damage: 8 })
        .build();
}
}
That neatly lays out the properties of what makes it tick: it has a position, an appearance, a name, it's an item that is destroyed on use, it has a range of 6 tiles and inflicts 8 points of damage. That's what I like about components: after a while, it sounds more like you are describing a blueprint for a device than writing many lines of code!
We'll go ahead and add them into the spawn list:
#![allow(unused)]
fn main() {
fn random_item(ecs: &mut World, x: i32, y: i32) {
    let roll :i32;
    {
        let mut rng = ecs.write_resource::<RandomNumberGenerator>();
        roll = rng.roll_dice(1, 2);
    }
    match roll {
        1 => { health_potion(ecs, x, y) }
        _ => { magic_missile_scroll(ecs, x, y) }
    }
}
}
Replace the call to health_potion in the item spawning code with a call to random_item.
If you run the program (with cargo run) now, you'll find scrolls as well as potions lying around. The components system already provides quite a bit of functionality:
- You can see them rendered on the map (thanks to the
RenderableandPosition) - You can pick them up and drop them (thank to
Item) - You can list them in your inventory
- You can call
useon them, and they are destroyed: but nothing happens.
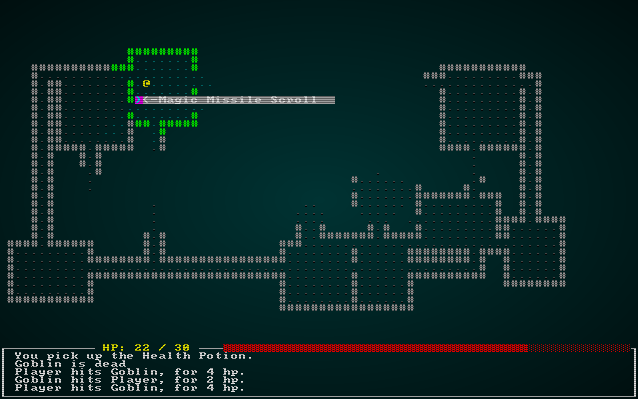
Implementing ranged damage for items
We want magic missile to be targeted: you activate it, and then have to select a victim. This will be another input mode, so we once again extend RunState in main.rs:
#![allow(unused)]
fn main() {
#[derive(PartialEq, Copy, Clone)]
pub enum RunState { AwaitingInput, PreRun, PlayerTurn, MonsterTurn, ShowInventory, ShowDropItem,
    ShowTargeting { range : i32, item : Entity} }
}
We'll extend our handler for ShowInventory in main.rs to handle items that are ranged and induce a mode switch:
#![allow(unused)]
fn main() {
RunState::ShowInventory => {
    let result = gui::show_inventory(self, ctx);
    match result.0 {
        gui::ItemMenuResult::Cancel => newrunstate = RunState::AwaitingInput,
        gui::ItemMenuResult::NoResponse => {}
        gui::ItemMenuResult::Selected => {
            let item_entity = result.1.unwrap();
            let is_ranged = self.ecs.read_storage::<Ranged>();
            let is_item_ranged = is_ranged.get(item_entity);
            if let Some(is_item_ranged) = is_item_ranged {
                newrunstate = RunState::ShowTargeting{ range: is_item_ranged.range, item: item_entity };
            } else {
                let mut intent = self.ecs.write_storage::<WantsToUseItem>();
                intent.insert(*self.ecs.fetch::<Entity>(), WantsToUseItem{ item: item_entity, target: None }).expect("Unable to insert intent");
                newrunstate = RunState::PlayerTurn;
            }
        }
    }
}
}
So now in main.rs, where we match the appropriate game mode, we can stub in:
#![allow(unused)]
fn main() {
RunState::ShowTargeting{range, item} => {
    let target = gui::ranged_target(self, ctx, range);
}
}
That naturally leads to actually writing gui::ranged_target. This looks complicated, but it's actually quite straightforward:
#![allow(unused)]
fn main() {
pub fn ranged_target(gs : &mut State, ctx : &mut Rltk, range : i32) -> (ItemMenuResult, Option<Point>) {
    let player_entity = gs.ecs.fetch::<Entity>();
    let player_pos = gs.ecs.fetch::<Point>();
    let viewsheds = gs.ecs.read_storage::<Viewshed>();

    ctx.print_color(5, 0, RGB::named(rltk::YELLOW), RGB::named(rltk::BLACK), "Select Target:");

    // Highlight available target cells
    let mut available_cells = Vec::new();
    let visible = viewsheds.get(*player_entity);
    if let Some(visible) = visible {
        // We have a viewshed
        for idx in visible.visible_tiles.iter() {
            let distance = rltk::DistanceAlg::Pythagoras.distance2d(*player_pos, *idx);
            if distance <= range as f32 {
                ctx.set_bg(idx.x, idx.y, RGB::named(rltk::BLUE));
                available_cells.push(idx);
            }
        }
    } else {
        return (ItemMenuResult::Cancel, None);
    }

    // Draw mouse cursor
    let mouse_pos = ctx.mouse_pos();
    let mut valid_target = false;
    for idx in available_cells.iter() { if idx.x == mouse_pos.0 && idx.y == mouse_pos.1 { valid_target = true; } }
    if valid_target {
        ctx.set_bg(mouse_pos.0, mouse_pos.1, RGB::named(rltk::CYAN));
        if ctx.left_click {
            return (ItemMenuResult::Selected, Some(Point::new(mouse_pos.0, mouse_pos.1)));
        }
    } else {
        ctx.set_bg(mouse_pos.0, mouse_pos.1, RGB::named(rltk::RED));
        if ctx.left_click {
            return (ItemMenuResult::Cancel, None);
        }
    }

    (ItemMenuResult::NoResponse, None)
}
}
So we start by obtaining the player's location and viewshed, and iterating cells they can see. We check the range of the cell versus the range of the item, and if it is in range - we highlight the cell in blue. We also maintain a list of what cells are possible to target. Then, we get the mouse position; if it is pointing at a valid target, we light it up in cyan - otherwise we use red. If you click a valid cell, it returns targeting information for where you are aiming - otherwise, it cancels.
Now we extend our ShowTargeting code to handle this:
#![allow(unused)]
fn main() {
RunState::ShowTargeting{range, item} => {
    let result = gui::ranged_target(self, ctx, range);
    match result.0 {
        gui::ItemMenuResult::Cancel => newrunstate = RunState::AwaitingInput,
        gui::ItemMenuResult::NoResponse => {}
        gui::ItemMenuResult::Selected => {
            let mut intent = self.ecs.write_storage::<WantsToUseItem>();
            intent.insert(*self.ecs.fetch::<Entity>(), WantsToUseItem{ item, target: result.1 }).expect("Unable to insert intent");
            newrunstate = RunState::PlayerTurn;
        }
    }
}
}
What's this target? I added another field to WantsToUseItem in components.rs:
#![allow(unused)] fn main() { #[derive(Component, Debug, ConvertSaveload, Clone)] pub struct WantsToUseItem { pub item : Entity, pub target : Option<rltk::Point> } }
So now when you receive a WantsToUseItem, you can now that the user is the owning entity, the item is the item field, and it is aimed at target - if there is one (targeting doesn't make much sense for healing potions!).
So now we can add another condition to our ItemUseSystem:
#![allow(unused)] fn main() { // If it inflicts damage, apply it to the target cell let item_damages = inflict_damage.get(useitem.item); match item_damages { None => {} Some(damage) => { let target_point = useitem.target.unwrap(); let idx = map.xy_idx(target_point.x, target_point.y); used_item = false; for mob in map.tile_content[idx].iter() { SufferDamage::new_damage(&mut suffer_damage, *mob, damage.damage); if entity == *player_entity { let mob_name = names.get(*mob).unwrap(); let item_name = names.get(useitem.item).unwrap(); gamelog.entries.push(format!("You use {} on {}, inflicting {} hp.", item_name.name, mob_name.name, damage.damage)); } used_item = true; } } } }
This checks to see if we have an InflictsDamage component on the item - and if it does, applies the damage to everyone in the targeted cell.
If you cargo run the game, you can now blast entities with your magic missile scrolls!
Introducing Area of Effect
We'll add another scroll type - Fireball. It's an old favorite, and introduces AoE - Area of Effect - damage. We'll start by adding a component to indicate our intent:
#![allow(unused)] fn main() { #[derive(Component, Debug)] pub struct AreaOfEffect { pub radius : i32 } }
We'll extend the random_item function in spawner.rs to offer it as an option:
#![allow(unused)] fn main() { fn random_item(ecs: &mut World, x: i32, y: i32) { let roll :i32; { let mut rng = ecs.write_resource::<RandomNumberGenerator>(); roll = rng.roll_dice(1, 3); } match roll { 1 => { health_potion(ecs, x, y) } 2 => { fireball_scroll(ecs, x, y) } _ => { magic_missile_scroll(ecs, x, y) } } } }
So now we can write a fireball_scroll function to actually spawn them. This is a lot like the other items:
#![allow(unused)] fn main() { fn fireball_scroll(ecs: &mut World, x: i32, y: i32) { ecs.create_entity() .with(Position{ x, y }) .with(Renderable{ glyph: rltk::to_cp437(')'), fg: RGB::named(rltk::ORANGE), bg: RGB::named(rltk::BLACK), render_order: 2 }) .with(Name{ name : "Fireball Scroll".to_string() }) .with(Item{}) .with(Consumable{}) .with(Ranged{ range: 6 }) .with(InflictsDamage{ damage: 20 }) .with(AreaOfEffect{ radius: 3 }) .build(); } }
Notice that it's basically the same - but we're adding an AreaOfEffect component to indicate that it is what we want. If you were to cargo run now, you'd see Fireball scrolls in the game - and they would inflict damage on a single entity. Clearly, we must fix that!
In our UseItemSystem, we'll build a new section to figure out a list of targets for an effect:
#![allow(unused)] fn main() { // Targeting let mut targets : Vec<Entity> = Vec::new(); match useitem.target { None => { targets.push( *player_entity ); } Some(target) => { let area_effect = aoe.get(useitem.item); match area_effect { None => { // Single target in tile let idx = map.xy_idx(target.x, target.y); for mob in map.tile_content[idx].iter() { targets.push(*mob); } } Some(area_effect) => { // AoE let mut blast_tiles = rltk::field_of_view(target, area_effect.radius, &*map); blast_tiles.retain(|p| p.x > 0 && p.x < map.width-1 && p.y > 0 && p.y < map.height-1 ); for tile_idx in blast_tiles.iter() { let idx = map.xy_idx(tile_idx.x, tile_idx.y); for mob in map.tile_content[idx].iter() { targets.push(*mob); } } } } } } }
This says "if there is no target, apply it to the player". If there is a target, check to see if it is an Area of Effect event; if it is - plot a viewshed from that point of the appropriate radius, and add every entity in the target area. If it isn't, we just get the entities in the target tile.
So now we need to make the effect code generic. We don't want to assume that effects are independent; later on, we may decide that zapping something with a scroll has all manner of effects! So for healing, it looks like this:
#![allow(unused)] fn main() { // If it heals, apply the healing let item_heals = healing.get(useitem.item); match item_heals { None => {} Some(healer) => { for target in targets.iter() { let stats = combat_stats.get_mut(*target); if let Some(stats) = stats { stats.hp = i32::min(stats.max_hp, stats.hp + healer.heal_amount); if entity == *player_entity { gamelog.entries.push(format!("You use the {}, healing {} hp.", names.get(useitem.item).unwrap().name, healer.heal_amount)); } } } } } }
The damage code is actually simplified, since we've already calculated targets:
#![allow(unused)] fn main() { // If it inflicts damage, apply it to the target cell let item_damages = inflict_damage.get(useitem.item); match item_damages { None => {} Some(damage) => { used_item = false; for mob in targets.iter() { SufferDamage::new_damage(&mut suffer_damage, *mob, damage.damage); if entity == *player_entity { let mob_name = names.get(*mob).unwrap(); let item_name = names.get(useitem.item).unwrap(); gamelog.entries.push(format!("You use {} on {}, inflicting {} hp.", item_name.name, mob_name.name, damage.damage)); } used_item = true; } } } }
If you cargo run the project now, you can use magic missile scrolls, fireball scrolls and health potions.
Confusion Scrolls
Let's add another item - confusion scrolls. These will target a single entity at range, and make them Confused for a few turns - during which time they will do nothing. We'll start by describing what we want in the item spawning code:
#![allow(unused)] fn main() { fn confusion_scroll(ecs: &mut World, x: i32, y: i32) { ecs.create_entity() .with(Position{ x, y }) .with(Renderable{ glyph: rltk::to_cp437(')'), fg: RGB::named(rltk::PINK), bg: RGB::named(rltk::BLACK), render_order: 2 }) .with(Name{ name : "Confusion Scroll".to_string() }) .with(Item{}) .with(Consumable{}) .with(Ranged{ range: 6 }) .with(Confusion{ turns: 4 }) .build(); } }
We'll also add it to the item choices:
#![allow(unused)] fn main() { fn random_item(ecs: &mut World, x: i32, y: i32) { let roll :i32; { let mut rng = ecs.write_resource::<RandomNumberGenerator>(); roll = rng.roll_dice(1, 4); } match roll { 1 => { health_potion(ecs, x, y) } 2 => { fireball_scroll(ecs, x, y) } 3 => { confusion_scroll(ecs, x, y) } _ => { magic_missile_scroll(ecs, x, y) } } } }
We'll add a new component (and register it!):
#![allow(unused)] fn main() { #[derive(Component, Debug)] pub struct Confusion { pub turns : i32 } }
That's enough to have them appear, be triggerable and cause targeting to happen - but nothing will happen when it is used. We'll add the ability to pass along confusion to the ItemUseSystem:
#![allow(unused)] fn main() { // Can it pass along confusion? Note the use of scopes to escape from the borrow checker! let mut add_confusion = Vec::new(); { let causes_confusion = confused.get(useitem.item); match causes_confusion { None => {} Some(confusion) => { used_item = false; for mob in targets.iter() { add_confusion.push((*mob, confusion.turns )); if entity == *player_entity { let mob_name = names.get(*mob).unwrap(); let item_name = names.get(useitem.item).unwrap(); gamelog.entries.push(format!("You use {} on {}, confusing them.", item_name.name, mob_name.name)); } } } } } for mob in add_confusion.iter() { confused.insert(mob.0, Confusion{ turns: mob.1 }).expect("Unable to insert status"); } }
Alright! Now we can add the Confused status to anything. We should update the monster_ai_system to use it. Replace the loop with:
#![allow(unused)] fn main() { for (entity, mut viewshed,_monster,mut pos) in (&entities, &mut viewshed, &monster, &mut position).join() { let mut can_act = true; let is_confused = confused.get_mut(entity); if let Some(i_am_confused) = is_confused { i_am_confused.turns -= 1; if i_am_confused.turns < 1 { confused.remove(entity); } can_act = false; } if can_act { let distance = rltk::DistanceAlg::Pythagoras.distance2d(Point::new(pos.x, pos.y), *player_pos); if distance < 1.5 { wants_to_melee.insert(entity, WantsToMelee{ target: *player_entity }).expect("Unable to insert attack"); } else if viewshed.visible_tiles.contains(&*player_pos) { // Path to the player let path = rltk::a_star_search( map.xy_idx(pos.x, pos.y), map.xy_idx(player_pos.x, player_pos.y), &mut *map ); if path.success && path.steps.len()>1 { let mut idx = map.xy_idx(pos.x, pos.y); map.blocked[idx] = false; pos.x = path.steps[1] as i32 % map.width; pos.y = path.steps[1] as i32 / map.width; idx = map.xy_idx(pos.x, pos.y); map.blocked[idx] = true; viewshed.dirty = true; } } } } }
If this sees a Confused component, it decrements the timer. If the timer hits 0, it removes it. It then returns, making the monster skip its turn.
The source code for this chapter may be found here
Run this chapter's example with web assembly, in your browser (WebGL2 required)
Copyright (C) 2019, Herbert Wolverson.
Loading and Saving the Game
About this tutorial
This tutorial is free and open source, and all code uses the MIT license - so you are free to do with it as you like. My hope is that you will enjoy the tutorial, and make great games!
If you enjoy this and would like me to keep writing, please consider supporting my Patreon.
In the last few chapters, we've focused on getting a playable (if not massively fun) game going. You can run around, slay monsters, and make use of various items. That's a great start! Most games let you stop playing, and come back later to continue. Fortunately, Rust (and associated libraries) makes it relatively easy.
A Main Menu
If you're going to resume a game, you need somewhere from which to do so! A main menu also gives you the option to abandon your last save, possibly view credits, and generally tell the world that your game is here - and written by you. It's an important thing to have, so we'll put one together.
Being in the menu is a state - so we'll add it to the ever-expanding RunState enum. We want to include menu state inside it, so the definition winds up looking like this:
#![allow(unused)] fn main() { #[derive(PartialEq, Copy, Clone)] pub enum RunState { AwaitingInput, PreRun, PlayerTurn, MonsterTurn, ShowInventory, ShowDropItem, ShowTargeting { range : i32, item : Entity}, MainMenu { menu_selection : gui::MainMenuSelection } } }
In gui.rs, we add a couple of enum types to handle main menu selections:
#![allow(unused)] fn main() { #[derive(PartialEq, Copy, Clone)] pub enum MainMenuSelection { NewGame, LoadGame, Quit } #[derive(PartialEq, Copy, Clone)] pub enum MainMenuResult { NoSelection{ selected : MainMenuSelection }, Selected{ selected: MainMenuSelection } } }
Your GUI is probably now telling you that main.rs has errors! It's right - we need to handle the new RunState option. We'll need to change things around a bit to ensure that we aren't also rendering the GUI and map when in the menu. So we rearrange tick:
#![allow(unused)] fn main() { fn tick(&mut self, ctx : &mut Rltk) { let mut newrunstate; { let runstate = self.ecs.fetch::<RunState>(); newrunstate = *runstate; } ctx.cls(); match newrunstate { RunState::MainMenu{..} => {} _ => { draw_map(&self.ecs, ctx); { let positions = self.ecs.read_storage::<Position>(); let renderables = self.ecs.read_storage::<Renderable>(); let map = self.ecs.fetch::<Map>(); let mut data = (&positions, &renderables).join().collect::<Vec<_>>(); data.sort_by(|&a, &b| b.1.render_order.cmp(&a.1.render_order) ); for (pos, render) in data.iter() { let idx = map.xy_idx(pos.x, pos.y); if map.visible_tiles[idx] { ctx.set(pos.x, pos.y, render.fg, render.bg, render.glyph) } } gui::draw_ui(&self.ecs, ctx); } } } ... }
We'll also handle the MainMenu state in our large match for RunState:
#![allow(unused)] fn main() { RunState::MainMenu{ .. } => { let result = gui::main_menu(self, ctx); match result { gui::MainMenuResult::NoSelection{ selected } => newrunstate = RunState::MainMenu{ menu_selection: selected }, gui::MainMenuResult::Selected{ selected } => { match selected { gui::MainMenuSelection::NewGame => newrunstate = RunState::PreRun, gui::MainMenuSelection::LoadGame => newrunstate = RunState::PreRun, gui::MainMenuSelection::Quit => { ::std::process::exit(0); } } } } } }
We're basically updating the state with the new menu selection, and if something has been selected we change the game state. For Quit, we simply terminate the process. For now, we'll make loading/starting a game do the same thing: go into the PreRun state to setup the game.
The last thing to do is to write the menu itself. In menu.rs:
pub fn main_menu(gs : &mut State, ctx : &mut Rltk) -> MainMenuResult { let runstate = gs.ecs.fetch::<RunState>(); ctx.print_color_centered(15, RGB::named(rltk::YELLOW), RGB::named(rltk::BLACK), "Rust Roguelike Tutorial"); if let RunState::MainMenu{ menu_selection : selection } = *runstate { if selection == MainMenuSelection::NewGame { ctx.print_color_centered(24, RGB::named(rltk::MAGENTA), RGB::named(rltk::BLACK), "Begin New Game"); } else { ctx.print_color_centered(24, RGB::named(rltk::WHITE), RGB::named(rltk::BLACK), "Begin New Game"); } if selection == MainMenuSelection::LoadGame { ctx.print_color_centered(25, RGB::named(rltk::MAGENTA), RGB::named(rltk::BLACK), "Load Game"); } else { ctx.print_color_centered(25, RGB::named(rltk::WHITE), RGB::named(rltk::BLACK), "Load Game"); } if selection == MainMenuSelection::Quit { ctx.print_color_centered(26, RGB::named(rltk::MAGENTA), RGB::named(rltk::BLACK), "Quit"); } else { ctx.print_color_centered(26, RGB::named(rltk::WHITE), RGB::named(rltk::BLACK), "Quit"); } match ctx.key { None => return MainMenuResult::NoSelection{ selected: selection }, Some(key) => { match key { VirtualKeyCode::Escape => { return MainMenuResult::NoSelection{ selected: MainMenuSelection::Quit } } VirtualKeyCode::Up => { let newselection; match selection { MainMenuSelection::NewGame => newselection = MainMenuSelection::Quit, MainMenuSelection::LoadGame => newselection = MainMenuSelection::NewGame, MainMenuSelection::Quit => newselection = MainMenuSelection::LoadGame } return MainMenuResult::NoSelection{ selected: newselection } } VirtualKeyCode::Down => { let newselection; match selection { MainMenuSelection::NewGame => newselection = MainMenuSelection::LoadGame, MainMenuSelection::LoadGame => newselection = MainMenuSelection::Quit, MainMenuSelection::Quit => newselection = MainMenuSelection::NewGame } return MainMenuResult::NoSelection{ selected: newselection } } VirtualKeyCode::Return => return MainMenuResult::Selected{ selected : selection }, _ => return MainMenuResult::NoSelection{ selected: selection } } } } } MainMenuResult::NoSelection { selected: MainMenuSelection::NewGame } }
That's a bit of a mouthful, but it displays menu options and lets you select them with the up/down keys and enter. It's very careful to not modify state itself, to keep things clear.
Including Serde
Serde is pretty much the gold-standard for serialization in Rust. It makes a lot of things easier! So the first step is to include it. In your project's Cargo.toml file, we'll expand the dependencies section to include it:
[dependencies]
rltk = { version = "0.8.0", features = ["serde"] }
specs = { version = "0.16.1", features = ["serde"] }
specs-derive = "0.4.1"
serde= { version = "1.0.93", features = ["derive"] }
serde_json = "1.0.39"
It may be worth calling cargo run now - it will take a while, downloading the new dependencies (and all of their dependencies) and building them for you. It should keep them around so you don't have to wait this long every time you build.
Adding a "SaveGame" state
We'll extend RunState once more to support game saving:
#![allow(unused)] fn main() { #[derive(PartialEq, Copy, Clone)] pub enum RunState { AwaitingInput, PreRun, PlayerTurn, MonsterTurn, ShowInventory, ShowDropItem, ShowTargeting { range : i32, item : Entity}, MainMenu { menu_selection : gui::MainMenuSelection }, SaveGame } }
In tick, we'll add dummy code for now:
#![allow(unused)] fn main() { RunState::SaveGame => { newrunstate = RunState::MainMenu{ menu_selection : gui::MainMenuSelection::LoadGame }; } }
In player.rs, we'll add another keyboard handler - escape:
#![allow(unused)] fn main() { // Save and Quit VirtualKeyCode::Escape => return RunState::SaveGame, }
If you cargo run now, you can start a game and press escape to quit to the menu.
Getting started with saving the game
Now that the scaffolding is in place, it's time to actually save something! Lets start simple, to get a feel for Serde. In the tick function, we extend the save system to just dump a JSON representation of the map to the console:
#![allow(unused)] fn main() { RunState::SaveGame => { let data = serde_json::to_string(&*self.ecs.fetch::<Map>()).unwrap(); println!("{}", data); newrunstate = RunState::MainMenu{ menu_selection : gui::MainMenuSelection::LoadGame }; } }
We'll also need to add an extern crate serde; to the top of main.rs.
This won't compile, because we need to tell Map to serialize itself! Fortunately, serde provides some helpers to make this easy. At the top of map.rs, we add use serde::{Serialize, Deserialize};. We then decorate the map to derive serialization and de-serialization code:
#![allow(unused)] fn main() { #[derive(Default, Serialize, Deserialize, Clone)] pub struct Map { pub tiles : Vec<TileType>, pub rooms : Vec<Rect>, pub width : i32, pub height : i32, pub revealed_tiles : Vec<bool>, pub visible_tiles : Vec<bool>, pub blocked : Vec<bool>, #[serde(skip_serializing)] #[serde(skip_deserializing)] pub tile_content : Vec<Vec<Entity>> } }
Note that we've decorated tile_content with directives to not serialize/de-serialize it. This prevents us from needing to store the entities, and since this data is rebuilt every frame - it doesn't matter. The game still won't compile; we need to add similar decorators to TileType and Rect:
#![allow(unused)] fn main() { #[derive(PartialEq, Copy, Clone, Serialize, Deserialize)] pub enum TileType { Wall, Floor } }
#![allow(unused)] fn main() { #[derive(PartialEq, Copy, Clone, Serialize, Deserialize)] pub struct Rect { pub x1 : i32, pub x2 : i32, pub y1 : i32, pub y2 : i32 } }
If you cargo run the project now, when you hit escape it will dump a huge blob of JSON data to the console. That's the game map!
Saving entity state
Now that we've seen how useful serde is, we should start to use it for the game itself. This is harder than one might expect, because of how specs handles Entity structures: their ID # is purely synthetic, with no guaranty that you'll get the same one next time! Also, you may not want to save everything - so specs introduces a concept of markers to help with this. It winds up being a bit more of a mouthful than it really needs to be, but gives a pretty powerful serialization system.
Introducing Markers
First of all, in main.rs we'll tell Rust that we'd like to make use of the marker functionality:
#![allow(unused)] fn main() { use specs::saveload::{SimpleMarker, SimpleMarkerAllocator}; }
In components.rs, we'll add a marker type:
#![allow(unused)] fn main() { pub struct SerializeMe; }
Back in main.rs, we'll add SerializeMe to the list of things that we register:
#![allow(unused)] fn main() { gs.ecs.register::<SimpleMarker<SerializeMe>>(); }
We'll also add an entry to the ECS resources, which gets used to determine the next identity:
#![allow(unused)] fn main() { gs.ecs.insert(SimpleMarkerAllocator::<SerializeMe>::new()); }
Finally, in spawners.rs we tell each entity builder to include the marker. Here's the complete entry for the Player:
#![allow(unused)] fn main() { pub fn player(ecs : &mut World, player_x : i32, player_y : i32) -> Entity { ecs .create_entity() .with(Position { x: player_x, y: player_y }) .with(Renderable { glyph: rltk::to_cp437('@'), fg: RGB::named(rltk::YELLOW), bg: RGB::named(rltk::BLACK), render_order: 0 }) .with(Player{}) .with(Viewshed{ visible_tiles : Vec::new(), range: 8, dirty: true }) .with(Name{name: "Player".to_string() }) .with(CombatStats{ max_hp: 30, hp: 30, defense: 2, power: 5 }) .marked::<SimpleMarker<SerializeMe>>() .build() } }
The new line (.marked::<SimpleMarker<SerializeMe>>()) needs to be repeated for all of our spawners in this file. It's worth looking at the source for this chapter; to avoid making a huge chapter full of source code, I've omitted the repeated details.
The ConvertSaveload derive macro
The Entity class itself (provided by Specs) isn't directly serializable; it's actually a reference to an identity in a special structure called a "slot map" (basically a really efficient way to store data and keep the locations stable until you delete it, but re-use the space when it becomes available). So, in order to save and load Entity classes, it becomes necessary to convert these synthetic identities to unique ID numbers. Fortunately, Specs provides a derive macro called ConvertSaveload for this purpose. It works for most components, but not for all!
It's pretty easy to serialize a type that doesn't have an Entity in it - but does have data: mark it with #[derive(Component, ConvertSaveload, Clone)]. So we go through all the simple component types in components.rs; for example, here's Position:
#![allow(unused)] fn main() { #[derive(Component, ConvertSaveload, Clone)] pub struct Position { pub x: i32, pub y: i32, } }
So what this is saying is that:
- The structure is a
Component. You can replace this with writing code specifying Specs storage if you prefer, but the macro is much easier! ConvertSaveloadis actually addingSerializeandDeserialize, but with extra conversion for anyEntityclasses it encounters.Cloneis saying "this structure can be copied in memory from one point to another." This is necessary for the inner-workings of Serde, and also allows you to attach.clone()to the end of any reference to a component - and get another, perfect copy of it. In most cases,cloneis really fast (and occasionally the compiler can make it do nothing at all!)
When you have a component with no data, the ConvertSaveload macro doesn't work! Fortunately, these don't require any additional conversion - so you can fall back to the default Serde syntax. Here's a non-data ("tag") class:
#![allow(unused)] fn main() { #[derive(Component, Serialize, Deserialize, Clone)] pub struct Player {} }
Actually saving something
The code for loading and saving gets large, so we've moved it into saveload_system.rs. Then include a mod saveload_system; in main.rs, and replace the SaveGame state with:
#![allow(unused)] fn main() { RunState::SaveGame => { saveload_system::save_game(&mut self.ecs); newrunstate = RunState::MainMenu{ menu_selection : gui::MainMenuSelection::LoadGame }; } }
So... onto implementing save_game. Serde and Specs work decently together, but the bridge is still pretty roughly defined. I kept running into problems like it failing to compile if I had more than 16 component types! To get around this, I build a macro. I recommend just copying the macro until you feel ready to learn Rust's (impressive) macro system.
#![allow(unused)] fn main() { macro_rules! serialize_individually { ($ecs:expr, $ser:expr, $data:expr, $( $type:ty),*) => { $( SerializeComponents::<NoError, SimpleMarker<SerializeMe>>::serialize( &( $ecs.read_storage::<$type>(), ), &$data.0, &$data.1, &mut $ser, ) .unwrap(); )* }; } }
The short version of what it does is that it takes your ECS as the first parameter, and a tuple with your entity store and "markers" stores in it (you'll see this in a moment). Every parameter after that is a type - listing a type stored in your ECS. These are repeating rules, so it issues one SerializeComponent::serialize call per type. It's not as efficient as doing them all at once, but it works - and doesn't fall over when you exceed 16 types! The save_game function then looks like this:
#![allow(unused)] fn main() { pub fn save_game(ecs : &mut World) { // Create helper let mapcopy = ecs.get_mut::<super::map::Map>().unwrap().clone(); let savehelper = ecs .create_entity() .with(SerializationHelper{ map : mapcopy }) .marked::<SimpleMarker<SerializeMe>>() .build(); // Actually serialize { let data = ( ecs.entities(), ecs.read_storage::<SimpleMarker<SerializeMe>>() ); let writer = File::create("./savegame.json").unwrap(); let mut serializer = serde_json::Serializer::new(writer); serialize_individually!(ecs, serializer, data, Position, Renderable, Player, Viewshed, Monster, Name, BlocksTile, CombatStats, SufferDamage, WantsToMelee, Item, Consumable, Ranged, InflictsDamage, AreaOfEffect, Confusion, ProvidesHealing, InBackpack, WantsToPickupItem, WantsToUseItem, WantsToDropItem, SerializationHelper ); } // Clean up ecs.delete_entity(savehelper).expect("Crash on cleanup"); } }
What's going on here, then?
- We start by creating a new component type -
SerializationHelperthat stores a copy of the map (see, we are using the map stuff from above!). It then creates a new entity, and gives it the new component - with a copy of the map (theclonecommand makes a deep copy). This is needed so we don't need to serialize the map separately. - We enter a block to avoid borrow-checker issues.
- We set
datato be a tuple, containing theEntitystore andReadStorageforSimpleMarker. These will be used by the save macro. - We open a
Filecalledsavegame.jsonin the current directory. - We obtain a JSON serializer from Serde.
- We call the
serialize_individuallymacro with all of our types. - We delete the temporary helper entity we created.
If you cargo run and start a game, then save it - you'll find a savegame.json file has appeared - with your game state in it. Yay!
Restoring Game State
Now that we have the game data, it's time to load it!
Is there a saved game?
First, we need to know if there is a saved game to load. In saveload_system.rs, we add the following function:
#![allow(unused)] fn main() { pub fn does_save_exist() -> bool { Path::new("./savegame.json").exists() } }
Then in gui.rs, we extend the main_menu function to check for the existence of a file - and not offer to load it if it isn't there:
pub fn main_menu(gs : &mut State, ctx : &mut Rltk) -> MainMenuResult { let save_exists = super::saveload_system::does_save_exist(); let runstate = gs.ecs.fetch::<RunState>(); ctx.print_color_centered(15, RGB::named(rltk::YELLOW), RGB::named(rltk::BLACK), "Rust Roguelike Tutorial"); if let RunState::MainMenu{ menu_selection : selection } = *runstate { if selection == MainMenuSelection::NewGame { ctx.print_color_centered(24, RGB::named(rltk::MAGENTA), RGB::named(rltk::BLACK), "Begin New Game"); } else { ctx.print_color_centered(24, RGB::named(rltk::WHITE), RGB::named(rltk::BLACK), "Begin New Game"); } if save_exists { if selection == MainMenuSelection::LoadGame { ctx.print_color_centered(25, RGB::named(rltk::MAGENTA), RGB::named(rltk::BLACK), "Load Game"); } else { ctx.print_color_centered(25, RGB::named(rltk::WHITE), RGB::named(rltk::BLACK), "Load Game"); } } if selection == MainMenuSelection::Quit { ctx.print_color_centered(26, RGB::named(rltk::MAGENTA), RGB::named(rltk::BLACK), "Quit"); } else { ctx.print_color_centered(26, RGB::named(rltk::WHITE), RGB::named(rltk::BLACK), "Quit"); } match ctx.key { None => return MainMenuResult::NoSelection{ selected: selection }, Some(key) => { match key { VirtualKeyCode::Escape => { return MainMenuResult::NoSelection{ selected: MainMenuSelection::Quit } } VirtualKeyCode::Up => { let mut newselection; match selection { MainMenuSelection::NewGame => newselection = MainMenuSelection::Quit, MainMenuSelection::LoadGame => newselection = MainMenuSelection::NewGame, MainMenuSelection::Quit => newselection = MainMenuSelection::LoadGame } if newselection == MainMenuSelection::LoadGame && !save_exists { newselection = MainMenuSelection::NewGame; } return MainMenuResult::NoSelection{ selected: newselection } } VirtualKeyCode::Down => { let mut newselection; match selection { MainMenuSelection::NewGame => newselection = MainMenuSelection::LoadGame, MainMenuSelection::LoadGame => newselection = MainMenuSelection::Quit, MainMenuSelection::Quit => newselection = MainMenuSelection::NewGame } if newselection == MainMenuSelection::LoadGame && !save_exists { newselection = MainMenuSelection::Quit; } return MainMenuResult::NoSelection{ selected: newselection } } VirtualKeyCode::Return => return MainMenuResult::Selected{ selected : selection }, _ => return MainMenuResult::NoSelection{ selected: selection } } } } } MainMenuResult::NoSelection { selected: MainMenuSelection::NewGame } }
Finally, we'll modify the calling code in main.rs to call game loading:
#![allow(unused)] fn main() { RunState::MainMenu{ .. } => { let result = gui::main_menu(self, ctx); match result { gui::MainMenuResult::NoSelection{ selected } => newrunstate = RunState::MainMenu{ menu_selection: selected }, gui::MainMenuResult::Selected{ selected } => { match selected { gui::MainMenuSelection::NewGame => newrunstate = RunState::PreRun, gui::MainMenuSelection::LoadGame => { saveload_system::load_game(&mut self.ecs); newrunstate = RunState::AwaitingInput; } gui::MainMenuSelection::Quit => { ::std::process::exit(0); } } } } } }
Actually loading the game
In saveload_system.rs, we're going to need another macro! This is pretty much the same as the serialize_individually macro - but reverses the process, and includes some slight changes:
#![allow(unused)] fn main() { macro_rules! deserialize_individually { ($ecs:expr, $de:expr, $data:expr, $( $type:ty),*) => { $( DeserializeComponents::<NoError, _>::deserialize( &mut ( &mut $ecs.write_storage::<$type>(), ), &mut $data.0, // entities &mut $data.1, // marker &mut $data.2, // allocater &mut $de, ) .unwrap(); )* }; } }
This is called from a new function, load_game:
#![allow(unused)] fn main() { pub fn load_game(ecs: &mut World) { { // Delete everything let mut to_delete = Vec::new(); for e in ecs.entities().join() { to_delete.push(e); } for del in to_delete.iter() { ecs.delete_entity(*del).expect("Deletion failed"); } } let data = fs::read_to_string("./savegame.json").unwrap(); let mut de = serde_json::Deserializer::from_str(&data); { let mut d = (&mut ecs.entities(), &mut ecs.write_storage::<SimpleMarker<SerializeMe>>(), &mut ecs.write_resource::<SimpleMarkerAllocator<SerializeMe>>()); deserialize_individually!(ecs, de, d, Position, Renderable, Player, Viewshed, Monster, Name, BlocksTile, CombatStats, SufferDamage, WantsToMelee, Item, Consumable, Ranged, InflictsDamage, AreaOfEffect, Confusion, ProvidesHealing, InBackpack, WantsToPickupItem, WantsToUseItem, WantsToDropItem, SerializationHelper ); } let mut deleteme : Option<Entity> = None; { let entities = ecs.entities(); let helper = ecs.read_storage::<SerializationHelper>(); let player = ecs.read_storage::<Player>(); let position = ecs.read_storage::<Position>(); for (e,h) in (&entities, &helper).join() { let mut worldmap = ecs.write_resource::<super::map::Map>(); *worldmap = h.map.clone(); worldmap.tile_content = vec![Vec::new(); super::map::MAPCOUNT]; deleteme = Some(e); } for (e,_p,pos) in (&entities, &player, &position).join() { let mut ppos = ecs.write_resource::<rltk::Point>(); *ppos = rltk::Point::new(pos.x, pos.y); let mut player_resource = ecs.write_resource::<Entity>(); *player_resource = e; } } ecs.delete_entity(deleteme.unwrap()).expect("Unable to delete helper"); } }
That's quite the mouthful, so lets step through it:
- Inside a block (to keep the borrow checker happy), we iterate all entities in the game. We add them to a vector, and then iterate the vector - deleting the entities. This is a two-step process to avoid invalidating the iterator in the first pass.
- We open the
savegame.jsonfile, and attach a JSON deserializer. - Then we build the tuple for the macro, which requires mutable access to the entities store, write access to the marker store, and an allocator (from Specs).
- Now we pass that to the macro we just made, which calls the de-serializer for each type in turn. Since we saved in the same order, it will pick up everything.
- Now we go into another block, to avoid borrow conflicts with the previous code and the entity deletion.
- We first iterate all entities with a
SerializationHelpertype. If we find it, we get access to the resource storing the map - and replace it. Since we aren't serializingtile_content, we replace it with an empty set of vectors. - Then we find the player, by iterating entities with a
Playertype and aPositiontype. We store the world resources for the player entity and his/her position. - Finally, we delete the helper entity - so we won't have a duplicate if we save the game again.
If you cargo run now, you can load your saved game!
Just add permadeath!
It wouldn't really be a roguelike if we let you keep your save game after you reload! So we'll add one more function to saveload_system:
#![allow(unused)] fn main() { pub fn delete_save() { if Path::new("./savegame.json").exists() { std::fs::remove_file("./savegame.json").expect("Unable to delete file"); } } }
We'll add a call to main.rs to delete the save after we load the game:
#![allow(unused)] fn main() { gui::MainMenuSelection::LoadGame => { saveload_system::load_game(&mut self.ecs); newrunstate = RunState::AwaitingInput; saveload_system::delete_save(); } }
Web Assembly
The example as-is will compile and run on the web assembly (wasm32) platform: but as soon as you try to save the game, it crashes. Unfortunately (well, fortunately if you like your computer not being attacked by every website you go to!), wasm is sandboxed - and doesn't have the ability to save files locally.
Supporting saving via LocalStorage (a browser/JavaScript feature) is planned for a future version of RLTK. In the meantime, we'll add some wrappers to avoid the crash - and simply not actually save the game on wasm32.
Rust offers conditional compilation (if you are familiar with C, it's a lot like the #define madness you find in big, cross-platform libraries). In saveload_system.rs, we'll modify save_game to only compile on non-web assembly platforms:
#![allow(unused)] fn main() { #[cfg(not(target_arch = "wasm32"))] pub fn save_game(ecs : &mut World) { }
That # tag is scary looking, but it makes sense if you unwrap it. #[cfg()] means "only compile if the current configuration matches the contents of the parentheses. not() inverts the result of a check, so when we check that target_arch = "wasm32") (are we compiling for wasm32) the result is inverted. The end result of this is that the function only compiles if you aren't building for wasm32.
That's all well and good, but there are calls to that function - so compilation on wasm will fail. We'll add a stub function to take its place:
#![allow(unused)] fn main() { #[cfg(target_arch = "wasm32")] pub fn save_game(_ecs : &mut World) { } }
The #[cfg(target_arch = "wasm32")] prefix means "only compile this for web assembly". We've kept the function signature the same, but added a _ before _ecs - telling the compiler that we intend not to use that variable. Then we keep the function empty.
The result? You can compile for wasm32 and the save_game function simply doesn't do anything at all. The rest of the structure remains, so the game correctly returns to the main menu - but with no resume function.
(Why does the check that the file exists work? Rust is smart enough to say "no filesystem, so the file can't exist". Thanks, Rust!)
Wrap-up
This has been a long chapter, with quite heavy content. The great news is that we now have a framework for loading and saving the game whenever we want to. Adding components has gained some steps: we have to register them in main, tag them for Serialize, Deserialize, and remember to add them to our component type lists in saveload_system.rs. That could be easier - but it's a very solid foundation.
The source code for this chapter may be found here
Run this chapter's example with web assembly, in your browser (WebGL2 required)
Copyright (C) 2019, Herbert Wolverson.
Delving Deeper
About this tutorial
This tutorial is free and open source, and all code uses the MIT license - so you are free to do with it as you like. My hope is that you will enjoy the tutorial, and make great games!
If you enjoy this and would like me to keep writing, please consider supporting my Patreon.
We have all the basics of a dungeon crawler now, but only having a single level is a big limitation! This chapter will introduce depth, with a new dungeon being spawned on each level down. We'll track the player's depth, and encourage ever-deeper exploration. What could possibly go wrong for the player?
Indicating - and storing - depth
We'll start by adding the current depth to the map. In map.rs, we adjust the Map structure to include an integer for depth:
#![allow(unused)] fn main() { #[derive(Default, Serialize, Deserialize, Clone)] pub struct Map { pub tiles : Vec<TileType>, pub rooms : Vec<Rect>, pub width : i32, pub height : i32, pub revealed_tiles : Vec<bool>, pub visible_tiles : Vec<bool>, pub blocked : Vec<bool>, pub depth : i32, #[serde(skip_serializing)] #[serde(skip_deserializing)] pub tile_content : Vec<Vec<Entity>> } }
i32 is a primitive type, and automatically handled by Serde - the serialization library. So adding it here automatically adds it to our game save/load mechanism. Our map creation code also needs to indicate that we are on level 1 of the map. We want to be able to use the map generator for additional levels, so we add in a parameter also. The updated function looks like this:
#![allow(unused)] fn main() { pub fn new_map_rooms_and_corridors(new_depth : i32) -> Map { let mut map = Map{ tiles : vec![TileType::Wall; MAPCOUNT], rooms : Vec::new(), width : MAPWIDTH as i32, height: MAPHEIGHT as i32, revealed_tiles : vec![false; MAPCOUNT], visible_tiles : vec![false; MAPCOUNT], blocked : vec![false; MAPCOUNT], tile_content : vec![Vec::new(); MAPCOUNT], depth: new_depth }; ... }
We call this from the setup code in main.rs, so we need to amend the call to the dungeon builder also:
#![allow(unused)] fn main() { let map : Map = Map::new_map_rooms_and_corridors(1); }
That's it! Our maps now know about depth. You'll want to delete any savegame.json files you have lying around, since we've changed the format - loading will fail.
Showing the player their map depth
We'll modify the player's heads-up-display to indicate the current map depth. In gui.rs, inside the draw_ui function, we add the following:
#![allow(unused)] fn main() { let map = ecs.fetch::<Map>(); let depth = format!("Depth: {}", map.depth); ctx.print_color(2, 43, RGB::named(rltk::YELLOW), RGB::named(rltk::BLACK), &depth); }
If you cargo run the project now, you'll see that we are showing you your current depth:
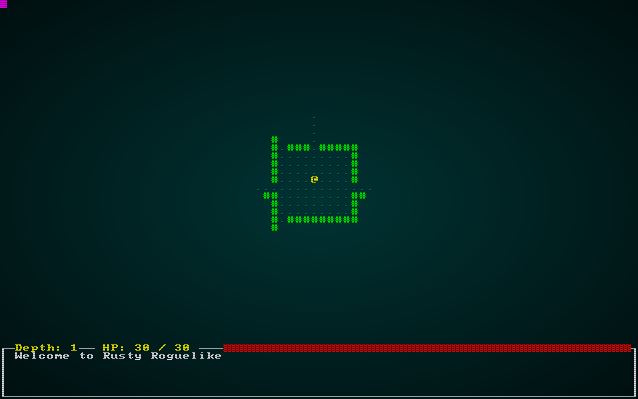
Adding down stairs
In map.rs, we have an enumeration - TileType - that lists the available tile types. We want to add a new one: down stairs. Modify the enumeration like this:
#![allow(unused)] fn main() { #[derive(PartialEq, Copy, Clone, Serialize, Deserialize)] pub enum TileType { Wall, Floor, DownStairs } }
We also want to be able to render the stairs. map.rs contains draw_map, and adding a tile type is a relatively simple task:
#![allow(unused)] fn main() { match tile { TileType::Floor => { glyph = rltk::to_cp437('.'); fg = RGB::from_f32(0.0, 0.5, 0.5); } TileType::Wall => { glyph = rltk::to_cp437('#'); fg = RGB::from_f32(0., 1.0, 0.); } TileType::DownStairs => { glyph = rltk::to_cp437('>'); fg = RGB::from_f32(0., 1.0, 1.0); } } }
Lastly, we should place the down stairs. We place the up stairs in the center of the first room the map generates - so we'll place the stairs in the center of the last room! Going back to new_map_rooms_and_corridors in map.rs, we modify it like this:
#![allow(unused)] fn main() { pub fn new_map_rooms_and_corridors(new_depth : i32) -> Map { let mut map = Map{ tiles : vec![TileType::Wall; MAPCOUNT], rooms : Vec::new(), width : MAPWIDTH as i32, height: MAPHEIGHT as i32, revealed_tiles : vec![false; MAPCOUNT], visible_tiles : vec![false; MAPCOUNT], blocked : vec![false; MAPCOUNT], tile_content : vec![Vec::new(); MAPCOUNT], depth: new_depth }; const MAX_ROOMS : i32 = 30; const MIN_SIZE : i32 = 6; const MAX_SIZE : i32 = 10; let mut rng = RandomNumberGenerator::new(); for i in 0..MAX_ROOMS { let w = rng.range(MIN_SIZE, MAX_SIZE); let h = rng.range(MIN_SIZE, MAX_SIZE); let x = rng.roll_dice(1, map.width - w - 1) - 1; let y = rng.roll_dice(1, map.height - h - 1) - 1; let new_room = Rect::new(x, y, w, h); let mut ok = true; for other_room in map.rooms.iter() { if new_room.intersect(other_room) { ok = false } } if ok { map.apply_room_to_map(&new_room); if !map.rooms.is_empty() { let (new_x, new_y) = new_room.center(); let (prev_x, prev_y) = map.rooms[map.rooms.len()-1].center(); if rng.range(0,2) == 1 { map.apply_horizontal_tunnel(prev_x, new_x, prev_y); map.apply_vertical_tunnel(prev_y, new_y, new_x); } else { map.apply_vertical_tunnel(prev_y, new_y, prev_x); map.apply_horizontal_tunnel(prev_x, new_x, new_y); } } map.rooms.push(new_room); } } let stairs_position = map.rooms[map.rooms.len()-1].center(); let stairs_idx = map.xy_idx(stairs_position.0, stairs_position.1); map.tiles[stairs_idx] = TileType::DownStairs; map } }
If you cargo run the project now, and run around a bit - you can find a set of down stairs! They don't do anything yet, but they are on the map.
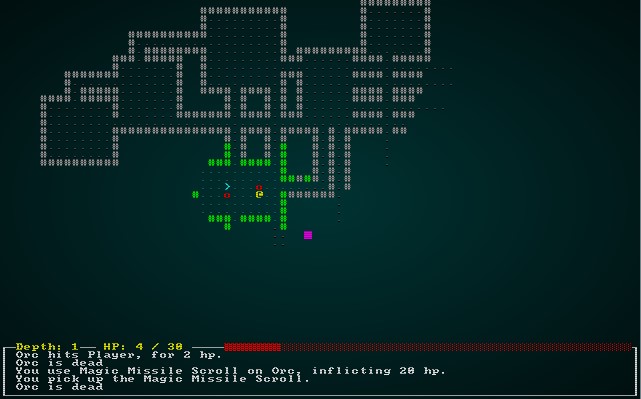
Actually going down a level
In player.rs, we have a big match statement that handles user input. Lets bind going to the next level to the period key (on US keyboards, that's > without the shift). Add this to the match:
#![allow(unused)] fn main() { // Level changes VirtualKeyCode::Period => { if try_next_level(&mut gs.ecs) { return RunState::NextLevel; } } }
Of course, now we need to implement try_next_level:
#![allow(unused)] fn main() { pub fn try_next_level(ecs: &mut World) -> bool { let player_pos = ecs.fetch::<Point>(); let map = ecs.fetch::<Map>(); let player_idx = map.xy_idx(player_pos.x, player_pos.y); if map.tiles[player_idx] == TileType::DownStairs { true } else { let mut gamelog = ecs.fetch_mut::<GameLog>(); gamelog.entries.push("There is no way down from here.".to_string()); false } } }
The eagle-eyed programmer will notice that we returned a new RunState - NextLevel. Since that doesn't exist yet, we'll open main.rs and implement it:
#![allow(unused)] fn main() { #[derive(PartialEq, Copy, Clone)] pub enum RunState { AwaitingInput, PreRun, PlayerTurn, MonsterTurn, ShowInventory, ShowDropItem, ShowTargeting { range : i32, item : Entity}, MainMenu { menu_selection : gui::MainMenuSelection }, SaveGame, NextLevel } }
Your IDE is by now complaining that we haven't actually implemented the new RunState! So we go into our ever-growing state handler in main.rs and add:
#![allow(unused)] fn main() { RunState::NextLevel => { self.goto_next_level(); newrunstate = RunState::PreRun; } }
We'll add a new impl section for State, so we can attach methods to it. We're first going to create a helper method:
#![allow(unused)] fn main() { impl State { fn entities_to_remove_on_level_change(&mut self) -> Vec<Entity> { let entities = self.ecs.entities(); let player = self.ecs.read_storage::<Player>(); let backpack = self.ecs.read_storage::<InBackpack>(); let player_entity = self.ecs.fetch::<Entity>(); let mut to_delete : Vec<Entity> = Vec::new(); for entity in entities.join() { let mut should_delete = true; // Don't delete the player let p = player.get(entity); if let Some(_p) = p { should_delete = false; } // Don't delete the player's equipment let bp = backpack.get(entity); if let Some(bp) = bp { if bp.owner == *player_entity { should_delete = false; } } if should_delete { to_delete.push(entity); } } to_delete } } }
When we go to the next level, we want to delete all the entities - except for the player and whatever equipment the player has. This helper function queries the ECS to obtain a list of entities for deletion. It's a bit long-winded, but relatively straightforward: we make a vector, and then iterate all entities. If the entity is the player, we mark it as should_delete=false. If it is in a backpack (having the InBackpack component), we check to see if the owner is the player - and if it is, we don't delete it.
Armed with that, we go to create the goto_next_level function, also inside the State implementation:
#![allow(unused)] fn main() { fn goto_next_level(&mut self) { // Delete entities that aren't the player or his/her equipment let to_delete = self.entities_to_remove_on_level_change(); for target in to_delete { self.ecs.delete_entity(target).expect("Unable to delete entity"); } // Build a new map and place the player let worldmap; { let mut worldmap_resource = self.ecs.write_resource::<Map>(); let current_depth = worldmap_resource.depth; *worldmap_resource = Map::new_map_rooms_and_corridors(current_depth + 1); worldmap = worldmap_resource.clone(); } // Spawn bad guys for room in worldmap.rooms.iter().skip(1) { spawner::spawn_room(&mut self.ecs, room); } // Place the player and update resources let (player_x, player_y) = worldmap.rooms[0].center(); let mut player_position = self.ecs.write_resource::<Point>(); *player_position = Point::new(player_x, player_y); let mut position_components = self.ecs.write_storage::<Position>(); let player_entity = self.ecs.fetch::<Entity>(); let player_pos_comp = position_components.get_mut(*player_entity); if let Some(player_pos_comp) = player_pos_comp { player_pos_comp.x = player_x; player_pos_comp.y = player_y; } // Mark the player's visibility as dirty let mut viewshed_components = self.ecs.write_storage::<Viewshed>(); let vs = viewshed_components.get_mut(*player_entity); if let Some(vs) = vs { vs.dirty = true; } // Notify the player and give them some health let mut gamelog = self.ecs.fetch_mut::<gamelog::GameLog>(); gamelog.entries.push("You descend to the next level, and take a moment to heal.".to_string()); let mut player_health_store = self.ecs.write_storage::<CombatStats>(); let player_health = player_health_store.get_mut(*player_entity); if let Some(player_health) = player_health { player_health.hp = i32::max(player_health.hp, player_health.max_hp / 2); } } }
This is a long function, but does everything we need. Lets break it down step-by-step:
- We use the helper function we just wrote to obtain a list of entities to delete, and ask the ECS to dispose of them.
- We create a
worldmapvariable, and enter a new scope. Otherwise, we get issues with immutable vs. mutable borrowing of the ECS. - In this scope, we obtain a writable reference to the resource for the current
Map. We get the current level, and replace the map with a new one - withcurrent_depth + 1as the new depth. We then store a clone of this in the outer variable and exit the scope (avoiding any borrowing/lifetime issues). - Now we use the same code we used in the initial setup to spawn bad guys and items in each room.
- Now we obtain the location of the first room, and update our resources for the player to set his/her location to the center of it. We also grab the player's
Positioncomponent and update it. - We obtain the player's
Viewshedcomponent, since it will be out of date now that the entire map has changed around him/her! We mark it as dirty - and will let the various systems take care of the rest. - We give the player a log entry that they have descended to the next level.
- We obtain the player's health component, and if their health is less than 50% - boost it to half.
If you cargo run the project now, you can run around and descend levels. Your depth indicator goes up - telling you that you are doing something right!
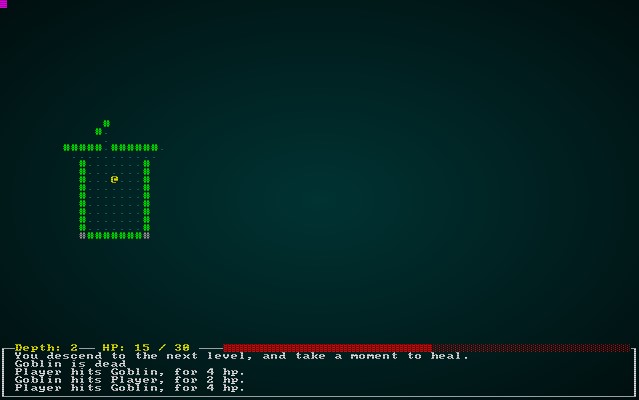
Wrapping Up
This chapter was a bit easier than the last couple! You can now descend through an effectively infinite (it's really bounded by the size of a 32-bit integer, but good luck getting through that many levels) dungeon. We've seen how the ECS can help, and how our serialization work readily expands to include new features like this one as we add to the project.
The source code for this chapter may be found here
Run this chapter's example with web assembly, in your browser (WebGL2 required)
Copyright (C) 2019, Herbert Wolverson.
Difficulty
About this tutorial
This tutorial is free and open source, and all code uses the MIT license - so you are free to do with it as you like. My hope is that you will enjoy the tutorial, and make great games!
If you enjoy this and would like me to keep writing, please consider supporting my Patreon.
Currently, you can advance through multiple dungeon levels - but they all have the same spawns. There's no ramp-up of difficulty as you advance, and no easy-mode to get you through the beginning. This chapter aims to change that.
Adding a wait key
An important tactical element of most roguelikes is the ability to skip a turn - let the monsters come to you (and not get the first hit!). As part of turning the game into a more tactical challenge, lets quickly implement turn skipping. In player.rs (along with the rest of the input), we'll add numeric keypad 5 and space to be skip:
#![allow(unused)] fn main() { // Skip Turn VirtualKeyCode::Numpad5 => return RunState::PlayerTurn, VirtualKeyCode::Space => return RunState::PlayerTurn, }
This adds a nice tactical dimension to the game: you can lure enemies towards you, and benefit from tactical placement. Another frequently found feature of roguelikes is waiting providing some healing if there are no enemies nearby. We'll only implement that for the player, since mobs suddenly healing up is disconcerting! So we'll change that to:
#![allow(unused)] fn main() { // Skip Turn VirtualKeyCode::Numpad5 => return skip_turn(&mut gs.ecs), VirtualKeyCode::Space => return skip_turn(&mut gs.ecs), }
Now we implement skip_turn:
#![allow(unused)] fn main() { fn skip_turn(ecs: &mut World) -> RunState { let player_entity = ecs.fetch::<Entity>(); let viewshed_components = ecs.read_storage::<Viewshed>(); let monsters = ecs.read_storage::<Monster>(); let worldmap_resource = ecs.fetch::<Map>(); let mut can_heal = true; let viewshed = viewshed_components.get(*player_entity).unwrap(); for tile in viewshed.visible_tiles.iter() { let idx = worldmap_resource.xy_idx(tile.x, tile.y); for entity_id in worldmap_resource.tile_content[idx].iter() { let mob = monsters.get(*entity_id); match mob { None => {} Some(_) => { can_heal = false; } } } } if can_heal { let mut health_components = ecs.write_storage::<CombatStats>(); let player_hp = health_components.get_mut(*player_entity).unwrap(); player_hp.hp = i32::min(player_hp.hp + 1, player_hp.max_hp); } RunState::PlayerTurn } }
This looks up various entities, and then iterates the player's viewshed using the tile_content system. It checks what the player can see for monsters; if no monster is present, it heals the player by 1 hp. This encourages cerebral play - and can be balanced with the inclusion of a hunger clock at a later date. It also makes the game really easy - but we're getting to that!
Increased difficulty as you delve: spawn tables
Thus far, we've been using a simple spawn system: it randomly picks a number of monsters and items, and then picks each with an equal weight. That's not much like "normal" games, which tend to make some things rare - and some things common. We'll create a generic random_table system, for use in the spawn system. Create a new file, random_table.rs and put the following in it:
#![allow(unused)] fn main() { use rltk::RandomNumberGenerator; pub struct RandomEntry { name : String, weight : i32 } impl RandomEntry { pub fn new<S:ToString>(name: S, weight: i32) -> RandomEntry { RandomEntry{ name: name.to_string(), weight } } } #[derive(Default)] pub struct RandomTable { entries : Vec<RandomEntry>, total_weight : i32 } impl RandomTable { pub fn new() -> RandomTable { RandomTable{ entries: Vec::new(), total_weight: 0 } } pub fn add<S:ToString>(mut self, name : S, weight: i32) -> RandomTable { self.total_weight += weight; self.entries.push(RandomEntry::new(name.to_string(), weight)); self } pub fn roll(&self, rng : &mut RandomNumberGenerator) -> String { if self.total_weight == 0 { return "None".to_string(); } let mut roll = rng.roll_dice(1, self.total_weight)-1; let mut index : usize = 0; while roll > 0 { if roll < self.entries[index].weight { return self.entries[index].name.clone(); } roll -= self.entries[index].weight; index += 1; } "None".to_string() } } }
So this creates a new type, random_table. It adds a new method to it, to facilitate making a new one. It also creates a vector or entries, each of which has a weight and a name (passing strings around isn't very efficient, but makes for clear example code!). It also implements an add function that lets you pass in a new name and weight, and updates the structure's total_weight. Finally, roll makes a dice roll from 0 .. total_weight - 1, and iterates through entries. If the roll is below the weight, it returns it - otherwise, it reduces the roll by the weight and tests the next entry. This gives a chance equal to the relative weight of the entry for any given item in the table. There's a bit of extra work in there to help chain methods together, for the Rust-like look of chained function calls. We'll use it in spawner.rs to create a new function, room_table:
#![allow(unused)] fn main() { fn room_table() -> RandomTable { RandomTable::new() .add("Goblin", 10) .add("Orc", 1) .add("Health Potion", 7) .add("Fireball Scroll", 2) .add("Confusion Scroll", 2) .add("Magic Missile Scroll", 4) } }
This contains all of the items and monsters we've added so far, with a weight attached. I wasn't very careful with these weights; we'll play with them later! It does mean that a call to room_table().roll(rng) will return a random room entry.
Now we simplify a bit. Delete the NUM_MONSTERS, random_monster and random_item functions in spawner.rs. Then we replace the room spawning code with:
#![allow(unused)] fn main() { #[allow(clippy::map_entry)] pub fn spawn_room(ecs: &mut World, room : &Rect) { let spawn_table = room_table(); let mut spawn_points : HashMap<usize, String> = HashMap::new(); // Scope to keep the borrow checker happy { let mut rng = ecs.write_resource::<RandomNumberGenerator>(); let num_spawns = rng.roll_dice(1, MAX_MONSTERS + 3) - 3; for _i in 0 .. num_spawns { let mut added = false; let mut tries = 0; while !added && tries < 20 { let x = (room.x1 + rng.roll_dice(1, i32::abs(room.x2 - room.x1))) as usize; let y = (room.y1 + rng.roll_dice(1, i32::abs(room.y2 - room.y1))) as usize; let idx = (y * MAPWIDTH) + x; if !spawn_points.contains_key(&idx) { spawn_points.insert(idx, spawn_table.roll(&mut rng)); added = true; } else { tries += 1; } } } } // Actually spawn the monsters for spawn in spawn_points.iter() { let x = (*spawn.0 % MAPWIDTH) as i32; let y = (*spawn.0 / MAPWIDTH) as i32; match spawn.1.as_ref() { "Goblin" => goblin(ecs, x, y), "Orc" => orc(ecs, x, y), "Health Potion" => health_potion(ecs, x, y), "Fireball Scroll" => fireball_scroll(ecs, x, y), "Confusion Scroll" => confusion_scroll(ecs, x, y), "Magic Missile Scroll" => magic_missile_scroll(ecs, x, y), _ => {} } } } }
Lets work through this:
- The first line tells the Rust linter that we really do like to check a
HashMapfor membership and then insert into it - we also set a flag, which doesn't work well with its suggestion. - We obtain the global random number generator, and set the number of spawns to be 1d7-3 (for a -2 to 4 range).
- For each spawn above 0, we pick a random point in the room. We keep picking random points until we find an empty one (or we exceed 20 tries, in which case we give up). Once we find a point, we add it to the
spawnlist with a location and a roll from our random table. - Then we iterate the spawn list, match on the roll result and spawn monsters and items.
This is definitely cleaner than the previous approach, and now you are less likely to run into orcs - and more likely to run into goblins and health potions.
A quick cargo run shows you the improved spawn variety.
Increasing the spawn rate as you delve
That gave a nicer distribution, but didn't solve the problem of later levels being of the same difficulty as earlier ones. A quick and dirty approach is to spawn more entities as you descend. That still doesn't solve the problem, but it's a start! We'll start by modifying the function signature of spawn_room to accept the map depth:
#![allow(unused)] fn main() { pub fn spawn_room(ecs: &mut World, room : &Rect, map_depth: i32) { }
Then we'll change the number of entities that spawn to use this:
#![allow(unused)] fn main() { let num_spawns = rng.roll_dice(1, MAX_MONSTERS + 3) + (map_depth - 1) - 3; }
We'll have to change a couple of calls in main.rs to pass in the depth:
#![allow(unused)] fn main() { for room in map.rooms.iter().skip(1) { spawner::spawn_room(&mut gs.ecs, room, 1); } }
#![allow(unused)] fn main() { // Build a new map and place the player let worldmap; let current_depth; { let mut worldmap_resource = self.ecs.write_resource::<Map>(); current_depth = worldmap_resource.depth; *worldmap_resource = Map::new_map_rooms_and_corridors(current_depth + 1); worldmap = worldmap_resource.clone(); } // Spawn bad guys for room in worldmap.rooms.iter().skip(1) { spawner::spawn_room(&mut self.ecs, room, current_depth+1); } }
If you cargo run now, the first level is quite quiet. Difficulty ramps up a bit as you descend, until you have veritable hordes of monsters!
Increasing the weights by depth
Let's modify the room_table function to include map depth:
#![allow(unused)] fn main() { fn room_table(map_depth: i32) -> RandomTable { RandomTable::new() .add("Goblin", 10) .add("Orc", 1 + map_depth) .add("Health Potion", 7) .add("Fireball Scroll", 2 + map_depth) .add("Confusion Scroll", 2 + map_depth) .add("Magic Missile Scroll", 4) } }
We also change the call to it in spawn_room to use it:
#![allow(unused)] fn main() { let spawn_table = room_table(map_depth); }
A cargo build later, and voila - you have an increasing probability of finding orcs, fireball and confusion scrolls as you descend. The total weight of goblins, health potions and magic missile scrolls remains the same - but because the others change, their total likelihood diminishes.
Wrapping Up
You now have a dungeon that increases in difficulty as you descend! In the next chapter, we'll look at giving your character some progression as well (through equipment), to balance things out.
The source code for this chapter may be found here
Run this chapter's example with web assembly, in your browser (WebGL2 required)
Copyright (C) 2019, Herbert Wolverson.
Equipping The Player
About this tutorial
This tutorial is free and open source, and all code uses the MIT license - so you are free to do with it as you like. My hope is that you will enjoy the tutorial, and make great games!
If you enjoy this and would like me to keep writing, please consider supporting my Patreon.
Now that we have a dungeon with increasing difficulty, it's time to start giving the player some ways to improve their performance! In this chapter, we'll start with the most basic of human tasks: equipping a weapon and shield.
Adding some items you can wear/wield
We already have a lot of the item system in place, so we'll build upon the foundation from previous chapters. Just using components we already have, we can start with the following in spawners.rs:
#![allow(unused)] fn main() { fn dagger(ecs: &mut World, x: i32, y: i32) { ecs.create_entity() .with(Position{ x, y }) .with(Renderable{ glyph: rltk::to_cp437('/'), fg: RGB::named(rltk::CYAN), bg: RGB::named(rltk::BLACK), render_order: 2 }) .with(Name{ name : "Dagger".to_string() }) .with(Item{}) .marked::<SimpleMarker<SerializeMe>>() .build(); } fn shield(ecs: &mut World, x: i32, y: i32) { ecs.create_entity() .with(Position{ x, y }) .with(Renderable{ glyph: rltk::to_cp437('('), fg: RGB::named(rltk::CYAN), bg: RGB::named(rltk::BLACK), render_order: 2 }) .with(Name{ name : "Shield".to_string() }) .with(Item{}) .marked::<SimpleMarker<SerializeMe>>() .build(); } }
In both cases, we're making a new entity. We give it a Position, because it has to start somewhere on the map. We assign a Renderable, set to appropriate CP437/ASCII glyphs. We give them a name, and mark them as items. We can add them to the spawn table like this:
#![allow(unused)] fn main() { fn room_table(map_depth: i32) -> RandomTable { RandomTable::new() .add("Goblin", 10) .add("Orc", 1 + map_depth) .add("Health Potion", 7) .add("Fireball Scroll", 2 + map_depth) .add("Confusion Scroll", 2 + map_depth) .add("Magic Missile Scroll", 4) .add("Dagger", 3) .add("Shield", 3) } }
We can also include them in the system that actually spawns them quite readily:
#![allow(unused)] fn main() { // Actually spawn the monsters for spawn in spawn_points.iter() { let x = (*spawn.0 % MAPWIDTH) as i32; let y = (*spawn.0 / MAPWIDTH) as i32; match spawn.1.as_ref() { "Goblin" => goblin(ecs, x, y), "Orc" => orc(ecs, x, y), "Health Potion" => health_potion(ecs, x, y), "Fireball Scroll" => fireball_scroll(ecs, x, y), "Confusion Scroll" => confusion_scroll(ecs, x, y), "Magic Missile Scroll" => magic_missile_scroll(ecs, x, y), "Dagger" => dagger(ecs, x, y), "Shield" => shield(ecs, x, y), _ => {} } } }
If you cargo run the project now, you can run around and eventually find a dagger or shield. You might consider raising the spawn frequency from 3 to a really big number while you test! Since we've added the Item tag, you can pick up and drop these items when you find them.
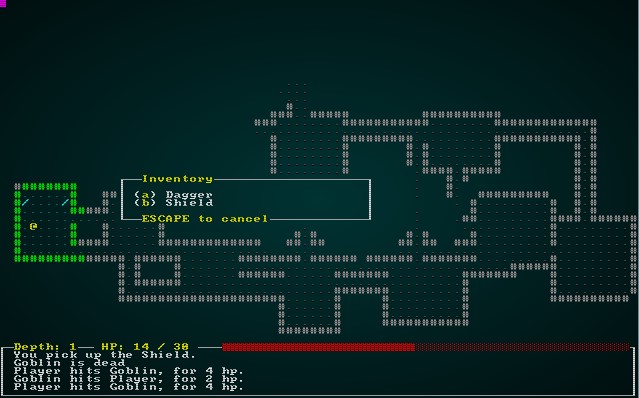
Equipping The Item
Daggers and shields aren't too useful if you can't use them! So lets make them equippable.
Equippable Component
We need a way to indicate that an item can be equipped. You've probably guessed by now, but we add a new component! In components.rs, we add:
#![allow(unused)] fn main() { #[derive(PartialEq, Copy, Clone, Serialize, Deserialize)] pub enum EquipmentSlot { Melee, Shield } #[derive(Component, Serialize, Deserialize, Clone)] pub struct Equippable { pub slot : EquipmentSlot } }
We also have to remember to register it in a few places, now that we have serialization support (from chapter 11). In main.rs, we add it to the list of registered components:
#![allow(unused)] fn main() { gs.ecs.register::<Equippable>(); }
In saveload_system.rs, we add it to both sets of component lists:
#![allow(unused)] fn main() { serialize_individually!(ecs, serializer, data, Position, Renderable, Player, Viewshed, Monster, Name, BlocksTile, CombatStats, SufferDamage, WantsToMelee, Item, Consumable, Ranged, InflictsDamage, AreaOfEffect, Confusion, ProvidesHealing, InBackpack, WantsToPickupItem, WantsToUseItem, WantsToDropItem, SerializationHelper, Equippable ); }
#![allow(unused)] fn main() { deserialize_individually!(ecs, de, d, Position, Renderable, Player, Viewshed, Monster, Name, BlocksTile, CombatStats, SufferDamage, WantsToMelee, Item, Consumable, Ranged, InflictsDamage, AreaOfEffect, Confusion, ProvidesHealing, InBackpack, WantsToPickupItem, WantsToUseItem, WantsToDropItem, SerializationHelper, Equippable ); }
Finally, we should add the Equippable component to our dagger and shield functions in spawner.rs:
#![allow(unused)] fn main() { fn dagger(ecs: &mut World, x: i32, y: i32) { ecs.create_entity() .with(Position{ x, y }) .with(Renderable{ glyph: rltk::to_cp437('/'), fg: RGB::named(rltk::CYAN), bg: RGB::named(rltk::BLACK), render_order: 2 }) .with(Name{ name : "Dagger".to_string() }) .with(Item{}) .with(Equippable{ slot: EquipmentSlot::Melee }) .marked::<SimpleMarker<SerializeMe>>() .build(); } fn shield(ecs: &mut World, x: i32, y: i32) { ecs.create_entity() .with(Position{ x, y }) .with(Renderable{ glyph: rltk::to_cp437('('), fg: RGB::named(rltk::CYAN), bg: RGB::named(rltk::BLACK), render_order: 2 }) .with(Name{ name : "Shield".to_string() }) .with(Item{}) .with(Equippable{ slot: EquipmentSlot::Shield }) .marked::<SimpleMarker<SerializeMe>>() .build(); } }
Making items equippable
Generally, having a shield in your backpack doesn't help much (obvious "how did you fit it in there?" questions aside - like many games, we'll gloss over that one!) - so you have to be able to pick one to equip. We'll start by making another component, Equipped. This works in a similar fashion to InBackpack - it indicates that an entity is holding it. Unlike InBackpack, it will indicate what slot is in use. Here's the basic Equipped component, in components.rs:
#![allow(unused)] fn main() { #[derive(Component, ConvertSaveload, Clone)] pub struct Equipped { pub owner : Entity, pub slot : EquipmentSlot } }
Just like before, we need to register it in main.rs, and include it in the serialization and deserialization lists in saveload_system.rs.
Actually equipping the item
Now we want to make it possible to actually equip the item. Doing so will automatically unequip any item in the same slot. We'll do this through the same interface we already have for using items, so we don't have disparate menus everywhere. Open inventory_system.rs, and we'll edit ItemUseSystem. We'll start by expanding the list of systems we are referencing:
#![allow(unused)] fn main() { impl<'a> System<'a> for ItemUseSystem { #[allow(clippy::type_complexity)] type SystemData = ( ReadExpect<'a, Entity>, WriteExpect<'a, GameLog>, ReadExpect<'a, Map>, Entities<'a>, WriteStorage<'a, WantsToUseItem>, ReadStorage<'a, Name>, ReadStorage<'a, Consumable>, ReadStorage<'a, ProvidesHealing>, ReadStorage<'a, InflictsDamage>, WriteStorage<'a, CombatStats>, WriteStorage<'a, SufferDamage>, ReadStorage<'a, AreaOfEffect>, WriteStorage<'a, Confusion>, ReadStorage<'a, Equippable>, WriteStorage<'a, Equipped>, WriteStorage<'a, InBackpack> ); fn run(&mut self, data : Self::SystemData) { let (player_entity, mut gamelog, map, entities, mut wants_use, names, consumables, healing, inflict_damage, mut combat_stats, mut suffer_damage, aoe, mut confused, equippable, mut equipped, mut backpack) = data; }
Now, after target acquisition, add the following block:
#![allow(unused)] fn main() { // If it is equippable, then we want to equip it - and unequip whatever else was in that slot let item_equippable = equippable.get(useitem.item); match item_equippable { None => {} Some(can_equip) => { let target_slot = can_equip.slot; let target = targets[0]; // Remove any items the target has in the item's slot let mut to_unequip : Vec<Entity> = Vec::new(); for (item_entity, already_equipped, name) in (&entities, &equipped, &names).join() { if already_equipped.owner == target && already_equipped.slot == target_slot { to_unequip.push(item_entity); if target == *player_entity { gamelog.entries.push(format!("You unequip {}.", name.name)); } } } for item in to_unequip.iter() { equipped.remove(*item); backpack.insert(*item, InBackpack{ owner: target }).expect("Unable to insert backpack entry"); } // Wield the item equipped.insert(useitem.item, Equipped{ owner: target, slot: target_slot }).expect("Unable to insert equipped component"); backpack.remove(useitem.item); if target == *player_entity { gamelog.entries.push(format!("You equip {}.", names.get(useitem.item).unwrap().name)); } } } }
This starts by matching to see if we can equip the item. If we can, it looks up the target slot for the item and looks to see if there is already an item in that slot. If there, it moves it to the backpack. Lastly, it adds an Equipped component to the item entity with the owner (the player right now) and the appropriate slot.
Lastly, you may remember that when the player moves to the next level we delete a lot of entities. We want to include Equipped by the player as a reason to keep an item in the ECS. In main.rs, we modify entities_to_remove_on_level_change as follows:
#![allow(unused)] fn main() { fn entities_to_remove_on_level_change(&mut self) -> Vec<Entity> { let entities = self.ecs.entities(); let player = self.ecs.read_storage::<Player>(); let backpack = self.ecs.read_storage::<InBackpack>(); let player_entity = self.ecs.fetch::<Entity>(); let equipped = self.ecs.read_storage::<Equipped>(); let mut to_delete : Vec<Entity> = Vec::new(); for entity in entities.join() { let mut should_delete = true; // Don't delete the player let p = player.get(entity); if let Some(_p) = p { should_delete = false; } // Don't delete the player's equipment let bp = backpack.get(entity); if let Some(bp) = bp { if bp.owner == *player_entity { should_delete = false; } } let eq = equipped.get(entity); if let Some(eq) = eq { if eq.owner == *player_entity { should_delete = false; } } if should_delete { to_delete.push(entity); } } to_delete } }
If you cargo run the project now, you can run around picking up the new items - and you can equip them. They don't do anything, yet - but at least you can swap them in and out. The game log will show equipping and unequipping.

Granting combat bonuses
Logically, a shield should provide some protection against incoming damage - and being stabbed with a dagger should hurt more than being punched! To facilitate this, we'll add some more components (this should be a familiar song by now). In components.rs:
#![allow(unused)] fn main() { #[derive(Component, ConvertSaveload, Clone)] pub struct MeleePowerBonus { pub power : i32 } #[derive(Component, ConvertSaveload, Clone)] pub struct DefenseBonus { pub defense : i32 } }
We also need to remember to register them in main.rs, and saveload_system.rs. We can then modify our code in spawner.rs to add these components to the right items:
#![allow(unused)] fn main() { fn dagger(ecs: &mut World, x: i32, y: i32) { ecs.create_entity() .with(Position{ x, y }) .with(Renderable{ glyph: rltk::to_cp437('/'), fg: RGB::named(rltk::CYAN), bg: RGB::named(rltk::BLACK), render_order: 2 }) .with(Name{ name : "Dagger".to_string() }) .with(Item{}) .with(Equippable{ slot: EquipmentSlot::Melee }) .with(MeleePowerBonus{ power: 2 }) .marked::<SimpleMarker<SerializeMe>>() .build(); } fn shield(ecs: &mut World, x: i32, y: i32) { ecs.create_entity() .with(Position{ x, y }) .with(Renderable{ glyph: rltk::to_cp437('('), fg: RGB::named(rltk::CYAN), bg: RGB::named(rltk::BLACK), render_order: 2 }) .with(Name{ name : "Shield".to_string() }) .with(Item{}) .with(Equippable{ slot: EquipmentSlot::Shield }) .with(DefenseBonus{ defense: 1 }) .marked::<SimpleMarker<SerializeMe>>() .build(); } }
Notice how we've added the component to each? Now we need to modify the melee_combat_system to apply these bonuses. We do this by adding some additional ECS queries to our system:
#![allow(unused)] fn main() { impl<'a> System<'a> for MeleeCombatSystem { #[allow(clippy::type_complexity)] type SystemData = ( Entities<'a>, WriteExpect<'a, GameLog>, WriteStorage<'a, WantsToMelee>, ReadStorage<'a, Name>, ReadStorage<'a, CombatStats>, WriteStorage<'a, SufferDamage>, ReadStorage<'a, MeleePowerBonus>, ReadStorage<'a, DefenseBonus>, ReadStorage<'a, Equipped> ); fn run(&mut self, data : Self::SystemData) { let (entities, mut log, mut wants_melee, names, combat_stats, mut inflict_damage, melee_power_bonuses, defense_bonuses, equipped) = data; for (entity, wants_melee, name, stats) in (&entities, &wants_melee, &names, &combat_stats).join() { if stats.hp > 0 { let mut offensive_bonus = 0; for (_item_entity, power_bonus, equipped_by) in (&entities, &melee_power_bonuses, &equipped).join() { if equipped_by.owner == entity { offensive_bonus += power_bonus.power; } } let target_stats = combat_stats.get(wants_melee.target).unwrap(); if target_stats.hp > 0 { let target_name = names.get(wants_melee.target).unwrap(); let mut defensive_bonus = 0; for (_item_entity, defense_bonus, equipped_by) in (&entities, &defense_bonuses, &equipped).join() { if equipped_by.owner == wants_melee.target { defensive_bonus += defense_bonus.defense; } } let damage = i32::max(0, (stats.power + offensive_bonus) - (target_stats.defense + defensive_bonus)); }
This is a big chunk of code, so lets go through it:
- We've added
MeleePowerBonus,DefenseBonusandEquippedreaders to the system. - Once we've determined that the attacker is alive, we set
offensive_bonusto 0. - We iterate all entities that have a
MeleePowerBonusand anEquippedentry. If they are equipped by the attacker, we add their power bonus tooffensive_bonus. - Once we've determined that the defender is alive, we set
defensive_bonusto 0. - We iterate all entities that have a
DefenseBonusand anEquippedentry. If they are equipped by the target, we add their defense to thedefense_bonus. - When we calculate damage, we add the offense bonus to the power side - and add the defense bonus to the defense side.
If you cargo run now, you'll find that using your dagger makes you hit harder - and using your shield makes you suffer less damage.
Unequipping the item
Now that you can equip items, and remove the by swapping, you may want to stop holding an item and return it to your backpack. In a game as simple as this one, this isn't strictly necessary - but it is a good option to have for the future. We'll bind the R key to remove an item, since that key is available. In player.rs, add this to the input code:
#![allow(unused)] fn main() { VirtualKeyCode::R => return RunState::ShowRemoveItem, }
Now we add ShowRemoveItem to RunState in main.rs:
#![allow(unused)] fn main() { #[derive(PartialEq, Copy, Clone)] pub enum RunState { AwaitingInput, PreRun, PlayerTurn, MonsterTurn, ShowInventory, ShowDropItem, ShowTargeting { range : i32, item : Entity}, MainMenu { menu_selection : gui::MainMenuSelection }, SaveGame, NextLevel, ShowRemoveItem } }
And we add a handler for it in tick:
#![allow(unused)] fn main() { RunState::ShowRemoveItem => { let result = gui::remove_item_menu(self, ctx); match result.0 { gui::ItemMenuResult::Cancel => newrunstate = RunState::AwaitingInput, gui::ItemMenuResult::NoResponse => {} gui::ItemMenuResult::Selected => { let item_entity = result.1.unwrap(); let mut intent = self.ecs.write_storage::<WantsToRemoveItem>(); intent.insert(*self.ecs.fetch::<Entity>(), WantsToRemoveItem{ item: item_entity }).expect("Unable to insert intent"); newrunstate = RunState::PlayerTurn; } } } }
We'll implement a new component in components.rs (see the source code for the serialization handler; it's a cut-and-paste of the handler for wanting to drop an item, with the names changed):
#![allow(unused)] fn main() { #[derive(Component, Debug, ConvertSaveload, Clone)] pub struct WantsToRemoveItem { pub item : Entity } }
As usual, it has to be registered in main.rs and saveload_system.rs.
Now in gui.rs, we'll implement remove_item_menu. It's almost exactly the same as the item dropping menu, but changing what is queries and the heading (it'd be a great idea to make these into more generic functions some time!):
#![allow(unused)] fn main() { pub fn remove_item_menu(gs : &mut State, ctx : &mut Rltk) -> (ItemMenuResult, Option<Entity>) { let player_entity = gs.ecs.fetch::<Entity>(); let names = gs.ecs.read_storage::<Name>(); let backpack = gs.ecs.read_storage::<Equipped>(); let entities = gs.ecs.entities(); let inventory = (&backpack, &names).join().filter(|item| item.0.owner == *player_entity ); let count = inventory.count(); let mut y = (25 - (count / 2)) as i32; ctx.draw_box(15, y-2, 31, (count+3) as i32, RGB::named(rltk::WHITE), RGB::named(rltk::BLACK)); ctx.print_color(18, y-2, RGB::named(rltk::YELLOW), RGB::named(rltk::BLACK), "Remove Which Item?"); ctx.print_color(18, y+count as i32+1, RGB::named(rltk::YELLOW), RGB::named(rltk::BLACK), "ESCAPE to cancel"); let mut equippable : Vec<Entity> = Vec::new(); let mut j = 0; for (entity, _pack, name) in (&entities, &backpack, &names).join().filter(|item| item.1.owner == *player_entity ) { ctx.set(17, y, RGB::named(rltk::WHITE), RGB::named(rltk::BLACK), rltk::to_cp437('(')); ctx.set(18, y, RGB::named(rltk::YELLOW), RGB::named(rltk::BLACK), 97+j as rltk::FontCharType); ctx.set(19, y, RGB::named(rltk::WHITE), RGB::named(rltk::BLACK), rltk::to_cp437(')')); ctx.print(21, y, &name.name.to_string()); equippable.push(entity); y += 1; j += 1; } match ctx.key { None => (ItemMenuResult::NoResponse, None), Some(key) => { match key { VirtualKeyCode::Escape => { (ItemMenuResult::Cancel, None) } _ => { let selection = rltk::letter_to_option(key); if selection > -1 && selection < count as i32 { return (ItemMenuResult::Selected, Some(equippable[selection as usize])); } (ItemMenuResult::NoResponse, None) } } } } } }
Next, we should extend inventory_system.rs to support removing items. Fortunately, this is a very simple system:
#![allow(unused)] fn main() { pub struct ItemRemoveSystem {} impl<'a> System<'a> for ItemRemoveSystem { #[allow(clippy::type_complexity)] type SystemData = ( Entities<'a>, WriteStorage<'a, WantsToRemoveItem>, WriteStorage<'a, Equipped>, WriteStorage<'a, InBackpack> ); fn run(&mut self, data : Self::SystemData) { let (entities, mut wants_remove, mut equipped, mut backpack) = data; for (entity, to_remove) in (&entities, &wants_remove).join() { equipped.remove(to_remove.item); backpack.insert(to_remove.item, InBackpack{ owner: entity }).expect("Unable to insert backpack"); } wants_remove.clear(); } } }
Lastly, we add it to the systems in main.rs:
#![allow(unused)] fn main() { impl State { fn run_systems(&mut self) { let mut vis = VisibilitySystem{}; vis.run_now(&self.ecs); let mut mob = MonsterAI{}; mob.run_now(&self.ecs); let mut mapindex = MapIndexingSystem{}; mapindex.run_now(&self.ecs); let mut melee = MeleeCombatSystem{}; melee.run_now(&self.ecs); let mut damage = DamageSystem{}; damage.run_now(&self.ecs); let mut pickup = ItemCollectionSystem{}; pickup.run_now(&self.ecs); let mut itemuse = ItemUseSystem{}; itemuse.run_now(&self.ecs); let mut drop_items = ItemDropSystem{}; drop_items.run_now(&self.ecs); let mut item_remove = ItemRemoveSystem{}; item_remove.run_now(&self.ecs); self.ecs.maintain(); } } }
Now if you cargo run, you can pick up a dagger or shield and equip it. Then you can press R to remove it.
Adding some more powerful gear later
Lets add a couple more items, in spawner.rs:
#![allow(unused)] fn main() { fn longsword(ecs: &mut World, x: i32, y: i32) { ecs.create_entity() .with(Position{ x, y }) .with(Renderable{ glyph: rltk::to_cp437('/'), fg: RGB::named(rltk::YELLOW), bg: RGB::named(rltk::BLACK), render_order: 2 }) .with(Name{ name : "Longsword".to_string() }) .with(Item{}) .with(Equippable{ slot: EquipmentSlot::Melee }) .with(MeleePowerBonus{ power: 4 }) .marked::<SimpleMarker<SerializeMe>>() .build(); } fn tower_shield(ecs: &mut World, x: i32, y: i32) { ecs.create_entity() .with(Position{ x, y }) .with(Renderable{ glyph: rltk::to_cp437('('), fg: RGB::named(rltk::YELLOW), bg: RGB::named(rltk::BLACK), render_order: 2 }) .with(Name{ name : "Tower Shield".to_string() }) .with(Item{}) .with(Equippable{ slot: EquipmentSlot::Shield }) .with(DefenseBonus{ defense: 3 }) .marked::<SimpleMarker<SerializeMe>>() .build(); } }
We're going to add a quick fix to random_table.rs to ignore entries with 0 or lower spawn chances:
#![allow(unused)] fn main() { pub fn add<S:ToString>(mut self, name : S, weight: i32) -> RandomTable { if weight > 0 { self.total_weight += weight; self.entries.push(RandomEntry::new(name.to_string(), weight)); } self } }
And back in spawner.rs, we'll add them to the loot table - with a chance of appearing later in the dungeon:
#![allow(unused)] fn main() { fn room_table(map_depth: i32) -> RandomTable { RandomTable::new() .add("Goblin", 10) .add("Orc", 1 + map_depth) .add("Health Potion", 7) .add("Fireball Scroll", 2 + map_depth) .add("Confusion Scroll", 2 + map_depth) .add("Magic Missile Scroll", 4) .add("Dagger", 3) .add("Shield", 3) .add("Longsword", map_depth - 1) .add("Tower Shield", map_depth - 1) } }
#![allow(unused)] fn main() { match spawn.1.as_ref() { "Goblin" => goblin(ecs, x, y), "Orc" => orc(ecs, x, y), "Health Potion" => health_potion(ecs, x, y), "Fireball Scroll" => fireball_scroll(ecs, x, y), "Confusion Scroll" => confusion_scroll(ecs, x, y), "Magic Missile Scroll" => magic_missile_scroll(ecs, x, y), "Dagger" => dagger(ecs, x, y), "Shield" => shield(ecs, x, y), "Longsword" => longsword(ecs, x, y), "Tower Shield" => tower_shield(ecs, x, y), _ => {} } }
Now as you descend further, you can find better weapons and shields!
The game over screen
We're nearly at the end of the basic tutorial, so lets make something happen when you die - rather than locking up in a console loop. In the file damage_system.rs, we'll edit the match statement on player for delete_the_dead:
#![allow(unused)] fn main() { match player { None => { let victim_name = names.get(entity); if let Some(victim_name) = victim_name { log.entries.push(format!("{} is dead", &victim_name.name)); } dead.push(entity) } Some(_) => { let mut runstate = ecs.write_resource::<RunState>(); *runstate = RunState::GameOver; } } }
Of course, we now have to go to main.rs and add the new state:
#![allow(unused)] fn main() { #[derive(PartialEq, Copy, Clone)] pub enum RunState { AwaitingInput, PreRun, PlayerTurn, MonsterTurn, ShowInventory, ShowDropItem, ShowTargeting { range : i32, item : Entity}, MainMenu { menu_selection : gui::MainMenuSelection }, SaveGame, NextLevel, ShowRemoveItem, GameOver } }
We'll add that to the state implementation, also in main.rs:
#![allow(unused)] fn main() { RunState::GameOver => { let result = gui::game_over(ctx); match result { gui::GameOverResult::NoSelection => {} gui::GameOverResult::QuitToMenu => { self.game_over_cleanup(); newrunstate = RunState::MainMenu{ menu_selection: gui::MainMenuSelection::NewGame }; } } } }
That's relatively straightforward: we call game_over to render the menu, and when you quit we delete everything in the ECS. Lastly, in gui.rs we'll implement game_over:
#![allow(unused)] fn main() { #[derive(PartialEq, Copy, Clone)] pub enum GameOverResult { NoSelection, QuitToMenu } pub fn game_over(ctx : &mut Rltk) -> GameOverResult { ctx.print_color_centered(15, RGB::named(rltk::YELLOW), RGB::named(rltk::BLACK), "Your journey has ended!"); ctx.print_color_centered(17, RGB::named(rltk::WHITE), RGB::named(rltk::BLACK), "One day, we'll tell you all about how you did."); ctx.print_color_centered(18, RGB::named(rltk::WHITE), RGB::named(rltk::BLACK), "That day, sadly, is not in this chapter.."); ctx.print_color_centered(20, RGB::named(rltk::MAGENTA), RGB::named(rltk::BLACK), "Press any key to return to the menu."); match ctx.key { None => GameOverResult::NoSelection, Some(_) => GameOverResult::QuitToMenu } } }
Lastly, we'll handle game_over_cleanup:
#![allow(unused)] fn main() { fn game_over_cleanup(&mut self) { // Delete everything let mut to_delete = Vec::new(); for e in self.ecs.entities().join() { to_delete.push(e); } for del in to_delete.iter() { self.ecs.delete_entity(*del).expect("Deletion failed"); } // Build a new map and place the player let worldmap; { let mut worldmap_resource = self.ecs.write_resource::<Map>(); *worldmap_resource = Map::new_map_rooms_and_corridors(1); worldmap = worldmap_resource.clone(); } // Spawn bad guys for room in worldmap.rooms.iter().skip(1) { spawner::spawn_room(&mut self.ecs, room, 1); } // Place the player and update resources let (player_x, player_y) = worldmap.rooms[0].center(); let player_entity = spawner::player(&mut self.ecs, player_x, player_y); let mut player_position = self.ecs.write_resource::<Point>(); *player_position = Point::new(player_x, player_y); let mut position_components = self.ecs.write_storage::<Position>(); let mut player_entity_writer = self.ecs.write_resource::<Entity>(); *player_entity_writer = player_entity; let player_pos_comp = position_components.get_mut(player_entity); if let Some(player_pos_comp) = player_pos_comp { player_pos_comp.x = player_x; player_pos_comp.y = player_y; } // Mark the player's visibility as dirty let mut viewshed_components = self.ecs.write_storage::<Viewshed>(); let vs = viewshed_components.get_mut(player_entity); if let Some(vs) = vs { vs.dirty = true; } } }
This should look familiar from our serialization work when loading the game. It's very similar, but it generates a new player.
If you cargo run now, and die - you'll get a message informing you that the game is done, and sending you back to the menu.
Wrapping Up
That's it for the first section of the tutorial. It sticks relatively closely to the Python tutorial, and takes you from "hello rust" to a moderately fun Roguelike. I hope you've enjoyed it! Stay tuned, I hope to add a section 2 soon.
The source code for this chapter may be found here
Run this chapter's example with web assembly, in your browser (WebGL2 required)
Copyright (C) 2019, Herbert Wolverson.
Section 2 - Stretch Goals
About this tutorial
This tutorial is free and open source, and all code uses the MIT license - so you are free to do with it as you like. My hope is that you will enjoy the tutorial, and make great games!
If you enjoy this and would like me to keep writing, please consider supporting my Patreon.
I've been enjoying writing this tutorial, and people are using it (thank you!) - so I decided to keep adding content. Section 2 is more of a smorgasbord of content than a structured tutorial. I'll keep adding content as we try to build a great roguelike as a community.
Please feel free to contact me (I'm @herberticus on Twitter) if you have any questions, ideas for improvements, or things you'd like me to add. Also, sorry about all the Patreon spam - hopefully someone will find this sufficiently useful to feel like throwing a coffee or two my way. :-)
Copyright (C) 2019, Herbert Wolverson.
Nicer Walls
About this tutorial
This tutorial is free and open source, and all code uses the MIT license - so you are free to do with it as you like. My hope is that you will enjoy the tutorial, and make great games!
If you enjoy this and would like me to keep writing, please consider supporting my Patreon.
So far, we've used a very traditional rendering style for the map. Hash symbols for walls, periods for floors. It looks pretty nice, but games like Dwarf Fortress do a lovely job of using codepage 437's line-drawing characters to make the walls of the dungeon look smooth. This short chapter will show how to use a bitmask to calculate appropriate walls and render them appropriately. As usual, we'll start with our previous code from the end of Section 1.
Counting neighbors to build our bitset
We have a decent map rendering system in map.rs, specifically the function draw_map. If you find the section that matches tile by type, we can start by extending the Wall selection:
#![allow(unused)] fn main() { TileType::Wall => { glyph = wall_glyph(&*map, x, y); fg = RGB::from_f32(0., 1.0, 0.); } }
This requires the wall_glyph function, so lets write it:
#![allow(unused)] fn main() { fn wall_glyph(map : &Map, x: i32, y:i32) -> rltk::FontCharType { if x < 1 || x > map.width-2 || y < 1 || y > map.height-2 as i32 { return 35; } let mut mask : u8 = 0; if is_revealed_and_wall(map, x, y - 1) { mask +=1; } if is_revealed_and_wall(map, x, y + 1) { mask +=2; } if is_revealed_and_wall(map, x - 1, y) { mask +=4; } if is_revealed_and_wall(map, x + 1, y) { mask +=8; } match mask { 0 => { 9 } // Pillar because we can't see neighbors 1 => { 186 } // Wall only to the north 2 => { 186 } // Wall only to the south 3 => { 186 } // Wall to the north and south 4 => { 205 } // Wall only to the west 5 => { 188 } // Wall to the north and west 6 => { 187 } // Wall to the south and west 7 => { 185 } // Wall to the north, south and west 8 => { 205 } // Wall only to the east 9 => { 200 } // Wall to the north and east 10 => { 201 } // Wall to the south and east 11 => { 204 } // Wall to the north, south and east 12 => { 205 } // Wall to the east and west 13 => { 202 } // Wall to the east, west, and south 14 => { 203 } // Wall to the east, west, and north 15 => { 206 } // ╬ Wall on all sides _ => { 35 } // We missed one? } } }
Lets step through this function:
- If we are at the map bounds, we aren't going to risk stepping outside of them - so we return a
#symbol (ASCII 35). - Now we create an 8-bit unsigned integer to act as our
bitmask. We're interested in setting individual bits and only need four of them - so an 8-bit number is perfect. - Next, we check each of the 4 directions and add to the mask. We're adding numbers corresponding to each of the first four bits in binary - so 1,2,4,8. This means that our final number will store whether or not we have each of the four possible neighbors. For example, a value of 3 means that we have neighbors to the north and south.
- Then we match on the resulting mask bit and return the appropriate line-drawing character from the codepage 437 character set
This function in turn calls is_revealed_and_wall, so we'll write that too! It's very simple:
#![allow(unused)] fn main() { fn is_revealed_and_wall(map: &Map, x: i32, y: i32) -> bool { let idx = map.xy_idx(x, y); map.tiles[idx] == TileType::Wall && map.revealed_tiles[idx] } }
It simply checks to see if a tile is revealed and if it is a wall. If both are true, it returns true - otherwise it returns false.
If you cargo run the project now, you get a nicer looking set of walls:

The source code for this chapter may be found here
Run this chapter's example with web assembly, in your browser (WebGL2 required)
Copyright (C) 2019, Herbert Wolverson.
Bloodstains
About this tutorial
This tutorial is free and open source, and all code uses the MIT license - so you are free to do with it as you like. My hope is that you will enjoy the tutorial, and make great games!
If you enjoy this and would like me to keep writing, please consider supporting my Patreon.
Our character lives the life of a "murder-hobo", looting and slaying at will - so it only makes sense that the pristine dungeon will start to resemble a charnel house. It also gives us a bridge into a future chapter, in which we'll start to add some particle and visual effects (in ASCII/CP437) to the game.
Storing the blood
Tiles either have blood or they don't, so it makes sense to attach them to the map as a set. So at the top of map.rs, we'll include a new storage type - HashSet:
#![allow(unused)] fn main() { use std::collections::HashSet; }
In the map definition, we'll include a HashSet of usize (to represent tile indices) types for blood:
#![allow(unused)] fn main() { #[derive(Default, Serialize, Deserialize, Clone)] pub struct Map { pub tiles : Vec<TileType>, pub rooms : Vec<Rect>, pub width : i32, pub height : i32, pub revealed_tiles : Vec<bool>, pub visible_tiles : Vec<bool>, pub blocked : Vec<bool>, pub depth : i32, pub bloodstains : HashSet<usize>, #[serde(skip_serializing)] #[serde(skip_deserializing)] pub tile_content : Vec<Vec<Entity>> } }
And in the new map generator, we'll initialize it:
#![allow(unused)] fn main() { let mut map = Map{ tiles : vec![TileType::Wall; MAPCOUNT], rooms : Vec::new(), width : MAPWIDTH as i32, height: MAPHEIGHT as i32, revealed_tiles : vec![false; MAPCOUNT], visible_tiles : vec![false; MAPCOUNT], blocked : vec![false; MAPCOUNT], tile_content : vec![Vec::new(); MAPCOUNT], depth: new_depth, bloodstains: HashSet::new() }; }
Rendering the blood
We'll indicate a bloodstain by changing a tile background to a dark red. We don't want to be too "in your face" with the effect, and we don't want to hide the tile content - so that should be sufficient. We'll also not show blood that isn't in visual range, to keep it understated. In map.rs, the render section now looks like this:
#![allow(unused)] fn main() { if map.revealed_tiles[idx] { let glyph; let mut fg; let mut bg = RGB::from_f32(0., 0., 0.); match tile { TileType::Floor => { glyph = rltk::to_cp437('.'); fg = RGB::from_f32(0.0, 0.5, 0.5); } TileType::Wall => { glyph = wall_glyph(&*map, x, y); fg = RGB::from_f32(0., 1.0, 0.); } TileType::DownStairs => { glyph = rltk::to_cp437('>'); fg = RGB::from_f32(0., 1.0, 1.0); } } if map.bloodstains.contains(&idx) { bg = RGB::from_f32(0.75, 0., 0.); } if !map.visible_tiles[idx] { fg = fg.to_greyscale(); bg = RGB::from_f32(0., 0., 0.); // Don't show stains out of visual range } ctx.set(x, y, fg, bg, glyph); } }
Blood for the blood god
Now we need to add blood to the scene! We'll mark a tile as bloody whenever someone takes damage in it. We'll adjust the DamageSystem in damage_system.rs to set the bloodstain:
#![allow(unused)] fn main() { impl<'a> System<'a> for DamageSystem { type SystemData = ( WriteStorage<'a, CombatStats>, WriteStorage<'a, SufferDamage>, ReadStorage<'a, Position>, WriteExpect<'a, Map>, Entities<'a> ); fn run(&mut self, data : Self::SystemData) { let (mut stats, mut damage, positions, mut map, entities) = data; for (entity, mut stats, damage) in (&entities, &mut stats, &damage).join() { stats.hp -= damage.amount.iter().sum::<i32>(); let pos = positions.get(entity); if let Some(pos) = pos { let idx = map.xy_idx(pos.x, pos.y); map.bloodstains.insert(idx); } } damage.clear(); } } }
If you cargo run your project, the map starts to show signs of battle!
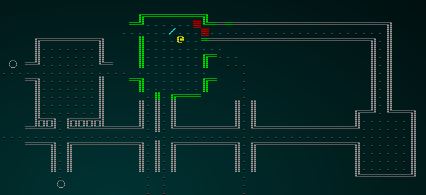
The source code for this chapter may be found here
Run this chapter's example with web assembly, in your browser (WebGL2 required)
Copyright (C) 2019, Herbert Wolverson.
Particle Effects in ASCII
About this tutorial
This tutorial is free and open source, and all code uses the MIT license - so you are free to do with it as you like. My hope is that you will enjoy the tutorial, and make great games!
If you enjoy this and would like me to keep writing, please consider supporting my Patreon.
There's no real visual feedback for your actions - you hit something, and it either goes away, or it doesn't. Bloodstains give a good impression of what previously happened in a location - but it would be nice to give some sort of instant reaction to your actions. These need to be fast, non-blocking (so you don't have to wait for the animation to finish to keep playing), and not too intrusive. Particles are a good fit for this, so we'll implement a simple ASCII/CP437 particle system.
Particle component
As usual, we'll start out by thinking about what a particle is. Typically it has a position, something to render, and a lifetime (so it goes away). We've already written two out of three of those, so lets go ahead and create a ParticleLifetime component. In components.rs:
#![allow(unused)] fn main() { #[derive(Component, Serialize, Deserialize, Clone)] pub struct ParticleLifetime { pub lifetime_ms : f32 } }
We have to register this in all the usual places: main.rs and saveload_system.rs (twice).
Grouping particle code together
We'll make a new file, particle_system.rs. It won't be a regular system, because we need access to the RLTK Context object - but it will have to provide services to other systems.
The first thing to support is making particles vanish after their lifetime. So we start with the following in particle_system.rs:
#![allow(unused)] fn main() { use specs::prelude::*; use super::{ Rltk, ParticleLifetime}; pub fn cull_dead_particles(ecs : &mut World, ctx : &Rltk) { let mut dead_particles : Vec<Entity> = Vec::new(); { // Age out particles let mut particles = ecs.write_storage::<ParticleLifetime>(); let entities = ecs.entities(); for (entity, mut particle) in (&entities, &mut particles).join() { particle.lifetime_ms -= ctx.frame_time_ms; if particle.lifetime_ms < 0.0 { dead_particles.push(entity); } } } for dead in dead_particles.iter() { ecs.delete_entity(*dead).expect("Particle will not die"); } } }
Then we modify the render loop in main.rs to call it:
#![allow(unused)] fn main() { ctx.cls(); particle_system::cull_dead_particles(&mut self.ecs, ctx); }
Spawning particles via a service
Let's extend particle_system.rs to offer a builder system: you obtain a ParticleBuilder and add requests to it, and then create your particles as a batch together. We'll offer the particle system as a resource - so it's available anywhere. This avoids having to add much intrusive code into each system, and lets us handle the actual particle spawning as a single (fast) batch.
Our basic ParticleBuilder looks like this. We haven't done anything to actually add any particles yet, but this provides the requestor service:
#![allow(unused)] fn main() { struct ParticleRequest { x: i32, y: i32, fg: RGB, bg: RGB, glyph: rltk::FontCharType, lifetime: f32 } pub struct ParticleBuilder { requests : Vec<ParticleRequest> } impl ParticleBuilder { #[allow(clippy::new_without_default)] pub fn new() -> ParticleBuilder { ParticleBuilder{ requests : Vec::new() } } pub fn request(&mut self, x:i32, y:i32, fg: RGB, bg:RGB, glyph: rltk::FontCharType, lifetime: f32) { self.requests.push( ParticleRequest{ x, y, fg, bg, glyph, lifetime } ); } } }
In main.rs, we'll turn it into a resource:
#![allow(unused)] fn main() { gs.ecs.insert(particle_system::ParticleBuilder::new()); }
Now, we'll return to particle_system.rs and build an actual system to spawn particles. The system looks like this:
#![allow(unused)] fn main() { pub struct ParticleSpawnSystem {} impl<'a> System<'a> for ParticleSpawnSystem { #[allow(clippy::type_complexity)] type SystemData = ( Entities<'a>, WriteStorage<'a, Position>, WriteStorage<'a, Renderable>, WriteStorage<'a, ParticleLifetime>, WriteExpect<'a, ParticleBuilder> ); fn run(&mut self, data : Self::SystemData) { let (entities, mut positions, mut renderables, mut particles, mut particle_builder) = data; for new_particle in particle_builder.requests.iter() { let p = entities.create(); positions.insert(p, Position{ x: new_particle.x, y: new_particle.y }).expect("Unable to inser position"); renderables.insert(p, Renderable{ fg: new_particle.fg, bg: new_particle.bg, glyph: new_particle.glyph, render_order: 0 }).expect("Unable to insert renderable"); particles.insert(p, ParticleLifetime{ lifetime_ms: new_particle.lifetime }).expect("Unable to insert lifetime"); } particle_builder.requests.clear(); } } }
This is a very simple service: it iterates the requests, and creates an entity for each particle with the component parameters from the request. Then it clears the builder list. The last step is to add it to the system schedule in main.rs:
#![allow(unused)] fn main() { impl State { fn run_systems(&mut self) { let mut vis = VisibilitySystem{}; vis.run_now(&self.ecs); let mut mob = MonsterAI{}; mob.run_now(&self.ecs); let mut mapindex = MapIndexingSystem{}; mapindex.run_now(&self.ecs); let mut melee = MeleeCombatSystem{}; melee.run_now(&self.ecs); let mut damage = DamageSystem{}; damage.run_now(&self.ecs); let mut pickup = ItemCollectionSystem{}; pickup.run_now(&self.ecs); let mut itemuse = ItemUseSystem{}; itemuse.run_now(&self.ecs); let mut drop_items = ItemDropSystem{}; drop_items.run_now(&self.ecs); let mut item_remove = ItemRemoveSystem{}; item_remove.run_now(&self.ecs); let mut particles = particle_system::ParticleSpawnSystem{}; particles.run_now(&self.ecs); self.ecs.maintain(); } } }
We've made it depend upon likely particle spawners. We'll have to be a little careful to avoid accidentally making it concurrent with anything that might add to it.
Actually spawning some particles for combat
Lets start by spawning a particle whenever someone attacks. Open up melee_combat_system.rs, and we'll add ParticleBuilder to the list of requested resources for the system. First, the includes:
#![allow(unused)] fn main() { use super::{CombatStats, WantsToMelee, Name, SufferDamage, gamelog::GameLog, MeleePowerBonus, DefenseBonus, Equipped, particle_system::ParticleBuilder, Position}; }
Then, a WriteExpect to be able to write to the resource:
#![allow(unused)] fn main() { type SystemData = ( Entities<'a>, WriteExpect<'a, GameLog>, WriteStorage<'a, WantsToMelee>, ReadStorage<'a, Name>, ReadStorage<'a, CombatStats>, WriteStorage<'a, SufferDamage>, ReadStorage<'a, MeleePowerBonus>, ReadStorage<'a, DefenseBonus>, ReadStorage<'a, Equipped>, WriteExpect<'a, ParticleBuilder>, ReadStorage<'a, Position> ); }
And the expanded list of resources for the run method itself:
#![allow(unused)] fn main() { let (entities, mut log, mut wants_melee, names, combat_stats, mut inflict_damage, melee_power_bonuses, defense_bonuses, equipped, mut particle_builder, positions) = data; }
Finally, we'll add the request:
#![allow(unused)] fn main() { let pos = positions.get(wants_melee.target); if let Some(pos) = pos { particle_builder.request(pos.x, pos.y, rltk::RGB::named(rltk::ORANGE), rltk::RGB::named(rltk::BLACK), rltk::to_cp437('‼'), 200.0); } let damage = i32::max(0, (stats.power + offensive_bonus) - (target_stats.defense + defensive_bonus)); }
If you cargo run now, you'll see a relatively subtle particle feedback to show that melee combat occurred. This definitely helps with the feel of gameplay, and is sufficiently non-intrusive that we aren't making our other systems too confusing.
Adding effects to item use
It would be great to add similar effects to item use, so lets do it! In inventory_system.rs, we'll expand the ItemUseSystem introduction to include the ParticleBuilder:
#![allow(unused)] fn main() { impl<'a> System<'a> for ItemUseSystem { #[allow(clippy::type_complexity)] type SystemData = ( ReadExpect<'a, Entity>, WriteExpect<'a, GameLog>, ReadExpect<'a, Map>, Entities<'a>, WriteStorage<'a, WantsToUseItem>, ReadStorage<'a, Name>, ReadStorage<'a, Consumable>, ReadStorage<'a, ProvidesHealing>, ReadStorage<'a, InflictsDamage>, WriteStorage<'a, CombatStats>, WriteStorage<'a, SufferDamage>, ReadStorage<'a, AreaOfEffect>, WriteStorage<'a, Confusion>, ReadStorage<'a, Equippable>, WriteStorage<'a, Equipped>, WriteStorage<'a, InBackpack>, WriteExpect<'a, ParticleBuilder>, ReadStorage<'a, Position> ); #[allow(clippy::cognitive_complexity)] fn run(&mut self, data : Self::SystemData) { let (player_entity, mut gamelog, map, entities, mut wants_use, names, consumables, healing, inflict_damage, mut combat_stats, mut suffer_damage, aoe, mut confused, equippable, mut equipped, mut backpack, mut particle_builder, positions) = data; }
We'll start by showing a heart when you drink a healing potion. In the healing section:
#![allow(unused)] fn main() { stats.hp = i32::min(stats.max_hp, stats.hp + healer.heal_amount); if entity == *player_entity { gamelog.entries.push(format!("You use the {}, healing {} hp.", names.get(useitem.item).unwrap().name, healer.heal_amount)); } used_item = true; let pos = positions.get(*target); if let Some(pos) = pos { particle_builder.request(pos.x, pos.y, rltk::RGB::named(rltk::GREEN), rltk::RGB::named(rltk::BLACK), rltk::to_cp437('♥'), 200.0); } }
We can use a similar effect for confusion - only with a magenta question mark. In the confusion section:
#![allow(unused)] fn main() { gamelog.entries.push(format!("You use {} on {}, confusing them.", item_name.name, mob_name.name)); let pos = positions.get(*mob); if let Some(pos) = pos { particle_builder.request(pos.x, pos.y, rltk::RGB::named(rltk::MAGENTA), rltk::RGB::named(rltk::BLACK), rltk::to_cp437('?'), 200.0); } }
We should also use a particle to indicate that damage was inflicted. In the damage section of the system:
#![allow(unused)] fn main() { gamelog.entries.push(format!("You use {} on {}, inflicting {} hp.", item_name.name, mob_name.name, damage.damage)); let pos = positions.get(*mob); if let Some(pos) = pos { particle_builder.request(pos.x, pos.y, rltk::RGB::named(rltk::RED), rltk::RGB::named(rltk::BLACK), rltk::to_cp437('‼'), 200.0); } }
Lastly, if an effect hits a whole area (for example, a fireball) it would be good to indicate what the area is. In the targeting section of the system, add:
#![allow(unused)] fn main() { for mob in map.tile_content[idx].iter() { targets.push(*mob); } particle_builder.request(tile_idx.x, tile_idx.y, rltk::RGB::named(rltk::ORANGE), rltk::RGB::named(rltk::BLACK), rltk::to_cp437('░'), 200.0); }
That wasn't too hard, was it? If you cargo run your project now, you'll see various visual effects firing.
Adding an indicator for missing a turn due to confusion
Lastly, we'll repeat the confused effect on monsters when it is their turn and they skip due to being confused. This should make it less confusing as to why they stand around. In monster_ai_system.rs, we first modify the system header to request the appropriate helper:
#![allow(unused)] fn main() { impl<'a> System<'a> for MonsterAI { #[allow(clippy::type_complexity)] type SystemData = ( WriteExpect<'a, Map>, ReadExpect<'a, Point>, ReadExpect<'a, Entity>, ReadExpect<'a, RunState>, Entities<'a>, WriteStorage<'a, Viewshed>, ReadStorage<'a, Monster>, WriteStorage<'a, Position>, WriteStorage<'a, WantsToMelee>, WriteStorage<'a, Confusion>, WriteExpect<'a, ParticleBuilder>); fn run(&mut self, data : Self::SystemData) { let (mut map, player_pos, player_entity, runstate, entities, mut viewshed, monster, mut position, mut wants_to_melee, mut confused, mut particle_builder) = data; }
Then we add in a request at the end of the confusion test:
#![allow(unused)] fn main() { can_act = false; particle_builder.request(pos.x, pos.y, rltk::RGB::named(rltk::MAGENTA), rltk::RGB::named(rltk::BLACK), rltk::to_cp437('?'), 200.0); }
We don't need to worry about getting the Position component here, because we already get it as part of the loop. If you cargo run your project now, and find a confusion scroll - you have visual feedback as to why a goblin isn't chasing you anymore:
Wrap Up
That's it for visual effects for now. We've given the game a much more visceral feel, with feedback given for actions. That's a big improvement, and goes a long way to modernizing an ASCII interface!
The source code for this chapter may be found here
Run this chapter's example with web assembly, in your browser (WebGL2 required)
Copyright (C) 2019, Herbert Wolverson.
Adding a hunger clock and food
About this tutorial
This tutorial is free and open source, and all code uses the MIT license - so you are free to do with it as you like. My hope is that you will enjoy the tutorial, and make great games!
If you enjoy this and would like me to keep writing, please consider supporting my Patreon.
Hunger clocks are a controversial feature of a lot of roguelikes. They can really irritate the player if you are spending all of your time looking for food, but they also drive you forward - so you can't sit around without exploring more. Resting to heal becomes more of a risk/reward system, in particular. This chapter will implement a basic hunger clock for the player.
Adding a hunger clock component
We'll be adding a hunger clock to the player, so the first step is to make a component to represent it. In components.rs:
#![allow(unused)] fn main() { #[derive(Serialize, Deserialize, Copy, Clone, PartialEq)] pub enum HungerState { WellFed, Normal, Hungry, Starving } #[derive(Component, Serialize, Deserialize, Clone)] pub struct HungerClock { pub state : HungerState, pub duration : i32 } }
As with all components, it needs to be registered in main.rs and saveload_system.rs. In spawners.rs, we'll extend the player function to add a hunger clock to the player:
#![allow(unused)] fn main() { pub fn player(ecs : &mut World, player_x : i32, player_y : i32) -> Entity { ecs .create_entity() .with(Position { x: player_x, y: player_y }) .with(Renderable { glyph: rltk::to_cp437('@'), fg: RGB::named(rltk::YELLOW), bg: RGB::named(rltk::BLACK), render_order: 0 }) .with(Player{}) .with(Viewshed{ visible_tiles : Vec::new(), range: 8, dirty: true }) .with(Name{name: "Player".to_string() }) .with(CombatStats{ max_hp: 30, hp: 30, defense: 2, power: 5 }) .with(HungerClock{ state: HungerState::WellFed, duration: 20 }) .marked::<SimpleMarker<SerializeMe>>() .build() } }
There's now a hunger clock component in place, but it doesn't do anything!
Adding a hunger system
We'll make a new file, hunger_system.rs and implement a hunger clock system. It's quite straightforward:
#![allow(unused)] fn main() { use specs::prelude::*; use super::{HungerClock, RunState, HungerState, SufferDamage, gamelog::GameLog}; pub struct HungerSystem {} impl<'a> System<'a> for HungerSystem { #[allow(clippy::type_complexity)] type SystemData = ( Entities<'a>, WriteStorage<'a, HungerClock>, ReadExpect<'a, Entity>, // The player ReadExpect<'a, RunState>, WriteStorage<'a, SufferDamage>, WriteExpect<'a, GameLog> ); fn run(&mut self, data : Self::SystemData) { let (entities, mut hunger_clock, player_entity, runstate, mut inflict_damage, mut log) = data; for (entity, mut clock) in (&entities, &mut hunger_clock).join() { let mut proceed = false; match *runstate { RunState::PlayerTurn => { if entity == *player_entity { proceed = true; } } RunState::MonsterTurn => { if entity != *player_entity { proceed = true; } } _ => proceed = false } if proceed { clock.duration -= 1; if clock.duration < 1 { match clock.state { HungerState::WellFed => { clock.state = HungerState::Normal; clock.duration = 200; if entity == *player_entity { log.entries.push("You are no longer well fed.".to_string()); } } HungerState::Normal => { clock.state = HungerState::Hungry; clock.duration = 200; if entity == *player_entity { log.entries.push("You are hungry.".to_string()); } } HungerState::Hungry => { clock.state = HungerState::Starving; clock.duration = 200; if entity == *player_entity { log.entries.push("You are starving!".to_string()); } } HungerState::Starving => { // Inflict damage from hunger if entity == *player_entity { log.entries.push("Your hunger pangs are getting painful! You suffer 1 hp damage.".to_string()); } SufferDamage::new_damage(&mut inflict_damage, entity, 1); } } } } } } } }
It works by iterating all entities that have a HungerClock. If they are the player, it only takes effect in the PlayerTurn state; likewise, if they are a monster, it only takes place in their turn (in case we want hungry monsters later!). The duration of the current state is reduced on each run-through. If it hits 0, it moves one state down - or if you are starving, damages you.
Now we need to add it to the list of systems running in main.rs:
#![allow(unused)] fn main() { impl State { fn run_systems(&mut self) { let mut vis = VisibilitySystem{}; vis.run_now(&self.ecs); let mut mob = MonsterAI{}; mob.run_now(&self.ecs); let mut mapindex = MapIndexingSystem{}; mapindex.run_now(&self.ecs); let mut melee = MeleeCombatSystem{}; melee.run_now(&self.ecs); let mut damage = DamageSystem{}; damage.run_now(&self.ecs); let mut pickup = ItemCollectionSystem{}; pickup.run_now(&self.ecs); let mut itemuse = ItemUseSystem{}; itemuse.run_now(&self.ecs); let mut drop_items = ItemDropSystem{}; drop_items.run_now(&self.ecs); let mut item_remove = ItemRemoveSystem{}; item_remove.run_now(&self.ecs); let mut hunger = hunger_system::HungerSystem{}; hunger.run_now(&self.ecs); let mut particles = particle_system::ParticleSpawnSystem{}; particles.run_now(&self.ecs); self.ecs.maintain(); } } }
If you cargo run now, and hit wait a lot - you'll starve to death.

Displaying the status
It would be nice to know your hunger state! We'll modify draw_ui in gui.rs to show it:
#![allow(unused)] fn main() { pub fn draw_ui(ecs: &World, ctx : &mut Rltk) { ctx.draw_box(0, 43, 79, 6, RGB::named(rltk::WHITE), RGB::named(rltk::BLACK)); let combat_stats = ecs.read_storage::<CombatStats>(); let players = ecs.read_storage::<Player>(); let hunger = ecs.read_storage::<HungerClock>(); for (_player, stats, hc) in (&players, &combat_stats, &hunger).join() { let health = format!(" HP: {} / {} ", stats.hp, stats.max_hp); ctx.print_color(12, 43, RGB::named(rltk::YELLOW), RGB::named(rltk::BLACK), &health); ctx.draw_bar_horizontal(28, 43, 51, stats.hp, stats.max_hp, RGB::named(rltk::RED), RGB::named(rltk::BLACK)); match hc.state { HungerState::WellFed => ctx.print_color(71, 42, RGB::named(rltk::GREEN), RGB::named(rltk::BLACK), "Well Fed"), HungerState::Normal => {} HungerState::Hungry => ctx.print_color(71, 42, RGB::named(rltk::ORANGE), RGB::named(rltk::BLACK), "Hungry"), HungerState::Starving => ctx.print_color(71, 42, RGB::named(rltk::RED), RGB::named(rltk::BLACK), "Starving"), } } ... }
If you cargo run your project, this gives quite a pleasant display:

Adding in food
It's all well and good starving to death, but players will find it frustrating if they always start do die after 620 turns (and suffer consequences before that! 620 may sound like a lot, but it's common to use a few hundred moves on a level, and we aren't trying to make food the primary game focus). We'll introduce a new item, Rations. We have most of the components needed for this already, but we need a new one to indicate that an item ProvidesFood. In components.rs:
#![allow(unused)] fn main() { #[derive(Component, Debug, Serialize, Deserialize, Clone)] pub struct ProvidesFood {} }
We will, as always, need to register this in main.rs and saveload_system.rs.
Now, in spawner.rs we'll create a new function to make rations:
#![allow(unused)] fn main() { fn rations(ecs: &mut World, x: i32, y: i32) { ecs.create_entity() .with(Position{ x, y }) .with(Renderable{ glyph: rltk::to_cp437('%'), fg: RGB::named(rltk::GREEN), bg: RGB::named(rltk::BLACK), render_order: 2 }) .with(Name{ name : "Rations".to_string() }) .with(Item{}) .with(ProvidesFood{}) .with(Consumable{}) .marked::<SimpleMarker<SerializeMe>>() .build(); } }
We'll also add it to the spawn table (quite common):
#![allow(unused)] fn main() { fn room_table(map_depth: i32) -> RandomTable { RandomTable::new() .add("Goblin", 10) .add("Orc", 1 + map_depth) .add("Health Potion", 7) .add("Fireball Scroll", 2 + map_depth) .add("Confusion Scroll", 2 + map_depth) .add("Magic Missile Scroll", 4) .add("Dagger", 3) .add("Shield", 3) .add("Longsword", map_depth - 1) .add("Tower Shield", map_depth - 1) .add("Rations", 10) } }
And to the spawn code:
#![allow(unused)] fn main() { match spawn.1.as_ref() { "Goblin" => goblin(ecs, x, y), "Orc" => orc(ecs, x, y), "Health Potion" => health_potion(ecs, x, y), "Fireball Scroll" => fireball_scroll(ecs, x, y), "Confusion Scroll" => confusion_scroll(ecs, x, y), "Magic Missile Scroll" => magic_missile_scroll(ecs, x, y), "Dagger" => dagger(ecs, x, y), "Shield" => shield(ecs, x, y), "Longsword" => longsword(ecs, x, y), "Tower Shield" => tower_shield(ecs, x, y), "Rations" => rations(ecs, x, y), _ => {} } }
If you cargo run now, you will encounter rations that you can pickup and drop. You can't, however, eat them! We'll add that to inventory_system.rs. Here's the relevant portion (see the tutorial source for the full version):
#![allow(unused)] fn main() { // It it is edible, eat it! let item_edible = provides_food.get(useitem.item); match item_edible { None => {} Some(_) => { used_item = true; let target = targets[0]; let hc = hunger_clocks.get_mut(target); if let Some(hc) = hc { hc.state = HungerState::WellFed; hc.duration = 20; gamelog.entries.push(format!("You eat the {}.", names.get(useitem.item).unwrap().name)); } } } }
If you cargo run now, you can run around - find rations, and eat them to reset the hunger clock!
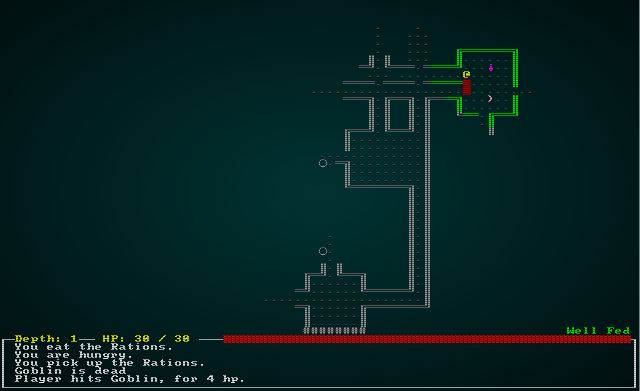
Adding a bonus for being well fed
It would be nice if being Well Fed does something! We'll give you a temporary +1 to your power when you are fed. This encourages the player to eat - even though they don't have to (sneakily making it harder to survive on lower levels as food becomes less plentiful). In melee_combat_system.rs we add:
#![allow(unused)] fn main() { let hc = hunger_clock.get(entity); if let Some(hc) = hc { if hc.state == HungerState::WellFed { offensive_bonus += 1; } } }
And that's it! You get a +1 power bonus for being full of rations.
Preventing healing when hungry or starving
As another benefit to food, we'll prevent you from wait-healing while hungry or starving (this also balances the healing system we added earlier). In player.rs, we modify skip_turn:
#![allow(unused)] fn main() { let hunger_clocks = ecs.read_storage::<HungerClock>(); let hc = hunger_clocks.get(*player_entity); if let Some(hc) = hc { match hc.state { HungerState::Hungry => can_heal = false, HungerState::Starving => can_heal = false, _ => {} } } if can_heal { }
Wrap-Up
We now have a working hunger clock system. You may want to tweak the durations to suit your taste (or skip it completely if it isn't your cup of tea) - but it's a mainstay of the genre, so it's good to have it included in the tutorials.
The source code for this chapter may be found here
Run this chapter's example with web assembly, in your browser (WebGL2 required)
Copyright (C) 2019, Herbert Wolverson.
Magic Mapping
About this tutorial
This tutorial is free and open source, and all code uses the MIT license - so you are free to do with it as you like. My hope is that you will enjoy the tutorial, and make great games!
If you enjoy this and would like me to keep writing, please consider supporting my Patreon.
A really common item in roguelikes is the scroll of magic mapping. You read it, and the dungeon is revealed. Fancier roguelikes have nice graphics for it. In this chapter, we'll start by making it work - and then make it pretty!
Adding a magic map component
We have everything we need except for an indicator that an item is a scroll (or any other item, really) of magic mapping. So in components.rs we'll add a component for it:
#![allow(unused)] fn main() { #[derive(Component, Debug, Serialize, Deserialize, Clone)] pub struct MagicMapper {} }
As always, we need to register it in main.rs and saveload_system.rs. We'll head over to spawners.rs and create a new function for it, as well as adding it to the loot tables:
#![allow(unused)] fn main() { fn magic_mapping_scroll(ecs: &mut World, x: i32, y: i32) { ecs.create_entity() .with(Position{ x, y }) .with(Renderable{ glyph: rltk::to_cp437(')'), fg: RGB::named(rltk::CYAN3), bg: RGB::named(rltk::BLACK), render_order: 2 }) .with(Name{ name : "Scroll of Magic Mapping".to_string() }) .with(Item{}) .with(MagicMapper{}) .with(Consumable{}) .marked::<SimpleMarker<SerializeMe>>() .build(); } }
And the loot table:
#![allow(unused)] fn main() { fn room_table(map_depth: i32) -> RandomTable { RandomTable::new() .add("Goblin", 10) .add("Orc", 1 + map_depth) .add("Health Potion", 7) .add("Fireball Scroll", 2 + map_depth) .add("Confusion Scroll", 2 + map_depth) .add("Magic Missile Scroll", 4) .add("Dagger", 3) .add("Shield", 3) .add("Longsword", map_depth - 1) .add("Tower Shield", map_depth - 1) .add("Rations", 10) .add("Magic Mapping Scroll", 400) } }
Notice that we've given it a weight of 400 - absolutely ridiculous. We'll fix it later, for now we really want to spawn the scroll so that we can test it! Lastly, we add it to the actual spawn function:
#![allow(unused)] fn main() { match spawn.1.as_ref() { "Goblin" => goblin(ecs, x, y), "Orc" => orc(ecs, x, y), "Health Potion" => health_potion(ecs, x, y), "Fireball Scroll" => fireball_scroll(ecs, x, y), "Confusion Scroll" => confusion_scroll(ecs, x, y), "Magic Missile Scroll" => magic_missile_scroll(ecs, x, y), "Dagger" => dagger(ecs, x, y), "Shield" => shield(ecs, x, y), "Longsword" => longsword(ecs, x, y), "Tower Shield" => tower_shield(ecs, x, y), "Rations" => rations(ecs, x, y), "Magic Mapping Scroll" => magic_mapping_scroll(ecs, x, y), _ => {} } }
If you were to cargo run now, you'd likely find scrolls you can pick up - but they won't do anything.
Mapping the level - the simple version
We'll modify inventory_system.rs to detect if you just used a mapping scroll, and reveal the whole map:
#![allow(unused)] fn main() { // If its a magic mapper... let is_mapper = magic_mapper.get(useitem.item); match is_mapper { None => {} Some(_) => { used_item = true; for r in map.revealed_tiles.iter_mut() { *r = true; } gamelog.entries.push("The map is revealed to you!".to_string()); } } }
There are some framework changes also (see the source); we've done this often enough, I don't think it needs repeating here again. If you cargo run the project now, find a scroll (they are everywhere) and use it - the map is instantly revealed:
Making it pretty
While the code presented there is effective, it isn't visually attractive. It's nice to include fluff in games, and let the user be pleasantly surprised by the beauty of an ASCII terminal from time to time! We'll start by modifying inventory_system.rs again:
#![allow(unused)] fn main() { // If its a magic mapper... let is_mapper = magic_mapper.get(useitem.item); match is_mapper { None => {} Some(_) => { used_item = true; gamelog.entries.push("The map is revealed to you!".to_string()); *runstate = RunState::MagicMapReveal{ row : 0}; } } }
Notice that instead of modifying the map, we are just changing the game state to mapping mode. We don't actually support doing that yet, so lets go into the state mapper in main.rs and modify PlayerTurn to handle it:
#![allow(unused)] fn main() { RunState::PlayerTurn => { self.systems.dispatch(&self.ecs); self.ecs.maintain(); match *self.ecs.fetch::<RunState>() { RunState::MagicMapReveal{ .. } => newrunstate = RunState::MagicMapReveal{ row: 0 }, _ => newrunstate = RunState::MonsterTurn } } }
While we're here, lets add the state to RunState:
#![allow(unused)] fn main() { #[derive(PartialEq, Copy, Clone)] pub enum RunState { AwaitingInput, PreRun, PlayerTurn, MonsterTurn, ShowInventory, ShowDropItem, ShowTargeting { range : i32, item : Entity}, MainMenu { menu_selection : gui::MainMenuSelection }, SaveGame, NextLevel, ShowRemoveItem, GameOver, MagicMapReveal { row : i32 } } }
We also add some logic to the tick loop for the new state:
#![allow(unused)] fn main() { RunState::MagicMapReveal{row} => { let mut map = self.ecs.fetch_mut::<Map>(); for x in 0..MAPWIDTH { let idx = map.xy_idx(x as i32,row); map.revealed_tiles[idx] = true; } if row as usize == MAPHEIGHT-1 { newrunstate = RunState::MonsterTurn; } else { newrunstate = RunState::MagicMapReveal{ row: row+1 }; } } }
This is pretty straightforward: it reveals the tiles on the current row, and then if we haven't hit the bottom of the map - it adds to row. If we have, it returns to where we were - MonsterTurn. If you cargo run now, find a magic mapping scroll and use it, the map fades in nicely:
Remember to lower the spawn priority!
In spawners.rs we are currently spawning magic mapping scrolls everywhere. That's probably not what we want! Edit the spawn table to have a much lower priority:
#![allow(unused)] fn main() { fn room_table(map_depth: i32) -> RandomTable { RandomTable::new() .add("Goblin", 10) .add("Orc", 1 + map_depth) .add("Health Potion", 7) .add("Fireball Scroll", 2 + map_depth) .add("Confusion Scroll", 2 + map_depth) .add("Magic Missile Scroll", 4) .add("Dagger", 3) .add("Shield", 3) .add("Longsword", map_depth - 1) .add("Tower Shield", map_depth - 1) .add("Rations", 10) .add("Magic Mapping Scroll", 2) } }
Wrap Up
This was a relatively quick chapter, but we now have another staple of the roguelike genre: magic mapping.
The source code for this chapter may be found here
Run this chapter's example with web assembly, in your browser (WebGL2 required)
Copyright (C) 2019, Herbert Wolverson.
REX Paint Main Menu
About this tutorial
This tutorial is free and open source, and all code uses the MIT license - so you are free to do with it as you like. My hope is that you will enjoy the tutorial, and make great games!
If you enjoy this and would like me to keep writing, please consider supporting my Patreon.
Our main menu is really boring, and not a good way to attract players! This chapter will spice it up a bit.
REX Paint
Grid Sage Games (the amazing u/Kyzrati on Reddit) provide a lovely tool for Codepage 437 image editing called REX Paint. RLTK has built-in support for using the output from this editor. As they used to say on the BBC's old kids show Blue Peter - here's one I made earlier.
I cheated a bit; I found a CC0 image, resized it to 80x50 in the GIMP, and used a tool I wrote years ago to convert the PNG to a REX Paint file. Still, I like the result. You can find the REX Paint file in the resources folder.
Loading REX Assets
We'll introduce a new file, rex_assets.rs to store our REX sprites. The file looks like this:
#![allow(unused)] fn main() { use rltk::{rex::XpFile}; rltk::embedded_resource!(SMALL_DUNGEON, "../../resources/SmallDungeon_80x50.xp"); pub struct RexAssets { pub menu : XpFile } impl RexAssets { #[allow(clippy::new_without_default)] pub fn new() -> RexAssets { rltk::link_resource!(SMALL_DUNGEON, "../../resources/SmallDungeon_80x50.xp"); RexAssets{ menu : XpFile::from_resource("../../resources/SmallDungeon_80x50.xp").unwrap() } } } }
Very simple - it defines a structure, and loads the dungeon graphic into it when new is called. We'll also insert it into Specs as a resource so we can access our sprites anywhere. There are some new concepts here:
- We're using
rltk::embedded_resource!to include the file in our binary. This gets around having to ship the binary with your executable (and makes life easier inwasmland). #[allow(clippy::new_without_default)]tells the linter to stop telling me to write a default implementation, when we don't need one!rltk::link_resource!is the second-half the the embedded resource; the first stores it in memory, this one tells RLTK where to find it.menu : XpFile::from_resource("../../resources/SmallDungeon_80x50.xp").unwrap()loads the Rex paint file from memory.
In main.rs:
#![allow(unused)] fn main() { gs.ecs.insert(rex_assets::RexAssets::new()); }
Now we open up gui.rs and find the main_menu function. We'll add two lines before we start printing menu content:
#![allow(unused)] fn main() { let assets = gs.ecs.fetch::<RexAssets>(); ctx.render_xp_sprite(&assets.menu, 0, 0); }
The result (cargo run to see it) is a good start at a menu!

Improving the look of the menu - adding a box and borders
To make it look a little snazzier, we'll work on spacing - and add a box for the menu and text. Replace the current title rendering code with:
#![allow(unused)] fn main() { ctx.draw_box_double(24, 18, 31, 10, RGB::named(rltk::WHEAT), RGB::named(rltk::BLACK)); ctx.print_color_centered(20, RGB::named(rltk::YELLOW), RGB::named(rltk::BLACK), "Rust Roguelike Tutorial"); ctx.print_color_centered(21, RGB::named(rltk::CYAN), RGB::named(rltk::BLACK), "by Herbert Wolverson"); ctx.print_color_centered(22, RGB::named(rltk::GRAY), RGB::named(rltk::BLACK), "Use Up/Down Arrows and Enter"); }
If you cargo run now, your menu looks like this:
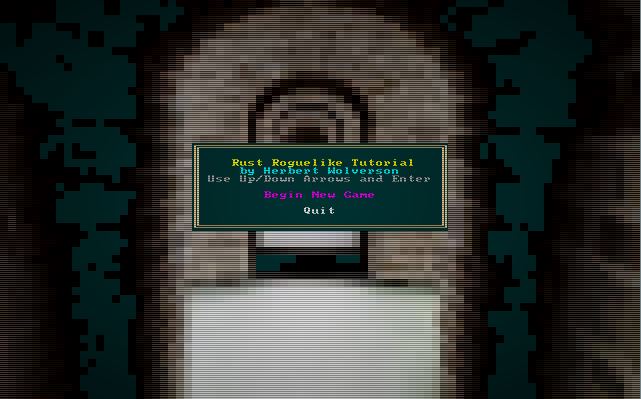
That's quite a bit better!
Fixing the spacing
You'll notice that if you don't have a saved game to load, there is an annoying gap between menu items. This is an easy fix, by keeping track of the y position we have used while we render the menu. Here's the new menu rendering code:
#![allow(unused)] fn main() { let mut y = 24; if let RunState::MainMenu{ menu_selection : selection } = *runstate { if selection == MainMenuSelection::NewGame { ctx.print_color_centered(y, RGB::named(rltk::MAGENTA), RGB::named(rltk::BLACK), "Begin New Game"); } else { ctx.print_color_centered(y, RGB::named(rltk::WHITE), RGB::named(rltk::BLACK), "Begin New Game"); } y += 1; if save_exists { if selection == MainMenuSelection::LoadGame { ctx.print_color_centered(y, RGB::named(rltk::MAGENTA), RGB::named(rltk::BLACK), "Load Game"); } else { ctx.print_color_centered(y, RGB::named(rltk::WHITE), RGB::named(rltk::BLACK), "Load Game"); } y += 1; } if selection == MainMenuSelection::Quit { ctx.print_color_centered(y, RGB::named(rltk::MAGENTA), RGB::named(rltk::BLACK), "Quit"); } else { ctx.print_color_centered(y, RGB::named(rltk::WHITE), RGB::named(rltk::BLACK), "Quit"); } ... }
If you cargo run now, it looks better:
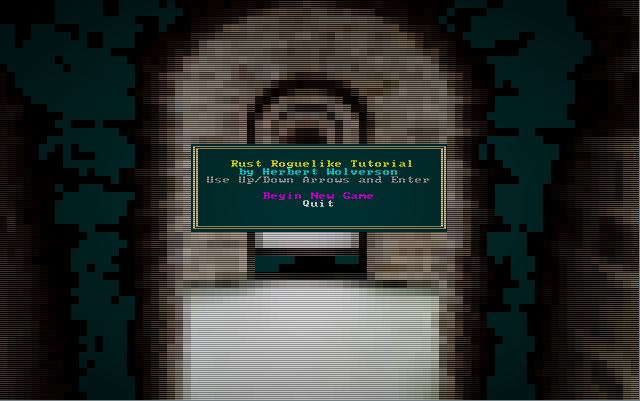
The source code for this chapter may be found here
Run this chapter's example with web assembly, in your browser (WebGL2 required)
Copyright (C) 2019, Herbert Wolverson.
Simple Traps
About this tutorial
This tutorial is free and open source, and all code uses the MIT license - so you are free to do with it as you like. My hope is that you will enjoy the tutorial, and make great games!
If you enjoy this and would like me to keep writing, please consider supporting my Patreon.
Most roguelikes, like their D&D precursors, feature traps in the dungeon. Walk down an innocent looking hallway, and oops - an arrow flies out and hits you. This chapter will implement some simple traps, and then examine some of the game implications they bring.
What is a trap?
Most traps follow the pattern of: you might see the trap (or you might not!), you enter the tile anyway, the trap goes off and something happens (damage, teleport, etc.). So traps can be logically divided into three sections:
- An appearance (which we already support), which may or may not be discovered (which we don't, yet).
- A trigger - if you enter the trap's tile, something happens.
- An effect - which we've touched on with magic items.
Let's work our way through getting components into place for these, in turn.
Rendering a basic bear trap
A lot of roguelikes use ^ for a trap, so we'll do the same. We have all the components required to render a basic object, so we'll make a new spawning function (in spawners.rs). It's pretty much the minimum to put a glyph on the map:
#![allow(unused)] fn main() { fn bear_trap(ecs: &mut World, x: i32, y: i32) { ecs.create_entity() .with(Position{ x, y }) .with(Renderable{ glyph: rltk::to_cp437('^'), fg: RGB::named(rltk::RED), bg: RGB::named(rltk::BLACK), render_order: 2 }) .with(Name{ name : "Bear Trap".to_string() }) .marked::<SimpleMarker<SerializeMe>>() .build(); } }
We'll also add it into the list of things that can spawn:
#![allow(unused)] fn main() { fn room_table(map_depth: i32) -> RandomTable { RandomTable::new() .add("Goblin", 10) .add("Orc", 1 + map_depth) .add("Health Potion", 7) .add("Fireball Scroll", 2 + map_depth) .add("Confusion Scroll", 2 + map_depth) .add("Magic Missile Scroll", 4) .add("Dagger", 3) .add("Shield", 3) .add("Longsword", map_depth - 1) .add("Tower Shield", map_depth - 1) .add("Rations", 10) .add("Magic Mapping Scroll", 2) .add("Bear Trap", 2) } }
#![allow(unused)] fn main() { match spawn.1.as_ref() { "Goblin" => goblin(ecs, x, y), "Orc" => orc(ecs, x, y), "Health Potion" => health_potion(ecs, x, y), "Fireball Scroll" => fireball_scroll(ecs, x, y), "Confusion Scroll" => confusion_scroll(ecs, x, y), "Magic Missile Scroll" => magic_missile_scroll(ecs, x, y), "Dagger" => dagger(ecs, x, y), "Shield" => shield(ecs, x, y), "Longsword" => longsword(ecs, x, y), "Tower Shield" => tower_shield(ecs, x, y), "Rations" => rations(ecs, x, y), "Magic Mapping Scroll" => magic_mapping_scroll(ecs, x, y), "Bear Trap" => bear_trap(ecs, x, y), _ => {} } }
If you cargo run the project now, occasionally you will run into a red ^ - and it will be labeled "Bear Trap" on the mouse-over. Not massively exciting, but a good start! Note that for testing, we'll up the spawn frequency from 2 to 100 - LOTS of traps, making debugging easier. Remember to lower it later!
But you don't always spot the trap!
It is pretty easy if you can always know that a trap awaits you! So we want to make traps hidden by default, and come up with a way to sometimes locate traps when you are near them. Like most things in an ECS driven world, analyzing the text gives a great clue as to what components you need. In this case, we need to go into components.rs and create a new component - Hidden:
#![allow(unused)] fn main() { #[derive(Component, Debug, Serialize, Deserialize, Clone)] pub struct Hidden {} }
As usual, we need to register it in main.rs and in saveload_system.rs. We'll also give the property to our new bear trap:
#![allow(unused)] fn main() { fn bear_trap(ecs: &mut World, x: i32, y: i32) { ecs.create_entity() .with(Position{ x, y }) .with(Renderable{ glyph: rltk::to_cp437('^'), fg: RGB::named(rltk::RED), bg: RGB::named(rltk::BLACK), render_order: 2 }) .with(Name{ name : "Bear Trap".to_string() }) .with(Hidden{}) .marked::<SimpleMarker<SerializeMe>>() .build(); } }
Now, we want to modify the object renderer to not show things that are hidden. The Specs Book provides a great clue as to how to exclude a component from a join, so we do that (in main.rs):
#![allow(unused)] fn main() { let mut data = (&positions, &renderables, !&hidden).join().collect::<Vec<_>>(); data.sort_by(|&a, &b| b.1.render_order.cmp(&a.1.render_order) ); for (pos, render, _hidden) in data.iter() { let idx = map.xy_idx(pos.x, pos.y); if map.visible_tiles[idx] { ctx.set(pos.x, pos.y, render.fg, render.bg, render.glyph) } } }
Notice that we've added a ! ("not" symbol) to the join - we're saying that entities must not have the Hidden component if we are to render them.
If you cargo run the project now, the bear traps are no longer visible. However, they show up in tool tips (which may be perhaps as well, we know they are there!). We'll exclude them from tool-tips also. In gui.rs, we amend the draw_tooltips function:
#![allow(unused)] fn main() { fn draw_tooltips(ecs: &World, ctx : &mut Rltk) { let map = ecs.fetch::<Map>(); let names = ecs.read_storage::<Name>(); let positions = ecs.read_storage::<Position>(); let hidden = ecs.read_storage::<Hidden>(); let mouse_pos = ctx.mouse_pos(); if mouse_pos.0 >= map.width || mouse_pos.1 >= map.height { return; } let mut tooltip : Vec<String> = Vec::new(); for (name, position, _hidden) in (&names, &positions, !&hidden).join() { let idx = map.xy_idx(position.x, position.y); if position.x == mouse_pos.0 && position.y == mouse_pos.1 && map.visible_tiles[idx] { tooltip.push(name.name.to_string()); } } ... }
Now if you cargo run, you'll have no idea that traps are present. Since they don't do anything yet - they may as well not exist!
Adding entry triggers
A trap should trigger when an entity walks onto them. So in components.rs, we'll create an EntryTrigger (as usual, we'll also register it in main.rs and saveload_system.rs):
#![allow(unused)] fn main() { #[derive(Component, Debug, Serialize, Deserialize, Clone)] pub struct EntryTrigger {} }
We'll give bear traps a trigger (in spawner.rs):
#![allow(unused)] fn main() { fn bear_trap(ecs: &mut World, x: i32, y: i32) { ecs.create_entity() .with(Position{ x, y }) .with(Renderable{ glyph: rltk::to_cp437('^'), fg: RGB::named(rltk::RED), bg: RGB::named(rltk::BLACK), render_order: 2 }) .with(Name{ name : "Bear Trap".to_string() }) .with(Hidden{}) .with(EntryTrigger{}) .marked::<SimpleMarker<SerializeMe>>() .build(); } }
We also need to have traps fire their trigger when an entity enters them. We'll add another component, EntityMoved to indicate that an entity has moved this turn. In components.rs (and remembering to register in main.rs and saveload_system.rs):
#![allow(unused)] fn main() { #[derive(Component, Debug, Serialize, Deserialize, Clone)] pub struct EntityMoved {} }
Now, we scour the codebase to add an EntityMoved component every time an entity moves. In player.rs, we handle player movement in the try_move_player function. At the top, we'll gain write access to the relevant component store:
#![allow(unused)] fn main() { let mut entity_moved = ecs.write_storage::<EntityMoved>(); }
Then when we've determined that the player did, in fact, move - we'll insert the EntityMoved component:
#![allow(unused)] fn main() { entity_moved.insert(entity, EntityMoved{}).expect("Unable to insert marker"); }
The other location that features movement is the Monster AI. So in monster_ai_system.rs, we do something similar. We add a WriteResource for the EntityMoved component, and insert one after the monster moves. The source code for the AI is getting a bit long, so I recommend you look at the source file directly for this one (here).
Lastly, we need a system to make triggers actually do something. We'll make a new file, trigger_system.rs:
#![allow(unused)] fn main() { use specs::prelude::*; use super::{EntityMoved, Position, EntryTrigger, Hidden, Map, Name, gamelog::GameLog}; pub struct TriggerSystem {} impl<'a> System<'a> for TriggerSystem { #[allow(clippy::type_complexity)] type SystemData = ( ReadExpect<'a, Map>, WriteStorage<'a, EntityMoved>, ReadStorage<'a, Position>, ReadStorage<'a, EntryTrigger>, WriteStorage<'a, Hidden>, ReadStorage<'a, Name>, Entities<'a>, WriteExpect<'a, GameLog>); fn run(&mut self, data : Self::SystemData) { let (map, mut entity_moved, position, entry_trigger, mut hidden, names, entities, mut log) = data; // Iterate the entities that moved and their final position for (entity, mut _entity_moved, pos) in (&entities, &mut entity_moved, &position).join() { let idx = map.xy_idx(pos.x, pos.y); for entity_id in map.tile_content[idx].iter() { if entity != *entity_id { // Do not bother to check yourself for being a trap! let maybe_trigger = entry_trigger.get(*entity_id); match maybe_trigger { None => {}, Some(_trigger) => { // We triggered it let name = names.get(*entity_id); if let Some(name) = name { log.entries.push(format!("{} triggers!", &name.name)); } hidden.remove(*entity_id); // The trap is no longer hidden } } } } } // Remove all entity movement markers entity_moved.clear(); } } }
This is relatively straightforward if you've been through the previous chapters:
- We iterate all entities that have a
Positionand anEntityMovedcomponent. - We obtain the map index for their location.
- We iterate the
tile_contentindex to see what's in the new tile. - We look to see if there is a trap there.
- If there is, we get its name and notify the player (via the log) that a trap activated.
- We remove the
hiddencomponent from the trap, since we now know that it is there.
We also have to go into main.rs and insert code to run the system. It goes after the Monster AI, since monsters can move - but we might output damage, so that system needs to run later:
#![allow(unused)] fn main() { ... let mut mob = MonsterAI{}; mob.run_now(&self.ecs); let mut triggers = trigger_system::TriggerSystem{}; triggers.run_now(&self.ecs); ... }
Traps that hurt
So that gets us a long way: traps can be sprinkled around the level, and trigger when you enter their target tile. It would help if the trap did something! We actually have a decent number of component types to describe the effect. In spawner.rs, we'll extend the bear trap to include some damage:
#![allow(unused)] fn main() { fn bear_trap(ecs: &mut World, x: i32, y: i32) { ecs.create_entity() .with(Position{ x, y }) .with(Renderable{ glyph: rltk::to_cp437('^'), fg: RGB::named(rltk::RED), bg: RGB::named(rltk::BLACK), render_order: 2 }) .with(Name{ name : "Bear Trap".to_string() }) .with(Hidden{}) .with(EntryTrigger{}) .with(InflictsDamage{ damage: 6 }) .marked::<SimpleMarker<SerializeMe>>() .build(); } }
We'll also extend the trigger_system to apply the damage:
#![allow(unused)] fn main() { // If the trap is damage inflicting, do it let damage = inflicts_damage.get(*entity_id); if let Some(damage) = damage { particle_builder.request(pos.x, pos.y, rltk::RGB::named(rltk::ORANGE), rltk::RGB::named(rltk::BLACK), rltk::to_cp437('‼'), 200.0); SufferDamage::new_damage(&mut inflict_damage, entity, damage.damage); } }
If you cargo run now, you can move around - and walking into a trap will damage you. If a monster walks into a trap, it damages them too! It even plays the particle effect for attacking.
Bear traps only snap once
Some traps, like a bear trap (think a spring with spikes) really only fire once. That seems like a useful property to model for our trigger system, so we'll add a new component (to components.rs, main.rs and saveload_system.rs):
#![allow(unused)] fn main() { #[derive(Component, Debug, Serialize, Deserialize, Clone)] pub struct SingleActivation {} }
We'll also add it to the Bear Trap function in spawner.rs:
#![allow(unused)] fn main() { .with(SingleActivation{}) }
Now we modify the trigger_system to apply it. Note that we remove the entities after looping through them, to avoid confusing our iterators.
#![allow(unused)] fn main() { use specs::prelude::*; use super::{EntityMoved, Position, EntryTrigger, Hidden, Map, Name, gamelog::GameLog, InflictsDamage, particle_system::ParticleBuilder, SufferDamage, SingleActivation}; pub struct TriggerSystem {} impl<'a> System<'a> for TriggerSystem { #[allow(clippy::type_complexity)] type SystemData = ( ReadExpect<'a, Map>, WriteStorage<'a, EntityMoved>, ReadStorage<'a, Position>, ReadStorage<'a, EntryTrigger>, WriteStorage<'a, Hidden>, ReadStorage<'a, Name>, Entities<'a>, WriteExpect<'a, GameLog>, ReadStorage<'a, InflictsDamage>, WriteExpect<'a, ParticleBuilder>, WriteStorage<'a, SufferDamage>, ReadStorage<'a, SingleActivation>); fn run(&mut self, data : Self::SystemData) { let (map, mut entity_moved, position, entry_trigger, mut hidden, names, entities, mut log, inflicts_damage, mut particle_builder, mut inflict_damage, single_activation) = data; // Iterate the entities that moved and their final position let mut remove_entities : Vec<Entity> = Vec::new(); for (entity, mut _entity_moved, pos) in (&entities, &mut entity_moved, &position).join() { let idx = map.xy_idx(pos.x, pos.y); for entity_id in map.tile_content[idx].iter() { if entity != *entity_id { // Do not bother to check yourself for being a trap! let maybe_trigger = entry_trigger.get(*entity_id); match maybe_trigger { None => {}, Some(_trigger) => { // We triggered it let name = names.get(*entity_id); if let Some(name) = name { log.entries.push(format!("{} triggers!", &name.name)); } hidden.remove(*entity_id); // The trap is no longer hidden // If the trap is damage inflicting, do it let damage = inflicts_damage.get(*entity_id); if let Some(damage) = damage { particle_builder.request(pos.x, pos.y, rltk::RGB::named(rltk::ORANGE), rltk::RGB::named(rltk::BLACK), rltk::to_cp437('‼'), 200.0); SufferDamage::new_damage(&mut inflict_damage, entity, damage.damage); } // If it is single activation, it needs to be removed let sa = single_activation.get(*entity_id); if let Some(_sa) = sa { remove_entities.push(*entity_id); } } } } } } // Remove any single activation traps for trap in remove_entities.iter() { entities.delete(*trap).expect("Unable to delete trap"); } // Remove all entity movement markers entity_moved.clear(); } } }
If you cargo run now (I recommend cargo run --release - it's getting slower!), you can be hit by a bear trap - take some damage, and the trap goes away.
Spotting Traps
We have a pretty functional trap system now, but it's annoying to randomly take damage for no apparent reason - because you had no way to know that a trap was there. It's also quite unfair, since there's no way to guard against it. We'll implement a chance to spot traps. At some point in the future, this might be tied to an attribute or skill - but for now, we'll go with a dice roll. That's a bit nicer than asking everyone to carry a 10 foot pole with them at all times (like some early D&D games!).
Since the visibility_system already handles revealing tiles, why not make it potentially reveal hidden things, too? Here's the code for visibility_system.rs:
#![allow(unused)] fn main() { use specs::prelude::*; use super::{Viewshed, Position, Map, Player, Hidden, gamelog::GameLog}; use rltk::{field_of_view, Point}; pub struct VisibilitySystem {} impl<'a> System<'a> for VisibilitySystem { #[allow(clippy::type_complexity)] type SystemData = ( WriteExpect<'a, Map>, Entities<'a>, WriteStorage<'a, Viewshed>, ReadStorage<'a, Position>, ReadStorage<'a, Player>, WriteStorage<'a, Hidden>, WriteExpect<'a, rltk::RandomNumberGenerator>, WriteExpect<'a, GameLog>, ReadStorage<'a, Name>,); fn run(&mut self, data : Self::SystemData) { let (mut map, entities, mut viewshed, pos, player, mut hidden, mut rng, mut log, names) = data; for (ent,viewshed,pos) in (&entities, &mut viewshed, &pos).join() { if viewshed.dirty { viewshed.dirty = false; viewshed.visible_tiles = field_of_view(Point::new(pos.x, pos.y), viewshed.range, &*map); viewshed.visible_tiles.retain(|p| p.x >= 0 && p.x < map.width && p.y >= 0 && p.y < map.height ); // If this is the player, reveal what they can see let _p : Option<&Player> = player.get(ent); if let Some(_p) = _p { for t in map.visible_tiles.iter_mut() { *t = false }; for vis in viewshed.visible_tiles.iter() { let idx = map.xy_idx(vis.x, vis.y); map.revealed_tiles[idx] = true; map.visible_tiles[idx] = true; // Chance to reveal hidden things for e in map.tile_content[idx].iter() { let maybe_hidden = hidden.get(*e); if let Some(_maybe_hidden) = maybe_hidden { if rng.roll_dice(1,24)==1 { let name = names.get(*e); if let Some(name) = name { log.entries.push(format!("You spotted a {}.", &name.name)); } hidden.remove(*e); } } } } } } } } } }
So why a 1 in 24 chance to spot traps? I played around until it felt about right. 1 in 6 (my first choice) was too good. Since your viewshed updates whenever you move, you have a high chance of spotting traps as you move around. Like a lot of things in game design: sometimes you just have to play with it until it feels right!
If you cargo run now, you can walk around - and sometimes spot traps. Monsters won't reveal traps, unless they fall into them.
The source code for this chapter may be found here
Run this chapter's example with web assembly, in your browser (WebGL2 required)
Copyright (C) 2019, Herbert Wolverson.
Section 3 - Procedurally Generating Maps
About this tutorial
This tutorial is free and open source, and all code uses the MIT license - so you are free to do with it as you like. My hope is that you will enjoy the tutorial, and make great games!
If you enjoy this and would like me to keep writing, please consider supporting my Patreon.
This started out as part of section 2, but I realized it was a large, open topic. The larger roguelike games, such as Dungeon Crawl Stone Soup, Cogmind, Caves of Qud, etc. all have a variety of maps. Section 3 is all about map building, and will cover many of the available algorithms for procedurally building interesting maps.
Copyright (C) 2019, Herbert Wolverson.
Refactor: Generic Map Interface
About this tutorial
This tutorial is free and open source, and all code uses the MIT license - so you are free to do with it as you like. My hope is that you will enjoy the tutorial, and make great games!
If you enjoy this and would like me to keep writing, please consider supporting my Patreon.
So far, we've really just had one map design. It's different every time (unless you hit a repeat random seed), which is a great start - but the world of procedural generation leaves so many more possibilities. Over the next few chapters, we'll start building a few different map types.
Refactoring the builder - Defining an Interface
Up until now, all of our map generation code has sat in the map.rs file. That's fine for a single style, but what if we want to have lots of styles? This is the perfect time to create a proper builder system! If you look at the map generation code in main.rs, we have the beginnings of an interface defined:
- We call
Map::new_map_rooms_and_corridors, which builds a set of rooms. - We pass that to
spawner::spawn_roomto populate each room. - We then place the player in the first room.
To better organize our code, we'll make a module. Rust lets you make a directory, with a file in it called mod.rs - and that directory is now a module. Modules are exposed through mod and pub mod, and provide a way to keep parts of your code together. The mod.rs file provides an interface - that is, a list of what is provided by the module, and how to interact with it. Other files in the module can do whatever they want, safely isolated from the rest of the code.
So, we'll create a directory (off of src) called map_builders. In that directory, we'll create an empty file called mod.rs. We're trying to define an interface, so we'll start with a skeleton. In mod.rs:
#![allow(unused)] fn main() { use super::Map; trait MapBuilder { fn build(new_depth: i32) -> Map; } }
The use of trait is new! A trait is like an interface in other languages: you are saying that any other type can implement the trait, and can then be treated as a variable of that type. Rust by Example has a great section on traits, as does The Rust Book. What we're stating is that anything can declare itself to be a MapBuilder - and that includes a promise that they will provide a build function that takes in an ECS World object, and returns a map.
Open up map.rs, and add a new function - called, appropriately enough, new:
#![allow(unused)] fn main() { /// Generates an empty map, consisting entirely of solid walls pub fn new(new_depth : i32) -> Map { Map{ tiles : vec![TileType::Wall; MAPCOUNT], rooms : Vec::new(), width : MAPWIDTH as i32, height: MAPHEIGHT as i32, revealed_tiles : vec![false; MAPCOUNT], visible_tiles : vec![false; MAPCOUNT], blocked : vec![false; MAPCOUNT], tile_content : vec![Vec::new(); MAPCOUNT], depth: new_depth, bloodstains: HashSet::new() } } }
We'll need this for other map generators, and it makes sense for a Map to know how to return a new one as a constructor - without having to encapsulate all the logic for map layout. The idea is that any Map will work basically the same way, irrespective of how we've decided to populate it.
Now we'll create a new file, also inside the map_builders directory. We'll call it simple_map.rs - and it'll be where we put the existing map generation system. We'll also put a skeleton in place here:
#![allow(unused)] fn main() { use super::MapBuilder; use super::Map; use specs::prelude::*; pub struct SimpleMapBuilder {} impl MapBuilder for SimpleMapBuilder { fn build(new_depth: i32) -> Map { Map::new(new_depth) } } }
This simply returns an unusable, solid map. We'll flesh out the details in a bit - lets get the interface working, first.
Now, back in map_builders/mod.rs we add a public function. For now, it just calls the builder in SimpleMapBuilder:
#![allow(unused)] fn main() { pub fn build_random_map(new_depth: i32) -> Map { SimpleMapBuilder::build(new_depth) } }
Finally, we'll tell main.rs to actually include the module:
#![allow(unused)] fn main() { pub mod map_builders; }
Ok, so that was a fair amount of work to not actually do anything - but we've gained a clean interface offering map creation (via a single function), and setup a trait to require that our map builders work in a similar fashion. That's a good start.
Fleshing out the Simple Map Builder
Now we start moving functionality out of map.rs into our SimpleMapBuilder. We'll start by adding another file to map_builders - common.rs. This will hold functions that used to be part of the map, and are now commonly used when building.
The file looks like this:
#![allow(unused)] fn main() { use super::{Map, Rect, TileType}; use std::cmp::{max, min}; pub fn apply_room_to_map(map : &mut Map, room : &Rect) { for y in room.y1 +1 ..= room.y2 { for x in room.x1 + 1 ..= room.x2 { let idx = map.xy_idx(x, y); map.tiles[idx] = TileType::Floor; } } } pub fn apply_horizontal_tunnel(map : &mut Map, x1:i32, x2:i32, y:i32) { for x in min(x1,x2) ..= max(x1,x2) { let idx = map.xy_idx(x, y); if idx > 0 && idx < map.width as usize * map.height as usize { map.tiles[idx as usize] = TileType::Floor; } } } pub fn apply_vertical_tunnel(map : &mut Map, y1:i32, y2:i32, x:i32) { for y in min(y1,y2) ..= max(y1,y2) { let idx = map.xy_idx(x, y); if idx > 0 && idx < map.width as usize * map.height as usize { map.tiles[idx as usize] = TileType::Floor; } } } }
These are exactly the same as the functions from map.rs, but with map passed as a mutable reference (so you are working on the original, rather than a new one) and all vestiges of self gone. These are free functions - that is, they are functions available from anywhere, not tied to a type. The pub fn means they are public within the module - unless we add pub use to the module itself, they aren't passed out of the module to the main program. This helps keeps code organized.
Now that we have these helpers, we can start porting the map builder itself. In simple_map.rs, we start by fleshing out the build function a bit:
#![allow(unused)] fn main() { impl MapBuilder for SimpleMapBuilder { fn build(new_depth: i32) -> Map { let mut map = Map::new(new_depth); SimpleMapBuilder::rooms_and_corridors(&mut map); map } } }
We're calling a new function, rooms_and_corridors. Lets build it:
#![allow(unused)] fn main() { impl SimpleMapBuilder { fn rooms_and_corridors(map : &mut Map) { const MAX_ROOMS : i32 = 30; const MIN_SIZE : i32 = 6; const MAX_SIZE : i32 = 10; let mut rng = RandomNumberGenerator::new(); for i in 0..MAX_ROOMS { let w = rng.range(MIN_SIZE, MAX_SIZE); let h = rng.range(MIN_SIZE, MAX_SIZE); let x = rng.roll_dice(1, map.width - w - 1) - 1; let y = rng.roll_dice(1, map.height - h - 1) - 1; let new_room = Rect::new(x, y, w, h); let mut ok = true; for other_room in map.rooms.iter() { if new_room.intersect(other_room) { ok = false } } if ok { apply_room_to_map(map, &new_room); if !map.rooms.is_empty() { let (new_x, new_y) = new_room.center(); let (prev_x, prev_y) = map.rooms[map.rooms.len()-1].center(); if rng.range(0,2) == 1 { apply_horizontal_tunnel(map, prev_x, new_x, prev_y); apply_vertical_tunnel(map, prev_y, new_y, new_x); } else { apply_vertical_tunnel(map, prev_y, new_y, prev_x); apply_horizontal_tunnel(map, prev_x, new_x, new_y); } } map.rooms.push(new_room); } } let stairs_position = map.rooms[map.rooms.len()-1].center(); let stairs_idx = map.xy_idx(stairs_position.0, stairs_position.1); map.tiles[stairs_idx] = TileType::DownStairs; } } }
You'll notice that this is built as a method attached to the SimpleMapBuilder structure. It isn't part of the trait, so we can't define it there - but we want to keep it separated from other builders, which might have their own functions. The code itself should look eerily familiar: it's the same as the generator in map.rs, but with map as a variable rather than being generated inside the function.
This is only the first half of generation, but it's a good start! Now go to map.rs, and delete the entire new_map_rooms_and_corridors function. Also delete the ones we replicated in common.rs. The map.rs file looks much cleaner now, without any references to map building strategy! Of course, your compiler/IDE is probably telling you that we've broken a bunch of stuff. That's ok - and a normal part of "refactoring" - the process of changing code to be easier to work with.
There are three lines in main.rs that are now flagged by the compiler.
- We can replace
*worldmap_resource = Map::new_map_rooms_and_corridors(current_depth + 1);with*worldmap_resource = map_builders::build_random_map(current_depth + 1);. *worldmap_resource = Map::new_map_rooms_and_corridors(1);can become*worldmap_resource = map_builders::build_random_map(1);.let map : Map = Map::new_map_rooms_and_corridors(1);transforms tolet map : Map = map_builders::build_random_map(1);.
If you cargo run now, you'll notice: the game is exactly the same! That's good: we've successfully refactored functionality out of Map and into map_builders.
Placing the Player
If you look in main.rs, pretty much every time we build a map - we then look for the first room, and use it to place the player. It's quite possible that we won't want to use the same strategy in future maps, so we should indicate where the player goes when we build the map. Lets expand our interface in map_builders/mod.rs to also return a position:
#![allow(unused)] fn main() { trait MapBuilder { fn build(new_depth: i32) -> (Map, Position); } pub fn build_random_map(new_depth: i32) -> (Map, Position) { SimpleMapBuilder::build(new_depth) } }
Notice that we're using a tuple to return two values at once. We've talked about those earlier, but this is a great example of why they are useful! We now need to go into simple_map to make the build function actually return the correct data. The definition of build in simple_map.rs now looks like this:
#![allow(unused)] fn main() { fn build(new_depth: i32) -> (Map, Position) { let mut map = Map::new(new_depth); let playerpos = SimpleMapBuilder::rooms_and_corridors(&mut map); (map, playerpos) } }
We'll update the signature of rooms_and_corridors:
#![allow(unused)] fn main() { fn rooms_and_corridors(map : &mut Map) -> Position { }
And we'll add a last line to return the center of room 0:
#![allow(unused)] fn main() { let start_pos = map.rooms[0].center(); Position{ x: start_pos.0, y: start_pos.1 } }
This has, of course, broken the code we updated in main.rs. We can quickly take care of that! The first error can be taken care of with the following code:
#![allow(unused)] fn main() { // Build a new map and place the player let worldmap; let current_depth; let player_start; { let mut worldmap_resource = self.ecs.write_resource::<Map>(); current_depth = worldmap_resource.depth; let (newmap, start) = map_builders::build_random_map(current_depth + 1); *worldmap_resource = newmap; player_start = start; worldmap = worldmap_resource.clone(); } // Spawn bad guys for room in worldmap.rooms.iter().skip(1) { spawner::spawn_room(&mut self.ecs, room, current_depth+1); } // Place the player and update resources let (player_x, player_y) = (player_start.x, player_start.y); }
Notice how we use destructuring to retrieve both the map and the start position from the builder. We then put these in the appropriate places. Since assignment in Rust is a move operation, this is pretty efficient - and the compiler can get rid of temporary assignments for us.
We do the same again on the second error (around line 369). It's almost exactly the same code, so feel free to check the source code for this chapter if you are stuck.
Lastly, the final error can be simply replaced like this:
#![allow(unused)] fn main() { let (map, player_start) = map_builders::build_random_map(1); let (player_x, player_y) = (player_start.x, player_start.y); }
Alright, lets cargo run that puppy! If all went well, then... nothing has changed. We've made a significant gain, however: our map building strategy now determines the player's starting point on a level, not the map itself.
Cleaning up room spawning
It's quite possible that we won't have the concept of rooms in some map designs, so we also want to move spawning to be a function of the map builder. We'll add a generic spawner to the interface in map_builders/mod.rs:
#![allow(unused)] fn main() { trait MapBuilder { fn build(new_depth: i32) -> (Map, Position); fn spawn(map : &Map, ecs : &mut World, new_depth: i32); } }
Simple enough: it requires the ECS (since we're adding entities) and the map. We'll also add a public function, spawn to provide an external interface to layout out the monsters:
#![allow(unused)] fn main() { pub fn spawn(map : &mut Map, ecs : &mut World, new_depth: i32) { SimpleMapBuilder::spawn(map, ecs, new_depth); } }
Now we open simple_map.rs and actually implement spawn. Fortunately, it's very simple:
#![allow(unused)] fn main() { fn spawn(map : &mut Map, ecs : &mut World) { for room in map.rooms.iter().skip(1) { spawner::spawn_room(ecs, room, 1); } } }
Now, we can go into main.rs and find every time we loop through calling spawn_room and replace it with a call to map_builders::spawn.
Once again, cargo run should give you the same game we've been looking at for 22 chapters!
Maintaining builder state
If you look closely at what we have so far, there's one problem: the builder has no way of knowing what should be used for the second call to the builder (spawning things). That's because our functions are stateless - we don't actually create a builder and give it a way to remember anything. Since we want to support a wide variety of builders, we should correct that.
This introduces a new Rust concept: dynamic dispatch. The Rust Book has a good section on this if you are familiar with the concept. If you've previously used an Object Oriented Programming language, then you will have encountered this also. The basic idea is that you have a "base object" that specifies an interface - and multiple objects implement the functions from the interface. You can then, at run-time (when the program runs, rather than when it compiles) put any object that implements the interface into a variable typed by the interface - and when you call the methods from the interface, the implementation runs from the actual type. This is nice because your underlying program doesn't have to know about the actual implementations - just how to talk to the interface. That helps keep your program clean.
Dynamic dispatch does come with a cost, which is why Entity Component Systems (and Rust in general) prefer not to use it for performance-critical code. There's actually two costs:
- Since you don't know what type the object is up-front, you have to allocate it via a pointer. Rust makes this easy by providing the
Boxsystem (more on that in a moment), but there is a cost: rather than just jumping to a readily defined piece of memory (which your CPU/memory can generally figure out easily in advance and make sure the cache is ready) the code has to follow the pointer - and then run what it finds at the end of the pointer. That's why some C++ programmers call->(dereference operator) the "cache miss operator". Simply by being boxed, your code is slowed down by a tiny amount. - Since multiple types can implement methods, the computer needs to know which one to run. It does this with a
vtable- that is, a "virtual table" of method implementations. So each call has to check the table, find out which method to run, and then run from there. That's another cache miss, and more time for your CPU to figure out what to do.
In this case, we're just generating the map - and making very few calls into the builder. That makes the slowdown acceptable, since it's really small and not being run frequently. You wouldn't want to do this in your main loop, if you can avoid it!
So - implementation. We'll start by changing our trait to be public, and have the methods accept an &mut self - which means "this method is a member of the trait, and should receive access to self - the attached object when we call it. The code looks like this:
#![allow(unused)] fn main() { pub trait MapBuilder { fn build_map(&mut self, new_depth: i32) -> (Map, Position); fn spawn_entities(&mut self, map : &Map, ecs : &mut World, new_depth: i32); } }
Notice that I've also taken the time to make the names a bit more descriptive! Now we replace our free function calls with a factory function: it creates a MapBuilder and returns it. The name is a bit of a lie until we have more map implementations - it claims to be random, but when there's only one choice it's not hard to guess which one it will pick (just ask Soviet election systems!):
#![allow(unused)] fn main() { pub fn random_builder() -> Box<dyn MapBuilder> { // Note that until we have a second map type, this isn't even slighlty random Box::new(SimpleMapBuilder{}) } }
Notice that it doesn't return a MapBuilder - rather it returns a Box<dyn MapBuilder>! That's rather convoluted (and in earlier versions of Rust, the dyn is optional). A Box is a type wrapped in a pointer, whose size may not be known at compile time. It's the same as a C++ MapBuilder * - it points to a MapBuilder rather than actually being one. The dyn is a flag to say "this should use dynamic dispatch"; the code will work without it (it will be inferred), but it's good practice to flag that you are doing something complicated/expensive here.
The function simply returns Box::new(SimpleMapBuilder{}). This is actually two calls, now: we make a box with Box::new(...), and we place an empty SimpleMapBuilder into the box.
Over in main.rs, we once again have to change all three calls to the map builder. We now need to use the following pattern:
- Obtain a boxed
MapBuilderobject, from the factory. - Call
build_mapas a method - that is, a function attached to the object. - Call
spawn_entitiesalso as a method.
The implementation from goto_next_level now reads as follows:
#![allow(unused)] fn main() { // Build a new map and place the player let mut builder = map_builders::random_builder(current_depth + 1); let worldmap; let current_depth; let player_start; { let mut worldmap_resource = self.ecs.write_resource::<Map>(); current_depth = worldmap_resource.depth; let (newmap, start) = builder.build_map(current_depth + 1); *worldmap_resource = newmap; player_start = start; worldmap = worldmap_resource.clone(); } // Spawn bad guys builder.spawn_entities(&worldmap, &mut self.ecs, current_depth+1); }
It's not very different, but now we're keeping the builder object around - so subsequent calls to the builder will apply to the same implementation (sometimes called "concrete object" - the object that actually physically exists).
If we were to add 5 more map builders, the code in main.rs wouldn't care! We can add them to the factory, and the rest of the program is blissfully unaware of the workings of the map builder. This is a very good example of how dynamic dispatch can be useful: you have a clearly defined interface, and the rest of the program doesn't need to understand the inner workings.
Adding a constructor to SimpleMapBuilder
We're currently making a SimpleMapBuilder as an empty object. What if it needs to keep track of some data? In case we need it, lets add a simple constructor to it and use that instead of a blank object. In simple_map.rs, modify the struct implementation as follows:
#![allow(unused)] fn main() { impl SimpleMapBuilder { pub fn new(new_depth : i32) -> SimpleMapBuilder { SimpleMapBuilder{} } ... }
That simply returns an empty object for now. In mod.rs, change the random_map_builder function to use it:
#![allow(unused)] fn main() { pub fn random_builder(new_depth : i32) -> Box<dyn MapBuilder> { // Note that until we have a second map type, this isn't even slighlty random Box::new(SimpleMapBuilder::new(new_depth)) } }
This hasn't gained us anything, but is a bit cleaner - when you write more maps, they may do something in their constructors!
Cleaning up the trait - simple, obvious steps and single return types
Now that we've come this far, lets extend the trait a bit to obtain the player's position in one function, the map in another, and build/spawn separately. Using small functions tends to make the code easier to read, which is a worthwhile goal in and of itself. In mod.rs, we change the interface as follows:
#![allow(unused)] fn main() { pub trait MapBuilder { fn build_map(&mut self); fn spawn_entities(&mut self, ecs : &mut World); fn get_map(&mut self) -> Map; fn get_starting_position(&mut self) -> Position; } }
There's a few things to note here:
build_mapno longer returns anything at all. We're using it as a function to build map state.spawn_entitiesno longer asks for a Map parameter. Since all map builders have to implement a map in order to make sense, we're going to assume that the map builder has one.get_mapreturns a map. Again, we're assuming that the builder implementation keeps one.get_starting_positionalso assumes that the builder will keep one around.
Obviously, our SimpleMapBuilder now needs to be modified to work this way. We'll start by modifying the struct to include the required variables. This is the map builder's state - and since we're doing dynamic object-oriented code, the state remains attached to the object. Here's the code from simple_map.rs:
#![allow(unused)] fn main() { pub struct SimpleMapBuilder { map : Map, starting_position : Position, depth: i32 } }
Next, we'll implement the getter functions. These are very simple: they simply return the variables from the structure's state:
#![allow(unused)] fn main() { impl MapBuilder for SimpleMapBuilder { fn get_map(&self) -> Map { self.map.clone() } fn get_starting_position(&self) -> Position { self.starting_position.clone() } ... }
We'll also update the constructor to create the state:
#![allow(unused)] fn main() { pub fn new(new_depth : i32) -> SimpleMapBuilder { SimpleMapBuilder{ map : Map::new(new_depth), starting_position : Position{ x: 0, y : 0 }, depth : new_depth } } }
This also simplifies build_map and spawn_entities:
#![allow(unused)] fn main() { fn build_map(&mut self) { SimpleMapBuilder::rooms_and_corridors(); } fn spawn_entities(&mut self, ecs : &mut World) { for room in self.map.rooms.iter().skip(1) { spawner::spawn_room(ecs, room, self.depth); } } }
Lastly, we need to modify rooms_and_corridors to work with this interface:
#![allow(unused)] fn main() { fn rooms_and_corridors(&mut self) { const MAX_ROOMS : i32 = 30; const MIN_SIZE : i32 = 6; const MAX_SIZE : i32 = 10; let mut rng = RandomNumberGenerator::new(); for i in 0..MAX_ROOMS { let w = rng.range(MIN_SIZE, MAX_SIZE); let h = rng.range(MIN_SIZE, MAX_SIZE); let x = rng.roll_dice(1, self.map.width - w - 1) - 1; let y = rng.roll_dice(1, self.map.height - h - 1) - 1; let new_room = Rect::new(x, y, w, h); let mut ok = true; for other_room in self.map.rooms.iter() { if new_room.intersect(other_room) { ok = false } } if ok { apply_room_to_map(&mut self.map, &new_room); if !self.map.rooms.is_empty() { let (new_x, new_y) = new_room.center(); let (prev_x, prev_y) = self.map.rooms[self.map.rooms.len()-1].center(); if rng.range(0,2) == 1 { apply_horizontal_tunnel(&mut self.map, prev_x, new_x, prev_y); apply_vertical_tunnel(&mut self.map, prev_y, new_y, new_x); } else { apply_vertical_tunnel(&mut self.map, prev_y, new_y, prev_x); apply_horizontal_tunnel(&mut self.map, prev_x, new_x, new_y); } } self.map.rooms.push(new_room); } } let stairs_position = self.map.rooms[self.map.rooms.len()-1].center(); let stairs_idx = self.map.xy_idx(stairs_position.0, stairs_position.1); self.map.tiles[stairs_idx] = TileType::DownStairs; let start_pos = self.map.rooms[0].center(); self.starting_position = Position{ x: start_pos.0, y: start_pos.1 }; } }
This is very similar to what we had before, but now uses self.map to refer to its own copy of the map, and stores the player position in self.starting_position.
The calls into the new code in main.rs once again change. The call from goto_next_level now looks like this:
#![allow(unused)] fn main() { let mut builder; let worldmap; let current_depth; let player_start; { let mut worldmap_resource = self.ecs.write_resource::<Map>(); current_depth = worldmap_resource.depth; builder = map_builders::random_builder(current_depth + 1); builder.build_map(); *worldmap_resource = builder.get_map(); player_start = builder.get_starting_position(); worldmap = worldmap_resource.clone(); } // Spawn bad guys builder.spawn_entities(&mut self.ecs); }
We basically repeat those changes for the others (see the source). We now have a pretty comfortable interface into the map builder: it exposes enough to be easy to use, without exposing the details of the magic it uses to actually build the map!
If you cargo run the project now: once again, nothing visible has changed - it still works the way it did before. When you are refactoring, that's a good thing!
So why do maps still have rooms?
Rooms don't actually do much in the game itself: they are an artifact of how we build the map. It's quite possible that later map builders won't actually care about rooms, at least not in the "here's a rectangle, we're calling a room" sense. Lets try and move that abstraction out of the map, and also out of the spawner.
As a first step, in map.rs we remove the rooms structure completely:
#![allow(unused)] fn main() { #[derive(Default, Serialize, Deserialize, Clone)] pub struct Map { pub tiles : Vec<TileType>, pub width : i32, pub height : i32, pub revealed_tiles : Vec<bool>, pub visible_tiles : Vec<bool>, pub blocked : Vec<bool>, pub depth : i32, pub bloodstains : HashSet<usize>, #[serde(skip_serializing)] #[serde(skip_deserializing)] pub tile_content : Vec<Vec<Entity>> } }
We also remove it from the new function. Take a look at your IDE, and you'll notice that you've only broken code in simple_map.rs! We weren't using the rooms anywhere else - which is a pretty big clue that they don't belong in the map we're passing around throughout the main program.
We can fix simple_map by putting rooms into the builder rather than the map. We'll put it into the structure:
#![allow(unused)] fn main() { pub struct SimpleMapBuilder { map : Map, starting_position : Position, depth: i32, rooms: Vec<Rect> } }
This requires that we fixup the constructor:
#![allow(unused)] fn main() { pub fn new(new_depth : i32) -> SimpleMapBuilder { SimpleMapBuilder{ map : Map::new(new_depth), starting_position : Position{ x: 0, y : 0 }, depth : new_depth, rooms: Vec::new() } } }
The spawn function becomes:
#![allow(unused)] fn main() { fn spawn_entities(&mut self, ecs : &mut World) { for room in self.rooms.iter().skip(1) { spawner::spawn_room(ecs, room, self.depth); } } }
And we replace every instance of map.rooms with self.rooms in rooms_and_corridors:
#![allow(unused)] fn main() { fn rooms_and_corridors(&mut self) { const MAX_ROOMS : i32 = 30; const MIN_SIZE : i32 = 6; const MAX_SIZE : i32 = 10; let mut rng = RandomNumberGenerator::new(); for i in 0..MAX_ROOMS { let w = rng.range(MIN_SIZE, MAX_SIZE); let h = rng.range(MIN_SIZE, MAX_SIZE); let x = rng.roll_dice(1, self.map.width - w - 1) - 1; let y = rng.roll_dice(1, self.map.height - h - 1) - 1; let new_room = Rect::new(x, y, w, h); let mut ok = true; for other_room in self.rooms.iter() { if new_room.intersect(other_room) { ok = false } } if ok { apply_room_to_map(&mut self.map, &new_room); if !self.rooms.is_empty() { let (new_x, new_y) = new_room.center(); let (prev_x, prev_y) = self.rooms[self.rooms.len()-1].center(); if rng.range(0,2) == 1 { apply_horizontal_tunnel(&mut self.map, prev_x, new_x, prev_y); apply_vertical_tunnel(&mut self.map, prev_y, new_y, new_x); } else { apply_vertical_tunnel(&mut self.map, prev_y, new_y, prev_x); apply_horizontal_tunnel(&mut self.map, prev_x, new_x, new_y); } } self.rooms.push(new_room); } } let stairs_position = self.rooms[self.rooms.len()-1].center(); let stairs_idx = self.map.xy_idx(stairs_position.0, stairs_position.1); self.map.tiles[stairs_idx] = TileType::DownStairs; let start_pos = self.rooms[0].center(); self.starting_position = Position{ x: start_pos.0, y: start_pos.1 }; } }
Once again, cargo run the project: and nothing should have changed.
Wrap-up
This was an interesting chapter to write, because the objective is to finish with code that operates exactly as it did before - but with the map builder cleaned into its own module, completely isolated from the rest of the code. That gives us a great starting point to start building new map builders, without having to change the game itself.
The source code for this chapter may be found here
Run this chapter's example with web assembly, in your browser (WebGL2 required). There isn't a lot of point, since refactoring aims to not change the visible result!
Copyright (C) 2019, Herbert Wolverson.
Map Construction Test Harness
About this tutorial
This tutorial is free and open source, and all code uses the MIT license - so you are free to do with it as you like. My hope is that you will enjoy the tutorial, and make great games!
If you enjoy this and would like me to keep writing, please consider supporting my Patreon.
As we're diving into generating new and interesting maps, it would be helpful to provide a way to see what the algorithms are doing. This chapter will build a test harness to accomplish this, and extend the SimpleMapBuilder from the previous chapter to support it. This is going to be a relatively large task, and we'll learn some new techniques along the way!
Cleaning up map creation - Do Not Repeat Yourself
In main.rs, we essentially have the same code three times. When the program starts, we insert a map into the world. When we change level, or finish the game - we do the same. The last two have different semantics (since we're updating the world rather than inserting for the first time) - but it's basically redundant repetition.
We'll start by changing the first one to insert placeholder values rather than the actual values we intend to use. This way, the World has the slots for the data - it just isn't all that useful yet. Here's a version with the old code commented out:
#![allow(unused)] fn main() { gs.ecs.insert(SimpleMarkerAllocator::<SerializeMe>::new()); gs.ecs.insert(Map::new(1)); gs.ecs.insert(Point::new(0, 0)); gs.ecs.insert(rltk::RandomNumberGenerator::new()); /*let mut builder = map_builders::random_builder(1); builder.build_map(); let player_start = builder.get_starting_position(); let map = builder.get_map(); let (player_x, player_y) = (player_start.x, player_start.y); builder.spawn_entities(&mut gs.ecs); gs.ecs.insert(map); gs.ecs.insert(Point::new(player_x, player_y));*/ let player_entity = spawner::player(&mut gs.ecs, 0, 0); gs.ecs.insert(player_entity); }
So instead of building the map, we put a placeholder into the World resources. That's obviously not very useful for actually starting the game, so we also need a function to do the actual building and update the resources. Not entirely coincidentally, that function is the same as the other two places from which we currently update the map! In other words, we can roll those into this function, too. So in the implementation of State, we add:
#![allow(unused)] fn main() { fn generate_world_map(&mut self, new_depth : i32) { let mut builder = map_builders::random_builder(new_depth); builder.build_map(); let player_start; { let mut worldmap_resource = self.ecs.write_resource::<Map>(); *worldmap_resource = builder.get_map(); player_start = builder.get_starting_position(); } // Spawn bad guys builder.spawn_entities(&mut self.ecs); // Place the player and update resources let (player_x, player_y) = (player_start.x, player_start.y); let mut player_position = self.ecs.write_resource::<Point>(); *player_position = Point::new(player_x, player_y); let mut position_components = self.ecs.write_storage::<Position>(); let player_entity = self.ecs.fetch::<Entity>(); let player_pos_comp = position_components.get_mut(*player_entity); if let Some(player_pos_comp) = player_pos_comp { player_pos_comp.x = player_x; player_pos_comp.y = player_y; } // Mark the player's visibility as dirty let mut viewshed_components = self.ecs.write_storage::<Viewshed>(); let vs = viewshed_components.get_mut(*player_entity); if let Some(vs) = vs { vs.dirty = true; } } }
Now we can get rid of the commented out code, and simplify our first call quite a bit:
#![allow(unused)] fn main() { gs.ecs.insert(Map::new(1)); gs.ecs.insert(Point::new(0, 0)); gs.ecs.insert(rltk::RandomNumberGenerator::new()); let player_entity = spawner::player(&mut gs.ecs, 0, 0); gs.ecs.insert(player_entity); gs.ecs.insert(RunState::MainMenu{ menu_selection: gui::MainMenuSelection::NewGame }); gs.ecs.insert(gamelog::GameLog{ entries : vec!["Welcome to Rusty Roguelike".to_string()] }); gs.ecs.insert(particle_system::ParticleBuilder::new()); gs.ecs.insert(rex_assets::RexAssets::new()); gs.generate_world_map(1); }
We can also go to the various parts of the code that call the same code we just added to generate_world_map and greatly simplify them by using the new function. We can replace goto_next_level with:
#![allow(unused)] fn main() { fn goto_next_level(&mut self) { // Delete entities that aren't the player or his/her equipment let to_delete = self.entities_to_remove_on_level_change(); for target in to_delete { self.ecs.delete_entity(target).expect("Unable to delete entity"); } // Build a new map and place the player let current_depth; { let worldmap_resource = self.ecs.fetch::<Map>(); current_depth = worldmap_resource.depth; } self.generate_world_map(current_depth + 1); // Notify the player and give them some health let player_entity = self.ecs.fetch::<Entity>(); let mut gamelog = self.ecs.fetch_mut::<gamelog::GameLog>(); gamelog.entries.push("You descend to the next level, and take a moment to heal.".to_string()); let mut player_health_store = self.ecs.write_storage::<CombatStats>(); let player_health = player_health_store.get_mut(*player_entity); if let Some(player_health) = player_health { player_health.hp = i32::max(player_health.hp, player_health.max_hp / 2); } } }
Likewise, we can clean up game_over_cleanup:
#![allow(unused)] fn main() { fn game_over_cleanup(&mut self) { // Delete everything let mut to_delete = Vec::new(); for e in self.ecs.entities().join() { to_delete.push(e); } for del in to_delete.iter() { self.ecs.delete_entity(*del).expect("Deletion failed"); } // Spawn a new player { let player_entity = spawner::player(&mut self.ecs, 0, 0); let mut player_entity_writer = self.ecs.write_resource::<Entity>(); *player_entity_writer = player_entity; } // Build a new map and place the player self.generate_world_map(1); } }
And there we go - cargo run gives the same game we've had for a while, and we've cut out a bunch of code. Refactors that make things smaller rock!
Making a generator
It's surprisingly difficult to combine two paradigms, sometimes:
- The graphical "tick" nature of RLTK (and the underlying GUI environment) encourages you to do everything fast, in one fell swoop.
- Actually visualizing progress while you generate a map encourages you to run in lots of phases as a "state machine", yielding map results along the way.
My first thought was to use coroutines, specifically Generators. They really are ideal for this type of thing: you can write code in a function that runs synchronously (in order) and "yields" values as the computation continues. I even went so far as to get a working implementation - but it required nightly support (unstable, unfinished Rust) and didn't play nicely with web assembly. So I scrapped it. There's a lesson here: sometimes the tooling isn't quite ready for what you really want!
Instead, I decided to go with a more traditional route. Maps can take a "snapshot" while they generate, and that big pile of snapshots can be played frame-by-frame in the visualizer. This isn't quite as nice as a coroutine, but it works and is stable. Those are desirable traits!
To get started, we should make sure that visualizing map generation is entirely optional. When you ship your game to players, you probably don't want to show them the whole map while they get started - but while you are working on map algorithms, it's very valuable. So towards the top of main.rs, we add a constant:
#![allow(unused)] fn main() { const SHOW_MAPGEN_VISUALIZER : bool = true; }
A constant is just that: a variable that cannot change once the program has started. Rust makes read-only constants pretty easy, and the compiler generally optimizes them out completely since the value is known ahead of time. In this case, we're stating that a bool called SHOW_MAPGEN_VISUALIZER is true. The idea is that we can set it to false when we don't want to display our map generation progress.
With that in place, it's time to add snapshot support to our map builder interface. In map_builders/mod.rs we extend the interface a bit:
#![allow(unused)] fn main() { pub trait MapBuilder { fn build_map(&mut self); fn spawn_entities(&mut self, ecs : &mut World); fn get_map(&self) -> Map; fn get_starting_position(&self) -> Position; fn get_snapshot_history(&self) -> Vec<Map>; fn take_snapshot(&mut self); } }
Notice the new entries: get_snapshot_history and take_snapshot. The former will be used to ask the generator for its history of map frames; the latter tells generators to support taking snapshots (and leaves it up to them how they do it).
This is a good time to mention one major difference between Rust and C++ (and other languages that provide Object Oriented Programming support). Rust traits do not support adding variables to the trait signature. So you can't include a history : Vec<Map> within the trait, even if that's exactly what you're using to store the snapshot in all the implementations. I honestly don't know why this is the case, but it's workable - just an odd departure from OOP norms.
Inside simple_map.rs, we need to implement these methods for our SimpleMapBuilder. We start by adding supporting variables to our struct:
#![allow(unused)] fn main() { pub struct SimpleMapBuilder { map : Map, starting_position : Position, depth: i32, rooms: Vec<Rect>, history: Vec<Map> } }
Notice that we've added history: Vec<Map> to the structure. It's what it says on the tin: a vector (resizable array) of Map structures. The idea is that we'll keep adding copies of the map into it for each "frame" of map generation.
Onto the trait implementations:
#![allow(unused)] fn main() { fn get_snapshot_history(&self) -> Vec<Map> { self.history.clone() } }
This is very simple: we return a copy of the history vector to the caller. We also need:
#![allow(unused)] fn main() { fn take_snapshot(&mut self) { if SHOW_MAPGEN_VISUALIZER { let mut snapshot = self.map.clone(); for v in snapshot.revealed_tiles.iter_mut() { *v = true; } self.history.push(snapshot); } } }
We first check to see if we're using the snapshot feature (no point in wasting memory if we aren't!). If we are, we take a copy of the current map, iterate every revealed_tiles cell and set it to true (so the map render will display everything, including inaccessible walls), and add it to the history list.
We can now call self.take_snapshot() at any point during map generation, and it gets added as a frame to the map generator. In simple_map.rs we add a couple of calls after we add rooms or corridors:
#![allow(unused)] fn main() { ... if ok { apply_room_to_map(&mut self.map, &new_room); self.take_snapshot(); if !self.rooms.is_empty() { let (new_x, new_y) = new_room.center(); let (prev_x, prev_y) = self.rooms[self.rooms.len()-1].center(); if rng.range(0,2) == 1 { apply_horizontal_tunnel(&mut self.map, prev_x, new_x, prev_y); apply_vertical_tunnel(&mut self.map, prev_y, new_y, new_x); } else { apply_vertical_tunnel(&mut self.map, prev_y, new_y, prev_x); apply_horizontal_tunnel(&mut self.map, prev_x, new_x, new_y); } } self.rooms.push(new_room); self.take_snapshot(); } ... }
Rendering the visualizer
Visualizing map development is another game state, so we add it to our RunState enumeration in main.rs:
#![allow(unused)] fn main() { #[derive(PartialEq, Copy, Clone)] pub enum RunState { AwaitingInput, PreRun, PlayerTurn, MonsterTurn, ShowInventory, ShowDropItem, ShowTargeting { range : i32, item : Entity}, MainMenu { menu_selection : gui::MainMenuSelection }, SaveGame, NextLevel, ShowRemoveItem, GameOver, MagicMapReveal { row : i32 }, MapGeneration } }
Visualization actually requires a few variables, but I ran into a problem: one of the variables really should be the next state to which we transition after visualizing. We might be building a new map from one of three sources (new game, game over, next level) - and they have different states following the generation. Unfortunately, you can't put a second RunState into the first one - Rust gives you cycle errors, and it won't compile. You can use a Box<RunState> - but that doesn't work with RunState deriving from Copy! I fought this for a while, and settled on adding to State instead:
#![allow(unused)] fn main() { pub struct State { pub ecs: World, mapgen_next_state : Option<RunState>, mapgen_history : Vec<Map>, mapgen_index : usize, mapgen_timer : f32 } }
We've added:
mapgen_next_state- which is where the game should go next.mapgen_history- a copy of the map history frames to play.mapgen_index- how far through the history we are during playback.mapgen_timer- used for frame timing during playback.
Since we've modified State, we also have to modify our creation of the State object:
#![allow(unused)] fn main() { let mut gs = State { ecs: World::new(), mapgen_next_state : Some(RunState::MainMenu{ menu_selection: gui::MainMenuSelection::NewGame }), mapgen_index : 0, mapgen_history: Vec::new(), mapgen_timer: 0.0 }; }
We've made the next state the same as the starting state we have been using: so the game will render map creation and then go to the menu. We can change our initial state to MapGeneration:
#![allow(unused)] fn main() { gs.ecs.insert(RunState::MapGeneration{} ); }
Now we need to implement the renderer. In our tick function, we add the following state:
#![allow(unused)] fn main() { match newrunstate { RunState::MapGeneration => { if !SHOW_MAPGEN_VISUALIZER { newrunstate = self.mapgen_next_state.unwrap(); } ctx.cls(); draw_map(&self.mapgen_history[self.mapgen_index], ctx); self.mapgen_timer += ctx.frame_time_ms; if self.mapgen_timer > 300.0 { self.mapgen_timer = 0.0; self.mapgen_index += 1; if self.mapgen_index >= self.mapgen_history.len() { newrunstate = self.mapgen_next_state.unwrap(); } } } ... }
This is relatively straight-forward:
- If the visualizer isn't enabled, simply transition to the next state immediately.
- Clear the screen.
- Call
draw_map, with the map history from our state - at the current frame. - Add the frame duration to the
mapgen_timer, and if it is greater than 300ms:- Set the timer back to 0.
- Increment the frame counter.
- If the frame counter has reached the end of our history, transition to the next game state.
The eagle-eyed reader will have noticed a subtle change here. draw_map didn't used to take a map - it would pull it from the ECS! In map.rs, the beginning of draw_map changes to:
#![allow(unused)] fn main() { pub fn draw_map(map : &Map, ctx : &mut Rltk) { }
Our regular call to draw_map in tick also changes to:
#![allow(unused)] fn main() { draw_map(&self.ecs.fetch::<Map>(), ctx); }
This is a tiny change that allowed us to render whatever Map structure we need!
Lastly, we need to actually give the visualizer some data to render. We adjust generate_world_map to reset the various mapgen_ variables, clear the history, and retrieve the snapshot history once it has run:
#![allow(unused)] fn main() { fn generate_world_map(&mut self, new_depth : i32) { self.mapgen_index = 0; self.mapgen_timer = 0.0; self.mapgen_history.clear(); let mut builder = map_builders::random_builder(new_depth); builder.build_map(); self.mapgen_history = builder.get_snapshot_history(); let player_start; { let mut worldmap_resource = self.ecs.write_resource::<Map>(); *worldmap_resource = builder.get_map(); player_start = builder.get_starting_position(); } }
If you cargo run the project now, you get to watch the simple map generator build your level before you start.
Wrap-Up
This finishes building the test harness - you can watch maps spawn, which should make generating maps (the topic of the next few chapters) a lot more intuitive.
The source code for this chapter may be found here
Run this chapter's example with web assembly, in your browser (WebGL2 required)
Copyright (C) 2019, Herbert Wolverson.
BSP Room Dungeons
About this tutorial
This tutorial is free and open source, and all code uses the MIT license - so you are free to do with it as you like. My hope is that you will enjoy the tutorial, and make great games!
If you enjoy this and would like me to keep writing, please consider supporting my Patreon.
A popular method of map generation uses "binary space partition" to sub-divide your map into rectangles of varying size, and then link the resulting rooms together into corridors. You can go a long way with this method: Nethack uses it extensively, Dungeon Crawl: Stone Soup uses it sometimes, and my project - One Knight in the Dungeon - uses it for sewer levels. This chapter will use the visualizer from the previous chapter to walk you through using this technique.
Implementing a new map - subdivided BSP, the boilerplate
We'll start by making a new file in map_builders - bsp_dungeon.rs. We start by making the basic BspDungeonBuilder struct:
#![allow(unused)] fn main() { pub struct BspDungeonBuilder { map : Map, starting_position : Position, depth: i32, rooms: Vec<Rect>, history: Vec<Map>, rects: Vec<Rect> } }
This is basically the same as the one from SimpleMapBuilder - and we've kept the rooms vector, because this method uses a concept of rooms as well. We've added a rects vector: the algorithm uses this a lot, so it's helpful to make it available throughout the implementation. We'll see why it's needed shortly.
Now we implement the MapBuilder trait to the type:
#![allow(unused)] fn main() { impl MapBuilder for BspDungeonBuilder { fn get_map(&self) -> Map { self.map.clone() } fn get_starting_position(&self) -> Position { self.starting_position.clone() } fn get_snapshot_history(&self) -> Vec<Map> { self.history.clone() } fn build_map(&mut self) { // We should do something here } fn spawn_entities(&mut self, ecs : &mut World) { for room in self.rooms.iter().skip(1) { spawner::spawn_room(ecs, room, self.depth); } } fn take_snapshot(&mut self) { if SHOW_MAPGEN_VISUALIZER { let mut snapshot = self.map.clone(); for v in snapshot.revealed_tiles.iter_mut() { *v = true; } self.history.push(snapshot); } } } }
This is also pretty much the same as SimpleMapBuilder, but build_map has a comment reminding us to write some code. If you ran the generator right now, you'd get a solid blob of walls - and no content whatsoever.
We also need to implement a constructor for BspMapBuilder. Once again, it's basically the same as SimpleMapBuilder:
#![allow(unused)] fn main() { impl BspDungeonBuilder { pub fn new(new_depth : i32) -> BspDungeonBuilder { BspDungeonBuilder{ map : Map::new(new_depth), starting_position : Position{ x: 0, y : 0 }, depth : new_depth, rooms: Vec::new(), history: Vec::new(), rects: Vec::new() } } } }
Lastly, we'll open map_builders/mod.rs and change the random_builder function to always return our new map type:
#![allow(unused)] fn main() { pub fn random_builder(new_depth: i32) -> Box<dyn MapBuilder> { // Note that until we have a second map type, this isn't even slighlty random Box::new(BspDungeonBuilder::new(new_depth)) } }
Once again, this isn't in the slightest bit random - but it's far easier to develop a feature that always runs, rather than keeping trying until it picks the one we want to debug!
Building the map creator
We'll worry about swapping out map types later. Onto making the map! Note that this implementation is ported from my C++ game, One Knight in the Dungeon. We'll start with room generation. Inside our impl BspMapBuilder, we add a new function:
#![allow(unused)] fn main() { fn build(&mut self) { let mut rng = RandomNumberGenerator::new(); self.rects.clear(); self.rects.push( Rect::new(2, 2, self.map.width-5, self.map.height-5) ); // Start with a single map-sized rectangle let first_room = self.rects[0]; self.add_subrects(first_room); // Divide the first room // Up to 240 times, we get a random rectangle and divide it. If its possible to squeeze a // room in there, we place it and add it to the rooms list. let mut n_rooms = 0; while n_rooms < 240 { let rect = self.get_random_rect(&mut rng); let candidate = self.get_random_sub_rect(rect, &mut rng); if self.is_possible(candidate) { apply_room_to_map(&mut self.map, &candidate); self.rooms.push(candidate); self.add_subrects(rect); self.take_snapshot(); } n_rooms += 1; } let start = self.rooms[0].center(); self.starting_position = Position{ x: start.0, y: start.1 }; } }
So what on Earth does this do?
- We clear the
rectsstructure we created as part of the builder. This will be used to store rectangles derived from the overall map. - We create the "first room" - which is really the whole map. We've trimmed a bit to add some padding to the sides of the map.
- We call
add_subrects, passing it the rectangle list - and the first room. We'll implement that in a minute, but what it does is: it divides the rectangle into four quadrants, and adds each of the quadrants to the rectangle list. - Now we setup a room counter, so we don't infinitely loop.
- While that counter is less than 240 (a relatively arbitrary limit that gives fun results):
- We call
get_random_rectto retrieve a random rectangle from the rectangles list. - We call
get_random_sub_rectusing this rectangle as an outer boundary. It creates a random room from 3 to 10 tiles in size (on each axis), somewhere within the parent rectangle. - We ask
is_possibleif the candidate can be drawn to the map; every tile must be within the map boundaries, and not already a room. If it IS possible:- We mark it on the map.
- We add it to the rooms list.
- We call
add_subrectsto sub-divide the rectangle we just used (not the candidate!).
- We call
There's quite a few support functions in play here, so lets go through them.
#![allow(unused)] fn main() { fn add_subrects(&mut self, rect : Rect) { let width = i32::abs(rect.x1 - rect.x2); let height = i32::abs(rect.y1 - rect.y2); let half_width = i32::max(width / 2, 1); let half_height = i32::max(height / 2, 1); self.rects.push(Rect::new( rect.x1, rect.y1, half_width, half_height )); self.rects.push(Rect::new( rect.x1, rect.y1 + half_height, half_width, half_height )); self.rects.push(Rect::new( rect.x1 + half_width, rect.y1, half_width, half_height )); self.rects.push(Rect::new( rect.x1 + half_width, rect.y1 + half_height, half_width, half_height )); } }
The function add_subrects is core to the BSP (Binary Space Partition) approach: it takes a rectangle, and divides the width and height in half. It then creates four new rectangles, one for each quadrant of the original. These are added to the rects list. Graphically:
############### ###############
# # # 1 + 2 #
# # # + #
# 0 # -> #+++++++++++++#
# # # 3 + 4 #
# # # + #
############### ###############
Next up is get_random_rect:
#![allow(unused)] fn main() { fn get_random_rect(&mut self, rng : &mut RandomNumberGenerator) -> Rect { if self.rects.len() == 1 { return self.rects[0]; } let idx = (rng.roll_dice(1, self.rects.len() as i32)-1) as usize; self.rects[idx] } }
This is a simple function. If there is only one rectangle in the rects list, it returns the first one. Otherwise, it rolls a dice for of 1d(size of rects list) and returns the rectangle found at the random index.
Next up is get_random_sub_rect:
#![allow(unused)] fn main() { fn get_random_sub_rect(&self, rect : Rect, rng : &mut RandomNumberGenerator) -> Rect { let mut result = rect; let rect_width = i32::abs(rect.x1 - rect.x2); let rect_height = i32::abs(rect.y1 - rect.y2); let w = i32::max(3, rng.roll_dice(1, i32::min(rect_width, 10))-1) + 1; let h = i32::max(3, rng.roll_dice(1, i32::min(rect_height, 10))-1) + 1; result.x1 += rng.roll_dice(1, 6)-1; result.y1 += rng.roll_dice(1, 6)-1; result.x2 = result.x1 + w; result.y2 = result.y1 + h; result } }
So this takes a rectangle as the parameter, and makes a mutable copy to use as the result. It calculates the width and height of the rectangle, and then produces a random width and height inside that rectangle - but no less than 3 tiles in size and no more than 10 on each dimension. You can tweak those numbers to change your desired room size. It then shunts the rectangle a bit, to provide some random placement (otherwise, it would always be against the sides of the sub-rectangle). Finally, it returns the result. Graphically:
############### ########
# # # 1 #
# # # #
# 0 # -> ########
# #
# #
###############
Finally, the is_possible function:
#![allow(unused)] fn main() { fn is_possible(&self, rect : Rect) -> bool { let mut expanded = rect; expanded.x1 -= 2; expanded.x2 += 2; expanded.y1 -= 2; expanded.y2 += 2; let mut can_build = true; for y in expanded.y1 ..= expanded.y2 { for x in expanded.x1 ..= expanded.x2 { if x > self.map.width-2 { can_build = false; } if y > self.map.height-2 { can_build = false; } if x < 1 { can_build = false; } if y < 1 { can_build = false; } if can_build { let idx = self.map.xy_idx(x, y); if self.map.tiles[idx] != TileType::Wall { can_build = false; } } } } can_build } }
This is a little more complicated, but makes sense when you break it down:
- Take a rectangle as a target, representing the room we are looking at.
- Create a mutable copy of the rectangle called
expanded. We then expand the rectangle out by 2 tiles in each direction, to prevent rooms from overlapping. - We iterate every
xandycoordinate in the rectangle:- If
xoryare out of the map boundaries, we markcan_buildasfalse- this won't work. - If we still can build it, we look at the existing map - if it isn't a solid wall, then we've overlapped an existing room, and mark that we can't build.
- If
- We return the result of
can_build.
So now that we've implemented all of these, the overall algorithm is more obvious:
- We start with a single rectangle covering the entire map.
- We sub-divide it, so now our map has 5 rectangles - one for each quadrant, one for the map as a whole.
- We use a counter to ensure that we don't loop forever (we'll reject a lot of rooms). While we can still add rooms, we:
- Obtain a random rectangle from the rectangles list. Initially, this will be one of the quadrants - or the whole map. This list will keep growing as we add subdivisions.
- We generate a random sub-rectangle inside this rectangle.
- We look to see if that's a possible room. If it is, we:
- Apply the room to the map (build it).
- Add it to the rooms list.
- Sub-divide the new rectangle into quadrants and add those to our rectangles list.
- Store a snapshot for the visualizer.
This tends to give a nice spread of rooms, and they are guaranteed not to overlap. Very Nethack like!
If you cargo run now, you will be in a room with no exits. You'll get to watch rooms appear around the map in the visualizer. That's a great start.
Adding in corridors
Now, we sort the rooms by left coordinate. You don't have to do this, but it helps make connected rooms line up.
#![allow(unused)] fn main() { self.rooms.sort_by(|a,b| a.x1.cmp(&b.x1) ); }
sort_by takes a closure - that is, an inline function (known as a "lambda" in other languages) as a parameter. You could specify a whole other function if you wanted to, or implement traits on Rect to make it sortable - but this is easy enough. It sorts by comparing the x1 value of each rectangle.
Now we'll add some corridors:
#![allow(unused)] fn main() { // Now we want corridors for i in 0..self.rooms.len()-1 { let room = self.rooms[i]; let next_room = self.rooms[i+1]; let start_x = room.x1 + (rng.roll_dice(1, i32::abs(room.x1 - room.x2))-1); let start_y = room.y1 + (rng.roll_dice(1, i32::abs(room.y1 - room.y2))-1); let end_x = next_room.x1 + (rng.roll_dice(1, i32::abs(next_room.x1 - next_room.x2))-1); let end_y = next_room.y1 + (rng.roll_dice(1, i32::abs(next_room.y1 - next_room.y2))-1); self.draw_corridor(start_x, start_y, end_x, end_y); self.take_snapshot(); } }
This iterates the rooms list, ignoring the last one. It fetches the current room, and the next one in the list and calculates a random location (start_x/start_y and end_x/end_y) within each room. It then calls the mysterious draw_corridor function with these coordinates. Draw corridor adds a line from the start to the end, using only north/south or east/west (it can give 90-degree bends). It won't give you a staggered, hard to navigate perfect line like Bresenham would. We also take a snapshot.
The draw_corridor function is quite simple:
#![allow(unused)] fn main() { fn draw_corridor(&mut self, x1:i32, y1:i32, x2:i32, y2:i32) { let mut x = x1; let mut y = y1; while x != x2 || y != y2 { if x < x2 { x += 1; } else if x > x2 { x -= 1; } else if y < y2 { y += 1; } else if y > y2 { y -= 1; } let idx = self.map.xy_idx(x, y); self.map.tiles[idx] = TileType::Floor; } } }
It takes a start and end point, and creates mutable x and y variables equal to the starting location. Then it keeps going until x and y match end end of the line. For each iteration, if x is less than the ending x - it goes left. If x is greater than the ending x - it goes right. Same for y, but with up and down. This gives straight corridors with a single corner.
Don't forget the stairs (I nearly did!)
Finally, we need to wrap up and create the exit:
#![allow(unused)] fn main() { // Don't forget the stairs let stairs = self.rooms[self.rooms.len()-1].center(); let stairs_idx = self.map.xy_idx(stairs.0, stairs.1); self.map.tiles[stairs_idx] = TileType::DownStairs; }
We place the exit in the last room, guaranteeing that the poor player has a ways to walk.
If you cargo run now, you'll see something like this:
 .
.
Randomizing the dungeon per level
Rather than always using the BSP sewer algorithm, we would like to sometimes use one or the other. In map_builders/mod.rs, replace the build function:
#![allow(unused)] fn main() { pub fn random_builder(new_depth: i32) -> Box<dyn MapBuilder> { let mut rng = rltk::RandomNumberGenerator::new(); let builder = rng.roll_dice(1, 2); match builder { 1 => Box::new(BspDungeonBuilder::new(new_depth)), _ => Box::new(SimpleMapBuilder::new(new_depth)) } } }
Now when you play, it's a coin toss what type of map you encounter. The spawn functions for the types are the same - so we're not going to worry about map builder state until the next chapter.
Wrap-Up
You've refactored your map building into a new module, and built a simple BSP (Binary Space Partitioning) based map. The game randomly picks a map type, and you have more variety. The next chapter will further refactor map generation, and introduce another technique.
The source code for this chapter may be found here
Run this chapter's example with web assembly, in your browser (WebGL2 required)
Copyright (C) 2019, Herbert Wolverson.
BSP Interior Design
About this tutorial
This tutorial is free and open source, and all code uses the MIT license - so you are free to do with it as you like. My hope is that you will enjoy the tutorial, and make great games!
If you enjoy this and would like me to keep writing, please consider supporting my Patreon.
In the last chapter, we used binary space partition (BSP) to build a dungeon with rooms. BSP is flexible, and can help you with a lot of problems; in this example, we're going to modify BSP to design an interior dungeon - completely inside a rectangular structure (for example, a castle) and with no wasted space other than interior walls.
The code for this chapter is converted from One Knight in the Dungeon's prison levels.
Scaffolding
We'll start by making a new file, map_builders/bsp_interior.rs and putting in the same initial boilerplate that we used in the previous chapter:
#![allow(unused)] fn main() { use super::{MapBuilder, Map, Rect, apply_room_to_map, TileType, Position, spawner, SHOW_MAPGEN_VISUALIZER}; use rltk::RandomNumberGenerator; use specs::prelude::*; pub struct BspInteriorBuilder { map : Map, starting_position : Position, depth: i32, rooms: Vec<Rect>, history: Vec<Map>, rects: Vec<Rect> } impl MapBuilder for BspInteriorBuilder { fn get_map(&self) -> Map { self.map.clone() } fn get_starting_position(&self) -> Position { self.starting_position.clone() } fn get_snapshot_history(&self) -> Vec<Map> { self.history.clone() } fn build_map(&mut self) { // We should do something here } fn spawn_entities(&mut self, ecs : &mut World) { for room in self.rooms.iter().skip(1) { spawner::spawn_room(ecs, room, self.depth); } } fn take_snapshot(&mut self) { if SHOW_MAPGEN_VISUALIZER { let mut snapshot = self.map.clone(); for v in snapshot.revealed_tiles.iter_mut() { *v = true; } self.history.push(snapshot); } } } impl BspInteriorBuilder { pub fn new(new_depth : i32) -> BspInteriorBuilder { BspInteriorBuilder{ map : Map::new(new_depth), starting_position : Position{ x: 0, y : 0 }, depth : new_depth, rooms: Vec::new(), history: Vec::new(), rects: Vec::new() } } } }
We'll also change our random builder function in map_builders/mod.rs to once again lie to the user and always "randomly" pick the new algorithm:
#![allow(unused)] fn main() { pub fn random_builder(new_depth: i32) -> Box<dyn MapBuilder> { /*let mut rng = rltk::RandomNumberGenerator::new(); let builder = rng.roll_dice(1, 2); match builder { 1 => Box::new(BspDungeonBuilder::new(new_depth)), _ => Box::new(SimpleMapBuilder::new(new_depth)) }*/ Box::new(BspInteriorBuilder::new(new_depth)) } }
Subdividing into rooms
We're not going to achieve a perfect subdivision due to rounding issues, but we can get pretty close. Certainly good enough for a game! We put together a build function that is quite similar to the one from the previous chapter:
#![allow(unused)] fn main() { fn build(&mut self) { let mut rng = RandomNumberGenerator::new(); self.rects.clear(); self.rects.push( Rect::new(1, 1, self.map.width-2, self.map.height-2) ); // Start with a single map-sized rectangle let first_room = self.rects[0]; self.add_subrects(first_room, &mut rng); // Divide the first room let rooms = self.rects.clone(); for r in rooms.iter() { let room = *r; //room.x2 -= 1; //room.y2 -= 1; self.rooms.push(room); for y in room.y1 .. room.y2 { for x in room.x1 .. room.x2 { let idx = self.map.xy_idx(x, y); if idx > 0 && idx < ((self.map.width * self.map.height)-1) as usize { self.map.tiles[idx] = TileType::Floor; } } } self.take_snapshot(); } let start = self.rooms[0].center(); self.starting_position = Position{ x: start.0, y: start.1 }; } }
Lets look at what this does:
- We create a new random number generator.
- We clear the
rectslist, and add a rectangle covering the whole map we intend to use. - We call a magical function
add_subrectson this rectangle. More on that in a minute. - We copy the rooms list, to avoid borring issues.
- For each room, we add it to the rooms list - and carve it out of the map. We also take a snapshot.
- We start the player in the first room.
The add_subrects function in this case does all the hard work:
#![allow(unused)] fn main() { fn add_subrects(&mut self, rect : Rect, rng : &mut RandomNumberGenerator) { // Remove the last rect from the list if !self.rects.is_empty() { self.rects.remove(self.rects.len() - 1); } // Calculate boundaries let width = rect.x2 - rect.x1; let height = rect.y2 - rect.y1; let half_width = width / 2; let half_height = height / 2; let split = rng.roll_dice(1, 4); if split <= 2 { // Horizontal split let h1 = Rect::new( rect.x1, rect.y1, half_width-1, height ); self.rects.push( h1 ); if half_width > MIN_ROOM_SIZE { self.add_subrects(h1, rng); } let h2 = Rect::new( rect.x1 + half_width, rect.y1, half_width, height ); self.rects.push( h2 ); if half_width > MIN_ROOM_SIZE { self.add_subrects(h2, rng); } } else { // Vertical split let v1 = Rect::new( rect.x1, rect.y1, width, half_height-1 ); self.rects.push(v1); if half_height > MIN_ROOM_SIZE { self.add_subrects(v1, rng); } let v2 = Rect::new( rect.x1, rect.y1 + half_height, width, half_height ); self.rects.push(v2); if half_height > MIN_ROOM_SIZE { self.add_subrects(v2, rng); } } } }
Lets take a look at what this function does:
- If the
rectslist isn't empty, we remove the last item from the list. This has the effect of removing the last rectangle we added - so when we start, we are removing the rectangle covering the whole map. Later on, we are removing a rectangle because we are dividing it. This way, we won't have overlaps. - We calculate the width and height of the rectangle, and well as half of the width and height.
- We roll a dice. There's a 50% chance of a horizontal or vertical split.
- If we're splitting horizontally:
- We make
h1- a new rectangle. It covers the left half of the parent rectangle. - We add
h1to therectslist. - If
half_widthis bigger thanMIN_ROOM_SIZE, we recursively calladd_subrectsagain, withh1as the target rectangle. - We make
h2- a new rectangle covering the right side of the parent rectangle. - We add
h2to therectslist. - If
half_widthis bigger thanMIN_ROOM_SIZE, we recursively calladd_subrectsagain, withh2as the target rectangle.
- We make
- If we're splitting vertically, it's the same as (4) - but with top and bottom rectangles.
Conceptually, this starts with a rectangle:
#################################
# #
# #
# #
# #
# #
# #
# #
# #
# #
#################################
A horizontal split would yield the following:
#################################
# # #
# # #
# # #
# # #
# # #
# # #
# # #
# # #
# # #
#################################
The next split might be vertical:
#################################
# # #
# # #
# # #
# # #
################ #
# # #
# # #
# # #
# # #
#################################
This repeats until we have a lot of small rooms.
You can cargo run the code right now, to see the rooms appearing.
Adding some doorways
It's all well and good to have rooms, but without doors connecting them it's not going to be a very fun experience! Fortunately, the exact same code from the previous chapter will work here, also.
#![allow(unused)] fn main() { // Now we want corridors for i in 0..self.rooms.len()-1 { let room = self.rooms[i]; let next_room = self.rooms[i+1]; let start_x = room.x1 + (rng.roll_dice(1, i32::abs(room.x1 - room.x2))-1); let start_y = room.y1 + (rng.roll_dice(1, i32::abs(room.y1 - room.y2))-1); let end_x = next_room.x1 + (rng.roll_dice(1, i32::abs(next_room.x1 - next_room.x2))-1); let end_y = next_room.y1 + (rng.roll_dice(1, i32::abs(next_room.y1 - next_room.y2))-1); self.draw_corridor(start_x, start_y, end_x, end_y); self.take_snapshot(); } }
This in turn calls the unchanged draw_corridor function:
#![allow(unused)] fn main() { fn draw_corridor(&mut self, x1:i32, y1:i32, x2:i32, y2:i32) { let mut x = x1; let mut y = y1; while x != x2 || y != y2 { if x < x2 { x += 1; } else if x > x2 { x -= 1; } else if y < y2 { y += 1; } else if y > y2 { y -= 1; } let idx = self.map.xy_idx(x, y); self.map.tiles[idx] = TileType::Floor; } } }
Don't forget the stairs (I nearly did, AGAIN!)
Finally, we need to wrap up and create the exit:
#![allow(unused)] fn main() { // Don't forget the stairs let stairs = self.rooms[self.rooms.len()-1].center(); let stairs_idx = self.map.xy_idx(stairs.0, stairs.1); self.map.tiles[stairs_idx] = TileType::DownStairs; }
We place the exit in the last room, guaranteeing that the poor player has a ways to walk.
If you cargo run now, you'll see something like this:
 .
.
Restoring randomness - again
Lastly, we go back to map_builders/mod.rs and edit our random_builder to once gain provide a random dungeon per level:
#![allow(unused)] fn main() { pub fn random_builder(new_depth: i32) -> Box<dyn MapBuilder> { let mut rng = rltk::RandomNumberGenerator::new(); let builder = rng.roll_dice(1, 3); match builder { 1 => Box::new(BspDungeonBuilder::new(new_depth)), 2 => Box::new(BspInteriorBuilder::new(new_depth)), _ => Box::new(SimpleMapBuilder::new(new_depth)) } } }
Wrap Up
This type of dungeon can represent an interior, maybe of a space ship, a castle, or even a home. You can tweak dimensions, door placement, and bias the splitting as you see fit - but you'll get a map that makes most of the available space usable by the game. It's probably worth being sparing with these levels (or incorporating them into other levels) - they can lack variety, even though they are random.
The source code for this chapter may be found here
Run this chapter's example with web assembly, in your browser (WebGL2 required)
Copyright (C) 2019, Herbert Wolverson.
Cellular Automata Maps
About this tutorial
This tutorial is free and open source, and all code uses the MIT license - so you are free to do with it as you like. My hope is that you will enjoy the tutorial, and make great games!
If you enjoy this and would like me to keep writing, please consider supporting my Patreon.
Sometimes, you need a break from rectangular rooms. You might want a nice, organic looking cavern; a winding forest trail, or a spooky quarry. One Knight in the Dungeon uses cellular automata for this purpose, inspired by this excellent article. This chapter will help you create natural looking maps.
Scaffolding
Once again, we're going to take a bunch of code from the previous tutorial and re-use it for the new generator. Create a new file, map_builders/cellular_automata.rs and place the following in it:
#![allow(unused)] fn main() { use super::{MapBuilder, Map, Rect, apply_room_to_map, TileType, Position, spawner, SHOW_MAPGEN_VISUALIZER}; use rltk::RandomNumberGenerator; use specs::prelude::*; const MIN_ROOM_SIZE : i32 = 8; pub struct CellularAutomataBuilder { map : Map, starting_position : Position, depth: i32, history: Vec<Map> } impl MapBuilder for CellularAutomataBuilder { fn get_map(&self) -> Map { self.map.clone() } fn get_starting_position(&self) -> Position { self.starting_position.clone() } fn get_snapshot_history(&self) -> Vec<Map> { self.history.clone() } fn build_map(&mut self) { //self.build(); - we should write this } fn spawn_entities(&mut self, ecs : &mut World) { // We need to rewrite this, too. } fn take_snapshot(&mut self) { if SHOW_MAPGEN_VISUALIZER { let mut snapshot = self.map.clone(); for v in snapshot.revealed_tiles.iter_mut() { *v = true; } self.history.push(snapshot); } } } impl CellularAutomataBuilder { pub fn new(new_depth : i32) -> CellularAutomataBuilder { CellularAutomataBuilder{ map : Map::new(new_depth), starting_position : Position{ x: 0, y : 0 }, depth : new_depth, history: Vec::new(), } } } }
Once again, we'll make the name random_builder a lie and only return the one we're working on:
#![allow(unused)] fn main() { pub fn random_builder(new_depth: i32) -> Box<dyn MapBuilder> { /*let mut rng = rltk::RandomNumberGenerator::new(); let builder = rng.roll_dice(1, 3); match builder { 1 => Box::new(BspDungeonBuilder::new(new_depth)), 2 => Box::new(BspInteriorBuilder::new(new_depth)), _ => Box::new(SimpleMapBuilder::new(new_depth)) }*/ Box::new(CellularAutomataBuilder::new(new_depth)) } }
Putting together the basic map
The first step is to make the map completely chaotic, with about 55% of tiles being solid. You can tweak that number for different effects, but I quite like the result. Here's the build function:
#![allow(unused)] fn main() { fn build(&mut self) { let mut rng = RandomNumberGenerator::new(); // First we completely randomize the map, setting 55% of it to be floor. for y in 1..self.map.height-1 { for x in 1..self.map.width-1 { let roll = rng.roll_dice(1, 100); let idx = self.map.xy_idx(x, y); if roll > 55 { self.map.tiles[idx] = TileType::Floor } else { self.map.tiles[idx] = TileType::Wall } } } self.take_snapshot(); } }
This makes a mess of an unusable level. Walls and floors everywhere with no rhyme or reason to them - and utterly unplayable. That's ok, because cellular automata are designed to make a level out of noise. It works by iterating each cell, counting the number of neighbors, and turning walls into floors or walls based on density. Here's a working builder:
#![allow(unused)] fn main() { fn build(&mut self) { let mut rng = RandomNumberGenerator::new(); // First we completely randomize the map, setting 55% of it to be floor. for y in 1..self.map.height-1 { for x in 1..self.map.width-1 { let roll = rng.roll_dice(1, 100); let idx = self.map.xy_idx(x, y); if roll > 55 { self.map.tiles[idx] = TileType::Floor } else { self.map.tiles[idx] = TileType::Wall } } } self.take_snapshot(); // Now we iteratively apply cellular automata rules for _i in 0..15 { let mut newtiles = self.map.tiles.clone(); for y in 1..self.map.height-1 { for x in 1..self.map.width-1 { let idx = self.map.xy_idx(x, y); let mut neighbors = 0; if self.map.tiles[idx - 1] == TileType::Wall { neighbors += 1; } if self.map.tiles[idx + 1] == TileType::Wall { neighbors += 1; } if self.map.tiles[idx - self.map.width as usize] == TileType::Wall { neighbors += 1; } if self.map.tiles[idx + self.map.width as usize] == TileType::Wall { neighbors += 1; } if self.map.tiles[idx - (self.map.width as usize - 1)] == TileType::Wall { neighbors += 1; } if self.map.tiles[idx - (self.map.width as usize + 1)] == TileType::Wall { neighbors += 1; } if self.map.tiles[idx + (self.map.width as usize - 1)] == TileType::Wall { neighbors += 1; } if self.map.tiles[idx + (self.map.width as usize + 1)] == TileType::Wall { neighbors += 1; } if neighbors > 4 || neighbors == 0 { newtiles[idx] = TileType::Wall; } else { newtiles[idx] = TileType::Floor; } } } self.map.tiles = newtiles.clone(); self.take_snapshot(); } } }
This is actually very simple:
- We randomize the map, as above.
- We count from 0 to 9, for 10 iterations of the algorithm.
- For each iteration:
- We take a copy of the map tiles, placing it into
newtiles. We do this so we aren't writing to the tiles we are counting, which gives a very odd map. - We iterate every cell on the map and count the number of tiles neighboring the tile that are walls.
- If there are more than 4, or zero, neighboring walls - then the tile (in
newtiles) becomes a wall. Otherwise, it becomes a floor. - We copy the
newtilesback into themap. - We take a snapshot.
- We take a copy of the map tiles, placing it into
This is a very simple algorithm - but produces quite beautiful results. Here it is in action:
 .
.
Picking a starting point
Picking a starting point for the player is a little more difficult than it has been in previous chapters. We don't have a list of rooms to query! Instead, we'll start in the middle and move left until we hit some open space. The code for this is quite simple:
#![allow(unused)] fn main() { // Find a starting point; start at the middle and walk left until we find an open tile self.starting_position = Position{ x: self.map.width / 2, y : self.map.height / 2 }; let mut start_idx = self.map.xy_idx(self.starting_position.x, self.starting_position.y); while self.map.tiles[start_idx] != TileType::Floor { self.starting_position.x -= 1; start_idx = self.map.xy_idx(self.starting_position.x, self.starting_position.y); } }
Placing an exit - and culling unreachable areas
We want the exit to be quite a way away from the player. We also don't want to keep areas that the player absolutely can't reach. Fortunately, the process to find an exit and the process to find orphans are quite similar. We can use a Dijkstra Map. If you haven't already read it, I recommend reading The Incredible Power of Dijkstra Maps. Fortunately, RLTK implements a very fast version of Dijkstra for you, so you won't have to fight with the algorithm. Here's the code:
#![allow(unused)] fn main() { // Find all tiles we can reach from the starting point let map_starts : Vec<usize> = vec![start_idx]; let dijkstra_map = rltk::DijkstraMap::new(self.map.width, self.map.height, &map_starts , &self.map, 200.0); let mut exit_tile = (0, 0.0f32); for (i, tile) in self.map.tiles.iter_mut().enumerate() { if *tile == TileType::Floor { let distance_to_start = dijkstra_map.map[i]; // We can't get to this tile - so we'll make it a wall if distance_to_start == std::f32::MAX { *tile = TileType::Wall; } else { // If it is further away than our current exit candidate, move the exit if distance_to_start > exit_tile.1 { exit_tile.0 = i; exit_tile.1 = distance_to_start; } } } } self.take_snapshot(); self.map.tiles[exit_tile.0] = TileType::DownStairs; self.take_snapshot(); }
This is a dense piece of code that does a lot, lets walk through it:
- We create a vector called
map_startsand give it a single value: the tile index on which the player starts. Dijkstra maps can have multiple starting points (distance 0), so this has to be a vector even though there is only one choice. - We ask RLTK to make a Dijkstra Map for us. It has dimensions that match the main map, uses the starts, has read access to the map itself, and we'll stop counting at 200 steps (a safety feature in case of runaways!)
- We set an
exit_tiletupleto0and0.0. The first zero is the tile index of the exit, the second zero is the distance to the exit. - We iterate the map tiles, using Rust's awesome enumerate feature. By adding
.enumerate()to the end of a range iteration, it adds the cell index as the first parameter in a tuple. We then destructure to obtain both the tile and the index. - If the tile is a floor,
- We obtain the distance to the starting point from the Dijkstra map.
- If the distance is the maximum value for an
f32(a marker the Dijkstra map uses for "unreachable"), then it doesn't need to be a floor at all - nobody can get there. So we turn it into a wall. - If the distance is greater than the distance in our
exit_tiletuple, we store both the new distance and the new tile index. - Once we've visited every tile, we take a snapshot to show the removed area.
- We set the tile at the
exit_tile(most distant reachable tile) to be a downward staircase.
If you cargo run, you actually have quite a playable map now! There's just one problem: there are no other entities on the map.
Populating our cave: freeing the spawn system from rooms.
If we were feeling lazy, we could simply iterate the map - find open spaces and have a random chance to spawn something. But that's not really very much fun. It makes more sense for monsters to be grouped together, with some "dead spaces" so you can catch your breath (and regain some health).
As a first step, we're going to revisit how we spawn entities. Right now, pretty much everything that isn't the player arrives into the world via the spawner.rs-provided spawn_room function. It has served us well up to now, but we want to be a bit more flexible; we might want to spawn in corridors, we might want to spawn in semi-open areas that don't fit a rectangle, and so on. Also, a look over spawn_room shows that it does several things in one function - which isn't the best design. A final objective is to keep the spawn_room interface available - so we can still use it, but to also offer more detailed options.
The first thing we'll do is separate out the actual spawning:
#![allow(unused)] fn main() { /// Spawns a named entity (name in tuple.1) at the location in (tuple.0) fn spawn_entity(ecs: &mut World, spawn : &(&usize, &String)) { let x = (*spawn.0 % MAPWIDTH) as i32; let y = (*spawn.0 / MAPWIDTH) as i32; match spawn.1.as_ref() { "Goblin" => goblin(ecs, x, y), "Orc" => orc(ecs, x, y), "Health Potion" => health_potion(ecs, x, y), "Fireball Scroll" => fireball_scroll(ecs, x, y), "Confusion Scroll" => confusion_scroll(ecs, x, y), "Magic Missile Scroll" => magic_missile_scroll(ecs, x, y), "Dagger" => dagger(ecs, x, y), "Shield" => shield(ecs, x, y), "Longsword" => longsword(ecs, x, y), "Tower Shield" => tower_shield(ecs, x, y), "Rations" => rations(ecs, x, y), "Magic Mapping Scroll" => magic_mapping_scroll(ecs, x, y), "Bear Trap" => bear_trap(ecs, x, y), _ => {} } } }
Now we can replace the last for loop in spawn_room with the following:
#![allow(unused)] fn main() { // Actually spawn the monsters for spawn in spawn_points.iter() { spawn_entity(ecs, &spawn); } }
Now, we'll replace spawn_room with a simplified version that calls our theoretical function:
#![allow(unused)] fn main() { pub fn spawn_room(ecs: &mut World, room : &Rect, map_depth: i32) { let mut possible_targets : Vec<usize> = Vec::new(); { // Borrow scope - to keep access to the map separated let map = ecs.fetch::<Map>(); for y in room.y1 + 1 .. room.y2 { for x in room.x1 + 1 .. room.x2 { let idx = map.xy_idx(x, y); if map.tiles[idx] == TileType::Floor { possible_targets.push(idx); } } } } spawn_region(ecs, &possible_targets, map_depth); } }
This function maintains the same interface/signature as the previous call - so our old code will still work. Instead of actually spawning anything, it builds a vector of all of the tiles in the room (checking that they are floors - something we didn't do before; monsters in walls is no longer possible!). It then calls a new function, spawn_region that accepts a similar signature - but wants a list of available tiles into which it can spawn things. Here's the new function:
#![allow(unused)] fn main() { pub fn spawn_region(ecs: &mut World, area : &[usize], map_depth: i32) { let spawn_table = room_table(map_depth); let mut spawn_points : HashMap<usize, String> = HashMap::new(); let mut areas : Vec<usize> = Vec::from(area); // Scope to keep the borrow checker happy { let mut rng = ecs.write_resource::<RandomNumberGenerator>(); let num_spawns = i32::min(areas.len() as i32, rng.roll_dice(1, MAX_MONSTERS + 3) + (map_depth - 1) - 3); if num_spawns == 0 { return; } for _i in 0 .. num_spawns { let array_index = if areas.len() == 1 { 0usize } else { (rng.roll_dice(1, areas.len() as i32)-1) as usize }; let map_idx = areas[array_index]; spawn_points.insert(map_idx, spawn_table.roll(&mut rng)); areas.remove(array_index); } } // Actually spawn the monsters for spawn in spawn_points.iter() { spawn_entity(ecs, &spawn); } } }
This is similar to the previous spawning code, but not quite the same (although the results are basically the same!). We'll go through it, just to be sure we understand what we're doing:
- We obtain a spawn table for the current map depth.
- We setup a
HashMapcalledspawn_points, listing pairs of data (map index and name tag) for everything we've decided to spawn. - We create a new
Vectorof areas, copied from the passed in slice. (A slice is a "view" of an array or vector). We're making a new one so we aren't modifying the parent area list. The caller might want to use that data for something else and it's good to avoid changing people's data without asking. Changing data without warning is called a "side effect" and it's good to avoid them in general (unless you actually want them). - We make a new scope, because Rust doesn't like us using the ECS to obtain the random number generator, and then using it later to spawn entities. The scope makes Rust "forget" our first borrow as soon as it ends.
- We obtain a random number generator from the ECS.
- We calculate the number of entities to spawn. This is the same random function as we used before, but we've added an
i32::mincall: we want the smaller of EITHER the number of available tiles, OR the random calculation. This way, we'll never try to spawn more entities than we have room for. - If the number to spawn is zero, we bail out of the function (nothing to do, here!).
- Repeating for zero to the number of spawns (minus 1 - we're not using an inclusive range):
- We pick an
array_indexfrom areas. If there is only one entry, we use it. Otherwise, we roll a dice (from 1 to the number of entries, subtract one because the array is zero-based). - The
map_idx(location in the map tiles array) is the value located at thearray_indexindex of the array. So we obtain that. - We insert a spawn into the
spawn_pointsmap, listing both the index and a random roll on the spawn table. - We remove the entry we just used from
areas- that way, we can't accidentally pick it again. Note that we're not checking to see if the array is empty: in step 6 above, we guaranteed that we won't spawn more entities than we have room for, so (at least in theory) that particular bug can't happen!
- We pick an
The best way to test this is to uncomment out the random_builder code (and comment the CellularAutomataBuilder entry) and give it a go. It should play just like before. Once you've tested it, go back to always spawning the map type we're working on.
Grouped placement in our map - Enter the Voronoi!
Voronoi Diagrams are a wonderfully useful piece of math. Given a group of points, it builds a diagram of regions surrounding each point (which could be random, or might mean something; that's the beauty of math, it's up to you!) - with no empty space. We'd like to do something similar for our maps: subdivide the map into random regions and spawn inside those regions. Fortunately, RLTK provides a type of noise to help with that: cellular noise.
First of all, what is noise. "Noise" in this case doesn't refer to the loud heavy metal you accidentally pipe out of your patio speakers at 2am while wondering what a stereo receiver you found in your new house does (true story...); it refers to random data - like the noise on old analog TVs if you didn't tune to a station (ok, I'm showing my age there). Like most things random, there's lots of ways to make it not-really-random and group it into useful patterns. A noise library provides lots of types of noise. Perlin/Simplex noise makes really good approximations of landscapes. White noise looks like someone randomly threw paint at a piece of paper. Cellular Noise randomly places points on a grid and then plots Voronoi diagrams around them. We're interested in the latter.
This is a somewhat complicated way to do things, so we'll take it a step at a time. Lets start by adding a structure to store generated areas into our CellularAutomataBuilder structure:
#![allow(unused)] fn main() { pub struct CellularAutomataBuilder { map : Map, starting_position : Position, depth: i32, history: Vec<Map>, noise_areas : HashMap<i32, Vec<usize>> } }
In new, we also have to initialize it:
#![allow(unused)] fn main() { impl CellularAutomataBuilder { pub fn new(new_depth : i32) -> CellularAutomataBuilder { CellularAutomataBuilder{ map : Map::new(new_depth), starting_position : Position{ x: 0, y : 0 }, depth : new_depth, history: Vec::new(), noise_areas : HashMap::new() } } ... }
The idea here is that we have a HashMap (dictionary in other languages) keyed on the ID number of an area. The area consists of a vector of tile ID numbers. Ideally, we'd generate 20-30 distinct areas all with spaces to spawn entities into.
Here's the next section of the build code:
#![allow(unused)] fn main() { // Now we build a noise map for use in spawning entities later let mut noise = rltk::FastNoise::seeded(rng.roll_dice(1, 65536) as u64); noise.set_noise_type(rltk::NoiseType::Cellular); noise.set_frequency(0.08); noise.set_cellular_distance_function(rltk::CellularDistanceFunction::Manhattan); for y in 1 .. self.map.height-1 { for x in 1 .. self.map.width-1 { let idx = self.map.xy_idx(x, y); if self.map.tiles[idx] == TileType::Floor { let cell_value_f = noise.get_noise(x as f32, y as f32) * 10240.0; let cell_value = cell_value_f as i32; if self.noise_areas.contains_key(&cell_value) { self.noise_areas.get_mut(&cell_value).unwrap().push(idx); } else { self.noise_areas.insert(cell_value, vec![idx]); } } } } }
Since this is quite complicated, lets walk through it:
- We create a new
FastNoiseobject, from RLTK's port of Auburns' excellentFastNoiselibrary. - We specify that we want Cellular noise. That's the same as Voronoi noise in this case.
- We specify a frequency of
0.08. This number was found by playing with different values! - We specify the
Manhattandistance function. There are three to choose from, and they give differing shapes. Manhattan tends to favor elongated shapes, which I like for this purpose. Try all three and see what you like. - We iterate the whole map:
- We get the
idxof the tile, in the map'stilesvectors. - We check to make sure it's a floor - and skip if it isn't.
- We query
FastNoisefor a noise value for the coordinates (converting them tof32floating point numbers, because the library likes floats). We multiply by10240.0because the default is very small numbers - and this brings it up into a reasonable range. - We convert the result to an integer.
- If the
noise_areasmap contains the area number we just generated, we add the tile index to the vector. - If the
noise_areasmap DOENS'T contain the area number we just generated, we make a new vector of tile indices with the map index number in it.
- We get the
This generates between 20 and 30 areas quite consistently, and they only contain valid floor tiles. So the last remaining job is to actually spawn some entities. We update our spawn_entities function:
#![allow(unused)] fn main() { fn spawn_entities(&mut self, ecs : &mut World) { for area in self.noise_areas.iter() { spawner::spawn_region(ecs, area.1, self.depth); } } }
This is quite simple: it iterates through each area and calls the new spawn_region with the vector of available map tiles for that region.
The game is now quite playable on these new maps:
 .
.
Restoring randomness
Once again, we should restore randomness to our map building. In map_builders/mod.rs:
#![allow(unused)] fn main() { pub fn random_builder(new_depth: i32) -> Box<dyn MapBuilder> { let mut rng = rltk::RandomNumberGenerator::new(); let builder = rng.roll_dice(1, 4); match builder { 1 => Box::new(BspDungeonBuilder::new(new_depth)), 2 => Box::new(BspInteriorBuilder::new(new_depth)), 3 => Box::new(CellularAutomataBuilder::new(new_depth)), _ => Box::new(SimpleMapBuilder::new(new_depth)) } } }
Wrap-Up
We've made a pretty nice map generator and fixed our dependency upon rooms. Cellular Automata are a really flexible algorithm and can be used for all kinds of organic looking maps. With a bit of tweaking to the rules, you can make a really large variety of maps.
The source code for this chapter may be found here
Run this chapter's example with web assembly, in your browser (WebGL2 required)
Copyright (C) 2019, Herbert Wolverson.
Drunkard's Walk Maps
About this tutorial
This tutorial is free and open source, and all code uses the MIT license - so you are free to do with it as you like. My hope is that you will enjoy the tutorial, and make great games!
If you enjoy this and would like me to keep writing, please consider supporting my Patreon.
Ever wondered what would happen if an Umber Hulk (or other tunneling creature) got really drunk, and went on a dungeon carving bender? The Drunkard's Walk algorithm answers the question - or more precisely, what would happen if a whole bunch of monsters had far too much to drink. As crazy it sounds, this is a good way to make organic dungeons.
Initial scaffolding
As usual, we'll start with scaffolding from the previous map tutorials. We've done it enough that it should be old hat by now! In map_builders/drunkard.rs, build a new DrunkardsWalkBuilder class. We'll keep the zone-based placement from Cellular Automata - but remove the map building code. Here's the scaffolding:
#![allow(unused)] fn main() { use super::{MapBuilder, Map, TileType, Position, spawner, SHOW_MAPGEN_VISUALIZER}; use rltk::RandomNumberGenerator; use specs::prelude::*; use std::collections::HashMap; pub struct DrunkardsWalkBuilder { map : Map, starting_position : Position, depth: i32, history: Vec<Map>, noise_areas : HashMap<i32, Vec<usize>> } impl MapBuilder for DrunkardsWalkBuilder { fn get_map(&self) -> Map { self.map.clone() } fn get_starting_position(&self) -> Position { self.starting_position.clone() } fn get_snapshot_history(&self) -> Vec<Map> { self.history.clone() } fn build_map(&mut self) { self.build(); } fn spawn_entities(&mut self, ecs : &mut World) { for area in self.noise_areas.iter() { spawner::spawn_region(ecs, area.1, self.depth); } } fn take_snapshot(&mut self) { if SHOW_MAPGEN_VISUALIZER { let mut snapshot = self.map.clone(); for v in snapshot.revealed_tiles.iter_mut() { *v = true; } self.history.push(snapshot); } } } impl DrunkardsWalkBuilder { pub fn new(new_depth : i32) -> DrunkardsWalkBuilder { DrunkardsWalkBuilder{ map : Map::new(new_depth), starting_position : Position{ x: 0, y : 0 }, depth : new_depth, history: Vec::new(), noise_areas : HashMap::new() } } #[allow(clippy::map_entry)] fn build(&mut self) { let mut rng = RandomNumberGenerator::new(); // Set a central starting point self.starting_position = Position{ x: self.map.width / 2, y: self.map.height / 2 }; let start_idx = self.map.xy_idx(self.starting_position.x, self.starting_position.y); // Find all tiles we can reach from the starting point let map_starts : Vec<usize> = vec![start_idx]; let dijkstra_map = rltk::DijkstraMap::new(self.map.width, self.map.height, &map_starts , &self.map, 200.0); let mut exit_tile = (0, 0.0f32); for (i, tile) in self.map.tiles.iter_mut().enumerate() { if *tile == TileType::Floor { let distance_to_start = dijkstra_map.map[i]; // We can't get to this tile - so we'll make it a wall if distance_to_start == std::f32::MAX { *tile = TileType::Wall; } else { // If it is further away than our current exit candidate, move the exit if distance_to_start > exit_tile.1 { exit_tile.0 = i; exit_tile.1 = distance_to_start; } } } } self.take_snapshot(); // Place the stairs self.map.tiles[exit_tile.0] = TileType::DownStairs; self.take_snapshot(); // Now we build a noise map for use in spawning entities later let mut noise = rltk::FastNoise::seeded(rng.roll_dice(1, 65536) as u64); noise.set_noise_type(rltk::NoiseType::Cellular); noise.set_frequency(0.08); noise.set_cellular_distance_function(rltk::CellularDistanceFunction::Manhattan); for y in 1 .. self.map.height-1 { for x in 1 .. self.map.width-1 { let idx = self.map.xy_idx(x, y); if self.map.tiles[idx] == TileType::Floor { let cell_value_f = noise.get_noise(x as f32, y as f32) * 10240.0; let cell_value = cell_value_f as i32; if self.noise_areas.contains_key(&cell_value) { self.noise_areas.get_mut(&cell_value).unwrap().push(idx); } else { self.noise_areas.insert(cell_value, vec![idx]); } } } } } } }
We've kept a lot of the work from the Cellular Automata chapter, since it can help us here also. We also go into map_builders/mod.rs and once again force the "random" system to pick our new code:
#![allow(unused)] fn main() { pub fn random_builder(new_depth: i32) -> Box<dyn MapBuilder> { /*let mut rng = rltk::RandomNumberGenerator::new(); let builder = rng.roll_dice(1, 4); match builder { 1 => Box::new(BspDungeonBuilder::new(new_depth)), 2 => Box::new(BspInteriorBuilder::new(new_depth)), 3 => Box::new(CellularAutomataBuilder::new(new_depth)), _ => Box::new(SimpleMapBuilder::new(new_depth)) }*/ Box::new(DrunkardsWalkBuilder::new(new_depth)) } }
Don't Repeat Yourself (The DRY principle)
Since we're re-using the exact code from Cellular Automata, we should take the common code and put it into map_builders/common.rs. This saves typing, saves the compiler from repeatedly remaking the same code (increasing your program size). So in common.rs, we refactor the common code into some functions. In common.rs, we create a new function - remove_unreachable_areas_returning_most_distant:
#![allow(unused)] fn main() { /// Searches a map, removes unreachable areas and returns the most distant tile. pub fn remove_unreachable_areas_returning_most_distant(map : &mut Map, start_idx : usize) -> usize { map.populate_blocked(); let map_starts : Vec<usize> = vec![start_idx]; let dijkstra_map = rltk::DijkstraMap::new(map.width as usize, map.height as usize, &map_starts , map, 200.0); let mut exit_tile = (0, 0.0f32); for (i, tile) in map.tiles.iter_mut().enumerate() { if *tile == TileType::Floor { let distance_to_start = dijkstra_map.map[i]; // We can't get to this tile - so we'll make it a wall if distance_to_start == std::f32::MAX { *tile = TileType::Wall; } else { // If it is further away than our current exit candidate, move the exit if distance_to_start > exit_tile.1 { exit_tile.0 = i; exit_tile.1 = distance_to_start; } } } } exit_tile.0 } }
We'll make a second function, generate_voronoi_spawn_regions:
#![allow(unused)] fn main() { /// Generates a Voronoi/cellular noise map of a region, and divides it into spawn regions. #[allow(clippy::map_entry)] pub fn generate_voronoi_spawn_regions(map: &Map, rng : &mut rltk::RandomNumberGenerator) -> HashMap<i32, Vec<usize>> { let mut noise_areas : HashMap<i32, Vec<usize>> = HashMap::new(); let mut noise = rltk::FastNoise::seeded(rng.roll_dice(1, 65536) as u64); noise.set_noise_type(rltk::NoiseType::Cellular); noise.set_frequency(0.08); noise.set_cellular_distance_function(rltk::CellularDistanceFunction::Manhattan); for y in 1 .. map.height-1 { for x in 1 .. map.width-1 { let idx = map.xy_idx(x, y); if map.tiles[idx] == TileType::Floor { let cell_value_f = noise.get_noise(x as f32, y as f32) * 10240.0; let cell_value = cell_value_f as i32; if noise_areas.contains_key(&cell_value) { noise_areas.get_mut(&cell_value).unwrap().push(idx); } else { noise_areas.insert(cell_value, vec![idx]); } } } } noise_areas } }
Plugging these into our build function lets us reduce the boilerplate section considerably:
#![allow(unused)] fn main() { // Find all tiles we can reach from the starting point let exit_tile = remove_unreachable_areas_returning_most_distant(&mut self.map, start_idx); self.take_snapshot(); // Place the stairs self.map.tiles[exit_tile] = TileType::DownStairs; self.take_snapshot(); // Now we build a noise map for use in spawning entities later self.noise_areas = generate_voronoi_spawn_regions(&self.map, &mut rng); }
In the example, I've gone back to the cellular_automata section and done the same.
This is basically the same code we had before (hence, it isn't explained here), but wrapped in a function (and taking a mutable map reference - so it changes the map you give it, and the starting point as parameters).
Walking Drunkards
The basic idea behind the algorithm is simple:
- Pick a central starting point, and convert it to a floor.
- We count how much of the map is floor space, and iterate until we have converted a percentage (we use 50% in the example) of the map to floors.
- Spawn a drunkard at the starting point. The drunkard has a "lifetime" and a "position".
- While the drunkard is still alive:
- Decrement the drunkard's lifetime (I like to think that they pass out and sleep).
- Roll a 4-sided dice.
- If we rolled a 1, move the drunkard North.
- If we rolled a 2, move the drunkard South.
- If we rolled a 3, move the drunkard East.
- If we rolled a 4, move the drunkard West.
- The tile on which the drunkard landed becomes a floor.
That's really all there is to it: we keep spawning drunkards until we have sufficient map coverage. Here's an implementation:
#![allow(unused)] fn main() { // Set a central starting point self.starting_position = Position{ x: self.map.width / 2, y: self.map.height / 2 }; let start_idx = self.map.xy_idx(self.starting_position.x, self.starting_position.y); self.map.tiles[start_idx] = TileType::Floor; let total_tiles = self.map.width * self.map.height; let desired_floor_tiles = (total_tiles / 2) as usize; let mut floor_tile_count = self.map.tiles.iter().filter(|a| **a == TileType::Floor).count(); let mut digger_count = 0; let mut active_digger_count = 0; while floor_tile_count < desired_floor_tiles { let mut did_something = false; let mut drunk_x = self.starting_position.x; let mut drunk_y = self.starting_position.y; let mut drunk_life = 400; while drunk_life > 0 { let drunk_idx = self.map.xy_idx(drunk_x, drunk_y); if self.map.tiles[drunk_idx] == TileType::Wall { did_something = true; } self.map.tiles[drunk_idx] = TileType::DownStairs; let stagger_direction = rng.roll_dice(1, 4); match stagger_direction { 1 => { if drunk_x > 2 { drunk_x -= 1; } } 2 => { if drunk_x < self.map.width-2 { drunk_x += 1; } } 3 => { if drunk_y > 2 { drunk_y -=1; } } _ => { if drunk_y < self.map.height-2 { drunk_y += 1; } } } drunk_life -= 1; } if did_something { self.take_snapshot(); active_digger_count += 1; } digger_count += 1; for t in self.map.tiles.iter_mut() { if *t == TileType::DownStairs { *t = TileType::Floor; } } floor_tile_count = self.map.tiles.iter().filter(|a| **a == TileType::Floor).count(); } rltk::console::log(format!("{} dwarves gave up their sobriety, of whom {} actually found a wall.", digger_count, active_digger_count)); }
This implementation expands a lot of things out, and could be much shorter - but for clarity, we've left it large and obvious. We've also made a bunch of things into variables that could be constants - it's easier to read, and is designed to be easy to "play" with values. It also prints a status update to the console, showing what happened.
If you cargo run now, you'll get a pretty nice open map:
 .
.
Managing The Diggers' Alcoholism
There's a lot of ways to tweak the "drunkard's walk" algorithm to generate different map types. Since these can produce radically different maps, lets customize the interface to the algorithm to provide a few different ways to run. We'll start by creating a struct to hold the parameter sets:
#![allow(unused)] fn main() { #[derive(PartialEq, Copy, Clone)] pub enum DrunkSpawnMode { StartingPoint, Random } pub struct DrunkardSettings { pub spawn_mode : DrunkSpawnMode } }
Now we'll modify new and the structure itself to accept it:
#![allow(unused)] fn main() { pub struct DrunkardsWalkBuilder { map : Map, starting_position : Position, depth: i32, history: Vec<Map>, noise_areas : HashMap<i32, Vec<usize>>, settings : DrunkardSettings } ... impl DrunkardsWalkBuilder { pub fn new(new_depth : i32, settings: DrunkardSettings) -> DrunkardsWalkBuilder { DrunkardsWalkBuilder{ map : Map::new(new_depth), starting_position : Position{ x: 0, y : 0 }, depth : new_depth, history: Vec::new(), noise_areas : HashMap::new(), settings } } ... }
We'll also modify the "random" builder to take settings:
#![allow(unused)] fn main() { Box::new(DrunkardsWalkBuilder::new(new_depth, DrunkardSettings{ spawn_mode: DrunkSpawnMode::StartingPoint })) }
Now we have a mechanism to tune the inebriation of our diggers!
Varying the drunken rambler's starting point
We alluded to it in the previous section with the creation of DrunkSpawnMode - we're going to see what happens if we change the way drunken diggers - after the first - spawn. Change the random_builder to DrunkSpawnMode::Random, and then modify build (in drunkard.rs) to use it:
#![allow(unused)] fn main() { ... while floor_tile_count < desired_floor_tiles { let mut did_something = false; let mut drunk_x; let mut drunk_y; match self.settings.spawn_mode { DrunkSpawnMode::StartingPoint => { drunk_x = self.starting_position.x; drunk_y = self.starting_position.y; } DrunkSpawnMode::Random => { if digger_count == 0 { drunk_x = self.starting_position.x; drunk_y = self.starting_position.y; } else { drunk_x = rng.roll_dice(1, self.map.width - 3) + 1; drunk_y = rng.roll_dice(1, self.map.height - 3) + 1; } } } let mut drunk_life = 400; ... }
This is a relatively easy change: if we're in "random" mode, the starting position for the drunkard is the center of the map for the first digger (to ensure that we have some space around the stairs), and then a random map location for each subsequent iteration. It produces maps like this:
 .
.
This is a much more spread out map. Less of a big central area, and more like a sprawling cavern. A handy variation!
Modifying how long it takes for the drunkard to pass out
Another parameter to tweak is how long the drunkard stays awake. This can seriously change the character of the resultant map. We'll add it into the settings:
#![allow(unused)] fn main() { pub struct DrunkardSettings { pub spawn_mode : DrunkSpawnMode, pub drunken_lifetime : i32 } }
We'll tell the random_builder function to use a shorter lifespan:
#![allow(unused)] fn main() { Box::new(DrunkardsWalkBuilder::new(new_depth, DrunkardSettings{ spawn_mode: DrunkSpawnMode::Random, drunken_lifetime: 100 })) }
And we'll modify the build code to actually use it:
#![allow(unused)] fn main() { let mut drunk_life = self.settings.drunken_lifetime; }
That's a simple change - and drastically alters the nature of the resulting map. Each digger can only go one quarter the distance of the previous ones (stronger beer!), so they tend to carve out less of the map. That leads to more iterations, and since they start randomly you tend to see more distinct map areas forming - and hope they join up (if they don't, they will be culled at the end).
cargo run with the 100 lifespan, randomly placed drunkards produces something like this:
 .
.
Changing the desired fill percentage
Lastly, we'll play with how much of the map we want to cover with floors. The lower the number, the more walls (and less open areas) you generate. We'll once again modify DrunkardSettings:
#![allow(unused)] fn main() { pub struct DrunkardSettings { pub spawn_mode : DrunkSpawnMode, pub drunken_lifetime : i32, pub floor_percent: f32 } }
We also change one line in our builder:
#![allow(unused)] fn main() { let desired_floor_tiles = (self.settings.floor_percent * total_tiles as f32) as usize; }
We previously had desired_floor_tiles as total_tiles / 2 - which would be represented by 0.5 in the new system. Lets try changing that to 0.4 in random_builder:
#![allow(unused)] fn main() { Box::new(DrunkardsWalkBuilder::new(new_depth, DrunkardSettings{ spawn_mode: DrunkSpawnMode::Random, drunken_lifetime: 200, floor_percent: 0.4 })) }
If you cargo run now, you'll see that we have even fewer open areas forming:
 .
.
Building some preset constructors
Now that we've got these parameters to play with, lets make a few more constructors to remove the need for the caller in mod.rs to know about the algorithm details:
#![allow(unused)] fn main() { pub fn new(new_depth : i32, settings: DrunkardSettings) -> DrunkardsWalkBuilder { DrunkardsWalkBuilder{ map : Map::new(new_depth), starting_position : Position{ x: 0, y : 0 }, depth : new_depth, history: Vec::new(), noise_areas : HashMap::new(), settings } } pub fn open_area(new_depth : i32) -> DrunkardsWalkBuilder { DrunkardsWalkBuilder{ map : Map::new(new_depth), starting_position : Position{ x: 0, y : 0 }, depth : new_depth, history: Vec::new(), noise_areas : HashMap::new(), settings : DrunkardSettings{ spawn_mode: DrunkSpawnMode::StartingPoint, drunken_lifetime: 400, floor_percent: 0.5 } } } pub fn open_halls(new_depth : i32) -> DrunkardsWalkBuilder { DrunkardsWalkBuilder{ map : Map::new(new_depth), starting_position : Position{ x: 0, y : 0 }, depth : new_depth, history: Vec::new(), noise_areas : HashMap::new(), settings : DrunkardSettings{ spawn_mode: DrunkSpawnMode::Random, drunken_lifetime: 400, floor_percent: 0.5 } } } pub fn winding_passages(new_depth : i32) -> DrunkardsWalkBuilder { DrunkardsWalkBuilder{ map : Map::new(new_depth), starting_position : Position{ x: 0, y : 0 }, depth : new_depth, history: Vec::new(), noise_areas : HashMap::new(), settings : DrunkardSettings{ spawn_mode: DrunkSpawnMode::Random, drunken_lifetime: 100, floor_percent: 0.4 } } } }
Now we can modify our random_builder function to be once again random - and offer three different map types:
#![allow(unused)] fn main() { pub fn random_builder(new_depth: i32) -> Box<dyn MapBuilder> { let mut rng = rltk::RandomNumberGenerator::new(); let builder = rng.roll_dice(1, 7); match builder { 1 => Box::new(BspDungeonBuilder::new(new_depth)), 2 => Box::new(BspInteriorBuilder::new(new_depth)), 3 => Box::new(CellularAutomataBuilder::new(new_depth)), 4 => Box::new(DrunkardsWalkBuilder::open_area(new_depth)), 5 => Box::new(DrunkardsWalkBuilder::open_halls(new_depth)), 6 => Box::new(DrunkardsWalkBuilder::winding_passages(new_depth)), _ => Box::new(SimpleMapBuilder::new(new_depth)) } } }
Wrap-Up
And we're done with drunken map building (words I never expected to type...)! It's a very flexible algorithm, and can be used to make a lot of different map types. It also combines well with other algorithms, as we'll see in future chapters.
The source code for this chapter may be found here
Run this chapter's example with web assembly, in your browser (WebGL2 required)
Copyright (C) 2019, Herbert Wolverson.
Maze/Labyrinth Generation
About this tutorial
This tutorial is free and open source, and all code uses the MIT license - so you are free to do with it as you like. My hope is that you will enjoy the tutorial, and make great games!
If you enjoy this and would like me to keep writing, please consider supporting my Patreon.
A mainstay of dungeon crawl games is the good old-fashioned labyrinth, often featuring a Minotaur. Dungeon Crawl: Stone Soup has a literal minotaur labyrinth, Tome 4 has sand-worm mazes, One Knight has an elven hedge maze. These levels can be annoying for the player, and should be used sparingly: a lot of players don't really enjoy the tedium of exploring to find an exit. This chapter will show you how to make a labyrinth!
Scaffolding
Once again, we'll use the previous chapter as scaffolding - and set our "random" builder to use the new design. In map_builders/maze.rs, place the following code:
#![allow(unused)] fn main() { use super::{MapBuilder, Map, TileType, Position, spawner, SHOW_MAPGEN_VISUALIZER, remove_unreachable_areas_returning_most_distant, generate_voronoi_spawn_regions}; use rltk::RandomNumberGenerator; use specs::prelude::*; use std::collections::HashMap; pub struct MazeBuilder { map : Map, starting_position : Position, depth: i32, history: Vec<Map>, noise_areas : HashMap<i32, Vec<usize>> } impl MapBuilder for MazeBuilder { fn get_map(&self) -> Map { self.map.clone() } fn get_starting_position(&self) -> Position { self.starting_position.clone() } fn get_snapshot_history(&self) -> Vec<Map> { self.history.clone() } fn build_map(&mut self) { self.build(); } fn spawn_entities(&mut self, ecs : &mut World) { for area in self.noise_areas.iter() { spawner::spawn_region(ecs, area.1, self.depth); } } fn take_snapshot(&mut self) { if SHOW_MAPGEN_VISUALIZER { let mut snapshot = self.map.clone(); for v in snapshot.revealed_tiles.iter_mut() { *v = true; } self.history.push(snapshot); } } } impl MazeBuilder { pub fn new(new_depth : i32) -> MazeBuilder { MazeBuilder{ map : Map::new(new_depth), starting_position : Position{ x: 0, y : 0 }, depth : new_depth, history: Vec::new(), noise_areas : HashMap::new() } } #[allow(clippy::map_entry)] fn build(&mut self) { let mut rng = RandomNumberGenerator::new(); // Find a starting point; start at the middle and walk left until we find an open tile self.starting_position = Position{ x: self.map.width / 2, y : self.map.height / 2 }; let mut start_idx = self.map.xy_idx(self.starting_position.x, self.starting_position.y); while self.map.tiles[start_idx] != TileType::Floor { self.starting_position.x -= 1; start_idx = self.map.xy_idx(self.starting_position.x, self.starting_position.y); } self.take_snapshot(); // Find all tiles we can reach from the starting point let exit_tile = remove_unreachable_areas_returning_most_distant(&mut self.map, start_idx); self.take_snapshot(); // Place the stairs self.map.tiles[exit_tile] = TileType::DownStairs; self.take_snapshot(); // Now we build a noise map for use in spawning entities later self.noise_areas = generate_voronoi_spawn_regions(&self.map, &mut rng); } } }
And in random_builder (map_builders/mod.rs):
#![allow(unused)] fn main() { pub fn random_builder(new_depth: i32) -> Box<dyn MapBuilder> { /*let mut rng = rltk::RandomNumberGenerator::new(); let builder = rng.roll_dice(1, 7); match builder { 1 => Box::new(BspDungeonBuilder::new(new_depth)), 2 => Box::new(BspInteriorBuilder::new(new_depth)), 3 => Box::new(CellularAutomataBuilder::new(new_depth)), 4 => Box::new(DrunkardsWalkBuilder::open_area(new_depth)), 5 => Box::new(DrunkardsWalkBuilder::open_halls(new_depth)), 6 => Box::new(DrunkardsWalkBuilder::winding_passages(new_depth)), _ => Box::new(SimpleMapBuilder::new(new_depth)) }*/ Box::new(MazeBuilder::new(new_depth)) } }
Actually building a maze
There are lots of good maze building algorithms out there, all guaranteed to give you a perfectly solvable maze. In One Knight in the Dungeon, I based my maze building code off of a relatively standard implementation - Cyucelen's mazeGenerator. It's an interesting algorithm because - like a lot of maze algorithms - it assumes that walls are part of the tile grid, rather than having separate wall entities. That isn't going to work for the type of tile map we are using, so we generate the grid at half the resolution of the actual map, and generate walls based upon wall adjacency information in the grid.
The algorithm started as C++ code with pointers everywhere, and took a bit of time to port. The most basic structure in the algorithm: the Cell. Cells are tiles on the map:
#![allow(unused)] fn main() { const TOP : usize = 0; const RIGHT : usize = 1; const BOTTOM : usize = 2; const LEFT : usize = 3; #[derive(Copy, Clone)] struct Cell { row: i32, column: i32, walls: [bool; 4], visited: bool, } }
We define four constants: TOP, RIGHT, BOTTOM and LEFT and assign them to the numbers 0..3. We use these whenever the algorithm wants to refer to a direction. Looking at Cell, it is relatively simple:
rowandcolumndefine where the cell is on the map.wallsis anarray, with aboolfor each of the directions we've defined. Rust arrays (static, you can't resize them like avector) are defined with the syntax[TYPE ; NUMBER_OF_ELEMENTS]. Most of the time we just use vectors because we like the dynamic sizing; in this case, the number of elements is known ahead of time, so using the lower-overhead type makes sense.visited- a bool indicating whether we've previously looked at the cell.
Cell also defines some methods. The first is its constructor:
#![allow(unused)] fn main() { impl Cell { fn new(row: i32, column: i32) -> Cell { Cell{ row, column, walls: [true, true, true, true], visited: false } } ... }
This is a simple constructor: it makes a cell with walls in each direction, and not previously visited. Cells also define a function called remove_walls:
#![allow(unused)] fn main() { fn remove_walls(&mut self, next : &mut Cell) { let x = self.column - next.column; let y = self.row - next.row; if x == 1 { self.walls[LEFT] = false; next.walls[RIGHT] = false; } else if x == -1 { self.walls[RIGHT] = false; next.walls[LEFT] = false; } else if y == 1 { self.walls[TOP] = false; next.walls[BOTTOM] = false; } else if y == -1 { self.walls[BOTTOM] = false; next.walls[TOP] = false; } } }
Uh oh, there's some new stuff here:
- We set
xto be ourcolumnvalue, minus thecolumnvalue of the next cell. - We do the same with
y- but withrowvalues. - If
xis equal to 1, then thenext's column must be greater than our column value. In other words, thenextcell is to the right of our current location. So we remove the wall to the right. - Likewise, if
xis-1, then we must be going left - so we remove the wall to the left. - Once again, if
yis1, we must be going up. So we remove the walls to the top. - Finally, if
yis-1, we must be going down - so we remove the walls below us.
Whew! Cell is done. Now to actually use it. In our maze algorithm, Cell is part of Grid. Here's the basic Grid definition:
#![allow(unused)] fn main() { struct Grid<'a> { width: i32, height: i32, cells: Vec<Cell>, backtrace: Vec<usize>, current: usize, rng : &'a mut RandomNumberGenerator } }
Some commentary on Grid:
- The
<'a>is a lifetime specifier. We have to specify one so that Rust's borrow checker can ensure that theGridwill not expire before we delete theRandomNumberGenerator. Because we're passing a mutable reference to the caller's RNG, Rust needs this to ensure that the RNG doesn't go away before we're finished with it. This type of bug often affects C/C++ users, so Rust made it really hard to mess up. Unfortunately, the price of making it hard to get wrong is some ugly syntax! - We have a
widthandheightdefining the size of the maze. - Cells are just a
Vectorof theCelltype we defined earlier. backtraceis used by the algorithm for recursively back-tracking to ensure that every cell has been processed. It's just avectorof cell indices - the index into thecellsvector.currentis used by the algorithm to tell whichCellwe're currently working with.rngis the reason for the ugly lifetime stuff; we want to use the random number generator built in thebuildfunction, so we store a reference to it here. Because obtaining a random number changes the content of the variable, we have to store a mutable reference. The really ugly&'a mutindicates that it is a reference, with the lifetime'a(defined above) and is mutable/changeable.
Grid implements quite a few methods. First up, the constructor:
#![allow(unused)] fn main() { impl<'a> Grid<'a> { fn new(width: i32, height:i32, rng: &mut RandomNumberGenerator) -> Grid { let mut grid = Grid{ width, height, cells: Vec::new(), backtrace: Vec::new(), current: 0, rng }; for row in 0..height { for column in 0..width { grid.cells.push(Cell::new(row, column)); } } grid } ... }
Notice that once again we had to use some ugly syntax for the lifetime! The constructor itself is quite simple: it makes a new Grid structure with the specified width and height, a new vector of cells, a new (empty) backtrace vector, sets current to 0 and stores the random number generator reference. Then it iterates the rows and columns of the grid, pushing new Cell structures to the cells vector, numbered by their location.
The Grid also implements calculate_index:
#![allow(unused)] fn main() { fn calculate_index(&self, row: i32, column: i32) -> i32 { if row < 0 || column < 0 || column > self.width-1 || row > self.height-1 { -1 } else { column + (row * self.width) } } }
This is very similar to our map's xy_idx function: it takes a row and column coordinate, and returns the array index at which one can find the cell. It also does some bounds checking, and returns -1 if the coordinates are invalid. Next, we provide get_available_neighbors:
#![allow(unused)] fn main() { fn get_available_neighbors(&self) -> Vec<usize> { let mut neighbors : Vec<usize> = Vec::new(); let current_row = self.cells[self.current].row; let current_column = self.cells[self.current].column; let neighbor_indices : [i32; 4] = [ self.calculate_index(current_row -1, current_column), self.calculate_index(current_row, current_column + 1), self.calculate_index(current_row + 1, current_column), self.calculate_index(current_row, current_column - 1) ]; for i in neighbor_indices.iter() { if *i != -1 && !self.cells[*i as usize].visited { neighbors.push(*i as usize); } } neighbors } }
This function provides the available exits from the current cell. It works by obtaining the row and column coordinates of the current cell, and then puts a call to calculate_index into an array (corresponding to the directions we defined with Cell). It finally iterates the array, and if the values are valid (greater than -1), and we haven't been there before (the visited check) it pushes them into the neighbors list. It then returns neighbors. A call to this for any cell address will return a vector listing all of the adjacent cells to which we can travel (ignoring walls). We first use this in find_next_cell:
#![allow(unused)] fn main() { fn find_next_cell(&mut self) -> Option<usize> { let neighbors = self.get_available_neighbors(); if !neighbors.is_empty() { if neighbors.len() == 1 { return Some(neighbors[0]); } else { return Some(neighbors[(self.rng.roll_dice(1, neighbors.len() as i32)-1) as usize]); } } None } }
This function is interesting in that it returns an Option. It's possible that there is nowhere to go from the current cell - in which case it returns None. Otherwise, it returns Some with the array index of the next destination. It works by:
- Obtain a list of neighbors for the current cell.
- If there are neighbors:
- If there is only one neighbor, return it.
- If there are multiple neighbors, pick one and random and return it.
- If there are no neighbors, return
None.
We use this from generate_maze:
#![allow(unused)] fn main() { fn generate_maze(&mut self, generator : &mut MazeBuilder) { loop { self.cells[self.current].visited = true; let next = self.find_next_cell(); match next { Some(next) => { self.cells[next].visited = true; self.backtrace.push(self.current); // __lower_part__ __higher_part_ // / \ / \ // --------cell1------ | cell2----------- let (lower_part, higher_part) = self.cells.split_at_mut(std::cmp::max(self.current, next)); let cell1 = &mut lower_part[std::cmp::min(self.current, next)]; let cell2 = &mut higher_part[0]; cell1.remove_walls(cell2); self.current = next; } None => { if !self.backtrace.is_empty() { self.current = self.backtrace[0]; self.backtrace.remove(0); } else { break; } } } self.copy_to_map(&mut generator.map); generator.take_snapshot(); } } }
So now we're onto the actual algorithm! Lets step through it to understand how it works:
- We start with a
loop. We haven't used one of these before (you can read about them here). Basically, aloopruns forever - until it hits abreakstatement. - We set the value of
visitedin thecurrentcell totrue. - We add the current cell to the beginning of the
backtracelist. - We call
find_next_celland set its index in the variablenext. If this is our first run, we'll get a random direction from the starting cell. Otherwise, we get an exit from thecurrentcell we're visiting. - If
nexthas a value, then:- Split cells to two mutable references. We will need two mutable references to the same slice, Rust normally doesn't allow this, but we can split our slice to two non-overlapping parts. This is a common use case and Rust provides a safe function to do exactly that.
- Get mutable reference to the cell with lower index from first part and to the second from start of second part.
- We call
remove_wallson the cell1 cell, referencing the cell2 cell.
- If
nextdoes not have a value (it's equal toNone), we:- If
backtraceisn't empty, we setcurrentto the first value in thebacktracelist. - If
backtraceis empty, we've finished - so webreakout of the loop.
- If
- Finally, we call
copy_to_map- which copies the maze to the map (more on that below), and take a snapshot for the iterative map generation renderer.
So why does that work?
- The first few iterations will get a non-visited neighbor, carving a clear path through the maze. Each step along the way, the cell we've visited is added to
backtrace. This is effectively a drunken walk through the maze, but ensuring that we cannot return to a cell. - When we hit a point at which we have no neighbors (we've hit the end of the maze), the algorithm will change
currentto the first entry in ourbacktracelist. It will then randomly walk from there, filling in more cells. - If that point can't go anywhere, it works back up the
backtracelist. - This repeats until every cell has been visited, meaning that
backtraceandneighborsare both empty. We're done!
The best way to understand this is to watch it in action:
 .
.
Finally, there's the copy_to_map function:
#![allow(unused)] fn main() { fn copy_to_map(&self, map : &mut Map) { // Clear the map for i in map.tiles.iter_mut() { *i = TileType::Wall; } for cell in self.cells.iter() { let x = cell.column + 1; let y = cell.row + 1; let idx = map.xy_idx(x * 2, y * 2); map.tiles[idx] = TileType::Floor; if !cell.walls[TOP] { map.tiles[idx - map.width as usize] = TileType::Floor } if !cell.walls[RIGHT] { map.tiles[idx + 1] = TileType::Floor } if !cell.walls[BOTTOM] { map.tiles[idx + map.width as usize] = TileType::Floor } if !cell.walls[LEFT] { map.tiles[idx - 1] = TileType::Floor } } } }
This is where the mismatch between Grid/Cell and our map format is resolved: each Cell in the maze structure can have walls in any of the four major directions. Our map doesn't work that way: walls aren't part of a tile, they are a tile. So we double the size of the Grid, and write carve floors where walls aren't present. Lets walk through this function:
- We set all cells in the map to be a solid wall.
- For each cell in the grid, we:
- Calculate
xas the cell'scolumnvalue, plus one. - Calculate
yas the cell'srowvalue, plus one. - Set
idxtomap.xy_idxof DOUBLE thexandyvalues: so spread each cell out. - We set the map tile at
idxto be a floor. - If the
Cellwe're referencing does not have aTOPwall, we set the map tile above ouridxtile to be a floor. - We repeat that for the other directions.
- Calculate
Speeding up the generator
We're wasting a lot of time by snapshotting at every iteration - we're building a huge list of snapshot maps. That was great for learning the algorithm, but simply takes too long when playing the game. We'll modify our generate_maze function to count iterations, and only log every 10th:
#![allow(unused)] fn main() { fn generate_maze(&mut self, generator : &mut MazeBuilder) { let mut i = 0; loop { self.cells[self.current].visited = true; let next = self.find_next_cell(); match next { Some(next) => { self.cells[next].visited = true; self.backtrace.push(self.current); unsafe { let next_cell : *mut Cell = &mut self.cells[next]; let current_cell = &mut self.cells[self.current]; current_cell.remove_walls(next_cell); } self.current = next; } None => { if !self.backtrace.is_empty() { self.current = self.backtrace[0]; self.backtrace.remove(0); } else { break; } } } if i % 50 == 0 { self.copy_to_map(&mut generator.map); generator.take_snapshot(); } i += 1; } } }
This brings the generator up to a reasonable speed, and you can still watch the maze develop.
Finding the exit
Fortunately, our current algorithm will start you at Cell (1,1) - which corresponds to map location (2,2). So in build, we can easily specify a starting point:
#![allow(unused)] fn main() { self.starting_position = Position{ x: 2, y : 2 }; let start_idx = self.map.xy_idx(self.starting_position.x, self.starting_position.y); self.take_snapshot(); }
We can then use the same code we've used in the last two examples to find an exit:
#![allow(unused)] fn main() { // Find all tiles we can reach from the starting point let exit_tile = remove_unreachable_areas_returning_most_distant(&mut self.map, start_idx); self.take_snapshot(); // Place the stairs self.map.tiles[exit_tile] = TileType::DownStairs; self.take_snapshot(); // Now we build a noise map for use in spawning entities later self.noise_areas = generate_voronoi_spawn_regions(&self.map, &mut rng); }
This is also a great test of the library's Dijkstra map code. It can solve a maze very quickly!
Restoring the randomness
Once again, we should restore random_builder to be random:
#![allow(unused)] fn main() { pub fn random_builder(new_depth: i32) -> Box<dyn MapBuilder> { let mut rng = rltk::RandomNumberGenerator::new(); let builder = rng.roll_dice(1, 8); match builder { 1 => Box::new(BspDungeonBuilder::new(new_depth)), 2 => Box::new(BspInteriorBuilder::new(new_depth)), 3 => Box::new(CellularAutomataBuilder::new(new_depth)), 4 => Box::new(DrunkardsWalkBuilder::open_area(new_depth)), 5 => Box::new(DrunkardsWalkBuilder::open_halls(new_depth)), 6 => Box::new(DrunkardsWalkBuilder::winding_passages(new_depth)), 7 => Box::new(MazeBuilder::new(new_depth)), _ => Box::new(SimpleMapBuilder::new(new_depth)) } } }
Wrap-Up
In this chapter, we've built a maze. It's a guaranteed solvable maze, so there's no risk of a level that you can't beat. You still have to use this type of map with caution: they make good one-off maps, and can really annoy players!
The source code for this chapter may be found here
Run this chapter's example with web assembly, in your browser (WebGL2 required)
Copyright (C) 2019, Herbert Wolverson.
Diffusion-Limited Aggregation
About this tutorial
This tutorial is free and open source, and all code uses the MIT license - so you are free to do with it as you like. My hope is that you will enjoy the tutorial, and make great games!
If you enjoy this and would like me to keep writing, please consider supporting my Patreon.
Diffusion-Limited Aggregation (DLA) is a fancy name for a constrained form of the drunken walk. It makes organic looking maps, with more of an emphasis on a central area and "arms" coming out of it. With some tricks, it can be made to look quite alien - or quite real. See this excellent article on Rogue Basin.
Scaffolding
We'll create a new file, map_builders/dla.rs and put the scaffolding in from previous projects. We'll name the builder DLABuilder. We'll also keep the voronoi spawn code, it will work fine for this application. Rather than repeat the scaffolding code blocks from previous chapters, we'll jump straight in. If you get stuck, you can check the source code for this chapter here.
Algorithm Tuning Knobs
In the last chapter, we introduced the idea of adding parameters to our builder. We'll do the same again for DLA - there's a few algorithm variants that can produce different map styles. We'll introduce the following enumerations:
#![allow(unused)] fn main() { #[derive(PartialEq, Copy, Clone)] pub enum DLAAlgorithm { WalkInwards, WalkOutwards, CentralAttractor } #[derive(PartialEq, Copy, Clone)] pub enum DLASymmetry { None, Horizontal, Vertical, Both } }
Our builder will include one more, brush size:
#![allow(unused)] fn main() { pub struct DLABuilder { map : Map, starting_position : Position, depth: i32, history: Vec<Map>, noise_areas : HashMap<i32, Vec<usize>>, algorithm : DLAAlgorithm, brush_size: i32, symmetry: DLASymmetry, floor_percent: f32 } }
This should be pretty self-explanatory by now if you've been through the other chapters:
- We're supporting three algorithms,
WalkInwards,WalkOutwards,CentralAttractor. We'll cover these in detail shortly. - We've added
symmetry, which can be eitherNone,Horizontal,VerticalorBoth. Symmetry can be used to make some beautiful results with this algorithm, and we'll cover that later in the article. - We've also added
brush_size, which specifies how many floor tiles we "paint" onto the map in one go. We'll look at this at the end of the chapter. - We've included
floor_percentfrom the Drunkard's Walk chapter.
Our new function needs to include these parameters:
#![allow(unused)] fn main() { pub fn new(new_depth : i32) -> DLABuilder { DLABuilder{ map : Map::new(new_depth), starting_position : Position{ x: 0, y : 0 }, depth : new_depth, history: Vec::new(), noise_areas : HashMap::new(), algorithm: DLAAlgorithm::WalkInwards, brush_size: 1, symmetry: DLASymmetry::None, floor_percent: 0.25 } } }
We'll make some type constructors once we've mastered the algorithms and their variants!
Walking Inwards
The most basic form of Diffusion-Limited Aggregation works like this:
- Dig a "seed" area around your central starting point.
- While the number of floor tiles is less than your desired total:
- Select a starting point at random for your digger.
- Use the "drunkard's walk" algorithm to move randomly.
- If the digger hit a floor tile, then the previous tile they were in also becomes a floor and the digger stops.
Very simple, and not too hard to implement:
#![allow(unused)] fn main() { fn build(&mut self) { let mut rng = RandomNumberGenerator::new(); // Carve a starting seed self.starting_position = Position{ x: self.map.width/2, y : self.map.height/2 }; let start_idx = self.map.xy_idx(self.starting_position.x, self.starting_position.y); self.take_snapshot(); self.map.tiles[start_idx] = TileType::Floor; self.map.tiles[start_idx-1] = TileType::Floor; self.map.tiles[start_idx+1] = TileType::Floor; self.map.tiles[start_idx-self.map.width as usize] = TileType::Floor; self.map.tiles[start_idx+self.map.width as usize] = TileType::Floor; // Random walker let total_tiles = self.map.width * self.map.height; let desired_floor_tiles = (self.floor_percent * total_tiles as f32) as usize; let mut floor_tile_count = self.map.tiles.iter().filter(|a| **a == TileType::Floor).count(); while floor_tile_count < desired_floor_tiles { match self.algorithm { DLAAlgorithm::WalkInwards => { let mut digger_x = rng.roll_dice(1, self.map.width - 3) + 1; let mut digger_y = rng.roll_dice(1, self.map.height - 3) + 1; let mut prev_x = digger_x; let mut prev_y = digger_y; let mut digger_idx = self.map.xy_idx(digger_x, digger_y); while self.map.tiles[digger_idx] == TileType::Wall { prev_x = digger_x; prev_y = digger_y; let stagger_direction = rng.roll_dice(1, 4); match stagger_direction { 1 => { if digger_x > 2 { digger_x -= 1; } } 2 => { if digger_x < self.map.width-2 { digger_x += 1; } } 3 => { if digger_y > 2 { digger_y -=1; } } _ => { if digger_y < self.map.height-2 { digger_y += 1; } } } digger_idx = self.map.xy_idx(digger_x, digger_y); } self.paint(prev_x, prev_y); } _ => {} ... }
The only new thing here is the call to paint. We'll be extending it later (to handle brush sizes), but here's a temporary implementation:
#![allow(unused)] fn main() { fn paint(&mut self, x: i32, y: i32) { let digger_idx = self.map.xy_idx(x, y); self.map.tiles[digger_idx] = TileType::Floor; } }
If you cargo run this, you will get a pretty cool looking dungeon:
 .
.
Walking outwards
A second variant of this algorithm reverses part of the process:
- Dig a "seed" area around your central starting point.
- While the number of floor tiles is less than your desired total:
- Set the digger to the starting central location.
- Use the "drunkard's walk" algorithm to move randomly.
- If the digger hit a wall tile, then that tile becomes a floor - and the digger stops.
So instead of marching inwards, our brave diggers are marching outwards. Implementing this is quite simple, and can be added to the match sequence of algorithms in build:
#![allow(unused)] fn main() { ... DLAAlgorithm::WalkOutwards => { let mut digger_x = self.starting_position.x; let mut digger_y = self.starting_position.y; let mut digger_idx = self.map.xy_idx(digger_x, digger_y); while self.map.tiles[digger_idx] == TileType::Floor { let stagger_direction = rng.roll_dice(1, 4); match stagger_direction { 1 => { if digger_x > 2 { digger_x -= 1; } } 2 => { if digger_x < self.map.width-2 { digger_x += 1; } } 3 => { if digger_y > 2 { digger_y -=1; } } _ => { if digger_y < self.map.height-2 { digger_y += 1; } } } digger_idx = self.map.xy_idx(digger_x, digger_y); } self.paint(digger_x, digger_y); } _ => {} }
There aren't any new concepts in this code, and if you understood Drunkard's Walk - it should be pretty self explanatory. If you adjust the constructor to use it, and call cargo run it looks pretty good:
 .
.
Central Attractor
This variant is again very similar, but slightly different. Instead of moving randomly, your particles path from a random point towards the middle:
- Dig a "seed" area around your central starting point.
- While the number of floor tiles is less than your desired total:
- Select a starting point at random for your digger.
- Plot a line to the center of the map, and keep it.
- Traverse the line. If the digger hit a floor tile, then the previous tile they were in also becomes a floor and the digger stops.
Again, this is relatively easy to implement:
#![allow(unused)] fn main() { ... DLAAlgorithm::CentralAttractor => { let mut digger_x = rng.roll_dice(1, self.map.width - 3) + 1; let mut digger_y = rng.roll_dice(1, self.map.height - 3) + 1; let mut prev_x = digger_x; let mut prev_y = digger_y; let mut digger_idx = self.map.xy_idx(digger_x, digger_y); let mut path = rltk::line2d( rltk::LineAlg::Bresenham, rltk::Point::new( digger_x, digger_y ), rltk::Point::new( self.starting_position.x, self.starting_position.y ) ); while self.map.tiles[digger_idx] == TileType::Wall && !path.is_empty() { prev_x = digger_x; prev_y = digger_y; digger_x = path[0].x; digger_y = path[0].y; path.remove(0); digger_idx = self.map.xy_idx(digger_x, digger_y); } self.paint(prev_x, prev_y); } }
If you adjust the constructor to use this algorithm, and cargo run the project you get a map that is more focused around a central point:
 .
.
Implementing Symmetry
Tyger Tyger, burning bright,
In the forests of the night;
What immortal hand or eye,
Could frame thy fearful symmetry?
(William Blake, The Tyger)
Symmetry can transform a random map into something that looks designed - but quite alien. It often looks quite insectoid or reminiscent of a Space Invaders enemy. This can make for some fun-looking levels!
Lets modify the paint function to handle symmetry:
#![allow(unused)] fn main() { fn paint(&mut self, x: i32, y:i32) { match self.symmetry { DLASymmetry::None => self.apply_paint(x, y), DLASymmetry::Horizontal => { let center_x = self.map.width / 2; if x == center_x { self.apply_paint(x, y); } else { let dist_x = i32::abs(center_x - x); self.apply_paint(center_x + dist_x, y); self.apply_paint(center_x - dist_x, y); } } DLASymmetry::Vertical => { let center_y = self.map.height / 2; if y == center_y { self.apply_paint(x, y); } else { let dist_y = i32::abs(center_y - y); self.apply_paint(x, center_y + dist_y); self.apply_paint(x, center_y - dist_y); } } DLASymmetry::Both => { let center_x = self.map.width / 2; let center_y = self.map.height / 2; if x == center_x && y == center_y { self.apply_paint(x, y); } else { let dist_x = i32::abs(center_x - x); self.apply_paint(center_x + dist_x, y); self.apply_paint(center_x - dist_x, y); let dist_y = i32::abs(center_y - y); self.apply_paint(x, center_y + dist_y); self.apply_paint(x, center_y - dist_y); } } } }
This is a longer function that it really needs to be, in the name of clarity. Here's how it works:
- We
matchon the current symmetry setting. - If it is
None, we simply callapply_paintwith the destination tile. - If it is
Horizontal:- We check to see if we are on the tile - if we are, just apply the paint once.
- Otherwise, obtain the horizontal distance from the center.
- Paint at
center_x - distanceandcenter_x + distanceto paint symmetrically on thexaxis.
- If it is
Vertical:- We check to see if we are on the tile - if we are, just apply the paint once (this helps with odd numbers of tiles by reducing rounding issues).
- Otherwise, obtain the vertical distance from the center.
- Paint at
center_y - distanceandcenter_y + distance.
- If it is
Both- then do both steps.
You'll notice that we're calling apply_paint rather than actually painting. That's because we've also implemented brush_size:
#![allow(unused)] fn main() { fn apply_paint(&mut self, x: i32, y: i32) { match self.brush_size { 1 => { let digger_idx = self.map.xy_idx(x, y); self.map.tiles[digger_idx] = TileType::Floor; } _ => { let half_brush_size = self.brush_size / 2; for brush_y in y-half_brush_size .. y+half_brush_size { for brush_x in x-half_brush_size .. x+half_brush_size { if brush_x > 1 && brush_x < self.map.width-1 && brush_y > 1 && brush_y < self.map.height-1 { let idx = self.map.xy_idx(brush_x, brush_y); self.map.tiles[idx] = TileType::Floor; } } } } } } }
This is quite simple:
- If brush size is 1, we just paint a floor tile.
- Otherwise, we loop through the brush size - and paint, performing bounds-checking to ensure we aren't painting off the map.
In your constructor, use the CentralAttractor algorithm - and enable symmetry with Horizontal. If you cargo run now, you get a map not unlike a cranky insectoid:
 .
.
Playing with Brush Sizes
Using a larger brush is ensures that you don't get too many 1x1 areas (that can be fiddly to navigate), and gives a more planned look to the map. Now that we've already implemented brush size, modify your constructor like this:
#![allow(unused)] fn main() { pub fn new(new_depth : i32) -> DLABuilder { DLABuilder{ map : Map::new(new_depth), starting_position : Position{ x: 0, y : 0 }, depth : new_depth, history: Vec::new(), noise_areas : HashMap::new(), algorithm: DLAAlgorithm::WalkInwards, brush_size: 2, symmetry: DLASymmetry::None, floor_percent: 0.25 } } }
With this simple change, our map looks much more open:
 .
.
Providing a few constructors
Rather than pollute the random_builder function with algorithm details, we'll make constructors for each of the major algorithms we used in this chapter:
#![allow(unused)] fn main() { pub fn walk_inwards(new_depth : i32) -> DLABuilder { DLABuilder{ map : Map::new(new_depth), starting_position : Position{ x: 0, y : 0 }, depth : new_depth, history: Vec::new(), noise_areas : HashMap::new(), algorithm: DLAAlgorithm::WalkInwards, brush_size: 1, symmetry: DLASymmetry::None, floor_percent: 0.25 } } pub fn walk_outwards(new_depth : i32) -> DLABuilder { DLABuilder{ map : Map::new(new_depth), starting_position : Position{ x: 0, y : 0 }, depth : new_depth, history: Vec::new(), noise_areas : HashMap::new(), algorithm: DLAAlgorithm::WalkOutwards, brush_size: 2, symmetry: DLASymmetry::None, floor_percent: 0.25 } } pub fn central_attractor(new_depth : i32) -> DLABuilder { DLABuilder{ map : Map::new(new_depth), starting_position : Position{ x: 0, y : 0 }, depth : new_depth, history: Vec::new(), noise_areas : HashMap::new(), algorithm: DLAAlgorithm::CentralAttractor, brush_size: 2, symmetry: DLASymmetry::None, floor_percent: 0.25 } } pub fn insectoid(new_depth : i32) -> DLABuilder { DLABuilder{ map : Map::new(new_depth), starting_position : Position{ x: 0, y : 0 }, depth : new_depth, history: Vec::new(), noise_areas : HashMap::new(), algorithm: DLAAlgorithm::CentralAttractor, brush_size: 2, symmetry: DLASymmetry::Horizontal, floor_percent: 0.25 } } }
Randomizing the map builder, once again
Now we can modify random_builder in map_builders/mod.rs to actually be random once more - and offer even more types of map!
#![allow(unused)] fn main() { pub fn random_builder(new_depth: i32) -> Box<dyn MapBuilder> { let mut rng = rltk::RandomNumberGenerator::new(); let builder = rng.roll_dice(1, 12); match builder { 1 => Box::new(BspDungeonBuilder::new(new_depth)), 2 => Box::new(BspInteriorBuilder::new(new_depth)), 3 => Box::new(CellularAutomataBuilder::new(new_depth)), 4 => Box::new(DrunkardsWalkBuilder::open_area(new_depth)), 5 => Box::new(DrunkardsWalkBuilder::open_halls(new_depth)), 6 => Box::new(DrunkardsWalkBuilder::winding_passages(new_depth)), 7 => Box::new(MazeBuilder::new(new_depth)), 8 => Box::new(DLABuilder::walk_inwards(new_depth)), 9 => Box::new(DLABuilder::walk_outwards(new_depth)), 10 => Box::new(DLABuilder::central_attractor(new_depth)), 11 => Box::new(DLABuilder::insectoid(new_depth)), _ => Box::new(SimpleMapBuilder::new(new_depth)) } } }
Wrap-up
This chapter has introduced another, very flexible, map builder for your arsenal. Great for making maps that feel like they were carved from the rock (or hewn from the forest, mined from the asteroid, etc.), it's another great way to introduce variety into your game.
The source code for this chapter may be found here
Run this chapter's example with web assembly, in your browser (WebGL2 required)
Copyright (C) 2019, Herbert Wolverson.
Adding Symmetry and Brush Size as Library Functions
About this tutorial
This tutorial is free and open source, and all code uses the MIT license - so you are free to do with it as you like. My hope is that you will enjoy the tutorial, and make great games!
If you enjoy this and would like me to keep writing, please consider supporting my Patreon.
In the previous chapter on Diffusion-Limited Aggregation, we introduced two new concepts for map building: symmetry and brush size. These readily apply to other algorithms, so we're going to take a moment to move them into library functions (in map_builders/common.rs), make them generic, and demonstrate how they can alter the Drunkard's Walk.
Building the library versions
We'll start by moving the DLASymmetry enumeration out of dla.rs and into common.rs. We'll also change its name, since we are no longer binding it to a specific algorithm:
#![allow(unused)] fn main() { #[derive(PartialEq, Copy, Clone)] pub enum Symmetry { None, Horizontal, Vertical, Both } }
At the end of common.rs, we can add the following:
#![allow(unused)] fn main() { pub fn paint(map: &mut Map, mode: Symmetry, brush_size: i32, x: i32, y:i32) { match mode { Symmetry::None => apply_paint(map, brush_size, x, y), Symmetry::Horizontal => { let center_x = map.width / 2; if x == center_x { apply_paint(map, brush_size, x, y); } else { let dist_x = i32::abs(center_x - x); apply_paint(map, brush_size, center_x + dist_x, y); apply_paint(map, brush_size, center_x - dist_x, y); } } Symmetry::Vertical => { let center_y = map.height / 2; if y == center_y { apply_paint(map, brush_size, x, y); } else { let dist_y = i32::abs(center_y - y); apply_paint(map, brush_size, x, center_y + dist_y); apply_paint(map, brush_size, x, center_y - dist_y); } } Symmetry::Both => { let center_x = map.width / 2; let center_y = map.height / 2; if x == center_x && y == center_y { apply_paint(map, brush_size, x, y); } else { let dist_x = i32::abs(center_x - x); apply_paint(map, brush_size, center_x + dist_x, y); apply_paint(map, brush_size, center_x - dist_x, y); let dist_y = i32::abs(center_y - y); apply_paint(map, brush_size, x, center_y + dist_y); apply_paint(map, brush_size, x, center_y - dist_y); } } } } fn apply_paint(map: &mut Map, brush_size: i32, x: i32, y: i32) { match brush_size { 1 => { let digger_idx = map.xy_idx(x, y); map.tiles[digger_idx] = TileType::Floor; } _ => { let half_brush_size = brush_size / 2; for brush_y in y-half_brush_size .. y+half_brush_size { for brush_x in x-half_brush_size .. x+half_brush_size { if brush_x > 1 && brush_x < map.width-1 && brush_y > 1 && brush_y < map.height-1 { let idx = map.xy_idx(brush_x, brush_y); map.tiles[idx] = TileType::Floor; } } } } } } }
This shouldn't be a surprise: it's the exact same code we had in dla.rs - but with the &mut self removed and instead taking parameters.
Modifying dla.rs to use it
It's relatively simple to modify dla.rs to use it. Replace all DLASymmetry references with Symmetry. Replace all calls to self.paint(x, y) with paint(&mut self.map, self.symmetry, self.brush_size, x, y);. You can check the source code to see the changes - no need to repeat them all here. Make sure to include paint and Symmetry in the list of included functions at the top, too.
Like a lot of refactoring, the proof of the pudding is that if you cargo run your code - nothing has changed! We won't bother with a screenshot to show that it's the same as last time!
Modifying Drunkard's Walk to use it
We'll start by modifying the DrunkardSettings struct to accept the two new features:
#![allow(unused)] fn main() { pub struct DrunkardSettings { pub spawn_mode : DrunkSpawnMode, pub drunken_lifetime : i32, pub floor_percent: f32, pub brush_size: i32, pub symmetry: Symmetry } }
The compiler will complain that we aren't setting these in our constructors, so we'll add some default values:
#![allow(unused)] fn main() { pub fn open_area(new_depth : i32) -> DrunkardsWalkBuilder { DrunkardsWalkBuilder{ map : Map::new(new_depth), starting_position : Position{ x: 0, y : 0 }, depth : new_depth, history: Vec::new(), noise_areas : HashMap::new(), settings : DrunkardSettings{ spawn_mode: DrunkSpawnMode::StartingPoint, drunken_lifetime: 400, floor_percent: 0.5, brush_size: 1, symmetry: Symmetry::None } } } }
We need to make similar changes to the other constructors - just adding brush_size and symmetry to each of the DrunkardSettings builders.
We also need to replace the line:
#![allow(unused)] fn main() { self.map.tiles[drunk_idx] = TileType::DownStairs; }
With:
#![allow(unused)] fn main() { paint(&mut self.map, self.settings.symmetry, self.settings.brush_size, drunk_x, drunk_y); self.map.tiles[drunk_idx] = TileType::DownStairs; }
The double-draw retains the function of adding > symbols to show you the walker's path, while retaining the overdraw of the paint function.
Making a wider-carving drunk
To test this out, we'll add a new constructor to drunkard.rs:
#![allow(unused)] fn main() { pub fn fat_passages(new_depth : i32) -> DrunkardsWalkBuilder { DrunkardsWalkBuilder{ map : Map::new(new_depth), starting_position : Position{ x: 0, y : 0 }, depth : new_depth, history: Vec::new(), noise_areas : HashMap::new(), settings : DrunkardSettings{ spawn_mode: DrunkSpawnMode::Random, drunken_lifetime: 100, floor_percent: 0.4, brush_size: 2, symmetry: Symmetry::None } } } }
We'll also quickly modify random_builder in map_builders/mod.rs to showcase this one:
#![allow(unused)] fn main() { pub fn random_builder(new_depth: i32) -> Box<dyn MapBuilder> { /*let mut rng = rltk::RandomNumberGenerator::new(); let builder = rng.roll_dice(1, 12); match builder { 1 => Box::new(BspDungeonBuilder::new(new_depth)), 2 => Box::new(BspInteriorBuilder::new(new_depth)), 3 => Box::new(CellularAutomataBuilder::new(new_depth)), 4 => Box::new(DrunkardsWalkBuilder::open_area(new_depth)), 5 => Box::new(DrunkardsWalkBuilder::open_halls(new_depth)), 6 => Box::new(DrunkardsWalkBuilder::winding_passages(new_depth)), 7 => Box::new(MazeBuilder::new(new_depth)), 8 => Box::new(DLABuilder::walk_inwards(new_depth)), 9 => Box::new(DLABuilder::walk_outwards(new_depth)), 10 => Box::new(DLABuilder::central_attractor(new_depth)), 11 => Box::new(DLABuilder::insectoid(new_depth)), _ => Box::new(SimpleMapBuilder::new(new_depth)) }*/ Box::new(DrunkardsWalkBuilder::fat_passages(new_depth)) } }
This shows an immediate change in the map generation:
 .
.
Notice how the "fatter" digging area gives more open halls. It also runs in half the time, since we exhaust the desired floor count much more quickly.
Adding Symmetry
Like DLA, symmetrical drunkards can make interesting looking maps. We'll add one more constructor:
#![allow(unused)] fn main() { pub fn fearful_symmetry(new_depth : i32) -> DrunkardsWalkBuilder { DrunkardsWalkBuilder{ map : Map::new(new_depth), starting_position : Position{ x: 0, y : 0 }, depth : new_depth, history: Vec::new(), noise_areas : HashMap::new(), settings : DrunkardSettings{ spawn_mode: DrunkSpawnMode::Random, drunken_lifetime: 100, floor_percent: 0.4, brush_size: 1, symmetry: Symmetry::Both } } } }
We also modify our random_builder function to use it:
#![allow(unused)] fn main() { pub fn random_builder(new_depth: i32) -> Box<dyn MapBuilder> { /*let mut rng = rltk::RandomNumberGenerator::new(); let builder = rng.roll_dice(1, 12); match builder { 1 => Box::new(BspDungeonBuilder::new(new_depth)), 2 => Box::new(BspInteriorBuilder::new(new_depth)), 3 => Box::new(CellularAutomataBuilder::new(new_depth)), 4 => Box::new(DrunkardsWalkBuilder::open_area(new_depth)), 5 => Box::new(DrunkardsWalkBuilder::open_halls(new_depth)), 6 => Box::new(DrunkardsWalkBuilder::winding_passages(new_depth)), 7 => Box::new(MazeBuilder::new(new_depth)), 8 => Box::new(DLABuilder::walk_inwards(new_depth)), 9 => Box::new(DLABuilder::walk_outwards(new_depth)), 10 => Box::new(DLABuilder::central_attractor(new_depth)), 11 => Box::new(DLABuilder::insectoid(new_depth)), _ => Box::new(SimpleMapBuilder::new(new_depth)) }*/ Box::new(DrunkardsWalkBuilder::fearful_symmetry(new_depth)) } }
cargo run will render results something like these:
 .
.
Notice how the symmetry is applied (really fast - we're blasting out the floor tiles, now!) - and then unreachable areas are culled, getting rid of part of the map. This is quite a nice map!
Restoring Randomness Once More
Once again, we add our new algorithms to the random_builder function in map_builders/mod.rs:
#![allow(unused)] fn main() { pub fn random_builder(new_depth: i32) -> Box<dyn MapBuilder> { let mut rng = rltk::RandomNumberGenerator::new(); let builder = rng.roll_dice(1, 14); match builder { 1 => Box::new(BspDungeonBuilder::new(new_depth)), 2 => Box::new(BspInteriorBuilder::new(new_depth)), 3 => Box::new(CellularAutomataBuilder::new(new_depth)), 4 => Box::new(DrunkardsWalkBuilder::open_area(new_depth)), 5 => Box::new(DrunkardsWalkBuilder::open_halls(new_depth)), 6 => Box::new(DrunkardsWalkBuilder::winding_passages(new_depth)), 7 => Box::new(DrunkardsWalkBuilder::fat_passages(new_depth)), 8 => Box::new(DrunkardsWalkBuilder::fearful_symmetry(new_depth)), 9 => Box::new(MazeBuilder::new(new_depth)), 10 => Box::new(DLABuilder::walk_inwards(new_depth)), 11 => Box::new(DLABuilder::walk_outwards(new_depth)), 12 => Box::new(DLABuilder::central_attractor(new_depth)), 13 => Box::new(DLABuilder::insectoid(new_depth)), _ => Box::new(SimpleMapBuilder::new(new_depth)) } } }
We're up to 14 algorithms, now! We have an increasingly varied game!
Wrap-Up
This chapter has demonstrated a very useful tool for the game programmer: finding a handy algorithm, making it generic, and using it in other parts of your code. It's rare to guess exactly what you need up-front (and there's a lot to be said for "you won't need it" - implementing things when you do need them), so it's a valuable weapon in our arsenal to be able to quickly refactor our code for reuse.
The source code for this chapter may be found here
Run this chapter's example with web assembly, in your browser (WebGL2 required)
Copyright (C) 2019, Herbert Wolverson.
Voronoi Hive/Cell Maps
About this tutorial
This tutorial is free and open source, and all code uses the MIT license - so you are free to do with it as you like. My hope is that you will enjoy the tutorial, and make great games!
If you enjoy this and would like me to keep writing, please consider supporting my Patreon.
We've touched on Voronoi diagrams before, in our spawn placement. In this section, we'll use them to make a map. The algorithm basically subdivides the map into regions, and places walls between them. The result is a bit like a hive. You can play with the distance/adjacency algorithm to adjust the results.
Scaffolding
We'll make scaffolding like in the previous chapters, making voronoi.rs with the structure VoronoiBuilder in it. We'll also adjust our random_builder function to only return VoronoiBuilder for now.
Building a Voronoi Diagram
In previous usages, we've skimmed over how to actually make a Voronoi diagram - and relied on the FastNoise library inside rltk. That's all well and good, but it doesn't really show us how it works - and gives very limited opportunities to tweak it. So - we'll make our own.
The first step in making some Voronoi noise it to populate a set of "seeds". These are randomly chosen (but not duplicate) points on the map. We'll make the number of seeds a variable so it can be tweaked later. Here's the code:
#![allow(unused)] fn main() { let n_seeds = 64; let mut voronoi_seeds : Vec<(usize, rltk::Point)> = Vec::new(); while voronoi_seeds.len() < n_seeds { let vx = rng.roll_dice(1, self.map.width-1); let vy = rng.roll_dice(1, self.map.height-1); let vidx = self.map.xy_idx(vx, vy); let candidate = (vidx, rltk::Point::new(vx, vy)); if !voronoi_seeds.contains(&candidate) { voronoi_seeds.push(candidate); } } }
This makes a vector, each entry containing a tuple. Inside that tuple, we're storing an index to the map location, and a Point with the x and y coordinates in it (we could skip saving those and calculate from the index if we wanted, but I feel that this is clearer). Then we randomly determine a position, check to see that we haven't already rolled that location, and add it. We repeat the process until we have the desired number of seeds. 64 is quite a lot, but will give a relatively dense hive-like structure.
The next step is to determine each cell's Voronoi membership:
#![allow(unused)] fn main() { let mut voronoi_distance = vec![(0, 0.0f32) ; n_seeds]; let mut voronoi_membership : Vec<i32> = vec![0 ; self.map.width as usize * self.map.height as usize]; for (i, vid) in voronoi_membership.iter_mut().enumerate() { let x = i as i32 % self.map.width; let y = i as i32 / self.map.width; for (seed, pos) in voronoi_seeds.iter().enumerate() { let distance = rltk::DistanceAlg::PythagorasSquared.distance2d( rltk::Point::new(x, y), pos.1 ); voronoi_distance[seed] = (seed, distance); } voronoi_distance.sort_by(|a,b| a.1.partial_cmp(&b.1).unwrap()); *vid = voronoi_distance[0].0 as i32; } }
In this block of code, we:
- Create a new
vector, calledvoronoi_distance. It contains tuples of ausizeand af32(float), and is pre-made withn_seedsentries. We could make this for every iteration, but it's a lot faster to reuse the same one. We create it zeroed. - We create a new
voronoi_membershipvector, containing one entry per tile on the map. We set them all to 0. We'll use this to store which Voronoi cell the tile belongs to. - For every tile in
voronoi_membership, we obtain an enumerator (index number) and the value. We have this mutably, so we can make changes.- We calculate the
xandyposition of the tile from the enumerator (i). - For each entry in the
voronoi_seedsstructure, we obtain the index (viaenumerate()) and the position tuple.- We calculate the distance from the seed to the current tile, using the
PythagorasSquaredalgorithm. - We set
voronoi_distance[seed]to the seed index and the distance.
- We calculate the distance from the seed to the current tile, using the
- We sort the
voronoi_distancevector by the distance, so the closest seed will be the first entry. - We set the tile's
vid(Voronoi ID) to the first entry in thevoronoi_distancelist.
- We calculate the
You can summarize that in English more easily: each tile is given membership of the Voronoi group to whom's seed it is physically closest.
Next, we use this to draw the map:
#![allow(unused)] fn main() { for y in 1..self.map.height-1 { for x in 1..self.map.width-1 { let mut neighbors = 0; let my_idx = self.map.xy_idx(x, y); let my_seed = voronoi_membership[my_idx]; if voronoi_membership[self.map.xy_idx(x-1, y)] != my_seed { neighbors += 1; } if voronoi_membership[self.map.xy_idx(x+1, y)] != my_seed { neighbors += 1; } if voronoi_membership[self.map.xy_idx(x, y-1)] != my_seed { neighbors += 1; } if voronoi_membership[self.map.xy_idx(x, y+1)] != my_seed { neighbors += 1; } if neighbors < 2 { self.map.tiles[my_idx] = TileType::Floor; } } self.take_snapshot(); } }
In this code, we visit every tile except for the very outer edges. We count how many neighboring tiles are in a different Voronoi group. If the answer is 0, then it is entirely in the group: so we can place a floor. If the answer is 1, it only borders 1 other group - so we can also place a floor (to ensure we can walk around the map). Otherwise, we leave the tile as a wall.
Then we run the same culling and placement code we've used before. If you cargo run the project now, you will see a pleasant structure:
 .
.
Tweaking the Hive
There are two obvious variables to expose to the builder: the number of seeds, and the distance algorithm to use. We'll update the structure signature to include these:
#![allow(unused)] fn main() { #[derive(PartialEq, Copy, Clone)] pub enum DistanceAlgorithm { Pythagoras, Manhattan, Chebyshev } pub struct VoronoiCellBuilder { map : Map, starting_position : Position, depth: i32, history: Vec<Map>, noise_areas : HashMap<i32, Vec<usize>>, n_seeds: usize, distance_algorithm: DistanceAlgorithm } }
Then we'll update the Voronoi code to use them:
#![allow(unused)] fn main() { fn build(&mut self) { let mut rng = RandomNumberGenerator::new(); // Make a Voronoi diagram. We'll do this the hard way to learn about the technique! let mut voronoi_seeds : Vec<(usize, rltk::Point)> = Vec::new(); while voronoi_seeds.len() < self.n_seeds { let vx = rng.roll_dice(1, self.map.width-1); let vy = rng.roll_dice(1, self.map.height-1); let vidx = self.map.xy_idx(vx, vy); let candidate = (vidx, rltk::Point::new(vx, vy)); if !voronoi_seeds.contains(&candidate) { voronoi_seeds.push(candidate); } } let mut voronoi_distance = vec![(0, 0.0f32) ; self.n_seeds]; let mut voronoi_membership : Vec<i32> = vec![0 ; self.map.width as usize * self.map.height as usize]; for (i, vid) in voronoi_membership.iter_mut().enumerate() { let x = i as i32 % self.map.width; let y = i as i32 / self.map.width; for (seed, pos) in voronoi_seeds.iter().enumerate() { let distance; match self.distance_algorithm { DistanceAlgorithm::Pythagoras => { distance = rltk::DistanceAlg::PythagorasSquared.distance2d( rltk::Point::new(x, y), pos.1 ); } DistanceAlgorithm::Manhattan => { distance = rltk::DistanceAlg::Manhattan.distance2d( rltk::Point::new(x, y), pos.1 ); } DistanceAlgorithm::Chebyshev => { distance = rltk::DistanceAlg::Chebyshev.distance2d( rltk::Point::new(x, y), pos.1 ); } } voronoi_distance[seed] = (seed, distance); } voronoi_distance.sort_by(|a,b| a.1.partial_cmp(&b.1).unwrap()); *vid = voronoi_distance[0].0 as i32; } for y in 1..self.map.height-1 { for x in 1..self.map.width-1 { let mut neighbors = 0; let my_idx = self.map.xy_idx(x, y); let my_seed = voronoi_membership[my_idx]; if voronoi_membership[self.map.xy_idx(x-1, y)] != my_seed { neighbors += 1; } if voronoi_membership[self.map.xy_idx(x+1, y)] != my_seed { neighbors += 1; } if voronoi_membership[self.map.xy_idx(x, y-1)] != my_seed { neighbors += 1; } if voronoi_membership[self.map.xy_idx(x, y+1)] != my_seed { neighbors += 1; } if neighbors < 2 { self.map.tiles[my_idx] = TileType::Floor; } } self.take_snapshot(); } ... }
As a test, lets change the constructor to use Manhattan distance. The results will look something like this:
 .
.
Notice how the lines are straighter, and less organic looking. That's what Manhattan distance does: it calculates distance like a Manhattan Taxi Driver - number of rows plus number of columns, rather than a straight line distance.
Restoring Randomness
So we'll put a couple of constructors in for each of the noise types:
#![allow(unused)] fn main() { pub fn pythagoras(new_depth : i32) -> VoronoiCellBuilder { VoronoiCellBuilder{ map : Map::new(new_depth), starting_position : Position{ x: 0, y : 0 }, depth : new_depth, history: Vec::new(), noise_areas : HashMap::new(), n_seeds: 64, distance_algorithm: DistanceAlgorithm::Pythagoras } } pub fn manhattan(new_depth : i32) -> VoronoiCellBuilder { VoronoiCellBuilder{ map : Map::new(new_depth), starting_position : Position{ x: 0, y : 0 }, depth : new_depth, history: Vec::new(), noise_areas : HashMap::new(), n_seeds: 64, distance_algorithm: DistanceAlgorithm::Manhattan } } }
Then we'll restore the random_builder to once again be random:
#![allow(unused)] fn main() { pub fn random_builder(new_depth: i32) -> Box<dyn MapBuilder> { let mut rng = rltk::RandomNumberGenerator::new(); let builder = rng.roll_dice(1, 16); match builder { 1 => Box::new(BspDungeonBuilder::new(new_depth)), 2 => Box::new(BspInteriorBuilder::new(new_depth)), 3 => Box::new(CellularAutomataBuilder::new(new_depth)), 4 => Box::new(DrunkardsWalkBuilder::open_area(new_depth)), 5 => Box::new(DrunkardsWalkBuilder::open_halls(new_depth)), 6 => Box::new(DrunkardsWalkBuilder::winding_passages(new_depth)), 7 => Box::new(DrunkardsWalkBuilder::fat_passages(new_depth)), 8 => Box::new(DrunkardsWalkBuilder::fearful_symmetry(new_depth)), 9 => Box::new(MazeBuilder::new(new_depth)), 10 => Box::new(DLABuilder::walk_inwards(new_depth)), 11 => Box::new(DLABuilder::walk_outwards(new_depth)), 12 => Box::new(DLABuilder::central_attractor(new_depth)), 13 => Box::new(DLABuilder::insectoid(new_depth)), 14 => Box::new(VoronoiCellBuilder::pythagoras(new_depth)), 15 => Box::new(VoronoiCellBuilder::manhattan(new_depth)), _ => Box::new(SimpleMapBuilder::new(new_depth)) } } }
Wrap-Up
That's another algorithm under our belts! We really have enough to write a pretty good roguelike now, but there are still more to come!
The source code for this chapter may be found here
Run this chapter's example with web assembly, in your browser (WebGL2 required)
Copyright (C) 2019, Herbert Wolverson.
Wave Function Collapse
About this tutorial
This tutorial is free and open source, and all code uses the MIT license - so you are free to do with it as you like. My hope is that you will enjoy the tutorial, and make great games!
If you enjoy this and would like me to keep writing, please consider supporting my Patreon.
A few years ago, Wave Function Collapse (WFC) exploded onto the procedural generation scene. Apparently magical, it took images in - and made a similar image. Demos showed it spitting out great looking game levels, and the amazing Caves of Qud started using it for generating fun levels. The canonical demonstrations - along with the original algorithm in C# and various explanatory links/ports - may be found here.
In this chapter, we're going to implement Wave Function Collapse from scratch - and apply it to making fun Roguelike levels. Note that there is a crate with the original algorithm available (wfc, accompanied by wfc-image); it seemed pretty good in testing, but I had problems making it work with Web Assembly. I also didn't feel that I was really teaching the algorithm by saying "just import this". It's a longer chapter, but by the end you should feel comfortable with the algorithm.
So what does WFC really do?
Wave Function Collapse is unlike the map generation algorithms we've used so far in that it doesn't actually make maps. It takes source data in (we'll use other maps!), scans them, and builds a new map featuring elements made exclusively from the source data. It operates in a few phases:
- It reads the incoming data. In the original implementation, this was a PNG file. In our implementation, this is a
Mapstructure like others we've worked with; we'll also implement a REX Paint reader to load maps. - It divides the source image into "tiles", and optionally makes more tiles by mirroring the tiles it reads along one or two axes.
- It either loads or builds a "constraints" graph. This is a set of rules specifying which tiles can go next to each other. In an image, this may be derived from tile adjacency. In a Roguelike map, connectivity of exits is a good metric. For a tile-based game, you might carefully build a layout of what can go where.
- It then divides the output image into tile-sized chunks, and sets them all to "empty". The first tile placed will be pretty random, and then it selects areas and examines tile data that is already known - placing down tiles that are compatible with what is already there. Eventually, it's placed all of the tiles - and you have a map/image!
The name "Wave Function Collapse" refers to the Quantum Physics idea that a particle may have not actually have a state until you look at it. In the algorithm, tiles don't really coalesce into being until you pick one to examine. So there is a slight similarity to Quantum Physics. In reality, though - the name is a triumph of marketing. The algorithm is what is known as a solver - given a set of constraints, it iterates through possible solutions until the constraints are solved. This isn't a new concept - Prolog is an entire programming language based around this idea, and it first hit the scene in 1972. So in a way, it's older than me!
Getting started: Rust support for complex modules
All our previous algorithms were small enough to fit into one source code file, without too much paging around to find the relevant bit of code. Wave Function Collapse is complicated enough that it deserves to be broken into multiple files - in much the same was as the map_builders module was broken into a module - WFC will be divided into its own module. The module will still live inside map_builders - so in a way it's really a sub-module.
Rust makes it pretty easy to break any module into multiple files: you create a directory inside the parent module, and put a file in it called mod.rs. You can then put more files in the folder, and so long as you enable them (with mod myfile) and use the contents (with use myfile::MyElement) it works just like a single file.
So to get started, inside your map_builders directory - make a new directory called waveform_collapse. Add a file, mod.rs into it. You should have a source tree like this:
\ src
\ map_builders
\ waveform_collapse
+ mod.rs
bsp_dungeon.rs
(etc)
main.rs
(etc)
We'll populate mod.rs with a skeletal implementation similar to previous chapters:
#![allow(unused)] fn main() { use super::{MapBuilder, Map, TileType, Position, spawner, SHOW_MAPGEN_VISUALIZER, generate_voronoi_spawn_regions, remove_unreachable_areas_returning_most_distant}; use rltk::RandomNumberGenerator; use specs::prelude::*; pub struct WaveformCollapseBuilder { map : Map, starting_position : Position, depth: i32, history: Vec<Map>, noise_areas : HashMap<i32, Vec<usize>> } impl MapBuilder for WaveformCollapseBuilder { fn get_map(&self) -> Map { self.map.clone() } fn get_starting_position(&self) -> Position { self.starting_position.clone() } fn get_snapshot_history(&self) -> Vec<Map> { self.history.clone() } fn build_map(&mut self) { self.build(); } fn spawn_entities(&mut self, ecs : &mut World) { for area in self.noise_areas.iter() { spawner::spawn_region(ecs, area.1, self.depth); } } fn take_snapshot(&mut self) { if SHOW_MAPGEN_VISUALIZER { let mut snapshot = self.map.clone(); for v in snapshot.revealed_tiles.iter_mut() { *v = true; } self.history.push(snapshot); } } } impl WaveformCollapseBuilder { pub fn new(new_depth : i32) -> WaveformCollapseBuilder { WaveformCollapseBuilder{ map : Map::new(new_depth), starting_position : Position{ x: 0, y : 0 }, depth : new_depth, history: Vec::new(), noise_areas : HashMap::new() } } fn build(&mut self) { let mut rng = RandomNumberGenerator::new(); // TODO: Builder goes here // Find a starting point; start at the middle and walk left until we find an open tile self.starting_position = Position{ x: self.map.width / 2, y : self.map.height / 2 }; /*let mut start_idx = self.map.xy_idx(self.starting_position.x, self.starting_position.y); while self.map.tiles[start_idx] != TileType::Floor { self.starting_position.x -= 1; start_idx = self.map.xy_idx(self.starting_position.x, self.starting_position.y); }*/ self.take_snapshot(); // Find all tiles we can reach from the starting point let exit_tile = remove_unreachable_areas_returning_most_distant(&mut self.map, start_idx); self.take_snapshot(); // Place the stairs self.map.tiles[exit_tile] = TileType::DownStairs; self.take_snapshot(); // Now we build a noise map for use in spawning entities later self.noise_areas = generate_voronoi_spawn_regions(&self.map, &mut rng); } } }
We'll also modify map_builders/mod.rs's random_builder function to always return the algorithm we're currently working with:
#![allow(unused)] fn main() { pub fn random_builder(new_depth: i32) -> Box<dyn MapBuilder> { /* let mut rng = rltk::RandomNumberGenerator::new(); let builder = rng.roll_dice(1, 16); match builder { 1 => Box::new(BspDungeonBuilder::new(new_depth)), 2 => Box::new(BspInteriorBuilder::new(new_depth)), 3 => Box::new(CellularAutomataBuilder::new(new_depth)), 4 => Box::new(DrunkardsWalkBuilder::open_area(new_depth)), 5 => Box::new(DrunkardsWalkBuilder::open_halls(new_depth)), 6 => Box::new(DrunkardsWalkBuilder::winding_passages(new_depth)), 7 => Box::new(DrunkardsWalkBuilder::fat_passages(new_depth)), 8 => Box::new(DrunkardsWalkBuilder::fearful_symmetry(new_depth)), 9 => Box::new(MazeBuilder::new(new_depth)), 10 => Box::new(DLABuilder::walk_inwards(new_depth)), 11 => Box::new(DLABuilder::walk_outwards(new_depth)), 12 => Box::new(DLABuilder::central_attractor(new_depth)), 13 => Box::new(DLABuilder::insectoid(new_depth)), 14 => Box::new(VoronoiCellBuilder::pythagoras(new_depth)), 15 => Box::new(VoronoiCellBuilder::manhattan(new_depth)), _ => Box::new(SimpleMapBuilder::new(new_depth)) }*/ Box::new(WaveformCollapseBuilder::new(new_depth)) } }
This will give you an empty map (all walls) if you cargo run it - but it's a good starting point.
Loading the source image - REX Paint
You may remember back in section 2 we loaded a REX Paint file to use as the main menu screen. We're going to do similar here, but we're going to turn it into a playable map. It's a deliberately odd map to help illustrate what you can do with this algorithm. Here's the original in REX Paint:
 .
.
I've tried to include some interesting shapes, a silly face, and plenty of corridors and different sized rooms. Here's a second REX Paint file, designed to be more like the old board game The Sorcerer's Cave, of which the algorithm reminds me - tiles with 1 exit, 2 exits, 3 exits and 4. It would be easy to make these prettier, but we'll keep it simple for demonstration purposes.
 .
.
These files are found in the resources directory, as wfc-demo1.xp and wfc-demo2.xp. One thing I love about REX Paint: the files are tiny (102k and 112k respectively). To make accessing them easier - and avoid having to ship them with the executable when you publish your finished game, we'll embed them into our game. We did this previously for the main menu. Modify rex_assets.xp to include the new files:
#![allow(unused)] fn main() { use rltk::{rex::XpFile}; rltk::embedded_resource!(SMALL_DUNGEON, "../../resources/SmallDungeon_80x50.xp"); rltk::embedded_resource!(WFC_DEMO_IMAGE1, "../../resources/wfc-demo1.xp"); rltk::embedded_resource!(WFC_DEMO_IMAGE2, "../../resources/wfc-demo2.xp"); pub struct RexAssets { pub menu : XpFile } impl RexAssets { #[allow(clippy::new_without_default)] pub fn new() -> RexAssets { rltk::link_resource!(SMALL_DUNGEON, "../../resources/SmallDungeon_80x50.xp"); rltk::link_resource!(WFC_DEMO_IMAGE1, "../../resources/wfc-demo1.xp"); rltk::link_resource!(WFC_DEMO_IMAGE2, "../../resources/wfc-demo2.xp"); RexAssets{ menu : XpFile::from_resource("../../resources/SmallDungeon_80x50.xp").unwrap() } } } }
Finally, we should load the map itself! Inside the waveform_collapse directory, make a new file: image_loader.rs:
#![allow(unused)] fn main() { use rltk::rex::XpFile; use super::{Map, TileType}; /// Loads a RexPaint file, and converts it into our map format pub fn load_rex_map(new_depth: i32, xp_file : &XpFile) -> Map { let mut map : Map = Map::new(new_depth); for layer in &xp_file.layers { for y in 0..layer.height { for x in 0..layer.width { let cell = layer.get(x, y).unwrap(); if x < map.width as usize && y < map.height as usize { let idx = map.xy_idx(x as i32, y as i32); match cell.ch { 32 => map.tiles[idx] = TileType::Floor, // # 35 => map.tiles[idx] = TileType::Wall, // # _ => {} } } } } } map } }
This is really simple, and if you remember the main menu graphic tutorial it should be quite self-explanatory. This function:
- Accepts arguments for
new_depth(because maps want it) and a reference to anXpFile- a REX Paint map. It will be made completely solid, walls everywhere by the constructor. - It creates a new map, using the
new_depthparameter. - For each layer in the REX Paint file (there should be only one at this point):
- For each
yandxon that layer:- Load the tile information for that coordinate.
- Ensure that we're within the map boundaries (in case we have a mismatch in sizes).
- Calculate the
tilesindex for the cell. - Match on the cell glyph; if its a
#(35) we place a wall, if its a space (32) we place a floor.
- For each
Now we can modify our build function (in mod.rs) to load the map:
#![allow(unused)] fn main() { fn build(&mut self) { let mut rng = RandomNumberGenerator::new(); self.map = load_rex_map(self.depth, &rltk::rex::XpFile::from_resource("../../resources/wfc-demo1.xp").unwrap()); self.take_snapshot(); // Find a starting point; start at the middle and walk left until we find an open tile self.starting_position = Position{ x: self.map.width / 2, y : self.map.height / 2 }; ... }
At the top, we have to tell it to use the new image_loader file:
#![allow(unused)] fn main() { mod image_loader; use image_loader::*; }
Note that we're not putting pub in front of these: we're using them, but not exposing them outside of the module. This helps us keep our code clean, and our compile times short!
In and of itself, this is cool - we can now load any REX Paint designed level and play it! If you cargo run now, you'll find that you can play the new map:
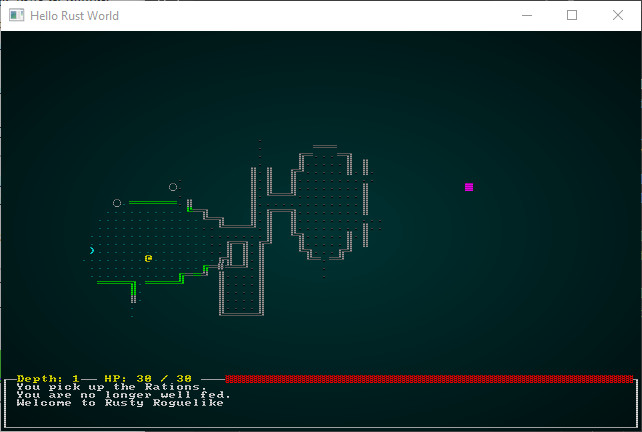 .
.
We'll make use of this in later chapters for vaults, prefabs and pre-designed levels - but for now, we'll just use it as source data for later in the Wave Function Collapse implementation.
Carving up our map into tiles
We discussed earlier that WFC works by carving the original image into chunks/tiles, and optionally flipping them in different directions. It does this as the first part of building constraints - how the map can be laid out. So now we need to start carving up our image.
We'll start by picking a tile size (we're going to call it chunk_size). We'll make it a constant for now (it'll become tweakable later), and start with a size of 7 - because that was the size of the tiles in our second REX demo file. We'll also call a function we'll write in a moment:
#![allow(unused)] fn main() { fn build(&mut self) { let mut rng = RandomNumberGenerator::new(); const CHUNK_SIZE :i32 = 7; self.map = load_rex_map(self.depth, &rltk::rex::XpFile::from_resource("../../resources/wfc-demo2.xp").unwrap()); self.take_snapshot(); let patterns = build_patterns(&self.map, CHUNK_SIZE, true, true); ... }
Since we're dealing with constraints, we'll make a new file in our map_builders/waveform_collapse directory - constraints.rs. We're going to make a function called build_patterns:
#![allow(unused)] fn main() { use super::{TileType, Map}; use std::collections::HashSet; pub fn build_patterns(map : &Map, chunk_size: i32, include_flipping: bool, dedupe: bool) -> Vec<Vec<TileType>> { let chunks_x = map.width / chunk_size; let chunks_y = map.height / chunk_size; let mut patterns = Vec::new(); for cy in 0..chunks_y { for cx in 0..chunks_x { // Normal orientation let mut pattern : Vec<TileType> = Vec::new(); let start_x = cx * chunk_size; let end_x = (cx+1) * chunk_size; let start_y = cy * chunk_size; let end_y = (cy+1) * chunk_size; for y in start_y .. end_y { for x in start_x .. end_x { let idx = map.xy_idx(x, y); pattern.push(map.tiles[idx]); } } patterns.push(pattern); if include_flipping { // Flip horizontal pattern = Vec::new(); for y in start_y .. end_y { for x in start_x .. end_x { let idx = map.xy_idx(end_x - (x+1), y); pattern.push(map.tiles[idx]); } } patterns.push(pattern); // Flip vertical pattern = Vec::new(); for y in start_y .. end_y { for x in start_x .. end_x { let idx = map.xy_idx(x, end_y - (y+1)); pattern.push(map.tiles[idx]); } } patterns.push(pattern); // Flip both pattern = Vec::new(); for y in start_y .. end_y { for x in start_x .. end_x { let idx = map.xy_idx(end_x - (x+1), end_y - (y+1)); pattern.push(map.tiles[idx]); } } patterns.push(pattern); } } } // Dedupe if dedupe { rltk::console::log(format!("Pre de-duplication, there are {} patterns", patterns.len())); let set: HashSet<Vec<TileType>> = patterns.drain(..).collect(); // dedup patterns.extend(set.into_iter()); rltk::console::log(format!("There are {} patterns", patterns.len())); } patterns } }
That's quite the mouthful of a function, so let's walk through it:
- At the top, we're importing some items from elsewhere in the project:
Map,TileType, and the built-in collectionHashMap. - We declare our
build_patternsfunction, with parameters for a reference to the source map, thechunk_sizeto use (tile size), and flags (boolvariables) forinclude_flippinganddedupe. These indicate which features we'd like to use when reading the source map. We're returning avector, containing a series ofvectors of differentTileTypes. The outer container holds each pattern. The inner vector holds theTileTypes that make up the pattern itself. - We determine how many chunks there are in each direction and store it in
chunks_xandchunks_y. - We create a new
vectorcalledpatterns. This will hold the result of the function; we don't declare it's type, because Rust is smart enough to see that we're returning it at the end of the function - and can figure out what type it is for us. - We iterate every vertical chunk in the variable
cy:- We iterate every horizontal chunk in the variable
cx:- We make a new
vectorto hold this pattern. - We calculate
start_x,end_x,start_yandend_yto hold the four corner coordinates of this chunk - on the original map. - We iterate the pattern in
y/xorder (to match our map format), read in theTileTypeof each map tile within the chunk, and add it to the pattern. - We push the pattern to the
patternsresult vector. - If
include_flippingis set totrue(because we'd like to flip our tiles, making more tiles!):- Repeat iterating
y/xin different orders, giving 3 more tiles. Each is added to thepatternsresult vector.
- Repeat iterating
- We make a new
- We iterate every horizontal chunk in the variable
- If
dedupeis set, then we are "de-duplicating" the pattern buffer. Basically, removing any pattern that occurs more than once. This is good for a map with lots of wasted space, if you don't want to make an equally sparse result map. We de-duplicate by adding the patterns into aHashMap(which can only store one of each entry) and then reading it back out again.
For this to compile, we have to make TileType know how to convert itself into a hash. HashMap uses "hashes" (basically a checksum of the contained values) to determine if an entry is unique, and to help find it. In map.rs, we can simply add one more derived attribute to the TileType enumeration:
#![allow(unused)] fn main() { #[derive(PartialEq, Eq, Hash, Copy, Clone, Serialize, Deserialize)] pub enum TileType { Wall, Floor, DownStairs } }
This code should get you every 7x7 tile within your source file - but it'd be great to be able to prove that it works! As Reagan's speech-writer once wrote, Trust - But Verify. In constraints.rs, we'll add another function: render_pattern_to_map:
#![allow(unused)] fn main() { fn render_pattern_to_map(map : &mut Map, pattern: &Vec<TileType>, chunk_size: i32, start_x : i32, start_y: i32) { let mut i = 0usize; for tile_y in 0..chunk_size { for tile_x in 0..chunk_size { let map_idx = map.xy_idx(start_x + tile_x, start_y + tile_y); map.tiles[map_idx] = pattern[i]; map.visible_tiles[map_idx] = true; i += 1; } } } }
This is pretty simple: iterate the pattern, and copy to a location on the map - offset by the start_x and start_y coordinates. Note that we're also marking the tile as visible - this will make the renderer display our tiles in color.
Now we just need to display our tiles as part of the snapshot system. In waveform_collapse/mod.rs add a new function as part of the implementation of WaveformCollapseBuilder (underneath build). It's a member function because it needs access to the take_snapshot command:
#![allow(unused)] fn main() { fn render_tile_gallery(&mut self, patterns: &Vec<Vec<TileType>>, chunk_size: i32) { self.map = Map::new(0); let mut counter = 0; let mut x = 1; let mut y = 1; while counter < patterns.len() { render_pattern_to_map(&mut self.map, &patterns[counter], chunk_size, x, y); x += chunk_size + 1; if x + chunk_size > self.map.width { // Move to the next row x = 1; y += chunk_size + 1; if y + chunk_size > self.map.height { // Move to the next page self.take_snapshot(); self.map = Map::new(0); x = 1; y = 1; } } counter += 1; } self.take_snapshot(); } }
Now, we need to call it. In build:
#![allow(unused)] fn main() { let patterns = build_patterns(&self.map, CHUNK_SIZE, true, true); self.render_tile_gallery(&patterns, CHUNK_SIZE); }
Also, comment out some code so that it doesn't crash from not being able to find a starting point:
#![allow(unused)] fn main() { let mut start_idx = self.map.xy_idx(self.starting_position.x, self.starting_position.y); /*while self.map.tiles[start_idx] != TileType::Floor { self.starting_position.x -= 1; start_idx = self.map.xy_idx(self.starting_position.x, self.starting_position.y); }*/ }
If you cargo run now, it'll show you the tile patterns from map sample 2:
 .
.
Notice how flipping has given us multiple variants of each tile. If we change the image loading code to load wfc-demo1 (by changing the loader to self.map = load_rex_map(self.depth, &rltk::rex::XpFile::from_resource("../../resources/wfc-demo1.xp").unwrap());), we get chunks of our hand-drawn map:
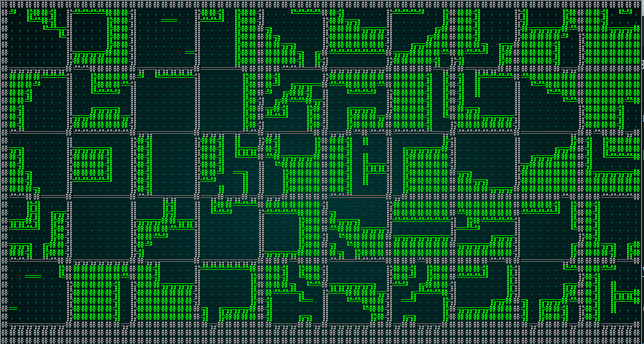 .
.
Building the constraints matrix
Now we need to begin to tell the algorithm how it can place tiles next to one another. We could go for a simple "what's next to it on the original image?" algorithm, but that would ignore a key factor in roguelike maps: connectivity. We're far more interested in the ability to go from point A to point B than we are in overall aesthetics! So we need to write a constraint builder that takes into account connectivity.
We'll start by extending builder in mod.rs to call a hypothetical function we'll implement in a second:
#![allow(unused)] fn main() { let patterns = build_patterns(&self.map, CHUNK_SIZE, true, true); self.render_tile_gallery(&patterns, CHUNK_SIZE); let constraints = patterns_to_constraints(patterns, CHUNK_SIZE); }
This gives us the signature of a new method, patterns_to_constraints to add to constraints.rs. We're also going to need a new type and a helper function. We'll use these in other places, so we're going to add a new file to the waveform_collapse folder - common.rs.
#![allow(unused)] fn main() { use super::TileType; #[derive(PartialEq, Eq, Hash, Clone)] pub struct MapChunk { pub pattern : Vec<TileType>, pub exits: [Vec<bool>; 4], pub has_exits: bool, pub compatible_with: [Vec<usize>; 4] } pub fn tile_idx_in_chunk(chunk_size: i32, x:i32, y:i32) -> usize { ((y * chunk_size) + x) as usize } }
We're defining MapChunk to be a structure, containing the actual pattern, a structure of exits (more on that in a moment), a bool to say we have any exits, and a structure called compatible_with (more on that in a second, too). We're also defining tile_idx_in_chunk - which is just like map.xy_idx - but constrained to a small tile type.
Now we'll write patterns_to_constraints in constraints.rs:
#![allow(unused)] fn main() { pub fn patterns_to_constraints(patterns: Vec<Vec<TileType>>, chunk_size : i32) -> Vec<MapChunk> { // Move into the new constraints object let mut constraints : Vec<MapChunk> = Vec::new(); for p in patterns { let mut new_chunk = MapChunk{ pattern: p, exits: [ Vec::new(), Vec::new(), Vec::new(), Vec::new() ], has_exits : true, compatible_with: [ Vec::new(), Vec::new(), Vec::new(), Vec::new() ] }; for exit in new_chunk.exits.iter_mut() { for _i in 0..chunk_size { exit.push(false); } } let mut n_exits = 0; for x in 0..chunk_size { // Check for north-bound exits let north_idx = tile_idx_in_chunk(chunk_size, x, 0); if new_chunk.pattern[north_idx] == TileType::Floor { new_chunk.exits[0][x as usize] = true; n_exits += 1; } // Check for south-bound exits let south_idx = tile_idx_in_chunk(chunk_size, x, chunk_size-1); if new_chunk.pattern[south_idx] == TileType::Floor { new_chunk.exits[1][x as usize] = true; n_exits += 1; } // Check for west-bound exits let west_idx = tile_idx_in_chunk(chunk_size, 0, x); if new_chunk.pattern[west_idx] == TileType::Floor { new_chunk.exits[2][x as usize] = true; n_exits += 1; } // Check for east-bound exits let east_idx = tile_idx_in_chunk(chunk_size, chunk_size-1, x); if new_chunk.pattern[east_idx] == TileType::Floor { new_chunk.exits[3][x as usize] = true; n_exits += 1; } } if n_exits == 0 { new_chunk.has_exits = false; } constraints.push(new_chunk); } // Build compatibility matrix let ch = constraints.clone(); for c in constraints.iter_mut() { for (j,potential) in ch.iter().enumerate() { // If there are no exits at all, it's compatible if !c.has_exits || !potential.has_exits { for compat in c.compatible_with.iter_mut() { compat.push(j); } } else { // Evaluate compatibilty by direction for (direction, exit_list) in c.exits.iter_mut().enumerate() { let opposite = match direction { 0 => 1, // Our North, Their South 1 => 0, // Our South, Their North 2 => 3, // Our West, Their East _ => 2 // Our East, Their West }; let mut it_fits = false; let mut has_any = false; for (slot, can_enter) in exit_list.iter().enumerate() { if *can_enter { has_any = true; if potential.exits[opposite][slot] { it_fits = true; } } } if it_fits { c.compatible_with[direction].push(j); } if !has_any { // There's no exits on this side, we don't care what goes there for compat in c.compatible_with.iter_mut() { compat.push(j); } } } } } } constraints } }
This is a really big function, but clearly broken down into sections. Let's take the time to walk through what it actually does:
- It accepts a first parameter,
patternsasVec<Vec<TileType>>- the type we used to build our patterns. A second parameter,chunk_sizeis the same as we've used before. It returns avectorof the newMapChunktype. AMapChunkis a pattern, but with additional exit and compatibility information added to it. So we're promising that given a set of pattern graphics, we're going to add all the navigation information to it and return the patterns as a set of chunks. - It makes a new
Vecof typeMapChunkcalledconstraints. This is our result - we'll be adding to it, and returning it to the caller at the end. - Now we iterate every pattern in
patterns, calling itp(to save typing). For each pattern:- We make a new
MapChunk. Thepatternfield gets a copy of our pattern.exitsis an array (fixed size set; in this case of size 4) of vectors, so we insert 4 empty vectors into it.compatible_withis also an array of vectors, so we set those to new - empty - vectors. We sethas_exitstotrue- we'll set that later. - We iterate from 0 to
chunk_size, and addfalseinto eachexitsfield of the new map chunk. Theexitsstructure represents one entry per possible direction (North, South, West, East) - so it needs one entry per size of the chunk to represent each possible exit tile in that direction. We'll check for actual connectivity later - for now, we just want placeholders for each direction. - We set
n_exitsto 0, and make it mutable - so we can add to it later. We'll be counting the total number of exits on the way through. - We iterate
xfrom 0 tochunk_size, and for each value ofx:- We check for north-bound exits. These are always at the location
(x, 0)within the chunk - so we calculate the tile index to check astile_idx_in_chunk(chunk_size, x, 0). If that tile is a floor, we add one ton_exitsand setnew_chunk.exits[0][x]totrue. - We do the same for south-bound exits. These are always at the location
(x, chunk_size-1), so we calculate the chunk index to betile_idx_in_chunk(chunk_size, x, chunk_size-1). If that tile is a floor, we add one ton_exitsand setnew_chunks.exits[1][x]totrue. - We do the same again for west-bound, which are at location
(0,x). - We do the same again for east-bound, which are at location
(chunk_size-1,0).
- We check for north-bound exits. These are always at the location
- If
n_exitsis 0, we setnew_chunk.has_exitsto 0 - there's no way in or out of this chunk! - We push
new_chunkto theconstraintsresult vector.
- We make a new
- Now it's time to build a compatibility matrix! The idea here is to match which tiles can be placed to which other tiles, by matching exits on adjacent edges.
- To avoid borrow-checker issues, we take a copy of the existing constraints with
let ch = constraints.clone();. Rust isn't a big fan of both reading from and writing to the samevectorat once - so this avoids us having to do a dance to keep it separated. - For each
constraintin or results vectorconstraints, namedcwe:- Iterate every constraint in
ch, our copy of the constraints vector, aspotential. We add an enumerator,jto tell us how it is indexed.- If neither
c(the constraint we are editing) orpotential(the constraint we are examining) has exits, then we make it compatible with everything. We do this to increase the chances of a map being successfully resolved and still featuring these tiles (otherwise, they would never be chosen). To add compatibility with everything, we addjto thecompatibile_withstructure for all four directions. Soccan be placed next topotentialin any direction. - Otherwise, we iterate through all four exit directions on
c:- We set
oppositeto the reciprocal of the direction we're evaluating; so North goes to South, East to West, etc. - We setup two mutable variables,
it_fitsandhas_any- and set both tofalse. We'll use these in the next steps.it_fitsmeans that there are one or more matching exits betweenc's exit tiles andpotential's entry tiles.has_anymeans thatchas any exits at all in this direction. We distinguish between the two because if there are no exits in that direction, we don't care what the neighbor is - we can't affect it. If there are exits, then we only want to be compatible with tiles you can actually visit. - We iterate
c's exits, keeping both aslot(the tile number we are evaluating) and the value of theexittile (can_enter). You'll remember that we've set these totrueif they are a floor - andfalseotherwise - so we're iterating possible exits.- If
can_enteristrue, then we sethas_anyto true - it has an exit in that direction. - We check
potential_exits.exits[opposite][slot]- that is that matching exit on the other tile, in the opposite direction to the way we're going. If there is a match-up, then you can go from tilecto tilepotentialin our currentdirection! That lets us setit_fitsto true.
- If
- If
it_fitsistrue, then there is a compatibility between the tiles: we addjtoc'scompatible_withvector for the current direction. - If
has_anyisfalse, then we don't care about adjacency in this direction - so we addjto the compatibility matrix for all directions, just like we did for a tile with no exits.
- We set
- If neither
- Iterate every constraint in
- Finally, we return our
constraintsresults vector.
That's quite a complicated algorithm, so we don't really want to trust that I got it right. We'll verify exit detection by adjusting our tile gallery code to show exits. In build, tweak the rendering order and what we're passing to render_tile_gallery:
#![allow(unused)] fn main() { let patterns = build_patterns(&self.map, CHUNK_SIZE, true, true); let constraints = patterns_to_constraints(patterns, CHUNK_SIZE); self.render_tile_gallery(&constraints, CHUNK_SIZE); }
We also need to modify render_tile_gallery:
#![allow(unused)] fn main() { fn render_tile_gallery(&mut self, constraints: &Vec<MapChunk>, chunk_size: i32) { self.map = Map::new(0); let mut counter = 0; let mut x = 1; let mut y = 1; while counter < constraints.len() { render_pattern_to_map(&mut self.map, &constraints[counter], chunk_size, x, y); x += chunk_size + 1; if x + chunk_size > self.map.width { // Move to the next row x = 1; y += chunk_size + 1; if y + chunk_size > self.map.height { // Move to the next page self.take_snapshot(); self.map = Map::new(0); x = 1; y = 1; } } counter += 1; } self.take_snapshot(); } }
This requires that we modify our render_pattern_to_map function, also:
#![allow(unused)] fn main() { pub fn render_pattern_to_map(map : &mut Map, chunk: &MapChunk, chunk_size: i32, start_x : i32, start_y: i32) { let mut i = 0usize; for tile_y in 0..chunk_size { for tile_x in 0..chunk_size { let map_idx = map.xy_idx(start_x + tile_x, start_y + tile_y); map.tiles[map_idx] = chunk.pattern[i]; map.visible_tiles[map_idx] = true; i += 1; } } for (x,northbound) in chunk.exits[0].iter().enumerate() { if *northbound { let map_idx = map.xy_idx(start_x + x as i32, start_y); map.tiles[map_idx] = TileType::DownStairs; } } for (x,southbound) in chunk.exits[1].iter().enumerate() { if *southbound { let map_idx = map.xy_idx(start_x + x as i32, start_y + chunk_size -1); map.tiles[map_idx] = TileType::DownStairs; } } for (x,westbound) in chunk.exits[2].iter().enumerate() { if *westbound { let map_idx = map.xy_idx(start_x, start_y + x as i32); map.tiles[map_idx] = TileType::DownStairs; } } for (x,eastbound) in chunk.exits[3].iter().enumerate() { if *eastbound { let map_idx = map.xy_idx(start_x + chunk_size - 1, start_y + x as i32); map.tiles[map_idx] = TileType::DownStairs; } } } }
Now that we have the demo framework running, we can cargo run the project - and see the tiles from wfc-demo2.xp correctly highlighting the exits:
 .
.
The wfc-demo1.xp exits are also highlighted:
 .
.
That's great! Our exit finder is working correctly.
Building the Solver
Do you remember the old books of logic problems you used to be able to buy for long trips? "Fred is a lawyer, Mary is a doctor, and Jim is unemployed. Fred can't sit next to unemployed people, because he's snooty. Mary likes everyone. How should you arrange their seating?" This is an example of the type of constrained problem a solver is designed to help with. Building our map is no different - we're reading the constraints matrix (which we built above) to determine which tiles we can place in any given area. Because it's a roguelike, and we want something different every time, we want to inject some randomness - and get a different but valid map every time.
Let's extend our build function to call a hypothetical solver:
#![allow(unused)] fn main() { let patterns = build_patterns(&self.map, CHUNK_SIZE, true, true); let constraints = patterns_to_constraints(patterns, CHUNK_SIZE); self.render_tile_gallery(&constraints, CHUNK_SIZE); self.map = Map::new(self.depth); loop { let mut solver = Solver::new(constraints.clone(), CHUNK_SIZE, &self.map); while !solver.iteration(&mut self.map, &mut rng) { self.take_snapshot(); } self.take_snapshot(); if solver.possible { break; } // If it has hit an impossible condition, try again } }
We make a freshly solid map (since we've been using it for rendering tile demos, and don't want to pollute the final map with a demo gallery!). Then we loop (the Rust loop that runs forever until something calls break). Inside that loop, we create a solver for a copy of the constraints matrix (we copy it in case we have to go through repeatedly; otherwise, we'd have to move it in and move it out again). We repeatedly call the solver's iteration function, taking a snapshot each time - until it reports that it is done. If the solver gave up and said it wasn't possible, we try again.
We'll start by adding solver.rs to our waveform_collapse directory. The solver needs to keep its own state: that is, as it iterates through, it needs to know how far it has come. We'll support this by making Solver into a struct:
#![allow(unused)] fn main() { pub struct Solver { constraints: Vec<MapChunk>, chunk_size : i32, chunks : Vec<Option<usize>>, chunks_x : usize, chunks_y : usize, remaining : Vec<(usize, i32)>, // (index, # neighbors) pub possible: bool } }
It stores the constraints we've been building, the chunk_size we're using, the chunks we're resolving (more on that in a second), the number of chunks it can fit onto the target map (chunks_x, and chunks_y), a remaining vector (more on that, too), and a possible indicator to indicate whether or not it gave up.
chunks is a vector of Option<usize>. The usize value is the index of the chunk. It's an option because we may not have filled it in, yet - so it might be None or Some(usize). This nicely represents the "quantum waveform collapse" nature of the problem - it either exists or it doesn't, and we don't know until we look at it!
remaining is a vector of all of the chunks, with their index. It's a tuple - we store the chunk index in the first entry, and the number of existing neighbors in the second. We'll use that to help decide which chunk to fill in next, and remove it from the remaining list when we've added one.
We'll need to implement methods for Solver, too. new is a basic constructor:
#![allow(unused)] fn main() { impl Solver { pub fn new(constraints: Vec<MapChunk>, chunk_size: i32, map : &Map) -> Solver { let chunks_x = (map.width / chunk_size) as usize; let chunks_y = (map.height / chunk_size) as usize; let mut remaining : Vec<(usize, i32)> = Vec::new(); for i in 0..(chunks_x*chunks_y) { remaining.push((i, 0)); } Solver { constraints, chunk_size, chunks: vec![None; chunks_x * chunks_y], chunks_x, chunks_y, remaining, possible: true } } ... }
It calculates the size (for chunks_x and chunks_y), fills remaining with every tile and no neighbors, and chunks with None values. This sets us up for our solving run! We also need a helper function called chunk_idx:
#![allow(unused)] fn main() { fn chunk_idx(&self, x:usize, y:usize) -> usize { ((y * self.chunks_x) + x) as usize } }
This is a lot like xy_idx in map, or tile_idx_in_chunk in common - but is constrained by the number of chunks we can fit onto our map. We'll also rely on count_neighbors:
#![allow(unused)] fn main() { fn count_neighbors(&self, chunk_x:usize, chunk_y:usize) -> i32 { let mut neighbors = 0; if chunk_x > 0 { let left_idx = self.chunk_idx(chunk_x-1, chunk_y); match self.chunks[left_idx] { None => {} Some(_) => { neighbors += 1; } } } if chunk_x < self.chunks_x-1 { let right_idx = self.chunk_idx(chunk_x+1, chunk_y); match self.chunks[right_idx] { None => {} Some(_) => { neighbors += 1; } } } if chunk_y > 0 { let up_idx = self.chunk_idx(chunk_x, chunk_y-1); match self.chunks[up_idx] { None => {} Some(_) => { neighbors += 1; } } } if chunk_y < self.chunks_y-1 { let down_idx = self.chunk_idx(chunk_x, chunk_y+1); match self.chunks[down_idx] { None => {} Some(_) => { neighbors += 1; } } } neighbors } }
This function could be a lot smaller, but I've left it spelling out every step for clarity. It looks at a chunk, and determines if it has a created (not set to None) chunk to the North, South, East and West.
Finally, we get to the iteration function - which does the hard work:
#![allow(unused)] fn main() { pub fn iteration(&mut self, map: &mut Map, rng : &mut super::RandomNumberGenerator) -> bool { if self.remaining.is_empty() { return true; } // Populate the neighbor count of the remaining list let mut remain_copy = self.remaining.clone(); let mut neighbors_exist = false; for r in remain_copy.iter_mut() { let idx = r.0; let chunk_x = idx % self.chunks_x; let chunk_y = idx / self.chunks_x; let neighbor_count = self.count_neighbors(chunk_x, chunk_y); if neighbor_count > 0 { neighbors_exist = true; } *r = (r.0, neighbor_count); } remain_copy.sort_by(|a,b| b.1.cmp(&a.1)); self.remaining = remain_copy; // Pick a random chunk we haven't dealt with yet and get its index, remove from remaining list let remaining_index = if !neighbors_exist { (rng.roll_dice(1, self.remaining.len() as i32)-1) as usize } else { 0usize }; let chunk_index = self.remaining[remaining_index].0; self.remaining.remove(remaining_index); let chunk_x = chunk_index % self.chunks_x; let chunk_y = chunk_index / self.chunks_x; let mut neighbors = 0; let mut options : Vec<Vec<usize>> = Vec::new(); if chunk_x > 0 { let left_idx = self.chunk_idx(chunk_x-1, chunk_y); match self.chunks[left_idx] { None => {} Some(nt) => { neighbors += 1; options.push(self.constraints[nt].compatible_with[3].clone()); } } } if chunk_x < self.chunks_x-1 { let right_idx = self.chunk_idx(chunk_x+1, chunk_y); match self.chunks[right_idx] { None => {} Some(nt) => { neighbors += 1; options.push(self.constraints[nt].compatible_with[2].clone()); } } } if chunk_y > 0 { let up_idx = self.chunk_idx(chunk_x, chunk_y-1); match self.chunks[up_idx] { None => {} Some(nt) => { neighbors += 1; options.push(self.constraints[nt].compatible_with[1].clone()); } } } if chunk_y < self.chunks_y-1 { let down_idx = self.chunk_idx(chunk_x, chunk_y+1); match self.chunks[down_idx] { None => {} Some(nt) => { neighbors += 1; options.push(self.constraints[nt].compatible_with[0].clone()); } } } if neighbors == 0 { // There is nothing nearby, so we can have anything! let new_chunk_idx = (rng.roll_dice(1, self.constraints.len() as i32)-1) as usize; self.chunks[chunk_index] = Some(new_chunk_idx); let left_x = chunk_x as i32 * self.chunk_size as i32; let right_x = (chunk_x as i32+1) * self.chunk_size as i32; let top_y = chunk_y as i32 * self.chunk_size as i32; let bottom_y = (chunk_y as i32+1) * self.chunk_size as i32; let mut i : usize = 0; for y in top_y .. bottom_y { for x in left_x .. right_x { let mapidx = map.xy_idx(x, y); let tile = self.constraints[new_chunk_idx].pattern[i]; map.tiles[mapidx] = tile; i += 1; } } } else { // There are neighbors, so we try to be compatible with them let mut options_to_check : HashSet<usize> = HashSet::new(); for o in options.iter() { for i in o.iter() { options_to_check.insert(*i); } } let mut possible_options : Vec<usize> = Vec::new(); for new_chunk_idx in options_to_check.iter() { let mut possible = true; for o in options.iter() { if !o.contains(new_chunk_idx) { possible = false; } } if possible { possible_options.push(*new_chunk_idx); } } if possible_options.is_empty() { rltk::console::log("Oh no! It's not possible!"); self.possible = false; return true; } else { let new_chunk_idx = if possible_options.len() == 1 { 0 } else { rng.roll_dice(1, possible_options.len() as i32)-1 }; self.chunks[chunk_index] = Some(new_chunk_idx as usize); let left_x = chunk_x as i32 * self.chunk_size as i32; let right_x = (chunk_x as i32+1) * self.chunk_size as i32; let top_y = chunk_y as i32 * self.chunk_size as i32; let bottom_y = (chunk_y as i32+1) * self.chunk_size as i32; let mut i : usize = 0; for y in top_y .. bottom_y { for x in left_x .. right_x { let mapidx = map.xy_idx(x, y); let tile = self.constraints[new_chunk_idx as usize].pattern[i]; map.tiles[mapidx] = tile; i += 1; } } } } false } }
This is another really big function, but once again that's because I tried to keep it easy to read. Let's walk through the algorithm:
- If there is nothing left in
remaining, we return that we have completed the map.possibleis true, because we actually finished the problem. - We take a
cloneofremainingto avoid borrow checker issues. - We iterate our copy of
remaining, and for each remaining chunk:- We determine it's
xandylocation from the chunk index. - We call
count_neighborsto determine how many (if any) neighboring chunks have been resolved. - If any neighbors were found, we set
neighbors_existto true - telling the algorithm that it has run at least once. - We update the copy of the
remaininglist to include the same index as before, and the new neighbor count.
- We determine it's
- We sort our copy of
remainingby the number of neighbors, descending - so the chunk with the most neighbors is first. - We copy our clone of
remainingback to our actualremaininglist. - We want to create a new variable,
remaining_index- to indicate which chunk we're going to work on, and where it is in theremainingvector. If we haven't made any tiles yet, we pick our starting point at random. Otherwise, we pick the first entry in theremaininglist - which will be the one with the most neighbors. - We obtain
chunk_idxfrom theremaining listat the selected index, and remove that chunk from the list. - Now we calculate
chunk_xandchunk_yto tell us where it is on the new map. - We set a mutable variable,
neighborsto 0; we'll be counting neighbors again. - We create a mutable variable called
Options. It has the rather strange typeVec<Vec<usize>>- it is a vector of vectors, each of which contains an array index (usize). We'll be storing compatible options for each direction in here - so we need the outer vector for directions, and the inner vector for options. These index theconstraintsvector. - If it isn't the left-most chunk on the map, it may have a chunk to the west - so we calculate the index of that chunk. If a chunk to the west exists (isn't
None), then we add it's east boundcompatible_withlist to ourOptionsvector. We incrementneighborsto indicate that we found a neighbor. - We repeat for the east - if it isn't the right-most chunk on the map. We increment
neighborsto indicate that we found a neighbor. - We repeat for the south - if it isn't the bottom chunk on the map. We increment
neighborsto indicate that we found a neighbor. - We repeat for the north - if it isn't the top chunk on the map. We increment
neighborsto indicate that we found a neighbor. - If there are no neighbors, we:
- Find a random tile from
constraints. - Figure out the bounds of where we are placing the tile in
left_x,right_x,top_y, andbottom_y. - Copy the selected tile to the map.
- Find a random tile from
- If there are neighbors, we:
- Insert all of the options from each direction into a
HashSet. We usedHashSetto de-duplicate our tiles earlier, and this is what we're doing here: we're removing all duplicate options, so we don't evaluate them repeatedly. - We make a new vector called
possible_options. For each option in theHashSet:- Set a mutable variable called
possibletotrue. - Check each directions'
options, and if it is compatible with its neighbors preferences - add it topossible_options.
- Set a mutable variable called
- If
possible_optionsis empty - then we've hit a brick wall, and can't add any more tiles. We setpossibleto false in the parent structure and bail out! - Otherwise, we pick a random entry from
possible_optionsand draw it to the map.
- Insert all of the options from each direction into a
So while it's a long function, it isn't a really complicated one. It looks for possible combinations for each iteration, and tries to apply them - giving up and returning failure if it can't find one.
The caller is already taking snapshots of each iteration, so if we cargo run the project with our wfc-test1.xp file we get something like this:
 .
.
Not the greatest map, but you can watch the solver chug along - placing tiles one at a time. Now lets try it with wfc-test2.xmp, a set of tiles designed for tiling:
 .
.
This is kind-of fun - it lays it out like a jigsaw, and eventually gets a map! The map isn't as well connected as one might hope, the edges with no exit lead to a smaller play area (which is culled at the end). It's still a good start!
Reducing the chunk size
We can significantly improve the resulting map in this case by reducing our CHUNK_SIZE constant to 3. Running it with test map 1 produces something like this:
 .
.
That's a much more interesting map! You can try it with wfc-test2.xp as well:
 .
.
Once again, it's an interesting and playable map! The problem is that we've got such a small chunk size that there really aren't all that many interesting options for adjacency - 3x3 grids really limits the amount of variability you can have on your map! So we'll try wfc-test1.xp with a chunk size of 5:
 .
.
That's more like it! It's not dissimilar from a map we might try and generate in another fashion.
Taking advantage of the ability to read other map types
Rather than loading one of our .xp files, lets feed in the results of a CellularAutomata run, and use that as the seed with a large (8) chunk. This is surprisingly easy with the structure we have! In our build function:
#![allow(unused)] fn main() { const CHUNK_SIZE :i32 = 8; let mut ca = super::CellularAutomataBuilder::new(0); ca.build_map(); self.map = ca.get_map(); for t in self.map.tiles.iter_mut() { if *t == TileType::DownStairs { *t = TileType::Floor; } } }
Notice that we're removing down stairs - the Cellular Automata generator will place one, and we don't want stairs everywhere! This gives a very pleasing result:
 .
.
Improving adjacency - and increasing the risk of rejection!
What we have already is quite a workable solution - you can make decent maps with it, especially when you use other generators as the seed. On winding jigsaw maps, it's not generating the adjacency we'd like. There's a small risk by making the matcher more specific that we will see some failures, but lets give it a go anyway. In our code that builds a compatibility matrix, find the comment There's no exits on this side and replace the section with this code:
#![allow(unused)] fn main() { if !has_any { // There's no exits on this side, let's match only if // the other edge also has no exits let matching_exit_count = potential.exits[opposite].iter().filter(|a| !**a).count(); if matching_exit_count == 0 { c.compatible_with[direction].push(j); } } }
Run against the our cellular automata example, we see a bit of a change:
 .
.
It also looks pretty good with our map test 1:
 .
.
Overall, that change is a winner! It doesn't look very good with our jigsaw puzzle anymore; there just aren't enough tiles to make good patterns.
Offering different build options to the game
We're going to offer three modes to our random_builder function: TestMap (just the REX Paint map), and Derived (run on an existing algorithm). So, in mod.rs we add an enumeration and extend our structure to hold some related data:
#![allow(unused)] fn main() { #[derive(PartialEq, Copy, Clone)] pub enum WaveformMode { TestMap, Derived } pub struct WaveformCollapseBuilder { map : Map, starting_position : Position, depth: i32, history: Vec<Map>, noise_areas : HashMap<i32, Vec<usize>>, mode : WaveformMode, derive_from : Option<Box<dyn MapBuilder>> } }
We'll extend our new constructor to include these:
#![allow(unused)] fn main() { impl WaveformCollapseBuilder { pub fn new(new_depth : i32, mode : WaveformMode, derive_from : Option<Box<dyn MapBuilder>>) -> WaveformCollapseBuilder { WaveformCollapseBuilder{ map : Map::new(new_depth), starting_position : Position{ x: 0, y : 0 }, depth : new_depth, history: Vec::new(), noise_areas : HashMap::new(), mode, derive_from } } }
Then we'll add some functionality into the top of our build function:
#![allow(unused)] fn main() { fn build(&mut self) { if self.mode == WaveformMode::TestMap { self.map = load_rex_map(self.depth, &rltk::rex::XpFile::from_resource("../../resources/wfc-demo1.xp").unwrap()); self.take_snapshot(); return; } let mut rng = RandomNumberGenerator::new(); const CHUNK_SIZE :i32 = 8; let prebuilder = &mut self.derive_from.as_mut().unwrap(); prebuilder.build_map(); self.map = prebuilder.get_map(); for t in self.map.tiles.iter_mut() { if *t == TileType::DownStairs { *t = TileType::Floor; } } self.take_snapshot(); ... }
Now we'll add a couple of constructors to make it easier for random_builder to not have to know about the innards of the WFC algorithm:
#![allow(unused)] fn main() { pub fn test_map(new_depth: i32) -> WaveformCollapseBuilder { WaveformCollapseBuilder::new(new_depth, WaveformMode::TestMap, None) } pub fn derived_map(new_depth: i32, builder: Box<dyn MapBuilder>) -> WaveformCollapseBuilder { WaveformCollapseBuilder::new(new_depth, WaveformMode::Derived, Some(builder)) } }
Lastly, we'll modify our random_builder (in map_builders/mod.rs) to sometimes return the test map - and sometimes run WFC on whatever map we've created:
#![allow(unused)] fn main() { pub fn random_builder(new_depth: i32) -> Box<dyn MapBuilder> { let mut rng = rltk::RandomNumberGenerator::new(); let builder = rng.roll_dice(1, 17); let mut result : Box<dyn MapBuilder>; match builder { 1 => { result = Box::new(BspDungeonBuilder::new(new_depth)); } 2 => { result = Box::new(BspInteriorBuilder::new(new_depth)); } 3 => { result = Box::new(CellularAutomataBuilder::new(new_depth)); } 4 => { result = Box::new(DrunkardsWalkBuilder::open_area(new_depth)); } 5 => { result = Box::new(DrunkardsWalkBuilder::open_halls(new_depth)); } 6 => { result = Box::new(DrunkardsWalkBuilder::winding_passages(new_depth)); } 7 => { result = Box::new(DrunkardsWalkBuilder::fat_passages(new_depth)); } 8 => { result = Box::new(DrunkardsWalkBuilder::fearful_symmetry(new_depth)); } 9 => { result = Box::new(MazeBuilder::new(new_depth)); } 10 => { result = Box::new(DLABuilder::walk_inwards(new_depth)); } 11 => { result = Box::new(DLABuilder::walk_outwards(new_depth)); } 12 => { result = Box::new(DLABuilder::central_attractor(new_depth)); } 13 => { result = Box::new(DLABuilder::insectoid(new_depth)); } 14 => { result = Box::new(VoronoiCellBuilder::pythagoras(new_depth)); } 15 => { result = Box::new(VoronoiCellBuilder::manhattan(new_depth)); } 16 => { result = Box::new(WaveformCollapseBuilder::test_map(new_depth)); } _ => { result = Box::new(SimpleMapBuilder::new(new_depth)); } } if rng.roll_dice(1, 3)==1 { result = Box::new(WaveformCollapseBuilder::derived_map(new_depth, result)); } result } }
That's quite a change. We roll a 17-sided dice (wouldn't it be nice if those really existed?), and pick a builder - as before, but with the option to use the .xp file from wfc_test1.xp. We store it in result. Then we roll 1d3; if it comes up 1, we wrap the builder in the WaveformCollapseBuilder in derived mode - so it will take the original map and rebuild it with WFC. Effectively, we just added another 17 options!
Cleaning Up Dead Code Warnings
Let's take a moment to do a little housekeeping on our code.
There are quite a few warnings in the project when you compile. They are almost all "this function is never used" (or equivalent). Since we're building a library of map builders, it's ok to not always call the constructors. You can add an annotation above a function definition - #[allow(dead_code)] to tell the compiler to stop worrying about this. For example, in drunkard.rs:
#![allow(unused)] fn main() { impl DrunkardsWalkBuilder { #[allow(dead_code)] pub fn new(new_depth : i32, settings: DrunkardSettings) -> DrunkardsWalkBuilder { }
I've gone through and applied these where necessary in the example code to silence the compiler.
Cleaning Up Unused Embedded Files
We're not using wfc-test2.xp anymore, so lets remove it from rex-assets.rs:
#![allow(unused)] fn main() { use rltk::{rex::XpFile}; rltk::embedded_resource!(SMALL_DUNGEON, "../../resources/SmallDungeon_80x50.xp"); rltk::embedded_resource!(WFC_DEMO_IMAGE1, "../../resources/wfc-demo1.xp"); pub struct RexAssets { pub menu : XpFile } impl RexAssets { #[allow(clippy::new_without_default)] pub fn new() -> RexAssets { rltk::link_resource!(SMALL_DUNGEON, "../../resources/SmallDungeon_80x50.xp"); rltk::link_resource!(WFC_DEMO_IMAGE1, "../../resources/wfc-demo1.xp"); RexAssets{ menu : XpFile::from_resource("../../resources/SmallDungeon_80x50.xp").unwrap() } } } }
This saves a little bit of space in the resulting binary (never a bad thing: smaller binaries fit into your CPU's cache better, and generally run faster).
The source code for this chapter may be found here
Run this chapter's example with web assembly, in your browser (WebGL2 required)
Copyright (C) 2019, Herbert Wolverson.
Prefabricated Levels and Level Sections
About this tutorial
This tutorial is free and open source, and all code uses the MIT license - so you are free to do with it as you like. My hope is that you will enjoy the tutorial, and make great games!
If you enjoy this and would like me to keep writing, please consider supporting my Patreon.
Despite being essentially pseudorandom (that is, random - but constrained in a way that makes for a fun, cohesive game), many roguelikes feature some hand-crafted content. Typically, these can be divided into a few categories:
- Hand-crafted levels - the whole level is premade, the content static. These are typically used very sparingly, for big set-piece battles essential to the story.
- Hand-crafted level sections - some of the level is randomly created, but a large part is pre-made. For example, a fortress might be a "set piece", but the dungeon leading up to it is random. Dungeon Crawl Stone Soup uses these extensively - you sometimes run into areas that you recognize because they are prefabricated - but the dungeon around them is clearly random. Cogmind uses these for parts of the caves (I'll avoid spoilers). Caves of Qud has a few set-piece levels that appear to be built around a number of prefabricated parts. Some systems call this mechanism "vaults" - but the name can also apply to the third category.
- Hand-crafted rooms (also called Vaults in some cases). The level is largely random, but when sometimes a room fits a vault - so you put one there.
The first category is special and should be used sparingly (otherwise, your players will just learn an optimal strategy and power on through it - and may become bored from lack of variety). The other categories benefit from either providing lots of vaults (so there's a ton of content to sprinkle around, meaning the game doesn't feel too similar each time you play) or being rare - so you only occasionally see them (for the same reason).
Some Clean Up
In the Wave Function Collapse chapter, we loaded a pre-made level - without any entities (those are added later). It's not really very nice to hide a map loader inside WFC - since that isn't it's primary purpose - so we'll start by removing it:
We'll start by deleting the file map_builders/waveform_collapse/image_loader.rs. We'll be building a better one in a moment.
Now we edit the start of mod.rs in ``map_builders/waveform_collapse`:
#![allow(unused)] fn main() { use super::{MapBuilder, Map, TileType, Position, spawner, SHOW_MAPGEN_VISUALIZER, generate_voronoi_spawn_regions, remove_unreachable_areas_returning_most_distant}; use rltk::RandomNumberGenerator; use specs::prelude::*; use std::collections::HashMap; mod common; use common::*; mod constraints; use constraints::*; mod solver; use solver::*; /// Provides a map builder using the Wave Function Collapse algorithm. pub struct WaveformCollapseBuilder { map : Map, starting_position : Position, depth: i32, history: Vec<Map>, noise_areas : HashMap<i32, Vec<usize>>, derive_from : Option<Box<dyn MapBuilder>> } ... impl WaveformCollapseBuilder { /// Generic constructor for waveform collapse. /// # Arguments /// * new_depth - the new map depth /// * derive_from - either None, or a boxed MapBuilder, as output by `random_builder` pub fn new(new_depth : i32, derive_from : Option<Box<dyn MapBuilder>>) -> WaveformCollapseBuilder { WaveformCollapseBuilder{ map : Map::new(new_depth), starting_position : Position{ x: 0, y : 0 }, depth : new_depth, history: Vec::new(), noise_areas : HashMap::new(), derive_from } } /// Derives a map from a pre-existing map builder. /// # Arguments /// * new_depth - the new map depth /// * derive_from - either None, or a boxed MapBuilder, as output by `random_builder` pub fn derived_map(new_depth: i32, builder: Box<dyn MapBuilder>) -> WaveformCollapseBuilder { WaveformCollapseBuilder::new(new_depth, Some(builder)) } ... }
We've removed all references to image_loader, removed the test map constructor, and removed the ugly mode enumeration. WFC is now exactly what it says on the tin, and nothing else. Lastly, we'll modify random_builder to not use the test map anymore:
#![allow(unused)] fn main() { pub fn random_builder(new_depth: i32) -> Box<dyn MapBuilder> { let mut rng = rltk::RandomNumberGenerator::new(); let builder = rng.roll_dice(1, 16); let mut result : Box<dyn MapBuilder>; match builder { 1 => { result = Box::new(BspDungeonBuilder::new(new_depth)); } 2 => { result = Box::new(BspInteriorBuilder::new(new_depth)); } 3 => { result = Box::new(CellularAutomataBuilder::new(new_depth)); } 4 => { result = Box::new(DrunkardsWalkBuilder::open_area(new_depth)); } 5 => { result = Box::new(DrunkardsWalkBuilder::open_halls(new_depth)); } 6 => { result = Box::new(DrunkardsWalkBuilder::winding_passages(new_depth)); } 7 => { result = Box::new(DrunkardsWalkBuilder::fat_passages(new_depth)); } 8 => { result = Box::new(DrunkardsWalkBuilder::fearful_symmetry(new_depth)); } 9 => { result = Box::new(MazeBuilder::new(new_depth)); } 10 => { result = Box::new(DLABuilder::walk_inwards(new_depth)); } 11 => { result = Box::new(DLABuilder::walk_outwards(new_depth)); } 12 => { result = Box::new(DLABuilder::central_attractor(new_depth)); } 13 => { result = Box::new(DLABuilder::insectoid(new_depth)); } 14 => { result = Box::new(VoronoiCellBuilder::pythagoras(new_depth)); } 15 => { result = Box::new(VoronoiCellBuilder::manhattan(new_depth)); } _ => { result = Box::new(SimpleMapBuilder::new(new_depth)); } } if rng.roll_dice(1, 3)==1 { result = Box::new(WaveformCollapseBuilder::derived_map(new_depth, result)); } result } }
Skeletal Builder
We'll start with a very basic skeleton, similar to those used before. We'll make a new file, prefab_builder.rs in map_builders:
#![allow(unused)] fn main() { use super::{MapBuilder, Map, TileType, Position, spawner, SHOW_MAPGEN_VISUALIZER, remove_unreachable_areas_returning_most_distant}; use rltk::RandomNumberGenerator; use specs::prelude::*; pub struct PrefabBuilder { map : Map, starting_position : Position, depth: i32, history: Vec<Map>, } impl MapBuilder for PrefabBuilder { fn get_map(&self) -> Map { self.map.clone() } fn get_starting_position(&self) -> Position { self.starting_position.clone() } fn get_snapshot_history(&self) -> Vec<Map> { self.history.clone() } fn build_map(&mut self) { self.build(); } fn spawn_entities(&mut self, ecs : &mut World) { } fn take_snapshot(&mut self) { if SHOW_MAPGEN_VISUALIZER { let mut snapshot = self.map.clone(); for v in snapshot.revealed_tiles.iter_mut() { *v = true; } self.history.push(snapshot); } } } impl PrefabBuilder { pub fn new(new_depth : i32) -> PrefabBuilder { PrefabBuilder{ map : Map::new(new_depth), starting_position : Position{ x: 0, y : 0 }, depth : new_depth, history : Vec::new() } } fn build(&mut self) { } } }
Prefab builder mode 1 - hand-crafted levels
We're going to support multiple modes for the prefab-builder, so lets bake that in at the beginning. In prefab_builder.rs:
#![allow(unused)] fn main() { #[derive(PartialEq, Clone)] #[allow(dead_code)] pub enum PrefabMode { RexLevel{ template : &'static str } } pub struct PrefabBuilder { map : Map, starting_position : Position, depth: i32, history: Vec<Map>, mode: PrefabMode } }
This is new - an enum with variables? This works because under the hood, Rust enumerations are actually unions. They can hold whatever you want to put in there, and the type is sized to hold the largest of the options. It's best used sparingly in tight code, but for things like configuration it is a very clean way to pass in data. We should also update the constructor to create the new types:
#![allow(unused)] fn main() { impl PrefabBuilder { #[allow(dead_code)] pub fn new(new_depth : i32) -> PrefabBuilder { PrefabBuilder{ map : Map::new(new_depth), starting_position : Position{ x: 0, y : 0 }, depth : new_depth, history : Vec::new(), mode : PrefabMode::RexLevel{ template : "../../resources/wfc-demo1.xp" } } } ... }
Including the map template path in the mode makes for easier reading, even if it is slightly more complicated. We're not filling the PrefabBuilder with variables for all of the options we might use - we're keeping them separated. That's generally good practice - it makes it much more obvious to someone who reads your code what's going on.
Now we'll re-implement the map reader we previously deleted from image_loader.rs - only we'll add it as a member function for PrefabBuilder, and use the enclosing class features rather than passing Map and new_depth in and out:
#![allow(unused)] fn main() { #[allow(dead_code)] fn load_rex_map(&mut self, path: &str) { let xp_file = rltk::rex::XpFile::from_resource(path).unwrap(); for layer in &xp_file.layers { for y in 0..layer.height { for x in 0..layer.width { let cell = layer.get(x, y).unwrap(); if x < self.map.width as usize && y < self.map.height as usize { let idx = self.map.xy_idx(x as i32, y as i32); match (cell.ch as u8) as char { ' ' => self.map.tiles[idx] = TileType::Floor, // space '#' => self.map.tiles[idx] = TileType::Wall, // # _ => {} } } } } } } }
That's pretty straightforward, more or less a direct port of the one form the Wave Function Collapse chapter. Now lets start making our build function:
#![allow(unused)] fn main() { fn build(&mut self) { match self.mode { PrefabMode::RexLevel{template} => self.load_rex_map(&template) } // Find a starting point; start at the middle and walk left until we find an open tile self.starting_position = Position{ x: self.map.width / 2, y : self.map.height / 2 }; let mut start_idx = self.map.xy_idx(self.starting_position.x, self.starting_position.y); while self.map.tiles[start_idx] != TileType::Floor { self.starting_position.x -= 1; start_idx = self.map.xy_idx(self.starting_position.x, self.starting_position.y); } self.take_snapshot(); } }
Notice that we've copied over the find starting point code; we'll improve that at some point, but for now it ensures you can play your level. We haven't spawned anything - so you will be alone in the level. There's also a slightly different usage of match here - we're using the variable in the enum. The code PrefabMode::RexLevel{template} says "match RexLevel, but with any value of template - and make that value available via the name template in the match scope". You could use _ to match any value if you didn't want to access it. Rust's pattern matching system is really impressive - you can do a lot with it!
Lets modify our random_builder function to always call this type of map (so we don't have to test over and over in the hopes of getting the one we want!). In map_builders/mod.rs:
#![allow(unused)] fn main() { pub fn random_builder(new_depth: i32) -> Box<dyn MapBuilder> { /* let mut rng = rltk::RandomNumberGenerator::new(); let builder = rng.roll_dice(1, 16); let mut result : Box<dyn MapBuilder>; match builder { 1 => { result = Box::new(BspDungeonBuilder::new(new_depth)); } 2 => { result = Box::new(BspInteriorBuilder::new(new_depth)); } 3 => { result = Box::new(CellularAutomataBuilder::new(new_depth)); } 4 => { result = Box::new(DrunkardsWalkBuilder::open_area(new_depth)); } 5 => { result = Box::new(DrunkardsWalkBuilder::open_halls(new_depth)); } 6 => { result = Box::new(DrunkardsWalkBuilder::winding_passages(new_depth)); } 7 => { result = Box::new(DrunkardsWalkBuilder::fat_passages(new_depth)); } 8 => { result = Box::new(DrunkardsWalkBuilder::fearful_symmetry(new_depth)); } 9 => { result = Box::new(MazeBuilder::new(new_depth)); } 10 => { result = Box::new(DLABuilder::walk_inwards(new_depth)); } 11 => { result = Box::new(DLABuilder::walk_outwards(new_depth)); } 12 => { result = Box::new(DLABuilder::central_attractor(new_depth)); } 13 => { result = Box::new(DLABuilder::insectoid(new_depth)); } 14 => { result = Box::new(VoronoiCellBuilder::pythagoras(new_depth)); } 15 => { result = Box::new(VoronoiCellBuilder::manhattan(new_depth)); } _ => { result = Box::new(SimpleMapBuilder::new(new_depth)); } } if rng.roll_dice(1, 3)==1 { result = Box::new(WaveformCollapseBuilder::derived_map(new_depth, result)); } result*/ Box::new(PrefabBuilder::new(new_depth)) } }
If you cargo run your project now, you can run around the (otherwise deserted) demo map:
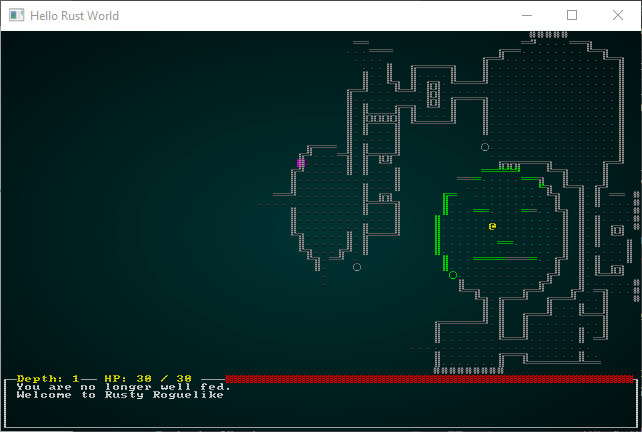 .
.
Populating the test map with prefabbed entities
Let's pretend that our test map is some sort of super-duper end-game map. We'll take a copy and call it wfc-populated.xp. Then we'll splat a bunch of monster and item glyphs around it:
 .
.
The color coding is completely optional, but I put it in for clarity. You'll see we have an @ to indicate the player start, a > to indicate the exit, and a bunch of g goblins, o orcs, ! potions, % rations and ^ traps. Not too bad a map, really.
We'll add wfc-populated.xp to our resources folder, and extend rex_assets.rs to load it:
#![allow(unused)] fn main() { use rltk::{rex::XpFile}; rltk::embedded_resource!(SMALL_DUNGEON, "../../resources/SmallDungeon_80x50.xp"); rltk::embedded_resource!(WFC_DEMO_IMAGE1, "../../resources/wfc-demo1.xp"); rltk::embedded_resource!(WFC_POPULATED, "../../resources/wfc-populated.xp"); pub struct RexAssets { pub menu : XpFile } impl RexAssets { #[allow(clippy::new_without_default)] pub fn new() -> RexAssets { rltk::link_resource!(SMALL_DUNGEON, "../../resources/SmallDungeon_80x50.xp"); rltk::link_resource!(WFC_DEMO_IMAGE1, "../../resources/wfc-demo1.xp"); rltk::link_resource!(WFC_POPULATED, "../../resources/wfc-populated.xp"); RexAssets{ menu : XpFile::from_resource("../../resources/SmallDungeon_80x50.xp").unwrap() } } } }
We also want to be able to list out spawns that are required by the map. Looking in spawner.rs, we have an established tuple format for how we pass spawns - so we'll use it in the struct:
#![allow(unused)] fn main() { #[allow(dead_code)] pub struct PrefabBuilder { map : Map, starting_position : Position, depth: i32, history: Vec<Map>, mode: PrefabMode, spawns: Vec<(usize, String)> } }
Now we'll modify our constructor to use the new map, and initialize spawns:
#![allow(unused)] fn main() { impl PrefabBuilder { #[allow(dead_code)] pub fn new(new_depth : i32) -> PrefabBuilder { PrefabBuilder{ map : Map::new(new_depth), starting_position : Position{ x: 0, y : 0 }, depth : new_depth, history : Vec::new(), mode : PrefabMode::RexLevel{ template : "../../resources/wfc-populated.xp" }, spawns: Vec::new() } } ... }
To make use of the function in spawner.rs that accepts this type of data, we need to make it public. So we open up the file, and add the word pub to the function signature:
#![allow(unused)] fn main() { /// Spawns a named entity (name in tuple.1) at the location in (tuple.0) pub fn spawn_entity(ecs: &mut World, spawn : &(&usize, &String)) { ... }
We'll then modify our PrefabBuilder's spawn_entities function to make use of this data:
#![allow(unused)] fn main() { fn spawn_entities(&mut self, ecs : &mut World) { for entity in self.spawns.iter() { spawner::spawn_entity(ecs, &(&entity.0, &entity.1)); } } }
We do a bit of a dance with references just to work with the previous function signature (and not have to change it, which would change lots of other code). So far, so good - it reads the spawn list, and requests that everything in the list be placed onto the map. Now would be a good time to add something to the list! We'll want to modify our load_rex_map to handle the new data:
#![allow(unused)] fn main() { #[allow(dead_code)] fn load_rex_map(&mut self, path: &str) { let xp_file = rltk::rex::XpFile::from_resource(path).unwrap(); for layer in &xp_file.layers { for y in 0..layer.height { for x in 0..layer.width { let cell = layer.get(x, y).unwrap(); if x < self.map.width as usize && y < self.map.height as usize { let idx = self.map.xy_idx(x as i32, y as i32); // We're doing some nasty casting to make it easier to type things like '#' in the match match (cell.ch as u8) as char { ' ' => self.map.tiles[idx] = TileType::Floor, '#' => self.map.tiles[idx] = TileType::Wall, '@' => { self.map.tiles[idx] = TileType::Floor; self.starting_position = Position{ x:x as i32, y:y as i32 }; } '>' => self.map.tiles[idx] = TileType::DownStairs, 'g' => { self.map.tiles[idx] = TileType::Floor; self.spawns.push((idx, "Goblin".to_string())); } 'o' => { self.map.tiles[idx] = TileType::Floor; self.spawns.push((idx, "Orc".to_string())); } '^' => { self.map.tiles[idx] = TileType::Floor; self.spawns.push((idx, "Bear Trap".to_string())); } '%' => { self.map.tiles[idx] = TileType::Floor; self.spawns.push((idx, "Rations".to_string())); } '!' => { self.map.tiles[idx] = TileType::Floor; self.spawns.push((idx, "Health Potion".to_string())); } _ => { rltk::console::log(format!("Unknown glyph loading map: {}", (cell.ch as u8) as char)); } } } } } } } }
This recognizes the extra glyphs, and prints a warning to the console if we've loaded one we forgot to handle. Note that for entities, we're setting the tile to Floor and then adding the entity type. That's because we can't overlay two glyphs on the same tile - but it stands to reason that the entity is standing on a floor.
Lastly, we need to modify our build function to not move the exit and the player. We simply wrap the fallback code in an if statement to detect if we've set a starting_position (we're going to require that if you set a start, you also set an exit):
#![allow(unused)] fn main() { fn build(&mut self) { match self.mode { PrefabMode::RexLevel{template} => self.load_rex_map(&template) } self.take_snapshot(); // Find a starting point; start at the middle and walk left until we find an open tile if self.starting_position.x == 0 { self.starting_position = Position{ x: self.map.width / 2, y : self.map.height / 2 }; let mut start_idx = self.map.xy_idx(self.starting_position.x, self.starting_position.y); while self.map.tiles[start_idx] != TileType::Floor { self.starting_position.x -= 1; start_idx = self.map.xy_idx(self.starting_position.x, self.starting_position.y); } self.take_snapshot(); // Find all tiles we can reach from the starting point let exit_tile = remove_unreachable_areas_returning_most_distant(&mut self.map, start_idx); self.take_snapshot(); // Place the stairs self.map.tiles[exit_tile] = TileType::DownStairs; self.take_snapshot(); } } }
If you cargo run the project now, you start in the specified location - and entities spawn around you.
 .
.
Rex-free prefabs
It's possible that you don't like Rex Paint (don't worry, I won't tell Kyzrati!), maybe you are on a platform that doesn't support it - or maybe you'd just like to not have to rely on an external tool. We'll extend our reader to also support string output for maps. This will be handy later when we get to small room prefabs/vaults.
I cheated a bit, and opened the wfc-populated.xp file in Rex and typed ctrl-t to save in TXT format. That gave me a nice Notepad friendly map file:
 .
.
I also realized that prefab_builder was going to outgrow a single file! Fortunately, Rust makes it pretty easy to turn a module into a multi-file monster. In map_builders, I made a new directory called prefab_builder. I then moved prefab_builder.rs into it, and renamed it mod.rs. The game compiles and runs exactly as before.
Make a new file in your prefab_builder folder, and name it prefab_levels.rs. We'll paste in the map definition, and decorate it a bit:
#![allow(unused)] fn main() { #[derive(PartialEq, Copy, Clone)] pub struct PrefabLevel { pub template : &'static str, pub width : usize, pub height: usize } pub const WFC_POPULATED : PrefabLevel = PrefabLevel{ template : LEVEL_MAP, width: 80, height: 43 }; const LEVEL_MAP : &str = " ############################################################################### ######################################################## ######### @ ###### ######### #### ################### ####### #### g # ############### ##### #### # # ####### #### ############# ### #### ######### # # ####### ######### #### ##### ### #### ######### ###### ####### o ######### #### ## ##### ### # #### ######### ### ## o ### #### ######### ### #### ####### ## ##### ### #### ######### ### #### ####### # ### ## ##### ### #### ######### ### #### ####### ####### ##### o ### ## ## ### #### ####### ################ ### ## ## ### o ###### ########### # ############ ### ## ## ### ###### ########### ### ### ## % ###### ########### # ### ! ## ### ## ## ### ###### ## ####### ## ### ## ## ### ## ### ##### # ######################## ##### ## ## ### ## ### ##### # # ###################### ##### ### ## ####### ###### ##### ### #### o ########### ###### ##### ### ## ####### ###### #### ## #### # ######### ###### ###### ## ####### ###### #### ## #### ############ ##### ###### g ## ####### ###### #### ## % ########### o o #### # # ## ### #### ## #### # ####### ## ## #### g # ###### ####### #### ###### ! ! ### # # ##### ##### #### # ###### ### ###### #### ##### # ########## ### ###### #### ! ### ###### # ########## o##o ### # ## #### ### ####### ## # ###### ### g ## ## #### ######## ### o ####### ^########^ #### # ## g # ###### ######## ##### ####### ^ ^ #### ###### ##g#### ###### ######## ################ ##### ###### ## ########## ########## ######## ################# ###### # #### ######### ########## % ######## ################### ######## ## # ### ### ######## ########## ######## #################### ########## # # ## ##### ###### ######### ######## ########### ####### # g# # ## ##### ############### ### ########### ####### #### # ## ##### #### ############## ######## g g ########### #### # ^ # ### ###^#### ############# ######## ##### #### # g# # #### ###### ### ######## ##### g #### ! ####^^ # #!%^## ### ## ########## ######## gg g # > # #!%^ ### ### ############### ######## ##### g #### # g# # %^## ^ ### ############### ######## ##### ################## ############################################################################### "; }
So we start by defining a new struct type: PrefabLevel. This holds a map template, a width and a height. Then we make a constant, WFC_POPULATED and create an always-available level definition in it. Lastly, we paste our Notepad file into a new constant, currently called MY_LEVEL. This is a big string, and will be stored like any other string.
Lets modify the mode to also allow this type:
#![allow(unused)] fn main() { #[derive(PartialEq, Copy, Clone)] #[allow(dead_code)] pub enum PrefabMode { RexLevel{ template : &'static str }, Constant{ level : prefab_levels::PrefabLevel } } }
We'll modify our build function to also handle this match pattern:
#![allow(unused)] fn main() { fn build(&mut self) { match self.mode { PrefabMode::RexLevel{template} => self.load_rex_map(&template), PrefabMode::Constant{level} => self.load_ascii_map(&level) } self.take_snapshot(); ... }
And modify our constructor to use it:
#![allow(unused)] fn main() { impl PrefabBuilder { #[allow(dead_code)] pub fn new(new_depth : i32) -> PrefabBuilder { PrefabBuilder{ map : Map::new(new_depth), starting_position : Position{ x: 0, y : 0 }, depth : new_depth, history : Vec::new(), mode : PrefabMode::Constant{level : prefab_levels::WFC_POPULATED}, spawns: Vec::new() } } }
Now we need to create a loader that can handle it. We'll modify our load_rex_map to share some code with it, so we aren't typing everything repeatedly - and make our new load_ascii_map function:
#![allow(unused)] fn main() { fn char_to_map(&mut self, ch : char, idx: usize) { match ch { ' ' => self.map.tiles[idx] = TileType::Floor, '#' => self.map.tiles[idx] = TileType::Wall, '@' => { let x = idx as i32 % self.map.width; let y = idx as i32 / self.map.width; self.map.tiles[idx] = TileType::Floor; self.starting_position = Position{ x:x as i32, y:y as i32 }; } '>' => self.map.tiles[idx] = TileType::DownStairs, 'g' => { self.map.tiles[idx] = TileType::Floor; self.spawns.push((idx, "Goblin".to_string())); } 'o' => { self.map.tiles[idx] = TileType::Floor; self.spawns.push((idx, "Orc".to_string())); } '^' => { self.map.tiles[idx] = TileType::Floor; self.spawns.push((idx, "Bear Trap".to_string())); } '%' => { self.map.tiles[idx] = TileType::Floor; self.spawns.push((idx, "Rations".to_string())); } '!' => { self.map.tiles[idx] = TileType::Floor; self.spawns.push((idx, "Health Potion".to_string())); } _ => { rltk::console::log(format!("Unknown glyph loading map: {}", (ch as u8) as char)); } } } #[allow(dead_code)] fn load_rex_map(&mut self, path: &str) { let xp_file = rltk::rex::XpFile::from_resource(path).unwrap(); for layer in &xp_file.layers { for y in 0..layer.height { for x in 0..layer.width { let cell = layer.get(x, y).unwrap(); if x < self.map.width as usize && y < self.map.height as usize { let idx = self.map.xy_idx(x as i32, y as i32); // We're doing some nasty casting to make it easier to type things like '#' in the match self.char_to_map(cell.ch as u8 as char, idx); } } } } } #[allow(dead_code)] fn load_ascii_map(&mut self, level: &prefab_levels::PrefabLevel) { // Start by converting to a vector, with newlines removed let mut string_vec : Vec<char> = level.template.chars().filter(|a| *a != '\r' && *a !='\n').collect(); for c in string_vec.iter_mut() { if *c as u8 == 160u8 { *c = ' '; } } let mut i = 0; for ty in 0..level.height { for tx in 0..level.width { if tx < self.map.width as usize && ty < self.map.height as usize { let idx = self.map.xy_idx(tx as i32, ty as i32); self.char_to_map(string_vec[i], idx); } i += 1; } } } }
The first thing to notice is that the giant match in load_rex_map is now a function - char_to_map. Since we're using the functionality more than once, this is good practice: now we only have to fix it once if we messed it up! Otherwise, load_rex_map is pretty much the same. Our new function is load_ascii_map. It starts with some ugly code that bears explanation:
let mut string_vec : Vec<char> = level.template.chars().filter(|a| *a != '\r' && *a !='\n').collect();is a common Rust pattern, but isn't really self-explanatory at all. It chains methods together, in left-to-right order. So it's really a big collection of instructions glued together:let mut string_vec : Vec<char>is just saying "make a variable namedstring_vec, or the typeVec<char>and let me edit it.level.templateis the string in which our level template lives..chars()turns the string into an iterator - the same as when we've previously typedmyvector.iter()..filter(|a| *a != '\r' && *a !='\n')is interesting. Filters take a lambda function in, and keep any entries that returntrue. So in this case, we're stripping out\rand\n- the two newline characters. We'll keep everything else..collect()says "take the results of everything before me, and put them into a vector."
- We then mutably iterate the string vector, and turn the character
160into spaces. I honestly have no idea why the text is reading spaces as character 160 and not 32, but we'll roll with it and just convert it. - We then iterate
yfrom0to the specified height.- We then iterate
xfrom0to the specified width.- If the
xandyvalues are within the map we're creating, we calculate theidxfor the map tile - and call ourchar_to_mapfunction to translate it.
- If the
- We then iterate
If you cargo run now, you'll see exactly the same as before - but instead of loading the Rex Paint file, we've loaded it from the constant ASCII in prefab_levels.rs.
Building a level section
Your brave adventurer emerges from the twisting tunnels, and comes across the walls of an ancient underground fortification! That's the stuff of great D&D stories, and also an occasional occurrence in games such as Dungeon Crawl: Stone Soup. It's quite likely that what actually happened is your brave adventurer emerges from a procedurally generated map and finds a level section prefab!
We'll extend our mapping system to explicitly support this: a regular builder makes a map, and then a sectional prefab replaces part of the map with your exciting premade content. We'll start by making a new file (in map_builders/prefab_builder) called prefab_sections.rs, and place a description of what we want:
#![allow(unused)] fn main() { #[allow(dead_code)] #[derive(PartialEq, Copy, Clone)] pub enum HorizontalPlacement { Left, Center, Right } #[allow(dead_code)] #[derive(PartialEq, Copy, Clone)] pub enum VerticalPlacement { Top, Center, Bottom } #[allow(dead_code)] #[derive(PartialEq, Copy, Clone)] pub struct PrefabSection { pub template : &'static str, pub width : usize, pub height: usize, pub placement : (HorizontalPlacement, VerticalPlacement) } #[allow(dead_code)] pub const UNDERGROUND_FORT : PrefabSection = PrefabSection{ template : RIGHT_FORT, width: 15, height: 43, placement: ( HorizontalPlacement::Right, VerticalPlacement::Top ) }; #[allow(dead_code)] const RIGHT_FORT : &str = " ###### # ####### g # ####### # ## ### # # ## ^ ^ ## # # # # ## ### # # g # # # ## ### # # # ## ^ ^ ## # # # ## ### # ####### g # ####### # ###### "; }
So we have RIGHT_FORT as a string, describing a fortification we might encounter. We've built a structure, PrefabSection which includes placement hints, and a constant for our actual fort (UNDERGROUND_FORT) specifying that we'd like to be at the right of the map, at the top (the vertical doesn't really matter in this example, because it is the full size of the map).
Level sections are different from builders we've made before, because they take a completed map - and replace part of it. We've done something similar with Wave Function Collapse, so we'll adopt a similar pattern. We'll start by modifying our PrefabBuilder to know about the new type of map decoration:
#![allow(unused)] fn main() { #[derive(PartialEq, Copy, Clone)] #[allow(dead_code)] pub enum PrefabMode { RexLevel{ template : &'static str }, Constant{ level : prefab_levels::PrefabLevel }, Sectional{ section : prefab_sections::PrefabSection } } #[allow(dead_code)] pub struct PrefabBuilder { map : Map, starting_position : Position, depth: i32, history: Vec<Map>, mode: PrefabMode, spawns: Vec<(usize, String)>, previous_builder : Option<Box<dyn MapBuilder>> } }
As much as I'd love to put the previous_builder into the enum, I kept running into lifetime problems. Perhaps there's a way to do it (and some kind reader will help me out?), but for now I've put it into PrefabBuilder. The requested map section is in the parameter, however. We also update our constructor to use this type of map:
#![allow(unused)] fn main() { impl PrefabBuilder { #[allow(dead_code)] pub fn new(new_depth : i32, previous_builder : Option<Box<dyn MapBuilder>>) -> PrefabBuilder { PrefabBuilder{ map : Map::new(new_depth), starting_position : Position{ x: 0, y : 0 }, depth : new_depth, history : Vec::new(), mode : PrefabMode::Sectional{ section: prefab_sections::UNDERGROUND_FORT }, spawns: Vec::new(), previous_builder } } ... }
Over in map_builders/mod.rs's random_builder, we'll modify the builder to first run a Cellular Automata map, and then apply the sectional:
#![allow(unused)] fn main() { Box::new( PrefabBuilder::new( new_depth, Some( Box::new( CellularAutomataBuilder::new(new_depth) ) ) ) ) }
This could be one line, but I've separated it out due to the sheer number of parentheses.
Next, we update our match statement (in build()) to actually call the builder:
#![allow(unused)] fn main() { fn build(&mut self) { match self.mode { PrefabMode::RexLevel{template} => self.load_rex_map(&template), PrefabMode::Constant{level} => self.load_ascii_map(&level), PrefabMode::Sectional{section} => self.apply_sectional(§ion) } self.take_snapshot(); ... }
Now, we'll write apply_sectional:
#![allow(unused)] fn main() { pub fn apply_sectional(&mut self, section : &prefab_sections::PrefabSection) { // Build the map let prev_builder = self.previous_builder.as_mut().unwrap(); prev_builder.build_map(); self.starting_position = prev_builder.get_starting_position(); self.map = prev_builder.get_map().clone(); self.take_snapshot(); use prefab_sections::*; let string_vec = PrefabBuilder::read_ascii_to_vec(section.template); // Place the new section let chunk_x; match section.placement.0 { HorizontalPlacement::Left => chunk_x = 0, HorizontalPlacement::Center => chunk_x = (self.map.width / 2) - (section.width as i32 / 2), HorizontalPlacement::Right => chunk_x = (self.map.width-1) - section.width as i32 } let chunk_y; match section.placement.1 { VerticalPlacement::Top => chunk_y = 0, VerticalPlacement::Center => chunk_y = (self.map.height / 2) - (section.height as i32 / 2), VerticalPlacement::Bottom => chunk_y = (self.map.height-1) - section.height as i32 } println!("{},{}", chunk_x, chunk_y); let mut i = 0; for ty in 0..section.height { for tx in 0..section.width { if tx < self.map.width as usize && ty < self.map.height as usize { let idx = self.map.xy_idx(tx as i32 + chunk_x, ty as i32 + chunk_y); self.char_to_map(string_vec[i], idx); } i += 1; } } self.take_snapshot(); } }
This a lot like other code we've written, but lets step through it anyway:
let prev_builder = self.previous_builder.as_mut().unwrap();is quite the mouthful. The previous builder is anOption- but if we're calling this code, it has to have a value. So we want tounwrapit (which will panic and crash if there is no value), but we can't! The borrow checker will complain if we just callprevious_builder.unwrap- so we have to inject anas_mut()in there, whichOptionprovides for just this purpose.- We call
build_mapon the previous builder, to construct the base map. - We copy the starting position from the previous builder to our new builder.
- We copy the map from the previous builder to our self (the new builder).
- We call
read_ascii_to_vec, which is the same as the string-to-vector code from the level example; we've actually updated the level example to use it also, in the source code. - We create two variables,
chunk_xandchunk_yand query the section's placement preference to determine where to put the new chunk. - We iterate the section just like when we were iterating a level earlier - but adding
chunk_xtotxandchunk_ytotyto offset the section inside the level.
If you cargo run the example now, you'll see a map built with a cave - and a fortification to the right.
 .
.
You may also notice that there aren't any entities at all, outside of the prefab area!
Adding entities to sectionals
Spawning and determining spawn points have been logically separated, to help keep the map generation code clean. Different maps can have their own strategies for placing entities, so there isn't a straightforward method to simply suck in the data from the previous algorithms and add to it. There should be, and it should enable filtering and all manner of tweaking with later "meta-map builders" (such as WFC or this one). We've stumbled upon a clue for a good interface in the code that places entities in prefabs: the spawn system already supports tuples of (position, type string). We'll use that as the basis for the new setup.
We'll start by opening up map_builders/mod.rs and editing the MapBuilder trait:
#![allow(unused)] fn main() { pub trait MapBuilder { fn build_map(&mut self); fn get_map(&self) -> Map; fn get_starting_position(&self) -> Position; fn get_snapshot_history(&self) -> Vec<Map>; fn take_snapshot(&mut self); fn get_spawn_list(&self) -> &Vec<(usize, String)>; fn spawn_entities(&mut self, ecs : &mut World) { for entity in self.get_spawn_list().iter() { spawner::spawn_entity(ecs, &(&entity.0, &entity.1)); } } } }
Congratulations, half your source code just turned red in your IDE. That's the danger of changing a base interface - you wind up implementing it everywhere. Also, the setup of spawn_entities has changed - there is now a default implementation. Implementers of the trait can override it if they want to - but otherwise they don't actually need to write it anymore. Since everything should be available via the get_spawn_list function, the trait has everything it needs to provide that implementation.
We'll go back to simple_map and update it to obey the new trait rules. We'll extend the SimpleMapBuiler structure to feature a spawn list:
#![allow(unused)] fn main() { pub struct SimpleMapBuilder { map : Map, starting_position : Position, depth: i32, rooms: Vec<Rect>, history: Vec<Map>, spawn_list: Vec<(usize, String)> } }
The get_spawn_list implementation is trivial:
#![allow(unused)] fn main() { fn get_spawn_list(&self) -> &Vec<(usize, String)> { &self.spawn_list } }
Now for the fun part. Previously, we didn't consider spawning until the call to spawn_entities. Lets remind ourselves what it does (it's been a while!):
#![allow(unused)] fn main() { fn spawn_entities(&mut self, ecs : &mut World) { for room in self.rooms.iter().skip(1) { spawner::spawn_room(ecs, room, self.depth); } } }
It iterates all the rooms, and spawns entities inside the rooms. We're using that pattern a lot, so it's time to visit spawn_room in spawner.rs. We'll modify it to spawn into a spawn_list rather than directly onto the map. So we open up spawner.rs, and modify spawn_room and spawn_region (since they are intertwined, we'll fix them together):
#![allow(unused)] fn main() { /// Fills a room with stuff! pub fn spawn_room(map: &Map, rng: &mut RandomNumberGenerator, room : &Rect, map_depth: i32, spawn_list : &mut Vec<(usize, String)>) { let mut possible_targets : Vec<usize> = Vec::new(); { // Borrow scope - to keep access to the map separated for y in room.y1 + 1 .. room.y2 { for x in room.x1 + 1 .. room.x2 { let idx = map.xy_idx(x, y); if map.tiles[idx] == TileType::Floor { possible_targets.push(idx); } } } } spawn_region(map, rng, &possible_targets, map_depth, spawn_list); } /// Fills a region with stuff! pub fn spawn_region(map: &Map, rng: &mut RandomNumberGenerator, area : &[usize], map_depth: i32, spawn_list : &mut Vec<(usize, String)>) { let spawn_table = room_table(map_depth); let mut spawn_points : HashMap<usize, String> = HashMap::new(); let mut areas : Vec<usize> = Vec::from(area); // Scope to keep the borrow checker happy { let num_spawns = i32::min(areas.len() as i32, rng.roll_dice(1, MAX_MONSTERS + 3) + (map_depth - 1) - 3); if num_spawns == 0 { return; } for _i in 0 .. num_spawns { let array_index = if areas.len() == 1 { 0usize } else { (rng.roll_dice(1, areas.len() as i32)-1) as usize }; let map_idx = areas[array_index]; spawn_points.insert(map_idx, spawn_table.roll(rng)); areas.remove(array_index); } } // Actually spawn the monsters for spawn in spawn_points.iter() { spawn_list.push((*spawn.0, spawn.1.to_string())); } } }
You'll notice that the biggest change is taking a mutable reference to the spawn_list in each function, and instead of actually spawning the entity - we defer the operation by pushing the spawn information into the spawn_list vector at the end. Instead of passing in the ECS, we're passing in the Map and RandomNumberGenerator.
Going back to simple_map.rs, we move the spawning code into the end of build:
#![allow(unused)] fn main() { ... self.starting_position = Position{ x: start_pos.0, y: start_pos.1 }; // Spawn some entities for room in self.rooms.iter().skip(1) { spawner::spawn_room(&self.map, &mut rng, room, self.depth, &mut self.spawn_list); } }
We can now delete SimpleMapBuilder's implementation of spawn_entities - the default will work fine.
The same changes can be made to all of the builders that rely on room spawning; for brevity, I won't spell them all out here - you can find them in the source code. The various builders that use Voronoi diagrams are similarly simple to update. For example, Cellular Automata. Add the spawn_list to the builder structure, and add a spawn_list : Vec::new() into the constructor. Move the monster spawning from spawn_entities into the end of build and delete the function. Copy the get_spawn_list from the other implementations. We changed the region spawning code a little, so here's the implementation from cellular_automata.rs:
#![allow(unused)] fn main() { // Now we build a noise map for use in spawning entities later self.noise_areas = generate_voronoi_spawn_regions(&self.map, &mut rng); // Spawn the entities for area in self.noise_areas.iter() { spawner::spawn_region(&self.map, &mut rng, area.1, self.depth, &mut self.spawn_list); } }
Once again, it's rinse and repeat on the other Voronoi spawn algorithms. I've done the work in the source code for you, if you'd like to take a peek.
Jump to here if refactoring is boring!
SO - now that we've refactored our spawn system, how do we use it inside our PrefabBuilder? We can add one line to our apply_sectional function and get all of the entities from the previous map. You could simply copy it, but that's probably not what you want; you need to filter out entities inside the new prefab, both to make room for new ones and to ensure that the spawning makes sense. We'll also need to rearrange a little to keep the borrow checker happy. Here's the function now:
#![allow(unused)] fn main() { pub fn apply_sectional(&mut self, section : &prefab_sections::PrefabSection) { use prefab_sections::*; let string_vec = PrefabBuilder::read_ascii_to_vec(section.template); // Place the new section let chunk_x; match section.placement.0 { HorizontalPlacement::Left => chunk_x = 0, HorizontalPlacement::Center => chunk_x = (self.map.width / 2) - (section.width as i32 / 2), HorizontalPlacement::Right => chunk_x = (self.map.width-1) - section.width as i32 } let chunk_y; match section.placement.1 { VerticalPlacement::Top => chunk_y = 0, VerticalPlacement::Center => chunk_y = (self.map.height / 2) - (section.height as i32 / 2), VerticalPlacement::Bottom => chunk_y = (self.map.height-1) - section.height as i32 } // Build the map let prev_builder = self.previous_builder.as_mut().unwrap(); prev_builder.build_map(); self.starting_position = prev_builder.get_starting_position(); self.map = prev_builder.get_map().clone(); for e in prev_builder.get_spawn_list().iter() { let idx = e.0; let x = idx as i32 % self.map.width; let y = idx as i32 / self.map.width; if x < chunk_x || x > (chunk_x + section.width as i32) || y < chunk_y || y > (chunk_y + section.height as i32) { self.spawn_list.push( (idx, e.1.to_string()) ) } } self.take_snapshot(); let mut i = 0; for ty in 0..section.height { for tx in 0..section.width { if tx > 0 && tx < self.map.width as usize -1 && ty < self.map.height as usize -1 && ty > 0 { let idx = self.map.xy_idx(tx as i32 + chunk_x, ty as i32 + chunk_y); self.char_to_map(string_vec[i], idx); } i += 1; } } self.take_snapshot(); } }
If you cargo run now, you'll face enemies in both sections of the map.
 .
.
Wrap Up
In this chapter, we've covered quite a bit of ground:
- We can load Rex Paint levels, complete with hand-placed entities and play them.
- We can define ASCII premade maps in our game, and play them (removing the requirement to use Rex Paint).
- We can load level sectionals, and apply them to the level.
- We can adjust the spawns from previous levels in the builder chain.
...
The source code for this chapter may be found here
Run this chapter's example with web assembly, in your browser (WebGL2 required)
Copyright (C) 2019, Herbert Wolverson.
Room Vaults
About this tutorial
This tutorial is free and open source, and all code uses the MIT license - so you are free to do with it as you like. My hope is that you will enjoy the tutorial, and make great games!
If you enjoy this and would like me to keep writing, please consider supporting my Patreon.
The last chapter was getting overly long, so it was broken into two. In the previous chapter, we learned how to load prefabricated maps and map sections, modified the spawn system so that meta-builders could affect the spawn patterns from the previous builder, and demonstrated integration of whole map chunks into levels. In this chapter, we'll explode room vaults - prefabricated content that integrates itself into your level. So you might hand-craft some rooms, and have them seamlessly fit into your existing map.
Designing a room: Totally Not A Trap
The life of a roguelike developer is part programmer, part interior decorator (in a weirdly Gnome Mad Scientist fashion). We've already designed whole levels and level sections, so it isn't a huge leap to designing rooms. Lets go ahead and build a few pre-designed rooms.
We'll make a new file in map_builders/prefab_builders called prefab_rooms.rs. We'll insert a relatively iconic map feature into it:
#![allow(unused)] fn main() { #[allow(dead_code)] #[derive(PartialEq, Copy, Clone)] pub struct PrefabRoom { pub template : &'static str, pub width : usize, pub height: usize, pub first_depth: i32, pub last_depth: i32 } #[allow(dead_code)] pub const TOTALLY_NOT_A_TRAP : PrefabRoom = PrefabRoom{ template : TOTALLY_NOT_A_TRAP_MAP, width: 5, height: 5, first_depth: 0, last_depth: 100 }; #[allow(dead_code)] const TOTALLY_NOT_A_TRAP_MAP : &str = " ^^^ ^!^ ^^^ "; }
If you look at the ASCII, you'll see a classic piece of map design: a health potion completely surrounded by traps. Since the traps are hidden by default, we're relying on the player to think "well, that doesn't look suspicious at all"! Not that there are spaces all around the content - there's a 1-tile gutter all around it. This ensures that any 5x5 room into which the vault is placed will still be traversable. We're also introducing first_depth and last_depth - these are the levels at which the vault might be applied; for the sake of introduction, we'll pick 0..100 - which should be every level, unless you are a really dedicated play-tester!
Placing the not-a-trap room
We'll start by adding another mode to the PrefabBuiler system:
#![allow(unused)] fn main() { #[derive(PartialEq, Copy, Clone)] #[allow(dead_code)] pub enum PrefabMode { RexLevel{ template : &'static str }, Constant{ level : prefab_levels::PrefabLevel }, Sectional{ section : prefab_sections::PrefabSection }, RoomVaults } }
We're not going to add any parameters yet - by the end of the chapter, we'll have it integrated into a broader system for placing vaults. We'll update our constructor to use this type of placement:
#![allow(unused)] fn main() { impl PrefabBuilder { #[allow(dead_code)] pub fn new(new_depth : i32, previous_builder : Option<Box<dyn MapBuilder>>) -> PrefabBuilder { PrefabBuilder{ map : Map::new(new_depth), starting_position : Position{ x: 0, y : 0 }, depth : new_depth, history : Vec::new(), mode : PrefabMode::RoomVaults, previous_builder, spawn_list : Vec::new() } } ... }
And we'll teach our match function in build to use it:
#![allow(unused)] fn main() { fn build(&mut self) { match self.mode { PrefabMode::RexLevel{template} => self.load_rex_map(&template), PrefabMode::Constant{level} => self.load_ascii_map(&level), PrefabMode::Sectional{section} => self.apply_sectional(§ion), PrefabMode::RoomVaults => self.apply_room_vaults() } self.take_snapshot(); ... }
That leaves the next logical step being to write apply_room_vaults. Our objective is to scan the incoming map (from a different builder, even a previous iteration of this one!) for appropriate places into which we can place a vault, and add it to the map. We'll also want to remove any spawned creatures from the vault area - so the vaults remain hand-crafted and aren't interfered with by random spawning.
We'll be re-using our "create previous iteration" code from apply_sectional - so lets rewrite it into a more generic form:
#![allow(unused)] fn main() { fn apply_previous_iteration<F>(&mut self, mut filter: F) where F : FnMut(i32, i32, &(usize, String)) -> bool { // Build the map let prev_builder = self.previous_builder.as_mut().unwrap(); prev_builder.build_map(); self.starting_position = prev_builder.get_starting_position(); self.map = prev_builder.get_map().clone(); for e in prev_builder.get_spawn_list().iter() { let idx = e.0; let x = idx as i32 % self.map.width; let y = idx as i32 / self.map.width; if filter(x, y, e) { self.spawn_list.push( (idx, e.1.to_string()) ) } } self.take_snapshot(); } }
There's a lot of new Rust here! Lets walk through it:
- You'll notice that we've added a template type to the function.
fn apply_previous_iteration<F>. This specifies that we don't know exactly whatFis when we write the function. - The second parameter (
mut filter: F) is also of typeF. So we're telling the function signature to accept the template type as the parameter. - Before the opening curly bracket, we've added a
whereclause. This type of clause can be used to limit what it accepted by the generic type. In this case, we're saying thatFmust be anFnMut. AnFnMutis a function pointer that is allowed to change state (mutable; if it were immutable it'd be anFn). We then specify the parameters of the function, and its return type. Inside the function, we can now treatfilterlike a function - even though we haven't actually written one. We're requiring that function accept twoi32(integers), and atupleof(usize, String). The latter should look familiar - its our spawn list format. The first two are thexandycoordinates of the spawn - we're passing that to save the caller from doing the math each time. - We then run the
prev_buildercode we wrote in the previous chapter - it builds the map and obtains the map data itself, along with thespawn_listfrom the previous algorithm. - We then iterate through the spawn list, and calculate the x/y coordinates and map index for each entity. We call
filterwith this information, and if it returnstruewe add it to ourspawn_list. - Lastly, we take a snapshot of the map so you can see the step in action.
That sounds really complicated, but most of what it as done is allow us to replace the following code in apply_sectional:
#![allow(unused)] fn main() { // Build the map let prev_builder = self.previous_builder.as_mut().unwrap(); prev_builder.build_map(); self.starting_position = prev_builder.get_starting_position(); self.map = prev_builder.get_map().clone(); for e in prev_builder.get_spawn_list().iter() { let idx = e.0; let x = idx as i32 % self.map.width; let y = idx as i32 / self.map.width; if x < chunk_x || x > (chunk_x + section.width as i32) || y < chunk_y || y > (chunk_y + section.height as i32) { self.spawn_list.push( (idx, e.1.to_string()) ) } } self.take_snapshot(); }
We can replace it with a more generic call:
#![allow(unused)] fn main() { // Build the map self.apply_previous_iteration(|x,y,e| { x < chunk_x || x > (chunk_x + section.width as i32) || y < chunk_y || y > (chunk_y + section.height as i32) }); }
This is interesting: we're passing in a closure - a lambda function to the filter. It receives x, y, and e from the previous map's spawn_list for each entity. In this case, we're checking against chunk_x, chunk_y, section.width and section.height to see if the entity is inside our sectional. You've probably noticed that we didn't declare these anywhere in the lambda function; we are relying on capture - you can call a lambda and reference other variables that are in its scope - and it can reference them as if they were its own. This is a very powerful feature, and you can learn about it here.
Room Vaults
Let's start building apply_room_vaults. We'll take it step-by-step, and work our way through. We'll start with the function signature:
#![allow(unused)] fn main() { fn apply_room_vaults(&mut self) { use prefab_rooms::*; let mut rng = RandomNumberGenerator::new(); }
Simple enough: no parameters other than mutable membership of the builder. It is going to be referring to types in prefab_rooms, so rather than type that every time an in-function using statement imports the names to the local namespace to save your fingers. We'll also need a random number generator, so we make one as we have before. Next up:
#![allow(unused)] fn main() { // Apply the previous builder, and keep all entities it spawns (for now) self.apply_previous_iteration(|_x,_y,_e| true); }
We use the code we just wrote to apply the previous map. The filter we're passing in this time always returns true: keep all the entities for now. Next:
#![allow(unused)] fn main() { // Note that this is a place-holder and will be moved out of this function let master_vault_list = vec![TOTALLY_NOT_A_TRAP]; // Filter the vault list down to ones that are applicable to the current depth let possible_vaults : Vec<&PrefabRoom> = master_vault_list .iter() .filter(|v| { self.depth >= v.first_depth && self.depth <= v.last_depth }) .collect(); if possible_vaults.is_empty() { return; } // Bail out if there's nothing to build let vault_index = if possible_vaults.len() == 1 { 0 } else { (rng.roll_dice(1, possible_vaults.len() as i32)-1) as usize }; let vault = possible_vaults[vault_index]; }
We make a vector of all possible vault types - there's currently only one, but when we have more they go in here. This isn't really ideal, but we'll worry about making it a global resource in a future chapter. We then make a possible_vaults list by taking the master_vault_list and filtering it to only include those whose first_depth and last_depth line up with the requested dungeon depth. The iter().filter(...).collect() pattern has been described before, and it's a very powerful way to quickly extract what you need from a vector. If there are no possible vaults, we return out of the function - nothing to do here! Finally, we use another pattern we've used before: we pick a vault to create by selecting a random member of the possible_vaults vector.
Next up:
#![allow(unused)] fn main() { // We'll make a list of places in which the vault could fit let mut vault_positions : Vec<Position> = Vec::new(); let mut idx = 0usize; loop { let x = (idx % self.map.width as usize) as i32; let y = (idx / self.map.width as usize) as i32; // Check that we won't overflow the map if x > 1 && (x+vault.width as i32) < self.map.width-2 && y > 1 && (y+vault.height as i32) < self.map.height-2 { let mut possible = true; for ty in 0..vault.height as i32 { for tx in 0..vault.width as i32 { let idx = self.map.xy_idx(tx + x, ty + y); if self.map.tiles[idx] != TileType::Floor { possible = false; } } } if possible { vault_positions.push(Position{ x,y }); break; } } idx += 1; if idx >= self.map.tiles.len()-1 { break; } } }
There's quite a bit of code in this section (which determines all the places a the vault might fit). Lets walk through it:
- We make a new vector of
Positions. This will contain all the possible places in which we could spawn our vault. - We set
idxto0- we plan to iterate through the whole map. - We start a
loop- the Rust loop type that doesn't exit until you callbreak.- We calculate
xandyto know where we are on the map. - We do an overflow check;
xneeds to be greater than 1, andx+1needs to be less than the map width. We check the same withyand the map height. If we're within the bounds:- We set
possibleto true. - We iterate every tile on the map in the range
(x .. x+vault width), (y .. y + vault height)- if any tile isn't a floor, we setpossibletofalse. - If it is possible to place the vault here, we add the position to our
vault_positionsvector from step 1.
- We set
- We increment
idxby 1. - If we've run out of map, we break out of the loop.
- We calculate
In other words, we quickly scan the whole map for everywhere we could put the vault - and make a list of possible placements. We then:
#![allow(unused)] fn main() { if !vault_positions.is_empty() { let pos_idx = if vault_positions.len()==1 { 0 } else { (rng.roll_dice(1, vault_positions.len() as i32)-1) as usize }; let pos = &vault_positions[pos_idx]; let chunk_x = pos.x; let chunk_y = pos.y; let string_vec = PrefabBuilder::read_ascii_to_vec(vault.template); let mut i = 0; for ty in 0..vault.height { for tx in 0..vault.width { let idx = self.map.xy_idx(tx as i32 + chunk_x, ty as i32 + chunk_y); self.char_to_map(string_vec[i], idx); i += 1; } } self.take_snapshot(); } }
So if there are any valid positions for the vault, we:
- Pick a random entry in the
vault_positionsvector - this is where we will place the vault. - Use
read_ascii_to_vecto read in the ASCII, just like we did in prefabs and sectionals. - Iterate the vault data and use
char_to_mapto place it - just like we did before.
Putting it all together, you have the following function:
#![allow(unused)] fn main() { fn apply_room_vaults(&mut self) { use prefab_rooms::*; let mut rng = RandomNumberGenerator::new(); // Apply the previous builder, and keep all entities it spawns (for now) self.apply_previous_iteration(|_x,_y,_e| true); // Note that this is a place-holder and will be moved out of this function let master_vault_list = vec![TOTALLY_NOT_A_TRAP]; // Filter the vault list down to ones that are applicable to the current depth let possible_vaults : Vec<&PrefabRoom> = master_vault_list .iter() .filter(|v| { self.depth >= v.first_depth && self.depth <= v.last_depth }) .collect(); if possible_vaults.is_empty() { return; } // Bail out if there's nothing to build let vault_index = if possible_vaults.len() == 1 { 0 } else { (rng.roll_dice(1, possible_vaults.len() as i32)-1) as usize }; let vault = possible_vaults[vault_index]; // We'll make a list of places in which the vault could fit let mut vault_positions : Vec<Position> = Vec::new(); let mut idx = 0usize; loop { let x = (idx % self.map.width as usize) as i32; let y = (idx / self.map.width as usize) as i32; // Check that we won't overflow the map if x > 1 && (x+vault.width as i32) < self.map.width-2 && y > 1 && (y+vault.height as i32) < self.map.height-2 { let mut possible = true; for ty in 0..vault.height as i32 { for tx in 0..vault.width as i32 { let idx = self.map.xy_idx(tx + x, ty + y); if self.map.tiles[idx] != TileType::Floor { possible = false; } } } if possible { vault_positions.push(Position{ x,y }); break; } } idx += 1; if idx >= self.map.tiles.len()-1 { break; } } if !vault_positions.is_empty() { let pos_idx = if vault_positions.len()==1 { 0 } else { (rng.roll_dice(1, vault_positions.len() as i32)-1) as usize }; let pos = &vault_positions[pos_idx]; let chunk_x = pos.x; let chunk_y = pos.y; let string_vec = PrefabBuilder::read_ascii_to_vec(vault.template); let mut i = 0; for ty in 0..vault.height { for tx in 0..vault.width { let idx = self.map.xy_idx(tx as i32 + chunk_x, ty as i32 + chunk_y); self.char_to_map(string_vec[i], idx); i += 1; } } self.take_snapshot(); } } }
It's more likely that a square vault will fit in rectangular rooms, so we'll pop over to map_builders/mod.rs and slightly adjust the random_builder to use the original simple map algorithm for the base map:
#![allow(unused)] fn main() { Box::new( PrefabBuilder::new( new_depth, Some( Box::new( SimpleMapBuilder::new(new_depth) ) ) ) ) }
If you cargo run now, the vault will probably be placed on your map. Here's a screenshot of a run in which I found it:
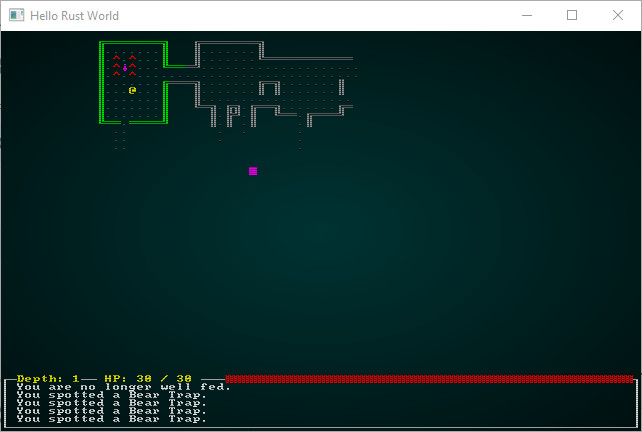 .
.
Filtering out entities
We probably don't want to keep entities that are inside our new vault from the previous map iteration. You might have a cunningly placed trap and spawn a goblin on top of it! (While fun, probably not what you had in mind). So we'll extend apply_room_vaults to do some filtering when it places the vault. We want to filter before we spawn new stuff, and then spawn more stuff with the room. Enter the retain feature:
#![allow(unused)] fn main() { ... let chunk_y = pos.y; let width = self.map.width; // The borrow checker really doesn't like it let height = self.map.height; // when we access `self` inside the `retain` self.spawn_list.retain(|e| { let idx = e.0 as i32; let x = idx % width; let y = idx / height; x < chunk_x || x > chunk_x + vault.width as i32 || y < chunk_y || y > chunk_y + vault.height as i32 }); ... }
Calling retain on a vector iterates through every entry, and calls the passed closure/lambda function. If it returns true, then the element is retained (kept) - otherwise it is removed. So here we're catching width and height (to avoid borrowing self), and then calculate the location for each entry. If it is outside of the new vault - we keep it.
I want more than one vault!
Having only one vault is pretty dull - albeit a good start in terms of proving the functionality works. In prefab_rooms.rs we'll go ahead and write a couple more. These aren't intended to be seminal examples of level design, but they illustrate the process. We'll add some more room prefabs:
#![allow(unused)] fn main() { #[allow(dead_code)] #[derive(PartialEq, Copy, Clone)] pub struct PrefabRoom { pub template : &'static str, pub width : usize, pub height: usize, pub first_depth: i32, pub last_depth: i32 } #[allow(dead_code)] pub const TOTALLY_NOT_A_TRAP : PrefabRoom = PrefabRoom{ template : TOTALLY_NOT_A_TRAP_MAP, width: 5, height: 5, first_depth: 0, last_depth: 100 }; #[allow(dead_code)] const TOTALLY_NOT_A_TRAP_MAP : &str = " ^^^ ^!^ ^^^ "; #[allow(dead_code)] pub const SILLY_SMILE : PrefabRoom = PrefabRoom{ template : SILLY_SMILE_MAP, width: 6, height: 6, first_depth: 0, last_depth: 100 }; #[allow(dead_code)] const SILLY_SMILE_MAP : &str = " ^ ^ # ### "; #[allow(dead_code)] pub const CHECKERBOARD : PrefabRoom = PrefabRoom{ template : CHECKERBOARD_MAP, width: 6, height: 6, first_depth: 0, last_depth: 100 }; #[allow(dead_code)] const CHECKERBOARD_MAP : &str = " ^# g#%# #!# ^# # "; }
We've added CHECKERBOARD (a grid of walls and spaces with traps, a goblin and goodies in it), and SILLY_SMILE which just looks like a silly wall feature. Now open up apply_room_vaults in map_builders/prefab_builder/mod.rs and add these to the master vector:
#![allow(unused)] fn main() { // Note that this is a place-holder and will be moved out of this function let master_vault_list = vec![TOTALLY_NOT_A_TRAP, CHECKERBOARD, SILLY_SMILE]; }
If you cargo run now, you'll most likely encounter one of the three vaults. Each time you advance a depth, you will probably encounter one of the three. My test ran into the checkerboard almost immediately:
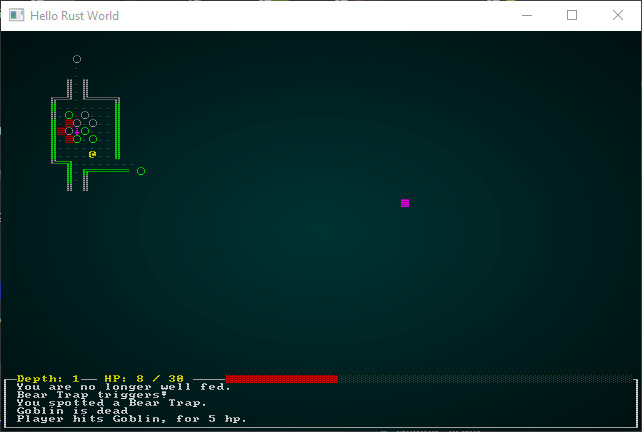 .
.
That's a great start, and gives a bit of flair to maps as you descend - but it may not be quite what you were asking for when you said you wanted more than one vault! How about more than one vault on a level? Back to apply_room_vaults! It's easy enough to come up with a number of vaults to spawn:
#![allow(unused)] fn main() { let n_vaults = i32::min(rng.roll_dice(1, 3), possible_vaults.len() as i32); }
This sets n_vaults to the minimum value of a dice roll (1d3) and the number of possible vaults - so it'll never exceed the number of options, but can vary a bit. It's also pretty easy to wrap the creation function in a for loop:
#![allow(unused)] fn main() { if possible_vaults.is_empty() { return; } // Bail out if there's nothing to build let n_vaults = i32::min(rng.roll_dice(1, 3), possible_vaults.len() as i32); for _i in 0..n_vaults { let vault_index = if possible_vaults.len() == 1 { 0 } else { (rng.roll_dice(1, possible_vaults.len() as i32)-1) as usize }; let vault = possible_vaults[vault_index]; ... self.take_snapshot(); possible_vaults.remove(vault_index); } } }
Notice that at the end of the loop, we're removing the vault we added from possible_vaults. We have to change the declaration to be able to do that: let mut possible_vaults : Vec<&PrefabRoom> = ... - we add the mut to allow us to change the vector. This way, we won't keep adding the same vault - they only get spawned once.
Now for the more difficult part: making sure that our new vaults don't overlap the previously spawned ones. We'll create a new HashSet of tiles we've consumed:
#![allow(unused)] fn main() { let mut used_tiles : HashSet<usize> = HashSet::new(); }
Hash sets have the advantage of offering a quick way to say if they contain a value, so they are ideal for what we need. We'll insert the tile idx into the set when we add a tile:
#![allow(unused)] fn main() { for ty in 0..vault.height { for tx in 0..vault.width { let idx = self.map.xy_idx(tx as i32 + chunk_x, ty as i32 + chunk_y); self.char_to_map(string_vec[i], idx); used_tiles.insert(idx); i += 1; } } }
Lastly, in our possibility checking we want to do a check against used_tiles to ensure we aren't overlapping:
#![allow(unused)] fn main() { let idx = self.map.xy_idx(tx + x, ty + y); if self.map.tiles[idx] != TileType::Floor { possible = false; } if used_tiles.contains(&idx) { possible = false; } }
Now if you cargo run your project, you might encounter several vaults. Here's a case where we encountered two vaults:
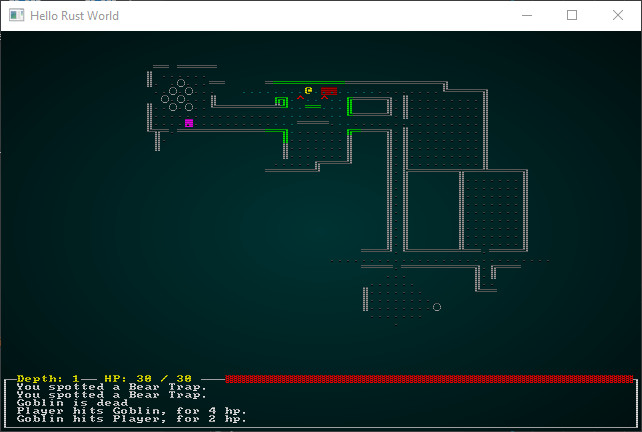 .
.
I don't always want a vault!
If you offer all of your vaults on every level, the game will be a bit more predictable than you probably want (unless you make a lot of vaults!). We'll modify apply_room_vaults to only sometimes have any vaults, with an increasing probability as you descend into the dungeon:
#![allow(unused)] fn main() { // Apply the previous builder, and keep all entities it spawns (for now) self.apply_previous_iteration(|_x,_y,_e| true); // Do we want a vault at all? let vault_roll = rng.roll_dice(1, 6) + self.depth; if vault_roll < 4 { return; } }
This is very simple: we roll a six-sided dice and add the current depth. If we rolled less than 4, we bail out and just provide the previously generated map. If you cargo run your project now, you'll sometimes encounter vaults - and sometimes you won't.
Finishing up: offering some constructors other than just new
We should offer some more friendly ways to build our PrefabBuilder, so it's obvious what we're doing when we construct our builder chain. Add the following constructors to prefab_builder/mod.rs:
#![allow(unused)] fn main() { #[allow(dead_code)] pub fn rex_level(new_depth : i32, template : &'static str) -> PrefabBuilder { PrefabBuilder{ map : Map::new(new_depth), starting_position : Position{ x: 0, y : 0 }, depth : new_depth, history : Vec::new(), mode : PrefabMode::RexLevel{ template }, previous_builder : None, spawn_list : Vec::new() } } #[allow(dead_code)] pub fn constant(new_depth : i32, level : prefab_levels::PrefabLevel) -> PrefabBuilder { PrefabBuilder{ map : Map::new(new_depth), starting_position : Position{ x: 0, y : 0 }, depth : new_depth, history : Vec::new(), mode : PrefabMode::Constant{ level }, previous_builder : None, spawn_list : Vec::new() } } #[allow(dead_code)] pub fn sectional(new_depth : i32, section : prefab_sections::PrefabSection, previous_builder : Box<dyn MapBuilder>) -> PrefabBuilder { PrefabBuilder{ map : Map::new(new_depth), starting_position : Position{ x: 0, y : 0 }, depth : new_depth, history : Vec::new(), mode : PrefabMode::Sectional{ section }, previous_builder : Some(previous_builder), spawn_list : Vec::new() } } #[allow(dead_code)] pub fn vaults(new_depth : i32, previous_builder : Box<dyn MapBuilder>) -> PrefabBuilder { PrefabBuilder{ map : Map::new(new_depth), starting_position : Position{ x: 0, y : 0 }, depth : new_depth, history : Vec::new(), mode : PrefabMode::RoomVaults, previous_builder : Some(previous_builder), spawn_list : Vec::new() } } }
We now have a decent interface for creating our meta-builder!
It's Turtles (Or Meta-Builders) All The Way Down
The last few chapters have all created meta builders - they aren't really builders in that they don't create an entirely new map, they modify the results of another algorithm. The really interesting thing here is that you can keep chaining them together to achieve the results you want. For example, lets make a map by starting with a Cellular Automata map, feeding it through Wave Function Collapse, possibly adding a castle wall, and then searching for vaults!
The syntax for this is currently quite ugly (that will be a future chapter topic). In map_builders/mod.rs:
#![allow(unused)] fn main() { Box::new( PrefabBuilder::vaults( new_depth, Box::new(PrefabBuilder::sectional( new_depth, prefab_builder::prefab_sections::UNDERGROUND_FORT, Box::new(WaveformCollapseBuilder::derived_map( new_depth, Box::new(CellularAutomataBuilder::new(new_depth)) )) )) ) ) }
Also in map_builders/prefab_builder/mod.rs make sure that you are publicly sharing the map modules:
#![allow(unused)] fn main() { pub mod prefab_levels; pub mod prefab_sections; pub mod prefab_rooms; }
If you cargo run this, you get to watch it cycle through the layered building:
 .
.
Restoring Randomness
Now that we've completed a two-chapter marathon of prefabricated, layered map building - it's time to restore the random_builder function to provide randomness once more. Here's the new function from map_builders/mod.rs:
#![allow(unused)] fn main() { pub fn random_builder(new_depth: i32) -> Box<dyn MapBuilder> { let mut rng = rltk::RandomNumberGenerator::new(); let builder = rng.roll_dice(1, 17); let mut result : Box<dyn MapBuilder>; match builder { 1 => { result = Box::new(BspDungeonBuilder::new(new_depth)); } 2 => { result = Box::new(BspInteriorBuilder::new(new_depth)); } 3 => { result = Box::new(CellularAutomataBuilder::new(new_depth)); } 4 => { result = Box::new(DrunkardsWalkBuilder::open_area(new_depth)); } 5 => { result = Box::new(DrunkardsWalkBuilder::open_halls(new_depth)); } 6 => { result = Box::new(DrunkardsWalkBuilder::winding_passages(new_depth)); } 7 => { result = Box::new(DrunkardsWalkBuilder::fat_passages(new_depth)); } 8 => { result = Box::new(DrunkardsWalkBuilder::fearful_symmetry(new_depth)); } 9 => { result = Box::new(MazeBuilder::new(new_depth)); } 10 => { result = Box::new(DLABuilder::walk_inwards(new_depth)); } 11 => { result = Box::new(DLABuilder::walk_outwards(new_depth)); } 12 => { result = Box::new(DLABuilder::central_attractor(new_depth)); } 13 => { result = Box::new(DLABuilder::insectoid(new_depth)); } 14 => { result = Box::new(VoronoiCellBuilder::pythagoras(new_depth)); } 15 => { result = Box::new(VoronoiCellBuilder::manhattan(new_depth)); } 16 => { result = Box::new(PrefabBuilder::constant(new_depth, prefab_builder::prefab_levels::WFC_POPULATED)) }, _ => { result = Box::new(SimpleMapBuilder::new(new_depth)); } } if rng.roll_dice(1, 3)==1 { result = Box::new(WaveformCollapseBuilder::derived_map(new_depth, result)); } if rng.roll_dice(1, 20)==1 { result = Box::new(PrefabBuilder::sectional(new_depth, prefab_builder::prefab_sections::UNDERGROUND_FORT ,result)); } result = Box::new(PrefabBuilder::vaults(new_depth, result)); result } }
We're taking full advantage of the composability of our layers system now! Our random builder now:
- In the first layer, we roll
1d17and pick a map type; we've included our pre-made level as one of the options. - Next, we roll
1d3- and on a 1, we run theWaveformCollapsealgorithm on that builder. - We roll
1d20, and on a 1 - we apply aPrefabBuildersectional, and add our fortress. That way, you'll only occasionally run into it. - We run whatever builder we came up with against our
PrefabBuilder's Room Vault system (the focus of this chapter!), to add premade rooms to the mix.
Wrap-Up
In this chapter, we've gained the ability to prefabricate rooms and include them if they fit into our level design. We've also explored the ability to add algorithms together, giving even more layers of randomness.
...
The source code for this chapter may be found here
Run this chapter's example with web assembly, in your browser (WebGL2 required)
Copyright (C) 2019, Herbert Wolverson.
Layering/Builder Chaining
About this tutorial
This tutorial is free and open source, and all code uses the MIT license - so you are free to do with it as you like. My hope is that you will enjoy the tutorial, and make great games!
If you enjoy this and would like me to keep writing, please consider supporting my Patreon.
The last few chapters have introduced an important concept in procedural generation: chained builders. We're happily building a map, calling Wave Function Collapse to mutate the map, calling our PrefabBuilder to change it again, and so on. This chapter will formalize this process a bit, expand upon it, and leave you with a framework that lets you clearly build new maps by chaining concepts together.
A builder-based interface
Builder chaining is a pretty profound approach to procedurally generating maps, and gives us an opportunity to clean up a lot of the code we've built thus far. We want an interface similar to the way we build entities with Specs: a builder, onto which we can keep chaining builders and return it as an "executor" - ready to build the maps. We also want to stop builders from doing more than one thing - they should do one thing, and do it well (that's a good principle of design; it makes debugging easier, and reduces duplication).
There are two major types of builders: those that just make a map (and only make sense to run once), and those that modify an existing map. We'll name those InitialMapBuilder and MetaMapBuilder respectively.
This gives us an idea of the syntax we want to employ:
- Our Builder should have:
- ONE Initial Builder.
- n Meta Builders, that run in order.
It makes sense then that the builder should have a start_with method that accepts the first map, and additional with methods to chain builders. The builders should be stored in a container that preserves the order in which they were added - a vector being the obvious choice.
It would also make sense to no longer make individual builders responsible for setting up their predecessors; ideally, a builder shouldn't have to know anything about the process beyond what it does. So we need to abstract the process, and support snapshotting (so you can view your procedural generation progress) along the way.
Shared map state - the BuilderMap
Rather than each builder defining their own copies of shared data, it would make sense to put the shared data in one place - and pass it around the chain as needed. So we'll start by defining some new structures and interfaces. First of all, we'll make BuilderMap in map_builders/mod.rs:
#![allow(unused)] fn main() { pub struct BuilderMap { pub spawn_list : Vec<(usize, String)>, pub map : Map, pub starting_position : Option<Position>, pub rooms: Option<Vec<Rect>>, pub history : Vec<Map> } }
You'll notice that this has all of the data we've been building into each map builder - and nothing else. It's intentionally generic - we'll be passing it to builders, and letting them work on it. Notice that all the fields are public - that's because we're passing it around, and there's a good chance that anything that touches it will need to access any/all of its contents.
The BuilderMap also needs to facilitate the task of taking snapshots for debugger viewing of maps as we work on algorithms. We're going to put one function into BuilderMap - to handle snapshotting development:
#![allow(unused)] fn main() { impl BuilderMap { fn take_snapshot(&mut self) { if SHOW_MAPGEN_VISUALIZER { let mut snapshot = self.map.clone(); for v in snapshot.revealed_tiles.iter_mut() { *v = true; } self.history.push(snapshot); } } } }
This is the same as the take_snapshot code we've been mixing into our builders. Since we're using a central repository of map building knowledge, we can promote it to apply to all our builders.
The BuilderChain - master builder to manage map creation
Previously, we've passed MapBuilder classes around, each capable of building previous maps. Since we've concluded that this is a poor idea, and defined the syntax we want, we'll make a replacement. The BuilderChain is a master builder - it controls the whole build process. To this end, we'll add the BuilderChain type:
#![allow(unused)] fn main() { pub struct BuilderChain { starter: Option<Box<dyn InitialMapBuilder>>, builders: Vec<Box<dyn MetaMapBuilder>>, pub build_data : BuilderMap } }
This is a more complicated structure, so let's go through it:
starteris anOption, so we know if there is one. Not having a first step (a map that doesn't refer to other maps) would be an error condition, so we'll track it. We're referencing a new trait,InitialMapBuilder; we'll get to that in a moment.buildersis a vector ofMetaMapBuilders, another new trait (and again - we'll get to it in a moment). These are builders that operate on the results of previous maps.build_datais a public variable (anyone can read/write it), containing theBuilderMapwe just made.
We'll implement some functions to support it. First up, a constructor:
#![allow(unused)] fn main() { impl BuilderChain { pub fn new(new_depth : i32) -> BuilderChain { BuilderChain{ starter: None, builders: Vec::new(), build_data : BuilderMap { spawn_list: Vec::new(), map: Map::new(new_depth), starting_position: None, rooms: None, history : Vec::new() } } } ... }
This is pretty simple: it makes a new BuilderChain with default values for everything. Now, lets permit our users to add a starting map to the chain. (A starting map is a first step that doesn't require a previous map as input, and results in a usable map structure which we may then modify):
#![allow(unused)] fn main() { ... pub fn start_with(&mut self, starter : Box<dyn InitialMapBuilder>) { match self.starter { None => self.starter = Some(starter), Some(_) => panic!("You can only have one starting builder.") }; } ... }
There's one new concept in here: panic!. If the user tries to add a second starting builder, we'll crash - because that doesn't make any sense. You'd simply be overwriting your previous steps, which is a giant waste of time! We'll also permit the user to add meta-builders:
#![allow(unused)] fn main() { ... pub fn with(&mut self, metabuilder : Box<dyn MetaMapBuilder>) { self.builders.push(metabuilder); } ... }
This is very simple: we simply add the meta-builder to the builder vector. Since vectors remain in the order in which you add to them, your operations will remain sorted appropriately. Finally, we'll implement a function to actually construct the map:
#![allow(unused)] fn main() { pub fn build_map(&mut self, rng : &mut rltk::RandomNumberGenerator) { match &mut self.starter { None => panic!("Cannot run a map builder chain without a starting build system"), Some(starter) => { // Build the starting map starter.build_map(rng, &mut self.build_data); } } // Build additional layers in turn for metabuilder in self.builders.iter_mut() { metabuilder.build_map(rng, &mut self.build_data); } } }
Let's walk through the steps here:
- We
matchon our starting map. If there isn't one, we panic - and crash the program with a message that you have to set a starting builder. - We call
build_mapon the starting map. - For each meta-builder, we call
build_mapon it - in the order specified.
That's not a bad syntax! It should enable us to chain builders together, and provide the required overview for constructing complicated, layered maps.
New Traits - InitialMapBuilder and MetaMapBuilder
Lets look at the two trait interfaces we've defined, InitialMapBuilder and MetaMapBuilder. We made them separate types to force the user to only pick one starting builder, and not try to put any starting builders in the list of modification layers. The implementation for them is the same:
#![allow(unused)] fn main() { pub trait InitialMapBuilder { fn build_map(&mut self, rng: &mut rltk::RandomNumberGenerator, build_data : &mut BuilderMap); } pub trait MetaMapBuilder { fn build_map(&mut self, rng: &mut rltk::RandomNumberGenerator, build_data : &mut BuilderMap); } }
build_map takes a random-number generator (so we stop creating new ones everywhere!), and a mutable reference to the BuilderMap we are working on. So instead of each builder optionally calling the previous one, we're passing along state as we work on it.
Spawn Function
We'll also want to implement our spawning system:
#![allow(unused)] fn main() { pub fn spawn_entities(&mut self, ecs : &mut World) { for entity in self.build_data.spawn_list.iter() { spawner::spawn_entity(ecs, &(&entity.0, &entity.1)); } } }
This is almost exactly the same code as our previous spawner in MapBuilder, but instead we're spawning from the spawn_list in our build_data structure. Otherwise, it's identical.
Random Builder - Take 1
Finally, we'll modify random_builder to use our SimpleMapBuilder with some new types to break out the creation steps:
#![allow(unused)] fn main() { pub fn random_builder(new_depth: i32, rng: &mut rltk::RandomNumberGenerator) -> BuilderChain { let mut builder = BuilderChain::new(new_depth); builder.start_with(SimpleMapBuilder::new()); builder.with(RoomBasedSpawner::new()); builder.with(RoomBasedStartingPosition::new()); builder.with(RoomBasedStairs::new()); builder } }
Notice that we're now taking a RandomNumberGenerator parameter. That's because we'd like to use the global RNG, rather than keep making new ones. This way, if the caller sets a "seed" - it will apply to world generation. This is intended to be the topic of a future chapter. We're also now returning a BuilderChain rather than a boxed trait - we're hiding the messy boxing/dynamic dispatch inside the implementation, so the caller doesn't have to worry about it. There's also two new types here: RoomBasedSpawner and RoomBasedStartingPosition - as well as a changed constructor for SimpleMapBuilder (it no longer accepts a depth parameter). We'll be looking at that in a second - but first, lets deal with the changes to the main program resulting from the new interface.
Nice looking interface - but you broke stuff!
We now have the interface we want - a good map of how the system interacts with the world. Unfortunately, the world is still expecting the setup we had before - so we need to fix it. In main.rs, we need to update our generate_world_map function to use the new interface:
#![allow(unused)] fn main() { fn generate_world_map(&mut self, new_depth : i32) { self.mapgen_index = 0; self.mapgen_timer = 0.0; self.mapgen_history.clear(); let mut rng = self.ecs.write_resource::<rltk::RandomNumberGenerator>(); let mut builder = map_builders::random_builder(new_depth, &mut rng); builder.build_map(&mut rng); std::mem::drop(rng); self.mapgen_history = builder.build_data.history.clone(); let player_start; { let mut worldmap_resource = self.ecs.write_resource::<Map>(); *worldmap_resource = builder.build_data.map.clone(); player_start = builder.build_data.starting_position.as_mut().unwrap().clone(); } // Spawn bad guys builder.spawn_entities(&mut self.ecs); }
- We reset
mapgen_index,mapgen_timerand themapgen_historyso that the progress viewer will run from the beginning. - We obtain the RNG from the ECS
World. - We create a new
random_builderwith the new interface, passing along the random number generator. - We tell it to build the new maps from the chain, also utilizing the RNG.
- We call
std::mem::dropon the RNG. This stops the "borrow" on it - so we're no longer borrowingselfeither. This prevents borrow-checker errors on the next phases of code. - We clone the map builder history into our own copy of the world's history. We copy it so we aren't destroying the builder, yet.
- We set
player_startto a clone of the builder's determined starting position. Note that we are callingunwrap- so theOptionfor a starting position must have a value at this point, or we'll crash. That's deliberate: we'd rather crash knowing that we forgot to set a starting point than have the program run in an unknown/confusing state. - We call
spawn_entitiesto populate the map.
Modifying SimpleMapBuilder
We can simplify SimpleMapBuilder (making it worthy of the name!) quite a bit. Here's the new code:
#![allow(unused)] fn main() { use super::{InitialMapBuilder, BuilderMap, Rect, apply_room_to_map, apply_horizontal_tunnel, apply_vertical_tunnel }; use rltk::RandomNumberGenerator; pub struct SimpleMapBuilder {} impl InitialMapBuilder for SimpleMapBuilder { #[allow(dead_code)] fn build_map(&mut self, rng: &mut rltk::RandomNumberGenerator, build_data : &mut BuilderMap) { self.rooms_and_corridors(rng, build_data); } } impl SimpleMapBuilder { #[allow(dead_code)] pub fn new() -> Box<SimpleMapBuilder> { Box::new(SimpleMapBuilder{}) } fn rooms_and_corridors(&mut self, rng : &mut RandomNumberGenerator, build_data : &mut BuilderMap) { const MAX_ROOMS : i32 = 30; const MIN_SIZE : i32 = 6; const MAX_SIZE : i32 = 10; let mut rooms : Vec<Rect> = Vec::new(); for i in 0..MAX_ROOMS { let w = rng.range(MIN_SIZE, MAX_SIZE); let h = rng.range(MIN_SIZE, MAX_SIZE); let x = rng.roll_dice(1, build_data.map.width - w - 1) - 1; let y = rng.roll_dice(1, build_data.map.height - h - 1) - 1; let new_room = Rect::new(x, y, w, h); let mut ok = true; for other_room in rooms.iter() { if new_room.intersect(other_room) { ok = false } } if ok { apply_room_to_map(&mut build_data.map, &new_room); build_data.take_snapshot(); if !rooms.is_empty() { let (new_x, new_y) = new_room.center(); let (prev_x, prev_y) = rooms[i as usize -1].center(); if rng.range(0,2) == 1 { apply_horizontal_tunnel(&mut build_data.map, prev_x, new_x, prev_y); apply_vertical_tunnel(&mut build_data.map, prev_y, new_y, new_x); } else { apply_vertical_tunnel(&mut build_data.map, prev_y, new_y, prev_x); apply_horizontal_tunnel(&mut build_data.map, prev_x, new_x, new_y); } } rooms.push(new_room); build_data.take_snapshot(); } } build_data.rooms = Some(rooms); } } }
This is basically the same as the old SimpleMapBuilder, but there's a number of changes:
- Notice that we're only applying the
InitialMapBuildertrait -MapBuilderis no more. - We're also not setting a starting position, or spawning entities - those are now the purview of other builders in the chain. We've basically distilled it down to just the room building algorithm.
- We set
build_data.roomstoSome(rooms). Not all algorithms support rooms - so our trait leaves theOptionset toNoneuntil we fill it. Since theSimpleMapBuilderis all about rooms - we fill it in.
Room-based spawning
Create a new file, room_based_spawner.rs in the map_builders directory. We're going to apply just the room populating system from the old SimpleMapBuilder here:
#![allow(unused)] fn main() { use super::{MetaMapBuilder, BuilderMap, spawner}; use rltk::RandomNumberGenerator; pub struct RoomBasedSpawner {} impl MetaMapBuilder for RoomBasedSpawner { fn build_map(&mut self, rng: &mut rltk::RandomNumberGenerator, build_data : &mut BuilderMap) { self.build(rng, build_data); } } impl RoomBasedSpawner { #[allow(dead_code)] pub fn new() -> Box<RoomBasedSpawner> { Box::new(RoomBasedSpawner{}) } fn build(&mut self, rng : &mut RandomNumberGenerator, build_data : &mut BuilderMap) { if let Some(rooms) = &build_data.rooms { for room in rooms.iter().skip(1) { spawner::spawn_room(&build_data.map, rng, room, build_data.map.depth, &mut build_data.spawn_list); } } else { panic!("Room Based Spawning only works after rooms have been created"); } } } }
In this sub-module, we're implementing MetaMapBuilder: this builder requires that you already have a map. In build, we've copied the old room-based spawning code from SimpleMapBuilder, and modified it to operate on the builder's rooms structure. To that end, if we if let to obtain the inner value of the Option; if there isn't one, then we panic! and the program quits stating that room-based spawning is only going to work if you have rooms.
We've reduced the functionality to just one task: if there are rooms, we spawn monsters in them.
Room-based starting position
This is very similar to room-based spawning, but places the player in the first room - just like it used to in SimpleMapBuilder. Create a new file, room_based_starting_position in map_builders:
#![allow(unused)] fn main() { use super::{MetaMapBuilder, BuilderMap, Position}; use rltk::RandomNumberGenerator; pub struct RoomBasedStartingPosition {} impl MetaMapBuilder for RoomBasedStartingPosition { fn build_map(&mut self, rng: &mut rltk::RandomNumberGenerator, build_data : &mut BuilderMap) { self.build(rng, build_data); } } impl RoomBasedStartingPosition { #[allow(dead_code)] pub fn new() -> Box<RoomBasedStartingPosition> { Box::new(RoomBasedStartingPosition{}) } fn build(&mut self, _rng : &mut RandomNumberGenerator, build_data : &mut BuilderMap) { if let Some(rooms) = &build_data.rooms { let start_pos = rooms[0].center(); build_data.starting_position = Some(Position{ x: start_pos.0, y: start_pos.1 }); } else { panic!("Room Based Staring Position only works after rooms have been created"); } } } }
Room-based stairs
This is also very similar to how we generated exit stairs in SimpleMapBuilder. Make a new file, room_based_stairs.rs:
#![allow(unused)] fn main() { use super::{MetaMapBuilder, BuilderMap, TileType}; use rltk::RandomNumberGenerator; pub struct RoomBasedStairs {} impl MetaMapBuilder for RoomBasedStairs { fn build_map(&mut self, rng: &mut rltk::RandomNumberGenerator, build_data : &mut BuilderMap) { self.build(rng, build_data); } } impl RoomBasedStairs { #[allow(dead_code)] pub fn new() -> Box<RoomBasedStairs> { Box::new(RoomBasedStairs{}) } fn build(&mut self, _rng : &mut RandomNumberGenerator, build_data : &mut BuilderMap) { if let Some(rooms) = &build_data.rooms { let stairs_position = rooms[rooms.len()-1].center(); let stairs_idx = build_data.map.xy_idx(stairs_position.0, stairs_position.1); build_data.map.tiles[stairs_idx] = TileType::DownStairs; build_data.take_snapshot(); } else { panic!("Room Based Stairs only works after rooms have been created"); } } } }
Putting it together to make a simple map with the new framework
Let's take another look at random_builder:
#![allow(unused)] fn main() { let mut builder = BuilderChain::new(new_depth); builder.start_with(SimpleMapBuilder::new()); builder.with(RoomBasedSpawner::new()); builder.with(RoomBasedStartingPosition::new()); builder.with(RoomBasedStairs::new()); builder }
Now that we've made all of the steps, this should make sense:
- We start with a map generated with the
SimpleMapBuildergenerator. - We modify the map with the meta-builder
RoomBasedSpawnerto spawn entities in rooms. - We again modify the map with the meta-builder
RoomBasedStartingPositionto start in the first room. - Once again, we modify the map with the meta-builder
RoomBasedStairsto place a down staircase in the last room.
If you cargo run the project now, you'll let lots of warnings about unused code - but the game should play with just the simple map from our first section. You may be wondering why we've taken so much effort to keep things the same; hopefully, it will become clear as we clean up more builders!
Cleaning up the BSP Dungeon Builder
Once again, we can seriously clean-up a map builder! Here's the new version of bsp_dungeon.rs:
#![allow(unused)] fn main() { use super::{InitialMapBuilder, BuilderMap, Map, Rect, apply_room_to_map, TileType, draw_corridor}; use rltk::RandomNumberGenerator; pub struct BspDungeonBuilder { rects: Vec<Rect>, } impl InitialMapBuilder for BspDungeonBuilder { #[allow(dead_code)] fn build_map(&mut self, rng: &mut rltk::RandomNumberGenerator, build_data : &mut BuilderMap) { self.build(rng, build_data); } } impl BspDungeonBuilder { #[allow(dead_code)] pub fn new() -> Box<BspDungeonBuilder> { Box::new(BspDungeonBuilder{ rects: Vec::new(), }) } fn build(&mut self, rng : &mut RandomNumberGenerator, build_data : &mut BuilderMap) { let mut rooms : Vec<Rect> = Vec::new(); self.rects.clear(); self.rects.push( Rect::new(2, 2, build_data.map.width-5, build_data.map.height-5) ); // Start with a single map-sized rectangle let first_room = self.rects[0]; self.add_subrects(first_room); // Divide the first room // Up to 240 times, we get a random rectangle and divide it. If its possible to squeeze a // room in there, we place it and add it to the rooms list. let mut n_rooms = 0; while n_rooms < 240 { let rect = self.get_random_rect(rng); let candidate = self.get_random_sub_rect(rect, rng); if self.is_possible(candidate, &build_data.map) { apply_room_to_map(&mut build_data.map, &candidate); rooms.push(candidate); self.add_subrects(rect); build_data.take_snapshot(); } n_rooms += 1; } // Now we sort the rooms rooms.sort_by(|a,b| a.x1.cmp(&b.x1) ); // Now we want corridors for i in 0..rooms.len()-1 { let room = rooms[i]; let next_room = rooms[i+1]; let start_x = room.x1 + (rng.roll_dice(1, i32::abs(room.x1 - room.x2))-1); let start_y = room.y1 + (rng.roll_dice(1, i32::abs(room.y1 - room.y2))-1); let end_x = next_room.x1 + (rng.roll_dice(1, i32::abs(next_room.x1 - next_room.x2))-1); let end_y = next_room.y1 + (rng.roll_dice(1, i32::abs(next_room.y1 - next_room.y2))-1); draw_corridor(&mut build_data.map, start_x, start_y, end_x, end_y); build_data.take_snapshot(); } build_data.rooms = Some(rooms); } fn add_subrects(&mut self, rect : Rect) { let width = i32::abs(rect.x1 - rect.x2); let height = i32::abs(rect.y1 - rect.y2); let half_width = i32::max(width / 2, 1); let half_height = i32::max(height / 2, 1); self.rects.push(Rect::new( rect.x1, rect.y1, half_width, half_height )); self.rects.push(Rect::new( rect.x1, rect.y1 + half_height, half_width, half_height )); self.rects.push(Rect::new( rect.x1 + half_width, rect.y1, half_width, half_height )); self.rects.push(Rect::new( rect.x1 + half_width, rect.y1 + half_height, half_width, half_height )); } fn get_random_rect(&mut self, rng : &mut RandomNumberGenerator) -> Rect { if self.rects.len() == 1 { return self.rects[0]; } let idx = (rng.roll_dice(1, self.rects.len() as i32)-1) as usize; self.rects[idx] } fn get_random_sub_rect(&self, rect : Rect, rng : &mut RandomNumberGenerator) -> Rect { let mut result = rect; let rect_width = i32::abs(rect.x1 - rect.x2); let rect_height = i32::abs(rect.y1 - rect.y2); let w = i32::max(3, rng.roll_dice(1, i32::min(rect_width, 10))-1) + 1; let h = i32::max(3, rng.roll_dice(1, i32::min(rect_height, 10))-1) + 1; result.x1 += rng.roll_dice(1, 6)-1; result.y1 += rng.roll_dice(1, 6)-1; result.x2 = result.x1 + w; result.y2 = result.y1 + h; result } fn is_possible(&self, rect : Rect, map : &Map) -> bool { let mut expanded = rect; expanded.x1 -= 2; expanded.x2 += 2; expanded.y1 -= 2; expanded.y2 += 2; let mut can_build = true; for y in expanded.y1 ..= expanded.y2 { for x in expanded.x1 ..= expanded.x2 { if x > map.width-2 { can_build = false; } if y > map.height-2 { can_build = false; } if x < 1 { can_build = false; } if y < 1 { can_build = false; } if can_build { let idx = map.xy_idx(x, y); if map.tiles[idx] != TileType::Wall { can_build = false; } } } } can_build } } }
Just like SimpleMapBuilder, we've stripped out all the non-room building code for a much cleaner piece of code. We're referencing the build_data struct from the builder, rather than making our own copies of everything - and the meat of the code is largely the same.
Now you can modify random_builder to make this map type:
#![allow(unused)] fn main() { let mut builder = BuilderChain::new(new_depth); builder.start_with(BspDungeonBuilder::new()); builder.with(RoomBasedSpawner::new()); builder.with(RoomBasedStartingPosition::new()); builder.with(RoomBasedStairs::new()); builder }
If you cargo run now, you'll get a dungeon based on the BspDungeonBuilder. See how you are reusing the spawner, starting position and stairs code? That's definitely an improvement over the older versions - if you change one, it can now help on multiple builders!
Same again for BSP Interior
Yet again, we can greatly clean up a builder - this time the BspInteriorBuilder. Here's the code for bsp_interior.rs:
#![allow(unused)] fn main() { use super::{InitialMapBuilder, BuilderMap, Rect, TileType, draw_corridor}; use rltk::RandomNumberGenerator; const MIN_ROOM_SIZE : i32 = 8; pub struct BspInteriorBuilder { rects: Vec<Rect> } impl InitialMapBuilder for BspInteriorBuilder { #[allow(dead_code)] fn build_map(&mut self, rng: &mut rltk::RandomNumberGenerator, build_data : &mut BuilderMap) { self.build(rng, build_data); } } impl BspInteriorBuilder { #[allow(dead_code)] pub fn new() -> Box<BspInteriorBuilder> { Box::new(BspInteriorBuilder{ rects: Vec::new() }) } fn build(&mut self, rng : &mut RandomNumberGenerator, build_data : &mut BuilderMap) { let mut rooms : Vec<Rect> = Vec::new(); self.rects.clear(); self.rects.push( Rect::new(1, 1, build_data.map.width-2, build_data.map.height-2) ); // Start with a single map-sized rectangle let first_room = self.rects[0]; self.add_subrects(first_room, rng); // Divide the first room let rooms_copy = self.rects.clone(); for r in rooms_copy.iter() { let room = *r; //room.x2 -= 1; //room.y2 -= 1; rooms.push(room); for y in room.y1 .. room.y2 { for x in room.x1 .. room.x2 { let idx = build_data.map.xy_idx(x, y); if idx > 0 && idx < ((build_data.map.width * build_data.map.height)-1) as usize { build_data.map.tiles[idx] = TileType::Floor; } } } build_data.take_snapshot(); } // Now we want corridors for i in 0..rooms.len()-1 { let room = rooms[i]; let next_room = rooms[i+1]; let start_x = room.x1 + (rng.roll_dice(1, i32::abs(room.x1 - room.x2))-1); let start_y = room.y1 + (rng.roll_dice(1, i32::abs(room.y1 - room.y2))-1); let end_x = next_room.x1 + (rng.roll_dice(1, i32::abs(next_room.x1 - next_room.x2))-1); let end_y = next_room.y1 + (rng.roll_dice(1, i32::abs(next_room.y1 - next_room.y2))-1); draw_corridor(&mut build_data.map, start_x, start_y, end_x, end_y); build_data.take_snapshot(); } build_data.rooms = Some(rooms); } fn add_subrects(&mut self, rect : Rect, rng : &mut RandomNumberGenerator) { // Remove the last rect from the list if !self.rects.is_empty() { self.rects.remove(self.rects.len() - 1); } // Calculate boundaries let width = rect.x2 - rect.x1; let height = rect.y2 - rect.y1; let half_width = width / 2; let half_height = height / 2; let split = rng.roll_dice(1, 4); if split <= 2 { // Horizontal split let h1 = Rect::new( rect.x1, rect.y1, half_width-1, height ); self.rects.push( h1 ); if half_width > MIN_ROOM_SIZE { self.add_subrects(h1, rng); } let h2 = Rect::new( rect.x1 + half_width, rect.y1, half_width, height ); self.rects.push( h2 ); if half_width > MIN_ROOM_SIZE { self.add_subrects(h2, rng); } } else { // Vertical split let v1 = Rect::new( rect.x1, rect.y1, width, half_height-1 ); self.rects.push(v1); if half_height > MIN_ROOM_SIZE { self.add_subrects(v1, rng); } let v2 = Rect::new( rect.x1, rect.y1 + half_height, width, half_height ); self.rects.push(v2); if half_height > MIN_ROOM_SIZE { self.add_subrects(v2, rng); } } } } }
You may test it by modifying random_builder:
#![allow(unused)] fn main() { let mut builder = BuilderChain::new(new_depth); builder.start_with(BspInteriorBuilder::new()); builder.with(RoomBasedSpawner::new()); builder.with(RoomBasedStartingPosition::new()); builder.with(RoomBasedStairs::new()); builder }
cargo run will now take you around an interior builder.
Cellular Automata
You should understand the basic idea here, now - we're breaking up builders into small chunks, and implementing the appropriate traits for the map type. Looking at Cellular Automata maps, you'll see that we do things a little differently:
- We make a map as usual. This obviously belongs in
CellularAutomataBuilder. - We search for a starting point close to the middle. This looks like it should be a separate step.
- We search the map for unreachable areas and cull them. This also looks like a separate step.
- We place the exit far from the starting position. That's also a different algorithm step.
The good news is that the last three of those are used in lots of other builders - so implementing them will let us reuse the code, and not keep repeating ourselves. The bad news is that if we run our cellular automata builder with the existing room-based steps, it will crash - we don't have rooms!
So we'll start by constructing the basic map builder. Like the others, this is mostly just rearranging code to fit with the new trait scheme. Here's the new cellular_automata.rs file:
#![allow(unused)] fn main() { use super::{InitialMapBuilder, BuilderMap, TileType}; use rltk::RandomNumberGenerator; pub struct CellularAutomataBuilder {} impl InitialMapBuilder for CellularAutomataBuilder { #[allow(dead_code)] fn build_map(&mut self, rng: &mut rltk::RandomNumberGenerator, build_data : &mut BuilderMap) { self.build(rng, build_data); } } impl CellularAutomataBuilder { #[allow(dead_code)] pub fn new() -> Box<CellularAutomataBuilder> { Box::new(CellularAutomataBuilder{}) } #[allow(clippy::map_entry)] fn build(&mut self, rng : &mut RandomNumberGenerator, build_data : &mut BuilderMap) { // First we completely randomize the map, setting 55% of it to be floor. for y in 1..build_data.map.height-1 { for x in 1..build_data.map.width-1 { let roll = rng.roll_dice(1, 100); let idx = build_data.map.xy_idx(x, y); if roll > 55 { build_data.map.tiles[idx] = TileType::Floor } else { build_data.map.tiles[idx] = TileType::Wall } } } build_data.take_snapshot(); // Now we iteratively apply cellular automata rules for _i in 0..15 { let mut newtiles = build_data.map.tiles.clone(); for y in 1..build_data.map.height-1 { for x in 1..build_data.map.width-1 { let idx = build_data.map.xy_idx(x, y); let mut neighbors = 0; if build_data.map.tiles[idx - 1] == TileType::Wall { neighbors += 1; } if build_data.map.tiles[idx + 1] == TileType::Wall { neighbors += 1; } if build_data.map.tiles[idx - build_data.map.width as usize] == TileType::Wall { neighbors += 1; } if build_data.map.tiles[idx + build_data.map.width as usize] == TileType::Wall { neighbors += 1; } if build_data.map.tiles[idx - (build_data.map.width as usize - 1)] == TileType::Wall { neighbors += 1; } if build_data.map.tiles[idx - (build_data.map.width as usize + 1)] == TileType::Wall { neighbors += 1; } if build_data.map.tiles[idx + (build_data.map.width as usize - 1)] == TileType::Wall { neighbors += 1; } if build_data.map.tiles[idx + (build_data.map.width as usize + 1)] == TileType::Wall { neighbors += 1; } if neighbors > 4 || neighbors == 0 { newtiles[idx] = TileType::Wall; } else { newtiles[idx] = TileType::Floor; } } } build_data.map.tiles = newtiles.clone(); build_data.take_snapshot(); } } } }
Non-Room Starting Points
It's entirely possible that we don't actually want to start in the middle of the map. Doing so presents lots of opportunities (and helps ensure connectivity), but maybe you would rather the player trudge through lots of map with less opportunity to pick the wrong direction. Maybe your story makes more sense if the player arrives at one end of the map and leaves via another. Lets implement a starting position system that takes a preferred starting point, and picks the closest valid tile. Create area_starting_points.rs:
#![allow(unused)] fn main() { use super::{MetaMapBuilder, BuilderMap, Position, TileType}; use rltk::RandomNumberGenerator; #[allow(dead_code)] pub enum XStart { LEFT, CENTER, RIGHT } #[allow(dead_code)] pub enum YStart { TOP, CENTER, BOTTOM } pub struct AreaStartingPosition { x : XStart, y : YStart } impl MetaMapBuilder for AreaStartingPosition { fn build_map(&mut self, rng: &mut rltk::RandomNumberGenerator, build_data : &mut BuilderMap) { self.build(rng, build_data); } } impl AreaStartingPosition { #[allow(dead_code)] pub fn new(x : XStart, y : YStart) -> Box<AreaStartingPosition> { Box::new(AreaStartingPosition{ x, y }) } fn build(&mut self, _rng : &mut RandomNumberGenerator, build_data : &mut BuilderMap) { let seed_x; let seed_y; match self.x { XStart::LEFT => seed_x = 1, XStart::CENTER => seed_x = build_data.map.width / 2, XStart::RIGHT => seed_x = build_data.map.width - 2 } match self.y { YStart::TOP => seed_y = 1, YStart::CENTER => seed_y = build_data.map.height / 2, YStart::BOTTOM => seed_y = build_data.map.height - 2 } let mut available_floors : Vec<(usize, f32)> = Vec::new(); for (idx, tiletype) in build_data.map.tiles.iter().enumerate() { if *tiletype == TileType::Floor { available_floors.push( ( idx, rltk::DistanceAlg::PythagorasSquared.distance2d( rltk::Point::new(idx as i32 % build_data.map.width, idx as i32 / build_data.map.width), rltk::Point::new(seed_x, seed_y) ) ) ); } } if available_floors.is_empty() { panic!("No valid floors to start on"); } available_floors.sort_by(|a,b| a.1.partial_cmp(&b.1).unwrap()); let start_x = available_floors[0].0 as i32 % build_data.map.width; let start_y = available_floors[0].0 as i32 / build_data.map.width; build_data.starting_position = Some(Position{x : start_x, y: start_y}); } } }
We've covered the boilerplate enough to not need to go over it again - so lets step through the build function:
- We are taking in a couple of
enumtypes: preferred position on the X and Y axes. - So we set
seed_xandseed_yto a point closest to the specified locations. - We iterate through the whole map, adding floor tiles to
available_floors- and calculating the distance to the preferred starting point. - We sort the available tile list, so the lower distances are first.
- We pick the first one on the list.
Note that we also panic! if there are no floors at all.
The great part here is that this will work for any map type - it searches for floors to stand on, and tries to find the closest starting point.
Culling Unreachable Areas
We've previously had good luck with culling areas that can't be reached from the starting point. So lets formalize that into its own meta-builder. Create cull_unreachable.rs:
#![allow(unused)] fn main() { use super::{MetaMapBuilder, BuilderMap, TileType}; use rltk::RandomNumberGenerator; pub struct CullUnreachable {} impl MetaMapBuilder for CullUnreachable { fn build_map(&mut self, rng: &mut rltk::RandomNumberGenerator, build_data : &mut BuilderMap) { self.build(rng, build_data); } } impl CullUnreachable { #[allow(dead_code)] pub fn new() -> Box<CullUnreachable> { Box::new(CullUnreachable{}) } fn build(&mut self, _rng : &mut RandomNumberGenerator, build_data : &mut BuilderMap) { let starting_pos = build_data.starting_position.as_ref().unwrap().clone(); let start_idx = build_data.map.xy_idx( starting_pos.x, starting_pos.y ); build_data.map.populate_blocked(); let map_starts : Vec<usize> = vec![start_idx]; let dijkstra_map = rltk::DijkstraMap::new(build_data.map.width as usize, build_data.map.height as usize, &map_starts , &build_data.map, 1000.0); for (i, tile) in build_data.map.tiles.iter_mut().enumerate() { if *tile == TileType::Floor { let distance_to_start = dijkstra_map.map[i]; // We can't get to this tile - so we'll make it a wall if distance_to_start == std::f32::MAX { *tile = TileType::Wall; } } } } } }
You'll notice this is almost exactly the same as remove_unreachable_areas_returning_most_distant from common.rs, but without returning a Dijkstra map. That's the intent: we remove areas the player can't get to, and only do that.
Voronoi-based spawning
We also need to replicate the functionality of Voronoi-based spawning. Create voronoi_spawning.rs:
#![allow(unused)] fn main() { use super::{MetaMapBuilder, BuilderMap, TileType, spawner}; use rltk::RandomNumberGenerator; use std::collections::HashMap; pub struct VoronoiSpawning {} impl MetaMapBuilder for VoronoiSpawning { fn build_map(&mut self, rng: &mut rltk::RandomNumberGenerator, build_data : &mut BuilderMap) { self.build(rng, build_data); } } impl VoronoiSpawning { #[allow(dead_code)] pub fn new() -> Box<VoronoiSpawning> { Box::new(VoronoiSpawning{}) } #[allow(clippy::map_entry)] fn build(&mut self, rng : &mut RandomNumberGenerator, build_data : &mut BuilderMap) { let mut noise_areas : HashMap<i32, Vec<usize>> = HashMap::new(); let mut noise = rltk::FastNoise::seeded(rng.roll_dice(1, 65536) as u64); noise.set_noise_type(rltk::NoiseType::Cellular); noise.set_frequency(0.08); noise.set_cellular_distance_function(rltk::CellularDistanceFunction::Manhattan); for y in 1 .. build_data.map.height-1 { for x in 1 .. build_data.map.width-1 { let idx = build_data.map.xy_idx(x, y); if build_data.map.tiles[idx] == TileType::Floor { let cell_value_f = noise.get_noise(x as f32, y as f32) * 10240.0; let cell_value = cell_value_f as i32; if noise_areas.contains_key(&cell_value) { noise_areas.get_mut(&cell_value).unwrap().push(idx); } else { noise_areas.insert(cell_value, vec![idx]); } } } } // Spawn the entities for area in noise_areas.iter() { spawner::spawn_region(&build_data.map, rng, area.1, build_data.map.depth, &mut build_data.spawn_list); } } } }
This is almost exactly the same as the code from common.rs we were calling in various builders, just modified to work within the builder chaining/builder map framework.
Spawning a distant exit
Another commonly used piece of code generated a Dijkstra map of the level, starting at the player's entry point - and used that map to place the exit at the most distant location from the player. This was in common.rs, and we called it a lot. We'll turn this into a map building step; create map_builders/distant_exit.rs:
#![allow(unused)] fn main() { use super::{MetaMapBuilder, BuilderMap, TileType}; use rltk::RandomNumberGenerator; pub struct DistantExit {} impl MetaMapBuilder for DistantExit { fn build_map(&mut self, rng: &mut rltk::RandomNumberGenerator, build_data : &mut BuilderMap) { self.build(rng, build_data); } } impl DistantExit { #[allow(dead_code)] pub fn new() -> Box<DistantExit> { Box::new(DistantExit{}) } fn build(&mut self, _rng : &mut RandomNumberGenerator, build_data : &mut BuilderMap) { let starting_pos = build_data.starting_position.as_ref().unwrap().clone(); let start_idx = build_data.map.xy_idx( starting_pos.x, starting_pos.y ); build_data.map.populate_blocked(); let map_starts : Vec<usize> = vec![start_idx]; let dijkstra_map = rltk::DijkstraMap::new(build_data.map.width as usize, build_data.map.height as usize, &map_starts , &build_data.map, 1000.0); let mut exit_tile = (0, 0.0f32); for (i, tile) in build_data.map.tiles.iter_mut().enumerate() { if *tile == TileType::Floor { let distance_to_start = dijkstra_map.map[i]; if distance_to_start != std::f32::MAX { // If it is further away than our current exit candidate, move the exit if distance_to_start > exit_tile.1 { exit_tile.0 = i; exit_tile.1 = distance_to_start; } } } } // Place a staircase let stairs_idx = exit_tile.0; build_data.map.tiles[stairs_idx] = TileType::DownStairs; build_data.take_snapshot(); } } }
Again, this is the same code we've used previously - just tweaked to match the new interface, so we won't go over it in detail.
Testing Cellular Automata
We've finally got all the pieces together, so lets give it a test. In random_builder, we'll use the new builder chains:
#![allow(unused)] fn main() { let mut builder = BuilderChain::new(new_depth); builder.start_with(CellularAutomataBuilder::new()); builder.with(AreaStartingPosition::new(XStart::CENTER, YStart::CENTER)); builder.with(CullUnreachable::new()); builder.with(VoronoiSpawning::new()); builder.with(DistantExit::new()); builder }
If you cargo run now, you'll get to play in a Cellular Automata generated map.
Updating Drunkard's Walk
You should have a pretty good picture of what we're doing now, so we'll gloss over the changes to drunkard.rs:
#![allow(unused)] fn main() { use super::{InitialMapBuilder, BuilderMap, TileType, Position, paint, Symmetry}; use rltk::RandomNumberGenerator; #[derive(PartialEq, Copy, Clone)] #[allow(dead_code)] pub enum DrunkSpawnMode { StartingPoint, Random } pub struct DrunkardSettings { pub spawn_mode : DrunkSpawnMode, pub drunken_lifetime : i32, pub floor_percent: f32, pub brush_size: i32, pub symmetry: Symmetry } pub struct DrunkardsWalkBuilder { settings : DrunkardSettings } impl InitialMapBuilder for DrunkardsWalkBuilder { #[allow(dead_code)] fn build_map(&mut self, rng: &mut rltk::RandomNumberGenerator, build_data : &mut BuilderMap) { self.build(rng, build_data); } } impl DrunkardsWalkBuilder { #[allow(dead_code)] pub fn new(settings: DrunkardSettings) -> DrunkardsWalkBuilder { DrunkardsWalkBuilder{ settings } } #[allow(dead_code)] pub fn open_area() -> Box<DrunkardsWalkBuilder> { Box::new(DrunkardsWalkBuilder{ settings : DrunkardSettings{ spawn_mode: DrunkSpawnMode::StartingPoint, drunken_lifetime: 400, floor_percent: 0.5, brush_size: 1, symmetry: Symmetry::None } }) } #[allow(dead_code)] pub fn open_halls() -> Box<DrunkardsWalkBuilder> { Box::new(DrunkardsWalkBuilder{ settings : DrunkardSettings{ spawn_mode: DrunkSpawnMode::Random, drunken_lifetime: 400, floor_percent: 0.5, brush_size: 1, symmetry: Symmetry::None }, }) } #[allow(dead_code)] pub fn winding_passages() -> Box<DrunkardsWalkBuilder> { Box::new(DrunkardsWalkBuilder{ settings : DrunkardSettings{ spawn_mode: DrunkSpawnMode::Random, drunken_lifetime: 100, floor_percent: 0.4, brush_size: 1, symmetry: Symmetry::None }, }) } #[allow(dead_code)] pub fn fat_passages() -> Box<DrunkardsWalkBuilder> { Box::new(DrunkardsWalkBuilder{ settings : DrunkardSettings{ spawn_mode: DrunkSpawnMode::Random, drunken_lifetime: 100, floor_percent: 0.4, brush_size: 2, symmetry: Symmetry::None }, }) } #[allow(dead_code)] pub fn fearful_symmetry() -> Box<DrunkardsWalkBuilder> { Box::new(DrunkardsWalkBuilder{ settings : DrunkardSettings{ spawn_mode: DrunkSpawnMode::Random, drunken_lifetime: 100, floor_percent: 0.4, brush_size: 1, symmetry: Symmetry::Both }, }) } fn build(&mut self, rng : &mut RandomNumberGenerator, build_data : &mut BuilderMap) { // Set a central starting point let starting_position = Position{ x: build_data.map.width / 2, y: build_data.map.height / 2 }; let start_idx = build_data.map.xy_idx(starting_position.x, starting_position.y); build_data.map.tiles[start_idx] = TileType::Floor; let total_tiles = build_data.map.width * build_data.map.height; let desired_floor_tiles = (self.settings.floor_percent * total_tiles as f32) as usize; let mut floor_tile_count = build_data.map.tiles.iter().filter(|a| **a == TileType::Floor).count(); let mut digger_count = 0; while floor_tile_count < desired_floor_tiles { let mut did_something = false; let mut drunk_x; let mut drunk_y; match self.settings.spawn_mode { DrunkSpawnMode::StartingPoint => { drunk_x = starting_position.x; drunk_y = starting_position.y; } DrunkSpawnMode::Random => { if digger_count == 0 { drunk_x = starting_position.x; drunk_y = starting_position.y; } else { drunk_x = rng.roll_dice(1, build_data.map.width - 3) + 1; drunk_y = rng.roll_dice(1, build_data.map.height - 3) + 1; } } } let mut drunk_life = self.settings.drunken_lifetime; while drunk_life > 0 { let drunk_idx = build_data.map.xy_idx(drunk_x, drunk_y); if build_data.map.tiles[drunk_idx] == TileType::Wall { did_something = true; } paint(&mut build_data.map, self.settings.symmetry, self.settings.brush_size, drunk_x, drunk_y); build_data.map.tiles[drunk_idx] = TileType::DownStairs; let stagger_direction = rng.roll_dice(1, 4); match stagger_direction { 1 => { if drunk_x > 2 { drunk_x -= 1; } } 2 => { if drunk_x < build_data.map.width-2 { drunk_x += 1; } } 3 => { if drunk_y > 2 { drunk_y -=1; } } _ => { if drunk_y < build_data.map.height-2 { drunk_y += 1; } } } drunk_life -= 1; } if did_something { build_data.take_snapshot(); } digger_count += 1; for t in build_data.map.tiles.iter_mut() { if *t == TileType::DownStairs { *t = TileType::Floor; } } floor_tile_count = build_data.map.tiles.iter().filter(|a| **a == TileType::Floor).count(); } } } }
Once again, you can test it by adjusting random_builder to:
#![allow(unused)] fn main() { let mut builder = BuilderChain::new(new_depth); builder.start_with(DrunkardsWalkBuilder::fearful_symmetry()); builder.with(AreaStartingPosition::new(XStart::CENTER, YStart::CENTER)); builder.with(CullUnreachable::new()); builder.with(VoronoiSpawning::new()); builder.with(DistantExit::new()); builder }
You can cargo run and see it in action.
Update Diffusion-Limited Aggregation
This is more of the same, so we'll again just provide the code for dla.rs:
#![allow(unused)] fn main() { use super::{InitialMapBuilder, BuilderMap, TileType, Position, Symmetry, paint}; use rltk::RandomNumberGenerator; #[derive(PartialEq, Copy, Clone)] #[allow(dead_code)] pub enum DLAAlgorithm { WalkInwards, WalkOutwards, CentralAttractor } pub struct DLABuilder { algorithm : DLAAlgorithm, brush_size: i32, symmetry: Symmetry, floor_percent: f32, } impl InitialMapBuilder for DLABuilder { #[allow(dead_code)] fn build_map(&mut self, rng: &mut rltk::RandomNumberGenerator, build_data : &mut BuilderMap) { self.build(rng, build_data); } } impl DLABuilder { #[allow(dead_code)] pub fn new() -> Box<DLABuilder> { Box::new(DLABuilder{ algorithm: DLAAlgorithm::WalkInwards, brush_size: 2, symmetry: Symmetry::None, floor_percent: 0.25, }) } #[allow(dead_code)] pub fn walk_inwards() -> Box<DLABuilder> { Box::new(DLABuilder{ algorithm: DLAAlgorithm::WalkInwards, brush_size: 1, symmetry: Symmetry::None, floor_percent: 0.25, }) } #[allow(dead_code)] pub fn walk_outwards() -> Box<DLABuilder> { Box::new(DLABuilder{ algorithm: DLAAlgorithm::WalkOutwards, brush_size: 2, symmetry: Symmetry::None, floor_percent: 0.25, }) } #[allow(dead_code)] pub fn central_attractor() -> Box<DLABuilder> { Box::new(DLABuilder{ algorithm: DLAAlgorithm::CentralAttractor, brush_size: 2, symmetry: Symmetry::None, floor_percent: 0.25, }) } #[allow(dead_code)] pub fn insectoid() -> Box<DLABuilder> { Box::new(DLABuilder{ algorithm: DLAAlgorithm::CentralAttractor, brush_size: 2, symmetry: Symmetry::Horizontal, floor_percent: 0.25, }) } #[allow(clippy::map_entry)] fn build(&mut self, rng : &mut RandomNumberGenerator, build_data : &mut BuilderMap) { // Carve a starting seed let starting_position = Position{ x: build_data.map.width/2, y : build_data.map.height/2 }; let start_idx = build_data.map.xy_idx(starting_position.x, starting_position.y); build_data.take_snapshot(); build_data.map.tiles[start_idx] = TileType::Floor; build_data.map.tiles[start_idx-1] = TileType::Floor; build_data.map.tiles[start_idx+1] = TileType::Floor; build_data.map.tiles[start_idx-build_data.map.width as usize] = TileType::Floor; build_data.map.tiles[start_idx+build_data.map.width as usize] = TileType::Floor; // Random walker let total_tiles = build_data.map.width * build_data.map.height; let desired_floor_tiles = (self.floor_percent * total_tiles as f32) as usize; let mut floor_tile_count = build_data.map.tiles.iter().filter(|a| **a == TileType::Floor).count(); while floor_tile_count < desired_floor_tiles { match self.algorithm { DLAAlgorithm::WalkInwards => { let mut digger_x = rng.roll_dice(1, build_data.map.width - 3) + 1; let mut digger_y = rng.roll_dice(1, build_data.map.height - 3) + 1; let mut prev_x = digger_x; let mut prev_y = digger_y; let mut digger_idx = build_data.map.xy_idx(digger_x, digger_y); while build_data.map.tiles[digger_idx] == TileType::Wall { prev_x = digger_x; prev_y = digger_y; let stagger_direction = rng.roll_dice(1, 4); match stagger_direction { 1 => { if digger_x > 2 { digger_x -= 1; } } 2 => { if digger_x < build_data.map.width-2 { digger_x += 1; } } 3 => { if digger_y > 2 { digger_y -=1; } } _ => { if digger_y < build_data.map.height-2 { digger_y += 1; } } } digger_idx = build_data.map.xy_idx(digger_x, digger_y); } paint(&mut build_data.map, self.symmetry, self.brush_size, prev_x, prev_y); } DLAAlgorithm::WalkOutwards => { let mut digger_x = starting_position.x; let mut digger_y = starting_position.y; let mut digger_idx = build_data.map.xy_idx(digger_x, digger_y); while build_data.map.tiles[digger_idx] == TileType::Floor { let stagger_direction = rng.roll_dice(1, 4); match stagger_direction { 1 => { if digger_x > 2 { digger_x -= 1; } } 2 => { if digger_x < build_data.map.width-2 { digger_x += 1; } } 3 => { if digger_y > 2 { digger_y -=1; } } _ => { if digger_y < build_data.map.height-2 { digger_y += 1; } } } digger_idx = build_data.map.xy_idx(digger_x, digger_y); } paint(&mut build_data.map, self.symmetry, self.brush_size, digger_x, digger_y); } DLAAlgorithm::CentralAttractor => { let mut digger_x = rng.roll_dice(1, build_data.map.width - 3) + 1; let mut digger_y = rng.roll_dice(1, build_data.map.height - 3) + 1; let mut prev_x = digger_x; let mut prev_y = digger_y; let mut digger_idx = build_data.map.xy_idx(digger_x, digger_y); let mut path = rltk::line2d( rltk::LineAlg::Bresenham, rltk::Point::new( digger_x, digger_y ), rltk::Point::new( starting_position.x, starting_position.y ) ); while build_data.map.tiles[digger_idx] == TileType::Wall && !path.is_empty() { prev_x = digger_x; prev_y = digger_y; digger_x = path[0].x; digger_y = path[0].y; path.remove(0); digger_idx = build_data.map.xy_idx(digger_x, digger_y); } paint(&mut build_data.map, self.symmetry, self.brush_size, prev_x, prev_y); } } build_data.take_snapshot(); floor_tile_count = build_data.map.tiles.iter().filter(|a| **a == TileType::Floor).count(); } } } }
Updating the Maze Builder
Once again, here's the code for maze.rs:
#![allow(unused)] fn main() { use super::{Map, InitialMapBuilder, BuilderMap, TileType}; use rltk::RandomNumberGenerator; pub struct MazeBuilder {} impl InitialMapBuilder for MazeBuilder { #[allow(dead_code)] fn build_map(&mut self, rng: &mut rltk::RandomNumberGenerator, build_data : &mut BuilderMap) { self.build(rng, build_data); } } impl MazeBuilder { #[allow(dead_code)] pub fn new() -> Box<MazeBuilder> { Box::new(MazeBuilder{}) } #[allow(clippy::map_entry)] fn build(&mut self, rng : &mut RandomNumberGenerator, build_data : &mut BuilderMap) { // Maze gen let mut maze = Grid::new((build_data.map.width / 2)-2, (build_data.map.height / 2)-2, rng); maze.generate_maze(build_data); } } /* Maze code taken under MIT from https://github.com/cyucelen/mazeGenerator/ */ const TOP : usize = 0; const RIGHT : usize = 1; const BOTTOM : usize = 2; const LEFT : usize = 3; #[derive(Copy, Clone)] struct Cell { row: i32, column: i32, walls: [bool; 4], visited: bool, } impl Cell { fn new(row: i32, column: i32) -> Cell { Cell{ row, column, walls: [true, true, true, true], visited: false } } fn remove_walls(&mut self, next : &mut Cell) { let x = self.column - next.column; let y = self.row - next.row; if x == 1 { self.walls[LEFT] = false; next.walls[RIGHT] = false; } else if x == -1 { self.walls[RIGHT] = false; next.walls[LEFT] = false; } else if y == 1 { self.walls[TOP] = false; next.walls[BOTTOM] = false; } else if y == -1 { self.walls[BOTTOM] = false; next.walls[TOP] = false; } } } struct Grid<'a> { width: i32, height: i32, cells: Vec<Cell>, backtrace: Vec<usize>, current: usize, rng : &'a mut RandomNumberGenerator } impl<'a> Grid<'a> { fn new(width: i32, height:i32, rng: &mut RandomNumberGenerator) -> Grid { let mut grid = Grid{ width, height, cells: Vec::new(), backtrace: Vec::new(), current: 0, rng }; for row in 0..height { for column in 0..width { grid.cells.push(Cell::new(row, column)); } } grid } fn calculate_index(&self, row: i32, column: i32) -> i32 { if row < 0 || column < 0 || column > self.width-1 || row > self.height-1 { -1 } else { column + (row * self.width) } } fn get_available_neighbors(&self) -> Vec<usize> { let mut neighbors : Vec<usize> = Vec::new(); let current_row = self.cells[self.current].row; let current_column = self.cells[self.current].column; let neighbor_indices : [i32; 4] = [ self.calculate_index(current_row -1, current_column), self.calculate_index(current_row, current_column + 1), self.calculate_index(current_row + 1, current_column), self.calculate_index(current_row, current_column - 1) ]; for i in neighbor_indices.iter() { if *i != -1 && !self.cells[*i as usize].visited { neighbors.push(*i as usize); } } neighbors } fn find_next_cell(&mut self) -> Option<usize> { let neighbors = self.get_available_neighbors(); if !neighbors.is_empty() { if neighbors.len() == 1 { return Some(neighbors[0]); } else { return Some(neighbors[(self.rng.roll_dice(1, neighbors.len() as i32)-1) as usize]); } } None } fn generate_maze(&mut self, build_data : &mut BuilderMap) { let mut i = 0; loop { self.cells[self.current].visited = true; let next = self.find_next_cell(); match next { Some(next) => { self.cells[next].visited = true; self.backtrace.push(self.current); // __lower_part__ __higher_part_ // / \ / \ // --------cell1------ | cell2----------- let (lower_part, higher_part) = self.cells.split_at_mut(std::cmp::max(self.current, next)); let cell1 = &mut lower_part[std::cmp::min(self.current, next)]; let cell2 = &mut higher_part[0]; cell1.remove_walls(cell2); self.current = next; } None => { if !self.backtrace.is_empty() { self.current = self.backtrace[0]; self.backtrace.remove(0); } else { break; } } } if i % 50 == 0 { self.copy_to_map(&mut build_data.map); build_data.take_snapshot(); } i += 1; } } fn copy_to_map(&self, map : &mut Map) { // Clear the map for i in map.tiles.iter_mut() { *i = TileType::Wall; } for cell in self.cells.iter() { let x = cell.column + 1; let y = cell.row + 1; let idx = map.xy_idx(x * 2, y * 2); map.tiles[idx] = TileType::Floor; if !cell.walls[TOP] { map.tiles[idx - map.width as usize] = TileType::Floor } if !cell.walls[RIGHT] { map.tiles[idx + 1] = TileType::Floor } if !cell.walls[BOTTOM] { map.tiles[idx + map.width as usize] = TileType::Floor } if !cell.walls[LEFT] { map.tiles[idx - 1] = TileType::Floor } } } } }
Updating Voronoi Maps
Here's the updated code for the Voronoi builder (in voronoi.rs):
#![allow(unused)] fn main() { use super::{InitialMapBuilder, BuilderMap, TileType}; use rltk::RandomNumberGenerator; #[derive(PartialEq, Copy, Clone)] #[allow(dead_code)] pub enum DistanceAlgorithm { Pythagoras, Manhattan, Chebyshev } pub struct VoronoiCellBuilder { n_seeds: usize, distance_algorithm: DistanceAlgorithm } impl InitialMapBuilder for VoronoiCellBuilder { #[allow(dead_code)] fn build_map(&mut self, rng: &mut rltk::RandomNumberGenerator, build_data : &mut BuilderMap) { self.build(rng, build_data); } } impl VoronoiCellBuilder { #[allow(dead_code)] pub fn new() -> Box<VoronoiCellBuilder> { Box::new(VoronoiCellBuilder{ n_seeds: 64, distance_algorithm: DistanceAlgorithm::Pythagoras, }) } #[allow(dead_code)] pub fn pythagoras() -> Box<VoronoiCellBuilder> { Box::new(VoronoiCellBuilder{ n_seeds: 64, distance_algorithm: DistanceAlgorithm::Pythagoras, }) } #[allow(dead_code)] pub fn manhattan() -> Box<VoronoiCellBuilder> { Box::new(VoronoiCellBuilder{ n_seeds: 64, distance_algorithm: DistanceAlgorithm::Manhattan, }) } #[allow(clippy::map_entry)] fn build(&mut self, rng : &mut RandomNumberGenerator, build_data : &mut BuilderMap) { // Make a Voronoi diagram. We'll do this the hard way to learn about the technique! let mut voronoi_seeds : Vec<(usize, rltk::Point)> = Vec::new(); while voronoi_seeds.len() < self.n_seeds { let vx = rng.roll_dice(1, build_data.map.width-1); let vy = rng.roll_dice(1, build_data.map.height-1); let vidx = build_data.map.xy_idx(vx, vy); let candidate = (vidx, rltk::Point::new(vx, vy)); if !voronoi_seeds.contains(&candidate) { voronoi_seeds.push(candidate); } } let mut voronoi_distance = vec![(0, 0.0f32) ; self.n_seeds]; let mut voronoi_membership : Vec<i32> = vec![0 ; build_data.map.width as usize * build_data.map.height as usize]; for (i, vid) in voronoi_membership.iter_mut().enumerate() { let x = i as i32 % build_data.map.width; let y = i as i32 / build_data.map.width; for (seed, pos) in voronoi_seeds.iter().enumerate() { let distance; match self.distance_algorithm { DistanceAlgorithm::Pythagoras => { distance = rltk::DistanceAlg::PythagorasSquared.distance2d( rltk::Point::new(x, y), pos.1 ); } DistanceAlgorithm::Manhattan => { distance = rltk::DistanceAlg::Manhattan.distance2d( rltk::Point::new(x, y), pos.1 ); } DistanceAlgorithm::Chebyshev => { distance = rltk::DistanceAlg::Chebyshev.distance2d( rltk::Point::new(x, y), pos.1 ); } } voronoi_distance[seed] = (seed, distance); } voronoi_distance.sort_by(|a,b| a.1.partial_cmp(&b.1).unwrap()); *vid = voronoi_distance[0].0 as i32; } for y in 1..build_data.map.height-1 { for x in 1..build_data.map.width-1 { let mut neighbors = 0; let my_idx = build_data.map.xy_idx(x, y); let my_seed = voronoi_membership[my_idx]; if voronoi_membership[build_data.map.xy_idx(x-1, y)] != my_seed { neighbors += 1; } if voronoi_membership[build_data.map.xy_idx(x+1, y)] != my_seed { neighbors += 1; } if voronoi_membership[build_data.map.xy_idx(x, y-1)] != my_seed { neighbors += 1; } if voronoi_membership[build_data.map.xy_idx(x, y+1)] != my_seed { neighbors += 1; } if neighbors < 2 { build_data.map.tiles[my_idx] = TileType::Floor; } } build_data.take_snapshot(); } } } }
Updating Wave Function Collapse
Wave Function Collapse is a slightly different one to port, because it already had a concept of a "previous builder". That's gone now (chaining is automatic), so there's a bit more to update. Wave Function Collapse is a meta-builder, so it implements that trait, rather than the initial map builder. Overall, these changes make it a lot more simple! The changes all take place in waveform_collapse/mod.rs:
#![allow(unused)] fn main() { use super::{MetaMapBuilder, BuilderMap, Map, TileType}; use rltk::RandomNumberGenerator; mod common; use common::*; mod constraints; use constraints::*; mod solver; use solver::*; /// Provides a map builder using the Wave Function Collapse algorithm. pub struct WaveformCollapseBuilder {} impl MetaMapBuilder for WaveformCollapseBuilder { fn build_map(&mut self, rng: &mut rltk::RandomNumberGenerator, build_data : &mut BuilderMap) { self.build(rng, build_data); } } impl WaveformCollapseBuilder { /// Constructor for waveform collapse. #[allow(dead_code)] pub fn new() -> Box<WaveformCollapseBuilder> { Box::new(WaveformCollapseBuilder{}) } fn build(&mut self, rng : &mut RandomNumberGenerator, build_data : &mut BuilderMap) { const CHUNK_SIZE :i32 = 8; build_data.take_snapshot(); let patterns = build_patterns(&build_data.map, CHUNK_SIZE, true, true); let constraints = patterns_to_constraints(patterns, CHUNK_SIZE); self.render_tile_gallery(&constraints, CHUNK_SIZE, build_data); build_data.map = Map::new(build_data.map.depth); loop { let mut solver = Solver::new(constraints.clone(), CHUNK_SIZE, &build_data.map); while !solver.iteration(&mut build_data.map, rng) { build_data.take_snapshot(); } build_data.take_snapshot(); if solver.possible { break; } // If it has hit an impossible condition, try again } build_data.spawn_list.clear(); } fn render_tile_gallery(&mut self, constraints: &[MapChunk], chunk_size: i32, build_data : &mut BuilderMap) { build_data.map = Map::new(0); let mut counter = 0; let mut x = 1; let mut y = 1; while counter < constraints.len() { render_pattern_to_map(&mut build_data.map, &constraints[counter], chunk_size, x, y); x += chunk_size + 1; if x + chunk_size > build_data.map.width { // Move to the next row x = 1; y += chunk_size + 1; if y + chunk_size > build_data.map.height { // Move to the next page build_data.take_snapshot(); build_data.map = Map::new(0); x = 1; y = 1; } } counter += 1; } build_data.take_snapshot(); } } }
You can test this with the following code:
#![allow(unused)] fn main() { let mut builder = BuilderChain::new(new_depth); builder.start_with(VoronoiCellBuilder::pythagoras()); builder.with(WaveformCollapseBuilder::new()); builder.with(AreaStartingPosition::new(XStart::CENTER, YStart::CENTER)); builder.with(CullUnreachable::new()); builder.with(VoronoiSpawning::new()); builder.with(DistantExit::new()); builder }
Updating the Prefab Builder
So here's a fun one. The PrefabBuilder is both an InitialMapBuilder and a MetaMapBuilder - with shared code between the two. Fortunately, the traits are identical - so we can implement them both and call into the main build function from each! Rust is smart enough to figure out which one we're calling based on the trait we are storing - so PrefabBuilder can be placed in either an initial or a meta map builder.
The changes all take place in prefab_builder/mod.rs:
#![allow(unused)] fn main() { use super::{InitialMapBuilder, MetaMapBuilder, BuilderMap, TileType, Position}; use rltk::RandomNumberGenerator; pub mod prefab_levels; pub mod prefab_sections; pub mod prefab_rooms; use std::collections::HashSet; #[derive(PartialEq, Copy, Clone)] #[allow(dead_code)] pub enum PrefabMode { RexLevel{ template : &'static str }, Constant{ level : prefab_levels::PrefabLevel }, Sectional{ section : prefab_sections::PrefabSection }, RoomVaults } #[allow(dead_code)] pub struct PrefabBuilder { mode: PrefabMode } impl MetaMapBuilder for PrefabBuilder { fn build_map(&mut self, rng: &mut rltk::RandomNumberGenerator, build_data : &mut BuilderMap) { self.build(rng, build_data); } } impl InitialMapBuilder for PrefabBuilder { #[allow(dead_code)] fn build_map(&mut self, rng: &mut rltk::RandomNumberGenerator, build_data : &mut BuilderMap) { self.build(rng, build_data); } } impl PrefabBuilder { #[allow(dead_code)] pub fn new() -> Box<PrefabBuilder> { Box::new(PrefabBuilder{ mode : PrefabMode::RoomVaults, }) } #[allow(dead_code)] pub fn rex_level(template : &'static str) -> Box<PrefabBuilder> { Box::new(PrefabBuilder{ mode : PrefabMode::RexLevel{ template }, }) } #[allow(dead_code)] pub fn constant(level : prefab_levels::PrefabLevel) -> Box<PrefabBuilder> { Box::new(PrefabBuilder{ mode : PrefabMode::Constant{ level }, }) } #[allow(dead_code)] pub fn sectional(section : prefab_sections::PrefabSection) -> Box<PrefabBuilder> { Box::new(PrefabBuilder{ mode : PrefabMode::Sectional{ section }, }) } #[allow(dead_code)] pub fn vaults() -> Box<PrefabBuilder> { Box::new(PrefabBuilder{ mode : PrefabMode::RoomVaults, }) } fn build(&mut self, rng : &mut RandomNumberGenerator, build_data : &mut BuilderMap) { match self.mode { PrefabMode::RexLevel{template} => self.load_rex_map(&template, build_data), PrefabMode::Constant{level} => self.load_ascii_map(&level, build_data), PrefabMode::Sectional{section} => self.apply_sectional(§ion, rng, build_data), PrefabMode::RoomVaults => self.apply_room_vaults(rng, build_data) } build_data.take_snapshot(); } fn char_to_map(&mut self, ch : char, idx: usize, build_data : &mut BuilderMap) { match ch { ' ' => build_data.map.tiles[idx] = TileType::Floor, '#' => build_data.map.tiles[idx] = TileType::Wall, '@' => { let x = idx as i32 % build_data.map.width; let y = idx as i32 / build_data.map.width; build_data.map.tiles[idx] = TileType::Floor; build_data.starting_position = Some(Position{ x:x as i32, y:y as i32 }); } '>' => build_data.map.tiles[idx] = TileType::DownStairs, 'g' => { build_data.map.tiles[idx] = TileType::Floor; build_data.spawn_list.push((idx, "Goblin".to_string())); } 'o' => { build_data.map.tiles[idx] = TileType::Floor; build_data.spawn_list.push((idx, "Orc".to_string())); } '^' => { build_data.map.tiles[idx] = TileType::Floor; build_data.spawn_list.push((idx, "Bear Trap".to_string())); } '%' => { build_data.map.tiles[idx] = TileType::Floor; build_data.spawn_list.push((idx, "Rations".to_string())); } '!' => { build_data.map.tiles[idx] = TileType::Floor; build_data.spawn_list.push((idx, "Health Potion".to_string())); } _ => { rltk::console::log(format!("Unknown glyph loading map: {}", (ch as u8) as char)); } } } #[allow(dead_code)] fn load_rex_map(&mut self, path: &str, build_data : &mut BuilderMap) { let xp_file = rltk::rex::XpFile::from_resource(path).unwrap(); for layer in &xp_file.layers { for y in 0..layer.height { for x in 0..layer.width { let cell = layer.get(x, y).unwrap(); if x < build_data.map.width as usize && y < build_data.map.height as usize { let idx = build_data.map.xy_idx(x as i32, y as i32); // We're doing some nasty casting to make it easier to type things like '#' in the match self.char_to_map(cell.ch as u8 as char, idx, build_data); } } } } } fn read_ascii_to_vec(template : &str) -> Vec<char> { let mut string_vec : Vec<char> = template.chars().filter(|a| *a != '\r' && *a !='\n').collect(); for c in string_vec.iter_mut() { if *c as u8 == 160u8 { *c = ' '; } } string_vec } #[allow(dead_code)] fn load_ascii_map(&mut self, level: &prefab_levels::PrefabLevel, build_data : &mut BuilderMap) { let string_vec = PrefabBuilder::read_ascii_to_vec(level.template); let mut i = 0; for ty in 0..level.height { for tx in 0..level.width { if tx < build_data.map.width as usize && ty < build_data.map.height as usize { let idx = build_data.map.xy_idx(tx as i32, ty as i32); if i < string_vec.len() { self.char_to_map(string_vec[i], idx, build_data); } } i += 1; } } } fn apply_previous_iteration<F>(&mut self, mut filter: F, _rng: &mut RandomNumberGenerator, build_data : &mut BuilderMap) where F : FnMut(i32, i32) -> bool { let width = build_data.map.width; build_data.spawn_list.retain(|(idx, _name)| { let x = *idx as i32 % width; let y = *idx as i32 / width; filter(x, y) }); build_data.take_snapshot(); } #[allow(dead_code)] fn apply_sectional(&mut self, section : &prefab_sections::PrefabSection, rng: &mut RandomNumberGenerator, build_data : &mut BuilderMap) { use prefab_sections::*; let string_vec = PrefabBuilder::read_ascii_to_vec(section.template); // Place the new section let chunk_x; match section.placement.0 { HorizontalPlacement::Left => chunk_x = 0, HorizontalPlacement::Center => chunk_x = (build_data.map.width / 2) - (section.width as i32 / 2), HorizontalPlacement::Right => chunk_x = (build_data.map.width-1) - section.width as i32 } let chunk_y; match section.placement.1 { VerticalPlacement::Top => chunk_y = 0, VerticalPlacement::Center => chunk_y = (build_data.map.height / 2) - (section.height as i32 / 2), VerticalPlacement::Bottom => chunk_y = (build_data.map.height-1) - section.height as i32 } // Build the map self.apply_previous_iteration(|x,y| { x < chunk_x || x > (chunk_x + section.width as i32) || y < chunk_y || y > (chunk_y + section.height as i32) }, rng, build_data); let mut i = 0; for ty in 0..section.height { for tx in 0..section.width { if tx > 0 && tx < build_data.map.width as usize -1 && ty < build_data.map.height as usize -1 && ty > 0 { let idx = build_data.map.xy_idx(tx as i32 + chunk_x, ty as i32 + chunk_y); if i < string_vec.len() { self.char_to_map(string_vec[i], idx, build_data); } } i += 1; } } build_data.take_snapshot(); } fn apply_room_vaults(&mut self, rng : &mut RandomNumberGenerator, build_data : &mut BuilderMap) { use prefab_rooms::*; // Apply the previous builder, and keep all entities it spawns (for now) self.apply_previous_iteration(|_x,_y| true, rng, build_data); // Do we want a vault at all? let vault_roll = rng.roll_dice(1, 6) + build_data.map.depth; if vault_roll < 4 { return; } // Note that this is a place-holder and will be moved out of this function let master_vault_list = vec![TOTALLY_NOT_A_TRAP, CHECKERBOARD, SILLY_SMILE]; // Filter the vault list down to ones that are applicable to the current depth let mut possible_vaults : Vec<&PrefabRoom> = master_vault_list .iter() .filter(|v| { build_data.map.depth >= v.first_depth && build_data.map.depth <= v.last_depth }) .collect(); if possible_vaults.is_empty() { return; } // Bail out if there's nothing to build let n_vaults = i32::min(rng.roll_dice(1, 3), possible_vaults.len() as i32); let mut used_tiles : HashSet<usize> = HashSet::new(); for _i in 0..n_vaults { let vault_index = if possible_vaults.len() == 1 { 0 } else { (rng.roll_dice(1, possible_vaults.len() as i32)-1) as usize }; let vault = possible_vaults[vault_index]; // We'll make a list of places in which the vault could fit let mut vault_positions : Vec<Position> = Vec::new(); let mut idx = 0usize; loop { let x = (idx % build_data.map.width as usize) as i32; let y = (idx / build_data.map.width as usize) as i32; // Check that we won't overflow the map if x > 1 && (x+vault.width as i32) < build_data.map.width-2 && y > 1 && (y+vault.height as i32) < build_data.map.height-2 { let mut possible = true; for ty in 0..vault.height as i32 { for tx in 0..vault.width as i32 { let idx = build_data.map.xy_idx(tx + x, ty + y); if build_data.map.tiles[idx] != TileType::Floor { possible = false; } if used_tiles.contains(&idx) { possible = false; } } } if possible { vault_positions.push(Position{ x,y }); break; } } idx += 1; if idx >= build_data.map.tiles.len()-1 { break; } } if !vault_positions.is_empty() { let pos_idx = if vault_positions.len()==1 { 0 } else { (rng.roll_dice(1, vault_positions.len() as i32)-1) as usize }; let pos = &vault_positions[pos_idx]; let chunk_x = pos.x; let chunk_y = pos.y; let width = build_data.map.width; // The borrow checker really doesn't like it let height = build_data.map.height; // when we access `self` inside the `retain` build_data.spawn_list.retain(|e| { let idx = e.0 as i32; let x = idx % width; let y = idx / height; x < chunk_x || x > chunk_x + vault.width as i32 || y < chunk_y || y > chunk_y + vault.height as i32 }); let string_vec = PrefabBuilder::read_ascii_to_vec(vault.template); let mut i = 0; for ty in 0..vault.height { for tx in 0..vault.width { let idx = build_data.map.xy_idx(tx as i32 + chunk_x, ty as i32 + chunk_y); if i < string_vec.len() { self.char_to_map(string_vec[i], idx, build_data); } used_tiles.insert(idx); i += 1; } } build_data.take_snapshot(); possible_vaults.remove(vault_index); } } } } }
You can test our recent changes with the following code in random_builder (in map_builders/mod.rs):
#![allow(unused)] fn main() { let mut builder = BuilderChain::new(new_depth); builder.start_with(VoronoiCellBuilder::pythagoras()); builder.with(WaveformCollapseBuilder::new()); builder.with(PrefabBuilder::vaults()); builder.with(AreaStartingPosition::new(XStart::CENTER, YStart::CENTER)); builder.with(CullUnreachable::new()); builder.with(VoronoiSpawning::new()); builder.with(PrefabBuilder::sectional(prefab_builder::prefab_sections::UNDERGROUND_FORT)); builder.with(DistantExit::new()); builder }
This demonstrates the power of our approach - we're putting a lot of functionality together from small building blocks. In this example we are:
- Starting with a map generated with the
VoronoiBuilderinPythagorasmode. - Modifying the map with a
WaveformCollapseBuilderrun, which will rearrange the map like a jigsaw puzzle. - Modifying the map by placing vaults, via the
PrefabBuilder(in Vaults mode). - Modifying the map with
AreaStartingPositionsindicating that we'd like to start near the middle of the map. - Modifying the map to cull unreachable areas.
- Modifying the map to spawn entities using a Voronoi spawning method.
- Modifying the map to add an underground fortress, again using the
PrefabBuilder. - Modifying the map to add an exit staircase, in the most distant location.
Delete the MapBuilder Trait and bits from common
Now that we have the builder mechanism in place, there's some old code we can delete. From common.rs, we can delete remove_unreachable_areas_returning_most_distant and generate_voronoi_spawn_regions; we've replaced them with builder steps.
We can also open map_builders/mod.rs and delete the MapBuilder trait and its implementation: we've completely replaced it now.
Randomize
As usual, we'd like to go back to having map generation be random. We're going to break the process up into two steps. We'll make a new function, random_initial_builder that rolls a dice and picks the starting builder. It also returns a bool, indicating whether or not we picked an algorithm that provides room data. The basic function should look familiar, but we've got rid of all the Box::new calls - the constructors make boxes for us, now:
#![allow(unused)] fn main() { fn random_initial_builder(rng: &mut rltk::RandomNumberGenerator) -> (Box<dyn InitialMapBuilder>, bool) { let builder = rng.roll_dice(1, 17); let result : (Box<dyn InitialMapBuilder>, bool); match builder { 1 => result = (BspDungeonBuilder::new(), true), 2 => result = (BspInteriorBuilder::new(), true), 3 => result = (CellularAutomataBuilder::new(), false), 4 => result = (DrunkardsWalkBuilder::open_area(), false), 5 => result = (DrunkardsWalkBuilder::open_halls(), false), 6 => result = (DrunkardsWalkBuilder::winding_passages(), false), 7 => result = (DrunkardsWalkBuilder::fat_passages(), false), 8 => result = (DrunkardsWalkBuilder::fearful_symmetry(), false), 9 => result = (MazeBuilder::new(), false), 10 => result = (DLABuilder::walk_inwards(), false), 11 => result = (DLABuilder::walk_outwards(), false), 12 => result = (DLABuilder::central_attractor(), false), 13 => result = (DLABuilder::insectoid(), false), 14 => result = (VoronoiCellBuilder::pythagoras(), false), 15 => result = (VoronoiCellBuilder::manhattan(), false), 16 => result = (PrefabBuilder::constant(prefab_builder::prefab_levels::WFC_POPULATED), false), _ => result = (SimpleMapBuilder::new(), true) } result } }
This is a pretty straightforward function - we roll a dice, match on the result table and return the builder and room information we picked. Now we'll modify our random_builder function to use it:
#![allow(unused)] fn main() { pub fn random_builder(new_depth: i32, rng: &mut rltk::RandomNumberGenerator) -> BuilderChain { let mut builder = BuilderChain::new(new_depth); let (random_starter, has_rooms) = random_initial_builder(rng); builder.start_with(random_starter); if has_rooms { builder.with(RoomBasedSpawner::new()); builder.with(RoomBasedStairs::new()); builder.with(RoomBasedStartingPosition::new()); } else { builder.with(AreaStartingPosition::new(XStart::CENTER, YStart::CENTER)); builder.with(CullUnreachable::new()); builder.with(VoronoiSpawning::new()); builder.with(DistantExit::new()); } if rng.roll_dice(1, 3)==1 { builder.with(WaveformCollapseBuilder::new()); } if rng.roll_dice(1, 20)==1 { builder.with(PrefabBuilder::sectional(prefab_builder::prefab_sections::UNDERGROUND_FORT)); } builder.with(PrefabBuilder::vaults()); builder } }
This should look familiar. This function:
- Selects a random room using the function we just created.
- If the builder provides room data, we chain
RoomBasedSpawner,RoomBasedStairsandRoomBasedStartingPositiosn- the three important steps required for room data. - If the builder doesn't provide room information, we chain
AreaStartingPosition,CullUnreachable,VoronoiSpawningandDistantExit- the defaults we used to apply inside each builder. - We roll a 3-sided die; if it comes up 1 - we apply a
WaveformCollapseBuilderto rearrange the map. - We roll a 20-sided die; if it comes up 1 - we apply our Underground Fort prefab.
- We apply vault creation to the final map, giving a chance for pre-made rooms to appear.
Wrap-Up
This has been an enormous chapter, but we've accomplished a lot:
- We now have a consistent builder interface for chaining as many meta-map modifiers as we want to our build chain. This should let us build the maps we want.
- Each builder now does just one task - so it's much more obvious where to go if you need to fix/debug them.
- Builders are no longer responsible for making other builders - so we've culled a swathe of code and moved the opportunity for bugs to creep in to just one (simple) control flow.
This sets the stage for the next chapter, which will look at more ways to use filters to modify your map.
...
The source code for this chapter may be found here
Run this chapter's example with web assembly, in your browser (WebGL2 required)
Copyright (C) 2019, Herbert Wolverson.
Fun With Layers
About this tutorial
This tutorial is free and open source, and all code uses the MIT license - so you are free to do with it as you like. My hope is that you will enjoy the tutorial, and make great games!
If you enjoy this and would like me to keep writing, please consider supporting my Patreon.
Now that we have a nice, clean layering system we'll take the opportunity to play with it a bit. This chapter is a collection of fun things you can do with layers, and will introduce a few new layer types. It's meant to whet your appetite to write more: the sky really is the limit!
Existing Algorithms as Meta-Builders
Let's start by adjusting some of our existing algorithms to be useful as filters.
Applying Cellular Automata as a meta-builder
When we wrote the Cellular Automata system, we aimed for a generic cavern builder. The algorithm is capable of quite a bit more than that - each iteration is basically a "meta builder" running on the previous iteration. A simple tweak allows it to also be a meta-builder that only runs a single iteration.
We'll start by moving the code for a single iteration into its own function:
#![allow(unused)] fn main() { fn apply_iteration(&mut self, build_data : &mut BuilderMap) { let mut newtiles = build_data.map.tiles.clone(); for y in 1..build_data.map.height-1 { for x in 1..build_data.map.width-1 { let idx = build_data.map.xy_idx(x, y); let mut neighbors = 0; if build_data.map.tiles[idx - 1] == TileType::Wall { neighbors += 1; } if build_data.map.tiles[idx + 1] == TileType::Wall { neighbors += 1; } if build_data.map.tiles[idx - build_data.map.width as usize] == TileType::Wall { neighbors += 1; } if build_data.map.tiles[idx + build_data.map.width as usize] == TileType::Wall { neighbors += 1; } if build_data.map.tiles[idx - (build_data.map.width as usize - 1)] == TileType::Wall { neighbors += 1; } if build_data.map.tiles[idx - (build_data.map.width as usize + 1)] == TileType::Wall { neighbors += 1; } if build_data.map.tiles[idx + (build_data.map.width as usize - 1)] == TileType::Wall { neighbors += 1; } if build_data.map.tiles[idx + (build_data.map.width as usize + 1)] == TileType::Wall { neighbors += 1; } if neighbors > 4 || neighbors == 0 { newtiles[idx] = TileType::Wall; } else { newtiles[idx] = TileType::Floor; } } } build_data.map.tiles = newtiles.clone(); build_data.take_snapshot(); } }
The build function is easily modified to call this on each iteration:
#![allow(unused)] fn main() { // Now we iteratively apply cellular automata rules for _i in 0..15 { self.apply_iteration(build_data); } }
Finally, we'll add an implementation of MetaMapBuilder to the mix:
#![allow(unused)] fn main() { impl MetaMapBuilder for CellularAutomataBuilder { #[allow(dead_code)] fn build_map(&mut self, _rng: &mut rltk::RandomNumberGenerator, build_data : &mut BuilderMap) { self.apply_iteration(build_data); } } }
See how we're calling a single iteration, instead of replacing the whole map? This shows how we can apply the cellular automata rules to the map - and change the resultant character quite a bit.
Now lets modify map_builders/mod.rs's random_builder to force it to use this as an example:
#![allow(unused)] fn main() { pub fn random_builder(new_depth: i32, rng: &mut rltk::RandomNumberGenerator) -> BuilderChain { let mut builder = BuilderChain::new(new_depth); builder.start_with(VoronoiCellBuilder::pythagoras()); builder.with(CellularAutomataBuilder::new()); builder.with(AreaStartingPosition::new(XStart::CENTER, YStart::CENTER)); builder.with(CullUnreachable::new()); builder.with(VoronoiSpawning::new()); builder.with(DistantExit::new()); builder } }
If you cargo run the project now, you'll see something like this:
 .
.
Eroding a boxy map with drunken dwarves
The Drunken Walk algorithm can also make a nice post-processing effect, with very minimal modification. In drunkard.rs, simply add the following:
#![allow(unused)] fn main() { impl MetaMapBuilder for DrunkardsWalkBuilder { #[allow(dead_code)] fn build_map(&mut self, rng: &mut rltk::RandomNumberGenerator, build_data : &mut BuilderMap) { self.build(rng, build_data); } } }
You can test it by once again modifying random_builder:
#![allow(unused)] fn main() { let mut builder = BuilderChain::new(new_depth); builder.start_with(SimpleMapBuilder::new()); builder.with(DrunkardsWalkBuilder::winding_passages()); builder.with(AreaStartingPosition::new(XStart::CENTER, YStart::CENTER)); builder.with(CullUnreachable::new()); builder.with(VoronoiSpawning::new()); builder.with(DistantExit::new()); builder }
If you cargo run the project, you'll see something like this:
 .
.
Notice how the initial boxy design now looks a bit more natural, because drunken dwarves have carved out sections of the map!
Attacking your boxy map with Diffusion-Limited Aggregation
DLA can also be modified to erode an existing, boxy map. Simply add the MetaBuilder trait to dla.rs:
#![allow(unused)] fn main() { impl MetaMapBuilder for DLABuilder { #[allow(dead_code)] fn build_map(&mut self, rng: &mut rltk::RandomNumberGenerator, build_data : &mut BuilderMap) { self.build(rng, build_data); } } }
We'll also add a new mode, heavy_erosion - it's the same as "walk inwards", but wants a greater percentage of floor space:
#![allow(unused)] fn main() { #[allow(dead_code)] pub fn heavy_erosion() -> Box<DLABuilder> { Box::new(DLABuilder{ algorithm: DLAAlgorithm::WalkInwards, brush_size: 2, symmetry: Symmetry::None, floor_percent: 0.35, }) } }
And modify your random_builder test harness:
#![allow(unused)] fn main() { let mut builder = BuilderChain::new(new_depth); builder.start_with(SimpleMapBuilder::new()); builder.with(DLABuilder::heavy_erosion()); builder.with(AreaStartingPosition::new(XStart::CENTER, YStart::CENTER)); builder.with(CullUnreachable::new()); builder.with(VoronoiSpawning::new()); builder.with(DistantExit::new()); builder }
If you cargo run the project, you'll see something like this:
 .
.
Some New Meta-Builders
There's also plenty of scope to write new map filters. We'll explore a few of the more interesting ones in this section. Pretty much anything you might use as an image filter in a program like Photoshop (or the GIMP!) could be adapted for this purpose. How useful a given filter is remains an open/interesting question!
Eroding rooms
Nethack-style boxy rooms make for very early-D&D type play, but people often remark that they aren't all that visually pleasing or interesting. One way to keep the basic room style, but get a more organic look, is to run drunkard's walk inside each room. I like to call this "exploding the room" - because it looks a bit like you set off dynamite in each room. In map_builders/, make a new file room_exploder.rs:
#![allow(unused)] fn main() { use super::{MetaMapBuilder, BuilderMap, TileType, paint, Symmetry, Rect}; use rltk::RandomNumberGenerator; pub struct RoomExploder {} impl MetaMapBuilder for RoomExploder { fn build_map(&mut self, rng: &mut rltk::RandomNumberGenerator, build_data : &mut BuilderMap) { self.build(rng, build_data); } } impl RoomExploder { #[allow(dead_code)] pub fn new() -> Box<RoomExploder> { Box::new(RoomExploder{}) } fn build(&mut self, rng : &mut RandomNumberGenerator, build_data : &mut BuilderMap) { let rooms : Vec<Rect>; if let Some(rooms_builder) = &build_data.rooms { rooms = rooms_builder.clone(); } else { panic!("Room Explosions require a builder with room structures"); } for room in rooms.iter() { let start = room.center(); let n_diggers = rng.roll_dice(1, 20)-5; if n_diggers > 0 { for _i in 0..n_diggers { let mut drunk_x = start.0; let mut drunk_y = start.1; let mut drunk_life = 20; let mut did_something = false; while drunk_life > 0 { let drunk_idx = build_data.map.xy_idx(drunk_x, drunk_y); if build_data.map.tiles[drunk_idx] == TileType::Wall { did_something = true; } paint(&mut build_data.map, Symmetry::None, 1, drunk_x, drunk_y); build_data.map.tiles[drunk_idx] = TileType::DownStairs; let stagger_direction = rng.roll_dice(1, 4); match stagger_direction { 1 => { if drunk_x > 2 { drunk_x -= 1; } } 2 => { if drunk_x < build_data.map.width-2 { drunk_x += 1; } } 3 => { if drunk_y > 2 { drunk_y -=1; } } _ => { if drunk_y < build_data.map.height-2 { drunk_y += 1; } } } drunk_life -= 1; } if did_something { build_data.take_snapshot(); } for t in build_data.map.tiles.iter_mut() { if *t == TileType::DownStairs { *t = TileType::Floor; } } } } } } } }
There's nothing too surprising in this code: it takes the rooms list from the parent build data, and then iterates each room. A random number (which can be zero) of drunkards is then run from the center of each room, with a short lifespan, carving out the edges of each room. You can test this with the following random_builder code:
#![allow(unused)] fn main() { let mut builder = BuilderChain::new(new_depth); builder.start_with(BspDungeonBuilder::new()); builder.with(RoomExploder::new()); builder.with(AreaStartingPosition::new(XStart::CENTER, YStart::CENTER)); builder.with(CullUnreachable::new()); builder.with(VoronoiSpawning::new()); builder.with(DistantExit::new()); builder }
 .
.
Rounding Room Corners
Another quick and easy way to make a boxy map look less rectangular is to smooth the corners a bit. Add room_corner_rounding.rs to map_builders/:
#![allow(unused)] fn main() { use super::{MetaMapBuilder, BuilderMap, TileType, Rect}; use rltk::RandomNumberGenerator; pub struct RoomCornerRounder {} impl MetaMapBuilder for RoomCornerRounder { fn build_map(&mut self, rng: &mut rltk::RandomNumberGenerator, build_data : &mut BuilderMap) { self.build(rng, build_data); } } impl RoomCornerRounder { #[allow(dead_code)] pub fn new() -> Box<RoomCornerRounder> { Box::new(RoomCornerRounder{}) } fn fill_if_corner(&mut self, x: i32, y: i32, build_data : &mut BuilderMap) { let w = build_data.map.width; let h = build_data.map.height; let idx = build_data.map.xy_idx(x, y); let mut neighbor_walls = 0; if x > 0 && build_data.map.tiles[idx-1] == TileType::Wall { neighbor_walls += 1; } if y > 0 && build_data.map.tiles[idx-w as usize] == TileType::Wall { neighbor_walls += 1; } if x < w-2 && build_data.map.tiles[idx+1] == TileType::Wall { neighbor_walls += 1; } if y < h-2 && build_data.map.tiles[idx+w as usize] == TileType::Wall { neighbor_walls += 1; } if neighbor_walls == 2 { build_data.map.tiles[idx] = TileType::Wall; } } fn build(&mut self, _rng : &mut RandomNumberGenerator, build_data : &mut BuilderMap) { let rooms : Vec<Rect>; if let Some(rooms_builder) = &build_data.rooms { rooms = rooms_builder.clone(); } else { panic!("Room Rounding require a builder with room structures"); } for room in rooms.iter() { self.fill_if_corner(room.x1+1, room.y1+1, build_data); self.fill_if_corner(room.x2, room.y1+1, build_data); self.fill_if_corner(room.x1+1, room.y2, build_data); self.fill_if_corner(room.x2, room.y2, build_data); build_data.take_snapshot(); } } } }
The boilerplate (repeated code) should look familiar by now, so we'll focus on the algorithm in build:
- We obtain a list of rooms, and
panic!if there aren't any. - For each of the 4 corners of the room, we call a new function
fill_if_corner. fill_if_cornercounts each of the neighboring tiles to see if it is a wall. If there are exactly 2 walls, then this tile is eligible to become a corner - so we fill in a wall.
You can try it out with the following random_builder code:
#![allow(unused)] fn main() { let mut builder = BuilderChain::new(new_depth); builder.start_with(BspDungeonBuilder::new()); builder.with(RoomCornerRounder::new()); builder.with(AreaStartingPosition::new(XStart::CENTER, YStart::CENTER)); builder.with(CullUnreachable::new()); builder.with(VoronoiSpawning::new()); builder.with(DistantExit::new()); builder }
The result (if you cargo run) should be something like this:
 .
.
Decoupling Rooms and Corridors
There's a fair amount of shared code between BSP room placement and "simple map" room placement - but with different corridor decision-making. What if we were to de-couple the stages - so the room algorithms decide where the rooms go, another algorithm draws them (possibly changing how they are drawn), and a third algorithm places corridors? Our improved framework supports this with just a bit of algorithm tweaking.
Here's simple_map.rs with the corridor code removed:
#![allow(unused)] fn main() { use super::{InitialMapBuilder, BuilderMap, Rect, apply_room_to_map, apply_horizontal_tunnel, apply_vertical_tunnel }; use rltk::RandomNumberGenerator; pub struct SimpleMapBuilder {} impl InitialMapBuilder for SimpleMapBuilder { #[allow(dead_code)] fn build_map(&mut self, rng: &mut rltk::RandomNumberGenerator, build_data : &mut BuilderMap) { self.build_rooms(rng, build_data); } } impl SimpleMapBuilder { #[allow(dead_code)] pub fn new() -> Box<SimpleMapBuilder> { Box::new(SimpleMapBuilder{}) } fn build_rooms(&mut self, rng : &mut RandomNumberGenerator, build_data : &mut BuilderMap) { const MAX_ROOMS : i32 = 30; const MIN_SIZE : i32 = 6; const MAX_SIZE : i32 = 10; let mut rooms : Vec<Rect> = Vec::new(); for i in 0..MAX_ROOMS { let w = rng.range(MIN_SIZE, MAX_SIZE); let h = rng.range(MIN_SIZE, MAX_SIZE); let x = rng.roll_dice(1, build_data.map.width - w - 1) - 1; let y = rng.roll_dice(1, build_data.map.height - h - 1) - 1; let new_room = Rect::new(x, y, w, h); let mut ok = true; for other_room in rooms.iter() { if new_room.intersect(other_room) { ok = false } } if ok { apply_room_to_map(&mut build_data.map, &new_room); build_data.take_snapshot(); rooms.push(new_room); build_data.take_snapshot(); } } build_data.rooms = Some(rooms); } } }
Other than renaming rooms_and_corridors to just build_rooms, the only change is removing the dice roll to place corridors.
Lets make a new file, map_builders/rooms_corridors_dogleg.rs. This is where we place the corridors. For now, we'll use the same algorithm we just removed from SimpleMapBuilder:
#![allow(unused)] fn main() { use super::{MetaMapBuilder, BuilderMap, Rect, apply_horizontal_tunnel, apply_vertical_tunnel }; use rltk::RandomNumberGenerator; pub struct DoglegCorridors {} impl MetaMapBuilder for DoglegCorridors { #[allow(dead_code)] fn build_map(&mut self, rng: &mut rltk::RandomNumberGenerator, build_data : &mut BuilderMap) { self.corridors(rng, build_data); } } impl DoglegCorridors { #[allow(dead_code)] pub fn new() -> Box<DoglegCorridors> { Box::new(DoglegCorridors{}) } fn corridors(&mut self, rng : &mut RandomNumberGenerator, build_data : &mut BuilderMap) { let rooms : Vec<Rect>; if let Some(rooms_builder) = &build_data.rooms { rooms = rooms_builder.clone(); } else { panic!("Dogleg Corridors require a builder with room structures"); } for (i,room) in rooms.iter().enumerate() { if i > 0 { let (new_x, new_y) = room.center(); let (prev_x, prev_y) = rooms[i as usize -1].center(); if rng.range(0,2) == 1 { apply_horizontal_tunnel(&mut build_data.map, prev_x, new_x, prev_y); apply_vertical_tunnel(&mut build_data.map, prev_y, new_y, new_x); } else { apply_vertical_tunnel(&mut build_data.map, prev_y, new_y, prev_x); apply_horizontal_tunnel(&mut build_data.map, prev_x, new_x, new_y); } build_data.take_snapshot(); } } } } }
Again - this is the code we just removed, but placed into a new builder by itself. So there's really nothing new. We can adjust random_builder to test this code:
#![allow(unused)] fn main() { let mut builder = BuilderChain::new(new_depth); builder.start_with(SimpleMapBuilder::new()); builder.with(DoglegCorridors::new()); builder.with(RoomBasedSpawner::new()); builder.with(RoomBasedStairs::new()); builder.with(RoomBasedStartingPosition::new()); builder }
Testing it with cargo run should show you that rooms are built, and then corridors:
 .
.
Same again with BSP Dungeons
It's easy to do the same to our BSPDungeonBuilder. In bsp_dungeon.rs, we also trim out the corridor code. We'll just include the build function for brevity:
#![allow(unused)] fn main() { fn build(&mut self, rng : &mut RandomNumberGenerator, build_data : &mut BuilderMap) { let mut rooms : Vec<Rect> = Vec::new(); self.rects.clear(); self.rects.push( Rect::new(2, 2, build_data.map.width-5, build_data.map.height-5) ); // Start with a single map-sized rectangle let first_room = self.rects[0]; self.add_subrects(first_room); // Divide the first room // Up to 240 times, we get a random rectangle and divide it. If its possible to squeeze a // room in there, we place it and add it to the rooms list. let mut n_rooms = 0; while n_rooms < 240 { let rect = self.get_random_rect(rng); let candidate = self.get_random_sub_rect(rect, rng); if self.is_possible(candidate, &build_data.map) { apply_room_to_map(&mut build_data.map, &candidate); rooms.push(candidate); self.add_subrects(rect); build_data.take_snapshot(); } n_rooms += 1; } build_data.rooms = Some(rooms); } }
We'll also move our BSP corridor code into a new builder, without the room sorting (we'll be touching on sorting in the next heading!). Create the new file map_builders/rooms_corridors_bsp.rs:
#![allow(unused)] fn main() { use super::{MetaMapBuilder, BuilderMap, Rect, draw_corridor }; use rltk::RandomNumberGenerator; pub struct BspCorridors {} impl MetaMapBuilder for BspCorridors { #[allow(dead_code)] fn build_map(&mut self, rng: &mut rltk::RandomNumberGenerator, build_data : &mut BuilderMap) { self.corridors(rng, build_data); } } impl BspCorridors { #[allow(dead_code)] pub fn new() -> Box<BspCorridors> { Box::new(BspCorridors{}) } fn corridors(&mut self, rng : &mut RandomNumberGenerator, build_data : &mut BuilderMap) { let rooms : Vec<Rect>; if let Some(rooms_builder) = &build_data.rooms { rooms = rooms_builder.clone(); } else { panic!("BSP Corridors require a builder with room structures"); } for i in 0..rooms.len()-1 { let room = rooms[i]; let next_room = rooms[i+1]; let start_x = room.x1 + (rng.roll_dice(1, i32::abs(room.x1 - room.x2))-1); let start_y = room.y1 + (rng.roll_dice(1, i32::abs(room.y1 - room.y2))-1); let end_x = next_room.x1 + (rng.roll_dice(1, i32::abs(next_room.x1 - next_room.x2))-1); let end_y = next_room.y1 + (rng.roll_dice(1, i32::abs(next_room.y1 - next_room.y2))-1); draw_corridor(&mut build_data.map, start_x, start_y, end_x, end_y); build_data.take_snapshot(); } } } }
Again, this is the corridor code from BspDungeonBuilder - just fitted into its own builder stage. You can prove that it works by modifying random_builder once again:
#![allow(unused)] fn main() { let mut builder = BuilderChain::new(new_depth); builder.start_with(BspDungeonBuilder::new()); builder.with(BspCorridors::new()); builder.with(RoomBasedSpawner::new()); builder.with(RoomBasedStairs::new()); builder.with(RoomBasedStartingPosition::new()); builder }
If you cargo run it, you'll see something like this:
 .
.
That looks like it works - but if you pay close attention, you'll see why we sorted the rooms in the original algorithm: there's lots of overlap between rooms/corridors, and corridors don't trend towards the shortest path. This was deliberate - we need to make a RoomSorter builder, to give us some more map-building options. Lets create map_builders/room_sorter.rs:
#![allow(unused)] fn main() { use super::{MetaMapBuilder, BuilderMap }; use rltk::RandomNumberGenerator; pub struct RoomSorter {} impl MetaMapBuilder for RoomSorter { #[allow(dead_code)] fn build_map(&mut self, rng: &mut rltk::RandomNumberGenerator, build_data : &mut BuilderMap) { self.sorter(rng, build_data); } } impl RoomSorter { #[allow(dead_code)] pub fn new() -> Box<RoomSorter> { Box::new(RoomSorter{}) } fn sorter(&mut self, _rng : &mut RandomNumberGenerator, build_data : &mut BuilderMap) { build_data.rooms.as_mut().unwrap().sort_by(|a,b| a.x1.cmp(&b.x1) ); } } }
This is exactly the same sorting we used before, and we can test it by inserting it into our builder sequence:
#![allow(unused)] fn main() { let mut builder = BuilderChain::new(new_depth); builder.start_with(BspDungeonBuilder::new()); builder.with(RoomSorter::new()); builder.with(BspCorridors::new()); builder.with(RoomBasedSpawner::new()); builder.with(RoomBasedStairs::new()); builder.with(RoomBasedStartingPosition::new()); builder }
If you cargo run it, you'll see something like this:
 .
.
That's better - we've restored the look and feel of our BSP Dungeon Builder!
More Room Sorting Options
Breaking the sorter into its own step is only really useful if we're going to come up with some different ways to sort the rooms! We're currently sorting by the left-most entry - giving a map that gradually works its way East, but jumps around.
Lets add an enum to give us more sorting options:
#![allow(unused)] fn main() { use super::{MetaMapBuilder, BuilderMap }; use rltk::RandomNumberGenerator; pub enum RoomSort { LEFTMOST } pub struct RoomSorter { sort_by : RoomSort } impl MetaMapBuilder for RoomSorter { #[allow(dead_code)] fn build_map(&mut self, rng: &mut rltk::RandomNumberGenerator, build_data : &mut BuilderMap) { self.sorter(rng, build_data); } } impl RoomSorter { #[allow(dead_code)] pub fn new(sort_by : RoomSort) -> Box<RoomSorter> { Box::new(RoomSorter{ sort_by }) } fn sorter(&mut self, _rng : &mut RandomNumberGenerator, build_data : &mut BuilderMap) { match self.sort_by { RoomSort::LEFTMOST => build_data.rooms.as_mut().unwrap().sort_by(|a,b| a.x1.cmp(&b.x1) ) } } } }
Simple enough: we store the sorting algorithm we wish to use in the structure, and match on it when it comes time to execute.
Lets add RIGHTMOST - which will simply reverse the sort:
#![allow(unused)] fn main() { pub enum RoomSort { LEFTMOST, RIGHTMOST } ... fn sorter(&mut self, _rng : &mut RandomNumberGenerator, build_data : &mut BuilderMap) { match self.sort_by { RoomSort::LEFTMOST => build_data.rooms.as_mut().unwrap().sort_by(|a,b| a.x1.cmp(&b.x1) ), RoomSort::RIGHTMOST => build_data.rooms.as_mut().unwrap().sort_by(|a,b| b.x2.cmp(&a.x2) ) } } }
That's so simple it's basically cheating! Lets add TOPMOST and BOTTOMMOST as well, for completeness of this type of sort:
#![allow(unused)] fn main() { #[allow(dead_code)] pub enum RoomSort { LEFTMOST, RIGHTMOST, TOPMOST, BOTTOMMOST } ... fn sorter(&mut self, _rng : &mut RandomNumberGenerator, build_data : &mut BuilderMap) { match self.sort_by { RoomSort::LEFTMOST => build_data.rooms.as_mut().unwrap().sort_by(|a,b| a.x1.cmp(&b.x1) ), RoomSort::RIGHTMOST => build_data.rooms.as_mut().unwrap().sort_by(|a,b| b.x2.cmp(&a.x2) ), RoomSort::TOPMOST => build_data.rooms.as_mut().unwrap().sort_by(|a,b| a.y1.cmp(&b.y1) ), RoomSort::BOTTOMMOST => build_data.rooms.as_mut().unwrap().sort_by(|a,b| b.y2.cmp(&a.y2) ) } } }
Here's BOTTOMMOST in action:
 .
.
See how that changes the character of the map without really changing the structure? It's amazing what you can do with little tweaks!
We'll add another sort, CENTRAL. This time, we're sorting by distance from the map center:
#![allow(unused)] fn main() { #[allow(dead_code)] pub enum RoomSort { LEFTMOST, RIGHTMOST, TOPMOST, BOTTOMMOST, CENTRAL } ... fn sorter(&mut self, _rng : &mut RandomNumberGenerator, build_data : &mut BuilderMap) { match self.sort_by { RoomSort::LEFTMOST => build_data.rooms.as_mut().unwrap().sort_by(|a,b| a.x1.cmp(&b.x1) ), RoomSort::RIGHTMOST => build_data.rooms.as_mut().unwrap().sort_by(|a,b| b.x2.cmp(&a.x2) ), RoomSort::TOPMOST => build_data.rooms.as_mut().unwrap().sort_by(|a,b| a.y1.cmp(&b.y1) ), RoomSort::BOTTOMMOST => build_data.rooms.as_mut().unwrap().sort_by(|a,b| b.y2.cmp(&a.y2) ), RoomSort::CENTRAL => { let map_center = rltk::Point::new( build_data.map.width / 2, build_data.map.height / 2 ); let center_sort = |a : &Rect, b : &Rect| { let a_center = a.center(); let a_center_pt = rltk::Point::new(a_center.0, a_center.1); let b_center = b.center(); let b_center_pt = rltk::Point::new(b_center.0, b_center.1); let distance_a = rltk::DistanceAlg::Pythagoras.distance2d(a_center_pt, map_center); let distance_b = rltk::DistanceAlg::Pythagoras.distance2d(b_center_pt, map_center); distance_a.partial_cmp(&distance_b).unwrap() }; build_data.rooms.as_mut().unwrap().sort_by(center_sort); } } } }
You can modify your random_builder function to use this:
#![allow(unused)] fn main() { let mut builder = BuilderChain::new(new_depth); builder.start_with(BspDungeonBuilder::new()); builder.with(RoomSorter::new(RoomSort::CENTRAL)); builder.with(BspCorridors::new()); builder.with(RoomBasedSpawner::new()); builder.with(RoomBasedStairs::new()); builder.with(RoomBasedStartingPosition::new()); builder }
And cargo run will give you something like this:
 .
.
Notice how all roads now lead to the middle - for a very connected map!
Cleaning up our random builder
Now that we're getting towards the end of this section (not there yet!), lets take the time to really take advantage of what we've built so far. We're going to completely restructure the way we're selecting a random build pattern.
Room-based spawning isn't as embarrassingly predictable as it used to be, now. So lets make a function that exposes all of the room variety we've built so far:
#![allow(unused)] fn main() { fn random_room_builder(rng: &mut rltk::RandomNumberGenerator, builder : &mut BuilderChain) { let build_roll = rng.roll_dice(1, 3); match build_roll { 1 => builder.start_with(SimpleMapBuilder::new()), 2 => builder.start_with(BspDungeonBuilder::new()), _ => builder.start_with(BspInteriorBuilder::new()) } // BSP Interior still makes holes in the walls if build_roll != 3 { // Sort by one of the 5 available algorithms let sort_roll = rng.roll_dice(1, 5); match sort_roll { 1 => builder.with(RoomSorter::new(RoomSort::LEFTMOST)), 2 => builder.with(RoomSorter::new(RoomSort::RIGHTMOST)), 3 => builder.with(RoomSorter::new(RoomSort::TOPMOST)), 4 => builder.with(RoomSorter::new(RoomSort::BOTTOMMOST)), _ => builder.with(RoomSorter::new(RoomSort::CENTRAL)), } let corridor_roll = rng.roll_dice(1, 2); match corridor_roll { 1 => builder.with(DoglegCorridors::new()), _ => builder.with(BspCorridors::new()) } let modifier_roll = rng.roll_dice(1, 6); match modifier_roll { 1 => builder.with(RoomExploder::new()), 2 => builder.with(RoomCornerRounder::new()), _ => {} } } let start_roll = rng.roll_dice(1, 2); match start_roll { 1 => builder.with(RoomBasedStartingPosition::new()), _ => { let (start_x, start_y) = random_start_position(rng); builder.with(AreaStartingPosition::new(start_x, start_y)); } } let exit_roll = rng.roll_dice(1, 2); match exit_roll { 1 => builder.with(RoomBasedStairs::new()), _ => builder.with(DistantExit::new()) } let spawn_roll = rng.roll_dice(1, 2); match spawn_roll { 1 => builder.with(RoomBasedSpawner::new()), _ => builder.with(VoronoiSpawning::new()) } } }
That's a big function, so we'll step through it. It's quite simple, just really spread out and full of branches:
- We roll 1d3, and pick from BSP Interior, Simple and BSP Dungeon map builders.
- If we didn't pick BSP Interior (which does a lot of stuff itself), we:
- Randomly pick a room sorting algorithm.
- Randomly pick one of the two corridor algorithms we now have.
- Randomly pick (or ignore) a room exploder or corner-rounder.
- We randomly choose between a Room-based starting position, and an area-based starting position. For the latter, call
random_start_positionto pick between 3 X-axis and 3 Y-axis starting positions to favor. - We randomly choose between a Room-based stairs placement and a "most distant from the start" exit.
- We randomly choose between Voronoi-area spawning and room-based spawning.
So that function is all about rolling dice, and making a map! It's a lot of combinations, even ignoring the thousands of possible layouts that can come from each starting builder. There are:
2 <starting rooms with options> * 5 <sort> * 2 <corridor> * 3 <modifier> = 60 basic room options.
+1 for BSP Interior Dungeons = 61 room options.
*2 <starting position options> = 122 room options.
*2 <exit placements> = 244 room options.
*2 <spawn options> = 488 room options!
So this function is offering 488 possible builder combinations!.
Now we'll create a function for the non-room spawners:
#![allow(unused)] fn main() { fn random_shape_builder(rng: &mut rltk::RandomNumberGenerator, builder : &mut BuilderChain) { let builder_roll = rng.roll_dice(1, 16); match builder_roll { 1 => builder.start_with(CellularAutomataBuilder::new()), 2 => builder.start_with(DrunkardsWalkBuilder::open_area()), 3 => builder.start_with(DrunkardsWalkBuilder::open_halls()), 4 => builder.start_with(DrunkardsWalkBuilder::winding_passages()), 5 => builder.start_with(DrunkardsWalkBuilder::fat_passages()), 6 => builder.start_with(DrunkardsWalkBuilder::fearful_symmetry()), 7 => builder.start_with(MazeBuilder::new()), 8 => builder.start_with(DLABuilder::walk_inwards()), 9 => builder.start_with(DLABuilder::walk_outwards()), 10 => builder.start_with(DLABuilder::central_attractor()), 11 => builder.start_with(DLABuilder::insectoid()), 12 => builder.start_with(VoronoiCellBuilder::pythagoras()), 13 => builder.start_with(VoronoiCellBuilder::manhattan()), _ => builder.start_with(PrefabBuilder::constant(prefab_builder::prefab_levels::WFC_POPULATED)), } // Set the start to the center and cull builder.with(AreaStartingPosition::new(XStart::CENTER, YStart::CENTER)); builder.with(CullUnreachable::new()); // Now set the start to a random starting area let (start_x, start_y) = random_start_position(rng); builder.with(AreaStartingPosition::new(start_x, start_y)); // Setup an exit and spawn mobs builder.with(VoronoiSpawning::new()); builder.with(DistantExit::new()); } }
This is similar to what we've done before, but with a twist: we now place the player centrally, cull unreachable areas, and then place the player in a random location. It's likely that the middle of a generated map is quite connected - so this gets rid of dead space, and minimizes the likelihood of starting in an "orphaned" section and culling the map down to just a few tiles.
This also provides a lot of combinations, but not quite as many.
14 basic room options
*1 Spawn option
*1 Exit option
*6 Starting options
= 84 options.
So this function is offering 84 room builder combinations.
Finally, we pull it all together in random_builder:
#![allow(unused)] fn main() { pub fn random_builder(new_depth: i32, rng: &mut rltk::RandomNumberGenerator) -> BuilderChain { let mut builder = BuilderChain::new(new_depth); let type_roll = rng.roll_dice(1, 2); match type_roll { 1 => random_room_builder(rng, &mut builder), _ => random_shape_builder(rng, &mut builder) } if rng.roll_dice(1, 3)==1 { builder.with(WaveformCollapseBuilder::new()); } if rng.roll_dice(1, 20)==1 { builder.with(PrefabBuilder::sectional(prefab_builder::prefab_sections::UNDERGROUND_FORT)); } builder.with(PrefabBuilder::vaults()); builder } }
This is relatively straightforward. We randomly pick either a room or a shape builder, as defined above. There's a 1 in 3 chance we'll then run Wave Function Collapse on it, and a 1 in 20 chance that we'll add a sectional to it. Finally, we try to spawn any vaults we might want to use.
So how does our total combinatorial explosion look? Pretty good at this point:
488 possible room builders +
84 possible shape builders =
572 builder combinations.
We might run Wave Function Collapse, giving another 2 options:
*2 = 1,144
We might add a sectional:
*2 = 2,288
So we now have 2,288 possible builder combinations, just from the last few chapters. Combine that with a random seed, and it's increasingly unlikely that a player will see the exact same combination of maps on a run twice.
...
The source code for this chapter may be found here
Run this chapter's example with web assembly, in your browser (WebGL2 required)
Copyright (C) 2019, Herbert Wolverson.
Improved room building
About this tutorial
This tutorial is free and open source, and all code uses the MIT license - so you are free to do with it as you like. My hope is that you will enjoy the tutorial, and make great games!
If you enjoy this and would like me to keep writing, please consider supporting my Patreon.
In the last chapter, we abstracted out room layout - but kept the actual placement of the rooms the same: they are always rectangles, although this can be mitigated with room explosion and corner rounding. This chapter will add the ability to use rooms of different shapes.
Rectangle Room Builder
First, we'll make a builder that accepts a set of rooms as input, and outputs those rooms as rectangles on the map - exactly like the previous editions. We'll also modify SimpleMapBuilder and BspDungeonBuilder to not duplicate the functionality.
We'll make a new file, map_builders/room_draw.rs:
#![allow(unused)] fn main() { use super::{MetaMapBuilder, BuilderMap, TileType, Rect}; use rltk::RandomNumberGenerator; pub struct RoomDrawer {} impl MetaMapBuilder for RoomDrawer { fn build_map(&mut self, rng: &mut rltk::RandomNumberGenerator, build_data : &mut BuilderMap) { self.build(rng, build_data); } } impl RoomDrawer { #[allow(dead_code)] pub fn new() -> Box<RoomDrawer> { Box::new(RoomDrawer{}) } fn build(&mut self, _rng : &mut RandomNumberGenerator, build_data : &mut BuilderMap) { let rooms : Vec<Rect>; if let Some(rooms_builder) = &build_data.rooms { rooms = rooms_builder.clone(); } else { panic!("Room Rounding require a builder with room structures"); } for room in rooms.iter() { for y in room.y1 +1 ..= room.y2 { for x in room.x1 + 1 ..= room.x2 { let idx = build_data.map.xy_idx(x, y); if idx > 0 && idx < ((build_data.map.width * build_data.map.height)-1) as usize { build_data.map.tiles[idx] = TileType::Floor; } } } build_data.take_snapshot(); } } } }
This is the same drawing functionality found in common.rs's apply_room_to_map - wrapped in the same meta-builder functionality we've used in the last couple of chapters. Nothing too surprising here!
In bsp_dungeon.rs, simply remove the line referencing apply_room_to_map. You can also remove take_snapshot - since we aren't applying anything to the map yet:
#![allow(unused)] fn main() { if self.is_possible(candidate, &build_data.map, &rooms) { rooms.push(candidate); self.add_subrects(rect); } }
We'll also have to update is_possible to check the rooms list rather than reading the live map (to which we haven't written anything):
#![allow(unused)] fn main() { fn is_possible(&self, rect : Rect, build_data : &BuilderMap, rooms: &Vec<Rect>) -> bool { let mut expanded = rect; expanded.x1 -= 2; expanded.x2 += 2; expanded.y1 -= 2; expanded.y2 += 2; let mut can_build = true; for r in rooms.iter() { if r.intersect(&rect) { can_build = false; } } for y in expanded.y1 ..= expanded.y2 { for x in expanded.x1 ..= expanded.x2 { if x > build_data.map.width-2 { can_build = false; } if y > build_data.map.height-2 { can_build = false; } if x < 1 { can_build = false; } if y < 1 { can_build = false; } if can_build { let idx = build_data.map.xy_idx(x, y); if build_data.map.tiles[idx] != TileType::Wall { can_build = false; } } } } can_build } }
Likewise, in simple_map.rs - just remove the apply_room_to_map and take_snapshot calls:
#![allow(unused)] fn main() { if ok { rooms.push(new_room); } }
Nothing is using apply_room_to_map in common.rs anymore - so we can delete that too!
Lastly, modify random_builder in map_builders/mod.rs to test our code:
#![allow(unused)] fn main() { pub fn random_builder(new_depth: i32, rng: &mut rltk::RandomNumberGenerator) -> BuilderChain { /*let mut builder = BuilderChain::new(new_depth); let type_roll = rng.roll_dice(1, 2); match type_roll { 1 => random_room_builder(rng, &mut builder), _ => random_shape_builder(rng, &mut builder) } if rng.roll_dice(1, 3)==1 { builder.with(WaveformCollapseBuilder::new()); } if rng.roll_dice(1, 20)==1 { builder.with(PrefabBuilder::sectional(prefab_builder::prefab_sections::UNDERGROUND_FORT)); } builder.with(PrefabBuilder::vaults()); builder*/ let mut builder = BuilderChain::new(new_depth); builder.start_with(SimpleMapBuilder::new()); builder.with(RoomDrawer::new()); builder.with(RoomSorter::new(RoomSort::LEFTMOST)); builder.with(BspCorridors::new()); builder.with(RoomBasedSpawner::new()); builder.with(RoomBasedStairs::new()); builder.with(RoomBasedStartingPosition::new()); builder } }
If you cargo run the project, you'll see our simple map builder run - just like before.
Circular Rooms
Simply moving the draw code out of the algorithm cleans things up, but doesn't gain us anything new. So we'll look at adding a few shape options for rooms. We'll start by moving the draw code out of the main loop and into its own function. Modify room_draw.rs as follows:
#![allow(unused)] fn main() { fn rectangle(&mut self, build_data : &mut BuilderMap, room : &Rect) { for y in room.y1 +1 ..= room.y2 { for x in room.x1 + 1 ..= room.x2 { let idx = build_data.map.xy_idx(x, y); if idx > 0 && idx < ((build_data.map.width * build_data.map.height)-1) as usize { build_data.map.tiles[idx] = TileType::Floor; } } } } fn build(&mut self, _rng : &mut RandomNumberGenerator, build_data : &mut BuilderMap) { let rooms : Vec<Rect>; if let Some(rooms_builder) = &build_data.rooms { rooms = rooms_builder.clone(); } else { panic!("Room Drawing require a builder with room structures"); } for room in rooms.iter() { self.rectangle(build_data, room); build_data.take_snapshot(); } } }
Once again, if you feel like testing it - cargo run will give you similar results to last time. Lets add a second room shape - circular rooms:
#![allow(unused)] fn main() { fn circle(&mut self, build_data : &mut BuilderMap, room : &Rect) { let radius = i32::min(room.x2 - room.x1, room.y2 - room.y1) as f32 / 2.0; let center = room.center(); let center_pt = rltk::Point::new(center.0, center.1); for y in room.y1 ..= room.y2 { for x in room.x1 ..= room.x2 { let idx = build_data.map.xy_idx(x, y); let distance = rltk::DistanceAlg::Pythagoras.distance2d(center_pt, rltk::Point::new(x, y)); if idx > 0 && idx < ((build_data.map.width * build_data.map.height)-1) as usize && distance <= radius { build_data.map.tiles[idx] = TileType::Floor; } } } } }
Now replace your call to rectangle with circle, type cargo run and enjoy the new room type:
 .
.
Picking a shape at random
It would be nice for round rooms to be an occasional feature. So we'll modify our build function to make roughly one quarter of rooms round:
#![allow(unused)] fn main() { fn build(&mut self, rng : &mut RandomNumberGenerator, build_data : &mut BuilderMap) { let rooms : Vec<Rect>; if let Some(rooms_builder) = &build_data.rooms { rooms = rooms_builder.clone(); } else { panic!("Room Drawing require a builder with room structures"); } for room in rooms.iter() { let room_type = rng.roll_dice(1,4); match room_type { 1 => self.circle(build_data, room), _ => self.rectangle(build_data, room) } build_data.take_snapshot(); } } }
If you cargo run the project now, you'll see something like this:
 .
.
Restoring randomness
In map_builders/mod.rs uncomment the code and remove the test harness:
#![allow(unused)] fn main() { pub fn random_builder(new_depth: i32, rng: &mut rltk::RandomNumberGenerator) -> BuilderChain { let mut builder = BuilderChain::new(new_depth); let type_roll = rng.roll_dice(1, 2); match type_roll { 1 => random_room_builder(rng, &mut builder), _ => random_shape_builder(rng, &mut builder) } if rng.roll_dice(1, 3)==1 { builder.with(WaveformCollapseBuilder::new()); } if rng.roll_dice(1, 20)==1 { builder.with(PrefabBuilder::sectional(prefab_builder::prefab_sections::UNDERGROUND_FORT)); } builder.with(PrefabBuilder::vaults()); builder } }
In random_room_builder, we add in the room drawing:
#![allow(unused)] fn main() { ... let sort_roll = rng.roll_dice(1, 5); match sort_roll { 1 => builder.with(RoomSorter::new(RoomSort::LEFTMOST)), 2 => builder.with(RoomSorter::new(RoomSort::RIGHTMOST)), 3 => builder.with(RoomSorter::new(RoomSort::TOPMOST)), 4 => builder.with(RoomSorter::new(RoomSort::BOTTOMMOST)), _ => builder.with(RoomSorter::new(RoomSort::CENTRAL)), } builder.with(RoomDrawer::new()); let corridor_roll = rng.roll_dice(1, 2); match corridor_roll { 1 => builder.with(DoglegCorridors::new()), _ => builder.with(BspCorridors::new()) } ... }
You can now get the full gamut of random room creation - but with the occasional round instead of rectangular room. That adds a bit more variety to the mix.
...
The source code for this chapter may be found here
Run this chapter's example with web assembly, in your browser (WebGL2 required)
Copyright (C) 2019, Herbert Wolverson.
Improved corridors
About this tutorial
This tutorial is free and open source, and all code uses the MIT license - so you are free to do with it as you like. My hope is that you will enjoy the tutorial, and make great games!
If you enjoy this and would like me to keep writing, please consider supporting my Patreon.
Our corridor generation so far has been quite primitive, featuring overlaps - and unless you use Voronoi spawning, nothing in them. This chapter will try to offer a few more generation strategies (in turn providing even more map variety), and allow hallways to contain entities.
New corridor strategy: nearest neighbor
One way to make a map feel more natural is to build hallways between near neighbors. This reduces (but doesn't eliminate) overlaps, and looks more like something that someone might actually build. We'll make a new file, map_builders/rooms_corridors_nearest.rs:
#![allow(unused)] fn main() { use super::{MetaMapBuilder, BuilderMap, Rect, draw_corridor }; use rltk::RandomNumberGenerator; use std::collections::HashSet; pub struct NearestCorridors {} impl MetaMapBuilder for NearestCorridors { #[allow(dead_code)] fn build_map(&mut self, rng: &mut rltk::RandomNumberGenerator, build_data : &mut BuilderMap) { self.corridors(rng, build_data); } } impl NearestCorridors { #[allow(dead_code)] pub fn new() -> Box<NearestCorridors> { Box::new(NearestCorridors{}) } fn corridors(&mut self, _rng : &mut RandomNumberGenerator, build_data : &mut BuilderMap) { let rooms : Vec<Rect>; if let Some(rooms_builder) = &build_data.rooms { rooms = rooms_builder.clone(); } else { panic!("Nearest Corridors require a builder with room structures"); } let mut connected : HashSet<usize> = HashSet::new(); for (i,room) in rooms.iter().enumerate() { let mut room_distance : Vec<(usize, f32)> = Vec::new(); let room_center = room.center(); let room_center_pt = rltk::Point::new(room_center.0, room_center.1); for (j,other_room) in rooms.iter().enumerate() { if i != j && !connected.contains(&j) { let other_center = other_room.center(); let other_center_pt = rltk::Point::new(other_center.0, other_center.1); let distance = rltk::DistanceAlg::Pythagoras.distance2d( room_center_pt, other_center_pt ); room_distance.push((j, distance)); } } if !room_distance.is_empty() { room_distance.sort_by(|a,b| a.1.partial_cmp(&b.1).unwrap() ); let dest_center = rooms[room_distance[0].0].center(); draw_corridor( &mut build_data.map, room_center.0, room_center.1, dest_center.0, dest_center.1 ); connected.insert(i); build_data.take_snapshot(); } } } } }
There's some boilerplate with which you should be familiar by now, so lets walk through the corridors function:
- We start by obtaining the
roomslist, andpanic!if there isn't one. - We make a new
HashSetnamedconnected. We'll add rooms to this as they gain exits, so as to avoid linking repeatedly to the same room. - For each room, we retrieve an "enumeration" called
i(the index number in the vector) and theroom:- We create a new vector called
room_distance. It stores tuples containing the room being considered's index and a floating point number that will store its distance to the current room. - We calculate the center of the room, and store it in a
Pointfrom RLTK (for compatibility with the distance algorithms). - For every room, we retrieve an enumeration called
j(it's customary to useiandjfor counters, presumably dating back to the days in which longer variable names were expensive!), and theother_room.- If
iandjare equal, we are looking at a corridor to/from the same room. We don't want to do that, so we skip it! - Likewise, if the
other_room's index (j) is in ourconnectedset, then we don't want to evaluate it either - so we skip that. - We calculate the distance from the outer room (
room/i) to the room we are evaluating (other_room/j). - We push the distance and the
jindex intoroom_distance.
- If
- If the list for
room_distanceis empty, we skip ahead. Otherwise: - We use
sort_byto sort theroom_distancevector, with the shortest distance being closest. - Then we use the
draw_corridorfunction to draw a corridor from the center of the currentroomto the closest room (index0inroom_distance)
- We create a new vector called
Lastly, we'll modify random_builder in map_builders/mod.rs to use this algorithm:
#![allow(unused)] fn main() { pub fn random_builder(new_depth: i32, rng: &mut rltk::RandomNumberGenerator) -> BuilderChain { /* let mut builder = BuilderChain::new(new_depth); let type_roll = rng.roll_dice(1, 2); match type_roll { 1 => random_room_builder(rng, &mut builder), _ => random_shape_builder(rng, &mut builder) } if rng.roll_dice(1, 3)==1 { builder.with(WaveformCollapseBuilder::new()); } if rng.roll_dice(1, 20)==1 { builder.with(PrefabBuilder::sectional(prefab_builder::prefab_sections::UNDERGROUND_FORT)); } builder.with(PrefabBuilder::vaults()); builder*/ let mut builder = BuilderChain::new(new_depth); builder.start_with(SimpleMapBuilder::new()); builder.with(RoomDrawer::new()); builder.with(RoomSorter::new(RoomSort::LEFTMOST)); builder.with(NearestCorridors::new()); builder.with(RoomBasedSpawner::new()); builder.with(RoomBasedStairs::new()); builder.with(RoomBasedStartingPosition::new()); builder } }
This gives nicely connected maps, with sensibly short corridor distances. If you cargo run the project, you should see something like this:
 .
.
Overlapping corridors can still happen, but it is now quite unlikely.
Corridors with Bresenham Lines
Instead of dog-legging around a corner, we can draw corridors as a straight line. This is a little more irritating for the player to navigate (more corners to navigate), but can give a pleasing effect. We'll create a new file, map_builders/rooms_corridors_lines.rs:
#![allow(unused)] fn main() { use super::{MetaMapBuilder, BuilderMap, Rect, TileType }; use rltk::RandomNumberGenerator; use std::collections::HashSet; pub struct StraightLineCorridors {} impl MetaMapBuilder for StraightLineCorridors { #[allow(dead_code)] fn build_map(&mut self, rng: &mut rltk::RandomNumberGenerator, build_data : &mut BuilderMap) { self.corridors(rng, build_data); } } impl StraightLineCorridors { #[allow(dead_code)] pub fn new() -> Box<StraightLineCorridors> { Box::new(StraightLineCorridors{}) } fn corridors(&mut self, _rng : &mut RandomNumberGenerator, build_data : &mut BuilderMap) { let rooms : Vec<Rect>; if let Some(rooms_builder) = &build_data.rooms { rooms = rooms_builder.clone(); } else { panic!("Straight Line Corridors require a builder with room structures"); } let mut connected : HashSet<usize> = HashSet::new(); for (i,room) in rooms.iter().enumerate() { let mut room_distance : Vec<(usize, f32)> = Vec::new(); let room_center = room.center(); let room_center_pt = rltk::Point::new(room_center.0, room_center.1); for (j,other_room) in rooms.iter().enumerate() { if i != j && !connected.contains(&j) { let other_center = other_room.center(); let other_center_pt = rltk::Point::new(other_center.0, other_center.1); let distance = rltk::DistanceAlg::Pythagoras.distance2d( room_center_pt, other_center_pt ); room_distance.push((j, distance)); } } if !room_distance.is_empty() { room_distance.sort_by(|a,b| a.1.partial_cmp(&b.1).unwrap() ); let dest_center = rooms[room_distance[0].0].center(); let line = rltk::line2d( rltk::LineAlg::Bresenham, room_center_pt, rltk::Point::new(dest_center.0, dest_center.1) ); for cell in line.iter() { let idx = build_data.map.xy_idx(cell.x, cell.y); build_data.map.tiles[idx] = TileType::Floor; } connected.insert(i); build_data.take_snapshot(); } } } } }
This is almost the same as the previous one, but instead of calling draw_corridor we use RLTK's line function to plot a line from the center of the source and destination rooms. We then mark each tile along the line as a floor. If you modify your random_builder to use this:
#![allow(unused)] fn main() { let mut builder = BuilderChain::new(new_depth); builder.start_with(SimpleMapBuilder::new()); builder.with(RoomDrawer::new()); builder.with(RoomSorter::new(RoomSort::LEFTMOST)); builder.with(StraightLineCorridors::new()); builder.with(RoomBasedSpawner::new()); builder.with(RoomBasedStairs::new()); builder.with(RoomBasedStartingPosition::new()); builder }
Then cargo run your project, you will see something like this:
 .
.
Storing corridor locations
We might want to do something with our corridor locations in the future, so lets store them. In map_builders/mod.rs, lets add a container to store our corridor locations. We'll make it an Option, so as to preserve compatibility with map types that don't use the concept:
#![allow(unused)] fn main() { pub struct BuilderMap { pub spawn_list : Vec<(usize, String)>, pub map : Map, pub starting_position : Option<Position>, pub rooms: Option<Vec<Rect>>, pub corridors: Option<Vec<Vec<usize>>>, pub history : Vec<Map> } }
We also need to adjust the constructor to ensure that corridors isn't forgotten:
#![allow(unused)] fn main() { impl BuilderChain { pub fn new(new_depth : i32) -> BuilderChain { BuilderChain{ starter: None, builders: Vec::new(), build_data : BuilderMap { spawn_list: Vec::new(), map: Map::new(new_depth), starting_position: None, rooms: None, corridors: None, history : Vec::new() } } } ... }
Now in common.rs, lets modify our corridor functions to return corridor placement information:
#![allow(unused)] fn main() { pub fn apply_horizontal_tunnel(map : &mut Map, x1:i32, x2:i32, y:i32) -> Vec<usize> { let mut corridor = Vec::new(); for x in min(x1,x2) ..= max(x1,x2) { let idx = map.xy_idx(x, y); if idx > 0 && idx < map.width as usize * map.height as usize && map.tiles[idx as usize] != TileType::Floor { map.tiles[idx as usize] = TileType::Floor; corridor.push(idx as usize); } } corridor } pub fn apply_vertical_tunnel(map : &mut Map, y1:i32, y2:i32, x:i32) -> Vec<usize> { let mut corridor = Vec::new(); for y in min(y1,y2) ..= max(y1,y2) { let idx = map.xy_idx(x, y); if idx > 0 && idx < map.width as usize * map.height as usize && map.tiles[idx as usize] != TileType::Floor { corridor.push(idx); map.tiles[idx as usize] = TileType::Floor; } } corridor } pub fn draw_corridor(map: &mut Map, x1:i32, y1:i32, x2:i32, y2:i32) -> Vec<usize> { let mut corridor = Vec::new(); let mut x = x1; let mut y = y1; while x != x2 || y != y2 { if x < x2 { x += 1; } else if x > x2 { x -= 1; } else if y < y2 { y += 1; } else if y > y2 { y -= 1; } let idx = map.xy_idx(x, y); if map.tiles[idx] != TileType::Floor { corridor.push(idx); map.tiles[idx] = TileType::Floor; } } corridor } }
Notice that they are essentially unchanged, but now return a vector of tile indices - and only add to them if the tile being modified is a floor? That will give us definitions for each leg of a corridor. Now we need to modify the corridor drawing algorithms to store this information. In rooms_corridors_bsp.rs, modify the corridors function to do this:
#![allow(unused)] fn main() { ... let mut corridors : Vec<Vec<usize>> = Vec::new(); for i in 0..rooms.len()-1 { let room = rooms[i]; let next_room = rooms[i+1]; let start_x = room.x1 + (rng.roll_dice(1, i32::abs(room.x1 - room.x2))-1); let start_y = room.y1 + (rng.roll_dice(1, i32::abs(room.y1 - room.y2))-1); let end_x = next_room.x1 + (rng.roll_dice(1, i32::abs(next_room.x1 - next_room.x2))-1); let end_y = next_room.y1 + (rng.roll_dice(1, i32::abs(next_room.y1 - next_room.y2))-1); let corridor = draw_corridor(&mut build_data.map, start_x, start_y, end_x, end_y); corridors.push(corridor); build_data.take_snapshot(); } build_data.corridors = Some(corridors); ... }
We do the same again in rooms_corridors_dogleg.rs:
#![allow(unused)] fn main() { ... let mut corridors : Vec<Vec<usize>> = Vec::new(); for (i,room) in rooms.iter().enumerate() { if i > 0 { let (new_x, new_y) = room.center(); let (prev_x, prev_y) = rooms[i as usize -1].center(); if rng.range(0,2) == 1 { let mut c1 = apply_horizontal_tunnel(&mut build_data.map, prev_x, new_x, prev_y); let mut c2 = apply_vertical_tunnel(&mut build_data.map, prev_y, new_y, new_x); c1.append(&mut c2); corridors.push(c1); } else { let mut c1 = apply_vertical_tunnel(&mut build_data.map, prev_y, new_y, prev_x); let mut c2 = apply_horizontal_tunnel(&mut build_data.map, prev_x, new_x, new_y); c1.append(&mut c2); corridors.push(c1); } build_data.take_snapshot(); } } build_data.corridors = Some(corridors); ... }
You'll notice that we append the second leg of the corridor to the first, so we treat it as one long corridor rather than two hallways. We need to apply the same change to our newly minted rooms_corridors_lines.rs:
#![allow(unused)] fn main() { fn corridors(&mut self, _rng : &mut RandomNumberGenerator, build_data : &mut BuilderMap) { let rooms : Vec<Rect>; if let Some(rooms_builder) = &build_data.rooms { rooms = rooms_builder.clone(); } else { panic!("Straight Line Corridors require a builder with room structures"); } let mut connected : HashSet<usize> = HashSet::new(); let mut corridors : Vec<Vec<usize>> = Vec::new(); for (i,room) in rooms.iter().enumerate() { let mut room_distance : Vec<(usize, f32)> = Vec::new(); let room_center = room.center(); let room_center_pt = rltk::Point::new(room_center.0, room_center.1); for (j,other_room) in rooms.iter().enumerate() { if i != j && !connected.contains(&j) { let other_center = other_room.center(); let other_center_pt = rltk::Point::new(other_center.0, other_center.1); let distance = rltk::DistanceAlg::Pythagoras.distance2d( room_center_pt, other_center_pt ); room_distance.push((j, distance)); } } if !room_distance.is_empty() { room_distance.sort_by(|a,b| a.1.partial_cmp(&b.1).unwrap() ); let dest_center = rooms[room_distance[0].0].center(); let line = rltk::line2d( rltk::LineAlg::Bresenham, room_center_pt, rltk::Point::new(dest_center.0, dest_center.1) ); let mut corridor = Vec::new(); for cell in line.iter() { let idx = build_data.map.xy_idx(cell.x, cell.y); if build_data.map.tiles[idx] != TileType::Floor { build_data.map.tiles[idx] = TileType::Floor; corridor.push(idx); } } corridors.push(corridor); connected.insert(i); build_data.take_snapshot(); } } build_data.corridors = Some(corridors); } }
We'll also do the same in rooms_corridors_nearest.rs:
#![allow(unused)] fn main() { fn corridors(&mut self, _rng : &mut RandomNumberGenerator, build_data : &mut BuilderMap) { let rooms : Vec<Rect>; if let Some(rooms_builder) = &build_data.rooms { rooms = rooms_builder.clone(); } else { panic!("Nearest Corridors require a builder with room structures"); } let mut connected : HashSet<usize> = HashSet::new(); let mut corridors : Vec<Vec<usize>> = Vec::new(); for (i,room) in rooms.iter().enumerate() { let mut room_distance : Vec<(usize, f32)> = Vec::new(); let room_center = room.center(); let room_center_pt = rltk::Point::new(room_center.0, room_center.1); for (j,other_room) in rooms.iter().enumerate() { if i != j && !connected.contains(&j) { let other_center = other_room.center(); let other_center_pt = rltk::Point::new(other_center.0, other_center.1); let distance = rltk::DistanceAlg::Pythagoras.distance2d( room_center_pt, other_center_pt ); room_distance.push((j, distance)); } } if !room_distance.is_empty() { room_distance.sort_by(|a,b| a.1.partial_cmp(&b.1).unwrap() ); let dest_center = rooms[room_distance[0].0].center(); let corridor = draw_corridor( &mut build_data.map, room_center.0, room_center.1, dest_center.0, dest_center.1 ); connected.insert(i); build_data.take_snapshot(); corridors.push(corridor); } } build_data.corridors = Some(corridors); } }
Ok, we have corridor data - now what?
One obvious use is to be able to spawn entities inside corridors. We'll make the new room_corridor_spawner.rs to do just that:
#![allow(unused)] fn main() { use super::{MetaMapBuilder, BuilderMap, spawner}; use rltk::RandomNumberGenerator; pub struct CorridorSpawner {} impl MetaMapBuilder for CorridorSpawner { fn build_map(&mut self, rng: &mut rltk::RandomNumberGenerator, build_data : &mut BuilderMap) { self.build(rng, build_data); } } impl CorridorSpawner { #[allow(dead_code)] pub fn new() -> Box<CorridorSpawner> { Box::new(CorridorSpawner{}) } fn build(&mut self, rng : &mut RandomNumberGenerator, build_data : &mut BuilderMap) { if let Some(corridors) = &build_data.corridors { for c in corridors.iter() { let depth = build_data.map.depth; spawner::spawn_region(&build_data.map, rng, &c, depth, &mut build_data.spawn_list); } } else { panic!("Corridor Based Spawning only works after corridors have been created"); } } } }
This was based off of room_based_spawner.rs - copy/pasted and changed the names! Then the if let for rooms was replaced with corridors and instead of spawning per room - we pass the corridor to spawn_region. Entities now spawn in the hallways.
You can test this by adding the spawner to your random_builder:
#![allow(unused)] fn main() { let mut builder = BuilderChain::new(new_depth); builder.start_with(SimpleMapBuilder::new()); builder.with(RoomDrawer::new()); builder.with(RoomSorter::new(RoomSort::LEFTMOST)); builder.with(StraightLineCorridors::new()); builder.with(RoomBasedSpawner::new()); builder.with(CorridorSpawner::new()); builder.with(RoomBasedStairs::new()); builder.with(RoomBasedStartingPosition::new()); builder }
Once you are playing, you can now find entities inside your corridors:
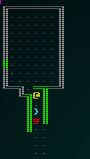 .
.
Restoring Randomness
Once again, it's the end of a sub-section - so we'll make random_builder random once more, but utilizing our new stuff!
Start by uncommenting the code in random_builder, and removing the test harness:
#![allow(unused)] fn main() { pub fn random_builder(new_depth: i32, rng: &mut rltk::RandomNumberGenerator) -> BuilderChain { let mut builder = BuilderChain::new(new_depth); let type_roll = rng.roll_dice(1, 2); match type_roll { 1 => random_room_builder(rng, &mut builder), _ => random_shape_builder(rng, &mut builder) } if rng.roll_dice(1, 3)==1 { builder.with(WaveformCollapseBuilder::new()); } if rng.roll_dice(1, 20)==1 { builder.with(PrefabBuilder::sectional(prefab_builder::prefab_sections::UNDERGROUND_FORT)); } builder.with(PrefabBuilder::vaults()); builder } }
Since everything we've worked on here has been room based, we'll also modify random_room_builder to include it. We'll expand the corridor related section:
#![allow(unused)] fn main() { let corridor_roll = rng.roll_dice(1, 4); match corridor_roll { 1 => builder.with(DoglegCorridors::new()), 2 => builder.with(NearestCorridors::new()), 3 => builder.with(StraightLineCorridors::new()), _ => builder.with(BspCorridors::new()) } let cspawn_roll = rng.roll_dice(1, 2); if cspawn_roll == 1 { builder.with(CorridorSpawner::new()); } }
So we've added an equal chance of straight-line corridors and nearest-neighbor corridors, and 50% of the time it will spawn entities in hallways.
...
The source code for this chapter may be found here
Run this chapter's example with web assembly, in your browser (WebGL2 required)
Copyright (C) 2019, Herbert Wolverson.
Doors
About this tutorial
This tutorial is free and open source, and all code uses the MIT license - so you are free to do with it as you like. My hope is that you will enjoy the tutorial, and make great games!
If you enjoy this and would like me to keep writing, please consider supporting my Patreon.
Doors and corners, that's where they get you. If we're ever going to make Miller's (from The Expanse - probably my favorite sci-fi novel series of the moment) warning come true - it would be a good idea to have doors in the game. Doors are a staple of dungeon-bashing! We've waited this long to implement them so as to ensure that we have good places to put them.
Doors are an entity, too
We'll start with simple, cosmetic doors that don't do anything at all. This will let us work on placing them appropriately, and then we can implement some door-related functionality. It's been a while since we added an entity type; fortunately, we have everything we need for cosmetic doors in the existing components. Open up spawner.rs, and refamiliarize yourself with it! Then we'll add a door spawner function:
#![allow(unused)] fn main() { fn door(ecs: &mut World, x: i32, y: i32) { ecs.create_entity() .with(Position{ x, y }) .with(Renderable{ glyph: rltk::to_cp437('+'), fg: RGB::named(rltk::CHOCOLATE), bg: RGB::named(rltk::BLACK), render_order: 2 }) .with(Name{ name : "Door".to_string() }) .marked::<SimpleMarker<SerializeMe>>() .build(); } }
So our cosmetic-only door is pretty simple: it has a glyph (+ is traditional in many roguelikes), is brown, and it has a Name and a Position. That's really all we need to make them appear on the map! We'll also modify spawn_entity to know what to do when given a Door to spawn:
#![allow(unused)] fn main() { match spawn.1.as_ref() { "Goblin" => goblin(ecs, x, y), "Orc" => orc(ecs, x, y), "Health Potion" => health_potion(ecs, x, y), "Fireball Scroll" => fireball_scroll(ecs, x, y), "Confusion Scroll" => confusion_scroll(ecs, x, y), "Magic Missile Scroll" => magic_missile_scroll(ecs, x, y), "Dagger" => dagger(ecs, x, y), "Shield" => shield(ecs, x, y), "Longsword" => longsword(ecs, x, y), "Tower Shield" => tower_shield(ecs, x, y), "Rations" => rations(ecs, x, y), "Magic Mapping Scroll" => magic_mapping_scroll(ecs, x, y), "Bear Trap" => bear_trap(ecs, x, y), "Door" => door(ecs, x, y), _ => {} } }
We won't add doors to the spawn tables; it wouldn't make a lot of sense for them to randomly appear in rooms!
Placing doors
We'll create a new builder (we're still in the map section, after all!) that can place doors. So in map_builders, make a new file: door_placement.rs:
#![allow(unused)] fn main() { use super::{MetaMapBuilder, BuilderMap }; use rltk::RandomNumberGenerator; pub struct DoorPlacement {} impl MetaMapBuilder for DoorPlacement { #[allow(dead_code)] fn build_map(&mut self, rng: &mut rltk::RandomNumberGenerator, build_data : &mut BuilderMap) { self.doors(rng, build_data); } } impl DoorPlacement { #[allow(dead_code)] pub fn new() -> Box<DoorPlacement> { Box::new(DoorPlacement{ }) } fn doors(&mut self, _rng : &mut RandomNumberGenerator, _build_data : &mut BuilderMap) { } } }
This is an empty skeleton of a meta-builder. Let's deal with the easiest case first: when we have corridor data, that provides something of a blueprint as to where doors might fit. We'll start with a new function, door_possible:
#![allow(unused)] fn main() { fn door_possible(&self, build_data : &mut BuilderMap, idx : usize) -> bool { let x = idx % build_data.map.width as usize; let y = idx / build_data.map.width as usize; // Check for east-west door possibility if build_data.map.tiles[idx] == TileType::Floor && (x > 1 && build_data.map.tiles[idx-1] == TileType::Floor) && (x < build_data.map.width-2 && build_data.map.tiles[idx+1] == TileType::Floor) && (y > 1 && build_data.map.tiles[idx - build_data.map.width as usize] == TileType::Wall) && (y < build_data.map.height-2 && build_data.map.tiles[idx + build_data.map.width as usize] == TileType::Wall) { return true; } // Check for north-south door possibility if build_data.map.tiles[idx] == TileType::Floor && (x > 1 && build_data.map.tiles[idx-1] == TileType::Wall) && (x < build_data.map.width-2 && build_data.map.tiles[idx+1] == TileType::Wall) && (y > 1 && build_data.map.tiles[idx - build_data.map.width as usize] == TileType::Floor) && (y < build_data.map.height-2 && build_data.map.tiles[idx + build_data.map.width as usize] == TileType::Floor) { return true; } false } }
There really are only two places in which a door makes sense: with east-west open and north-south blocked, and vice versa. We don't want doors to appear in open areas. So this function checks for those conditions, and returns true if a door is possible - and false otherwise. Now we expand the doors function to scan corridors and put doors at their beginning:
#![allow(unused)] fn main() { fn doors(&mut self, _rng : &mut RandomNumberGenerator, build_data : &mut BuilderMap) { if let Some(halls_original) = &build_data.corridors { let halls = halls_original.clone(); // To avoid nested borrowing for hall in halls.iter() { if hall.len() > 2 { // We aren't interested in tiny corridors if self.door_possible(build_data, hall[0]) { build_data.spawn_list.push((hall[0], "Door".to_string())); } } } } } }
We start by checking that there is corridor information to use. If there is, we take a copy (to make the borrow checker happy - otherwise we're borrowing twice into halls) and iterate it. Each entry is a hallway - a vector of tiles that make up that hall. We're only interested in halls with more than 2 entries - to avoid really short corridors with doors attached. So, if its long enough - we check to see if a door makes sense at index 0 of the hall; if it does, we add it to the spawn list.
We'll quickly modify random_builder again to create a case in which there are probably doors to spawn:
#![allow(unused)] fn main() { let mut builder = BuilderChain::new(new_depth); builder.start_with(SimpleMapBuilder::new()); builder.with(RoomDrawer::new()); builder.with(RoomSorter::new(RoomSort::LEFTMOST)); builder.with(StraightLineCorridors::new()); builder.with(RoomBasedSpawner::new()); builder.with(CorridorSpawner::new()); builder.with(RoomBasedStairs::new()); builder.with(RoomBasedStartingPosition::new()); builder.with(DoorPlacement::new()); builder }
We cargo run the project, and lo and behold - doors:
 .
.
What about other designs?
It's certainly possible to scan other maps tile-by-tile looking to see if there is a possibility of a door appearing. Lets do that:
#![allow(unused)] fn main() { if let Some(halls_original) = &build_data.corridors { let halls = halls_original.clone(); // To avoid nested borrowing for hall in halls.iter() { if hall.len() > 2 { // We aren't interested in tiny corridors if self.door_possible(build_data, hall[0]) { build_data.spawn_list.push((hall[0], "Door".to_string())); } } } } else { // There are no corridors - scan for possible places let tiles = build_data.map.tiles.clone(); for (i, tile) in tiles.iter().enumerate() { if *tile == TileType::Floor && self.door_possible(build_data, i) { build_data.spawn_list.push((i, "Door".to_string())); } } } } }
Modify your random_builder to use a map without hallways:
#![allow(unused)] fn main() { let mut builder = BuilderChain::new(new_depth); builder.start_with(BspInteriorBuilder::new()); builder.with(DoorPlacement::new()); builder.with(RoomBasedSpawner::new()); builder.with(RoomBasedStairs::new()); builder.with(RoomBasedStartingPosition::new()); builder }
You can cargo run the project and see doors:
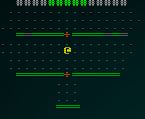 .
.
That worked rather well!
Restore our random function
We'll but random_builder back to how it was, with one change: we'll add a door spawner as the final step:
#![allow(unused)] fn main() { pub fn random_builder(new_depth: i32, rng: &mut rltk::RandomNumberGenerator) -> BuilderChain { let mut builder = BuilderChain::new(new_depth); let type_roll = rng.roll_dice(1, 2); match type_roll { 1 => random_room_builder(rng, &mut builder), _ => random_shape_builder(rng, &mut builder) } if rng.roll_dice(1, 3)==1 { builder.with(WaveformCollapseBuilder::new()); } if rng.roll_dice(1, 20)==1 { builder.with(PrefabBuilder::sectional(prefab_builder::prefab_sections::UNDERGROUND_FORT)); } builder.with(DoorPlacement::new()); builder.with(PrefabBuilder::vaults()); builder } }
Notice that we added it before we add vaults; that's deliberate - the vault gets the chance to spawn and remove any doors that would interfere with it.
Making Doors Do Something
Doors have a few properties: when closed, they block movement and visibility. They can be opened (optionally requiring unlocking, but we're not going there yet), at which point you can see through them just fine.
Let's start by "blocking out" (suggesting!) some new components. In spawner.rs:
#![allow(unused)] fn main() { fn door(ecs: &mut World, x: i32, y: i32) { ecs.create_entity() .with(Position{ x, y }) .with(Renderable{ glyph: rltk::to_cp437('+'), fg: RGB::named(rltk::CHOCOLATE), bg: RGB::named(rltk::BLACK), render_order: 2 }) .with(Name{ name : "Door".to_string() }) .with(BlocksTile{}) .with(BlocksVisibility{}) .with(Door{open: false}) .marked::<SimpleMarker<SerializeMe>>() .build(); } }
There are two new component types here!
BlocksVisibilitywill do what it says - prevent you (and monsters) from seeing through it. It's nice to have this as a component rather than a special-case, because now you can make anything block visibility. A really big treasure chest, a giant or even a moving wall - it makes sense to be able to prevent seeing through them.Door- which denotes that it is a door, and will need its own handling.
Open up components.rs and we'll make these new components:
#![allow(unused)] fn main() { #[derive(Component, Debug, Serialize, Deserialize, Clone)] pub struct BlocksVisibility {} #[derive(Component, Debug, Serialize, Deserialize, Clone)] pub struct Door { pub open: bool } }
As with all components, don't forget to register them both in main and in saveload_system.rs.
Extending The Visibility System to Handle Entities Blocking Your View
Since field of view is handled by RLTK, which relies upon a Map trait - we need to extend our map class to handle the concept. Add a new field:
#![allow(unused)] fn main() { #[derive(Default, Serialize, Deserialize, Clone)] pub struct Map { pub tiles : Vec<TileType>, pub width : i32, pub height : i32, pub revealed_tiles : Vec<bool>, pub visible_tiles : Vec<bool>, pub blocked : Vec<bool>, pub depth : i32, pub bloodstains : HashSet<usize>, pub view_blocked : HashSet<usize>, #[serde(skip_serializing)] #[serde(skip_deserializing)] pub tile_content : Vec<Vec<Entity>> } }
And update the constructor so it can't be forgotten:
#![allow(unused)] fn main() { pub fn new(new_depth : i32) -> Map { Map{ tiles : vec![TileType::Wall; MAPCOUNT], width : MAPWIDTH as i32, height: MAPHEIGHT as i32, revealed_tiles : vec![false; MAPCOUNT], visible_tiles : vec![false; MAPCOUNT], blocked : vec![false; MAPCOUNT], tile_content : vec![Vec::new(); MAPCOUNT], depth: new_depth, bloodstains: HashSet::new(), view_blocked : HashSet::new() } } }
Now we'll update the is_opaque function (used by field-of-view) to include a check against it:
#![allow(unused)] fn main() { fn is_opaque(&self, idx:i32) -> bool { let idx_u = idx as usize; self.tiles[idx_u] == TileType::Wall || self.view_blocked.contains(&idx_u) } }
We'll also have to visit visibility_system.rs to populate this data. We'll need to extend the system's data to retrieve a little more:
#![allow(unused)] fn main() { type SystemData = ( WriteExpect<'a, Map>, Entities<'a>, WriteStorage<'a, Viewshed>, ReadStorage<'a, Position>, ReadStorage<'a, Player>, WriteStorage<'a, Hidden>, WriteExpect<'a, rltk::RandomNumberGenerator>, WriteExpect<'a, GameLog>, ReadStorage<'a, Name>, ReadStorage<'a, BlocksVisibility>); fn run(&mut self, data : Self::SystemData) { let (mut map, entities, mut viewshed, pos, player, mut hidden, mut rng, mut log, names, blocks_visibility) = data; ... }
Right after that, we'll loop through all entities that block visibility and set their index in the view_blocked HashSet:
#![allow(unused)] fn main() { map.view_blocked.clear(); for (block_pos, _block) in (&pos, &blocks_visibility).join() { let idx = map.xy_idx(block_pos.x, block_pos.y); map.view_blocked.insert(idx); } }
If you cargo run the project now, you'll see that doors now block line-of-sight:
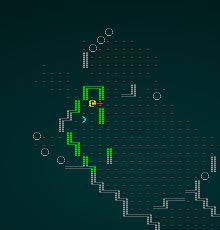 .
.
Handling Doors
Moving against a closed door should open it, and then you can pass freely through (we could add an open and close command - maybe we will later - but for now lets keep it simple). Open up player.rs, and we'll add the functionality to try_move_player:
#![allow(unused)] fn main() { ... let mut doors = ecs.write_storage::<Door>(); let mut blocks_visibility = ecs.write_storage::<BlocksVisibility>(); let mut blocks_movement = ecs.write_storage::<BlocksTile>(); let mut renderables = ecs.write_storage::<Renderable>(); for (entity, _player, pos, viewshed) in (&entities, &players, &mut positions, &mut viewsheds).join() { if pos.x + delta_x < 1 || pos.x + delta_x > map.width-1 || pos.y + delta_y < 1 || pos.y + delta_y > map.height-1 { return RunState::AwaitingInput; } let destination_idx = map.xy_idx(pos.x + delta_x, pos.y + delta_y); for potential_target in map.tile_content[destination_idx].iter() { let target = combat_stats.get(*potential_target); if let Some(_target) = target { wants_to_melee.insert(entity, WantsToMelee{ target: *potential_target }).expect("Add target failed"); return; } let door = doors.get_mut(*potential_target); if let Some(door) = door { door.open = true; blocks_visibility.remove(*potential_target); blocks_movement.remove(*potential_target); let glyph = renderables.get_mut(*potential_target).unwrap(); glyph.glyph = rltk::to_cp437('/'); viewshed.dirty = true; } } ... }
Let's walk through it:
- We obtain write access to the storages for
Door,BlocksVisibility,BlocksTileandRenderable. - We iterate potential targets in the movement tile, handling melee as before.
- We also check if potential targets are a door. If they are:
- Set the door
openvariable totrue. - Remove the
BlocksVisibilityentry - you can see through it, now (and so can monsters!). - Remove the
BlocksTileentry - you can move through it, now (and so can everyone else!) - Update the glyph to show an open doorway.
- We mark the viewshed as dirty, to now reveal what you can see through the door.
- Set the door
If you cargo run the project now, you get the desired functionality:
 .
.
Too many doors!
On the non-corridor maps, there is a slight problem when play-testing the door placement: there are doors everywhere. Lets reduce the frequency of door placement. We'll just add a little randomness:
#![allow(unused)] fn main() { fn doors(&mut self, rng : &mut RandomNumberGenerator, build_data : &mut BuilderMap) { if let Some(halls_original) = &build_data.corridors { let halls = halls_original.clone(); // To avoid nested borrowing for hall in halls.iter() { if hall.len() > 2 { // We aren't interested in tiny corridors if self.door_possible(build_data, hall[0]) { build_data.spawn_list.push((hall[0], "Door".to_string())); } } } } else { // There are no corridors - scan for possible places let tiles = build_data.map.tiles.clone(); for (i, tile) in tiles.iter().enumerate() { if *tile == TileType::Floor && self.door_possible(build_data, i) && rng.roll_dice(1,3)==1 { build_data.spawn_list.push((i, "Door".to_string())); } } } } }
This gives a 1 in 3 chance of any possible door placement yielding a door. From playing the game, this feels about right. It may not work for you - so you can change it! You may even want to make it a parameter.
Doors on top of other entities
Sometimes, a door spawns on top of another entity. It's rare, but it can happen. Lets prevent that issue from occurring. We can fix this with a quick scan of the spawn list in door_possible:
#![allow(unused)] fn main() { fn door_possible(&self, build_data : &mut BuilderMap, idx : usize) -> bool { let mut blocked = false; for spawn in build_data.spawn_list.iter() { if spawn.0 == idx { blocked = true; } } if blocked { return false; } ... }
If speed becomes a concern, this would be easy to speed up (make a quick HashSet of occupied tiles, and query that instead of the whole list) - but we haven't really had any performance issues, and map building runs outside of the main loop (so it's once per level, not every frame) - so chances are that you don't need it.
Addendum: Fixing WFC
In our random_builder, we've made a mistake! Wave Function Collapse changes the nature of maps, and should adjust spawn, entry and exit points. Here's the correct code:
#![allow(unused)] fn main() { if rng.roll_dice(1, 3)==1 { builder.with(WaveformCollapseBuilder::new()); // Now set the start to a random starting area let (start_x, start_y) = random_start_position(rng); builder.with(AreaStartingPosition::new(start_x, start_y)); // Setup an exit and spawn mobs builder.with(VoronoiSpawning::new()); builder.with(DistantExit::new()); } }
Wrap-Up
That's it for doors! There's definitely room for improvement in the future - but the feature is working. You can approach a door, and it blocks both movement and line-of-sight (so the occupants of the room won't bother you). Open it, and you can see through - and the occupants can see you back. Now it's open, you can travel through it. That's pretty close to the definition of a door!
...
The source code for this chapter may be found here
Run this chapter's example with web assembly, in your browser (WebGL2 required)
Copyright (C) 2019, Herbert Wolverson.
Decoupling map size from terminal size
About this tutorial
This tutorial is free and open source, and all code uses the MIT license - so you are free to do with it as you like. My hope is that you will enjoy the tutorial, and make great games!
If you enjoy this and would like me to keep writing, please consider supporting my Patreon.
So far, we've firmly tied map size to terminal resolution. You have an 80x50 screen, and use a few lines for the user interface - so everything we've made is 80 tiles wide and 43 tiles high. As you've seen in previous chapters, you can do a lot with 3,440 tiles - but sometimes you want more (and sometimes you want less). You may also want a big, open world setting - but we're not going to go there yet! This chapter will start by decoupling the camera from the map, and then enable map size and screen size to differ. The difficult topic of resizing the user interface will be left for future development.
Introducing a Camera
A common abstraction in games is to separate what you are viewing (the map and entities) from how you are viewing it - the camera. The camera typically follows your brave adventurer around the map, showing you the world from their point of view. In 3D games, the camera can be pretty complicated; in top-down roguelikes (viewing the map from above), it typically centers the view on the player's @.
Predictably enough, we'll start by making a new file: camera.rs. To enable it, add pub mod camera towards the top of main.rs (with the other module access).
We'll start out by making a function, render_camera, and doing some calculations we'll need:
#![allow(unused)] fn main() { use specs::prelude::*; use super::{Map,TileType,Position,Renderable,Hidden}; use rltk::{Point, Rltk, RGB}; const SHOW_BOUNDARIES : bool = true; pub fn render_camera(ecs: &World, ctx : &mut Rltk) { let map = ecs.fetch::<Map>(); let player_pos = ecs.fetch::<Point>(); let (x_chars, y_chars) = ctx.get_char_size(); let center_x = (x_chars / 2) as i32; let center_y = (y_chars / 2) as i32; let min_x = player_pos.x - center_x; let max_x = min_x + x_chars as i32; let min_y = player_pos.y - center_y; let max_y = min_.y + y_chars as i32; ... }
I've broken this down into steps to make it clear what's going on:
- We create a constant,
SHOW_BOUNDARIES. If true, we'll render a marker for out-of-bounds tiles so we know where the edges of the map are. Most of the time, this will befalse(no need for the player to get that information), but it's very handy for debugging. - We start by retrieving the map from the ECS World.
- We then retrieve the player's position from the ECS World.
- We ask RLTK for the current console dimensions, in character space (so with an 8x8 font,
80x50). - We calculate the center of the console.
- We set
min_xto the left-most tile, relative to the player. So the player'sxposition, minus the center of the console. This will center thexaxis on the player. - We set
max_xto the bemin_xplus the console width - again, ensuring that the player is centered. - We do the same for
min_yandmax_y.
So we've established where the camera is in world space - that is, coordinates on the map itself. We've also established that with our camera view, that should be the center of the rendered area.
Now we'll render the actual map:
#![allow(unused)] fn main() { let map_width = map.width-1; let map_height = map.height-1; let mut y = 0; for ty in min_y .. max_y { let mut x = 0; for tx in min_x .. max_x { if tx > 0 && tx < map_width && ty > 0 && ty < map_height { let idx = map.xy_idx(tx, ty); if map.revealed_tiles[idx] { let (glyph, fg, bg) = get_tile_glyph(idx, &*map); ctx.set(x, y, fg, bg, glyph); } } else if SHOW_BOUNDARIES { ctx.set(x, y, RGB::named(rltk::GRAY), RGB::named(rltk::BLACK), rltk::to_cp437('·')); } x += 1; } y += 1; } }
This is similar to our old draw_map code, but a little more complicated. Lets walk through it:
- We set
yto 0; we're usingxandyto represent actual screen coordinates. - We loop
tyfrommin_ytomax_y. We're usingtxandtyfor map coordinates - or "tile space" coordinates (hence thet).- We set
xto zero, because we're starting a new row on the screen. - We loop from
min_xtomax_xin the variabletx- so we're covering the visible tile space intx.- We do a clipping check. We check that
txandtyare actually inside the map boundaries. It's quite likely that the player will visit the edge of the map, and you don't want to crash because they can see tiles that aren't in the map area! - We calculate the
idx(index) of thetx/typosition, telling us where on the map this screen location is. - If it is revealed, we call the mysterious
get_tile_glyphfunction for this index (more on that in a moment), and set the results on the screen. - If the tile is off the map and
SHOW_BOUNDARIESistrue- we draw a dot. - Regardless of clipping, we add 1 to
x- we're moving to the next column.
- We do a clipping check. We check that
- We add one to
y, since we're now moving down the screen.
- We set
- We've rendered a map!
That's actually quite simple - we're rendering what is effectively a window looking into part of the map, rather than the whole map - and centering the window on the player.
Next, we need to render our entities:
#![allow(unused)] fn main() { let positions = ecs.read_storage::<Position>(); let renderables = ecs.read_storage::<Renderable>(); let hidden = ecs.read_storage::<Hidden>(); let map = ecs.fetch::<Map>(); let mut data = (&positions, &renderables, !&hidden).join().collect::<Vec<_>>(); data.sort_by(|&a, &b| b.1.render_order.cmp(&a.1.render_order) ); for (pos, render, _hidden) in data.iter() { let idx = map.xy_idx(pos.x, pos.y); if map.visible_tiles[idx] { let entity_screen_x = pos.x - min_x; let entity_screen_y = pos.y - min_y; if entity_screen_x > 0 && entity_screen_x < map_width && entity_screen_y > 0 && entity_screen_y < map_height { ctx.set(entity_screen_x, entity_screen_y, render.fg, render.bg, render.glyph); } } } }
If this looks familiar, it's because it's the same as the render code that used to live in main.rs. There are two major differences: we subtract min_x and min_y from the x and y coordinates, to line the entities up with our camera view. We also perform clipping on the coordinates - we won't try and render anything that isn't on the screen.
We previously referred to get_tile_glyph, so here it is:
#![allow(unused)] fn main() { fn get_tile_glyph(idx: usize, map : &Map) -> (rltk::FontCharType, RGB, RGB) { let glyph; let mut fg; let mut bg = RGB::from_f32(0., 0., 0.); match map.tiles[idx] { TileType::Floor => { glyph = rltk::to_cp437('.'); fg = RGB::from_f32(0.0, 0.5, 0.5); } TileType::Wall => { let x = idx as i32 % map.width; let y = idx as i32 / map.width; glyph = wall_glyph(&*map, x, y); fg = RGB::from_f32(0., 1.0, 0.); } TileType::DownStairs => { glyph = rltk::to_cp437('>'); fg = RGB::from_f32(0., 1.0, 1.0); } } if map.bloodstains.contains(&idx) { bg = RGB::from_f32(0.75, 0., 0.); } if !map.visible_tiles[idx] { fg = fg.to_greyscale(); bg = RGB::from_f32(0., 0., 0.); // Don't show stains out of visual range } (glyph, fg, bg) } }
This is very similar to the code from draw_map we wrote ages ago, but instead of drawing to the map it returns a glyph, foreground and background colors. It still handles bloodstains, greying out areas that you can't see, and calls wall_glyph for nice walls. We've simply copied wall_glyph over from map.rs:
#![allow(unused)] fn main() { fn wall_glyph(map : &Map, x: i32, y:i32) -> rltk::FontCharType { if x < 1 || x > map.width-2 || y < 1 || y > map.height-2 as i32 { return 35; } let mut mask : u8 = 0; if is_revealed_and_wall(map, x, y - 1) { mask +=1; } if is_revealed_and_wall(map, x, y + 1) { mask +=2; } if is_revealed_and_wall(map, x - 1, y) { mask +=4; } if is_revealed_and_wall(map, x + 1, y) { mask +=8; } match mask { 0 => { 9 } // Pillar because we can't see neighbors 1 => { 186 } // Wall only to the north 2 => { 186 } // Wall only to the south 3 => { 186 } // Wall to the north and south 4 => { 205 } // Wall only to the west 5 => { 188 } // Wall to the north and west 6 => { 187 } // Wall to the south and west 7 => { 185 } // Wall to the north, south and west 8 => { 205 } // Wall only to the east 9 => { 200 } // Wall to the north and east 10 => { 201 } // Wall to the south and east 11 => { 204 } // Wall to the north, south and east 12 => { 205 } // Wall to the east and west 13 => { 202 } // Wall to the east, west, and south 14 => { 203 } // Wall to the east, west, and north 15 => { 206 } // ╬ Wall on all sides _ => { 35 } // We missed one? } } fn is_revealed_and_wall(map: &Map, x: i32, y: i32) -> bool { let idx = map.xy_idx(x, y); map.tiles[idx] == TileType::Wall && map.revealed_tiles[idx] } }
Finally, in main.rs find the following code:
#![allow(unused)] fn main() { ... RunState::GameOver{..} => {} _ => { draw_map(&self.ecs.fetch::<Map>(), ctx); let positions = self.ecs.read_storage::<Position>(); let renderables = self.ecs.read_storage::<Renderable>(); let hidden = self.ecs.read_storage::<Hidden>(); let map = self.ecs.fetch::<Map>(); let mut data = (&positions, &renderables, !&hidden).join().collect::<Vec<_>>(); data.sort_by(|&a, &b| b.1.render_order.cmp(&a.1.render_order) ); for (pos, render, _hidden) in data.iter() { let idx = map.xy_idx(pos.x, pos.y); if map.visible_tiles[idx] { ctx.set(pos.x, pos.y, render.fg, render.bg, render.glyph) } } gui::draw_ui(&self.ecs, ctx); } ... }
We can now replace that with a much shorter piece of code:
#![allow(unused)] fn main() { RunState::GameOver{..} => {} _ => { camera::render_camera(&self.ecs, ctx); gui::draw_ui(&self.ecs, ctx); } }
If you cargo run the project now, you'll see that we can still play - and the camera is centered on the player:
 .
.
Oops - we didn't move the tooltips or targeting!
If you play for a bit, you'll probably notice that tool-tips aren't working (they are still bound to the map coordinates). We should fix that! First of all, it's becoming obvious that the screen boundaries are something we'll need in more than just the drawing code, so lets break it into a separate function in camera.rs:
#![allow(unused)] fn main() { pub fn get_screen_bounds(ecs: &World, ctx : &mut Rltk) -> (i32, i32, i32, i32) { let player_pos = ecs.fetch::<Point>(); let (x_chars, y_chars) = ctx.get_char_size(); let center_x = (x_chars / 2) as i32; let center_y = (y_chars / 2) as i32; let min_x = player_pos.x - center_x; let max_x = min_x + x_chars as i32; let min_y = player_pos.y - center_y; let max_y = min_y + y_chars as i32; (min_x, max_x, min_y, max_y) } pub fn render_camera(ecs: &World, ctx : &mut Rltk) { let map = ecs.fetch::<Map>(); let (min_x, max_x, min_y, max_y) = get_screen_bounds(ecs, ctx); }
It's the same code from render_camera - just moved into a function. We've also extended render_camera to use the function, rather than repeating ourselves. Now we can go into gui.rs and edit draw_tooltips to use the camera position quite easily:
#![allow(unused)] fn main() { fn draw_tooltips(ecs: &World, ctx : &mut Rltk) { let (min_x, _max_x, min_y, _max_y) = camera::get_screen_bounds(ecs, ctx); let map = ecs.fetch::<Map>(); let names = ecs.read_storage::<Name>(); let positions = ecs.read_storage::<Position>(); let hidden = ecs.read_storage::<Hidden>(); let mouse_pos = ctx.mouse_pos(); let mut mouse_map_pos = mouse_pos; mouse_map_pos.0 += min_x; mouse_map_pos.1 += min_y; if mouse_map_pos.0 >= map.width-1 || mouse_map_pos.1 >= map.height-1 || mouse_map_pos.0 < 1 || mouse_map_pos.1 < 1 { return; } if !map.visible_tiles[map.xy_idx(mouse_map_pos.0, mouse_map_pos.1)] { return; } let mut tooltip : Vec<String> = Vec::new(); for (name, position, _hidden) in (&names, &positions, !&hidden).join() { if position.x == mouse_map_pos.0 && position.y == mouse_map_pos.1 { tooltip.push(name.name.to_string()); } } ... }
So our changes are:
- At the beginning, we retrieve the screen boundaries with
camera::get_screen_bounds. We aren't going to use themaxvariables, so we put an underscore before them to let Rust know that we're intentionally ignoring them. - After getting the
mouse_pos, we make a newmouse_map_posvariable. It is equal tomouse_pos, but we add themin_xandmin_yvalues - offsetting it to match the visible coordinates. - We extended our clipping to check all directions, so tooltips don't crash the game when you look at an area outside of the actual map because the viewport is at an extreme end of the map.
- Our comparison for
positionnow compares withmouse_map_posrather thanmouse_pos. - That's it - the rest can be unchanged.
If you cargo run now, tooltips will work:
 .
.
Fixing Targeting
If you play for a bit, you'll also notice if you try and use a fireball or similar effect - the targeting system is completely out of whack. It's still referencing the screen/map positions from when they were directly linked. So you see the available tiles, but they are in completely the wrong place! We should fix that, too.
In gui.rs, we'll edit the function ranged_target:
#![allow(unused)] fn main() { pub fn ranged_target(gs : &mut State, ctx : &mut Rltk, range : i32) -> (ItemMenuResult, Option<Point>) { let (min_x, max_x, min_y, max_y) = camera::get_screen_bounds(&gs.ecs, ctx); let player_entity = gs.ecs.fetch::<Entity>(); let player_pos = gs.ecs.fetch::<Point>(); let viewsheds = gs.ecs.read_storage::<Viewshed>(); ctx.print_color(5, 0, RGB::named(rltk::YELLOW), RGB::named(rltk::BLACK), "Select Target:"); // Highlight available target cells let mut available_cells = Vec::new(); let visible = viewsheds.get(*player_entity); if let Some(visible) = visible { // We have a viewshed for idx in visible.visible_tiles.iter() { let distance = rltk::DistanceAlg::Pythagoras.distance2d(*player_pos, *idx); if distance <= range as f32 { let screen_x = idx.x - min_x; let screen_y = idx.y - min_y; if screen_x > 1 && screen_x < (max_x - min_x)-1 && screen_y > 1 && screen_y < (max_y - min_y)-1 { ctx.set_bg(screen_x, screen_y, RGB::named(rltk::BLUE)); available_cells.push(idx); } } } } else { return (ItemMenuResult::Cancel, None); } // Draw mouse cursor let mouse_pos = ctx.mouse_pos(); let mut mouse_map_pos = mouse_pos; mouse_map_pos.0 += min_x; mouse_map_pos.1 += min_y; let mut valid_target = false; for idx in available_cells.iter() { if idx.x == mouse_map_pos.0 && idx.y == mouse_map_pos.1 { valid_target = true; } } if valid_target { ctx.set_bg(mouse_pos.0, mouse_pos.1, RGB::named(rltk::CYAN)); if ctx.left_click { return (ItemMenuResult::Selected, Some(Point::new(mouse_map_pos.0, mouse_map_pos.1))); } } else { ctx.set_bg(mouse_pos.0, mouse_pos.1, RGB::named(rltk::RED)); if ctx.left_click { return (ItemMenuResult::Cancel, None); } } (ItemMenuResult::NoResponse, None) } }
This is fundamentally what we had before, with some changes:
- We obtain the boundaries at the beginning, once again with
camera::get_screen_bounds. - In our visible target tiles section, we're calculating
screen_xandscreen_yby taking the map index and adding ourmin_xandmin_yvalues. We then check to see if it is on the screen, before drawing the targeting highlight at those locations. - We use the same
mouse_map_poscalculation after calculatingmouse_pos. - We then reference the
mouse_map_poswhen checking if a target is under the mouse, or selected.
If you cargo run now, targeting will work:
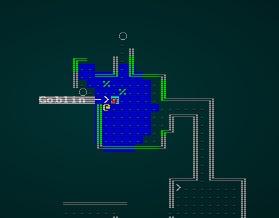 .
.
Variable map sizes
Now that our map isn't directly linked to our screen, we can have maps of any size we want! A word of caution: if you go with a huge map, it will take your player a really long time to explore it all - and it becomes more and more challenging to ensure that all of the map is interesting enough to want to visit it.
An easy start
Let's start with the simplest possible case: changing the size of the map globally. Go to map.rs, and find the constants MAPWIDTH, MAPHEIGHT and MAPCOUNT. Lets change them to a square map:
#![allow(unused)] fn main() { pub const MAPWIDTH : usize = 64; pub const MAPHEIGHT : usize = 64; pub const MAPCOUNT : usize = MAPHEIGHT * MAPWIDTH; }
If you cargo run the project, it should work - we've been pretty good about using either map.width/map.height or these constants throughout the program. The algorithms run, and try to make a map for your use. Here's our player wandering a 64x64 map - note how the sides of the map are displayed as out-of-bounds:
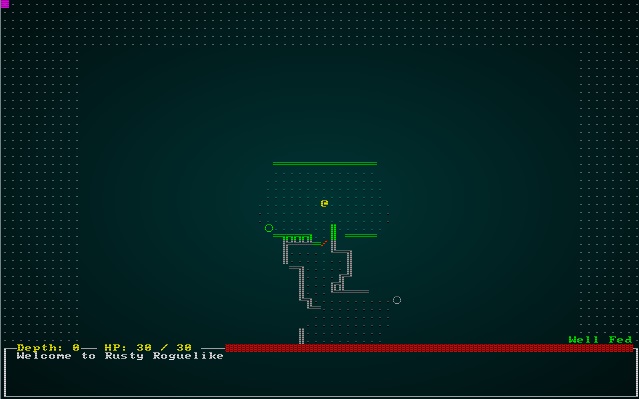 .
.
Harder: removing the constants
Now delete the three constants from map.rs, and watch your IDE paint the world red. Before we start fixing things, we'll add a bit more red:
#![allow(unused)] fn main() { /// Generates an empty map, consisting entirely of solid walls pub fn new(new_depth : i32, width: i32, height: i32) -> Map { Map{ tiles : vec![TileType::Wall; MAPCOUNT], width, height, revealed_tiles : vec![false; MAPCOUNT], visible_tiles : vec![false; MAPCOUNT], blocked : vec![false; MAPCOUNT], tile_content : vec![Vec::new(); MAPCOUNT], depth: new_depth, bloodstains: HashSet::new(), view_blocked : HashSet::new() } } }
Now creating a map requires that you specify a size as well as depth. We can make a start on fixing some errors by changing the constructor once more to use the specified size in creating the various vectors:
#![allow(unused)] fn main() { pub fn new(new_depth : i32, width: i32, height: i32) -> Map { let map_tile_count = (width*height) as usize; Map{ tiles : vec![TileType::Wall; map_tile_count], width, height, revealed_tiles : vec![false; map_tile_count], visible_tiles : vec![false; map_tile_count], blocked : vec![false; map_tile_count], tile_content : vec![Vec::new(); map_tile_count], depth: new_depth, bloodstains: HashSet::new(), view_blocked : HashSet::new() } } }
map.rs also has an error in draw_map. Fortunately, it's an easy fix:
#![allow(unused)] fn main() { ... // Move the coordinates x += 1; if x > (map.width * map.height) as i32-1 { x = 0; y += 1; } ... }
spawner.rs is an equally easy fix. Remove map::MAPWIDTH from the list of use imports at the beginning, and find the spawn_entity function. We can obtain the map width from the ECS directly:
#![allow(unused)] fn main() { pub fn spawn_entity(ecs: &mut World, spawn : &(&usize, &String)) { let map = ecs.fetch::<Map>(); let width = map.width as usize; let x = (*spawn.0 % width) as i32; let y = (*spawn.0 / width) as i32; std::mem::drop(map); ... }
The issue in saveload_system.rs is also easy to fix. Around line 102, you can replace MAPCOUNT with (worldmap.width * worldmap.height) as usize:
#![allow(unused)] fn main() { ... let mut deleteme : Option<Entity> = None; { let entities = ecs.entities(); let helper = ecs.read_storage::<SerializationHelper>(); let player = ecs.read_storage::<Player>(); let position = ecs.read_storage::<Position>(); for (e,h) in (&entities, &helper).join() { let mut worldmap = ecs.write_resource::<super::map::Map>(); *worldmap = h.map.clone(); worldmap.tile_content = vec![Vec::new(); (worldmap.height * worldmap.width) as usize]; deleteme = Some(e); } ... }
main.rs also needs some help. In tick, the MagicMapReveal code is a simple fix:
#![allow(unused)] fn main() { RunState::MagicMapReveal{row} => { let mut map = self.ecs.fetch_mut::<Map>(); for x in 0..map.width { let idx = map.xy_idx(x as i32,row); map.revealed_tiles[idx] = true; } if row == map.height-1 { newrunstate = RunState::MonsterTurn; } else { newrunstate = RunState::MagicMapReveal{ row: row+1 }; } } }
Down around line 451, we're also making a map with map::new(1). We want to introduce a map size here, so we go with map::new(1, 64, 64) (the size doesn't really matter since we'll be replacing it with a map from a builder anyway).
Open up player.rs and you'll find that we've committed a real programming sin. We've hard-coded 79 and 49 as map boundaries for player movement! Let's fix that:
#![allow(unused)] fn main() { if !map.blocked[destination_idx] { pos.x = min(map.width-1 , max(0, pos.x + delta_x)); pos.y = min(map.height-1, max(0, pos.y + delta_y)); }
Finally, expanding our map_builders folder reveals a few errors. We're going to introduce a couple more before we fix them! In map_builders/mod.rs we'll store the requested map size:
#![allow(unused)] fn main() { pub struct BuilderMap { pub spawn_list : Vec<(usize, String)>, pub map : Map, pub starting_position : Option<Position>, pub rooms: Option<Vec<Rect>>, pub corridors: Option<Vec<Vec<usize>>>, pub history : Vec<Map>, pub width: i32, pub height: i32 } }
We'll then update the constructor to use it:
#![allow(unused)] fn main() { impl BuilderChain { pub fn new(new_depth : i32, width: i32, height: i32) -> BuilderChain { BuilderChain{ starter: None, builders: Vec::new(), build_data : BuilderMap { spawn_list: Vec::new(), map: Map::new(new_depth, width, height), starting_position: None, rooms: None, corridors: None, history : Vec::new(), width, height } } } }
We also need to adjust the signature for random_builder to accept a map size:
#![allow(unused)] fn main() { pub fn random_builder(new_depth: i32, rng: &mut rltk::RandomNumberGenerator, width: i32, height: i32) -> BuilderChain { let mut builder = BuilderChain::new(new_depth, width, height); ... }
We'll also visit map_builders/waveform_collapse/mod.rs and make some fixes. Basically, all our references to Map::new need to include the new size.
Finally, go back to main.rs and around line 370 you'll find our call to random_builder. We need to add a width and height to it; for now, we'll use 64x64:
#![allow(unused)] fn main() { let mut builder = map_builders::random_builder(new_depth, &mut rng, 64, 64); }
And that's it! If you cargo run the project now, you can roam a 64x64 map:
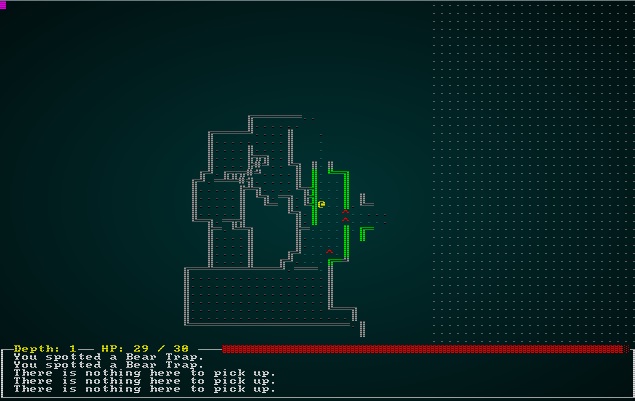 .
.
If you change that line to different sizes, you can roam a huge map:
#![allow(unused)] fn main() { let mut builder = map_builders::random_builder(new_depth, &mut rng, 128, 128); }
Voila - you are roaming a huge map! A definite downside of a huge map, and rolling a largely open area is that sometimes it can be really difficult to survive:
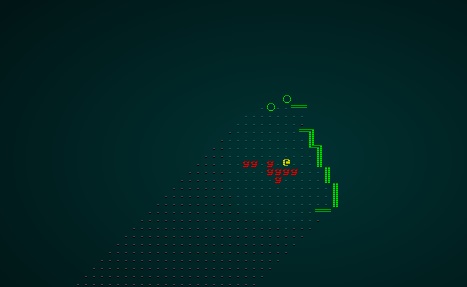 .
.
Revisiting draw_map for progressive map rendering.
If you keep the huge map, open main.rs and set const SHOW_MAPGEN_VISUALIZER : bool = false; to true - congratulations, you just crashed the game! That's because we never adjusted the draw_map function that we are using to verify map creation to handle maps of any size other than the original. Oops. This does bring up a problem: on an ASCII terminal we can't simply render the whole map and scale it down to fit. So we'll settle for rendering a portion of the map.
We'll add a new function to camera.rs:
#![allow(unused)] fn main() { pub fn render_debug_map(map : &Map, ctx : &mut Rltk) { let player_pos = Point::new(map.width / 2, map.height / 2); let (x_chars, y_chars) = ctx.get_char_size(); let center_x = (x_chars / 2) as i32; let center_y = (y_chars / 2) as i32; let min_x = player_pos.x - center_x; let max_x = min_x + x_chars as i32; let min_y = player_pos.y - center_y; let max_y = min_y + y_chars as i32; let map_width = map.width-1; let map_height = map.height-1; let mut y = 0; for ty in min_y .. max_y { let mut x = 0; for tx in min_x .. max_x { if tx > 0 && tx < map_width && ty > 0 && ty < map_height { let idx = map.xy_idx(tx, ty); if map.revealed_tiles[idx] { let (glyph, fg, bg) = get_tile_glyph(idx, &*map); ctx.set(x, y, fg, bg, glyph); } } else if SHOW_BOUNDARIES { ctx.set(x, y, RGB::named(rltk::GRAY), RGB::named(rltk::BLACK), rltk::to_cp437('·')); } x += 1; } y += 1; } } }
This is a lot like our regular map drawing, but we lock the camera to the middle of the map - and don't render entities.
In main.rs, replace the call to draw_map with:
#![allow(unused)] fn main() { if self.mapgen_index < self.mapgen_history.len() { camera::render_debug_map(&self.mapgen_history[self.mapgen_index], ctx); } }
Now you can go into map.rs and remove draw_map, wall_glyph and is_revealed_and_wall completely.
Wrap-Up
We'll set the map size back to something reasonable in main.rs:
#![allow(unused)] fn main() { let mut builder = map_builders::random_builder(new_depth, &mut rng, 80, 50); }
And - we're done! In this chapter, we've made it possible to have any size of map you like. We've reverted to a "normal" size at the end - but we'll find this feature very useful in the future. We can scale maps up or down - and the system won't mind at all.
...
The source code for this chapter may be found here
Run this chapter's example with web assembly, in your browser (WebGL2 required)
Copyright (C) 2019, Herbert Wolverson.
Section 3 - Wrap Up
About this tutorial
This tutorial is free and open source, and all code uses the MIT license - so you are free to do with it as you like. My hope is that you will enjoy the tutorial, and make great games!
If you enjoy this and would like me to keep writing, please consider supporting my Patreon.
And that wraps up section 3 - map building! We've covered a lot of ground in this section, learning many techniques for map building. I hope it has inspired you to search for your own interesting combinations, and make fun games! Procedurally generating maps is a huge part of making a roguelike, hence it being such a large part of this tutorial.
Section 4 will cover actually making a game.
...
Copyright (C) 2019, Herbert Wolverson.
Let's Make a Game!
About this tutorial
This tutorial is free and open source, and all code uses the MIT license - so you are free to do with it as you like. My hope is that you will enjoy the tutorial, and make great games!
If you enjoy this and would like me to keep writing, please consider supporting my Patreon.
So far, the tutorial has followed three sections:
- Make a skeletal game, showing how to make a very minimalistic roguelike.
- Add some essential genre features to the game, making it more fun to play.
- Building lots of maps, a very important part of making fun roguelikes.
Now we're going to start a series of articles that actually makes a cohesive game from our framework. It won't be huge, and it's unlikely to challenge for "best Roguelike ever!" status - but it will explore the trials and tribulations that go with turning a tech demo into a cohesive game.
The Berlin Interpretation
This game will stick closely to the genre, with very little ground-breaking innovation. So we'll have a fantasy setting, dungeon diving, and limited progression. If you're familiar with the Berlin Interpretation (an attempt at codifying what counts as a roguelike in a world of games using the name!), we'll try to stick closely to the important aspects:
High-value targets
- Random Environment Generation is essential, and we've already covered a lot of interesting ways to do it!
- Permadeath defines the genre, so we'll go with it. We'll probably sneak in game saving/loading, and look at how to handle non-permadeath if that's what you want - but we'll stick to the principle, and its implication that you should be able to beat a roguelike without dying.
- Turn-based - we'll definitely stick to a turn-based setup, but will introduce varying speeds and initiative.
- Grid-based - we'll definitely stick to a grid-based system.
- Non-modal - we'll probably break this one, by having systems that take you out of the regular "all on one screen" play system.
- Complexity - we'll strive for complexity, but try to keep the game playable without being a Master's thesis topic!
- Resource management - we've already got some of that with the hunger clock and consumable items, but we'll definitely want to retain this as a defining trait.
- Hack'n'slash - definitely!
- Exploration and discovery - absolutely!
Low-value targets
- Single player character - we're unlikely to introduce groups in this section, but we might introduce friendly NPCs.
- Monsters are similar to players - the ECS helps with this, since we're simulating the player in the same way as NPCs. We'll stick to the basic principle.
- Tactical challenge - always something to strive for; what good is a game without challenge?
- ASCII Display - we'll be sticking with this, but may find time to introduce graphical tiles later.
- Dungeons - of course! They don't have to be rooms and corridors, but we've worked hard to have good rooms and corridors!
- Numbers - this one is a little more controversial; not everyone wants to see a giant wall of math every time they punch a goblin. We'll try for some balance - so there are plenty of numbers, mostly visible, but they aren't essential to playing the game.
So it seems pretty likely that with this constraints we will be making a real roguelike - one that checks almost all of the boxes!
Setting
We've already decided on a fantasy-faux-medieval setting, but that doesn't mean it has to be just like D&D or Tolkien! We'll try and introduce some fun and unique elements in our setting.
Narrative
In the next chapter, we'll work on outlining our overall objective in a design document. This will necessarily include some narrative, although roguelikes aren't really known for deep stories!
...
Copyright (C) 2019, Herbert Wolverson.
Design Document
About this tutorial
This tutorial is free and open source, and all code uses the MIT license - so you are free to do with it as you like. My hope is that you will enjoy the tutorial, and make great games!
If you enjoy this and would like me to keep writing, please consider supporting my Patreon.
If you plan to finish a game, it's important to set out your objectives ahead of time! Traditionally, this has taken the form of a design document - a master document outlining the game, and smaller sections detailing what you want to accomplish. In this case, it also forms the skeleton of writing the section. There are thousands of online references to writing game design documents. The format really doesn't matter so long as it acts as a guiding light for development and gives you criteria for which you can say "this is done!"
Because this is a tutorial, we're going to make the game design document a skeleton for now, and flesh it out as we progress. That leaves some flexibility in writing the guide on my end! So until this section is approaching complete, consider this to be a living document - a perpetual work in progress, being expanded as we go. That's really not how one should write a design document, but I have two luxuries that most teams don't: no time limit, and no team members to direct!
Rusty Roguelike
Rusty Roguelike is a 2D traditional roguelike that attempts to capture the essentials of the genre as it has developed since Rogue's release in 1980. Turn-based, tile-based and centered on an adventurer's descent into a dungeon to retrieve the Amulet of Yala (Yet Another Lost Amulet). The adventurer battles through numerous procedurally generated levels to retrieve the amulet, and then must fight their way back to town to win the game.
Characters
The player controls one major character, Hero Protagonist as he/she/it battles through the dungeon. Human NPCs will range from shop-keepers to fantasy RPG staples such as bandits, brigands, sorcerers, etc. Other characters in the game will largely be fantasy RPG staples: elves, dwarves, gnomes, halflings, orcs, goblins, trolls, ogres, dragons, etc.
(Description of all NPCs should go here)
A stretch goal is to have NPCs belong to factions, and allow the clever player to "faction farm" and adjust loyalties.
Ideally, NPC AI should be more intelligent than a rock.
Story
This is not a story heavy game (Roguelikes are frequently shorter in story than traditional RPGs, because you die and restart a lot and won't generally spend a lot of time reading story/lore).
In the dark ages of yore, the sorcerer kings crafted the Amulet of Yala to bind the demons of the Abyss - and end their reign of terror. A Golden Age followed, and the good races flourished. Now dark times have fallen upon the land once more, demons stir, and the forces of darkness once again ravage the land. The Amulet of Yala may be the good folk's last hope. After a long night in the pub, you realize that maybe it is your destiny to recover it and restore tranquility to the land. Only slightly hungover, you set forth into the dungeons beneath your home town - sure that you can be the one to set things right.
Theme
We'll aim for a traditional D&D style dungeon bash, with traps, monsters, the occasional puzzle and "replayability". The game should be different every time. A light-hearted approach is preferred, with humor sprinkled liberally (another staple of the genre). A "kitchen sink" approach is preferred to strictly focused realism - this is a tutorial project, and it's better to have lots of themes (from which to learn) than a single cohesive one in this case.
Story Progression
There is no horizontal progression - you don't keep any benefits from previous runs through the game. So you always start in the same place as a new character, and gain benefits for a single run only. You can go both up and down in the dungeon, returning to town to sell items and goods. Progression on levels is preserved until you find the Amulet of Yala - at which point the universe truly is out to get you until you return home.
As a starting guide, consider the following progression. It will evolve and become more random as we work on the game.
- The game starts in town. In town, there are only minimal enemies (pickpockets, thugs). You start in the to-be-named pub (tavern), armed only with a meager purse, minimal starting equipment, a stein of beer, a dried sausage, a backpack and a hangover. Town lets you visit various vendors.
- You spelunk into the caves next to town, and fight your way through natural limestone caverns.
- The limestone caverns give way to a ruined dwarven fortress, now occupied by vile beasts - and a black dragon (thanks Mr. Sveller!).
- Beneath the dwarven fortress lies a vast mushroom forest.
- The mushroom forest gives way to a dark elven city.
- The depths contain a citadel with a portal to the Abyss.
- The Abyss is a nasty fight against high-level demonic monsters. Here you find the Amulet of Yala.
- You fight your way back up to town.
Travel should be facilitated with an equivalent of Town Portal scrolls from Diablo.
Gameplay
Gameplay should be a very traditional turn-based dungeon crawl, but with an emphasis on making mechanics easy to use. At the base level, this is the "murder hobo experience": you start with very little, subsist off of what you find, kill (or evade) monsters you encounter, and take their stuff! This should be sprinkled with staples of the genre: item identification, interesting magical items, stats and plenty of ways to modify them, and multiple "valid" ways to play and beat the game. The game should be difficult but not impossible. Nothing that requires quick reflexes is permitted!
In a real game design document, we'd painstakingly describe each element here. For the purposes of the tutorial, we'll add to the list as we write more.
Goals
- Overall: The ultimate goal is to retrieve the Amulet of Yala - and return to town (town portal spells stop working once you have it).
- Short-term: Defeat enemies on each level.
- Navigate each level of the dungeon, avoiding traps and reaching the exit.
- Obtain lots of cool loot.
- Earn bragging rights for your score.
User Skills
- Navigating different dungeons.
- Tactical combat, learning AI behavior and terrain to maximize the chances of survival.
- Item identification should be more than just "identify spell" - there should be some hints/system that the user can use to better understand the odds.
- Stat management - equip to improve your chances of survival for different threats.
- Long and short-term resource management.
- Ideally we want enough depth to spur "build" discussions.
Game Mechanics
We'll go with the tried and tested "sort of D&D" mechanics used by so many games (and licensed under the Open Gaming License), but without being tied to a D&D-like game. We'll expand upon this as we develop the tutorial.
Items and Power-Ups
The game should include a good variety of items. Broadly, items are divided as:
- Wearables (armor, clothes, etc.)
- Wearable specials (amulets, rings, etc.)
- Defense items (shields and similar)
- Melee weapons
- Ranged weapons
- Consumables (potions, scrolls, anything consumed by use)
- Charged items (items that can only be used
xtimes unless recharged) - Loot/junk to sell/scrap.
- Food.
Other notes:
- Eventually, items should have weight and inventory management becomes a skill. Until then, it can be quite loose/ready.
- Magical items shouldn't immediately reveal what they do, beyond being magical.
- Items should be drawn from loot tables that at least sort-of make sense.
- "Props" are a special form of item that doesn't move, but can be interacted with.
Progression and challenge
- As you defeat enemies, you earn experience points and can level up. This improves your general abilities and grants access to better ways to defeat more enemies!
- The levels should increase in difficulty as you descend. "Out of level" enemies are possible but very rare - to keep it fair.
- Try to avoid capriciously killing the player with no hope of circumventing it.
- Once the Amulet of Yala has been claimed, difficulty ramps up on all levels as you fight your way back up to town. Certain perks (like town portal) no longer work.
- There is no progression between runs - it's entirely self-contained.
Losing
Losing is fun! In fact, a fair portion of the appeal of traditional roguelikes is that you have one life - and it's "game over" when you succumb to your wounds/traps/being turned into a banana. The game will feature permadeath - once you've died, your run is over and you start afresh.
As a stretch goal, we may introduce some ways to mitigate/soften this.
Art Style
We'll aim for beautiful ASCII, and may introduce tiles.
Music and Sound
None! It would be nice to have once tiles are done, but fully voicing a modern RPG is far beyond my resources.
Technical Description
The game will be written in Rust, using rltk_rs for its back-end. It will support all the platforms on which Rust can compile and link to OpenGL, including Web Assembly for browser-based play.
Marketing and Funding
This is a free tutorial, so the budget is approximately $0. If anyone wants to donate to my Patreon I can promise eternal gratitude, a monster in your honor, and not a lot else!
Localization
I'm hopeless at languages, so English it is.
Other Ideas
Anyone who has great ideas should send them to me. :-)
Wrap-Up
So there we have it: a very skeletal design document, with lots of holes in it. It's a good idea to write one of these, especially when making a time-constrained game such as a "7-day roguelike challenge". This chapter will keep improving in quality as more features are implemented. For now, it's intended to serve as a baseline.
...
Copyright (C) 2019, Herbert Wolverson.
Data-Driven Design: Raw Files
About this tutorial
This tutorial is free and open source, and all code uses the MIT license - so you are free to do with it as you like. My hope is that you will enjoy the tutorial, and make great games!
If you enjoy this and would like me to keep writing, please consider supporting my Patreon.
If you've ever played Dwarf Fortress, one of its defining characteristics (under the hood) is the raw file system. Huge amounts of the game are detailed in the raws, and you can completely "mod" the game into something else. Other games, such as Tome 4 take this to the extent of defining scripting engine files for everything - you can customize the game to your heart's content. Once implemented, raws turn your game into more of an engine - displaying/managing interactions with content written in the raw files. That isn't to say the engine is simple: it has to support everything that one specifies in the raw files!
This is called data-driven design: your game is defined by the data describing it, more than the actual engine mechanics. It has a few advantages:
- It makes it very easy to make changes; you don't have to dig through
spawner.rsevery time you want to change a goblin, or make a new variant such as acowardly goblin. Instead, you edit therawsto include your new monster, add him/her/it to spawn, loot and faction tables, and the monster is now in your game! (Unless of course being cowardly requires new support code - in which case you write that, too). - Data-driven design meshes beautifully with Entity Component Systems (ECS). The
rawsserve as a template, from which you build your entities by composing components until it matches yourrawdescription. - Data-driven design makes it easy for people to change the game you've created. For a tutorial such as this, this is pretty essential: I'd much rather you come out of this tutorial able to go forth and make your own game, rather than just re-hashing this one!
A downside of web assembly
Web assembly doesn't make it easy to read files from your computer. That's why we started using the embedding system for assets; otherwise you have to make a bunch of hooks to read game data with JavaScript calls to download resources, obtain them as arrays of data, and pass the arrays into the Web Assembly module. There are probably better ways to do it than embedding everything, but until I find a good one (that also works in native code), we'll stick to embedding.
That gets rid of one advantage of data-driven design: you still have to recompile the game. So we'll make the embedding optional; if we can read a file from disk, we'll do so. In practice, this will mean that when you ship your game, you have to include the executable and the raw files - or embed them in the final build.
Deciding upon a format for our Raw files
In some projects, I've used the scripting language Lua for this sort of thing. It's a great language, and having executable configuration is surprisingly useful (the configuration can include functions and helpers to build itself). That's overkill for this project. We already support JSON in our saving/loading of the game, so we'll use it for Raws also.
Taking a look at spawner.rs in the current game should give us some clues as to what to put into these files. Thanks to our use of components, there's already a lot of shared functionality we can build upon. For example, the definition for a health potion looks like this:
#![allow(unused)] fn main() { fn health_potion(ecs: &mut World, x: i32, y: i32) { ecs.create_entity() .with(Position{ x, y }) .with(Renderable{ glyph: rltk::to_cp437('¡'), fg: RGB::named(rltk::MAGENTA), bg: RGB::named(rltk::BLACK), render_order: 2 }) .with(Name{ name : "Health Potion".to_string() }) .with(Item{}) .with(Consumable{}) .with(ProvidesHealing{ heal_amount: 8 }) .marked::<SimpleMarker<SerializeMe>>() .build(); } }
In JSON, we might go for a representation like this (just an example):
{
"name" : "Healing Potion",
"renderable": {
"glyph" : "!",
"fg" : "#FF00FF",
"bg" : "#000000"
},
"consumable" : {
"effects" : { "provides_healing" : "8" }
}
}
Making a raw files
Your package should be laid out like this:
| Root folder
\ - src (your source files)
At the root level, we'll make a new directory/folder called raws. So your tree should look like this:
| Root folder
\ - src (your source files)
\ - raws
In this directory, create a new file: spawns.json. We'll temporarily put all of our definitions into one file; this will change later, but we want to get support for our data-driven ambitions bootstrapped. In this file, we'll put definitions for some of the entities we currently support in spawner.rs. We'll start with just a couple of items:
{
{
"items" : [
{
"name" : "Health Potion",
"renderable": {
"glyph" : "!",
"fg" : "#FF00FF",
"bg" : "#000000",
"order" : 2
},
"consumable" : {
"effects" : { "provides_healing" : "8" }
}
},
{
"name" : "Magic Missile Scroll",
"renderable": {
"glyph" : ")",
"fg" : "#00FFFF",
"bg" : "#000000",
"order" : 2
},
"consumable" : {
"effects" : {
"ranged" : "6",
"damage" : "20"
}
}
}
]
}
If you aren't familiar with the JSON format, it's basically a JavaScript dump of data:
- We wrap the file in
{and}to denote the object we are loading. This will be ourRawsobject, eventually. - Then we have an array called
Items- which will hold our items. - Each
Itemhas aname- this maps directly to theNamecomponent. - Items may have a
renderablestructure, listing glyph, foreground and background colors. - These items are
consumable, and we list their effects in a "key/value map" - basically aHashMaplike we've used before, aDictionaryin other languages.
We'll be adding a lot more to the spawns list eventually, but lets start by making these work.
Embedding the Raw Files
In your project src directory, make a new directory: src/raws. We can reasonably expect this module to become quite large, so we'll support breaking it into smaller pieces from the beginning. To comply with Rust's requirements for building modules, make a new file called mod.rs in the new folder:
#![allow(unused)] fn main() { rltk::embedded_resource!(RAW_FILE, "../../raws/spawns.json"); pub fn load_raws() { rltk::link_resource!(RAW_FILE, "../../raws/spawns.json"); } }
And at the top of main.rs add it to the list of modules we use:
#![allow(unused)] fn main() { pub mod raws; }
In our initialization, add a call to load_raws after component initialization and before you start adding to World:
#![allow(unused)] fn main() { ... gs.ecs.register::<Door>(); gs.ecs.insert(SimpleMarkerAllocator::<SerializeMe>::new()); raws::load_raws(); gs.ecs.insert(Map::new(1, 64, 64)); ... }
The spawns.json file will now be embedded into your executable, courtesy of RLTK's embedding system.
Parsing the raw files
This is the hard part: we need a way to read the JSON file we've created, and to turn it into a format we can use within Rust. Going back to mod.rs, we can expand the function to load our embedded data as a string:
#![allow(unused)] fn main() { // Retrieve the raw data as an array of u8 (8-bit unsigned chars) let raw_data = rltk::embedding::EMBED .lock() .unwrap() .get_resource("../../raws/spawns.json".to_string()) .unwrap(); let raw_string = std::str::from_utf8(&raw_data).expect("Unable to convert to a valid UTF-8 string."); }
This will panic (crash) if it isn't able to find the resource, or if it is unable to parse it as a regular string (Rust likes UTF-8 Unicode encoding, so we'll go with it. It lets us include extended glyphs, which we can parse via RLTK's to_cp437 function - so it works out nicely!).
Now we need to actually parse the JSON into something usable. Just like our saveload.rs system, we can do this with Serde. For now, we'll just dump the results to the console so we can see that it did something:
#![allow(unused)] fn main() { let decoder : Raws = serde_json::from_str(&raw_string).expect("Unable to parse JSON"); rltk::console::log(format!("{:?}", decoder)); }
(See the cryptic {:?}? That's a way to print debug information about a structure). This will fail to compile, because we haven't actually implemented Raws - the type it is looking for.
For clarity, we'll put the classes that actually handle the data in their own file, raws/item_structs.rs. Here's the file:
#![allow(unused)] fn main() { use serde::{Deserialize}; use std::collections::HashMap; #[derive(Deserialize, Debug)] pub struct Raws { pub items : Vec<Item> } #[derive(Deserialize, Debug)] pub struct Item { pub name : String, pub renderable : Option<Renderable>, pub consumable : Option<Consumable> } #[derive(Deserialize, Debug)] pub struct Renderable { pub glyph: String, pub fg : String, pub bg : String, pub order: i32 } #[derive(Deserialize, Debug)] pub struct Consumable { pub effects : HashMap<String, String> } }
At the top of the file, make sure to include use serde::{Deserialize}; and use std::collections::HashMap; to include the types we need. Also notice that we have included Debug in the derived types list. This allows Rust to print a debug copy of the struct, so we can see what the code did. Notice also that a lot of things are an Option. This way, the parsing will work if an item doesn't have that entry. It will make reading them a little more complicated later on, but we can live with that!
If you cargo run the project now, ignore the game window - watch the console. You'll see the following:
Raws { items: [Item { name: "Healing Potion", renderable: Some(Renderable { glyph: "!", fg: "#FF00FF", bg: "#000000" }), consumable: Some(Consumable { effects: {"provides_healing": "8"} }) }, Item { name: "Magic Missile Scroll", renderable: Some(Renderable { glyph: ")", fg: "#00FFFF", bg: "#000000"
}), consumable: Some(Consumable { effects: {"damage": "20", "ranged": "6"} }) }] }
That's super ugly and horribly formatted, but you can see that it contains the data we entered!
Storing and indexing our raw item data
Having this (largely text) data is great, but it doesn't really help us until it can directly relate to spawning entities. We're also discarding the data as soon as we've loaded it!
We want to create a structure to hold all of our raw data, and provide useful services such as spawning an object entirely from the data in the raws. We'll make a new file, raws/rawmaster.rs:
#![allow(unused)] fn main() { use std::collections::HashMap; use specs::prelude::*; use crate::components::*; use super::{Raws}; pub struct RawMaster { raws : Raws, item_index : HashMap<String, usize> } impl RawMaster { pub fn empty() -> RawMaster { RawMaster { raws : Raws{ items: Vec::new() }, item_index : HashMap::new() } } pub fn load(&mut self, raws : Raws) { self.raws = raws; self.item_index = HashMap::new(); for (i,item) in self.raws.items.iter().enumerate() { self.item_index.insert(item.name.clone(), i); } } } }
That's very straightforward, and well within what we've learned of Rust so far: we make a structure called RawMaster, it gets a private copy of the Raws data and a HashMap storing item names and their index inside Raws.items. The empty constructor does just that: it makes a completely empty version of the RawMaster structure. load takes the de-serialized Raws structure, stores it, and indexes the items by name and location in the items array.
Accessing Raw Data From Anywhere
This is one of those times that it would be nice if Rust didn't make global variables difficult to use; we want exactly one copy of the RawMaster data, and we'd like to be able to read it from anywhere. You can accomplish that with a bunch of unsafe code, but we'll be good "Rustaceans" and use a popular method: the lazy_static. This functionality isn't part of the language itself, so we need to add a crate to cargo.toml. Add the following line to your [dependencies] in the file:
lazy_static = "1.4.0"
Now we do a bit of a dance to make the global safely available from everywhere. At the end of main.rs's import section, add:
#![allow(unused)] fn main() { #[macro_use] extern crate lazy_static; }
This is similar to what we've done for other macros: it tells Rust that we'd like to import the macros from the crate lazy_static. In mod.rs, declare the following:
#![allow(unused)] fn main() { mod rawmaster; pub use rawmaster::*; use std::sync::Mutex; }
Also:
#![allow(unused)] fn main() { lazy_static! { pub static ref RAWS : Mutex<RawMaster> = Mutex::new(RawMaster::empty()); } }
The lazy_static! macro does a bunch of hard work for us to make this safe. The interesting part is that we still have to use a Mutex. Mutexes are a construct that ensure that no more than one thread at a time can write to a structure. You access a Mutex by calling lock - it is now yours until the lock goes out of scope. So in our load_raws function, we need to populate it:
#![allow(unused)] fn main() { // Retrieve the raw data as an array of u8 (8-bit unsigned chars) let raw_data = rltk::embedding::EMBED .lock() .get_resource("../../raws/spawns.json".to_string()) .unwrap(); let raw_string = std::str::from_utf8(&raw_data).expect("Unable to convert to a valid UTF-8 string."); let decoder : Raws = serde_json::from_str(&raw_string).expect("Unable to parse JSON"); RAWS.lock().unwrap().load(decoder); }
You'll notice that RLTK's embedding system is quietly using a lazy_static itself - that's what the lock and unwrap code is for: it manages the Mutex. So for our RAWS global, we lock it (retrieving a scoped lock), unwrap that lock (to allow us to access the contents), and call the load function we wrote earlier. Quite a mouthful, but now we can safely share the RAWS data without having to worry about threading problems. Once loaded, we'll probably never write to it again - and Mutex locks for reading are pretty much instantaneous when you don't have lots of threads running.
Spawning items from the RAWS
In rawmaster.rs, we'll make a new function:
#![allow(unused)] fn main() { pub fn spawn_named_item(raws: &RawMaster, new_entity : EntityBuilder, key : &str, pos : SpawnType) -> Option<Entity> { if raws.item_index.contains_key(key) { let item_template = &raws.raws.items[raws.item_index[key]]; let mut eb = new_entity; // Spawn in the specified location match pos { SpawnType::AtPosition{x,y} => { eb = eb.with(Position{ x, y }); } } // Renderable if let Some(renderable) = &item_template.renderable { eb = eb.with(crate::components::Renderable{ glyph: rltk::to_cp437(renderable.glyph.chars().next().unwrap()), fg : rltk::RGB::from_hex(&renderable.fg).expect("Invalid RGB"), bg : rltk::RGB::from_hex(&renderable.bg).expect("Invalid RGB"), render_order : renderable.order }); } eb = eb.with(Name{ name : item_template.name.clone() }); eb = eb.with(crate::components::Item{}); if let Some(consumable) = &item_template.consumable { eb = eb.with(crate::components::Consumable{}); for effect in consumable.effects.iter() { let effect_name = effect.0.as_str(); match effect_name { "provides_healing" => { eb = eb.with(ProvidesHealing{ heal_amount: effect.1.parse::<i32>().unwrap() }) } "ranged" => { eb = eb.with(Ranged{ range: effect.1.parse::<i32>().unwrap() }) }, "damage" => { eb = eb.with(InflictsDamage{ damage : effect.1.parse::<i32>().unwrap() }) } _ => { rltk::console::log(format!("Warning: consumable effect {} not implemented.", effect_name)); } } } } return Some(eb.build()); } None } }
It's a long function, but it's actually very straightforward - and uses patterns we've encountered plenty of times before. It does the following:
- It looks to see if the
keywe've passed exists in theitem_index. If it doesn't, it returnsNone- it didn't do anything. - If the
keydoes exist, then it adds aNamecomponent to the entity - with the name from the raw file. - If
Renderableexists in the item definition, it creates a component of typeRenderable. - If
Consumableexists in the item definition, it makes a new consumable. It iterates through all of the keys/values inside theeffectdictionary, adding effect components as needed.
Now you can open spawner.rs and modify spawn_entity:
#![allow(unused)] fn main() { pub fn spawn_entity(ecs: &mut World, spawn : &(&usize, &String)) { let map = ecs.fetch::<Map>(); let width = map.width as usize; let x = (*spawn.0 % width) as i32; let y = (*spawn.0 / width) as i32; std::mem::drop(map); let item_result = spawn_named_item(&RAWS.lock().unwrap(), ecs.create_entity(), &spawn.1, SpawnType::AtPosition{ x, y}); if item_result.is_some() { return; } match spawn.1.as_ref() { "Goblin" => goblin(ecs, x, y), "Orc" => orc(ecs, x, y), "Fireball Scroll" => fireball_scroll(ecs, x, y), "Confusion Scroll" => confusion_scroll(ecs, x, y), "Dagger" => dagger(ecs, x, y), "Shield" => shield(ecs, x, y), "Longsword" => longsword(ecs, x, y), "Tower Shield" => tower_shield(ecs, x, y), "Rations" => rations(ecs, x, y), "Magic Mapping Scroll" => magic_mapping_scroll(ecs, x, y), "Bear Trap" => bear_trap(ecs, x, y), "Door" => door(ecs, x, y), _ => {} } } }
Note that we've deleted the items we've added into spawns.json. We can also delete the associated functions. spawner.rs will be really small when we're done! So the magic here is that it calls spawn_named_item, using a rather ugly &RAWS.lock().unwrap() to obtain safe access to our RAWS global variable. If it matched a key, it will return Some(Entity) - otherwise, we get None. So we check if item_result.is_some() and return if we succeeded in spawning something from the data. Otherwise, we use the new code.
You'll also want to add a raws::* to the list of items imported from super.
If you cargo run now, the game runs as before - including health potions and magic missile scrolls.
Adding the rest of the consumables
We'll go ahead and get the rest of the consumables into spawns.json:
...
{
"name" : "Fireball Scroll",
"renderable": {
"glyph" : ")",
"fg" : "#FFA500",
"bg" : "#000000",
"order" : 2
},
"consumable" : {
"effects" : {
"ranged" : "6",
"damage" : "20",
"area_of_effect" : "3"
}
}
},
{
"name" : "Confusion Scroll",
"renderable": {
"glyph" : ")",
"fg" : "#FFAAAA",
"bg" : "#000000",
"order" : 2
},
"consumable" : {
"effects" : {
"ranged" : "6",
"damage" : "20",
"confusion" : "4"
}
}
},
{
"name" : "Magic Mapping Scroll",
"renderable": {
"glyph" : ")",
"fg" : "#AAAAFF",
"bg" : "#000000",
"order" : 2
},
"consumable" : {
"effects" : {
"magic_mapping" : ""
}
}
},
{
"name" : "Rations",
"renderable": {
"glyph" : "%",
"fg" : "#00FF00",
"bg" : "#000000",
"order" : 2
},
"consumable" : {
"effects" : {
"food" : ""
}
}
}
]
}
We'll put their effects into rawmaster.rs's spawn_named_item function:
#![allow(unused)] fn main() { if let Some(consumable) = &item_template.consumable { eb = eb.with(crate::components::Consumable{}); for effect in consumable.effects.iter() { let effect_name = effect.0.as_str(); match effect_name { "provides_healing" => { eb = eb.with(ProvidesHealing{ heal_amount: effect.1.parse::<i32>().unwrap() }) } "ranged" => { eb = eb.with(Ranged{ range: effect.1.parse::<i32>().unwrap() }) }, "damage" => { eb = eb.with(InflictsDamage{ damage : effect.1.parse::<i32>().unwrap() }) } "area_of_effect" => { eb = eb.with(AreaOfEffect{ radius: effect.1.parse::<i32>().unwrap() }) } "confusion" => { eb = eb.with(Confusion{ turns: effect.1.parse::<i32>().unwrap() }) } "magic_mapping" => { eb = eb.with(MagicMapper{}) } "food" => { eb = eb.with(ProvidesFood{}) } _ => { rltk::console::log(format!("Warning: consumable effect {} not implemented.", effect_name)); } } } } }
You can now delete the fireball, magic mapping and confusion scrolls from spawner.rs! Run the game, and you have access to these items. Hopefully, this is starting to illustrate the power of linking a data file to your component creation.
Adding the remaining items
We'll make a few more JSON entries in spawns.json to cover the various other items we have remaining:
{
"name" : "Dagger",
"renderable": {
"glyph" : "/",
"fg" : "#FFAAAA",
"bg" : "#000000",
"order" : 2
},
"weapon" : {
"range" : "melee",
"power_bonus" : 2
}
},
{
"name" : "Longsword",
"renderable": {
"glyph" : "/",
"fg" : "#FFAAFF",
"bg" : "#000000",
"order" : 2
},
"weapon" : {
"range" : "melee",
"power_bonus" : 4
}
},
{
"name" : "Shield",
"renderable": {
"glyph" : "[",
"fg" : "#00AAFF",
"bg" : "#000000",
"order" : 2
},
"shield" : {
"defense_bonus" : 1
}
},
{
"name" : "Tower Shield",
"renderable": {
"glyph" : "[",
"fg" : "#00FFFF",
"bg" : "#000000",
"order" : 2
},
"shield" : {
"defense_bonus" : 3
}
}
There are two new fields here! shield and weapon. We need to expand our item_structs.rs to handle them:
#![allow(unused)] fn main() { #[derive(Deserialize, Debug)] pub struct Item { pub name : String, pub renderable : Option<Renderable>, pub consumable : Option<Consumable>, pub weapon : Option<Weapon>, pub shield : Option<Shield> } ... #[derive(Deserialize, Debug)] pub struct Weapon { pub range: String, pub power_bonus: i32 } #[derive(Deserialize, Debug)] pub struct Shield { pub defense_bonus: i32 } }
We'll also have to teach our spawn_named_item function (in rawmaster.rs) to use this data:
#![allow(unused)] fn main() { if let Some(weapon) = &item_template.weapon { eb = eb.with(Equippable{ slot: EquipmentSlot::Melee }); eb = eb.with(MeleePowerBonus{ power : weapon.power_bonus }); } if let Some(shield) = &item_template.shield { eb = eb.with(Equippable{ slot: EquipmentSlot::Shield }); eb = eb.with(DefenseBonus{ defense: shield.defense_bonus }); } }
You can now delete these items from spawner.rs as well, and they still spawn in game - as before.
Now for the monsters!
We'll add a new array to spawns.json to handle monsters. We're calling it "mobs" - this is slang from many games for "movable object", but it has come to mean things that move around and fight you in common parlance:
"mobs" : [
{
"name" : "Orc",
"renderable": {
"glyph" : "o",
"fg" : "#FF0000",
"bg" : "#000000",
"order" : 1
},
"blocks_tile" : true,
"stats" : {
"max_hp" : 16,
"hp" : 16,
"defense" : 1,
"power" : 4
},
"vision_range" : 8
},
{
"name" : "Goblin",
"renderable": {
"glyph" : "g",
"fg" : "#FF0000",
"bg" : "#000000",
"order" : 1
},
"blocks_tile" : true,
"stats" : {
"max_hp" : 8,
"hp" : 8,
"defense" : 1,
"power" : 3
},
"vision_range" : 8
}
]
You'll notice that we're fixing a minor issue from before: orcs and goblins are no longer identical in stats! Otherwise, this should make sense: the stats we set in spawner.rs are instead set in the JSON file. We need to create a new file, raws/mob_structs.rs:
#![allow(unused)] fn main() { use serde::{Deserialize}; use super::{Renderable}; #[derive(Deserialize, Debug)] pub struct Mob { pub name : String, pub renderable : Option<Renderable>, pub blocks_tile : bool, pub stats : MobStats, pub vision_range : i32 } #[derive(Deserialize, Debug)] pub struct MobStats { pub max_hp : i32, pub hp : i32, pub power : i32, pub defense : i32 } }
We'll also modify Raws (currently in item_structs.rs). We'll move it to mod.rs, since it is shared with other modules and edit it:
#![allow(unused)] fn main() { #[derive(Deserialize, Debug)] pub struct Raws { pub items : Vec<Item>, pub mobs : Vec<Mob> } }
We also need to modify rawmaster.rs to add an empty mobs list to the constructor:
#![allow(unused)] fn main() { impl RawMaster { pub fn empty() -> RawMaster { RawMaster { raws : Raws{ items: Vec::new(), mobs: Vec::new() }, item_index : HashMap::new() } } ... }
We'll also modify RawMaster to index our mobs:
#![allow(unused)] fn main() { pub struct RawMaster { raws : Raws, item_index : HashMap<String, usize>, mob_index : HashMap<String, usize> } impl RawMaster { pub fn empty() -> RawMaster { RawMaster { raws : Raws{ items: Vec::new(), mobs: Vec::new() }, item_index : HashMap::new(), mob_index : HashMap::new() } } pub fn load(&mut self, raws : Raws) { self.raws = raws; self.item_index = HashMap::new(); for (i,item) in self.raws.items.iter().enumerate() { self.item_index.insert(item.name.clone(), i); } for (i,mob) in self.raws.mobs.iter().enumerate() { self.mob_index.insert(mob.name.clone(), i); } } } }
We're going to want to build a spawn_named_mob function, but first lets create some helpers so we're sharing functionality with spawn_named_item - avoid repeating ourselves. The first is pretty straightforward:
#![allow(unused)] fn main() { fn spawn_position(pos : SpawnType, new_entity : EntityBuilder) -> EntityBuilder { let mut eb = new_entity; // Spawn in the specified location match pos { SpawnType::AtPosition{x,y} => { eb = eb.with(Position{ x, y }); } } eb } }
When we add more SpawnType entries, this function will necessarily expand to include them - so it's great that it's a function. We can replace the same code in spawn_named_item with a single call to this function:
#![allow(unused)] fn main() { // Spawn in the specified location eb = spawn_position(pos, eb); }
Let's also break out handling of Renderable data. This was more difficult; I had a terrible time getting Rust's lifetime checker to work with a system that actually added it to the EntityBuilder. I finally settled on a function that returns the component for the caller to add:
#![allow(unused)] fn main() { fn get_renderable_component(renderable : &super::item_structs::Renderable) -> crate::components::Renderable { crate::components::Renderable{ glyph: rltk::to_cp437(renderable.glyph.chars().next().unwrap()), fg : rltk::RGB::from_hex(&renderable.fg).expect("Invalid RGB"), bg : rltk::RGB::from_hex(&renderable.bg).expect("Invalid RGB"), render_order : renderable.order } } }
That still cleans up the call in spawn_named_item:
#![allow(unused)] fn main() { // Renderable if let Some(renderable) = &item_template.renderable { eb = eb.with(get_renderable_component(renderable)); } }
Alright - so with that in hand, we can go ahead and make spawn_named_mob:
#![allow(unused)] fn main() { pub fn spawn_named_mob(raws: &RawMaster, new_entity : EntityBuilder, key : &str, pos : SpawnType) -> Option<Entity> { if raws.mob_index.contains_key(key) { let mob_template = &raws.raws.mobs[raws.mob_index[key]]; let mut eb = new_entity; // Spawn in the specified location eb = spawn_position(pos, eb); // Renderable if let Some(renderable) = &mob_template.renderable { eb = eb.with(get_renderable_component(renderable)); } eb = eb.with(Name{ name : mob_template.name.clone() }); eb = eb.with(Monster{}); if mob_template.blocks_tile { eb = eb.with(BlocksTile{}); } eb = eb.with(CombatStats{ max_hp : mob_template.stats.max_hp, hp : mob_template.stats.hp, power : mob_template.stats.power, defense : mob_template.stats.defense }); eb = eb.with(Viewshed{ visible_tiles : Vec::new(), range: mob_template.vision_range, dirty: true }); return Some(eb.build()); } None } }
There's really nothing we haven't already covered in this function: we simply apply a renderable, position, name using the same code as before - and then check blocks_tile to see if we should add a BlocksTile component, and copy the stats into a CombatStats component. We also setup a Viewshed component with vision_range range.
Before we update spawner.rs again, lets introduce a master spawning method - spawn_named_entity. The reasoning behind this is that the spawn system doesn't actually know (or care) if an entity is an item, mob, or anything else. Rather than push a lot of if checks into it, we'll provide a single interface:
#![allow(unused)] fn main() { pub fn spawn_named_entity(raws: &RawMaster, new_entity : EntityBuilder, key : &str, pos : SpawnType) -> Option<Entity> { if raws.item_index.contains_key(key) { return spawn_named_item(raws, new_entity, key, pos); } else if raws.mob_index.contains_key(key) { return spawn_named_mob(raws, new_entity, key, pos); } None } }
So over in spawner.rs we can use the generic spawner now:
#![allow(unused)] fn main() { let spawn_result = spawn_named_entity(&RAWS.lock().unwrap(), ecs.create_entity(), &spawn.1, SpawnType::AtPosition{ x, y}); if spawn_result.is_some() { return; } }
We can also go ahead and delete the references to Orcs, Goblins and Monsters! We're nearly there - you can get your data-driven monsters now.
Doors and Traps
There are two remaining hard-coded entities. These have been left separate because they aren't really the same as the other types: they are what I call "props" - level features. You can't pick them up, but they are an integral part of the level. So in spawns.json, we'll go ahead and define some props:
"props" : [
{
"name" : "Bear Trap",
"renderable": {
"glyph" : "^",
"fg" : "#FF0000",
"bg" : "#000000",
"order" : 2
},
"hidden" : true,
"entry_trigger" : {
"effects" : {
"damage" : "6",
"single_activation" : "1"
}
}
},
{
"name" : "Door",
"renderable": {
"glyph" : "+",
"fg" : "#805A46",
"bg" : "#000000",
"order" : 2
},
"hidden" : false,
"blocks_tile" : true,
"blocks_visibility" : true,
"door_open" : true
}
]
The problem with props is that they can be really quite varied, so we end up with a lot of optional stuff in the definition. I'd rather have a complex definition on the Rust side than on the JSON side, to reduce the sheer volume of typing when we have a lot of props. So we wind up making something reasonably expressive in JSON, and do a lot of work to make it function in Rust! We'll make a new file, prop_structs.rs and put our serialization classes into it:
#![allow(unused)] fn main() { use serde::{Deserialize}; use super::{Renderable}; use std::collections::HashMap; #[derive(Deserialize, Debug)] pub struct Prop { pub name : String, pub renderable : Option<Renderable>, pub hidden : Option<bool>, pub blocks_tile : Option<bool>, pub blocks_visibility : Option<bool>, pub door_open : Option<bool>, pub entry_trigger : Option<EntryTrigger> } #[derive(Deserialize, Debug)] pub struct EntryTrigger { pub effects : HashMap<String, String> } }
We have to tell raws/mod.rs to use it:
#![allow(unused)] fn main() { mod prop_structs; use prop_structs::*; }
We also need to extend Raws to hold them:
#![allow(unused)] fn main() { #[derive(Deserialize, Debug)] pub struct Raws { pub items : Vec<Item>, pub mobs : Vec<Mob>, pub props : Vec<Prop> } }
That takes us into rawmaster.rs, where we need to extend the constructor and reader to include the new types:
#![allow(unused)] fn main() { pub struct RawMaster { raws : Raws, item_index : HashMap<String, usize>, mob_index : HashMap<String, usize>, prop_index : HashMap<String, usize> } impl RawMaster { pub fn empty() -> RawMaster { RawMaster { raws : Raws{ items: Vec::new(), mobs: Vec::new(), props: Vec::new() }, item_index : HashMap::new(), mob_index : HashMap::new(), prop_index : HashMap::new() } } pub fn load(&mut self, raws : Raws) { self.raws = raws; self.item_index = HashMap::new(); for (i,item) in self.raws.items.iter().enumerate() { self.item_index.insert(item.name.clone(), i); } for (i,mob) in self.raws.mobs.iter().enumerate() { self.mob_index.insert(mob.name.clone(), i); } for (i,prop) in self.raws.props.iter().enumerate() { self.prop_index.insert(prop.name.clone(), i); } } } }
We also make a new function, spawn_named_prop:
#![allow(unused)] fn main() { pub fn spawn_named_prop(raws: &RawMaster, new_entity : EntityBuilder, key : &str, pos : SpawnType) -> Option<Entity> { if raws.prop_index.contains_key(key) { let prop_template = &raws.raws.props[raws.prop_index[key]]; let mut eb = new_entity; // Spawn in the specified location eb = spawn_position(pos, eb); // Renderable if let Some(renderable) = &prop_template.renderable { eb = eb.with(get_renderable_component(renderable)); } eb = eb.with(Name{ name : prop_template.name.clone() }); if let Some(hidden) = prop_template.hidden { if hidden { eb = eb.with(Hidden{}) }; } if let Some(blocks_tile) = prop_template.blocks_tile { if blocks_tile { eb = eb.with(BlocksTile{}) }; } if let Some(blocks_visibility) = prop_template.blocks_visibility { if blocks_visibility { eb = eb.with(BlocksVisibility{}) }; } if let Some(door_open) = prop_template.door_open { eb = eb.with(Door{ open: door_open }); } if let Some(entry_trigger) = &prop_template.entry_trigger { eb = eb.with(EntryTrigger{}); for effect in entry_trigger.effects.iter() { match effect.0.as_str() { "damage" => { eb = eb.with(InflictsDamage{ damage : effect.1.parse::<i32>().unwrap() }) } "single_activation" => { eb = eb.with(SingleActivation{}) } _ => {} } } } return Some(eb.build()); } None } }
We'll gloss over the contents because this is basically the same as what we've done before. We need to extend spawn_named_entity to include props:
#![allow(unused)] fn main() { pub fn spawn_named_entity(raws: &RawMaster, new_entity : EntityBuilder, key : &str, pos : SpawnType) -> Option<Entity> { if raws.item_index.contains_key(key) { return spawn_named_item(raws, new_entity, key, pos); } else if raws.mob_index.contains_key(key) { return spawn_named_mob(raws, new_entity, key, pos); } else if raws.prop_index.contains_key(key) { return spawn_named_prop(raws, new_entity, key, pos); } None } }
Finally, we can go into spawner.rs and remove the door and bear trap functions. We can finish cleaning up the spawn_entity function. We're also going to add a warning in case you try to spawn something we don't know about:
#![allow(unused)] fn main() { /// Spawns a named entity (name in tuple.1) at the location in (tuple.0) pub fn spawn_entity(ecs: &mut World, spawn : &(&usize, &String)) { let map = ecs.fetch::<Map>(); let width = map.width as usize; let x = (*spawn.0 % width) as i32; let y = (*spawn.0 / width) as i32; std::mem::drop(map); let spawn_result = spawn_named_entity(&RAWS.lock().unwrap(), ecs.create_entity(), &spawn.1, SpawnType::AtPosition{ x, y}); if spawn_result.is_some() { return; } rltk::console::log(format!("WARNING: We don't know how to spawn [{}]!", spawn.1)); } }
If you cargo run now, you'll see doors and traps working as before.
Wrap-Up
This chapter has given us the ability to easily change the items, mobs and props that adorn our levels. We haven't touched adding more yet (or adjusting the spawn tables) - that'll be the next chapter. You can quickly change the character of the game now; want Goblins to be weaker? Lower their stats! Want them to have better eyesight than Orcs? Adjust their vision range! That's the primary benefit of a data-driven approach: you can quickly make changes without having to dive into source code. The engine becomes responsible for simulating the world - and the data becomes responsible for describing the world.
The source code for this chapter may be found here
Run this chapter's example with web assembly, in your browser (WebGL2 required)
Copyright (C) 2019, Herbert Wolverson.
Data-Driven Spawn Tables
About this tutorial
This tutorial is free and open source, and all code uses the MIT license - so you are free to do with it as you like. My hope is that you will enjoy the tutorial, and make great games!
If you enjoy this and would like me to keep writing, please consider supporting my Patreon.
In the previous chapter, we moved spawning to be data-driven: you define your monsters, items and props in a JSON data file - and the spawn function becomes a parser that builds components based on your definitions. That gets you half-way to a data-driven world.
If you look at the ever-shrinking spawner.rs file, we have a hard-coded table for handling spawning:
#![allow(unused)] fn main() { fn room_table(map_depth: i32) -> RandomTable { RandomTable::new() .add("Goblin", 10) .add("Orc", 1 + map_depth) .add("Health Potion", 7) .add("Fireball Scroll", 2 + map_depth) .add("Confusion Scroll", 2 + map_depth) .add("Magic Missile Scroll", 4) .add("Dagger", 3) .add("Shield", 3) .add("Longsword", map_depth - 1) .add("Tower Shield", map_depth - 1) .add("Rations", 10) .add("Magic Mapping Scroll", 2) .add("Bear Trap", 5) } }
It's served us well for all these chapters, but sadly it's time to put it out to pasture. We'd like to be able to specify the spawn table in our JSON data - that way, we can add new entities to the data file and spawn list, and they appear in the game with no additional Rust coding (unless they need new features, in which case it's time to extend the engine).
A JSON-based spawn table
Here's an example of how I'm envisioning our spawn table:
"spawn_table" : [
{ "name" : "Goblin", "weight" : 10, "min_depth" : 0, "max_depth" : 100 }
],
So the spawn_table is an array, with each entry containing something that can be spawned. We're storing the name of the spawnable. We give it a weight, which corresponds to the same field in our current RandomTable structure. We've added a min_depth and max_depth - so this spawn line will only apply to a specified depth range of the dungeon.
That looks pretty good, so lets put all of our entities in:
"spawn_table" : [
{ "name" : "Goblin", "weight" : 10, "min_depth" : 0, "max_depth" : 100 },
{ "name" : "Orc", "weight" : 1, "min_depth" : 0, "max_depth" : 100, "add_map_depth_to_weight" : true },
{ "name" : "Health Potion", "weight" : 7, "min_depth" : 0, "max_depth" : 100 },
{ "name" : "Fireball Scroll", "weight" : 2, "min_depth" : 0, "max_depth" : 100, "add_map_depth_to_weight" : true },
{ "name" : "Confusion Scroll", "weight" : 2, "min_depth" : 0, "max_depth" : 100, "add_map_depth_to_weight" : true },
{ "name" : "Magic Missile Scroll", "weight" : 4, "min_depth" : 0, "max_depth" : 100 },
{ "name" : "Dagger", "weight" : 3, "min_depth" : 0, "max_depth" : 100 },
{ "name" : "Shield", "weight" : 3, "min_depth" : 0, "max_depth" : 100 },
{ "name" : "Longsword", "weight" : 1, "min_depth" : 1, "max_depth" : 100 },
{ "name" : "Tower Shield", "weight" : 1, "min_depth" : 1, "max_depth" : 100 },
{ "name" : "Rations", "weight" : 10, "min_depth" : 0, "max_depth" : 100 },
{ "name" : "Magic Mapping Scroll", "weight" : 2, "min_depth" : 0, "max_depth" : 100 },
{ "name" : "Bear Trap", "weight" : 5, "min_depth" : 0, "max_depth" : 100 }
],
Notice that we've added add_map_depth_to_weight to allow us to indicate that things become more probable later on in the game. That lets us keep the variable weighting capability. We've also put longsword and tower shield only occurring after the first level.
That's pretty comprehensive (covers everything we have so far, and adds some capability), so lets make a new file spawn_table_structs in raws and define the classes required to read this data:
#![allow(unused)] fn main() { use serde::{Deserialize}; use super::{Renderable}; #[derive(Deserialize, Debug)] pub struct SpawnTableEntry { pub name : String, pub weight : i32, pub min_depth: i32, pub max_depth: i32, pub add_map_depth_to_weight : Option<bool> } }
Open up raws/mod.rs and we'll add it to the Raws structure:
#![allow(unused)] fn main() { mod spawn_table_structs; use spawn_table_structs::*; ... #[derive(Deserialize, Debug)] pub struct Raws { pub items : Vec<Item>, pub mobs : Vec<Mob>, pub props : Vec<Prop>, pub spawn_table : Vec<SpawnTableEntry> } }
We also need to add it to the constructor in rawmaster.rs:
#![allow(unused)] fn main() { pub fn empty() -> RawMaster { RawMaster { raws : Raws{ items: Vec::new(), mobs: Vec::new(), props: Vec::new(), spawn_table: Vec::new() }, item_index : HashMap::new(), mob_index : HashMap::new(), prop_index : HashMap::new(), } } }
It's worth doing a quick cargo run now, just to be sure that the spawn table is loading without errors. It won't do anything yet, but it's always good to know that the data loads properly.
Using the new spawn table
In rawmaster.rs, we're going to add a new function to build a random spawn table from our JSON data:
#![allow(unused)] fn main() { pub fn get_spawn_table_for_depth(raws: &RawMaster, depth: i32) -> RandomTable { use super::SpawnTableEntry; let available_options : Vec<&SpawnTableEntry> = raws.raws.spawn_table .iter() .filter(|a| depth >= a.min_depth && depth <= a.max_depth) .collect(); let mut rt = RandomTable::new(); for e in available_options.iter() { let mut weight = e.weight; if e.add_map_depth_to_weight.is_some() { weight += depth; } rt = rt.add(e.name.clone(), weight); } rt } }
This function is quite simple:
- We obtain
raws.raws.spawn_table- which is the master spawn table list. - We obtain an iterator with
iter(). - We use
filterto only include items that are within the requested map depth's range. - We
collect()it into a vector of references toSpawnTableEntrylines. - We iterate all of the collected available options:
- We grab the weight.
- If the entry has an "add map depth to weight" requirement, we add that depth to that entry's weight.
- We add it to our
RandomTable.
That's pretty straightforward! We can open up spawner.rs and modify our RoomTable function to use it:
#![allow(unused)] fn main() { fn room_table(map_depth: i32) -> RandomTable { get_spawn_table_for_depth(&RAWS.lock().unwrap(), map_depth) } }
Wow, that's a short function! It does the job, however. If you cargo run now, you'll be playing the game like before.
Adding some sanity checks
We've now got the ability to add entities without touching our Rust code! Before we explore that, lets look at adding some "sanity checking" to the system to help avoid mistakes. We simply change the load function in rawmaster.rs:
#![allow(unused)] fn main() { pub fn load(&mut self, raws : Raws) { self.raws = raws; self.item_index = HashMap::new(); let mut used_names : HashSet<String> = HashSet::new(); for (i,item) in self.raws.items.iter().enumerate() { if used_names.contains(&item.name) { rltk::console::log(format!("WARNING - duplicate item name in raws [{}]", item.name)); } self.item_index.insert(item.name.clone(), i); used_names.insert(item.name.clone()); } for (i,mob) in self.raws.mobs.iter().enumerate() { if used_names.contains(&mob.name) { rltk::console::log(format!("WARNING - duplicate mob name in raws [{}]", mob.name)); } self.mob_index.insert(mob.name.clone(), i); used_names.insert(mob.name.clone()); } for (i,prop) in self.raws.props.iter().enumerate() { if used_names.contains(&prop.name) { rltk::console::log(format!("WARNING - duplicate prop name in raws [{}]", prop.name)); } self.prop_index.insert(prop.name.clone(), i); used_names.insert(prop.name.clone()); } for spawn in self.raws.spawn_table.iter() { if !used_names.contains(&spawn.name) { rltk::console::log(format!("WARNING - Spawn tables references unspecified entity {}", spawn.name)); } } } }
What are we doing here? We create used_names as a HashSet. Whenever we load something, we add it to the set. If it already exists? Then we've made a duplicate and bad things will happen - so we warn the user. Then we iterate the spawn table, and if we've references an entity name that hasn't been defined - we again warn the user.
These types of data-entry bugs are common, and won't actually crash the program. This sanity check ensures that we are at least warned about it before we proceed thinking that all is well. If you're paranoid (when programming, that's actually a good trait; there are plenty of people who are out to get you!), you could replace the println! with panic! and crash instead of just reminding the user. You may not want to do that if you like to cargo run often to see how you are doing!
Benefitting from our data-driven architecture
Lets quickly add a new weapon and a new monster to the game. We can do this without touching the Rust code other than to recompile (embedding the changed file). In spawns.json, lets add a Battleaxe to the weapons list:
{
"name" : "Battleaxe",
"renderable": {
"glyph" : "¶",
"fg" : "#FF55FF",
"bg" : "#000000",
"order" : 2
},
"weapon" : {
"range" : "melee",
"power_bonus" : 5
}
},
We'll also add it into the spawn table:
{ "name" : "Battleaxe", "weight" : 1, "min_depth" : 2, "max_depth" : 100 }
Let's also add a humble kobold. It's basically an even weaker goblin. We like kobolds, lets have lots of them!
{
"name" : "Kobold",
"renderable": {
"glyph" : "k",
"fg" : "#FF0000",
"bg" : "#000000",
"order" : 1
},
"blocks_tile" : true,
"stats" : {
"max_hp" : 4,
"hp" : 4,
"defense" : 0,
"power" : 2
},
"vision_range" : 4
}
So we'll also add this little critter to the spawn list:
{ "name" : "Kobold", "weight" : 15, "min_depth" : 0, "max_depth" : 3 }
Notice that we make them really common - and stop harassing the player with them after level 3.
If you cargo run the project now, you'll find the new entities in the game:
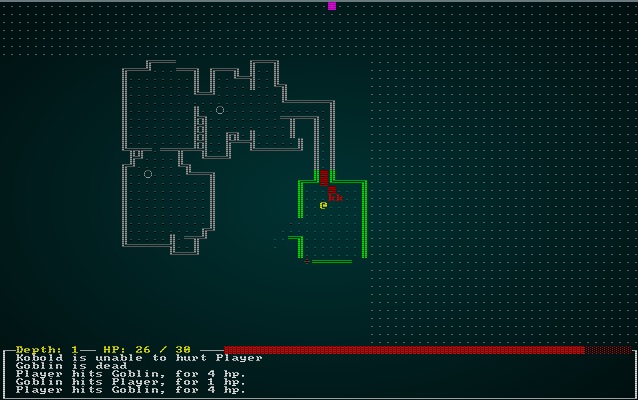 .
.
Wrap-Up
That's it for spawn tables! You've gained considerable power in these last two chapters - use it wisely. You can add in all manner of entities without having to write a line of Rust now, and could easily start to shape the game to what you want. In the next chapter, we'll begin doing just that.
The source code for this chapter may be found here
Run this chapter's example with web assembly, in your browser (WebGL2 required)
Copyright (C) 2019, Herbert Wolverson.
Making the starting town
About this tutorial
This tutorial is free and open source, and all code uses the MIT license - so you are free to do with it as you like. My hope is that you will enjoy the tutorial, and make great games!
If you enjoy this and would like me to keep writing, please consider supporting my Patreon.
What is the town for?
Back in the Design Document we decided: The game starts in town. In town, there are only minimal enemies (pickpockets, thugs). You start in the to-be-named pub (tavern), armed only with a meager purse, minimal starting equipment, a stein of beer, a dried sausage, a backpack and a hangover. Town lets you visit various vendors.
From a development point of view, this tells us a few things:
- The town has a story aspect, in that you start there and it ground the story - giving a starting point, a destiny (in this case a drunken promise to save the world). So the town implies a certain cozy starting point, implies some communication to help you understand why you are embarking on the life of an adventurer, and so on.
- The town has vendors. That won't make sense at this point, because we don't have a value/currency system - but we know that we need somewhere to put them.
- The town has a tavern/inn/pub - it's a starting location, but it's obviously important enough that it needs to do something!
- Elsewhere in the design document, we mention that you can town portal back to the settlement. This again implies a certain coziness/safety, and also implies that doing so is useful - so the services offered by the town need to retain their utility throughout the game.
- Finally, the town is the winning condition: once you've grabbed the Amulet of Yala - getting back to town lets you save the world. That implies that the town should have some sort of holy structure to which you have to return the amulet.
- The town is the first thing that new players will encounter - so it has to look alive and somewhat slick, or players will just close the window and try something else. It may also serve as a location for some tutorials.
This sort of discussion is essential to game design; you don't want to implement something just because you can (in most cases; big open world games relax that a bit). The town has a purpose, and that purpose guides its design.
So what do we have to include in the town?
So that discussion lets us determine that the town must include:
- One or more merchants. We're not implementing the sale of goods yet, but they need a place to operate.
- Some friendly/neutral NPCs for color.
- A temple.
- A tavern.
- A place that town portals arrive.
- A way out to begin your adventure.
We can also think a little bit about what makes a town:
- There's generally a communication route (land or sea), otherwise the town won't prosper.
- Frequently, there's a market (surrounding villages use towns for commerce).
- There's almost certainly either a river or a deep natural water source.
- Towns typically have authority figures, visible at least as Guards or Watch.
- Towns also generally have a shady side.
How do we want to generate our town?
We could go for a prefabricated town. This has the upside that the town can be tweaked until it's just right, and plays smoothly. It has the downside that getting out of the town becomes a purely mechanical step after the first couple of play-throughs ("runs"); look at Joppa in Caves of Qud - it became little more than a "grab the chest content, talk to these guys, and off you go" speed-bump start to an amazing game.
So - we want a procedurally generated town, but we want to keep it functional - and make it pretty. Not much to ask!
Making some new tile types
From the above, it sounds like we are going to need some new tiles. The ones that spring to mind for a town are roads, grass, water (both deep and shallow), bridge, wooden floors, and building walls. One thing we can count on: we're going to add lots of new tile types as we progress, so we better take the time to make it a seamless experience up-front!
The map.rs could get quite complicated if we're not careful, so lets make it into its own module with a directory. We'll start by making a directory, map/. Then we'll move map.rs into it, and rename it mod.rs. Now, we'll take TileType out of mod.rs and put it into a new file - tiletype.rs:
#![allow(unused)] fn main() { use serde::{Serialize, Deserialize}; #[derive(PartialEq, Eq, Hash, Copy, Clone, Serialize, Deserialize)] pub enum TileType { Wall, Floor, DownStairs } }
And in mod.rs we'll accept the module and share the public types it exposes:
#![allow(unused)] fn main() { mod tiletype; pub use tiletype::TileType; }
This hasn't gained us much yet... but now we can start supporting the various tile types. As we add functionality, you'll hopefully see why using a separate file makes it easier to find the relevant code:
#![allow(unused)] fn main() { #[derive(PartialEq, Eq, Hash, Copy, Clone, Serialize, Deserialize)] pub enum TileType { Wall, Floor, DownStairs, Road, Grass, ShallowWater, DeepWater, WoodFloor, Bridge } }
This is only part of the picture, because now we need to handle a bunch of grunt-work: can you enter tiles of that type, do they block visibility, do they have a different cost for path-finding, and so on. We've also done a lot of "spawn if its a floor" code in our map builders; maybe that wasn't such a good idea if you can have multiple floor types? Anyway, the current map.rs provides some of what we need in order to satisfy the BaseMap trait for RLTK.
We'll make a few functions to help satisfy this requirement, while keeping our tile functionality in one place:
#![allow(unused)] fn main() { pub fn tile_walkable(tt : TileType) -> bool { match tt { TileType::Floor | TileType::DownStairs | TileType::Road | TileType::Grass | TileType::ShallowWater | TileType::WoodFloor | TileType::Bridge => true, _ => false } } pub fn tile_opaque(tt : TileType) -> bool { match tt { TileType::Wall => true, _ => false } } }
Now we'll go back into mod.rs, and import these - and make them public to anyone who wants them:
#![allow(unused)] fn main() { mod tiletype; pub use tiletype::{TileType, tile_walkable, tile_opaque}; }
We also need to update some of our functions to use this functionality. We determine a lot of path-finding with the blocked system, so we need to update populate_blocked to handle the various types using the functions we just made:
#![allow(unused)] fn main() { pub fn populate_blocked(&mut self) { for (i,tile) in self.tiles.iter_mut().enumerate() { self.blocked[i] = !tile_walkable(*tile); } } }
We also need to update our visibility determination code:
#![allow(unused)] fn main() { impl BaseMap for Map { fn is_opaque(&self, idx:i32) -> bool { let idx_u = idx as usize; if idx_u > 0 && idx_u < self.tiles.len() { tile_opaque(self.tiles[idx_u]) || self.view_blocked.contains(&idx_u) } else { true } } ... }
Lastly, lets look at get_available_exits. This uses the blocked system to determine if an exit is possible, but so far we've hard-coded all of our costs. When there is just a floor and a wall to choose from, it is a pretty easy choice after all! Once we start offering choices, we might want to encourage certain behaviors. It would certainly look more realistic if people preferred to travel on the road than the grass, and definitely more realistic if they avoid standing in shallow water unless they need to. So we'll build a cost function (in tiletype.rs):
#![allow(unused)] fn main() { pub fn tile_cost(tt : TileType) -> f32 { match tt { TileType::Road => 0.8, TileType::Grass => 1.1, TileType::ShallowWater => 1.2, _ => 1.0 } } }
Then we update our get_available_exits to use it:
#![allow(unused)] fn main() { fn get_available_exits(&self, idx:i32) -> Vec<(i32, f32)> { let mut exits : Vec<(i32, f32)> = Vec::new(); let x = idx % self.width; let y = idx / self.width; let tt = self.tiles[idx as usize]; // Cardinal directions if self.is_exit_valid(x-1, y) { exits.push((idx-1, tile_cost(tt))) }; if self.is_exit_valid(x+1, y) { exits.push((idx+1, tile_cost(tt))) }; if self.is_exit_valid(x, y-1) { exits.push((idx-self.width, tile_cost(tt))) }; if self.is_exit_valid(x, y+1) { exits.push((idx+self.width, tile_cost(tt))) }; // Diagonals if self.is_exit_valid(x-1, y-1) { exits.push(((idx-self.width)-1, tile_cost(tt) * 1.45)); } if self.is_exit_valid(x+1, y-1) { exits.push(((idx-self.width)+1, tile_cost(tt) * 1.45)); } if self.is_exit_valid(x-1, y+1) { exits.push(((idx+self.width)-1, tile_cost(tt) * 1.45)); } if self.is_exit_valid(x+1, y+1) { exits.push(((idx+self.width)+1, tile_cost(tt) * 1.45)); } exits } }
We've replaced all the costs of 1.0 with a call to our tile_cost function, and multiplied diagonals by 1.45 to encourage more natural looking movement.
Fixing our camera
We also need to be able to render these tile types, so we open up camera.rs and add them to the match statement in get_tile_glyph:
#![allow(unused)] fn main() { fn get_tile_glyph(idx: usize, map : &Map) -> (rltk::FontCharType, RGB, RGB) { let glyph; let mut fg; let mut bg = RGB::from_f32(0., 0., 0.); match map.tiles[idx] { TileType::Floor => { glyph = rltk::to_cp437('.'); fg = RGB::from_f32(0.0, 0.5, 0.5); } TileType::WoodFloor => { glyph = rltk::to_cp437('.'); fg = RGB::named(rltk::CHOCOLATE); } TileType::Wall => { let x = idx as i32 % map.width; let y = idx as i32 / map.width; glyph = wall_glyph(&*map, x, y); fg = RGB::from_f32(0., 1.0, 0.); } TileType::DownStairs => { glyph = rltk::to_cp437('>'); fg = RGB::from_f32(0., 1.0, 1.0); } TileType::Bridge => { glyph = rltk::to_cp437('.'); fg = RGB::named(rltk::CHOCOLATE); } TileType::Road => { glyph = rltk::to_cp437('~'); fg = RGB::named(rltk::GRAY); } TileType::Grass => { glyph = rltk::to_cp437('"'); fg = RGB::named(rltk::GREEN); } TileType::ShallowWater => { glyph = rltk::to_cp437('≈'); fg = RGB::named(rltk::CYAN); } TileType::DeepWater => { glyph = rltk::to_cp437('≈'); fg = RGB::named(rltk::NAVY_BLUE); } } if map.bloodstains.contains(&idx) { bg = RGB::from_f32(0.75, 0., 0.); } if !map.visible_tiles[idx] { fg = fg.to_greyscale(); bg = RGB::from_f32(0., 0., 0.); // Don't show stains out of visual range } (glyph, fg, bg) } }
Starting to build our town
We want to stop making maps randomly, and instead start being a bit predictable in what we make. So when you start depth 1, you always get a town. In map_builders/mod.rs, we'll make a new function. For now, it'll just fall back to being random:
#![allow(unused)] fn main() { pub fn level_builder(new_depth: i32, rng: &mut rltk::RandomNumberGenerator, width: i32, height: i32) -> BuilderChain { random_builder(new_depth, rng, width, height) } }
Pop over to main.rs and change the builder function call to use our new function:
#![allow(unused)] fn main() { fn generate_world_map(&mut self, new_depth : i32) { self.mapgen_index = 0; self.mapgen_timer = 0.0; self.mapgen_history.clear(); let mut rng = self.ecs.write_resource::<rltk::RandomNumberGenerator>(); let mut builder = map_builders::level_builder(new_depth, &mut rng, 80, 50); ... }
Now, we'll start fleshing out our level_builder; we want depth 1 to generate a town map - otherwise, we'll stick with random for now. We also want it to be obvious via a match statement how we're routing each level's procedural generation:
#![allow(unused)] fn main() { pub fn level_builder(new_depth: i32, rng: &mut rltk::RandomNumberGenerator, width: i32, height: i32) -> BuilderChain { rltk::console::log(format!("Depth: {}", new_depth)); match new_depth { 1 => town_builder(new_depth, rng, width, height), _ => random_builder(new_depth, rng, width, height) } } }
At the top of the mod.rs file, add:
#![allow(unused)] fn main() { mod town; use town::town_builder; }
And in a new file, map_builders/town.rs we'll begin our function:
#![allow(unused)] fn main() { use super::BuilderChain; pub fn level_builder(new_depth: i32, rng: &mut rltk::RandomNumberGenerator, width: i32, height: i32) -> BuilderChain { let mut chain = BuilderChain::new(new_depth, width, height); chain.start_with(TownBuilder::new()); let (start_x, start_y) = super::random_start_position(rng); chain.with(AreaStartingPosition::new(start_x, start_y)); chain.with(DistantExit::new()); chain } }
The AreaStartingPosition and DistantExit are temporary to get us valid start/end points. The meat is the call to TownBuilder. We haven't written that yet, so we'll work through step-by-step until we have a town we like!
Here's an empty skeleton to start with:
#![allow(unused)] fn main() { pub struct TownBuilder {} impl InitialMapBuilder for TownBuilder { #[allow(dead_code)] fn build_map(&mut self, rng: &mut rltk::RandomNumberGenerator, build_data : &mut BuilderMap) { self.build_rooms(rng, build_data); } } impl TownBuilder { pub fn new() -> Box<TownBuilder> { Box::new(TownBuilder{}) } pub fn build_rooms(&mut self, rng: &mut rltk::RandomNumberGenerator, build_data : &mut BuilderMap) { } } }
Let's make a fishing town
Let's start by adding grass, water and piers to the region. We'll write the skeleton first:
#![allow(unused)] fn main() { pub fn build_rooms(&mut self, rng: &mut rltk::RandomNumberGenerator, build_data : &mut BuilderMap) { self.grass_layer(build_data); self.water_and_piers(rng, build_data); // Make visible for screenshot for t in build_data.map.visible_tiles.iter_mut() { *t = true; } build_data.take_snapshot(); } }
The function grass_layer is really simple: we replace everything with grass:
#![allow(unused)] fn main() { fn grass_layer(&mut self, build_data : &mut BuilderMap) { // We'll start with a nice layer of grass for t in build_data.map.tiles.iter_mut() { *t = TileType::Grass; } build_data.take_snapshot(); } }
Adding water is more interesting. We don't want it to be the same each time, but we want to keep the same basic structure. Here's the code:
#![allow(unused)] fn main() { fn water_and_piers(&mut self, rng: &mut rltk::RandomNumberGenerator, build_data : &mut BuilderMap) { let mut n = (rng.roll_dice(1, 65535) as f32) / 65535f32; let mut water_width : Vec<i32> = Vec::new(); for y in 0..build_data.height { let n_water = (f32::sin(n) * 10.0) as i32 + 14 + rng.roll_dice(1, 6); water_width.push(n_water); n += 0.1; for x in 0..n_water { let idx = build_data.map.xy_idx(x, y); build_data.map.tiles[idx] = TileType::DeepWater; } for x in n_water .. n_water+3 { let idx = build_data.map.xy_idx(x, y); build_data.map.tiles[idx] = TileType::ShallowWater; } } build_data.take_snapshot(); // Add piers for _i in 0..rng.roll_dice(1, 4)+6 { let y = rng.roll_dice(1, build_data.height)-1; for x in 2 + rng.roll_dice(1, 6) .. water_width[y as usize] + 4 { let idx = build_data.map.xy_idx(x, y); build_data.map.tiles[idx] = TileType::WoodFloor; } } build_data.take_snapshot(); } }
There's quite a bit going on here, so we'll step through:
- We make
nequal to a random floating point number between0.0and1.0by rolling a 65,535 sided dice (wouldn't it be nice if one of those existed?) and dividing by the maximum number. - We make a new vector called
water_width. We'll store the number of water tiles on each row in here as we generate them. - For each
yrow down the map:- We make
n_water. This is the number of water tiles present. We start by taking thesin(Sine) ofn(we randomized it to give a random gradient). Sin waves are great, they give a nice predictable curve and you can read anywhere along them to determine where the curve is. Sincesingives a number from -1 to 1, we multiply by 10 to give -10 to +10. We then add 14, guaranteeing between 4 and 24 tiles of water. To make it look jagged, we add a little bit of randomness also. - We
pushthis into thewater_widthvector, storing it for later. - We add
0.1ton, progressing along the sine wave. - Then we iterate from 0 to
n_water(asx) and writeDeepWatertiles to the position of each water tile. - We go from
n_waterton_water+3to add some shallow water at the edge.
- We make
- We take a snapshot so you can watch the map progression.
- We iterate from 0 to 1d4+6 to generate between 10 and 14 piers.
- We pick
yat random. - We look up the water placement for that
yvalue, and draw wooden floors starting at 2+1d6 towater_width[y]+4- giving a pier that extends out into the water for some way, and ends squarely on land.
- We pick
If you cargo run, you'll see a map like this now:
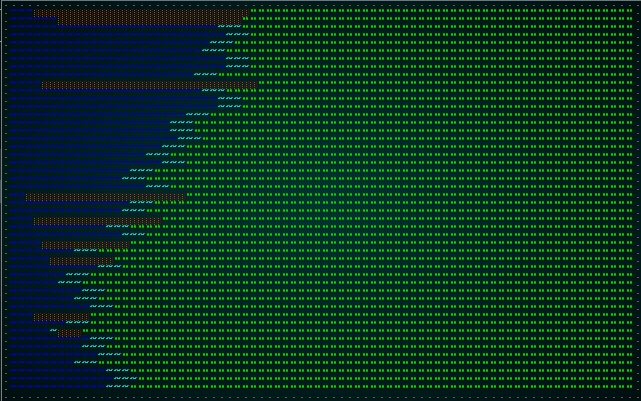
Adding town walls, gravel and a road
Now that we have some terrain, we should add some initial outline to the town. Extend the build function with another function call:
#![allow(unused)] fn main() { let (mut available_building_tiles, wall_gap_y) = self.town_walls(rng, build_data); }
The function looks like this:
#![allow(unused)] fn main() { fn town_walls(&mut self, rng: &mut rltk::RandomNumberGenerator, build_data : &mut BuilderMap) -> (HashSet<usize>, i32) { let mut available_building_tiles : HashSet<usize> = HashSet::new(); let wall_gap_y = rng.roll_dice(1, build_data.height - 9) + 5; for y in 1 .. build_data.height-2 { if !(y > wall_gap_y-4 && y < wall_gap_y+4) { let idx = build_data.map.xy_idx(30, y); build_data.map.tiles[idx] = TileType::Wall; build_data.map.tiles[idx-1] = TileType::Floor; let idx_right = build_data.map.xy_idx(build_data.width - 2, y); build_data.map.tiles[idx_right] = TileType::Wall; for x in 31 .. build_data.width-2 { let gravel_idx = build_data.map.xy_idx(x, y); build_data.map.tiles[gravel_idx] = TileType::Gravel; if y > 2 && y < build_data.height-1 { available_building_tiles.insert(gravel_idx); } } } else { for x in 30 .. build_data.width { let road_idx = build_data.map.xy_idx(x, y); build_data.map.tiles[road_idx] = TileType::Road; } } } build_data.take_snapshot(); for x in 30 .. build_data.width-1 { let idx_top = build_data.map.xy_idx(x, 1); build_data.map.tiles[idx_top] = TileType::Wall; let idx_bot = build_data.map.xy_idx(x, build_data.height-2); build_data.map.tiles[idx_bot] = TileType::Wall; } build_data.take_snapshot(); (available_building_tiles, wall_gap_y) } }
Again, let's step through how this works:
- We make a new
HashSetcalledavailable_building_tiles. We'll be returning this so that other functions can use it later. - We set
wall_gap_yto be a randomylocation on the map, between 6 andmap.height - 8. We'll use this for the location of the road that runs through the town, and gates in the city walls. - We iterate the
yaxis on the map, skipping the very top and bottom-most tiles.- If
yis outside of the "wall gap" (8 tiles centered onwall_gap_y):- We draw a wall tile at location
30,yand a road at29,y. This gives a wall after the shore, and a clear gap in front of it (clearly they have lawn management employees!) - We also draw a wall at the far east of the map.
- We fill the intervening area with gravel.
- For tiles that gained gravel, we add them to the
available_building_tilesset.
- We draw a wall tile at location
- If it is in the gap, we draw a road.
- If
- Lastly we fill rows
1andheight-2with walls between 30 andwidth-2.
If you cargo run now, you have the outline of a town:
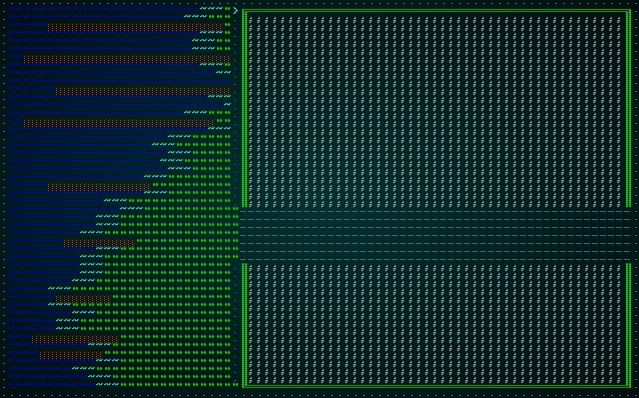
Adding some buildings
A town without buildings is both rather pointless and rather unusual! So let's add some. We'll add another call to the builder function, this time passing the available_building_tiles structure we created:
#![allow(unused)] fn main() { let mut buildings = self.buildings(rng, build_data, &mut available_building_tiles); }
The meat of the buildings code looks like this:
#![allow(unused)] fn main() { fn buildings(&mut self, rng: &mut rltk::RandomNumberGenerator, build_data : &mut BuilderMap, available_building_tiles : &mut HashSet<usize>) -> Vec<(i32, i32, i32, i32)> { let mut buildings : Vec<(i32, i32, i32, i32)> = Vec::new(); let mut n_buildings = 0; while n_buildings < 12 { let bx = rng.roll_dice(1, build_data.map.width - 32) + 30; let by = rng.roll_dice(1, build_data.map.height)-2; let bw = rng.roll_dice(1, 8)+4; let bh = rng.roll_dice(1, 8)+4; let mut possible = true; for y in by .. by+bh { for x in bx .. bx+bw { if x < 0 || x > build_data.width-1 || y < 0 || y > build_data.height-1 { possible = false; } else { let idx = build_data.map.xy_idx(x, y); if !available_building_tiles.contains(&idx) { possible = false; } } } } if possible { n_buildings += 1; buildings.push((bx, by, bw, bh)); for y in by .. by+bh { for x in bx .. bx+bw { let idx = build_data.map.xy_idx(x, y); build_data.map.tiles[idx] = TileType::WoodFloor; available_building_tiles.remove(&idx); available_building_tiles.remove(&(idx+1)); available_building_tiles.remove(&(idx+build_data.width as usize)); available_building_tiles.remove(&(idx-1)); available_building_tiles.remove(&(idx-build_data.width as usize)); } } build_data.take_snapshot(); } } // Outline buildings let mut mapclone = build_data.map.clone(); for y in 2..build_data.height-2 { for x in 32..build_data.width-2 { let idx = build_data.map.xy_idx(x, y); if build_data.map.tiles[idx] == TileType::WoodFloor { let mut neighbors = 0; if build_data.map.tiles[idx - 1] != TileType::WoodFloor { neighbors +=1; } if build_data.map.tiles[idx + 1] != TileType::WoodFloor { neighbors +=1; } if build_data.map.tiles[idx-build_data.width as usize] != TileType::WoodFloor { neighbors +=1; } if build_data.map.tiles[idx+build_data.width as usize] != TileType::WoodFloor { neighbors +=1; } if neighbors > 0 { mapclone.tiles[idx] = TileType::Wall; } } } } build_data.map = mapclone; build_data.take_snapshot(); buildings } }
Once again, lets walk through this algorithm:
- We make a vector of tuples, each containing 4 integers. These are the building's
xandycoordinates, along with its size in each dimension. - We make a variable
n_buildingsto store how many we've placed, and loop until we have 12. For each building:- We pick a random
xandyposition, and a randomwidthandheightfor the building. - We set
possibletotrue- and then loop over every tile in the candidate building location. If it isn't in theavailable_building_tilesset, we setpossible to false. - If
possibleis still true, we again loop over every tile - setting to be aWoodenFloor. We then remove that tile, and all four surrounding tiles from theavailable_building_tileslist - ensuring a gap between buildings. We also incrementn_buildings, and add the building to a list of completed buildings.
- We pick a random
- Now we have 12 buildings, we take a copy of the map.
- We loop over every tile on in the "town" part of the map.
- For each tile, we count the number of neighboring tiles that aren't a
WoodenFloor(in all four directions). - If the neighboring tile count is greater than zero, then we can place a wall here (because it must be the edge of a building). We write to our copy of the map - so as not to influence the check on subsequent tiles (otherwise, you'll have buildings replaced with walls).
- For each tile, we count the number of neighboring tiles that aren't a
- We put the copy back into our map.
- We return out list of placed buildings.
If you cargo run now, you'll see that we have buildings!
Adding some doors
The buildings are great, but there are no doors. So you can't ever enter or exit them. We should fix that. Extend the builder function with another call:
#![allow(unused)] fn main() { let doors = self.add_doors(rng, build_data, &mut buildings, wall_gap_y); }
The add_doors function looks like this:
#![allow(unused)] fn main() { fn add_doors(&mut self, rng: &mut rltk::RandomNumberGenerator, build_data : &mut BuilderMap, buildings: &mut Vec<(i32, i32, i32, i32)>, wall_gap_y : i32) -> Vec<usize> { let mut doors = Vec::new(); for building in buildings.iter() { let door_x = building.0 + 1 + rng.roll_dice(1, building.2 - 3); let cy = building.1 + (building.3 / 2); let idx = if cy > wall_gap_y { // Door on the north wall build_data.map.xy_idx(door_x, building.1) } else { build_data.map.xy_idx(door_x, building.1 + building.3 - 1) }; build_data.map.tiles[idx] = TileType::Floor; build_data.spawn_list.push((idx, "Door".to_string())); doors.push(idx); } build_data.take_snapshot(); doors } }
This function is quite simple, but we'll step through it:
- We make a new vector of door locations; we'll need it later.
- For each building in our buildings list:
- Set
door_xto a random point along the building's horizontal side, not including the corners. - Calculate
cyto be the center of the building. - If
cy > wall_gap_y(remember that one? Where the road is!), we place the door'sycoordinate on the North side - sobuilding.1. Otherwise, we place it on the south side -building.1 + building.3 - 1(ylocation plus height, minus one). - We set the door tile to be a
Floor. - We add a
Doorto the spawn list. - We add the door to the doors vector.
- Set
- We return the doors vector.
If you cargo run now, you'll see doors appear for each building:
Paths to doors
It would be nice to decorate the gravel with some paths to the various doors in the town. It makes sense - even wear and tear from walking to/from the buildings will erode a path. So we add another call to the builder function:
#![allow(unused)] fn main() { self.add_paths(build_data, &doors); }
The add_paths function is a little long, but quite simple:
#![allow(unused)] fn main() { fn add_paths(&mut self, build_data : &mut BuilderMap, doors : &[usize]) { let mut roads = Vec::new(); for y in 0..build_data.height { for x in 0..build_data.width { let idx = build_data.map.xy_idx(x, y); if build_data.map.tiles[idx] == TileType::Road { roads.push(idx); } } } build_data.map.populate_blocked(); for door_idx in doors.iter() { let mut nearest_roads : Vec<(usize, f32)> = Vec::new(); let door_pt = rltk::Point::new( *door_idx as i32 % build_data.map.width as i32, *door_idx as i32 / build_data.map.width as i32 ); for r in roads.iter() { nearest_roads.push(( *r, rltk::DistanceAlg::PythagorasSquared.distance2d( door_pt, rltk::Point::new( *r as i32 % build_data.map.width, *r as i32 / build_data.map.width ) ) )); } nearest_roads.sort_by(|a,b| a.1.partial_cmp(&b.1).unwrap()); let destination = nearest_roads[0].0; let path = rltk::a_star_search(*door_idx, destination, &mut build_data.map); if path.success { for step in path.steps.iter() { let idx = *step as usize; build_data.map.tiles[idx] = TileType::Road; roads.push(idx); } } build_data.take_snapshot(); } } }
Let's walk through this:
- We start by making a
roadsvector, storing the map indices of every road tile on the map. We gather this by quickly scanning the map and adding matching tiles to our list. - Then we iterate through all the doors we've placed:
- We make another vector (
nearest_roads) containing an index and a float. - We add each road, with its index and the calculated distance to the door.
- We sort the
nearest_roadsvector by the distances, ensuring that element0will be the closest road position. Not that we're doing this for each door: if the nearest road is one we've added to another door, it will choose that one. - We call RLTK's a star pathing to find a route from the door to the nearest road.
- We iterate the path, writing a road tile at each location on the route. We also add it to the
roadsvector, so it will influence future paths.
- We make another vector (
If you cargo run now, you'll see a pretty decent start for a town:
Start position and exit
We don't really want completely random start positions, nor an exit that is deliberately far away on this map. So we'll edit our TownBuilder constructor to remove the additional meta-builders that provide this:
#![allow(unused)] fn main() { pub fn town_builder(new_depth: i32, rng: &mut rltk::RandomNumberGenerator, width: i32, height: i32) -> BuilderChain { let mut chain = BuilderChain::new(new_depth, width, height); chain.start_with(TownBuilder::new()); chain } }
Now we have to modify our build function to provide these instead. Placing the exit is easy - we want it to be to the East, on the road:
#![allow(unused)] fn main() { let exit_idx = build_data.map.xy_idx(build_data.width-5, wall_gap_y); build_data.map.tiles[exit_idx] = TileType::DownStairs; }
Placing the entrance is more difficult. We want the player to start their journey in the pub - but we haven't decided which building is the pub! We'll make the pub the largest building on the map. After all, it's the most important for the game! The following code will sort the buildings by size (in a building_size vector, with the first tuple element being the building's index and the second being it's "square tileage"):
#![allow(unused)] fn main() { let mut building_size : Vec<(usize, i32)> = Vec::new(); for (i,building) in buildings.iter().enumerate() { building_size.push(( i, building.2 * building.3 )); } building_size.sort_by(|a,b| b.1.cmp(&a.1)); }
Not that we sorted in descending order (by doing b.cmp(&a) rather than the other way around) - so the largest building is building 0.
Now we can set the player's starting location:
#![allow(unused)] fn main() { // Start in the pub let the_pub = &buildings[building_size[0].0]; build_data.starting_position = Some(Position{ x : the_pub.0 + (the_pub.2 / 2), y : the_pub.1 + (the_pub.3 / 2) }); }
If you cargo run now, you'll start in the pub - and be able to navigate an empty town to the exit:

Wrap-Up
This chapter has walked through how to use what we know about map generation to make a targeted procedural generation project - a fishing town. There's a river to the west, a road, town walls, buildings, and paths. It doesn't look bad at all for a starting point!
It is completely devoid of NPCs, props and anything to do. We'll rectify that in the next chapter.
The source code for this chapter may be found here
Run this chapter's example with web assembly, in your browser (WebGL2 required)
Copyright (C) 2019, Herbert Wolverson.
Populating the starting town
About this tutorial
This tutorial is free and open source, and all code uses the MIT license - so you are free to do with it as you like. My hope is that you will enjoy the tutorial, and make great games!
If you enjoy this and would like me to keep writing, please consider supporting my Patreon.
In the previous chapter, we built the layout of our town. In this chapter, we'll populate it with NPCs and Props. We'll introduce some new AI types to handle friendly or neutral NPCs, and begin placing merchants, townsfolk and other residents to make the town come alive. We'll also begin placing furniture and items to make the place feel less barren.
Identifying the buildings
We're not making a real, full-sized down. There would be potentially hundreds of buildings, and the player would quickly grow bored trying to find the exit. Instead - we have 12 buildings. Looking at our design document, two of them are important:
- The Pub.
- The Temple.
That leaves 10 other locations that aren't really relevant, but we've implied that they will include vendors. Brainstorming a few vendors, it would make sense to have:
- A Blacksmith (for your weapon/armor needs).
- A clothier (for clothes, leather, and similar).
- An alchemist for potions, magical items and item identification.
So we're down to 5 more locations to fill! Lets make three of them into regular homes with residents, one into your house - complete with a nagging mother, and one into an abandoned house with a rodent issue. Rodent problems are a staple of fantasy games, and it might make for a good tutorial when we get that far.
You'll remember that we sorted our buildings by size, and decided that the largest is the pub. Let's extend that to tag each building. In map_builders/town.rs, look at the build function and we'll expand the building sorter. First, lets make an enum for our building types:
#![allow(unused)] fn main() { enum BuildingTag { Pub, Temple, Blacksmith, Clothier, Alchemist, PlayerHouse, Hovel, Abandoned, Unassigned } }
Next, we'll move our building sorter code into its own function (as part of TownBuilder):
#![allow(unused)] fn main() { fn sort_buildings(&mut self, buildings: &[(i32, i32, i32, i32)]) -> Vec<(usize, i32, BuildingTag)> { let mut building_size : Vec<(usize, i32, BuildingTag)> = Vec::new(); for (i,building) in buildings.iter().enumerate() { building_size.push(( i, building.2 * building.3, BuildingTag::Unassigned )); } building_size.sort_by(|a,b| b.1.cmp(&a.1)); building_size[0].2 = BuildingTag::Pub; building_size[1].2 = BuildingTag::Temple; building_size[2].2 = BuildingTag::Blacksmith; building_size[3].2 = BuildingTag::Clothier; building_size[4].2 = BuildingTag::Alchemist; building_size[5].2 = BuildingTag::PlayerHouse; for b in building_size.iter_mut().skip(6) { b.2 = BuildingTag::Hovel; } let last_index = building_size.len()-1; building_size[last_index].2 = BuildingTag::Abandoned; building_size } }
This is the code we had before, with added BuildingTag entries. Once we've sorted by size, we assign the various building types - with the last one always being the abandoned house. This will ensure that we have all of our building types, and they are sorted in descending size order.
In the build function, replace your sort code with a call to the function - and a call to building_factory, which we'll write in a moment:
#![allow(unused)] fn main() { let building_size = self.sort_buildings(&buildings); self.building_factory(rng, build_data, &buildings, &building_size); }
Now we'll build a skeletal factory:
#![allow(unused)] fn main() { fn building_factory(&mut self, rng: &mut rltk::RandomNumberGenerator, build_data : &mut BuilderMap, buildings: &[(i32, i32, i32, i32)], building_index : &[(usize, i32, BuildingTag)]) { for (i,building) in buildings.iter().enumerate() { let build_type = &building_index[i].2; match build_type { _ => {} } } } }
The Pub
So what would you expect to find in a pub early in the morning, when you awaken hung-over and surprised to discover that you've promised to save the world? A few ideas spring to mind:
- Other hung-over patrons, possibly asleep.
- A shady-as-can-be "lost" goods salesperson.
- A Barkeep, who probably wants you to go home.
- Tables, chairs, barrels.
We'll extend our factory function to have a match line to build the pub:
#![allow(unused)] fn main() { fn building_factory(&mut self, rng: &mut rltk::RandomNumberGenerator, build_data : &mut BuilderMap, buildings: &[(i32, i32, i32, i32)], building_index : &[(usize, i32, BuildingTag)]) { for (i,building) in buildings.iter().enumerate() { let build_type = &building_index[i].2; match build_type { BuildingTag::Pub => self.build_pub(&building, build_data, rng), _ => {} } } } }
And we'll start on the new function build_pub:
#![allow(unused)] fn main() { fn build_pub(&mut self, building: &(i32, i32, i32, i32), build_data : &mut BuilderMap, rng: &mut rltk::RandomNumberGenerator) { // Place the player build_data.starting_position = Some(Position{ x : building.0 + (building.2 / 2), y : building.1 + (building.3 / 2) }); let player_idx = build_data.map.xy_idx(building.0 + (building.2 / 2), building.1 + (building.3 / 2)); // Place other items let mut to_place : Vec<&str> = vec!["Barkeep", "Shady Salesman", "Patron", "Patron", "Keg", "Table", "Chair", "Table", "Chair"]; for y in building.1 .. building.1 + building.3 { for x in building.0 .. building.0 + building.2 { let idx = build_data.map.xy_idx(x, y); if build_data.map.tiles[idx] == TileType::WoodFloor && idx != player_idx && rng.roll_dice(1, 3)==1 && !to_place.is_empty() { let entity_tag = to_place[0]; to_place.remove(0); build_data.spawn_list.push((idx, entity_tag.to_string())); } } } } }
Let's walk through this:
- The function takes our building data, map information and random number generator as parameters.
- Since we always start the player in the pub, we do that here. We can remove it from the
buildfunction. - We store the
player_idx- we don't want to spawn anything on top of the player. - We make
to_place- a list of string tags that we want in the bar. We'll worry about writing these in a bit. - We iterate
xandyacross the whole building.- We calculate the map index of the building tile.
- If the building tile is a wooden floor, the map index is not the player map index, and a 1d3 roll comes up 1, we:
- Take the first tag from the
to_placelist, and remove it from the list (no duplicates unless we put it in twice). - Add that tag to the
spawn_listfor the map, using the current tile tag.
- Take the first tag from the
That's pretty simple, and also parts are definitely generic enough to help with future buildings. If you were to run the project now, you'll see error messages such as: WARNING: We don't know how to spawn [Barkeep]!. That's because we haven't written them, yet. We need spawns.json to include all of the tags we're trying to spawn.
Making non-hostile NPCs
Let's add an entry into spawns.json for our Barkeep. We'll introduce one new element - the ai:
"mobs" : [
{
"name" : "Barkeep",
"renderable": {
"glyph" : "☺",
"fg" : "#EE82EE",
"bg" : "#000000",
"order" : 1
},
"blocks_tile" : true,
"stats" : {
"max_hp" : 16,
"hp" : 16,
"defense" : 1,
"power" : 4
},
"vision_range" : 4,
"ai" : "bystander"
},
To support the AI element, we need to open up raws/mob_structs.rs and edit Mob:
#![allow(unused)] fn main() { #[derive(Deserialize, Debug)] pub struct Mob { pub name : String, pub renderable : Option<Renderable>, pub blocks_tile : bool, pub stats : MobStats, pub vision_range : i32, pub ai : String } }
We'll also need to add "ai" : "melee" to each other mob. Now open raws/rawmaster.rs, and we'll edit spawn_named_mob to support it. Replace the line eb = eb.with(Monster{}); with:
#![allow(unused)] fn main() { match mob_template.ai.as_ref() { "melee" => eb = eb.with(Monster{}), "bystander" => eb = eb.with(Bystander{}), _ => {} } }
Bystander is a new component - so we need to open up components.rs and add it:
#![allow(unused)] fn main() { #[derive(Component, Debug, Serialize, Deserialize, Clone)] pub struct Bystander {} }
Then don't forget to register it in main.rs and saveload_system.rs!
If you cargo run now, you should see a smiling barkeep. He's resplendent in Purple (RGB #EE82EE from the JSON). Why purple? We're going to make vendors purple eventually (vendors are for a future chapter):
He won't react to you or do anything, but he's there. We'll add some behavior later in the chapter. For now, lets go ahead and add some other entities to spawns.json now that we support innocent bystanders (pro-tip: copy an existing entry and edit it; much easier than typing it all out again):
{
"name" : "Shady Salesman",
"renderable": {
"glyph" : "h",
"fg" : "#EE82EE",
"bg" : "#000000",
"order" : 1
},
"blocks_tile" : true,
"stats" : {
"max_hp" : 16,
"hp" : 16,
"defense" : 1,
"power" : 4
},
"vision_range" : 4,
"ai" : "bystander"
},
{
"name" : "Patron",
"renderable": {
"glyph" : "☺",
"fg" : "#AAAAAA",
"bg" : "#000000",
"order" : 1
},
"blocks_tile" : true,
"stats" : {
"max_hp" : 16,
"hp" : 16,
"defense" : 1,
"power" : 4
},
"vision_range" : 4,
"ai" : "bystander"
},
If you cargo run now, the bar comes to life a bit more:
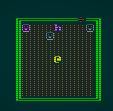
Adding props
A pub with people and nothing for them to drink, sit on or eat at is a pretty shabby pub. I suppose we could argue that it's a real dive and the budget won't stretch to that, but that argument wears thin when you start adding other buildings. So we'll add some props to spawns.json:
{
"name" : "Keg",
"renderable": {
"glyph" : "φ",
"fg" : "#AAAAAA",
"bg" : "#000000",
"order" : 2
},
"hidden" : false
},
{
"name" : "Table",
"renderable": {
"glyph" : "╦",
"fg" : "#AAAAAA",
"bg" : "#000000",
"order" : 2
},
"hidden" : false
},
{
"name" : "Chair",
"renderable": {
"glyph" : "└",
"fg" : "#AAAAAA",
"bg" : "#000000",
"order" : 2
},
"hidden" : false
}
If you cargo run now, you'll see some inert props littering the pub:
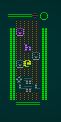
That's not amazing, but it already feels more alive!
Making the temple
The temple will be similar to the pub in terms of spawning code. So similar, in fact, that we're going to break out the part of the build_pub function that spawns entities and make a generic function out of it. Here's the new function:
#![allow(unused)] fn main() { fn random_building_spawn( &mut self, building: &(i32, i32, i32, i32), build_data : &mut BuilderMap, rng: &mut rltk::RandomNumberGenerator, to_place : &mut Vec<&str>, player_idx : usize) { for y in building.1 .. building.1 + building.3 { for x in building.0 .. building.0 + building.2 { let idx = build_data.map.xy_idx(x, y); if build_data.map.tiles[idx] == TileType::WoodFloor && idx != player_idx && rng.roll_dice(1, 3)==1 && !to_place.is_empty() { let entity_tag = to_place[0]; to_place.remove(0); build_data.spawn_list.push((idx, entity_tag.to_string())); } } } } }
We'll replace our call to that code in build_pub with:
#![allow(unused)] fn main() { // Place other items let mut to_place : Vec<&str> = vec!["Barkeep", "Shady Salesman", "Patron", "Patron", "Keg", "Table", "Chair", "Table", "Chair"]; self.random_building_spawn(building, build_data, rng, &mut to_place, player_idx); }
With that in place, let's think about what you might find in a temple:
- Priests
- Parishioners
- Chairs
- Candles
Now we'll extend our factory to include temples:
#![allow(unused)] fn main() { match build_type { BuildingTag::Pub => self.build_pub(&building, build_data, rng), BuildingTag::Temple => self.build_temple(&building, build_data, rng), _ => {} } }
And our build_temple function can be very simple:
#![allow(unused)] fn main() { fn build_temple(&mut self, building: &(i32, i32, i32, i32), build_data : &mut BuilderMap, rng: &mut rltk::RandomNumberGenerator) { // Place items let mut to_place : Vec<&str> = vec!["Priest", "Parishioner", "Parishioner", "Chair", "Chair", "Candle", "Candle"]; self.random_building_spawn(building, build_data, rng, &mut to_place, 0); } }
So, with that in place - we still have to add Priests, Parishioners, and Candles to the spawns.json list. The Priest and Parishioner go in the mobs section, and are basically the same as the Barkeep:
{
"name" : "Priest",
"renderable": {
"glyph" : "☺",
"fg" : "#EE82EE",
"bg" : "#000000",
"order" : 1
},
"blocks_tile" : true,
"stats" : {
"max_hp" : 16,
"hp" : 16,
"defense" : 1,
"power" : 4
},
"vision_range" : 4,
"ai" : "bystander"
},
{
"name" : "Parishioner",
"renderable": {
"glyph" : "☺",
"fg" : "#AAAAAA",
"bg" : "#000000",
"order" : 1
},
"blocks_tile" : true,
"stats" : {
"max_hp" : 16,
"hp" : 16,
"defense" : 1,
"power" : 4
},
"vision_range" : 4,
"ai" : "bystander"
},
Likewise, for now at least - candles are just another prop:
{
"name" : "Candle",
"renderable": {
"glyph" : "Ä",
"fg" : "#FFA500",
"bg" : "#000000",
"order" : 2
},
"hidden" : false
}
If you cargo run now, you can run around and find a temple:
Build other buildings
We've done most of the hard work now, so we are just filling in the blanks. Lets expand our match in our builder to include the various types other than the Abandoned House:
#![allow(unused)] fn main() { let build_type = &building_index[i].2; match build_type { BuildingTag::Pub => self.build_pub(&building, build_data, rng), BuildingTag::Temple => self.build_temple(&building, build_data, rng), BuildingTag::Blacksmith => self.build_smith(&building, build_data, rng), BuildingTag::Clothier => self.build_clothier(&building, build_data, rng), BuildingTag::Alchemist => self.build_alchemist(&building, build_data, rng), BuildingTag::PlayerHouse => self.build_my_house(&building, build_data, rng), BuildingTag::Hovel => self.build_hovel(&building, build_data, rng), _ => {} } }
We're lumping these in together because they are basically the same function! Here's the body of each of them:
#![allow(unused)] fn main() { fn build_smith(&mut self, building: &(i32, i32, i32, i32), build_data : &mut BuilderMap, rng: &mut rltk::RandomNumberGenerator) { // Place items let mut to_place : Vec<&str> = vec!["Blacksmith", "Anvil", "Water Trough", "Weapon Rack", "Armor Stand"]; self.random_building_spawn(building, build_data, rng, &mut to_place, 0); } fn build_clothier(&mut self, building: &(i32, i32, i32, i32), build_data : &mut BuilderMap, rng: &mut rltk::RandomNumberGenerator) { // Place items let mut to_place : Vec<&str> = vec!["Clothier", "Cabinet", "Table", "Loom", "Hide Rack"]; self.random_building_spawn(building, build_data, rng, &mut to_place, 0); } fn build_alchemist(&mut self, building: &(i32, i32, i32, i32), build_data : &mut BuilderMap, rng: &mut rltk::RandomNumberGenerator) { // Place items let mut to_place : Vec<&str> = vec!["Alchemist", "Chemistry Set", "Dead Thing", "Chair", "Table"]; self.random_building_spawn(building, build_data, rng, &mut to_place, 0); } fn build_my_house(&mut self, building: &(i32, i32, i32, i32), build_data : &mut BuilderMap, rng: &mut rltk::RandomNumberGenerator) { // Place items let mut to_place : Vec<&str> = vec!["Mom", "Bed", "Cabinet", "Chair", "Table"]; self.random_building_spawn(building, build_data, rng, &mut to_place, 0); } fn build_hovel(&mut self, building: &(i32, i32, i32, i32), build_data : &mut BuilderMap, rng: &mut rltk::RandomNumberGenerator) { // Place items let mut to_place : Vec<&str> = vec!["Peasant", "Bed", "Chair", "Table"]; self.random_building_spawn(building, build_data, rng, &mut to_place, 0); } }
As you can see - these are basically passing spawn lists to the building spawner, rather than doing anything too fancy. We've created quite a lot of new entities here! I tried to come up with things you might find in each location:
- The smith has of course got a Blacksmith. He likes to be around Anvils, Water Troughs, Weapon Racks, and Armor Stands.
- The clothier has a Clothier, and a Cabinet, a Table, a Loom and a Hide Rack.
- The alchemist has an Alchemist, a Chemistry Set, a Dead Thing (why not, right?), a Chair and a Table.
- My House features Mom (the characters mother!), a bed, a cabinet, a chair and a table.
- Hovels feature a Peasant, a bed, a chair and a table.
So we'll need to support these in spawns.json:
{
"name" : "Blacksmith",
"renderable": {
"glyph" : "☺",
"fg" : "#EE82EE",
"bg" : "#000000",
"order" : 1
},
"blocks_tile" : true,
"stats" : {
"max_hp" : 16,
"hp" : 16,
"defense" : 1,
"power" : 4
},
"vision_range" : 4,
"ai" : "bystander"
},
{
"name" : "Clothier",
"renderable": {
"glyph" : "☺",
"fg" : "#EE82EE",
"bg" : "#000000",
"order" : 1
},
"blocks_tile" : true,
"stats" : {
"max_hp" : 16,
"hp" : 16,
"defense" : 1,
"power" : 4
},
"vision_range" : 4,
"ai" : "bystander"
},
{
"name" : "Alchemist",
"renderable": {
"glyph" : "☺",
"fg" : "#EE82EE",
"bg" : "#000000",
"order" : 1
},
"blocks_tile" : true,
"stats" : {
"max_hp" : 16,
"hp" : 16,
"defense" : 1,
"power" : 4
},
"vision_range" : 4,
"ai" : "bystander"
},
{
"name" : "Mom",
"renderable": {
"glyph" : "☺",
"fg" : "#FFAAAA",
"bg" : "#000000",
"order" : 1
},
"blocks_tile" : true,
"stats" : {
"max_hp" : 16,
"hp" : 16,
"defense" : 1,
"power" : 4
},
"vision_range" : 4,
"ai" : "bystander"
},
{
"name" : "Peasant",
"renderable": {
"glyph" : "☺",
"fg" : "#999999",
"bg" : "#000000",
"order" : 1
},
"blocks_tile" : true,
"stats" : {
"max_hp" : 16,
"hp" : 16,
"defense" : 1,
"power" : 4
},
"vision_range" : 4,
"ai" : "bystander"
},
And in the props section:
{
"name" : "Anvil",
"renderable": {
"glyph" : "╔",
"fg" : "#AAAAAA",
"bg" : "#000000",
"order" : 2
},
"hidden" : false
},
{
"name" : "Water Trough",
"renderable": {
"glyph" : "•",
"fg" : "#5555FF",
"bg" : "#000000",
"order" : 2
},
"hidden" : false
},
{
"name" : "Weapon Rack",
"renderable": {
"glyph" : "π",
"fg" : "#FFD700",
"bg" : "#000000",
"order" : 2
},
"hidden" : false
},
{
"name" : "Armor Stand",
"renderable": {
"glyph" : "⌠",
"fg" : "#FFFFFF",
"bg" : "#000000",
"order" : 2
},
"hidden" : false
},
{
"name" : "Chemistry Set",
"renderable": {
"glyph" : "δ",
"fg" : "#00FFFF",
"bg" : "#000000",
"order" : 2
},
"hidden" : false
},
{
"name" : "Dead Thing",
"renderable": {
"glyph" : "☻",
"fg" : "#AA0000",
"bg" : "#000000",
"order" : 2
},
"hidden" : false
},
{
"name" : "Cabinet",
"renderable": {
"glyph" : "∩",
"fg" : "#805A46",
"bg" : "#000000",
"order" : 2
},
"hidden" : false
},
{
"name" : "Bed",
"renderable": {
"glyph" : "8",
"fg" : "#805A46",
"bg" : "#000000",
"order" : 2
},
"hidden" : false
},
{
"name" : "Loom",
"renderable": {
"glyph" : "≡",
"fg" : "#805A46",
"bg" : "#000000",
"order" : 2
},
"hidden" : false
},
{
"name" : "Hide Rack",
"renderable": {
"glyph" : "π",
"fg" : "#805A46",
"bg" : "#000000",
"order" : 2
},
"hidden" : false
}
If you cargo run now, you can run around and find largely populated rooms:

Hopefully, you also spot the bug: the player beat his/her Mom (and the alchemist)! We don't really want to encourage that type of behavior! So in the next segment, we'll work on some neutral AI and player movement behavior with NPCs.
Neutral AI/Movement
There are two issues present with our current "bystander" handling: bystanders just stand there like lumps (blocking your movement, even!), and there is no way to get around them without slaughtering them. I'd like to think our hero won't start his/her adventure by murdering their Mom - so lets rectify the situation!
Trading Places
Currently, when you "bump" into a tile containing anything with combat stats - you launch an attack. This is provided in player.rs, the try_move_player function:
#![allow(unused)] fn main() { let target = combat_stats.get(*potential_target); if let Some(_target) = target { wants_to_melee.insert(entity, WantsToMelee{ target: *potential_target }).expect("Add target failed"); return; } }
We need to extend this to not only attack, but swap places with the NPC when we bump into them. This way, they can't block your movement - but you also can't murder your mother! So first, we need to gain access to the Bystanders component store, and make a vector in which we will store our intent to move NPCs (we can't just access them in-loop; the borrow checker will throw a fit, unfortunately):
#![allow(unused)] fn main() { let bystanders = ecs.read_storage::<Bystander>(); let mut swap_entities : Vec<(Entity, i32, i32)> = Vec::new(); }
So in swap_entities, we're storing the entity to move and their x/y destination coordinates. Now we adjust our main loop to check to see if a target is a bystander, add them to the swap list and move anyway if they are. We also make attacking conditional upon them not being a bystander:
#![allow(unused)] fn main() { let bystander = bystanders.get(*potential_target); if bystander.is_some() { // Note that we want to move the bystander swap_entities.push((*potential_target, pos.x, pos.y)); // Move the player pos.x = min(map.width-1 , max(0, pos.x + delta_x)); pos.y = min(map.height-1, max(0, pos.y + delta_y)); entity_moved.insert(entity, EntityMoved{}).expect("Unable to insert marker"); viewshed.dirty = true; let mut ppos = ecs.write_resource::<Point>(); ppos.x = pos.x; ppos.y = pos.y; } else { let target = combat_stats.get(*potential_target); if let Some(_target) = target { wants_to_melee.insert(entity, WantsToMelee{ target: *potential_target }).expect("Add target failed"); return; } } }
Finally, at the very end of the function we iterate through swap_entities and apply the movement:
#![allow(unused)] fn main() { for m in swap_entities.iter() { let their_pos = positions.get_mut(m.0); if let Some(their_pos) = their_pos { their_pos.x = m.1; their_pos.y = m.2; } } }
If you cargo run now, you can no longer murder all of the NPCs; bumping into them swaps your positions:
The Abandoned House
Lastly (for this chapter), we need to populate the abandoned house. We decided that it was going to contain a massive rodent problem, since rodents of unusual size are a significant problem for low-level adventurers! We'll add another match line to our building factory matcher:
#![allow(unused)] fn main() { BuildingTag::Abandoned => self.build_abandoned_house(&building, build_data, rng), }
And here's the function to about half-fill the house with rodents:
#![allow(unused)] fn main() { fn build_abandoned_house(&mut self, building: &(i32, i32, i32, i32), build_data : &mut BuilderMap, rng: &mut rltk::RandomNumberGenerator) { for y in building.1 .. building.1 + building.3 { for x in building.0 .. building.0 + building.2 { let idx = build_data.map.xy_idx(x, y); if build_data.map.tiles[idx] == TileType::WoodFloor && idx != 0 && rng.roll_dice(1, 2)==1 { build_data.spawn_list.push((idx, "Rat".to_string())); } } } } }
Lastly, we need to add Rat to the mob list in spawns.json:
{
"name" : "Rat",
"renderable": {
"glyph" : "r",
"fg" : "#FF0000",
"bg" : "#000000",
"order" : 1
},
"blocks_tile" : true,
"stats" : {
"max_hp" : 2,
"hp" : 2,
"defense" : 1,
"power" : 3
},
"vision_range" : 8,
"ai" : "melee"
},
If you cargo run now, and hunt around for the abandoned house - you'll find it full of hostile rats:
Wrap-Up
In this chapter, we've added a bunch of props and bystanders to the town - as well as a house full of angry rats. That makes it feel a lot more alive. It's by no means done yet, but it's already starting to feel like the opening scene of a fantasy game. In the next chapter, we're going to make some AI adjustments to make it feel more alive - and add some bystanders who aren't conveniently hanging around inside buildings.
The source code for this chapter may be found here
Run this chapter's example with web assembly, in your browser (WebGL2 required)
Copyright (C) 2019, Herbert Wolverson.
Bringing NPCs to Life
About this tutorial
This tutorial is free and open source, and all code uses the MIT license - so you are free to do with it as you like. My hope is that you will enjoy the tutorial, and make great games!
If you enjoy this and would like me to keep writing, please consider supporting my Patreon.
I'd like to suggest dark incantations and candles to breathe life into NPCs, but in reality - it's more code. We don't want our bystanders to stand around, dumb as rocks anymore. They don't have to behave particularly sensibly, but it would be good if they at least roam around a bit (other than vendors, that gets annoying - "where did the blacksmith go?") and tell you about their day.
New components - dividing vendors from bystanders
First, we're going to make a new component - the Vendor. In components.rs, add the following component type:
#![allow(unused)] fn main() { #[derive(Component, Debug, Serialize, Deserialize, Clone)] pub struct Vendor {} }
Don't forget to register it in main.rs and saveload_system.rs!
Now we'll adjust our raw files (spawns.json); all of the merchants who feature "ai" : "bystander" need to be changed to "ai" : "vendor". So we'll change it for our Barkeep, Alchemist, Clothier, Blacksmith and Shady Salesman.
Next, we adjust our raws/rawmaster.rs's function spawn_named_mob to also spawn vendors:
#![allow(unused)] fn main() { match mob_template.ai.as_ref() { "melee" => eb = eb.with(Monster{}), "bystander" => eb = eb.with(Bystander{}), "vendor" => eb = eb.with(Vendor{}), _ => {} } }
Finally, we'll adjust the try_move_player function in player.rs to also not attack vendors:
#![allow(unused)] fn main() { ... let vendors = ecs.read_storage::<Vendor>(); let mut swap_entities : Vec<(Entity, i32, i32)> = Vec::new(); for (entity, _player, pos, viewshed) in (&entities, &players, &mut positions, &mut viewsheds).join() { if pos.x + delta_x < 1 || pos.x + delta_x > map.width-1 || pos.y + delta_y < 1 || pos.y + delta_y > map.height-1 { return RunState::AwaitingInput; } let destination_idx = map.xy_idx(pos.x + delta_x, pos.y + delta_y); for potential_target in map.tile_content[destination_idx].iter() { let bystander = bystanders.get(*potential_target); let vendor = vendors.get(*potential_target); if bystander.is_some() || vendor.is_some() { ... }
A System for Moving Bystanders
We want bystanders to wander around the town. We won't have them open doors, to keep things consistent (so when you enter the pub, you can expect patrons - and they won't have wandered off to fight rats!). Make a new file, bystander_ai_system.rs and paste the following into it:
#![allow(unused)] fn main() { use specs::prelude::*; use super::{Viewshed, Bystander, Map, Position, RunState, EntityMoved}; pub struct BystanderAI {} impl<'a> System<'a> for BystanderAI { #[allow(clippy::type_complexity)] type SystemData = ( WriteExpect<'a, Map>, ReadExpect<'a, RunState>, Entities<'a>, WriteStorage<'a, Viewshed>, ReadStorage<'a, Bystander>, WriteStorage<'a, Position>, WriteStorage<'a, EntityMoved>, WriteExpect<'a, rltk::RandomNumberGenerator>); fn run(&mut self, data : Self::SystemData) { let (mut map, runstate, entities, mut viewshed, bystander, mut position, mut entity_moved, mut rng) = data; if *runstate != RunState::MonsterTurn { return; } for (entity, mut viewshed, _bystander, mut pos) in (&entities, &mut viewshed, &bystander, &mut position).join() { // Try to move randomly let mut x = pos.x; let mut y = pos.y; let move_roll = rng.roll_dice(1, 5); match move_roll { 1 => x -= 1, 2 => x += 1, 3 => y -= 1, 4 => y += 1, _ => {} } if x > 0 && x < map.width-1 && y > 0 && y < map.height-1 { let dest_idx = map.xy_idx(x, y); if !map.blocked[dest_idx] { let idx = map.xy_idx(pos.x, pos.y); map.blocked[idx] = false; pos.x = x; pos.y = y; entity_moved.insert(entity, EntityMoved{}).expect("Unable to insert marker"); map.blocked[dest_idx] = true; viewshed.dirty = true; } } } } } }
If you remember from the systems we've made before, the first part is boilerplate telling the ECS what resources we want to access. We check to see if it is the monster's turn (really, NPCs are monsters in this setup); if it isn't, we bail out. Then we roll a dice for a random direction, see if we can go that way - and move if we can. It's pretty simple!
In main.rs, we need to tell it to use the new module:
#![allow(unused)] fn main() { pub mod bystander_ai_system; }
We also need to add the system to our list of systems to run:
#![allow(unused)] fn main() { impl State { fn run_systems(&mut self) { let mut vis = VisibilitySystem{}; vis.run_now(&self.ecs); let mut mob = MonsterAI{}; mob.run_now(&self.ecs); let mut mapindex = MapIndexingSystem{}; mapindex.run_now(&self.ecs); let mut bystander = bystander_ai_system::BystanderAI{}; bystander.run_now(&self.ecs); let mut triggers = trigger_system::TriggerSystem{}; triggers.run_now(&self.ecs); let mut melee = MeleeCombatSystem{}; melee.run_now(&self.ecs); let mut damage = DamageSystem{}; damage.run_now(&self.ecs); let mut pickup = ItemCollectionSystem{}; pickup.run_now(&self.ecs); let mut itemuse = ItemUseSystem{}; itemuse.run_now(&self.ecs); let mut drop_items = ItemDropSystem{}; drop_items.run_now(&self.ecs); let mut item_remove = ItemRemoveSystem{}; item_remove.run_now(&self.ecs); let mut hunger = hunger_system::HungerSystem{}; hunger.run_now(&self.ecs); let mut particles = particle_system::ParticleSpawnSystem{}; particles.run_now(&self.ecs); self.ecs.maintain(); } } }
If you cargo run the project now, you can watch NPCs bumbling around randomly. Having them move goes a long way to not making it feel like a town of statues!
Quipping NPCs
To further brings things to life, lets allow NPCs to "quip" when they spot you. In spawns.json, lets add some quips to the Patron (bar patron):
{
"name" : "Patron",
"renderable": {
"glyph" : "☺",
"fg" : "#AAAAAA",
"bg" : "#000000",
"order" : 1
},
"blocks_tile" : true,
"stats" : {
"max_hp" : 16,
"hp" : 16,
"defense" : 1,
"power" : 4
},
"vision_range" : 4,
"ai" : "bystander",
"quips" : [ "Quiet down, it's too early!", "Oh my, I drank too much.", "Still saving the world, eh?" ]
},
We need to modify raws/mob_structs.rs to handle loading this data:
#![allow(unused)] fn main() { #[derive(Deserialize, Debug)] pub struct Mob { pub name : String, pub renderable : Option<Renderable>, pub blocks_tile : bool, pub stats : MobStats, pub vision_range : i32, pub ai : String, pub quips : Option<Vec<String>> } }
We also need to create a component to hold available quips. In components.rs:
#![allow(unused)] fn main() { #[derive(Component, Debug, Serialize, Deserialize, Clone)] pub struct Quips { pub available : Vec<String> } }
Don't forget to register it in main.rs and saveload_system.rs!
We need to update rawmaster.rs's function spawn_named_mob to be able to add this component:
#![allow(unused)] fn main() { if let Some(quips) = &mob_template.quips { eb = eb.with(Quips{ available: quips.clone() }); } }
Lastly, we'll add the ability to enter these quips into the game log when they spot you. In bystander_ai_system.rs. First, extend the available set of data for the system as follows:
#![allow(unused)] fn main() { ... WriteExpect<'a, rltk::RandomNumberGenerator>, ReadExpect<'a, Point>, WriteExpect<'a, GameLog>, WriteStorage<'a, Quips>, ReadStorage<'a, Name>); fn run(&mut self, data : Self::SystemData) { let (mut map, runstate, entities, mut viewshed, bystander, mut position, mut entity_moved, mut rng, player_pos, mut gamelog, mut quips, names) = data; ... }
You may remember this: it gets read-only access the the Point resource we store containing the player's location, write access to the GameLog, and access to the component stores for Quips and Name. Now, we add the quipping to the function body:
#![allow(unused)] fn main() { ... for (entity, mut viewshed,_bystander,mut pos) in (&entities, &mut viewshed, &bystander, &mut position).join() { // Possibly quip let quip = quips.get_mut(entity); if let Some(quip) = quip { if !quip.available.is_empty() && viewshed.visible_tiles.contains(&player_pos) && rng.roll_dice(1,6)==1 { let name = names.get(entity); let quip_index = if quip.available.len() == 1 { 0 } else { (rng.roll_dice(1, quip.available.len() as i32)-1) as usize }; gamelog.entries.push( format!("{} says \"{}\"", name.unwrap().name, quip.available[quip_index]) ); quip.available.remove(quip_index); } } // Try to move randomly ... }
We can step through what it's doing:
- It asks for a component from the
quipsstore. This will be anOption- eitherNone(nothing to say) orSome- containing the quips. - If there are some quips...
- If the list of available quips isn't empty, the viewshed contains the player's tile, and 1d6 roll comes up 1...
- We look up the entity's name,
- Randomly pick an entry in the
availablelist fromquip. - Log a string as
NamesaysQuip. - Remove the quip from that entity's available quip list - they won't keep repeating themselves.
If you run the game now, you'll find that patrons are willing to comment on life in general:
We'll find that this can be used in other parts of the game, such as having guards shouting alerts, or goblins saying appropriately "Goblinesque" things. For brevity, we won't list every quip in the game here. Check out the source to see what we've added.
This sort of "fluff" goes a long way towards making a world feel alive, even if it doesn't really add to gameplay in a meaningful fashion. Since the town is the first area the player sees, it's good to have fluff.
Outdoor NPCs
All of the NPCs in the town so far have been conveniently located inside buildings. It isn't very realistic, even in terrible weather (which we don't have!); so we should look at spawning a few outdoor NPCs.
Open up map_builders/town.rs and we'll make two new functions; here's the calls to them in the main build function:
#![allow(unused)] fn main() { self.spawn_dockers(build_data, rng); self.spawn_townsfolk(build_data, rng, &mut available_building_tiles); }
The spawn_dockers function looks for bridge tiles, and places various people on them:
#![allow(unused)] fn main() { fn spawn_dockers(&mut self, build_data : &mut BuilderMap, rng: &mut rltk::RandomNumberGenerator) { for (idx, tt) in build_data.map.tiles.iter().enumerate() { if *tt == TileType::Bridge && rng.roll_dice(1, 6)==1 { let roll = rng.roll_dice(1, 3); match roll { 1 => build_data.spawn_list.push((idx, "Dock Worker".to_string())), 2 => build_data.spawn_list.push((idx, "Wannabe Pirate".to_string())), _ => build_data.spawn_list.push((idx, "Fisher".to_string())), } } } } }
This is simple enough: for each tile on the map, retrieve its index and type. If its a bridge, and a 1d6 comes up a 1 - spawn someone. We randomly pick between Dock Workers, Wannabe Pirates and Fisherfolk.
spawn_townsfolk is pretty simple, too:
#![allow(unused)] fn main() { fn spawn_townsfolk(&mut self, build_data : &mut BuilderMap, rng: &mut rltk::RandomNumberGenerator, available_building_tiles : &mut HashSet<usize>) { for idx in available_building_tiles.iter() { if rng.roll_dice(1, 10)==1 { let roll = rng.roll_dice(1, 4); match roll { 1 => build_data.spawn_list.push((*idx, "Peasant".to_string())), 2 => build_data.spawn_list.push((*idx, "Drunk".to_string())), 3 => build_data.spawn_list.push((*idx, "Dock Worker".to_string())), _ => build_data.spawn_list.push((*idx, "Fisher".to_string())), } } } } }
This iterates all the remaining availble_building_tiles; these are tiles we know won't be inside of a building, because we removed them when we placed buildings! So each spot is guaranteed to be outdoors, and in town. For each tile, we roll 1d10 - and if its a 1, we spawn one of a Peasant, a Drunk, a Dock Worker or a Fisher.
Lastly, we add these folk to our spawns.json file:
{
"name" : "Dock Worker",
"renderable": {
"glyph" : "☺",
"fg" : "#999999",
"bg" : "#000000",
"order" : 1
},
"blocks_tile" : true,
"stats" : {
"max_hp" : 16,
"hp" : 16,
"defense" : 1,
"power" : 4
},
"vision_range" : 4,
"ai" : "bystander",
"quips" : [ "Lovely day, eh?", "Nice weather", "Hello" ]
},
{
"name" : "Fisher",
"renderable": {
"glyph" : "☺",
"fg" : "#999999",
"bg" : "#000000",
"order" : 1
},
"blocks_tile" : true,
"stats" : {
"max_hp" : 16,
"hp" : 16,
"defense" : 1,
"power" : 4
},
"vision_range" : 4,
"ai" : "bystander",
"quips" : [ "They're biting today!", "I caught something, but it wasn't a fish!", "Looks like rain" ]
},
{
"name" : "Wannabe Pirate",
"renderable": {
"glyph" : "☺",
"fg" : "#aa9999",
"bg" : "#000000",
"order" : 1
},
"blocks_tile" : true,
"stats" : {
"max_hp" : 16,
"hp" : 16,
"defense" : 1,
"power" : 4
},
"vision_range" : 4,
"ai" : "bystander",
"quips" : [ "Arrr", "Grog!", "Booze!" ]
},
{
"name" : "Drunk",
"renderable": {
"glyph" : "☺",
"fg" : "#aa9999",
"bg" : "#000000",
"order" : 1
},
"blocks_tile" : true,
"stats" : {
"max_hp" : 16,
"hp" : 16,
"defense" : 1,
"power" : 4
},
"vision_range" : 4,
"ai" : "bystander",
"quips" : [ "Hic", "Need... more... booze!", "Spare a copper?" ]
},
If you cargo run now, you'll see a town teeming with life:
Wrap-Up
This chapter has really brought our town to life. There's always room for improvement, but it's good enough for a starting map! The next chapter will change gear, and start adding stats to the game.
The source code for this chapter may be found here
Run this chapter's example with web assembly, in your browser (WebGL2 required)
Copyright (C) 2019, Herbert Wolverson.
Game Stats
About this tutorial
This tutorial is free and open source, and all code uses the MIT license - so you are free to do with it as you like. My hope is that you will enjoy the tutorial, and make great games!
If you enjoy this and would like me to keep writing, please consider supporting my Patreon.
Up until now, we've had very primitive stats: power and defense. This doesn't give a lot of room for variation, nor does it live up to the Roguelike ideal of drowning the player in numbers (ok, that's an overstatement). In the design document, we mentioned wanting a D&D-like approach to game stats. That gives a lot of room to play with things, allowing items with various bonuses (and penalties), and should feel familiar to most people likely to play a game in this genre. It will also require some UI work, but we'll push the bulk of it off until the next chapter.
The Basic 6 Stats - Condensed to 4
Anyone who has played D&D will know that characters - and in later editions, everyone else - has six attributes:
- Strength, governing how much you can carry, how hard you bash things, and your general physical capability.
- Dexterity, governing how fast you dodge things, how well you leap around acrobatically, and things like picking locks and aiming your bow.
- Constitution, governing how physically fit and healthy you are, adjusting your hit point total and helping to resist disease.
- Intelligence for how smart you are, helping with spells, reading things.
- Wisdom for how much common sense you have, as well as helpful interactions with deities.
- Charisma for how well you interact with others.
This is overkill for the game we're making. Intelligence and Wisdom don't need to be separate (Wisdom would end up being the "dump stat" everyone ditches to get points elsewhere!), and Charisma is really only useful for interacting with vendors since we aren't doing a lot of social interaction in-game. So we'll opt for a condensed set of attributes for this game:
- Might, governing your general ability to hit things.
- Fitness, your general health.
- Quickness, your general dexterity replacement.
- Intelligence, which really combines Intelligence and Wisdom in D&D terms.
This is a pretty common mix for other games. Let's open components.rs and make a new component to hold them:
#![allow(unused)] fn main() { #[derive(Debug, Serialize, Deserialize, Clone)] pub struct Attribute { pub base : i32, pub modifiers : i32, pub bonus : i32 } #[derive(Component, Debug, Serialize, Deserialize, Clone)] pub struct Attributes { pub might : Attribute, pub fitness : Attribute, pub quickness : Attribute, pub intelligence : Attribute } }
So we make a structure for an attribute, and store three values:
- The base value, which is the completely unmodified value.
- The modifiers value, which represents any active bonuses or penalties to the attribute (and will have to be recomputed from time to time).
- The bonus, which is derived from the final modified value - and most of the time, is what we're actually going to use.
Don't forget to register Attributes in main.rs and saveload_system.rs. Attribute isn't actually a component - it's just used by one - so you don't have to register it.
Giving the player some attributes
Now, we should give the player some attributes. We'll start simple, and give every attribute a value of 11 (we're using D&D-style 3-18, 3d6 generated attributes). In spawner.rs, modify the player function as follows:
#![allow(unused)] fn main() { pub fn player(ecs : &mut World, player_x : i32, player_y : i32) -> Entity { ecs .create_entity() .with(Position { x: player_x, y: player_y }) .with(Renderable { glyph: rltk::to_cp437('@'), fg: RGB::named(rltk::YELLOW), bg: RGB::named(rltk::BLACK), render_order: 0 }) .with(Player{}) .with(Viewshed{ visible_tiles : Vec::new(), range: 8, dirty: true }) .with(Name{name: "Player".to_string() }) .with(CombatStats{ max_hp: 30, hp: 30, defense: 2, power: 5 }) .with(HungerClock{ state: HungerState::WellFed, duration: 20 }) .with(Attributes{ might: Attribute{ base: 11, modifiers: 0, bonus: 0 }, fitness: Attribute{ base: 11, modifiers: 0, bonus: 0 }, quickness: Attribute{ base: 11, modifiers: 0, bonus: 0 }, intelligence: Attribute{ base: 11, modifiers: 0, bonus: 0 }, }) .marked::<SimpleMarker<SerializeMe>>() .build() } }
Attributes for NPCs
We probably don't want to have to write out every single attribute for every NPC in the spawns.json, but we'd like to be able to do so if we want to. Take a normal NPC like the Barkeep. We could use the following syntax to indicate that he has "normal" attributes for everything, but is smarter than your average peasant:
{
"name" : "Barkeep",
"renderable": {
"glyph" : "☺",
"fg" : "#EE82EE",
"bg" : "#000000",
"order" : 1
},
"blocks_tile" : true,
"stats" : {
"max_hp" : 16,
"hp" : 16,
"defense" : 1,
"power" : 4
},
"vision_range" : 4,
"ai" : "vendor",
"attributes" : {
"intelligence" : 13
}
},
This pattern is powerful, because we can gloss-over the details of everyone who is basically scenery - but fill in as much detail as we want for important monsters! If you don't specify an attribute, it defaults to a middle-of-the-road value.
Let's extend the structs in raws/mob_structs.rs to support such a flexible format:
#![allow(unused)] fn main() { use serde::{Deserialize}; use super::{Renderable}; #[derive(Deserialize, Debug)] pub struct Mob { pub name : String, pub renderable : Option<Renderable>, pub blocks_tile : bool, pub stats : MobStats, pub vision_range : i32, pub ai : String, pub quips : Option<Vec<String>>, pub attributes : MobAttributes } #[derive(Deserialize, Debug)] pub struct MobStats { pub max_hp : i32, pub hp : i32, pub power : i32, pub defense : i32 } #[derive(Deserialize, Debug)] pub struct MobAttributes { pub might : Option<i32>, pub fitness : Option<i32>, pub quickness : Option<i32>, pub intelligence : Option<i32> } }
Notice that we're making attributes required - so you have to have one for the JSON to load. Then we're making all of the attribute values optional; if you don't specify them, we'll go with a nice, normal value.
Now lets open up raws/rasmaster.rs and modify spawn_named_mob to generate this data:
#![allow(unused)] fn main() { let mut attr = Attributes{ might: Attribute{ base: 11, modifiers: 0, bonus: 0 }, fitness: Attribute{ base: 11, modifiers: 0, bonus: 0 }, quickness: Attribute{ base: 11, modifiers: 0, bonus: 0 }, intelligence: Attribute{ base: 11, modifiers: 0, bonus: 0 }, }; if let Some(might) = mob_template.attributes.might { attr.might = Attribute{ base: might, modifiers: 0, bonus: 0 }; } if let Some(fitness) = mob_template.attributes.fitness { attr.fitness = Attribute{ base: fitness, modifiers: 0, bonus: 0 }; } if let Some(quickness) = mob_template.attributes.quickness { attr.quickness = Attribute{ base: quickness, modifiers: 0, bonus: 0 }; } if let Some(intelligence) = mob_template.attributes.intelligence { attr.intelligence = Attribute{ base: intelligence, modifiers: 0, bonus: 0 }; } eb = eb.with(attr); }
This checks for the presence of each attribute in the JSON, and assigns it to the mob.
Attribute Bonuses
So far, so good - but what about the bonus field? A bonus of 0 for every value isn't right! We're going to need to do a lot of game system calculation - so we'll create a new file in the main project, gamesystem.rs:
#![allow(unused)] fn main() { pub fn attr_bonus(value: i32) -> i32 { (value-10)/2 // See: https://roll20.net/compendium/dnd5e/Ability%20Scores#content } }
This uses the standard D&D rules for determining an attribute bonus: subtract 10 and divide by 2. So our 11 will give a bonus of 0 - it's average. Our Barkeeper will have a bonus of 1 to intelligence rolls.
At the top of main.rs, add a mod gamesystem and a pub use gamesystem::* to make this module available everywhere.
Now modify the player spawn in spawner.rs to use it:
#![allow(unused)] fn main() { use crate::attr_bonus; ... .with(Attributes{ might: Attribute{ base: 11, modifiers: 0, bonus: attr_bonus(11) }, fitness: Attribute{ base: 11, modifiers: 0, bonus: attr_bonus(11) }, quickness: Attribute{ base: 11, modifiers: 0, bonus: attr_bonus(11) }, intelligence: Attribute{ base: 11, modifiers: 0, bonus: attr_bonus(11) }, }) ... }
Do the same in rawmaster.rs:
#![allow(unused)] fn main() { use crate::attr_bonus; // At the top! ... let mut attr = Attributes{ might: Attribute{ base: 11, modifiers: 0, bonus: attr_bonus(11) }, fitness: Attribute{ base: 11, modifiers: 0, bonus: attr_bonus(11) }, quickness: Attribute{ base: 11, modifiers: 0, bonus: attr_bonus(11) }, intelligence: Attribute{ base: 11, modifiers: 0, bonus: attr_bonus(11) }, }; if let Some(might) = mob_template.attributes.might { attr.might = Attribute{ base: might, modifiers: 0, bonus: attr_bonus(might) }; } if let Some(fitness) = mob_template.attributes.fitness { attr.fitness = Attribute{ base: fitness, modifiers: 0, bonus: attr_bonus(fitness) }; } if let Some(quickness) = mob_template.attributes.quickness { attr.quickness = Attribute{ base: quickness, modifiers: 0, bonus: attr_bonus(quickness) }; } if let Some(intelligence) = mob_template.attributes.intelligence { attr.intelligence = Attribute{ base: intelligence, modifiers: 0, bonus: attr_bonus(intelligence) }; } eb = eb.with(attr); ... }
Before you compile/run the game, add a blank attributes entry to every mob in spawns.json to avoid errors. Here's an example:
{
"name" : "Shady Salesman",
"renderable": {
"glyph" : "h",
"fg" : "#EE82EE",
"bg" : "#000000",
"order" : 1
},
"blocks_tile" : true,
"stats" : {
"max_hp" : 16,
"hp" : 16,
"defense" : 1,
"power" : 4
},
"vision_range" : 4,
"ai" : "vendor",
"attributes" : {}
},
Skills
Before we start to use attributes, we should consider the other element with which they go hand-in-hand: skills. For this game, we don't want to get too complicated with hundreds of skills; we'd never finish the tutorial! Instead, lets go with some very basic skills: melee, defense, and magic. We can always add more later (but taking them away can cause howls of derision from users!).
In components.rs, lets make a skill holding component:
#![allow(unused)] fn main() { #[derive(Debug, Serialize, Deserialize, Clone, Eq, PartialEq, Hash)] pub enum Skill { Melee, Defense, Magic } #[derive(Component, Debug, Serialize, Deserialize, Clone)] pub struct Skills { pub skills : HashMap<Skill, i32> } }
So if we add skills, we'll need to add them to the enum in the future - but our basic skills structure can hold whatever skills we come up with. Don't forget to add Skills (but not Skill) to main.rs and saveload_system.rs for registration!
Open up spawners.rs, and lets give the player a skill of 1 in everything:
#![allow(unused)] fn main() { pub fn player(ecs : &mut World, player_x : i32, player_y : i32) -> Entity { let mut skills = Skills{ skills: HashMap::new() }; skills.skills.insert(Skill::Melee, 1); skills.skills.insert(Skill::Defense, 1); skills.skills.insert(Skill::Magic, 1); ecs .create_entity() .with(Position { x: player_x, y: player_y }) .with(Renderable { glyph: rltk::to_cp437('@'), fg: RGB::named(rltk::YELLOW), bg: RGB::named(rltk::BLACK), render_order: 0 }) .with(Player{}) .with(Viewshed{ visible_tiles : Vec::new(), range: 8, dirty: true }) .with(Name{name: "Player".to_string() }) .with(CombatStats{ max_hp: 30, hp: 30, defense: 2, power: 5 }) .with(HungerClock{ state: HungerState::WellFed, duration: 20 }) .with(Attributes{ might: Attribute{ base: 11, modifiers: 0, bonus: attr_bonus(11) }, fitness: Attribute{ base: 11, modifiers: 0, bonus: attr_bonus(11) }, quickness: Attribute{ base: 11, modifiers: 0, bonus: attr_bonus(11) }, intelligence: Attribute{ base: 11, modifiers: 0, bonus: attr_bonus(11) }, }) .with(skills) .marked::<SimpleMarker<SerializeMe>>() .build() } }
For mobs, we'll also assume a skill of 1 in each skill unless otherwise specified. In raws/mob_structs.rs, update the Mob:
#![allow(unused)] fn main() { #[derive(Deserialize, Debug)] pub struct Mob { pub name : String, pub renderable : Option<Renderable>, pub blocks_tile : bool, pub stats : MobStats, pub vision_range : i32, pub ai : String, pub quips : Option<Vec<String>>, pub attributes : MobAttributes, pub skills : Option<HashMap<String, i32>> } }
That allows us to omit it completely in many cases (no non-default skills), which will avoid hitting a mob with a penalty if we forget to give them a skill! The mob can have skills overridden, should we so wish. They have to line up with the HashMap structure. Let's give our Barkeep in spawns.json a skill bonus (it won't do anything, but it works as an example):
{
"name" : "Barkeep",
"renderable": {
"glyph" : "☺",
"fg" : "#EE82EE",
"bg" : "#000000",
"order" : 1
},
"blocks_tile" : true,
"stats" : {
"max_hp" : 16,
"hp" : 16,
"defense" : 1,
"power" : 4
},
"vision_range" : 4,
"ai" : "vendor",
"attributes" : {
"intelligence" : 13
},
"skills" : {
"Melee" : 2
}
},
Let's modify our raws/rawmaster.rs's spawn_named_mob function to use this data:
#![allow(unused)] fn main() { let mut skills = Skills{ skills: HashMap::new() }; skills.skills.insert(Skill::Melee, 1); skills.skills.insert(Skill::Defense, 1); skills.skills.insert(Skill::Magic, 1); if let Some(mobskills) = &mob_template.skills { for sk in mobskills.iter() { match sk.0.as_str() { "Melee" => { skills.skills.insert(Skill::Melee, *sk.1); } "Defense" => { skills.skills.insert(Skill::Defense, *sk.1); } "Magic" => { skills.skills.insert(Skill::Magic, *sk.1); } _ => { rltk::console::log(format!("Unknown skill referenced: [{}]", sk.0)); } } } } eb = eb.with(skills); }
Making level, experience and health a component, adding Mana
In components.rs, go ahead and add another component (and then register it in main.rs and saveload_system.rs):
#![allow(unused)] fn main() { #[derive(Debug, Serialize, Deserialize, Clone)] pub struct Pool { pub max: i32, pub current: i32 } #[derive(Component, Debug, Serialize, Deserialize, Clone)] pub struct Pools { pub hit_points : Pool, pub mana : Pool, pub xp : i32, pub level : i32 } }
There is quite a bit there:
- We create a new type to represent a depletable resource, a
Pool. Pools have a maximum and a current value. This represents getting injured, or using up your magical power; the maximum is unchanged, but the current value fluctuates. - We use the
Poolto store bothhit_pointsandmana. - We also store
xpfor "Experience Points". - We store
levelfor what level you (or the NPC) are.
We should define some defaults for these, and determine how your attributes affect them. In gamesystem.rs, we'll use the following functions:
#![allow(unused)] fn main() { pub fn attr_bonus(value: i32) -> i32 { (value-10)/2 // See: https://roll20.net/compendium/dnd5e/Ability%20Scores#content } pub fn player_hp_per_level(fitness: i32) -> i32 { 10 + attr_bonus(fitness) } pub fn player_hp_at_level(fitness:i32, level:i32) -> i32 { player_hp_per_level(fitness) * level } pub fn npc_hp(fitness: i32, level: i32) -> i32 { let mut total = 1; for _i in 0..level { total += i32::max(1, 8 + attr_bonus(fitness)); } total } pub fn mana_per_level(intelligence: i32) -> i32 { i32::max(1, 4 + attr_bonus(intelligence)) } pub fn mana_at_level(intelligence: i32, level: i32) -> i32 { mana_per_level(intelligence) * level } pub fn skill_bonus(skill : Skill, skills: &Skills) -> i32 { if skills.skills.contains_key(&skill) { skills.skills[&skill] } else { -4 } } }
If you've been following along, these should be really easy to understand: players get 10 HP per level, modified by their fitness attribute. NPCs get 8 per level, also modified by fitness - with a minimum of 1 per level (for bad rolls).
So in spawner.rs, we can modify the player function to fill in these pools for a starting character:
#![allow(unused)] fn main() { .with(Pools{ hit_points : Pool{ current: player_hp_at_level(11, 1), max: player_hp_at_level(11, 1) }, mana: Pool{ current: mana_at_level(11, 1), max: mana_at_level(11, 1) }, xp: 0, level: 1 }) }
Likewise, we need to give NPCs the ability to have pools. At the very least, we have to add a level attribute to their definition - but lets make it optional, if omitted it goes with 1 (so you don't need to modify every single fluff NPC!). We'll also make optional hp and mana fields - so you can go with random defaults, or override them for an important monster. Here's raws/mob_structs.rs adjusted:
#![allow(unused)] fn main() { #[derive(Deserialize, Debug)] pub struct Mob { pub name : String, pub renderable : Option<Renderable>, pub blocks_tile : bool, pub vision_range : i32, pub ai : String, pub quips : Option<Vec<String>>, pub attributes : MobAttributes, pub skills : Option<HashMap<String, i32>>, pub level : Option<i32>, pub hp : Option<i32>, pub mana : Option<i32> } }
We should also modify spawn_named_mob (from raws/rawmaster.rs) to include this:
#![allow(unused)] fn main() { let mut mob_fitness = 11; let mut mob_int = 11; let mut attr = Attributes{ might: Attribute{ base: 11, modifiers: 0, bonus: attr_bonus(11) }, fitness: Attribute{ base: 11, modifiers: 0, bonus: attr_bonus(11) }, quickness: Attribute{ base: 11, modifiers: 0, bonus: attr_bonus(11) }, intelligence: Attribute{ base: 11, modifiers: 0, bonus: attr_bonus(11) }, }; if let Some(might) = mob_template.attributes.might { attr.might = Attribute{ base: might, modifiers: 0, bonus: attr_bonus(might) }; } if let Some(fitness) = mob_template.attributes.fitness { attr.fitness = Attribute{ base: fitness, modifiers: 0, bonus: attr_bonus(fitness) }; mob_fitness = fitness; } if let Some(quickness) = mob_template.attributes.quickness { attr.quickness = Attribute{ base: quickness, modifiers: 0, bonus: attr_bonus(quickness) }; } if let Some(intelligence) = mob_template.attributes.intelligence { attr.intelligence = Attribute{ base: intelligence, modifiers: 0, bonus: attr_bonus(intelligence) }; mob_int = intelligence; } eb = eb.with(attr); let mob_level = if mob_template.level.is_some() { mob_template.level.unwrap() } else { 1 }; let mob_hp = npc_hp(mob_fitness, mob_level); let mob_mana = mana_at_level(mob_int, mob_level); let pools = Pools{ level: mob_level, xp: 0, hit_points : Pool{ current: mob_hp, max: mob_hp }, mana: Pool{current: mob_mana, max: mob_mana} }; eb = eb.with(pools); }
We're capturing the relevant stats during their building, and calling the new functions to help build the NPC's Pools.
Time to break stuff: delete the old stats!
In components.rs, delete CombatStats. You'll want to delete it in main.rs and saveload_system.rs as well. Watch your IDE paint the town red - we've used that quite a bit! Since we're enacting a new D&D-like system, it has to be done... this also gives us a chance to look at the places in which we're actually using it, and make some informed decisions.
If you don't want to follow all of these changes directly, or get confused (it happens to all of us!), the source code for this chapter has the working versions.
Here are the simpler changes:
- In
mob_structs.rsyou can deleteMobStatsand its reference inMob. - In
rawmaster.rs, delete the code assigningCombatStatsto an NPC. - In
spawns.jsonyou can delete all of the stat blocks. - In
damage_system.rsreplace all references toCombatStatswithPools, and all references tostats.hpwithstats.hit_points.currentorstats.hit_points.max(formax_hp). - In
inventory_system.rs, replace all references toCombatStatswithPools, and replace the line referencingmax_hpandhpwithstats.hit_points = i32::min(stats.hit_points.max, stats.hit_points.current + healer.heal_amount);
And the less easy ones:
In player.rs replace CombatStats with Pools - it'll serve the same purpose. Also, find the can_heal section and replace it with:
#![allow(unused)] fn main() { if can_heal { let mut health_components = ecs.write_storage::<Pools>(); let pools = health_components.get_mut(*player_entity).unwrap(); pools.hit_points.current = i32::min(pools.hit_points.current + 1, pools.hit_points.max); } }
In main.rs (line 345), we reference the player's health - they've changed dungeon level and we give them some hit points back. Let's stop being so nice and delete that altogether. The unkind code now reads like this:
#![allow(unused)] fn main() { let player_entity = self.ecs.fetch::<Entity>(); let mut gamelog = self.ecs.fetch_mut::<gamelog::GameLog>(); gamelog.entries.push("You descend to the next level.".to_string()); }
gui.rs is an easy fix. Replace the import for CombatStats with Pools; here's the relevant section:
#![allow(unused)] fn main() { ... use super::{Pools, Player, gamelog::GameLog, Map, Name, Position, State, InBackpack, Viewshed, RunState, Equipped, HungerClock, HungerState, rex_assets::RexAssets, Hidden, camera }; pub fn draw_ui(ecs: &World, ctx : &mut Rltk) { ctx.draw_box(0, 43, 79, 6, RGB::named(rltk::WHITE), RGB::named(rltk::BLACK)); let combat_stats = ecs.read_storage::<Pools>(); let players = ecs.read_storage::<Player>(); let hunger = ecs.read_storage::<HungerClock>(); for (_player, stats, hc) in (&players, &combat_stats, &hunger).join() { let health = format!(" HP: {} / {} ", stats.hp, stats.max_hp); ctx.print_color(12, 43, RGB::named(rltk::YELLOW), RGB::named(rltk::BLACK), &health); ctx.draw_bar_horizontal(28, 43, 51, stats.hit_points.current, stats.hit_points.max, RGB::named(rltk::RED), RGB::named(rltk::BLACK)); ... }
Updating the melee combat system.
We're down to one "red file" (files with errors), in melee_combat_system.rs, but they now relate to core game systems that relied upon the old system. We want to make that more like a D20 (D&D) game, so they should be replaced anyway.
That means it's time to discuss the combat system we want. Let's go with a very D&D-like (but not quite) setup:
- We look to see what weapon the attacker is using. We'll need to determine if it is Might or Quickness based. If you are unarmed, we'll go with Might.
- The attacker rolls 1d20 (a 20-sided dice).
- If the roll is a natural, unmodified 20, it always hits.
- A natural roll of 1 always misses.
- The attacker adds the attribute bonus for either might or quickness, depending upon the weapon.
- The attacker adds the skill bonus, equal to the number of points spent on the Melee skill.
- The attacker adds any bonuses imparted by the weapon itself (in case it's magical).
- The attacker adds any situational or status bonuses, which aren't implemented yet but are good to keep in mind.
- If the total attack roll is equal to or greater than the target's armor class, then the target is hit and will sustain damage.
Armor Class is determined by:
- Start with the base number 10.
- Add the Defense skill.
- Add the armor bonus for the equipped armor (not implemented yet! and shield).
Damage is then determined from the melee weapon:
- The weapon will specify a die type and bonus (e.g.
1d6+1); if there is no weapon equipped, then unarmed combat does1d4. - Add the attacker's might bonus.
- Add the attacker's melee bonus.
So now that we've defined how it should work, we can start implementing it. Until we've revamped some equipment, it's going to be incomplete - but at least we can get it compiling.
Here's a replacement melee_combat_system.rs that does what we described:
#![allow(unused)] fn main() { use specs::prelude::*; use super::{Attributes, Skills, WantsToMelee, Name, SufferDamage, gamelog::GameLog, particle_system::ParticleBuilder, Position, HungerClock, HungerState, Pools, skill_bonus, Skill}; pub struct MeleeCombatSystem {} impl<'a> System<'a> for MeleeCombatSystem { #[allow(clippy::type_complexity)] type SystemData = ( Entities<'a>, WriteExpect<'a, GameLog>, WriteStorage<'a, WantsToMelee>, ReadStorage<'a, Name>, ReadStorage<'a, Attributes>, ReadStorage<'a, Skills>, WriteStorage<'a, SufferDamage>, WriteExpect<'a, ParticleBuilder>, ReadStorage<'a, Position>, ReadStorage<'a, HungerClock>, ReadStorage<'a, Pools>, WriteExpect<'a, rltk::RandomNumberGenerator> ); fn run(&mut self, data : Self::SystemData) { let (entities, mut log, mut wants_melee, names, attributes, skills, mut inflict_damage, mut particle_builder, positions, hunger_clock, pools, mut rng) = data; for (entity, wants_melee, name, attacker_attributes, attacker_skills, attacker_pools) in (&entities, &wants_melee, &names, &attributes, &skills, &pools).join() { // Are the attacker and defender alive? Only attack if they are let target_pools = pools.get(wants_melee.target).unwrap(); let target_attributes = attributes.get(wants_melee.target).unwrap(); let target_skills = skills.get(wants_melee.target).unwrap(); if attacker_pools.hit_points.current > 0 && target_pools.hit_points.current > 0 { let target_name = names.get(wants_melee.target).unwrap(); let natural_roll = rng.roll_dice(1, 20); let attribute_hit_bonus = attacker_attributes.might.bonus; let skill_hit_bonus = skill_bonus(Skill::Melee, &*attacker_skills); let weapon_hit_bonus = 0; // TODO: Once weapons support this let mut status_hit_bonus = 0; if let Some(hc) = hunger_clock.get(entity) { // Well-Fed grants +1 if hc.state == HungerState::WellFed { status_hit_bonus += 1; } } let modified_hit_roll = natural_roll + attribute_hit_bonus + skill_hit_bonus + weapon_hit_bonus + status_hit_bonus; let base_armor_class = 10; let armor_quickness_bonus = target_attributes.quickness.bonus; let armor_skill_bonus = skill_bonus(Skill::Defense, &*target_skills); let armor_item_bonus = 0; // TODO: Once armor supports this let armor_class = base_armor_class + armor_quickness_bonus + armor_skill_bonus + armor_item_bonus; if natural_roll != 1 && (natural_roll == 20 || modified_hit_roll > armor_class) { // Target hit! Until we support weapons, we're going with 1d4 let base_damage = rng.roll_dice(1, 4); let attr_damage_bonus = attacker_attributes.might.bonus; let skill_damage_bonus = skill_bonus(Skill::Melee, &*attacker_skills); let weapon_damage_bonus = 0; let damage = i32::max(0, base_damage + attr_damage_bonus + skill_hit_bonus + skill_damage_bonus + weapon_damage_bonus); SufferDamage::new_damage(&mut inflict_damage, wants_melee.target, damage); log.entries.push(format!("{} hits {}, for {} hp.", &name.name, &target_name.name, damage)); if let Some(pos) = positions.get(wants_melee.target) { particle_builder.request(pos.x, pos.y, rltk::RGB::named(rltk::ORANGE), rltk::RGB::named(rltk::BLACK), rltk::to_cp437('‼'), 200.0); } } else if natural_roll == 1 { // Natural 1 miss log.entries.push(format!("{} considers attacking {}, but misjudges the timing.", name.name, target_name.name)); if let Some(pos) = positions.get(wants_melee.target) { particle_builder.request(pos.x, pos.y, rltk::RGB::named(rltk::BLUE), rltk::RGB::named(rltk::BLACK), rltk::to_cp437('‼'), 200.0); } } else { // Miss log.entries.push(format!("{} attacks {}, but can't connect.", name.name, target_name.name)); if let Some(pos) = positions.get(wants_melee.target) { particle_builder.request(pos.x, pos.y, rltk::RGB::named(rltk::CYAN), rltk::RGB::named(rltk::BLACK), rltk::to_cp437('‼'), 200.0); } } } } wants_melee.clear(); } } }
That's a lot of code, but it's very similar to the outline we created. Let's walk through it:
- We carefully define a lot of the ECS resources to which we need access.
- We iterate all entities that want to melee, and have a name, skills, attributes and pools.
- We obtain the target's skills and pools.
- We check that both attacker and target are alive, and skip if they aren't.
- We get the target's name, which we'll need for logging.
- We obtain a
natural_rollby rolling 1d20. - We calculate the attribute hit bonus, referencing the attacker's might bonus.
- We calculate the skill hit bonus, referencing the attacker's melee skill.
- We set
weapon_hit_bonusto 0, because we haven't implemented that yet. - We look to see if the attacker is Well Fed and give them a +1 situational bonus if they are.
- We can now calculate
modified_hit_rollby adding steps 6 through 10. - We set
base_armor_classto 10. - We get the quickness bonus from the target, and set it as the
armor_quickness_bonus. - We get the defense skill from the target, and set it as the
armor_skill_bonus. - We set
armor_item_bonusbecause we haven't implemented that yet. - We calculate the
armor_classby adding steps 12 through 15. - If the
natural_rolldoesn't equal 1, and is either a 20 ormodified_hit_rollis greater than or equal toarmor_class- then the attacker has hit:- Since we don't support combat items properly yet, we roll
1d4for base damage. - We add the attacker's might bonus.
- We add the attacker's melee skill.
- We send an
inflict_damagemessage to the damage system, log the attack, and play an orange particle.
- Since we don't support combat items properly yet, we roll
- If the
natural_rollis one, we mention that it was a spectacular miss and show a blue particle. - Otherwise, it was a normal miss - play a cyan particle and log the miss.
Finally, lets open spawns.json and make rats really weak. Otherwise, with no equipment you'll simply be murdered when you find them:
{
"name" : "Rat",
"renderable": {
"glyph" : "r",
"fg" : "#FF0000",
"bg" : "#000000",
"order" : 1
},
"blocks_tile" : true,
"vision_range" : 8,
"ai" : "melee",
"attributes" : {
"Might" : 3,
"Fitness" : 3
},
"skills" : {
"Melee" : -1,
"Defense" : -1
}
},
You can cargo run now, jog to the down stair (it'll be on the right) or find the abandoned house, and engage in combat! It will still be rather lacking in content, due to not having implemented items yet - but the basics are there, and you can see the "d20" system in action. Combat is less deterministic, and may have some real tension rather than "chess tension".
Wrap-Up
We've now implemented game stats and a simple D&D-like melee system. There's still more to do, and we'll get to the next phase - gear - in the following chapter.
The source code for this chapter may be found here
Run this chapter's example with web assembly, in your browser (WebGL2 required)
Copyright (C) 2019, Herbert Wolverson.
Equipment
About this tutorial
This tutorial is free and open source, and all code uses the MIT license - so you are free to do with it as you like. My hope is that you will enjoy the tutorial, and make great games!
If you enjoy this and would like me to keep writing, please consider supporting my Patreon.
In the last chapter, we moved to a d20-style (D&D-like) combat system and attributes system. It's functional, but doesn't really give any opportunity to better your character through gear. Finding cool items, and painstakingly maximizing your efficiency is a bedrock of roguelike games - providing a lot of depth, and a feeling that while the game is random you can heavily influence it to get the results you desire.
Parsing Dice Strings
We're going to find it very helpful to be able to read a string containing a D&D dice specification (e.g. 20d6+4) and turn it into computer-friendly numbers. We'll use this a lot when reading the raw files, so we'll put it in there - but make it public in case we need it somewhere else.
Parsing out bit of text like that is a perfect job for regular expressions. These are supported in Rust via a crate, so we have to open up our cargo.toml and add regex = "1.3.6" to our [dependencies] section. Actually teaching regular expressions would be a book unto itself; it's a hugely complicated (and powerful) system, and has a tendency to look like a cat walked on your keyboard. Here's a regular expression that parses a 1d20+4 type of string:
(\d+)d(\d+)([\+\-]\d+)?
What on Earth does that mean?
- Each part contained in parentheses
(..)is a match group. You're telling the regular expression that whatever is in those parentheses is important to you, and can be captured for reading. \dis regular-expression speak for "I expect a digit here".- Adding a
+means "there may be more than one digit here, keep reading until you hit something else. - Therefore, the first
(\d+)means "capture all the digits at the front of the string". - The
doutside of a group is a literaldcharacter. So we separate the first set of numbers from subsequent parts with the letterd. Now we're up to1d. - The next
(\d+)works the same way - keep reading digits in, and capture them into the second group. So now we've read up to1d20and captured1and20in groups. - The last group is a bit more confusing.
[..]means "expect any one of these characters". The backslash (\) is escaping the subsequent character, meaning "+ or - can mean something in regular expression language; in this case, please just treat it as a symbol". So[\+\-]means "expect a plus or a minus here". Then we read however many digits are there. - So now we've got
1d20+4broken into1,20, and4.
It's entirely possible that we'll pass a dice type without a +4, e.g. 1d20. In this case, the regex will match the 1 and the 20 - but the last group will be empty.
Here's the Rust for our function:
#![allow(unused)] fn main() { pub fn parse_dice_string(dice : &str) -> (i32, i32, i32) { lazy_static! { static ref DICE_RE : Regex = Regex::new(r"(\d+)d(\d+)([\+\-]\d+)?").unwrap(); } let mut n_dice = 1; let mut die_type = 4; let mut die_bonus = 0; for cap in DICE_RE.captures_iter(dice) { if let Some(group) = cap.get(1) { n_dice = group.as_str().parse::<i32>().expect("Not a digit"); } if let Some(group) = cap.get(2) { die_type = group.as_str().parse::<i32>().expect("Not a digit"); } if let Some(group) = cap.get(3) { die_bonus = group.as_str().parse::<i32>().expect("Not a digit"); } } (n_dice, die_type, die_bonus) } }
Well, that's as clear as mud. Let's walk through and try to decipher it a bit.
- Regular expressions are compiled into their own internal format when first parsed by the Rust Regex library. We don't want to do this every time we try to read a dice string, so we take the advice of the Rust Cookbook and bake reading the expression into a
lazy_static!(like we used for globals). This way, it'll be parsed just once and the regular expression is ready to use when we need it. - We set some mutable variables to the different parts of the dice expression; the number of dice, their type (number of sides) and bonus (which will be negative for a penalty). We give them some defaults in case we have troubles reading the string (or parts thereof).
- Now we use the
captures_iterfeature of the regex library; we pass it the string we are looking at, and it returns an iterator of all captures (complicated regular expressions might have lots of these). In our case, this returns one capture set, which may contain all of the groups we discussed above. - Now, it's possible that any of the groups won't exist. So we do an
if leton each capture group. If it does exist, we retrieve the string withas_strand parse it into an integer - and assign it to the right part of the dice reader. - We return all the parts as a tuple.
Defining melee weaponry
For now, there's no need to change consumables - the system works ok. We're going to focus on equippable items: those you can wield, wear or otherwise benefit from. Our previous definition of a "dagger" looked like this:
{
"name" : "Dagger",
"renderable": {
"glyph" : "/",
"fg" : "#FFAAAA",
"bg" : "#000000",
"order" : 2
},
"weapon" : {
"range" : "melee",
"power_bonus" : 2
}
},
The power_bonus is now outmoded; weapons don't work that way anymore. Instead, we want to be able to define D&D-like stats for them. Here's a modernized dagger:
{
"name" : "Dagger",
"renderable": {
"glyph" : "/",
"fg" : "#FFAAAA",
"bg" : "#000000",
"order" : 2
},
"weapon" : {
"range" : "melee",
"attribute" : "Quickness",
"base_damage" : "1d4",
"hit_bonus" : 0
}
},
To support this, in raws/item_structs.rs we change the Weapon struct:
#![allow(unused)] fn main() { #[derive(Deserialize, Debug)] pub struct Weapon { pub range: String, pub attribute: String, pub base_damage: String, pub hit_bonus: i32 } }
Now open components.rs, and we'll change MeleePowerBonus (and rename it from main.rs and saveload_system.rs). We're going to replace it with MeleeWeapon that captures these aspects, but in a more machine-friendly format (so we aren't parsing strings all the time):
#![allow(unused)] fn main() { #[derive(PartialEq, Copy, Clone, Serialize, Deserialize)] pub enum WeaponAttribute { Might, Quickness } #[derive(Component, Serialize, Deserialize, Clone)] pub struct MeleeWeapon { pub attribute : WeaponAttribute, pub damage_n_dice : i32, pub damage_die_type : i32, pub damage_bonus : i32, pub hit_bonus : i32 } }
We've condensed attribute into an enum (much faster to read), and broken 1d4+0 into meaning: (1) damage_n_dice, (4) damage_die_type, plus damage_bonus.
We'll also need to change spawn_named_item in raws/rawmaster.rs:
#![allow(unused)] fn main() { if let Some(weapon) = &item_template.weapon { eb = eb.with(Equippable{ slot: EquipmentSlot::Melee }); let (n_dice, die_type, bonus) = parse_dice_string(&weapon.base_damage); let mut wpn = MeleeWeapon{ attribute : WeaponAttribute::Might, damage_n_dice : n_dice, damage_die_type : die_type, damage_bonus : bonus, hit_bonus : weapon.hit_bonus }; match weapon.attribute.as_str() { "Quickness" => wpn.attribute = WeaponAttribute::Quickness, _ => wpn.attribute = WeaponAttribute::Might } eb = eb.with(wpn); } }
That should be enough to read in our nicer weapons format, and have them usable in-game.
Starting with a weapon
If you go back to the design document, we stated that you start with some minimal equipment. We'll let you start with your father's rusty longsword. Let's add this to the spawns.json file:
{
"name" : "Rusty Longsword",
"renderable": {
"glyph" : "/",
"fg" : "#BB77BB",
"bg" : "#000000",
"order" : 2
},
"weapon" : {
"range" : "melee",
"attribute" : "Might",
"base_damage" : "1d8-1",
"hit_bonus" : -1
}
},
We've darkened the color a bit (it is rusty, after all) and added a -1 penalty to the sword (to account for its condition). Now, we want it to start with the player. Currently in spawners.rs, our player function makes the player - and nothing else. We want him/her to start with some initial equipment. Currently, we only allow for spawning items on the ground; that won't do (you'd have to remember to pick it up when you start!) - so we'll expand our raw file spawning system to handle it (that's why we had the SpawnType enumeration in mod/rawmaster.rs - even if it only had one entry!). Let's add Equipped and Carried to that enum:
#![allow(unused)] fn main() { pub enum SpawnType { AtPosition { x: i32, y: i32 }, Equipped { by: Entity }, Carried { by: Entity } } }
We're going to need a function to figure out what slot an equipped item should go into. This will do the trick:
#![allow(unused)] fn main() { fn find_slot_for_equippable_item(tag : &str, raws: &RawMaster) -> EquipmentSlot { if !raws.item_index.contains_key(tag) { panic!("Trying to equip an unknown item: {}", tag); } let item_index = raws.item_index[tag]; let item = &raws.raws.items[item_index]; if let Some(_wpn) = &item.weapon { return EquipmentSlot::Melee; } else if let Some(wearable) = &item.wearable { return string_to_slot(&wearable.slot); } panic!("Trying to equip {}, but it has no slot tag.", tag); } }
Notice that we're explicitly calling panic! for conditions that could result in really weird/unexpected game behavior. Now you have no excuse not to be careful with your raw file entries! It's pretty simple: it looks up the item name in the index, and uses that to look up the item. If its a weapon, it derives the slot from that (currently always Melee). If its a wearable, it uses out string_to_slot function to calculate from that.
We'll also need to update the spawn_position function to handle this:
#![allow(unused)] fn main() { fn spawn_position<'a>(pos : SpawnType, new_entity : EntityBuilder<'a>, tag : &str, raws: &RawMaster) -> EntityBuilder<'a> { let eb = new_entity; // Spawn in the specified location match pos { SpawnType::AtPosition{x,y} => eb.with(Position{ x, y }), SpawnType::Carried{by} => eb.with(InBackpack{ owner: by }), SpawnType::Equipped{by} => { let slot = find_slot_for_equippable_item(tag, raws); eb.with(Equipped{ owner: by, slot }) } } } }
There's a few notable thins here:
- We've had to change the method signature, so you're going to have to fix calls to it. It now needs access to the
rawsfiles, and the name tag of the item you are spawning. - Because we're passing references into it, and
EntityBuilderactually contains a reference to the ECS, we had to add some lifetime decorations to tell Rust that the returnedEntityBuilderdoesn't rely on the tag or the raw files sticking around as a valid reference. So we name a lifetimea- and attach it to the function name (spawn_position<'a>is declaring that'ais a lifetime it uses). Then we tack on<'a>to the types that share that lifetime. This is enough of a hint to avoid scaring the lifetime checker. - We return from a
match;AtPositionandCarriedare simple;Equippedmakes use of the tag finder we just wrote.
We'll have to change three lines to use the new function signature. They are the same; find eb = spawn_position(pos, eb); and replace with eb = spawn_position(pos, eb, key, raws);.
Unfortunately, I ran into another issue while implementing this. We've been passing in a new entity (ecs.create_entity()) to our spawn_named_x functions. Unfortunately, this is going to be a problem: we're starting to need entity spawns to trigger other entity spawns (for example, spawning an NPC with equipment - below - or spawning a chest with contents). Let's fix that now so we don't have issues later.
We'll change the function signature for spawn_named_item, and change the first use of eb to actually create the entity:
#![allow(unused)] fn main() { pub fn spawn_named_item(raws: &RawMaster, ecs : &mut World, key : &str, pos : SpawnType) -> Option<Entity> { if raws.item_index.contains_key(key) { let item_template = &raws.raws.items[raws.item_index[key]]; let mut eb = ecs.create_entity().marked::<SimpleMarker<SerializeMe>>(); ... }
We'll do the same for spawn_named_mob:
#![allow(unused)] fn main() { pub fn spawn_named_mob(raws: &RawMaster, ecs : &mut World, key : &str, pos : SpawnType) -> Option<Entity> { if raws.mob_index.contains_key(key) { let mob_template = &raws.raws.mobs[raws.mob_index[key]]; let mut eb = ecs.create_entity().marked::<SimpleMarker<SerializeMe>>(); ... }
And again for spawn_named_prop:
#![allow(unused)] fn main() { pub fn spawn_named_prop(raws: &RawMaster, ecs : &mut World, key : &str, pos : SpawnType) -> Option<Entity> { if raws.prop_index.contains_key(key) { let prop_template = &raws.raws.props[raws.prop_index[key]]; let mut eb = ecs.create_entity().marked::<SimpleMarker<SerializeMe>>(); ... }
This then requires that we change the signature of spawn_named_entity and what it passes through:
#![allow(unused)] fn main() { pub fn spawn_named_entity(raws: &RawMaster, ecs : &mut World, key : &str, pos : SpawnType) -> Option<Entity> { if raws.item_index.contains_key(key) { return spawn_named_item(raws, ecs, key, pos); } else if raws.mob_index.contains_key(key) { return spawn_named_mob(raws, ecs, key, pos); } else if raws.prop_index.contains_key(key) { return spawn_named_prop(raws, ecs, key, pos); } None } }
In spawner.rs, we need to change the calling signature for spawn_named_entity:
#![allow(unused)] fn main() { let spawn_result = spawn_named_entity(&RAWS.lock().unwrap(), ecs, &spawn.1, SpawnType::AtPosition{ x, y}); if spawn_result.is_some() { return; } }
If you're wondering why we couldn't pass both the ECS and the new entity, it's because of Rust's borrow checker. New entities actually keep hold of a reference to their parent ECS (so when you call build they know the world into which they should be inserted). So if you try and send both &mut World and a new entity - you get errors because you have two "borrows" into the same object. It's probably safe to do that, but Rust can't prove it - so it warns you. This actually prevents an entire class of bug found regularly in the C/C++ world, so while it's a pain - it's for our own good.
So now we can update the player function in spawners.rs to start with a rusty longsword:
#![allow(unused)] fn main() { pub fn player(ecs : &mut World, player_x : i32, player_y : i32) -> Entity { let mut skills = Skills{ skills: HashMap::new() }; skills.skills.insert(Skill::Melee, 1); skills.skills.insert(Skill::Defense, 1); skills.skills.insert(Skill::Magic, 1); let player = ecs .create_entity() .with(Position { x: player_x, y: player_y }) .with(Renderable { glyph: rltk::to_cp437('@'), fg: RGB::named(rltk::YELLOW), bg: RGB::named(rltk::BLACK), render_order: 0 }) .with(Player{}) .with(Viewshed{ visible_tiles : Vec::new(), range: 8, dirty: true }) .with(Name{name: "Player".to_string() }) .with(HungerClock{ state: HungerState::WellFed, duration: 20 }) .with(Attributes{ might: Attribute{ base: 11, modifiers: 0, bonus: attr_bonus(11) }, fitness: Attribute{ base: 11, modifiers: 0, bonus: attr_bonus(11) }, quickness: Attribute{ base: 11, modifiers: 0, bonus: attr_bonus(11) }, intelligence: Attribute{ base: 11, modifiers: 0, bonus: attr_bonus(11) }, }) .with(skills) .with(Pools{ hit_points : Pool{ current: player_hp_at_level(11, 1), max: player_hp_at_level(11, 1) }, mana: Pool{ current: mana_at_level(11, 1), max: mana_at_level(11, 1) }, xp: 0, level: 1 }) .marked::<SimpleMarker<SerializeMe>>() .build(); // Starting equipment spawn_named_entity(&RAWS.lock().unwrap(), ecs, "Rusty Longsword", SpawnType::Equipped{by : player}); player } }
The main changes here are that we put the new entity into a variable named player, before turning it. We then use that as the parameter for who is holding the "Rusty Longsword" we spawn via spawn_named_entity.
If you cargo run now, you'll start with a rusty longsword. It won't work, but you have it:
Making the rusty longsword do some damage
We left a number of placeholders in the melee_combat_system.rs. Now, it's time to fill in the weapon gaps. Open up the file, and we'll first add some more types we need:
#![allow(unused)] fn main() { impl<'a> System<'a> for MeleeCombatSystem { #[allow(clippy::type_complexity)] type SystemData = ( Entities<'a>, WriteExpect<'a, GameLog>, WriteStorage<'a, WantsToMelee>, ReadStorage<'a, Name>, ReadStorage<'a, Attributes>, ReadStorage<'a, Skills>, WriteStorage<'a, SufferDamage>, WriteExpect<'a, ParticleBuilder>, ReadStorage<'a, Position>, ReadStorage<'a, HungerClock>, ReadStorage<'a, Pools>, WriteExpect<'a, rltk::RandomNumberGenerator>, ReadStorage<'a, Equipped>, ReadStorage<'a, MeleeWeapon> ); fn run(&mut self, data : Self::SystemData) { let (entities, mut log, mut wants_melee, names, attributes, skills, mut inflict_damage, mut particle_builder, positions, hunger_clock, pools, mut rng, equipped_items, meleeweapons) = data; ... }
Then we'll add some code to put in the default weapon information, and then search for a replacement if the attacker has something equipped:
#![allow(unused)] fn main() { let mut weapon_info = MeleeWeapon{ attribute : WeaponAttribute::Might, hit_bonus : 0, damage_n_dice : 1, damage_die_type : 4, damage_bonus : 0 }; for (wielded,melee) in (&equipped_items, &meleeweapons).join() { if wielded.owner == entity && wielded.slot == EquipmentSlot::Melee { weapon_info = melee.clone(); } } }
That makes substituting in the weapon-dependent parts of the code quite easy:
#![allow(unused)] fn main() { let natural_roll = rng.roll_dice(1, 20); let attribute_hit_bonus = if weapon_info.attribute == WeaponAttribute::Might { attacker_attributes.might.bonus } else { attacker_attributes.quickness.bonus}; let skill_hit_bonus = skill_bonus(Skill::Melee, &*attacker_skills); let weapon_hit_bonus = weapon_info.hit_bonus; }
We can also swap in the weapon's damage information:
#![allow(unused)] fn main() { let base_damage = rng.roll_dice(weapon_info.damage_n_dice, weapon_info.damage_die_type); let attr_damage_bonus = attacker_attributes.might.bonus; let skill_damage_bonus = skill_bonus(Skill::Melee, &*attacker_skills); let weapon_damage_bonus = weapon_info.damage_bonus; }
Now, if you cargo run the project you can use your sword to hack the rats into little pieces!
Oh - well that didn't go so well! We were hitting for plenty of damage, but the rats soon overwhelmed us - even doing default damage of 1d4 with a might penalty! As you saw in the recording, I tried to retreat with the intention of healing - and noticed that I was hungry (took too long to find the house!) and couldn't. Fortunately, we have everything we need to also add some food to the player's inventory. The design document states that you should be starting with a stein of beer and a dried sausage. Let's put those into spawns.json:
{
"name" : "Dried Sausage",
"renderable": {
"glyph" : "%",
"fg" : "#00FF00",
"bg" : "#000000",
"order" : 2
},
"consumable" : {
"effects" : {
"food" : ""
}
}
},
{
"name" : "Beer",
"renderable": {
"glyph" : "!",
"fg" : "#FF00FF",
"bg" : "#000000",
"order" : 2
},
"consumable" : {
"effects" : { "provides_healing" : "4" }
}
},
The sausage is a copy of "rations" - and cures hunger. The Beer is a super-weak health potion, but these would have been enough to defeat the rodent menace!
Let's modify player in spawner.rs to also include these in the player's backpack:
#![allow(unused)] fn main() { spawn_named_entity(&RAWS.lock().unwrap(), ecs, "Dried Sausage", SpawnType::Carried{by : player} ); spawn_named_entity(&RAWS.lock().unwrap(), ecs, "Beer", SpawnType::Carried{by : player}); }
Now the player starts with a healing option, and a anti-hunger device (commonly known as food).
But wait - we're naked, with only a sausage and some beer? I didn't think it was THAT sort of game?
Nobody in the game is currently wearing anything. That's probably ok for the rats, but we weren't envisioning a massively liberal society here for humans. More importantly, we also don't have any armor class bonuses if we don't have anything to wear!
In components.rs, we'll replace DefenseBonus with Wearable - and flesh it out a bit. (Don't forget to change the component in main.rs and saveload_system.rs):
#![allow(unused)] fn main() { #[derive(Component, Serialize, Deserialize, Clone)] pub struct Wearable { pub armor_class : f32 } }
That's a very simple change. Let's update our raw file reader in raws/item_structs.rs to reflect what we want:
{
"name" : "Shield",
"renderable": {
"glyph" : "[",
"fg" : "#00AAFF",
"bg" : "#000000",
"order" : 2
},
"wearable" : {
"slot" : "Shield",
"armor_class" : 1.0
}
},
We probably also want to support more equipment slots! In components.rs, we should update EquipmentSlot to handle more possible locations:
#![allow(unused)] fn main() { #[derive(PartialEq, Copy, Clone, Serialize, Deserialize)] pub enum EquipmentSlot { Melee, Shield, Head, Torso, Legs, Feet, Hands } }
We'll undoubtedly add more later, but that covers the basics. We need to update raws/item_structs.rs to reflect the changes:
#![allow(unused)] fn main() { #[derive(Deserialize, Debug)] pub struct Item { pub name : String, pub renderable : Option<Renderable>, pub consumable : Option<Consumable>, pub weapon : Option<Weapon>, pub wearable : Option<Wearable> } ... #[derive(Deserialize, Debug)] pub struct Wearable { pub armor_class: f32, pub slot : String } }
We're going to need to convert from strings (in JSON) to EquipmentSlot a few times, so we'll add a function to raws/rawmaster.rs to do this:
#![allow(unused)] fn main() { pub fn string_to_slot(slot : &str) -> EquipmentSlot { match slot { "Shield" => EquipmentSlot::Shield, "Head" => EquipmentSlot::Head, "Torso" => EquipmentSlot::Torso, "Legs" => EquipmentSlot::Legs, "Feet" => EquipmentSlot::Feet, "Hands" => EquipmentSlot::Hands, "Melee" => EquipmentSlot::Melee, _ => { rltk::console::log(format!("Warning: unknown equipment slot type [{}])", slot)); EquipmentSlot::Melee } } } }
We'll want to expand our spawn_named_item code in raws/rawmaster.rs to handle the expanded options:
#![allow(unused)] fn main() { if let Some(wearable) = &item_template.wearable { let slot = string_to_slot(&wearable.slot); eb = eb.with(Equippable{ slot }); eb = eb.with(Wearable{ slot, armor_class: wearable.armor_class }); } }
Let's make a few more items in spawns.json to give the player something to wear:
{
"name" : "Stained Tunic",
"renderable": {
"glyph" : "[",
"fg" : "#00FF00",
"bg" : "#000000",
"order" : 2
},
"wearable" : {
"slot" : "Torso",
"armor_class" : 0.1
}
},
{
"name" : "Torn Trousers",
"renderable": {
"glyph" : "[",
"fg" : "#00FFFF",
"bg" : "#000000",
"order" : 2
},
"wearable" : {
"slot" : "Legs",
"armor_class" : 0.1
}
},
{
"name" : "Old Boots",
"renderable": {
"glyph" : "[",
"fg" : "#FF9999",
"bg" : "#000000",
"order" : 2
},
"wearable" : {
"slot" : "Legs",
"armor_class" : 0.1
}
}
Now we'll open up spawner.rs and add these items to the player:
#![allow(unused)] fn main() { spawn_named_entity(&RAWS.lock().unwrap(), ecs, "Rusty Longsword", SpawnType::Equipped{by : player}); spawn_named_entity(&RAWS.lock().unwrap(), ecs, "Dried Sausage", SpawnType::Carried{by : player} ); spawn_named_entity(&RAWS.lock().unwrap(), ecs, "Beer", SpawnType::Carried{by : player}); spawn_named_entity(&RAWS.lock().unwrap(), ecs, "Stained Tunic", SpawnType::Equipped{by : player}); spawn_named_entity(&RAWS.lock().unwrap(), ecs, "Torn Trousers", SpawnType::Equipped{by : player}); spawn_named_entity(&RAWS.lock().unwrap(), ecs, "Old Boots", SpawnType::Equipped{by : player}); }
If you run the game now, checking your inventory and removing items will show you that you are starting correctly - with your stained shirt, torn trousers, old boots, beer, sausage and a rusty sword.
We still have one more thing to do with wearables; melee_system.rs needs to know how to calculate armor class. Fortunately, this is quite easy:
#![allow(unused)] fn main() { let mut armor_item_bonus_f = 0.0; for (wielded,armor) in (&equipped_items, &wearables).join() { if wielded.owner == wants_melee.target { armor_item_bonus_f += armor.armor_class; } } let base_armor_class = 10; let armor_quickness_bonus = target_attributes.quickness.bonus; let armor_skill_bonus = skill_bonus(Skill::Defense, &*target_skills); let armor_item_bonus = armor_item_bonus_f as i32; }
We iterate through equipped armor, and add the bonus together for each item that is worn by the defender. Then we truncate the number down to an integer.
So why are we using floating point numbers? Classic D&D assigns armor values to complete sets of armor. So in 5th Edition, leather armor has an AC of 11 (plus dexterity). In our game, you can wear the pieces of leather armor separately - so we give them a value equivalent to part of the desired AC for a full set. Then we add them together, to handle piecemeal armor (you found a nice breastplate and only leather leggings, for example).
Ok, so I'm wearing clothes - why isn't everyone else?
We've got far enough in implementing clothing and weaponry that we can start to give it to NPCs. Since the Barkeep is our favorite test victim, lets decorate his entry with how we'd like to spawn items:
{
"name" : "Barkeep",
"renderable": {
"glyph" : "☺",
"fg" : "#EE82EE",
"bg" : "#000000",
"order" : 1
},
"blocks_tile" : true,
"vision_range" : 4,
"ai" : "vendor",
"attributes" : {
"intelligence" : 13
},
"skills" : {
"Melee" : 2
},
"equipped" : [ "Cudgel", "Cloth Tunic", "Cloth Pants", "Slippers" ]
},
Easy enough: we've added an array called equipped, and list out everything we'd like the barkeep to wear. Of course, we now have to write those items.
{
"name" : "Cudgel",
"renderable": {
"glyph" : "/",
"fg" : "#A52A2A",
"bg" : "#000000",
"order" : 2
},
"weapon" : {
"range" : "melee",
"attribute" : "Quickness",
"base_damage" : "1d4",
"hit_bonus" : 0
}
},
{
"name" : "Cloth Tunic",
"renderable": {
"glyph" : "[",
"fg" : "#00FF00",
"bg" : "#000000",
"order" : 2
},
"wearable" : {
"slot" : "Torso",
"armor_class" : 0.1
}
},
{
"name" : "Cloth Pants",
"renderable": {
"glyph" : "[",
"fg" : "#00FFFF",
"bg" : "#000000",
"order" : 2
},
"wearable" : {
"slot" : "Legs",
"armor_class" : 0.1
}
},
{
"name" : "Slippers",
"renderable": {
"glyph" : "[",
"fg" : "#FF9999",
"bg" : "#000000",
"order" : 2
},
"wearable" : {
"slot" : "Legs",
"armor_class" : 0.1
}
}
There's nothing new there, just data-entry. We need to modify our raws/mob_structs.rs file to accommodate giving NPCs equipment:
#![allow(unused)] fn main() { #[derive(Deserialize, Debug)] pub struct Mob { pub name : String, pub renderable : Option<Renderable>, pub blocks_tile : bool, pub vision_range : i32, pub ai : String, pub quips : Option<Vec<String>>, pub attributes : MobAttributes, pub skills : Option<HashMap<String, i32>>, pub level : Option<i32>, pub hp : Option<i32>, pub mana : Option<i32>, pub equipped : Option<Vec<String>> } }
Again, easy enough - we optionally provide a list of strings (representing item name tags) to the mob. So we have to modify spawn_named_mob in raws/rawmaster.rs to handle this. We'll replace Some(eb.build()) with:
#![allow(unused)] fn main() { let new_mob = eb.build(); // Are they wielding anyting? if let Some(wielding) = &mob_template.equipped { for tag in wielding.iter() { spawn_named_entity(raws, ecs, tag, SpawnType::Equipped{ by: new_mob }); } } return Some(new_mob); }
This makes the new mob, and stores the entity as new_mob. It then looks to see if there's a an equipped field in the mob template; if there is, it iterates through it, spawning each item as equipped on the mob.
If you cargo run now, you'll find that you are wearing clothing, wielding a rusty sword, and have your beer and sausage.
Dressing up your NPCs
I won't paste in the full spawns.json file in here, but if you check the source you'll find that I've added clothing to our basic NPCs. For now, they are all the same as the barkeep - hopefully we'll remember to adjust these in the future!
What about natural attacks and defenses?
So the NPCs are nicely dressed and equipped, which gives them combat stats and armor classes. But what about our rats? Rats don't typically wear cute little rat suits and carry weaponry (if you have rats that do: start running). Instead, they have natural attacks and defenses. They typically bite to attack (we're not going to worry about rat-borne disease just yet; everyone dying of Black Plague would be sad), and rely on their natural fur coat to provide a minimal level of protection.
Some creatures have more than one natural attack. Ignoring breath weapon and tails, Dragons are often listed as having "claw, claw, bite" (for the front claws and their mouth). Even kittens can claw and bite. So we need to support multiple natural attacks from a creature. Let's decorate our Rat to show how we'd like to handle this:
{
"name" : "Rat",
"renderable": {
"glyph" : "r",
"fg" : "#FF0000",
"bg" : "#000000",
"order" : 1
},
"blocks_tile" : true,
"vision_range" : 8,
"ai" : "melee",
"attributes" : {
"Might" : 3,
"Fitness" : 3
},
"skills" : {
"Melee" : -1,
"Defense" : -1
},
"natural" : {
"armor_class" : 11,
"attacks" : [
{ "name" : "bite", "hit_bonus" : 0, "damage" : "1d4" }
]
}
},
To support this, we'll have to add to raws/mob_structs.rs:
#![allow(unused)] fn main() { #[derive(Deserialize, Debug)] pub struct Mob { pub name : String, pub renderable : Option<Renderable>, pub blocks_tile : bool, pub vision_range : i32, pub ai : String, pub quips : Option<Vec<String>>, pub attributes : MobAttributes, pub skills : Option<HashMap<String, i32>>, pub level : Option<i32>, pub hp : Option<i32>, pub mana : Option<i32>, pub equipped : Option<Vec<String>>, pub natural : Option<MobNatural> } ... #[derive(Deserialize, Debug)] pub struct MobNatural { pub armor_class : Option<i32>, pub attacks: Option<Vec<NaturalAttack>> } #[derive(Deserialize, Debug)] pub struct NaturalAttack { pub name : String, pub hit_bonus : i32, pub damage : String } }
This is much like the raw file reading we've done before: it optionally loads a natural key, and fills out the Mob's natural armor and attacks. Now we have to make use of this information. This will, of course, require even more components! In components.rs, add the following (and don't forget to register them in main.rs and saveload_system.rs; you only have to register NaturalAttackDefense - the other structure isn't a component, just part of one):
#![allow(unused)] fn main() { #[derive(Serialize, Deserialize, Clone)] pub struct NaturalAttack { pub name : String, pub damage_n_dice : i32, pub damage_die_type : i32, pub damage_bonus : i32, pub hit_bonus : i32 } #[derive(Component, Serialize, Deserialize, Clone)] pub struct NaturalAttackDefense { pub armor_class : Option<i32>, pub attacks : Vec<NaturalAttack> } }
In turn, we have to adjust raws/rawmaster.rs's spawn_named_mob function to generate this data:
#![allow(unused)] fn main() { if let Some(na) = &mob_template.natural { let mut nature = NaturalAttackDefense{ armor_class : na.armor_class, attacks: Vec::new() }; if let Some(attacks) = &na.attacks { for nattack in attacks.iter() { let (n, d, b) = parse_dice_string(&nattack.damage); let attack = NaturalAttack{ name : nattack.name.clone(), hit_bonus : nattack.hit_bonus, damage_n_dice : n, damage_die_type : d, damage_bonus: b }; nature.attacks.push(attack); } } eb = eb.with(nature); } }
Finally, we need to adjust melee_combat_system.rs to use this data. We'll start by giving the system the ability to read from our new NaturalAttackDefense store:
#![allow(unused)] fn main() { ... ReadStorage<'a, NaturalAttackDefense> ); fn run(&mut self, data : Self::SystemData) { let (entities, mut log, mut wants_melee, names, attributes, skills, mut inflict_damage, mut particle_builder, positions, hunger_clock, pools, mut rng, equipped_items, meleeweapons, wearables, natural) = data; ... }
Armor class is relatively easy; we'll adjust our base_armor_class to not be a constant:
#![allow(unused)] fn main() { let base_armor_class = match natural.get(wants_melee.target) { None => 10, Some(nat) => nat.armor_class.unwrap_or(10) }; }
That's a bit of a mouthful! So we get the natural attacks info, and if its None - we stick to using 10 as our base. Then we use unwrap_or to either use the natural armor class (if there is one), or 10 (if there isn't). So why are we modifying the base? This allows you to have a beastie with natural armor who also wears actual armor. For example, you might have a demon lord who gets some natural armor just for being a cool demon, and he also gets to benefit from the cool looking plate and mail you gave him.
Natural attacks are a bit more complicated:
#![allow(unused)] fn main() { let mut weapon_info = MeleeWeapon{ attribute : WeaponAttribute::Might, hit_bonus : 0, damage_n_dice : 1, damage_die_type : 4, damage_bonus : 0 }; if let Some(nat) = natural.get(entity) { if !nat.attacks.is_empty() { let attack_index = if nat.attacks.len()==1 { 0 } else { rng.roll_dice(1, nat.attacks.len() as i32) as usize -1 }; weapon_info.hit_bonus = nat.attacks[attack_index].hit_bonus; weapon_info.damage_n_dice = nat.attacks[attack_index].damage_n_dice; weapon_info.damage_die_type = nat.attacks[attack_index].damage_die_type; weapon_info.damage_bonus = nat.attacks[attack_index].damage_bonus; } } }
So we keep the weapon_info as before, and then we look to see if the entity has a NaturalAttackDefense attribute. If it does, we check that there are any natural attacks. If there are, we pick one at random - and turn the weapon info into that attack type. This prevents monsters from completely shredding the player with multiple attacks at once, but allows you to spread out the attack types.
If you cargo run now, the rats have slightly more natural behavior. They may well still kill the beginning adventurer, but that's roguelike life!
Wrap-Up
In this chapter, we've gained a lot of functionality:
- We've implemented a simplified
d20system to simulate attributes and combat. - We've given all the entities in the game stats.
- We've given entities equipment, and allowed us to specify their load-out in the raw files.
- Monsters can now have natural attacks.
In other words: we've come a long way in a relatively long chapter! The great news is that we now have a very solid base on which to build a real game.
The source code for this chapter may be found here
Run this chapter's example with web assembly, in your browser (WebGL2 required)
Copyright (C) 2019, Herbert Wolverson.
User Interface
About this tutorial
This tutorial is free and open source, and all code uses the MIT license - so you are free to do with it as you like. My hope is that you will enjoy the tutorial, and make great games!
If you enjoy this and would like me to keep writing, please consider supporting my Patreon.
Along with the town, the first thing your player sees will be your user interface. We've chugged along with a reasonably decent one for a while, but not a great one. Ideally, a user interface should make the game approachable to new players - while still offering enough depth for returning ones. It should support keyboard and mouse input (I know many long-time roguelike players hate the mouse; but many newer ones love it), and offer feedback as to what the symbol soup actually means. Symbols are a great way to represent the world, but there is a learning curve while your brain comes to associate g with a goblin and imagines the scary little blighter.
Cogmind is an inspiration for ASCII (and simple tile) user interfaces. If you haven't played it, I wholeheartedly recommend giving it a look. Also, in a conversation with the creator of Red Blob Games, he gave some very insightful commentary on the importance of a good UI: building a UI up-front helps you realize if you can show the player what you are making, and can give a really good "feel" for what you are building. So once you are passed initial prototyping, building a user interface can act as a guide for the rest. He's a very wise man, so we'll take his advice!
Prototyping a User Interface
I like to sketch out UI in Rex Paint. Here's what I first came up with for the tutorial game:
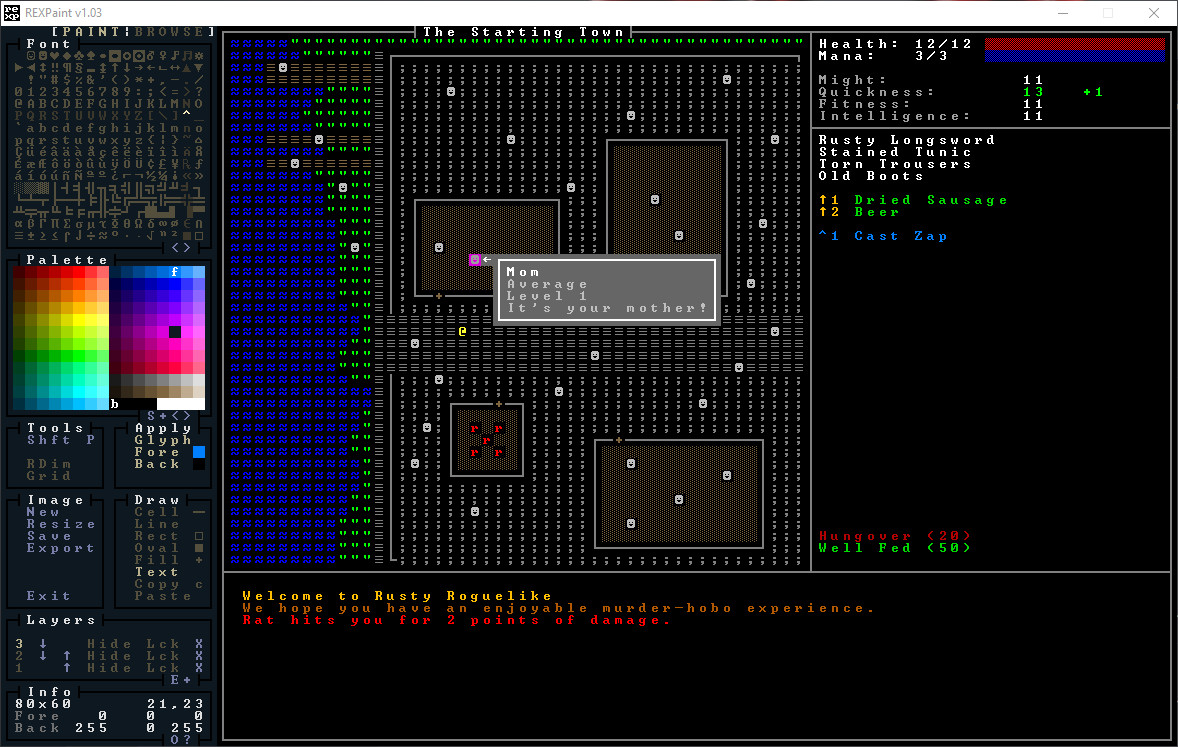
This isn't a bad start, as far as ASCII user interfaces go. Some pertinent notes:
- We've expanded the terminal to
80x60, which is a pretty common resolution for these games (Cogmind defaults to it). - We've shrunk the amount of screen devoted to the map, so as to show you more pertinent information on the screen at once; it's actually
50x48. - The bottom panel is the log, which I colored in and gave some silly fake text just to make it clear what goes there. We'll definitely want to improve our logging experience to help immerse the player.
- The top-right shows some important information: your health and mana, both numerically and with bars. Below that, we're showing your attributes - and highlighting the ones that are improved in some way (we didn't say how!).
- The next panel down lists your equipped inventory.
- Below that, we show your consumables - complete with a hot-key (shift + number) to activate them.
- Below that, we're showing an example spell - that's not implemented yet, but the idea stands.
- At the bottom of the right panel, we're listing status effects. The design document says that you start with a hangover, so we've listed it (even if it isn't written yet). You also start well fed, so we'll show that, too.
Changing the console size
In main.rs, the first thing our main function does is to bootstrap RLTK. We specify resolution and window title here. So we'll update it to match what we want:
#![allow(unused)] fn main() { use rltk::RltkBuilder; let mut context = RltkBuilder::simple(80, 60) .unwrap() .with_title("Roguelike Tutorial") .build()?; }
If you cargo run now, you'll see a bigger console - and nothing making use of the extra space!
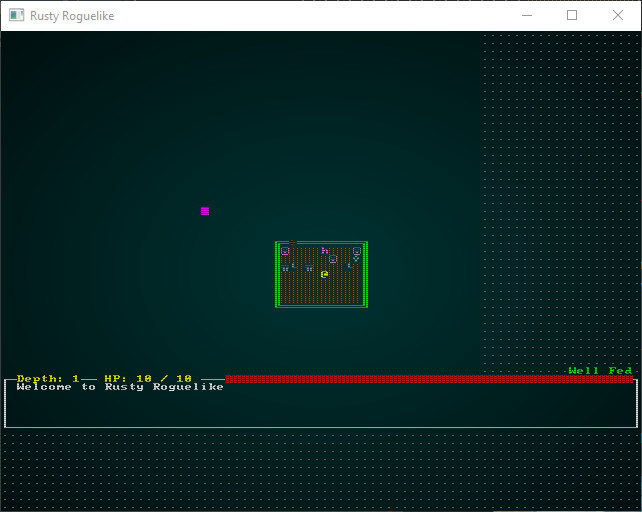
We'll worry about fixing the main menu later. Let's start making the game look like the prototype sketch.
Restricting the rendered map
The prototype has the map starting at 1,1 and running to 48,44. So open up camera.rs, and we'll change the boundaries. Instead of using the screen bounds, we'll use our desired viewport:
#![allow(unused)] fn main() { pub fn get_screen_bounds(ecs: &World, _ctx: &mut Rltk) -> (i32, i32, i32, i32) { let player_pos = ecs.fetch::<Point>(); //let (x_chars, y_chars) = ctx.get_char_size(); let (x_chars, y_chars) = (48, 44); let center_x = (x_chars / 2) as i32; let center_y = (y_chars / 2) as i32; let min_x = player_pos.x - center_x; let max_x = min_x + x_chars as i32; let min_y = player_pos.y - center_y; let max_y = min_y + y_chars as i32; (min_x, max_x, min_y, max_y) } }
Instead of reading the screen size and scaling to it, we're constraining the map to the desired viewport. We've kept the ctx parameter even though we aren't using it, so as to not break all the other places that use it.
The map viewport is now nicely constrained:
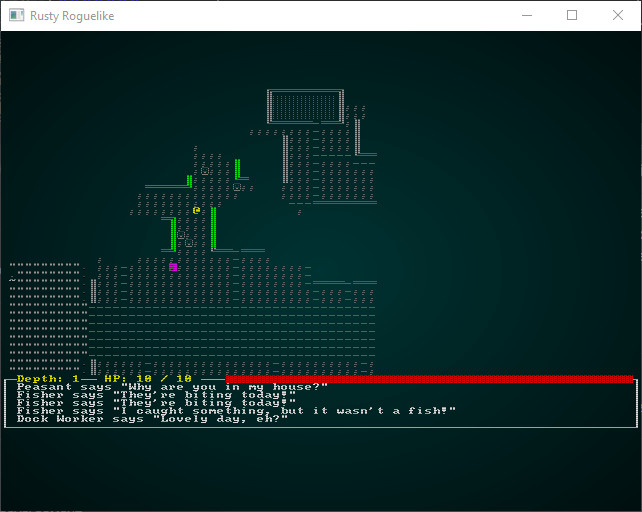
Drawing boxes
We'll go into gui.rs (specifically draw_ui) and start to place the basic boxes that make up the user interface. We'll also comment out the parts we aren't using yet. The RLTK box function works well, but it fills in the box. That's not what we need here, so at the top of gui.rs I added a new function:
#![allow(unused)] fn main() { pub fn draw_hollow_box( console: &mut Rltk, sx: i32, sy: i32, width: i32, height: i32, fg: RGB, bg: RGB, ) { use rltk::to_cp437; console.set(sx, sy, fg, bg, to_cp437('┌')); console.set(sx + width, sy, fg, bg, to_cp437('┐')); console.set(sx, sy + height, fg, bg, to_cp437('└')); console.set(sx + width, sy + height, fg, bg, to_cp437('┘')); for x in sx + 1..sx + width { console.set(x, sy, fg, bg, to_cp437('─')); console.set(x, sy + height, fg, bg, to_cp437('─')); } for y in sy + 1..sy + height { console.set(sx, y, fg, bg, to_cp437('│')); console.set(sx + width, y, fg, bg, to_cp437('│')); } } }
This is actually copied from RLTK, but with the fill removed.
Next, we begin work on draw_ui:
#![allow(unused)] fn main() { pub fn draw_ui(ecs: &World, ctx : &mut Rltk) { use rltk::to_cp437; let box_gray : RGB = RGB::from_hex("#999999").expect("Oops"); let black = RGB::named(rltk::BLACK); draw_hollow_box(ctx, 0, 0, 79, 59, box_gray, black); // Overall box draw_hollow_box(ctx, 0, 0, 49, 45, box_gray, black); // Map box draw_hollow_box(ctx, 0, 45, 79, 14, box_gray, black); // Log box draw_hollow_box(ctx, 49, 0, 30, 8, box_gray, black); // Top-right panel } }
This gives us a cropped map, and the basic box outline from the prototype graphic:
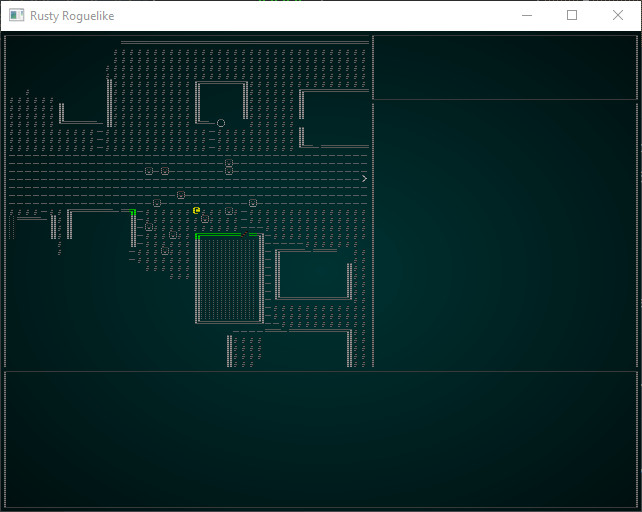
Now we add some box connectors in, making it look smoother:
#![allow(unused)] fn main() { ctx.set(0, 45, box_gray, black, to_cp437('├')); ctx.set(49, 8, box_gray, black, to_cp437('├')); ctx.set(49, 0, box_gray, black, to_cp437('┬')); ctx.set(49, 45, box_gray, black, to_cp437('┴')); ctx.set(79, 8, box_gray, black, to_cp437('┤')); ctx.set(79, 45, box_gray, black, to_cp437('┤')); }
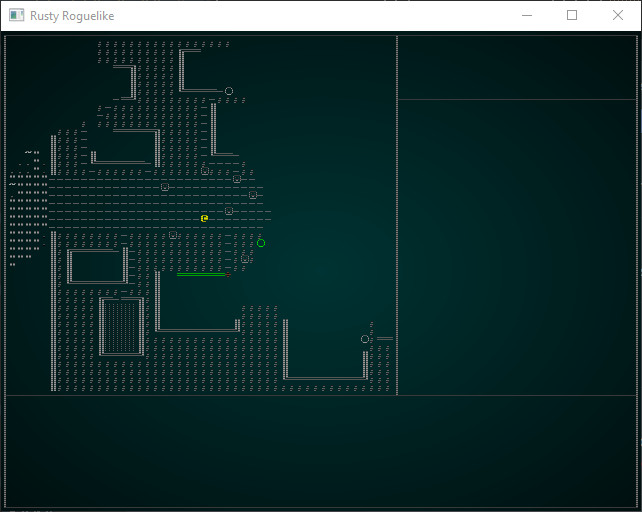
Adding a map name
It looks really nice to show the map name at the top - but maps don't current have a name! Let's rectify that. Open up map/mod.rs and modify the Map structure:
#![allow(unused)] fn main() { #[derive(Default, Serialize, Deserialize, Clone)] pub struct Map { pub tiles : Vec<TileType>, pub width : i32, pub height : i32, pub revealed_tiles : Vec<bool>, pub visible_tiles : Vec<bool>, pub blocked : Vec<bool>, pub depth : i32, pub bloodstains : HashSet<usize>, pub view_blocked : HashSet<usize>, pub name : String, #[serde(skip_serializing)] #[serde(skip_deserializing)] pub tile_content : Vec<Vec<Entity>> } }
We'll also modify the constructor, using the to_string pattern we've used elsewhere to let you send anything somewhat string-like:
#![allow(unused)] fn main() { /// Generates an empty map, consisting entirely of solid walls pub fn new<S : ToString>(new_depth : i32, width: i32, height: i32, name: S) -> Map { let map_tile_count = (width*height) as usize; Map{ tiles : vec![TileType::Wall; map_tile_count], width, height, revealed_tiles : vec![false; map_tile_count], visible_tiles : vec![false; map_tile_count], blocked : vec![false; map_tile_count], tile_content : vec![Vec::new(); map_tile_count], depth: new_depth, bloodstains: HashSet::new(), view_blocked : HashSet::new(), name : name.to_string() } } }
In map_builders/waveform_collapse/mod.rs (lines 39, 62 and 78) update the call to Map::new to read build_data.map = Map::new(build_data.map.depth, build_data.width, build_data.height, &build_data.map.name);.
In map_builders/mod.rs update the BuilderChain constructor:
#![allow(unused)] fn main() { impl BuilderChain { pub fn new<S : ToString>(new_depth : i32, width: i32, height: i32, name : S) -> BuilderChain { BuilderChain{ starter: None, builders: Vec::new(), build_data : BuilderMap { spawn_list: Vec::new(), map: Map::new(new_depth, width, height, name), starting_position: None, rooms: None, corridors: None, history : Vec::new(), width, height } } } ... }
Also, line 268 changes to: let mut builder = BuilderChain::new(new_depth, width, height, "New Map");.
main.rs line 465 changes to: gs.ecs.insert(Map::new(1, 64, 64, "New Map"));.
Finally, in map_builders/town.rs change the constructor to name our town. I suggest you pick a name that isn't my company!
#![allow(unused)] fn main() { pub fn town_builder(new_depth: i32, _rng: &mut rltk::RandomNumberGenerator, width: i32, height: i32) -> BuilderChain { let mut chain = BuilderChain::new(new_depth, width, height, "The Town of Bracketon"); chain.start_with(TownBuilder::new()); chain } }
Whew! After all that, let's draw the map name in gui.rs:
#![allow(unused)] fn main() { // Draw the town name let map = ecs.fetch::<Map>(); let name_length = map.name.len() + 2; let x_pos = (22 - (name_length / 2)) as i32; ctx.set(x_pos, 0, box_gray, black, to_cp437('┤')); ctx.set(x_pos + name_length as i32, 0, box_gray, black, to_cp437('├')); ctx.print_color(x_pos+1, 0, white, black, &map.name); std::mem::drop(map); }
So we fetch the map from the ECS World, calculate the name's length (plus two for the wrapping characters). Then we figure out the centered position (over the map pane; so 22, half the pane width, minus half the length of the name). Then we draw the endcaps and the name. You can cargo run to see the improvement:
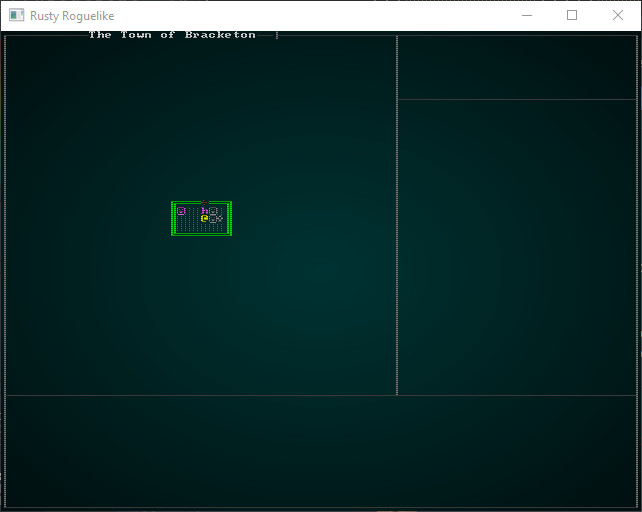
Showing health, mana and attributes
We can modify the existing code for health and mana. The following will work:
#![allow(unused)] fn main() { // Draw stats let player_entity = ecs.fetch::<Entity>(); let pools = ecs.read_storage::<Pools>(); let player_pools = pools.get(*player_entity).unwrap(); let health = format!("Health: {}/{}", player_pools.hit_points.current, player_pools.hit_points.max); let mana = format!("Mana: {}/{}", player_pools.mana.current, player_pools.mana.max); ctx.print_color(50, 1, white, black, &health); ctx.print_color(50, 2, white, black, &mana); ctx.draw_bar_horizontal(64, 1, 14, player_pools.hit_points.current, player_pools.hit_points.max, RGB::named(rltk::RED), RGB::named(rltk::BLACK)); ctx.draw_bar_horizontal(64, 2, 14, player_pools.mana.current, player_pools.mana.max, RGB::named(rltk::BLUE), RGB::named(rltk::BLACK)); }
Underneath, we want to display the attributes. Since we're formatting each of them the same, lets introduce a function:
#![allow(unused)] fn main() { fn draw_attribute(name : &str, attribute : &Attribute, y : i32, ctx: &mut Rltk) { let black = RGB::named(rltk::BLACK); let attr_gray : RGB = RGB::from_hex("#CCCCCC").expect("Oops"); ctx.print_color(50, y, attr_gray, black, name); let color : RGB = if attribute.modifiers < 0 { RGB::from_f32(1.0, 0.0, 0.0) } else if attribute.modifiers == 0 { RGB::named(rltk::WHITE) } else { RGB::from_f32(0.0, 1.0, 0.0) }; ctx.print_color(67, y, color, black, &format!("{}", attribute.base + attribute.modifiers)); ctx.print_color(73, y, color, black, &format!("{}", attribute.bonus)); if attribute.bonus > 0 { ctx.set(72, y, color, black, rltk::to_cp437('+')); } } }
So this attribute prints the name at 50,y in a lighter grey. Then we determine color based on modifiers; if there are non, we use white. If they are bad (negative) we use red. If they are good (positive) we use green. So that lets us print the value + modifiers (total) at 67,y. We'll print the bonus at 73,y. If the bonus is positive, we'll add a + symbol.
Now we can call it from our draw_ui function:
#![allow(unused)] fn main() { // Attributes let attributes = ecs.read_storage::<Attributes>(); let attr = attributes.get(*player_entity).unwrap(); draw_attribute("Might:", &attr.might, 4, ctx); draw_attribute("Quickness:", &attr.quickness, 5, ctx); draw_attribute("Fitness:", &attr.fitness, 6, ctx); draw_attribute("Intelligence:", &attr.intelligence, 7, ctx); }
cargo run now, and you'll see we are definitely making progress:
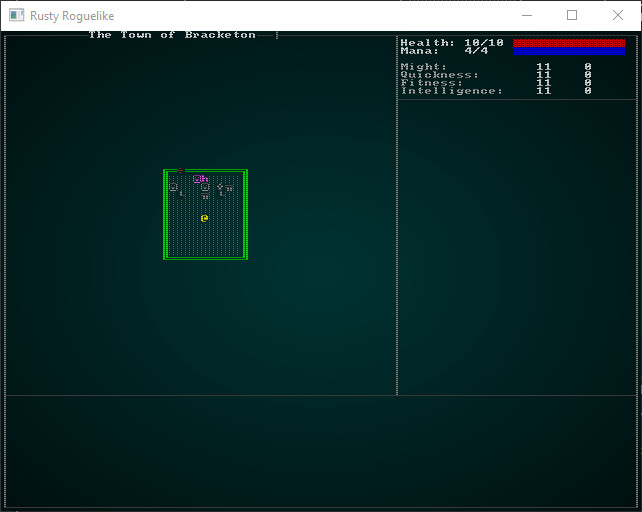
Adding in equipped items
A nice feature of the prototype UI is that it shows what equipment we have equipped. That's actually quite easy, so let's do it! We iterate Equipped items and if they owner equals the player, we display their Name:
#![allow(unused)] fn main() { // Equipped let mut y = 9; let equipped = ecs.read_storage::<Equipped>(); let name = ecs.read_storage::<Name>(); for (equipped_by, item_name) in (&equipped, &name).join() { if equipped_by.owner == *player_entity { ctx.print_color(50, y, white, black, &item_name.name); y += 1; } } }
Adding consumables
This is also easy:
#![allow(unused)] fn main() { // Consumables y += 1; let green = RGB::from_f32(0.0, 1.0, 0.0); let yellow = RGB::named(rltk::YELLOW); let consumables = ecs.read_storage::<Consumable>(); let backpack = ecs.read_storage::<InBackpack>(); let mut index = 1; for (carried_by, _consumable, item_name) in (&backpack, &consumables, &name).join() { if carried_by.owner == *player_entity && index < 10 { ctx.print_color(50, y, yellow, black, &format!("↑{}", index)); ctx.print_color(53, y, green, black, &item_name.name); y += 1; index += 1; } } }
We add 1 to y, to force it down a line. Then set index to 1 (not zero, because we're aiming for keys across the keyboard!). Then we join backpack, consumables and name. For each item, we check that owner is the player, and index is still less than 10. If it is, we print the name in the format ↑1 Dried Sausage - where 1 is the index. Add one to to the index, increment y and we're good to go.
cargo run now, and you'll see we are definitely getting closer:
We'll worry about making the consumables hot-keys work momentarily. Lets finish the UI, first!
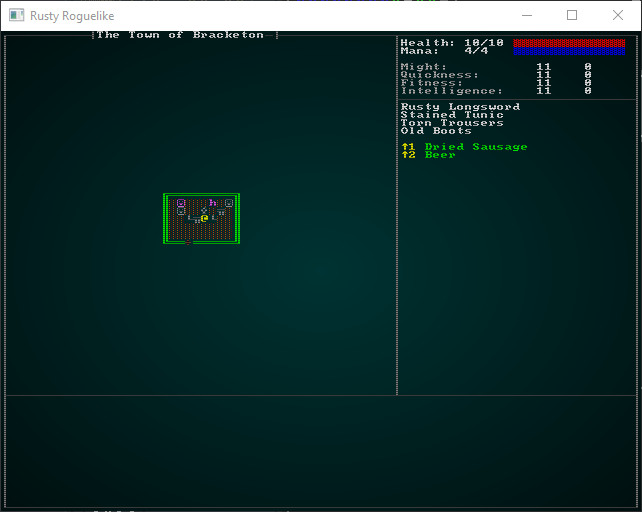
Status effects
We'll gloss over this a little because we currently only have one. This is a direct port of the previous code, so no need for too much explanation:
#![allow(unused)] fn main() { // Status let hunger = ecs.read_storage::<HungerClock>(); let hc = hunger.get(*player_entity).unwrap(); match hc.state { HungerState::WellFed => ctx.print_color(50, 44, RGB::named(rltk::GREEN), RGB::named(rltk::BLACK), "Well Fed"), HungerState::Normal => {} HungerState::Hungry => ctx.print_color(50, 44, RGB::named(rltk::ORANGE), RGB::named(rltk::BLACK), "Hungry"), HungerState::Starving => ctx.print_color(50, 44, RGB::named(rltk::RED), RGB::named(rltk::BLACK), "Starving"), } }
Displaying the log
Again, this is pretty much a direct copy:
#![allow(unused)] fn main() { // Draw the log let log = ecs.fetch::<GameLog>(); let mut y = 46; for s in log.entries.iter().rev() { if y < 59 { ctx.print(2, y, s); } y += 1; } }
Again, making it nicely colored is a future topic.
Tool-tips
We'll restore the call to draw the tooltips:
#![allow(unused)] fn main() { draw_tooltips(ecs, ctx); }
Inside draw_tooltips, we first have to compensate for the map now being offset from the screen. We simply add 1 to mouse_map_pos:
#![allow(unused)] fn main() { mouse_map_pos.0 += min_x - 1; mouse_map_pos.1 += min_y - 1; }
Shiny, new tool-tips!
That gets our old tooltip system working - but the prototype shows a spiffy new display! So we need to create a way to make these pretty tooltips, and arrange them. Since tooltips can be thought of as a self-contained entity, we'll make an object to define them:
#![allow(unused)] fn main() { struct Tooltip { lines : Vec<String> } impl Tooltip { fn new() -> Tooltip { Tooltip { lines : Vec::new() } } fn add<S:ToString>(&mut self, line : S) { self.lines.push(line.to_string()); } fn width(&self) -> i32 { let mut max = 0; for s in self.lines.iter() { if s.len() > max { max = s.len(); } } max as i32 + 2i32 } fn height(&self) -> i32 { self.lines.len() as i32 + 2i32 } fn render(&self, ctx : &mut Rltk, x : i32, y : i32) { let box_gray : RGB = RGB::from_hex("#999999").expect("Oops"); let light_gray : RGB = RGB::from_hex("#DDDDDD").expect("Oops"); let white = RGB::named(rltk::WHITE); let black = RGB::named(rltk::BLACK); ctx.draw_box(x, y, self.width()-1, self.height()-1, white, box_gray); for (i,s) in self.lines.iter().enumerate() { let col = if i == 0 { white } else { light_gray }; ctx.print_color(x+1, y+i as i32+1, col, black, &s); } } } }
The idea here is to think about what constitutes a tool-tip:
- The most important part of at tool-tip is the text: so we have a vector (of type
String) to represent each line. - We need a way to make a new tool-tip, so we define a constructor - the
newfunction. This creates an empty tool-tip. - We need a way to add lines, so we define an
addfunction. - We'll need to know how wide the tip is, so we can figure out where to put it on the screen. So we have a
widthfunction. It goes through each line of the tooltip, finding the longest width (we aren't supporting wrapping, yet), and uses that - with2added to it, to take into account the border. - We also need to know the tooltip's height - so the
heightfunction is the number of lines plus2to account for the border. - We need to be able to render the tool-tip to the console. We start by using RLTK's
draw_boxfeature to draw a box and fill it in (no need for hollow box here!), and then add each line in turn.
So now we actually need to use some tool-tips. We'll largely replace the draw_tooltips function. We'll start by obtaining access to the various parts of the ECS we need:
#![allow(unused)] fn main() { fn draw_tooltips(ecs: &World, ctx : &mut Rltk) { use rltk::to_cp437; let (min_x, _max_x, min_y, _max_y) = camera::get_screen_bounds(ecs, ctx); let map = ecs.fetch::<Map>(); let names = ecs.read_storage::<Name>(); let positions = ecs.read_storage::<Position>(); let hidden = ecs.read_storage::<Hidden>(); let attributes = ecs.read_storage::<Attributes>(); let pools = ecs.read_storage::<Pools>(); let entities = ecs.entities(); ... }
This isn't anything we haven't done before, so no need for much explanation. You are just asking the ECS for read_storage to component stores, and using fetch to obtain the map. Next, we query the mouse position in the console, and translate it to a position on the map:
#![allow(unused)] fn main() { ... let mouse_pos = ctx.mouse_pos(); let mut mouse_map_pos = mouse_pos; mouse_map_pos.0 += min_x - 1; mouse_map_pos.1 += min_y - 1; if mouse_map_pos.0 >= map.width-1 || mouse_map_pos.1 >= map.height-1 || mouse_map_pos.0 < 1 || mouse_map_pos.1 < 1 { return; } ... }
Notice how we're calling return if the mouse cursor is outside of the map. We're also adding min_x and min_y to find the on-screen position in map space, and subtracting one to account for the map's border. mouse_map_pos now contains the mouse cursor location on the map. Next, we look to see what's here and if it needs a tool-tip:
#![allow(unused)] fn main() { ... let mut tip_boxes : Vec<Tooltip> = Vec::new(); for (entity, name, position, _hidden) in (&entities, &names, &positions, !&hidden).join() { if position.x == mouse_map_pos.0 && position.y == mouse_map_pos.1 { ... }
So we're making a new vector, tip_boxes. This will contain any tooltips we decide that we need. Then we use Specs' join function to search for entities that have ALL of a name, a position and do not have a hidden component (that's what the exclamation mark does). The left-hand side list is the variables that will hold the components for each matching entity; the right-hand side are the entity stores we are searching. Then we check to see if the entity's Position component has the same location as the mouse_map_pos structure we created.
Now that we've decided that the entity is on the tile we are examining, we start building the tooltip contents:
#![allow(unused)] fn main() { let mut tip = Tooltip::new(); tip.add(name.name.to_string()); }
This creates a new tooltip object, and adds the entity's name as the first line.
#![allow(unused)] fn main() { // Comment on attributes let attr = attributes.get(entity); if let Some(attr) = attr { let mut s = "".to_string(); if attr.might.bonus < 0 { s += "Weak. " }; if attr.might.bonus > 0 { s += "Strong. " }; if attr.quickness.bonus < 0 { s += "Clumsy. " }; if attr.quickness.bonus > 0 { s += "Agile. " }; if attr.fitness.bonus < 0 { s += "Unheathy. " }; if attr.fitness.bonus > 0 { s += "Healthy." }; if attr.intelligence.bonus < 0 { s += "Unintelligent. "}; if attr.intelligence.bonus > 0 { s += "Smart. "}; if s.is_empty() { s = "Quite Average".to_string(); } tip.add(s); } }
Now we look to see if the entity has attributes. If it does, we look at the bonus for each attribute and add a descriptive word for it; so a low strength is "weak" - a high strength is "strong" (and so on, for each attribute). If there are no modifiers, we use "Quite Average" - and add the description line.
#![allow(unused)] fn main() { // Comment on pools let stat = pools.get(entity); if let Some(stat) = stat { tip.add(format!("Level: {}", stat.level)); } }
We also check to see if the entity has a Pools component, and if they do - we add their level to the tooltip. Finally, we add the tooltip to the tip_boxes vector and close out of the loop:
#![allow(unused)] fn main() { tip_boxes.push(tip); } } }
If there are no tooltips, then we may as well exit the function now:
#![allow(unused)] fn main() { if tip_boxes.is_empty() { return; } }
So if we've made it this far, there are tooltips! We'll use code similar to what we had before to determine whether to place the tip to the left or right of the target (whichever side has more room):
#![allow(unused)] fn main() { let box_gray : RGB = RGB::from_hex("#999999").expect("Oops"); let white = RGB::named(rltk::WHITE); let arrow; let arrow_x; let arrow_y = mouse_pos.1; if mouse_pos.0 < 40 { // Render to the left arrow = to_cp437('→'); arrow_x = mouse_pos.0 - 1; } else { // Render to the right arrow = to_cp437('←'); arrow_x = mouse_pos.0 + 1; } ctx.set(arrow_x, arrow_y, white, box_gray, arrow); }
See how we're setting arrow_x and arrow_y? If the mouse is in the left half of the screen, we place it one tile to the left of the target. If its in the right half of the screen, we place the tip to the right. We also note which character to draw. Next, we'll calculate the total height of all the tooltips:
#![allow(unused)] fn main() { let mut total_height = 0; for tt in tip_boxes.iter() { total_height += tt.height(); } }
This is just the sum of the height() function of all the tips. Now we shunt all the boxes upwards to center the stack:
#![allow(unused)] fn main() { let mut y = mouse_pos.1 - (total_height / 2); while y + (total_height/2) > 50 { y -= 1; } }
Finally, we actually draw the boxes:
#![allow(unused)] fn main() { for tt in tip_boxes.iter() { let x = if mouse_pos.0 < 40 { mouse_pos.0 - (1 + tt.width()) } else { mouse_pos.0 + (1 + tt.width()) }; tt.render(ctx, x, y); y += tt.height(); } }
If you cargo run now and mouse over a character, you'll see something like this:
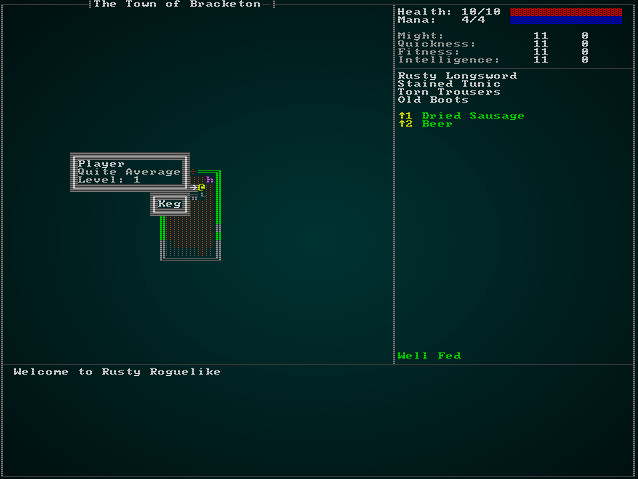
That's looking a lot like our prototype!
Enabling consumable hotkeys
Since we added a spiffy new way to use consumables from the UI, we should make them do something! We handle all our player input in player.rs, so lets go there - and look at the appropriately named player_input function. We'll add a section at the beginning to see if shift is held down (that's what the up arrow generally indicates), and call a new function if shift and a number key are down:
#![allow(unused)] fn main() { pub fn player_input(gs: &mut State, ctx: &mut Rltk) -> RunState { // Hotkeys if ctx.shift && ctx.key.is_some() { let key : Option<i32> = match ctx.key.unwrap() { VirtualKeyCode::Key1 => Some(1), VirtualKeyCode::Key2 => Some(2), VirtualKeyCode::Key3 => Some(3), VirtualKeyCode::Key4 => Some(4), VirtualKeyCode::Key5 => Some(5), VirtualKeyCode::Key6 => Some(6), VirtualKeyCode::Key7 => Some(7), VirtualKeyCode::Key8 => Some(8), VirtualKeyCode::Key9 => Some(9), _ => None }; if let Some(key) = key { return use_consumable_hotkey(gs, key-1); } } ... }
This should be pretty easy to understand: if shift is pressed and a key is down (so ctx.key.is_some() returns true), then we match on the number keycodes and set key to the matching number (or leave it as None if some other key is called). After that, if there is Some key pressed, we call use_consumable_hotkey; if it returns true, we return the new run-state RunState::PlayerTurn to indicate that we did something. Otherwise, we let input run as normal. That leaves writing the new function, use_consumable_hotkey:
#![allow(unused)] fn main() { fn use_consumable_hotkey(gs: &mut State, key: i32) -> RunState { use super::{Consumable, InBackpack, WantsToUseItem}; let consumables = gs.ecs.read_storage::<Consumable>(); let backpack = gs.ecs.read_storage::<InBackpack>(); let player_entity = gs.ecs.fetch::<Entity>(); let entities = gs.ecs.entities(); let mut carried_consumables = Vec::new(); for (entity, carried_by, _consumable) in (&entities, &backpack, &consumables).join() { if carried_by.owner == *player_entity { carried_consumables.push(entity); } } if (key as usize) < carried_consumables.len() { use crate::components::Ranged; if let Some(ranged) = gs.ecs.read_storage::<Ranged>().get(carried_consumables[key as usize]) { return RunState::ShowTargeting{ range: ranged.range, item: carried_consumables[key as usize] }; } let mut intent = gs.ecs.write_storage::<WantsToUseItem>(); intent.insert( *player_entity, WantsToUseItem{ item: carried_consumables[key as usize], target: None } ).expect("Unable to insert intent"); return RunState::PlayerTurn; } RunState::PlayerTurn } }
Let's step through this:
- We add a few
usestatements to reference components. You could also put these at the top of the file if you wish, but since we're just using them in the function we'll do it here. - We obtain access to a few things from the ECS; we've done this often enough you should have this down by now!
- We iterate carried consumables, exactly like we did for rendering the GUI - but without the name. We store these in a
carried_consumablesvector, storing the entity of the item. - We check that the requested keypress falls inside the range of the vector; if it doesn't, we ignore the key-press and return false.
- We check to see if the item requires ranged targeting; if it does, we return a
ShowTargetingrun state, just as if we'd used it through the menu. - If it does, then we insert a
WantsToUseItemcomponent, just like we did for the inventory handler a while back. It belongs to theplayer_entity- the player is using the item. Theitemto use is theEntityfrom thecarried_consumableslist. - We return
PlayerTurn, making the game go to thePlayerTurnrun-state.
The rest will happen automatically: we've already written handlers for WantsToUseItem, this just provides another way to indicate what the player wants to do.
So now we have a nice, easy way for the player to quickly use items!
Wrap Up
In this chapter, we've built a pretty nice GUI. It's not as slick as it could be, yet - we'll be adding to it in the coming chapter, but it provides a good base to work from. This chapter has illustrated a good process for building a GUI: draw a prototype, and then gradually implement it.
Here's the iterative progress:
The source code for this chapter may be found here
Run this chapter's example with web assembly, in your browser (WebGL2 required)
Copyright (C) 2019, Herbert Wolverson.
Into the Woods!
About this tutorial
This tutorial is free and open source, and all code uses the MIT license - so you are free to do with it as you like. My hope is that you will enjoy the tutorial, and make great games!
If you enjoy this and would like me to keep writing, please consider supporting my Patreon.
We've spend a few chapters improving the basic game, its interface, and the starting town. That's fun, and we could honestly keep improving it for many chapters - but it's a good idea when developing to see some real progress. Otherwise, you tend to get demotivated! So for this chapter, we're going to add the next level to the game, populate it, and tackle the concept of themes to differentiate levels.
Into the woods!
Our design document says that we go from the town to a limestone cavern. That's a good start, but it's quite unlikely that you would transition from one to the other with nothing in-between; otherwise, everyone would go there! So we're going to add a forest next to the town of Bracketon, with a cave entrance to the main adventure. A road runs through the woods, which is where everyone else typically goes (those who aren't set on trying to save the world, which is most people!).
Let's start by moving the exit from Bracketon to cover the whole east side. In town.rs, find the line placing the exit (it's around line 36), and replace with:
#![allow(unused)] fn main() { for y in wall_gap_y-3 .. wall_gap_y + 4 { let exit_idx = build_data.map.xy_idx(build_data.width-2, y); build_data.map.tiles[exit_idx] = TileType::DownStairs; } }
This fills the whole road out of town with exit tiles:
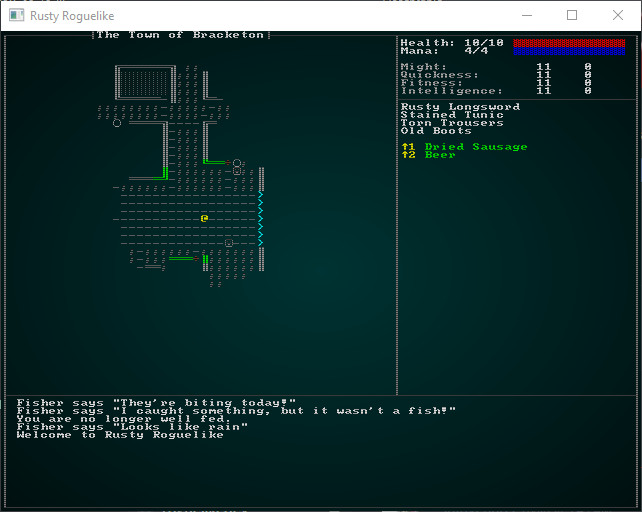
This has one primary advantage: it's really hard to miss!
Building the woods
Now we want to start on the second level. In map_builders/mod.rs we have the function level_builder; lets add a new call in there for the second level:
#![allow(unused)] fn main() { pub fn level_builder(new_depth: i32, rng: &mut rltk::RandomNumberGenerator, width: i32, height: i32) -> BuilderChain { rltk::console::log(format!("Depth: {}", new_depth)); match new_depth { 1 => town_builder(new_depth, rng, width, height), 2 => forest_builder(new_depth, rng, width, height), _ => random_builder(new_depth, rng, width, height) } } }
To implement this, we'll make a new file - map_builders/forest.rs and give it some placeholder content (just like we did for the town):
#![allow(unused)] fn main() { use super::{BuilderChain, CellularAutomataBuilder, XStart, YStart, AreaStartingPosition, CullUnreachable, VoronoiSpawning, DistantExit}; pub fn forest_builder(new_depth: i32, _rng: &mut rltk::RandomNumberGenerator, width: i32, height: i32) -> BuilderChain { let mut chain = BuilderChain::new(new_depth, width, height, "Into the Woods"); chain.start_with(CellularAutomataBuilder::new()); chain.with(AreaStartingPosition::new(XStart::CENTER, YStart::CENTER)); chain.with(CullUnreachable::new()); chain.with(AreaStartingPosition::new(XStart::LEFT, YStart::CENTER)); // Setup an exit and spawn mobs chain.with(VoronoiSpawning::new()); chain.with(DistantExit::new()); chain } }
Also, don't forget to add mod forest; use forest::forest_builder to your map_builders/mod.rs file! If you run this, you'll see that we have a basic cellular automata dungeon:
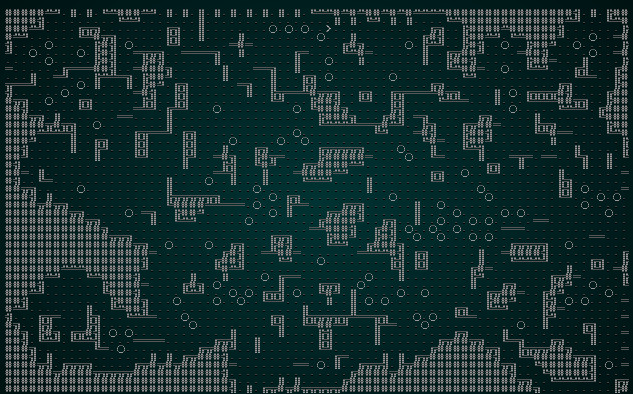
That's isn't really what we want... or is it? It does look a bit forest like in shape - but rendering it with wall graphics everywhere doesn't give the impression that you are in a forest.
Themes
You could make all new tiles, and have the forest generator spit them out - but that's duplicating a lot of code just to change appearance. A better approach would be to support themes. So the town uses one look, the forest uses another - but they share basic functionality such as walls blocking movement. Now we reveal why we made map into a multi-file module: we're going to build a theming engine! Create a new file, map/themes.rs and we'll put in a default function and our existing tile selection code (from camera.rs):
#![allow(unused)] fn main() { use super::{Map, TileType}; use rltk::RGB; pub fn tile_glyph(idx: usize, map : &Map) -> (rltk::FontCharType, RGB, RGB) { let (glyph, mut fg, mut bg) = match map.depth { 2 => get_forest_glyph(idx, map), _ => get_tile_glyph_default(idx, map) }; if map.bloodstains.contains(&idx) { bg = RGB::from_f32(0.75, 0., 0.); } if !map.visible_tiles[idx] { fg = fg.to_greyscale(); bg = RGB::from_f32(0., 0., 0.); // Don't show stains out of visual range } (glyph, fg, bg) } fn get_tile_glyph_default(idx: usize, map : &Map) -> (rltk::FontCharType, RGB, RGB) { let glyph; let fg; let bg = RGB::from_f32(0., 0., 0.); match map.tiles[idx] { TileType::Floor => { glyph = rltk::to_cp437('.'); fg = RGB::from_f32(0.0, 0.5, 0.5); } TileType::WoodFloor => { glyph = rltk::to_cp437('░'); fg = RGB::named(rltk::CHOCOLATE); } TileType::Wall => { let x = idx as i32 % map.width; let y = idx as i32 / map.width; glyph = wall_glyph(&*map, x, y); fg = RGB::from_f32(0., 1.0, 0.); } TileType::DownStairs => { glyph = rltk::to_cp437('>'); fg = RGB::from_f32(0., 1.0, 1.0); } TileType::Bridge => { glyph = rltk::to_cp437('.'); fg = RGB::named(rltk::CHOCOLATE); } TileType::Road => { glyph = rltk::to_cp437('≡'); fg = RGB::named(rltk::GRAY); } TileType::Grass => { glyph = rltk::to_cp437('"'); fg = RGB::named(rltk::GREEN); } TileType::ShallowWater => { glyph = rltk::to_cp437('~'); fg = RGB::named(rltk::CYAN); } TileType::DeepWater => { glyph = rltk::to_cp437('~'); fg = RGB::named(rltk::BLUE); } TileType::Gravel => { glyph = rltk::to_cp437(';'); fg = RGB::from_f32(0.5, 0.5, 0.5); } } (glyph, fg, bg) } fn wall_glyph(map : &Map, x: i32, y:i32) -> rltk::FontCharType { if x < 1 || x > map.width-2 || y < 1 || y > map.height-2 as i32 { return 35; } let mut mask : u8 = 0; if is_revealed_and_wall(map, x, y - 1) { mask +=1; } if is_revealed_and_wall(map, x, y + 1) { mask +=2; } if is_revealed_and_wall(map, x - 1, y) { mask +=4; } if is_revealed_and_wall(map, x + 1, y) { mask +=8; } match mask { 0 => { 9 } // Pillar because we can't see neighbors 1 => { 186 } // Wall only to the north 2 => { 186 } // Wall only to the south 3 => { 186 } // Wall to the north and south 4 => { 205 } // Wall only to the west 5 => { 188 } // Wall to the north and west 6 => { 187 } // Wall to the south and west 7 => { 185 } // Wall to the north, south and west 8 => { 205 } // Wall only to the east 9 => { 200 } // Wall to the north and east 10 => { 201 } // Wall to the south and east 11 => { 204 } // Wall to the north, south and east 12 => { 205 } // Wall to the east and west 13 => { 202 } // Wall to the east, west, and south 14 => { 203 } // Wall to the east, west, and north 15 => { 206 } // ╬ Wall on all sides _ => { 35 } // We missed one? } } fn is_revealed_and_wall(map: &Map, x: i32, y: i32) -> bool { let idx = map.xy_idx(x, y); map.tiles[idx] == TileType::Wall && map.revealed_tiles[idx] } }
In map/mod.rs add mod themes; pub use themes::* to add it to your project.
Now we'll modify camera.rs by deleting these functions, and importing the map themes instead. Delete get_tile_glyph, wall_glyph and is_revealed_and_wall. At the top, add use crate::map::tile_glyph and change the two render functions to use it:
#![allow(unused)] fn main() { let (glyph, fg, bg) = tile_glyph(idx, &*map); }
This has two nice effects: your camera is now just a camera, and you have the ability to change your theme per level!
Building a forest theme
In themes.rs, lets extend the tile_glyph function to branch to a separate forest theme for level 2:
#![allow(unused)] fn main() { pub fn tile_glyph(idx: usize, map : &Map) -> (rltk::FontCharType, RGB, RGB) { match map.depth { 2 => get_forest_glyph(idx, map), _ => get_tile_glyph_default(idx, map) } } }
Now, of course, we have to write get_forest_glyph:
#![allow(unused)] fn main() { fn get_forest_glyph(idx:usize, map: &Map) -> (rltk::FontCharType, RGB, RGB) { let glyph; let fg; let bg = RGB::from_f32(0., 0., 0.); match map.tiles[idx] { TileType::Wall => { glyph = rltk::to_cp437('♣'); fg = RGB::from_f32(0.0, 0.6, 0.0); } TileType::Bridge => { glyph = rltk::to_cp437('.'); fg = RGB::named(rltk::CHOCOLATE); } TileType::Road => { glyph = rltk::to_cp437('≡'); fg = RGB::named(rltk::YELLOW); } TileType::Grass => { glyph = rltk::to_cp437('"'); fg = RGB::named(rltk::GREEN); } TileType::ShallowWater => { glyph = rltk::to_cp437('~'); fg = RGB::named(rltk::CYAN); } TileType::DeepWater => { glyph = rltk::to_cp437('~'); fg = RGB::named(rltk::BLUE); } TileType::Gravel => { glyph = rltk::to_cp437(';'); fg = RGB::from_f32(0.5, 0.5, 0.5); } TileType::DownStairs => { glyph = rltk::to_cp437('>'); fg = RGB::from_f32(0., 1.0, 1.0); } _ => { glyph = rltk::to_cp437('"'); fg = RGB::from_f32(0.0, 0.6, 0.0); } } (glyph, fg, bg) } }
cargo run now, and you'll see that the visual change made a huge difference - it now looks like a forest!
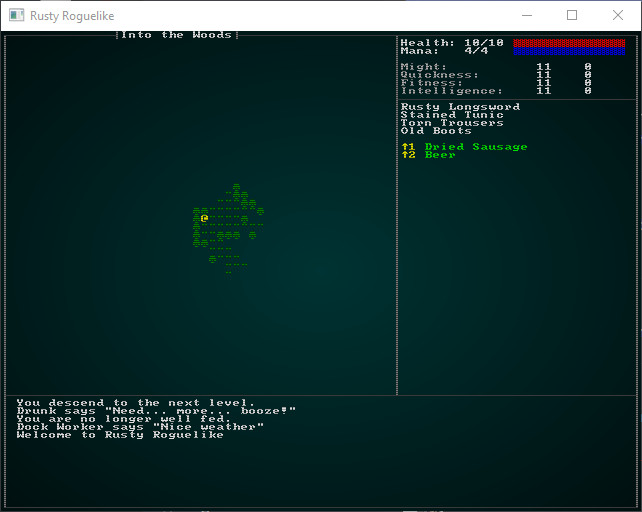
Follow the yellow-brick road
We specified that a roads runs through the level, but we don't have a builder for that! Let's make one and add it to the builder chain. First, we'll modify the builder chain - get rid of the DistantExit part and add a new YellowBrickRoad stage:
#![allow(unused)] fn main() { pub fn forest_builder(new_depth: i32, _rng: &mut rltk::RandomNumberGenerator, width: i32, height: i32) -> BuilderChain { let mut chain = BuilderChain::new(new_depth, width, height, "Into the Woods"); chain.start_with(CellularAutomataBuilder::new()); chain.with(AreaStartingPosition::new(XStart::CENTER, YStart::CENTER)); chain.with(CullUnreachable::new()); chain.with(AreaStartingPosition::new(XStart::LEFT, YStart::CENTER)); chain.with(VoronoiSpawning::new()); chain.with(YellowBrickRoad::new()); chain } }
Then we'll implement YellowBrickRoad:
#![allow(unused)] fn main() { pub struct YellowBrickRoad {} impl MetaMapBuilder for YellowBrickRoad { fn build_map(&mut self, rng: &mut rltk::RandomNumberGenerator, build_data : &mut BuilderMap) { self.build(rng, build_data); } } impl YellowBrickRoad { #[allow(dead_code)] pub fn new() -> Box<YellowBrickRoad> { Box::new(YellowBrickRoad{}) } fn find_exit(&self, build_data : &mut BuilderMap, seed_x : i32, seed_y: i32) -> (i32, i32) { let mut available_floors : Vec<(usize, f32)> = Vec::new(); for (idx, tiletype) in build_data.map.tiles.iter().enumerate() { if map::tile_walkable(*tiletype) { available_floors.push( ( idx, rltk::DistanceAlg::PythagorasSquared.distance2d( rltk::Point::new(idx as i32 % build_data.map.width, idx as i32 / build_data.map.width), rltk::Point::new(seed_x, seed_y) ) ) ); } } if available_floors.is_empty() { panic!("No valid floors to start on"); } available_floors.sort_by(|a,b| a.1.partial_cmp(&b.1).unwrap()); let end_x = available_floors[0].0 as i32 % build_data.map.width; let end_y = available_floors[0].0 as i32 / build_data.map.width; (end_x, end_y) } fn paint_road(&self, build_data : &mut BuilderMap, x: i32, y: i32) { if x < 1 || x > build_data.map.width-2 || y < 1 || y > build_data.map.height-2 { return; } let idx = build_data.map.xy_idx(x, y); if build_data.map.tiles[idx] != TileType::DownStairs { build_data.map.tiles[idx] = TileType::Road; } } fn build(&mut self, rng : &mut RandomNumberGenerator, build_data : &mut BuilderMap) { let starting_pos = build_data.starting_position.as_ref().unwrap().clone(); let start_idx = build_data.map.xy_idx(starting_pos.x, starting_pos.y); let (end_x, end_y) = self.find_exit(build_data, build_data.map.width - 2, build_data.map.height / 2); let end_idx = build_data.map.xy_idx(end_x, end_y); build_data.map.tiles[end_idx] = TileType::DownStairs; build_data.map.populate_blocked(); let path = rltk::a_star_search(start_idx, end_idx, &mut build_data.map); //if !path.success { // panic!("No valid path for the road"); //} for idx in path.steps.iter() { let x = *idx as i32 % build_data.map.width; let y = *idx as i32 / build_data.map.width; self.paint_road(build_data, x, y); self.paint_road(build_data, x-1, y); self.paint_road(build_data, x+1, y); self.paint_road(build_data, x, y-1); self.paint_road(build_data, x, y+1); } build_data.take_snapshot(); } } }
This builder combines a few concepts we've already implemented:
find_exitis just like theAreaStartingPointbuilder, but finds an area close to the provided "seed" location and returns it. We'll give it a central-east seed point, and use the result as a destination for the road, since we've started in the west.paint_roadchecks to see if a tile is within the map bounds, and if it isn't a down staircase - paints it as a road.buildcallsa_star_searchto find an efficient path from west to east. It then paints a 3x3 road all along the path.
The result is a forest with a yellow road going to the East. Of course, there isn't actually an exit yet (and you are highly likely to be murdered by kobolds, goblins and orcs)!
Adding an exit - and some breadcrumbs
Now we'll hide the exit somewhere in the north-east of the map - or the south-east, we'll pick randomly! Hiding it provides an element of exploration, but not giving the user a clue (especially when the road is essentially a red herring) as to the location is a good way to frustrate your players! We know that the destination is a limestone cave, and limestone caves generally happen because of water - so it stands to reason that there should be a water source in/around the cave. We'll add a stream to the map! Add the following to your build function:
#![allow(unused)] fn main() { // Place exit let exit_dir = rng.roll_dice(1, 2); let (seed_x, seed_y, stream_startx, stream_starty) = if exit_dir == 1 { (build_data.map.width-1, 1, 0, build_data.height-1) } else { (build_data.map.width-1, build_data.height-1, 1, build_data.height-1) }; let (stairs_x, stairs_y) = self.find_exit(build_data, seed_x, seed_y); let stairs_idx = build_data.map.xy_idx(stairs_x, stairs_y); build_data.take_snapshot(); let (stream_x, stream_y) = self.find_exit(build_data, stream_startx, stream_starty); let stream_idx = build_data.map.xy_idx(stream_x, stream_y) as usize; let stream = rltk::a_star_search(stairs_idx, stream_idx, &mut build_data.map); for tile in stream.steps.iter() { if build_data.map.tiles[*tile as usize] == TileType::Floor { build_data.map.tiles[*tile as usize] = TileType::ShallowWater; } } build_data.map.tiles[stairs_idx] = TileType::DownStairs; build_data.take_snapshot(); }
This randomly picks an exit location (from NE and SE), and then adds a stream in the opposite direction. Once again, we use path-finding to place the stream - so we don't disturb the overall layout too much. Then we place the exit stairs.
But - I keep getting murdered by orcs!
We've left the default spawning to happen, with no concern for updating the monsters for our level! Our player is probably very low level, especially given that we won't implement levelling up until the next chapter. ahem. Anyway, we should introduce some beginner-friendly spawns and adjust the spawn locations of our other enemies. Take a look at spawns.json once again, and we'll go straight to the spawn tables at the top. We'll start by adjusting the min_depth entries for things we don't want to see yet:
"spawn_table" : [
{ "name" : "Goblin", "weight" : 10, "min_depth" : 3, "max_depth" : 100 },
{ "name" : "Orc", "weight" : 1, "min_depth" : 3, "max_depth" : 100, "add_map_depth_to_weight" : true },
{ "name" : "Health Potion", "weight" : 7, "min_depth" : 0, "max_depth" : 100 },
{ "name" : "Fireball Scroll", "weight" : 2, "min_depth" : 0, "max_depth" : 100, "add_map_depth_to_weight" : true },
{ "name" : "Confusion Scroll", "weight" : 2, "min_depth" : 0, "max_depth" : 100, "add_map_depth_to_weight" : true },
{ "name" : "Magic Missile Scroll", "weight" : 4, "min_depth" : 0, "max_depth" : 100 },
{ "name" : "Dagger", "weight" : 3, "min_depth" : 0, "max_depth" : 100 },
{ "name" : "Shield", "weight" : 3, "min_depth" : 0, "max_depth" : 100 },
{ "name" : "Longsword", "weight" : 1, "min_depth" : 3, "max_depth" : 100 },
{ "name" : "Tower Shield", "weight" : 1, "min_depth" : 3, "max_depth" : 100 },
{ "name" : "Rations", "weight" : 10, "min_depth" : 0, "max_depth" : 100 },
{ "name" : "Magic Mapping Scroll", "weight" : 2, "min_depth" : 0, "max_depth" : 100 },
{ "name" : "Bear Trap", "weight" : 5, "min_depth" : 0, "max_depth" : 100 },
{ "name" : "Battleaxe", "weight" : 1, "min_depth" : 2, "max_depth" : 100 },
{ "name" : "Kobold", "weight" : 15, "min_depth" : 3, "max_depth" : 3 }
],
See how none of the monsters appear before depth 3? If you cargo run now, you'll have a "Monty Haul" (this was an old TV show about getting free stuff; it became a D&D term for "too easy, too much treasure") of a forest - free stuff everywhere and nary a bit of risk to be seen. We want the player to find some useful items, but we also want some risk! It's not much of a game if you just win every time!
Adding some woodland beasties
What would you expect to find in a beginner-friendly wood? Probably rats, wolves, foxes, various edible-but-harmless wildlife (such as deer) and maybe some travelers. You might even encounter a bear, but it would be very scary at this level! We already have rats, so lets just add them to the spawn table:
{ "name" : "Rat", "weight" : 15, "min_depth" : 2, "max_depth" : 3 }
We can add wolves by copy/pasting the rat and editing a bit:
{
"name" : "Mangy Wolf",
"renderable": {
"glyph" : "w",
"fg" : "#FF0000",
"bg" : "#000000",
"order" : 1
},
"blocks_tile" : true,
"vision_range" : 8,
"ai" : "melee",
"attributes" : {
"Might" : 3,
"Fitness" : 3
},
"skills" : {
"Melee" : -1,
"Defense" : -1
},
"natural" : {
"armor_class" : 12,
"attacks" : [
{ "name" : "bite", "hit_bonus" : 0, "damage" : "1d6" }
]
}
},
We'd like them to be less frequent than rats, so lets put them into the spawn table, too - but with a lower weight:
{ "name" : "Mangy Wolf", "weight" : 13, "min_depth" : 2, "max_depth" : 3 }
We could make a nasty fox, too. Again, it's secretly quite rat-like!
{
"name" : "Fox",
"renderable": {
"glyph" : "f",
"fg" : "#FF0000",
"bg" : "#000000",
"order" : 1
},
"blocks_tile" : true,
"vision_range" : 8,
"ai" : "melee",
"attributes" : {
"Might" : 3,
"Fitness" : 3
},
"skills" : {
"Melee" : -1,
"Defense" : -1
},
"natural" : {
"armor_class" : 11,
"attacks" : [
{ "name" : "bite", "hit_bonus" : 0, "damage" : "1d4" }
]
}
},
And add the fox to the spawn table, too:
{ "name" : "Fox", "weight" : 15, "min_depth" : 2, "max_depth" : 3 }
It's still too hard - lets give the player more health!
Ok, so we're still getting murdered far too often. Let's give the poor player some more hit points! Open gamesystem.rs and edit player_hp_at_level to add 10 more HP:
#![allow(unused)] fn main() { pub fn player_hp_at_level(fitness:i32, level:i32) -> i32 { 10 + (player_hp_per_level(fitness) * level) } }
In a real game, you'll find yourself tweaking this stuff a lot until you get the right feeling of balance!
Adding in some harmless beasties
Not everything in a typical forest is trying to kill you (unless you live in Australia, I'm told). Let's start by making a deer and giving it bystander AI so it won't hurt anyone:
{
"name" : "Deer",
"renderable": {
"glyph" : "d",
"fg" : "#FFFF00",
"bg" : "#000000",
"order" : 1
},
"blocks_tile" : true,
"vision_range" : 8,
"ai" : "bystander",
"attributes" : {
"Might" : 3,
"Fitness" : 3
},
"skills" : {
"Melee" : -1,
"Defense" : -1
},
"natural" : {
"armor_class" : 11,
"attacks" : [
{ "name" : "bite", "hit_bonus" : 0, "damage" : "1d4" }
]
}
},
And adding it to the spawn table:
{ "name" : "Deer", "weight" : 14, "min_depth" : 2, "max_depth" : 3 }
If you cargo run now, you'll encounter a plethora of life in the forest - and deer will roam randomly, not doing much.
But Venison is Tasty!
The problem with making deer use the bystander system is that they roam stupidly, and neither you - nor the wolves - can eat them. On a larger level, you can't eat the wolves either (not that they would taste good). Nor can you sell their pelts, or otherwise profit from their slaughter!
It seems like there are really three issues here:
- When we kill things, they should (sometimes) drop loot for us to use.
- Deer need their own AI.
- Wolves need to want to eat deer, which probably requires that they have their own AI too.
Loot Dropping
A good start would be that when we kill an entity, it has a chance to drop whatever it is carrying. Open up damage_system.rs, and we'll add a stage to delete_the_dead (after we determine who is dead, and before we delete them):
#![allow(unused)] fn main() { // Drop everything held by dead people { let mut to_drop : Vec<(Entity, Position)> = Vec::new(); let entities = ecs.entities(); let mut equipped = ecs.write_storage::<Equipped>(); let mut carried = ecs.write_storage::<InBackpack>(); let mut positions = ecs.write_storage::<Position>(); for victim in dead.iter() { for (entity, equipped) in (&entities, &equipped).join() { if equipped.owner == *victim { // Drop their stuff let pos = positions.get(*victim); if let Some(pos) = pos { to_drop.push((entity, pos.clone())); } } } for (entity, backpack) in (&entities, &carried).join() { if backpack.owner == *victim { // Drop their stuff let pos = positions.get(*victim); if let Some(pos) = pos { to_drop.push((entity, pos.clone())); } } } } for drop in to_drop.iter() { equipped.remove(drop.0); carried.remove(drop.0); positions.insert(drop.0, drop.1.clone()).expect("Unable to insert position"); } } }
So this code searches the Equipped and InBackpack component stores for the entity who died, and lists the entity's position and the item in a vector. It then iterates the vector, removing any InBackpack and Equipped tags from the item - and adding a position on the ground. The net result of this is that when someone dies - their stuff drops to the floor. That's a good start, although well-equipped entities may be leaving a lot of stuff lying around. We'll worry about that later.
So with this code, you could spawn everything you want an entity to drop as something they carry around. It would be a little odd, conceptually (I guess deer do carry around meat...) - but it'd work. However, we may not want every deer to drop the same thing. Enter: Loot tables!
Loot Tables
It's nice to have a bit of control over what items drop where. There's a split in games between "wolves drop anything" (even armor!) and a more realistic "wolves drop pelts and meat". Loot tables let you make this determination yourself.
We'll start by opening up spawns.json and building a prototype for what we'd like our loot table structure to look like. We'll try to make it similar to the spawn table - so we can make use of the same RandomTable infrastructure. Here's what I came up with:
"loot_tables" : [
{ "name" : "Animal",
"drops" : [
{ "name" : "Hide", "weight" : 10 },
{ "name" : "Meat", "weight" : 10 }
]
}
],
This is a little more complex than the spawn table, because we want to have multiple loot tables. So breaking this down:
- We have an outer container,
loot_tables- which holds a number of tables. - Tables have a
name(to identify it) and a set ofdrops- items that can "drop" when the loot table is activated. - Each entry in
dropsconsists of aname(matching an item in the items list) and aweight- just like the weight for random spawns.
So really, it's multiple - named - tables inside a single array. Now we have to read it; we'll open up the raws directory and make a new file: raws/loot_structs.rs. This is designed to match the content of the loot tables structure:
#![allow(unused)] fn main() { use serde::{Deserialize}; #[derive(Deserialize, Debug)] pub struct LootTable { pub name : String, pub drops : Vec<LootDrop> } #[derive(Deserialize, Debug)] pub struct LootDrop { pub name : String, pub weight : i32 } }
This is pretty much the same as the JSON version, just in Rust. Once again, we're describing the structure we're attempting to read, and letting Serde - the serialization library - handle converting between the two. Then we open up raws/mod.rs and add:
#![allow(unused)] fn main() { mod loot_structs; use loot_structs::*; }
At the top, and extend the Raws structure to include the loot table:
#![allow(unused)] fn main() { #[derive(Deserialize, Debug)] pub struct Raws { pub items : Vec<Item>, pub mobs : Vec<Mob>, pub props : Vec<Prop>, pub spawn_table : Vec<SpawnTableEntry>, pub loot_tables : Vec<LootTable> } }
We need to add it to the constructor in rawmaster.rs, too:
#![allow(unused)] fn main() { impl RawMaster { pub fn empty() -> RawMaster { RawMaster { raws : Raws{ items: Vec::new(), mobs: Vec::new(), props: Vec::new(), spawn_table: Vec::new(), loot_tables: Vec::new() }, item_index : HashMap::new(), mob_index : HashMap::new(), prop_index : HashMap::new(), } } ... }
That's enough to read the loot tables - but we actually need to use them! We'll start by adding another index to RawMaster (in raws/rawmaster.rs):
#![allow(unused)] fn main() { pub struct RawMaster { raws : Raws, item_index : HashMap<String, usize>, mob_index : HashMap<String, usize>, prop_index : HashMap<String, usize>, loot_index : HashMap<String, usize> } }
We also have to add loot_index : HashMap::new() to the RawMaster::new function, and add a reader to the load function:
#![allow(unused)] fn main() { for (i,loot) in self.raws.loot_tables.iter().enumerate() { self.loot_index.insert(loot.name.clone(), i); } }
Next, we need to give mobs the option of having a loot table entry. So we open up mob_structs.rs and add it to the Mob struct:
#![allow(unused)] fn main() { #[derive(Deserialize, Debug)] pub struct Mob { pub name : String, pub renderable : Option<Renderable>, pub blocks_tile : bool, pub vision_range : i32, pub ai : String, pub quips : Option<Vec<String>>, pub attributes : MobAttributes, pub skills : Option<HashMap<String, i32>>, pub level : Option<i32>, pub hp : Option<i32>, pub mana : Option<i32>, pub equipped : Option<Vec<String>>, pub natural : Option<MobNatural>, pub loot_table : Option<String> } }
We'll also need to add a new component, so in components.rs (and registered in saveload_system.rs and main.rs):
#![allow(unused)] fn main() { #[derive(Component, Debug, Serialize, Deserialize, Clone)] pub struct LootTable { pub table : String } }
Then we'll go back to rawmaster.rs and look at the spawn_named_mob function. We need to add the ability to attach a LootTable component if the mob supports one:
#![allow(unused)] fn main() { if let Some(loot) = &mob_template.loot_table { eb = eb.with(LootTable{table: loot.clone()}); } }
We've referred to two new items, so we need to add those into the items section of spawns.json:
{
"name" : "Meat",
"renderable": {
"glyph" : "%",
"fg" : "#00FF00",
"bg" : "#000000",
"order" : 2
},
"consumable" : {
"effects" : {
"food" : ""
}
}
},
{
"name" : "Hide",
"renderable": {
"glyph" : "ß",
"fg" : "#A52A2A",
"bg" : "#000000",
"order" : 2
}
},
You'll notice that hide is completely useless at this point; we'll worry about that in a later chapter. Now, let's modify the mangy wolf and deer to have a loot table. It's as easy as adding a single line:
"loot_table" : "Animal"
Now that's all in place - we actually need to spawn some loot when a creature dies! We need a way to roll for loot, so in rawmaster.rs we introduce a new function:
#![allow(unused)] fn main() { pub fn get_item_drop(raws: &RawMaster, rng : &mut rltk::RandomNumberGenerator, table: &str) -> Option<String> { if raws.loot_index.contains_key(table) { let mut rt = RandomTable::new(); let available_options = &raws.raws.loot_tables[raws.loot_index[table]]; for item in available_options.drops.iter() { rt = rt.add(item.name.clone(), item.weight); } return Some(rt.roll(rng)); } None } }
This is pretty simple: we look to see if a table of the specified name exists, and return None if it doesn't. If it does exist, we make a table of names and weights from the raw file information - and roll to determine a randomly weighted result, which we then return. Now, we'll attach it to delete_the_dead in damage_system.rs:
#![allow(unused)] fn main() { // Drop everything held by dead people let mut to_spawn : Vec<(String, Position)> = Vec::new(); { // To avoid keeping hold of borrowed entries, use a scope let mut to_drop : Vec<(Entity, Position)> = Vec::new(); let entities = ecs.entities(); let mut equipped = ecs.write_storage::<Equipped>(); let mut carried = ecs.write_storage::<InBackpack>(); let mut positions = ecs.write_storage::<Position>(); let loot_tables = ecs.read_storage::<LootTable>(); let mut rng = ecs.write_resource::<rltk::RandomNumberGenerator>(); for victim in dead.iter() { let pos = positions.get(*victim); for (entity, equipped) in (&entities, &equipped).join() { if equipped.owner == *victim { // Drop their stuff if let Some(pos) = pos { to_drop.push((entity, pos.clone())); } } } for (entity, backpack) in (&entities, &carried).join() { if backpack.owner == *victim { // Drop their stuff if let Some(pos) = pos { to_drop.push((entity, pos.clone())); } } } if let Some(table) = loot_tables.get(*victim) { let drop_finder = crate::raws::get_item_drop( &crate::raws::RAWS.lock().unwrap(), &mut rng, &table.table ); if let Some(tag) = drop_finder { if let Some(pos) = pos { to_spawn.push((tag, pos.clone())); } } } } for drop in to_drop.iter() { equipped.remove(drop.0); carried.remove(drop.0); positions.insert(drop.0, drop.1.clone()).expect("Unable to insert position"); } } { for drop in to_spawn.iter() { crate::raws::spawn_named_item( &crate::raws::RAWS.lock().unwrap(), ecs, &drop.0, crate::raws::SpawnType::AtPosition{x : drop.1.x, y: drop.1.y} ); } } }
This is a bit messy. We start by creating a to_spawn vector, containing positions and names. Then, after we've finished moving items out of the backpack and equipped, we look to see if there is a loot table. If there is, and there is a position - we add both to the to_spawn list. Once we're done, we iterate the to_spawn list and call spawn_named_item for each result we found. The reason this is spread out like this is the borrow checker: we keep hold of entities while we're looking at dropping items, but spawn_named_item expects to temporarily (while it runs) own the world! So we have to wait until we're done before handing ownership over.
If you cargo run now, you can slay wolves and deer - and they drop meat and hide. That's a good improvement - you can actively hunt animals to ensure you have something to eat!
Some Brigands - and they drop stuff!
Let's add a few brigands, and give them some minimal equipment. This gives the player an opportunity to loot some better equipment before they get to the next level, as well as more variety in the forest. Here's the NPC definition:
{
"name" : "Bandit",
"renderable": {
"glyph" : "☻",
"fg" : "#FF0000",
"bg" : "#000000",
"order" : 1
},
"blocks_tile" : true,
"vision_range" : 4,
"ai" : "melee",
"quips" : [ "Stand and deliver!", "Alright, hand it over" ],
"attributes" : {},
"equipped" : [ "Shortsword", "Shield", "Leather Armor", "Leather Boots" ]
},
Add them to the spawn table like this:
{ "name" : "Bandit", "weight" : 9, "min_depth" : 2, "max_depth" : 3 }
We'll also have to define Short-sword, Leather Armor and Leather Boots since they are new! This should be old news by now:
{
"name" : "Shortsword",
"renderable": {
"glyph" : "/",
"fg" : "#FFAAFF",
"bg" : "#000000",
"order" : 2
},
"weapon" : {
"range" : "melee",
"attribute" : "Might",
"base_damage" : "1d6",
"hit_bonus" : 0
}
},
{
"name" : "Leather Armor",
"renderable": {
"glyph" : "[",
"fg" : "#00FF00",
"bg" : "#000000",
"order" : 2
},
"wearable" : {
"slot" : "Torso",
"armor_class" : 1.0
}
},
{
"name" : "Leather Boots",
"renderable": {
"glyph" : "[",
"fg" : "#00FF00",
"bg" : "#000000",
"order" : 2
},
"wearable" : {
"slot" : "Feet",
"armor_class" : 0.2
}
}
If you cargo run now, you can hopefully find a bandit - and killing them will drop their loot!
Scared Deer and Hungry Wolves
We're doing pretty well in this chapter! We've got a whole new level to play, new monsters, new items, loot tables and NPCs dropping what they own when they die. There's still one thing that bugs me: you can't kill deer, and neither can the wolves. It's really unrealistic to expect a wolf to hang out with Bambi and not ruin the movie by eating him, and it's surprising that a deer wouldn't run away from both the player and the wolves.
Open up components.rs and we'll introduce two new components: Carnivore and Herbivore (and we won't forget to register them in main.rs and saveload_system.rs):
#![allow(unused)] fn main() { #[derive(Component, Debug, Serialize, Deserialize, Clone)] pub struct Carnivore {} #[derive(Component, Debug, Serialize, Deserialize, Clone)] pub struct Herbivore {} }
We'll also modify spawn_named_mob in raws/rawmaster.rs to let us spawn carnivores and herbivores as AI classes:
#![allow(unused)] fn main() { match mob_template.ai.as_ref() { "melee" => eb = eb.with(Monster{}), "bystander" => eb = eb.with(Bystander{}), "vendor" => eb = eb.with(Vendor{}), "carnivore" => eb = eb.with(Carnivore{}), "herbivore" => eb = eb.with(Herbivore{}), _ => {} } }
Now we'll make a new system to handle their AI, putting it into the file: animal_ai_system.rs:
#![allow(unused)] fn main() { use specs::prelude::*; use super::{Viewshed, Herbivore, Carnivore, Item, Map, Position, WantsToMelee, RunState, Confusion, particle_system::ParticleBuilder, EntityMoved}; use rltk::{Point}; pub struct AnimalAI {} impl<'a> System<'a> for AnimalAI { #[allow(clippy::type_complexity)] type SystemData = ( WriteExpect<'a, Map>, ReadExpect<'a, Entity>, ReadExpect<'a, RunState>, Entities<'a>, WriteStorage<'a, Viewshed>, ReadStorage<'a, Herbivore>, ReadStorage<'a, Carnivore>, ReadStorage<'a, Item>, WriteStorage<'a, WantsToMelee>, WriteStorage<'a, EntityMoved>, WriteStorage<'a, Position> ); fn run(&mut self, data : Self::SystemData) { let (mut map, player_entity, runstate, entities, mut viewshed, herbivore, carnivore, item, mut wants_to_melee, mut entity_moved, mut position) = data; if *runstate != RunState::MonsterTurn { return; } // Herbivores run away a lot for (entity, mut viewshed, _herbivore, mut pos) in (&entities, &mut viewshed, &herbivore, &mut position).join() { let mut run_away_from : Vec<usize> = Vec::new(); for other_tile in viewshed.visible_tiles.iter() { let view_idx = map.xy_idx(other_tile.x, other_tile.y); for other_entity in map.tile_content[view_idx].iter() { // They don't run away from items if item.get(*other_entity).is_none() { run_away_from.push(view_idx); } } } if !run_away_from.is_empty() { let my_idx = map.xy_idx(pos.x, pos.y); map.populate_blocked(); let flee_map = rltk::DijkstraMap::new(map.width as usize, map.height as usize, &run_away_from, &*map, 100.0); let flee_target = rltk::DijkstraMap::find_highest_exit(&flee_map, my_idx, &*map); if let Some(flee_target) = flee_target { if !map.blocked[flee_target as usize] { map.blocked[my_idx] = false; map.blocked[flee_target as usize] = true; viewshed.dirty = true; pos.x = flee_target as i32 % map.width; pos.y = flee_target as i32 / map.width; entity_moved.insert(entity, EntityMoved{}).expect("Unable to insert marker"); } } } } // Carnivores just want to eat everything for (entity, mut viewshed, _carnivore, mut pos) in (&entities, &mut viewshed, &carnivore, &mut position).join() { let mut run_towards : Vec<usize> = Vec::new(); let mut attacked = false; for other_tile in viewshed.visible_tiles.iter() { let view_idx = map.xy_idx(other_tile.x, other_tile.y); for other_entity in map.tile_content[view_idx].iter() { if herbivore.get(*other_entity).is_some() || *other_entity == *player_entity { let distance = rltk::DistanceAlg::Pythagoras.distance2d( Point::new(pos.x, pos.y), *other_tile ); if distance < 1.5 { wants_to_melee.insert(entity, WantsToMelee{ target: *other_entity }).expect("Unable to insert attack"); attacked = true; } else { run_towards.push(view_idx); } } } } if !run_towards.is_empty() && !attacked { let my_idx = map.xy_idx(pos.x, pos.y); map.populate_blocked(); let chase_map = rltk::DijkstraMap::new(map.width as usize, map.height as usize, &run_towards, &*map, 100.0); let chase_target = rltk::DijkstraMap::find_lowest_exit(&chase_map, my_idx, &*map); if let Some(chase_target) = chase_target { if !map.blocked[chase_target as usize] { map.blocked[my_idx] = false; map.blocked[chase_target as usize] = true; viewshed.dirty = true; pos.x = chase_target as i32 % map.width; pos.y = chase_target as i32 / map.width; entity_moved.insert(entity, EntityMoved{}).expect("Unable to insert marker"); } } } } } } }
(We also need to add this to run_systems in main.rs). We've made a few systems already, so we'll gloss over some of it. The important part are the loops that cover herbivores and carnivores. They are basically the same - but with some logic flipped. Let's walk through herbivores:
- We loop over entities that have a
Herbivorecomponent, as well as positions, and viewsheds. - We go through the herbivore's viewshed, looking at each tile they can see.
- We iterate over the
tile_contentof the visible tile, and if it isn't an item (we don't need deer to run away from rations!) we add it to aflee_fromlist. - We use
flee_fromto build a Dijkstra Map, and pick the highest possible exit: meaning they want to get as far away from other entities as possible! - If it isn't blocked, we move them.
This has the nice effect that deer will spot you, and try to stay far away. They will do the same for everyone else on the map. If you can catch them, you can kill them and eat them - but they try their very best to escape.
The Carnivore loop is very similar:
- We loop over entities that have a
Carnivorecomponent, as well as positions and viewsheds. - We go through the carnivore's viewshed, looking at what they can see.
- We iterate over
tile_contentto see what's there; if it is a herbivore or the player, they add it to arun_towardslist. They ALSO check distance: if they are adjacent, they initiate melee. - We use
run_towardsto build a Dijkstra map, and usefind_lowest_exitto move towards the closest target.
This makes for a lively map: deer are running away, and wolves are trying to eat them. If a wolf is chasing you, you may be able to distract it with a deer and escape!
Wrap-Up
This has been a large chapter, but we've added a whole level to the game! It has a map, a theme, loot tables, droppable items, new NPCs/monsters, two new AI categories, and demonstrates how Dijkstra Maps can make for realistic - but simple - AI. Whew!
In the next chapter, we'll change gear and look at adding some player progression.
The source code for this chapter may be found here
Run this chapter's example with web assembly, in your browser (WebGL2 required)
Copyright (C) 2019, Herbert Wolverson.
Experience and Levelling
About this tutorial
This tutorial is free and open source, and all code uses the MIT license - so you are free to do with it as you like. My hope is that you will enjoy the tutorial, and make great games!
If you enjoy this and would like me to keep writing, please consider supporting my Patreon.
So far, we've delved into the dungeon and really only improved ourselves by finding better gear. Swords, shields and armor with better stats - giving us a chance to survive stronger enemies. That's good, but only half of the equation typically found in roguelikes and RPGs; defeating enemies typically grants experience points - and those can be used to better your character.
The type of game we are making implies some guidelines:
- With permadeath, you can expect to die a lot. So managing your character's progression needs to be simple - so you don't spend a huge amount of time on it, only to have to do it all again.
- Vertical progression is a good thing: as you delve, you get stronger (allowing us to make stronger mobs). Horizontal progression largely defeats the point of permadeath; if you keep benefits between games, then the "each run is unique" aspect of roguelikes is compromised, and you can expect the fine fellows of
/r/roguelikeson Reddit to complain!
Gaining experience points
When you defeat something, you should gain XP. We'll go with a simple progression for now: you earn 100 XP * enemy level each time you defeat something. This gives a bigger benefit to killing something tough - and a smaller (relative) benefit to hunting things down once you have out-levelled them. Additionally, we'll decide that you need 1,000 XP * Current Level to advance to the next one.
We already have level and xp in our Pools component (you'd almost think that we were planning this chapter!). Let's start by modifying our GUI to display level progression. Open up gui.rs, and we'll add the following to draw_ui:
#![allow(unused)] fn main() { format!("Level: {}", player_pools.level); ctx.print_color(50, 3, white, black, &xp); let xp_level_start = (player_pools.level-1) * 1000; ctx.draw_bar_horizontal(64, 3, 14, player_pools.xp - xp_level_start, 1000, RGB::named(rltk::GOLD), RGB::named(rltk::BLACK)); }
This adds a gold bar to the screen for our current level progress, and shows our current level:
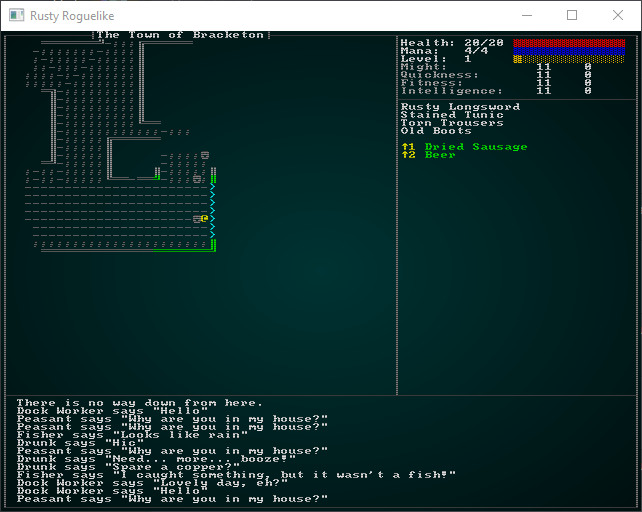
Now we should support actually gaining experience. We should start by tracking where damage came from. Open up components.rs, and we'll add a field to SufferDamage:
#![allow(unused)] fn main() { #[derive(Component, Debug, Serialize, Deserialize, Clone)] pub struct SufferDamage { pub amount : Vec<(i32, bool)>, } impl SufferDamage { pub fn new_damage(store: &mut WriteStorage<SufferDamage>, victim: Entity, amount: i32, from_player: bool) { if let Some(suffering) = store.get_mut(victim) { suffering.amount.push((amount, from_player)); } else { let dmg = SufferDamage { amount : vec![(amount, from_player)] }; store.insert(victim, dmg).expect("Unable to insert damage"); } } } }
We've added from_player. If the damage originated from the player - then we'll mark it as such. We don't really care about other entities gaining levels, so this is enough differentiation for now. A few places will now give compiler errors when they make SufferDamage components; in most cases you can add from_player: false to the creation to fix them. This is true for hunger_system.rs, trigger_system.rs. inventory_system.rs needs to use from_player : true - since right now only players can use items. melee_combat_system.rs needs a little more work to ensure you don't gain XP from other creatures killing one another (thanks, wolves!).
First, we need to add the player entity to the list of resource to which the system requests access:
#![allow(unused)] fn main() { ... ReadStorage<'a, NaturalAttackDefense>, ReadExpect<'a, Entity> ); fn run(&mut self, data : Self::SystemData) { let (entities, mut log, mut wants_melee, names, attributes, skills, mut inflict_damage, mut particle_builder, positions, hunger_clock, pools, mut rng, equipped_items, meleeweapons, wearables, natural, player_entity) = data; ... }
Then we make the from_player conditional upon the attacking entity matching the player (all the way down on line 105):
#![allow(unused)] fn main() { SufferDamage::new_damage(&mut inflict_damage, wants_melee.target, damage, from_player: entity == *player_entity); }
So that takes care of knowing where damage came from. We can now modify damage_system.rs to actually grant XP. Here's the updated system:
#![allow(unused)] fn main() { use specs::prelude::*; use super::{Pools, SufferDamage, Player, Name, gamelog::GameLog, RunState, Position, Map, InBackpack, Equipped, LootTable, Attributes}; use crate::gamesystem::{player_hp_at_level, mana_at_level}; pub struct DamageSystem {} impl<'a> System<'a> for DamageSystem { #[allow(clippy::type_complexity)] type SystemData = ( WriteStorage<'a, Pools>, WriteStorage<'a, SufferDamage>, ReadStorage<'a, Position>, WriteExpect<'a, Map>, Entities<'a>, ReadExpect<'a, Entity>, ReadStorage<'a, Attributes> ); fn run(&mut self, data : Self::SystemData) { let (mut stats, mut damage, positions, mut map, entities, player, attributes) = data; let mut xp_gain = 0; for (entity, mut stats, damage) in (&entities, &mut stats, &damage).join() { for dmg in damage.amount.iter() { stats.hit_points.current -= dmg.0; let pos = positions.get(entity); if let Some(pos) = pos { let idx = map.xy_idx(pos.x, pos.y); map.bloodstains.insert(idx); } if stats.hit_points.current < 1 && dmg.1 { xp_gain += stats.level * 100; } } } if xp_gain != 0 { let mut player_stats = stats.get_mut(*player).unwrap(); let player_attributes = attributes.get(*player).unwrap(); player_stats.xp += xp_gain; if player_stats.xp >= player_stats.level * 1000 { // We've gone up a level! player_stats.level += 1; player_stats.hit_points.max = player_hp_at_level( player_attributes.fitness.base + player_attributes.fitness.modifiers, player_stats.level ); player_stats.hit_points.current = player_stats.hit_points.max; player_stats.mana.max = mana_at_level( player_attributes.intelligence.base + player_attributes.intelligence.modifiers, player_stats.level ); player_stats.mana.current = player_stats.mana.max; } } damage.clear(); } } }
So as we process damage, if it is from the player and slays the target - we add to the variable xp_gain. After we're done with the slaying, we check to see if xp_gain is non-zero; if it is, we obtain information about the player and grant them the XP. If they level up, we recalculate their hit points and mana.
You can cargo run now, and if you slay 10 beasties you will become level 2!

Making the level-up more dramatic
It's a big deal - you levelled up, healed yourself and are ready to face the world on a whole new stratum! We should make it look like a big deal! The first thing we should do is announce the level up on the game log. In our previous level-up code, we can add:
#![allow(unused)] fn main() { WriteExpect<'a, GameLog> ); fn run(&mut self, data : Self::SystemData) { let (mut stats, mut damage, positions, mut map, entities, player, attributes, mut log) = data; ... log.entries.push(format!("Congratulations, you are now level {}", player_stats.level)); }
Now at least we're telling the player, rather than just hoping they notice. That's still not much of a victory lap, so lets add some particle effects!
We'll first add two more data accessors:
#![allow(unused)] fn main() { WriteExpect<'a, ParticleBuilder>, ReadExpect<'a, Position> ); fn run(&mut self, data : Self::SystemData) { let (mut stats, mut damage, positions, mut map, entities, player, attributes, mut log, mut particles, player_pos) = data; }
And we'll add a stream of gold above the player!
#![allow(unused)] fn main() { for i in 0..10 { if player_pos.y - i > 1 { particles.request( player_pos.x, player_pos.y - i, rltk::RGB::named(rltk::GOLD), rltk::RGB::named(rltk::BLACK), rltk::to_cp437('░'), 200.0 ); } } }
What about skills?
We're not really using skills right now, other than giving the player a +1 to a lot of things. So until we start using them, we'll leave this blank.
Wrap-Up
So now you can go up levels! Huzzah!
The source code for this chapter may be found here
Run this chapter's example with web assembly, in your browser (WebGL2 required)
Copyright (C) 2019, Herbert Wolverson.
Backtracking
About this tutorial
This tutorial is free and open source, and all code uses the MIT license - so you are free to do with it as you like. My hope is that you will enjoy the tutorial, and make great games!
If you enjoy this and would like me to keep writing, please consider supporting my Patreon.
The design document talks about using Town Portal to return to town, which implies that backtracking is possible - that is, it's possible to return to levels. This is quite a common feature of games such as Dungeon Crawl: Stone Soup (in which it is standard procedure to leave items in a "stash" where hopefully the monsters won't find them).
If we're going to support going back and forth between levels (either via entrance/exit pairs, or through mechanisms such as teleports/portals), we need to adjust the way we handle levels and transitioning between them.
A Master Dungeon Map
We'll start by making a structure to store all of our maps - the MasterDungeonMap. Make a new file, map/dungeon.rs and we'll start putting it together:
#![allow(unused)] fn main() { use std::collections::HashMap; use serde::{Serialize, Deserialize}; use super::{Map}; #[derive(Default, Serialize, Deserialize, Clone)] pub struct MasterDungeonMap { maps : HashMap<i32, Map> } impl MasterDungeonMap { pub fn new() -> MasterDungeonMap { MasterDungeonMap{ maps: HashMap::new() } } pub fn store_map(&mut self, map : &Map) { self.maps.insert(map.depth, map.clone()); } pub fn get_map(&self, depth : i32) -> Option<Map> { if self.maps.contains_key(&depth) { let mut result = self.maps[&depth].clone(); result.tile_content = vec![Vec::new(); (result.width * result.height) as usize]; Some(result) } else { None } } } }
This is pretty easy to follow: the structure itself has a single, private (no pub) field - maps. It's a HashMap - a dictionary - of Map structures, indexed by the map depth. We provide a constructor for easy creation of the class (new), and functions to store_map (save a map) and get_map (retrieve one as an Option, with None indicating that we don't have one). We also added the Serde decorations to make the structure serializable - so you can save the game. We also remake the tile_content field, because we don't serialize it.
In map/mod.rs, you need to add a line: pub mod dungeon;. This tells the module to expose the dungeon to the world.
Adding backwards exits
Let's add upwards staircases to the world. In map/tiletype.rs we add the new type:
#![allow(unused)] fn main() { #[derive(PartialEq, Eq, Hash, Copy, Clone, Serialize, Deserialize)] pub enum TileType { Wall, Floor, DownStairs, Road, Grass, ShallowWater, DeepWater, WoodFloor, Bridge, Gravel, UpStairs } }
Then in themes.rs, we add a couple of missing patterns to render it (in each theme):
#![allow(unused)] fn main() { TileType::UpStairs => { glyph = rltk::to_cp437('<'); fg = RGB::from_f32(0., 1.0, 1.0); } }
Storing New Maps As We Make Them
Currently, whenever the player enters a new level we call generate_world_map in main.rs to make a new one from scratch. Instead, we'd like to have the whole dungeon map as a global resource - and reference it when we make new maps, using the existing one if possible. It's also pretty messy having this in main.rs, so we'll take this opportunity to refactor it into our map system.
We can start by adding a a MasterDungeonMap resource to the ECS World. In your main function, at the top of the ecs.insert calls, add a line to insert a MasterDungeonMap into the World (I've included the line after it so you can see where it goes):
#![allow(unused)] fn main() { gs.ecs.insert(map::MasterDungeonMap::new()); gs.ecs.insert(Map::new(1, 64, 64, "New Map")); }
We want to reset the MasterDungeonMap whenever we start a new game, so we'll add the same line to game_over_cleanup:
#![allow(unused)] fn main() { fn game_over_cleanup(&mut self) { // Delete everything let mut to_delete = Vec::new(); for e in self.ecs.entities().join() { to_delete.push(e); } for del in to_delete.iter() { self.ecs.delete_entity(*del).expect("Deletion failed"); } // Spawn a new player { let player_entity = spawner::player(&mut self.ecs, 0, 0); let mut player_entity_writer = self.ecs.write_resource::<Entity>(); *player_entity_writer = player_entity; } // Replace the world maps self.ecs.insert(map::MasterDungeonMap::new()); // Build a new map and place the player self.generate_world_map(1, 0); } }
Now we'll simplify generate_world_map down to the basics:
#![allow(unused)] fn main() { fn generate_world_map(&mut self, new_depth : i32) { self.mapgen_index = 0; self.mapgen_timer = 0.0; self.mapgen_history.clear(); let map_building_info = map::level_transition(&mut self.ecs, new_depth); if let Some(history) = map_building_info { self.mapgen_history = history; } } }
This function resets the builder information (which is good, because it's taking care of its own responsibilities - but not others), and asks a new function map::level_transition if it has history information. If it does, it stores it as the map building history; otherwise, it leaves the history empty.
In map/dungeon.rs, we'll build the outer function it is calling (and remember to add it to the pub use section in map/mod.rs!):
#![allow(unused)] fn main() { pub fn level_transition(ecs : &mut World, new_depth: i32) -> Option<Vec<Map>> { // Obtain the master dungeon map let dungeon_master = ecs.read_resource::<MasterDungeonMap>(); // Do we already have a map? if dungeon_master.get_map(new_depth).is_some() { std::mem::drop(dungeon_master); transition_to_existing_map(ecs, new_depth); None } else { std::mem::drop(dungeon_master); Some(transition_to_new_map(ecs, new_depth)) } } }
This function obtains the master map from the ECS World, and calls get_map. If there is one, it calls transition_to_existing_map. If there isn't, it calls transition_to_new_map. Note the std::mem::drop calls: obtaining dungeon_master from the World holds a "borrow" to it; we need to stop borrowing (drop it) before we pass the ECS on to the other functions, to avoid multiple reference issues.
The new function transition_to_new_map is the code from the old generate_world_map function, modified to not rely on self. It has one new section at the end:
#![allow(unused)] fn main() { fn transition_to_new_map(ecs : &mut World, new_depth: i32) -> Vec<Map> { let mut rng = ecs.write_resource::<rltk::RandomNumberGenerator>(); let mut builder = level_builder(new_depth, &mut rng, 80, 50); builder.build_map(&mut rng); if new_depth > 1 { if let Some(pos) = &builder.build_data.starting_position { let up_idx = builder.build_data.map.xy_idx(pos.x, pos.y); builder.build_data.map.tiles[up_idx] = TileType::UpStairs; } } let mapgen_history = builder.build_data.history.clone(); let player_start; { let mut worldmap_resource = ecs.write_resource::<Map>(); *worldmap_resource = builder.build_data.map.clone(); player_start = builder.build_data.starting_position.as_mut().unwrap().clone(); } // Spawn bad guys std::mem::drop(rng); builder.spawn_entities(ecs); // Place the player and update resources let (player_x, player_y) = (player_start.x, player_start.y); let mut player_position = ecs.write_resource::<Point>(); *player_position = Point::new(player_x, player_y); let mut position_components = ecs.write_storage::<Position>(); let player_entity = ecs.fetch::<Entity>(); let player_pos_comp = position_components.get_mut(*player_entity); if let Some(player_pos_comp) = player_pos_comp { player_pos_comp.x = player_x; player_pos_comp.y = player_y; } // Mark the player's visibility as dirty let mut viewshed_components = ecs.write_storage::<Viewshed>(); let vs = viewshed_components.get_mut(*player_entity); if let Some(vs) = vs { vs.dirty = true; } // Store the newly minted map let mut dungeon_master = ecs.write_resource::<MasterDungeonMap>(); dungeon_master.store_map(&builder.build_data.map); mapgen_history } }
At the very end, it returns the building history. Before that, it obtains access to the new MasterDungeonMap system and adds the new map to the stored map list. We also add an "up" staircase to the starting position.
Retrieving maps we've visited before
Now we need to handle loading up a previous map! It's time to flesh out transition_to_existing_map:
#![allow(unused)] fn main() { fn transition_to_existing_map(ecs: &mut World, new_depth: i32) { let dungeon_master = ecs.read_resource::<MasterDungeonMap>(); let map = dungeon_master.get_map(new_depth).unwrap(); let mut worldmap_resource = ecs.write_resource::<Map>(); let player_entity = ecs.fetch::<Entity>(); // Find the down stairs and place the player let w = map.width; for (idx, tt) in map.tiles.iter().enumerate() { if *tt == TileType::DownStairs { let mut player_position = ecs.write_resource::<Point>(); *player_position = Point::new(idx as i32 % w, idx as i32 / w); let mut position_components = ecs.write_storage::<Position>(); let player_pos_comp = position_components.get_mut(*player_entity); if let Some(player_pos_comp) = player_pos_comp { player_pos_comp.x = idx as i32 % w; player_pos_comp.y = idx as i32 / w; } } } *worldmap_resource = map; // Mark the player's visibility as dirty let mut viewshed_components = ecs.write_storage::<Viewshed>(); let vs = viewshed_components.get_mut(*player_entity); if let Some(vs) = vs { vs.dirty = true; } } }
So this is quite simple: we get the map from the dungeon master list, and store it as the current map in the World. We scan the map for a down staircase, and put the player on it. We also mark the player's visibility as dirty, so it will be recalculated for the new map.
Input for previous level
Now we need to handle the actual transition. Since we handle going down a level with RunState::NextLevel, we'll add a state for going back up:
#![allow(unused)] fn main() { #[derive(PartialEq, Copy, Clone)] pub enum RunState { AwaitingInput, PreRun, PlayerTurn, MonsterTurn, ShowInventory, ShowDropItem, ShowTargeting { range : i32, item : Entity}, MainMenu { menu_selection : gui::MainMenuSelection }, SaveGame, NextLevel, PreviousLevel, ShowRemoveItem, GameOver, MagicMapReveal { row : i32 }, MapGeneration } }
We'll also need to handle it in our state matching function. We'll basically copy the "next level" option:
#![allow(unused)] fn main() { RunState::PreviousLevel => { self.goto_previous_level(); self.mapgen_next_state = Some(RunState::PreRun); newrunstate = RunState::MapGeneration; } }
We'll copy/paste goto_next_level() and goto_previous_level() and change some numbers around:
#![allow(unused)] fn main() { fn goto_previous_level(&mut self) { // Delete entities that aren't the player or his/her equipment let to_delete = self.entities_to_remove_on_level_change(); for target in to_delete { self.ecs.delete_entity(target).expect("Unable to delete entity"); } // Build a new map and place the player let current_depth; { let worldmap_resource = self.ecs.fetch::<Map>(); current_depth = worldmap_resource.depth; } self.generate_world_map(current_depth - 1); // Notify the player and give them some health let mut gamelog = self.ecs.fetch_mut::<gamelog::GameLog>(); gamelog.entries.push("You ascend to the previous level.".to_string()); } }
Next, in player.rs (where we handle input) - we need to handle receiving the "go up" instruction. Again, we'll basically copy "go down":
#![allow(unused)] fn main() { VirtualKeyCode::Comma => { if try_previous_level(&mut gs.ecs) { return RunState::PreviousLevel; } } }
This in turn requires that we copy try_next_level and make try_previous_level:
#![allow(unused)] fn main() { pub fn try_previous_level(ecs: &mut World) -> bool { let player_pos = ecs.fetch::<Point>(); let map = ecs.fetch::<Map>(); let player_idx = map.xy_idx(player_pos.x, player_pos.y); if map.tiles[player_idx] == TileType::UpStairs { true } else { let mut gamelog = ecs.fetch_mut::<GameLog>(); gamelog.entries.push("There is no way up from here.".to_string()); false } } }
If you cargo run now, you can transition between maps. When you go back, however - it's a ghost town. There's nobody else on the level. Spooky, and the loss of your Mom should upset you!
Entity freezing and unfreezing
If you think back to the first part of the tutorial, we spent some time making sure that we delete everything that isn't the player when we change level. It made sense: you'd never be coming back, so why waste memory on keeping them? Now that we're able to go back and forth, we need to keep track of where things are - so we can find them once again. We can also take this opportunity to clean up our transitions a bit - it's messy with all those functions!
Thinking about what we want to do, our objective is to store an entity's position on another level. So we need to store the level, as well as their x/y positions. Lets make a new component. In components.rs (and register in main.rs and saveload_system.rs):
#![allow(unused)] fn main() { #[derive(Component, Serialize, Deserialize, Clone)] pub struct OtherLevelPosition { pub x: i32, pub y: i32, pub depth: i32 } }
We can actually make a relatively simple function to adjust our entity state. In map/dungeon.rs, we'll make a new function:
#![allow(unused)] fn main() { pub fn freeze_level_entities(ecs: &mut World) { // Obtain ECS access let entities = ecs.entities(); let mut positions = ecs.write_storage::<Position>(); let mut other_level_positions = ecs.write_storage::<OtherLevelPosition>(); let player_entity = ecs.fetch::<Entity>(); let map_depth = ecs.fetch::<Map>().depth; // Find positions and make OtherLevelPosition let mut pos_to_delete : Vec<Entity> = Vec::new(); for (entity, pos) in (&entities, &positions).join() { if entity != *player_entity { other_level_positions.insert(entity, OtherLevelPosition{ x: pos.x, y: pos.y, depth: map_depth }).expect("Insert fail"); pos_to_delete.push(entity); } } // Remove positions for p in pos_to_delete.iter() { positions.remove(*p); } } }
This is another relatively simple function: we get access to various stores, and then iterate all entities that have a position. We check that it isn't the player (since they are handled differently); if they aren't - we add an OtherLevelPosition for them, and mark them in the pos_to_delete vector. Then we iterate the vector, and remove Position components from everyone whom we marked.
Restoring them to life (thawing) is quite easy, too:
#![allow(unused)] fn main() { pub fn thaw_level_entities(ecs: &mut World) { // Obtain ECS access let entities = ecs.entities(); let mut positions = ecs.write_storage::<Position>(); let mut other_level_positions = ecs.write_storage::<OtherLevelPosition>(); let player_entity = ecs.fetch::<Entity>(); let map_depth = ecs.fetch::<Map>().depth; // Find OtherLevelPosition let mut pos_to_delete : Vec<Entity> = Vec::new(); for (entity, pos) in (&entities, &other_level_positions).join() { if entity != *player_entity && pos.depth == map_depth { positions.insert(entity, Position{ x: pos.x, y: pos.y }).expect("Insert fail"); pos_to_delete.push(entity); } } // Remove positions for p in pos_to_delete.iter() { other_level_positions.remove(*p); } } }
This is basically the same function, but with the logic reversed! We add Position components, and delete OtherLevelPosition components.
In main.rs, we have a mess of goto_next_level and goto_previous_level functions. Lets replace them with one generic function that understands which way we are going:
#![allow(unused)] fn main() { fn goto_level(&mut self, offset: i32) { freeze_level_entities(&mut self.ecs); // Build a new map and place the player let current_depth = self.ecs.fetch::<Map>().depth; self.generate_world_map(current_depth + offset, offset); // Notify the player let mut gamelog = self.ecs.fetch_mut::<gamelog::GameLog>(); gamelog.entries.push("You change level.".to_string()); } }
This is a lot simpler - we call our new freeze_level_entities function, obtain the current depth, and call generate_world_map with the new depth. What's this? We're also passing the offset. We need to know which way you are going, otherwise you can complete whole levels by going back and then forward again - and being teleported to the "down" staircase! So we'll modify generate_world_map to take this parameter:
#![allow(unused)] fn main() { fn generate_world_map(&mut self, new_depth : i32, offset: i32) { self.mapgen_index = 0; self.mapgen_timer = 0.0; self.mapgen_history.clear(); let map_building_info = map::level_transition(&mut self.ecs, new_depth, offset); if let Some(history) = map_building_info { self.mapgen_history = history; } else { map::thaw_level_entities(&mut self.ecs); } } }
Notice that we're basically calling the same code, but also passing offset to level_transition (more on that in a second). We also call thaw if we didn't make a new map. That way, new maps get new entities - old maps get the old ones.
You'll need to fix various calls to generate_world_map. You can pass 0 as the offset if you are making a new level. You'll also want to fix the two match entries for changing level:
#![allow(unused)] fn main() { RunState::NextLevel => { self.goto_level(1); self.mapgen_next_state = Some(RunState::PreRun); newrunstate = RunState::MapGeneration; } RunState::PreviousLevel => { self.goto_level(-1); self.mapgen_next_state = Some(RunState::PreRun); newrunstate = RunState::MapGeneration; } }
Lastly, we need to open up dungeon.rs and make a simple change to the level transition system to handle taking an offset:
#![allow(unused)] fn main() { pub fn level_transition(ecs : &mut World, new_depth: i32, offset: i32) -> Option<Vec<Map>> { // Obtain the master dungeon map let dungeon_master = ecs.read_resource::<MasterDungeonMap>(); // Do we already have a map? if dungeon_master.get_map(new_depth).is_some() { std::mem::drop(dungeon_master); transition_to_existing_map(ecs, new_depth, offset); None } else { std::mem::drop(dungeon_master); Some(transition_to_new_map(ecs, new_depth)) } } }
The only difference here is that we pass the offset to transition_to_existing_map. Here's that updated function:
#![allow(unused)] fn main() { fn transition_to_existing_map(ecs: &mut World, new_depth: i32, offset: i32) { let dungeon_master = ecs.read_resource::<MasterDungeonMap>(); let map = dungeon_master.get_map(new_depth).unwrap(); let mut worldmap_resource = ecs.write_resource::<Map>(); let player_entity = ecs.fetch::<Entity>(); // Find the down stairs and place the player let w = map.width; let stair_type = if offset < 0 { TileType::DownStairs } else { TileType::UpStairs }; for (idx, tt) in map.tiles.iter().enumerate() { if *tt == stair_type { ... }
We updated the signature, and use it to determine where to place the player. If offset is less than 0, we want a down staircase - otherwise we want an up staircase.
You can cargo run now, and hop back and forth between levels to your heart's content - the entities on each level will be exactly where you left them!
Saving/Loading the game
Now we need to include the dungeon master map in our save game; otherwise, reloading will keep the current map and generate a whole bunch of new ones - with invalid entity placement! We'll need to extend our serialization system to save the entire dungeon map, rather than just the current one.
We'll start in components.rs; you may remember that we had to make a special SerializationHelper to help us save the map as part of the game. It looks like this:
#![allow(unused)] fn main() { #[derive(Component, Serialize, Deserialize, Clone)] pub struct SerializationHelper { pub map : super::map::Map } }
We'll need a second one, to store the MasterDungeonMap. It looks like this:
#![allow(unused)] fn main() { #[derive(Component, Serialize, Deserialize, Clone)] pub struct DMSerializationHelper { pub map : super::map::MasterDungeonMap } }
In main.rs, we have to register it like other components:
#![allow(unused)] fn main() { gs.ecs.register::<DMSerializationHelper>(); }
And in saveload.rs we need to include it in the big lists of component types. Also in saveload.rs, we need to do the same trick to add it to the ECS World, save it, and then remove it that we used before:
#![allow(unused)] fn main() { pub fn save_game(ecs : &mut World) { // Create helper let mapcopy = ecs.get_mut::<super::map::Map>().unwrap().clone(); let dungeon_master = ecs.get_mut::<super::map::MasterDungeonMap>().unwrap().clone(); let savehelper = ecs .create_entity() .with(SerializationHelper{ map : mapcopy }) .marked::<SimpleMarker<SerializeMe>>() .build(); let savehelper2 = ecs .create_entity() .with(DMSerializationHelper{ map : dungeon_master }) .marked::<SimpleMarker<SerializeMe>>() .build(); // Actually serialize { let data = ( ecs.entities(), ecs.read_storage::<SimpleMarker<SerializeMe>>() ); let writer = File::create("./savegame.json").unwrap(); let mut serializer = serde_json::Serializer::new(writer); serialize_individually!(ecs, serializer, data, Position, Renderable, Player, Viewshed, Monster, Name, BlocksTile, SufferDamage, WantsToMelee, Item, Consumable, Ranged, InflictsDamage, AreaOfEffect, Confusion, ProvidesHealing, InBackpack, WantsToPickupItem, WantsToUseItem, WantsToDropItem, SerializationHelper, Equippable, Equipped, MeleeWeapon, Wearable, WantsToRemoveItem, ParticleLifetime, HungerClock, ProvidesFood, MagicMapper, Hidden, EntryTrigger, EntityMoved, SingleActivation, BlocksVisibility, Door, Bystander, Vendor, Quips, Attributes, Skills, Pools, NaturalAttackDefense, LootTable, Carnivore, Herbivore, OtherLevelPosition, DMSerializationHelper ); } // Clean up ecs.delete_entity(savehelper).expect("Crash on cleanup"); ecs.delete_entity(savehelper2).expect("Crash on cleanup"); } }
Notice that we're making a second temporary entity - savehelper2. This ensures that the data is saved alongside all the other data. We remove it in the very last line. We also need to tweak our loader:
#![allow(unused)] fn main() { pub fn load_game(ecs: &mut World) { { // Delete everything let mut to_delete = Vec::new(); for e in ecs.entities().join() { to_delete.push(e); } for del in to_delete.iter() { ecs.delete_entity(*del).expect("Deletion failed"); } } let data = fs::read_to_string("./savegame.json").unwrap(); let mut de = serde_json::Deserializer::from_str(&data); { let mut d = (&mut ecs.entities(), &mut ecs.write_storage::<SimpleMarker<SerializeMe>>(), &mut ecs.write_resource::<SimpleMarkerAllocator<SerializeMe>>()); deserialize_individually!(ecs, de, d, Position, Renderable, Player, Viewshed, Monster, Name, BlocksTile, SufferDamage, WantsToMelee, Item, Consumable, Ranged, InflictsDamage, AreaOfEffect, Confusion, ProvidesHealing, InBackpack, WantsToPickupItem, WantsToUseItem, WantsToDropItem, SerializationHelper, Equippable, Equipped, MeleeWeapon, Wearable, WantsToRemoveItem, ParticleLifetime, HungerClock, ProvidesFood, MagicMapper, Hidden, EntryTrigger, EntityMoved, SingleActivation, BlocksVisibility, Door, Bystander, Vendor, Quips, Attributes, Skills, Pools, NaturalAttackDefense, LootTable, Carnivore, Herbivore, OtherLevelPosition, DMSerializationHelper ); } let mut deleteme : Option<Entity> = None; let mut deleteme2 : Option<Entity> = None; { let entities = ecs.entities(); let helper = ecs.read_storage::<SerializationHelper>(); let helper2 = ecs.read_storage::<DMSerializationHelper>(); let player = ecs.read_storage::<Player>(); let position = ecs.read_storage::<Position>(); for (e,h) in (&entities, &helper).join() { let mut worldmap = ecs.write_resource::<super::map::Map>(); *worldmap = h.map.clone(); worldmap.tile_content = vec![Vec::new(); (worldmap.height * worldmap.width) as usize]; deleteme = Some(e); } for (e,h) in (&entities, &helper2).join() { let mut dungeonmaster = ecs.write_resource::<super::map::MasterDungeonMap>(); *dungeonmaster = h.map.clone(); deleteme2 = Some(e); } for (e,_p,pos) in (&entities, &player, &position).join() { let mut ppos = ecs.write_resource::<rltk::Point>(); *ppos = rltk::Point::new(pos.x, pos.y); let mut player_resource = ecs.write_resource::<Entity>(); *player_resource = e; } } ecs.delete_entity(deleteme.unwrap()).expect("Unable to delete helper"); ecs.delete_entity(deleteme2.unwrap()).expect("Unable to delete helper"); } }
So in this one, we added iterating through for the MasterDungeonMap helper, and adding it to the World as a resource - and then deleting the entity. It's just the same as we did for the Map - but for the MasterDungeonMap.
If you cargo run now, you can transition levels, save the game, and then transition again. Serialization works!
More seamless transition
It's not very ergonomic to require that the player type keys that are only ever used once (for up/down stairs) when they encounter a stair-case. Not only that, but it's sometimes difficult with international keyboards to catch the right key-code! It would definitely be smoother if walking into a stair-case takes you to the stair's destination. At the same time, we could fix something that's been bugging me for a while: trying and failing to move costs a turn while you mindlessly plough into the wall!
Since player.rs is where we handle input, lets open it up. We're going to change try_move_player to return a RunState:
#![allow(unused)] fn main() { pub fn try_move_player(delta_x: i32, delta_y: i32, ecs: &mut World) -> RunState { let mut positions = ecs.write_storage::<Position>(); let players = ecs.read_storage::<Player>(); let mut viewsheds = ecs.write_storage::<Viewshed>(); let entities = ecs.entities(); let combat_stats = ecs.read_storage::<Attributes>(); let map = ecs.fetch::<Map>(); let mut wants_to_melee = ecs.write_storage::<WantsToMelee>(); let mut entity_moved = ecs.write_storage::<EntityMoved>(); let mut doors = ecs.write_storage::<Door>(); let mut blocks_visibility = ecs.write_storage::<BlocksVisibility>(); let mut blocks_movement = ecs.write_storage::<BlocksTile>(); let mut renderables = ecs.write_storage::<Renderable>(); let bystanders = ecs.read_storage::<Bystander>(); let vendors = ecs.read_storage::<Vendor>(); let mut result = RunState::AwaitingInput; let mut swap_entities : Vec<(Entity, i32, i32)> = Vec::new(); for (entity, _player, pos, viewshed) in (&entities, &players, &mut positions, &mut viewsheds).join() { if pos.x + delta_x < 1 || pos.x + delta_x > map.width-1 || pos.y + delta_y < 1 || pos.y + delta_y > map.height-1 { return RunState::AwaitingInput; } let destination_idx = map.xy_idx(pos.x + delta_x, pos.y + delta_y); for potential_target in map.tile_content[destination_idx].iter() { let bystander = bystanders.get(*potential_target); let vendor = vendors.get(*potential_target); if bystander.is_some() || vendor.is_some() { // Note that we want to move the bystander swap_entities.push((*potential_target, pos.x, pos.y)); // Move the player pos.x = min(map.width-1 , max(0, pos.x + delta_x)); pos.y = min(map.height-1, max(0, pos.y + delta_y)); entity_moved.insert(entity, EntityMoved{}).expect("Unable to insert marker"); viewshed.dirty = true; let mut ppos = ecs.write_resource::<Point>(); ppos.x = pos.x; ppos.y = pos.y; result = RunState::PlayerTurn; } else { let target = combat_stats.get(*potential_target); if let Some(_target) = target { wants_to_melee.insert(entity, WantsToMelee{ target: *potential_target }).expect("Add target failed"); return RunState::PlayerTurn; } } let door = doors.get_mut(*potential_target); if let Some(door) = door { door.open = true; blocks_visibility.remove(*potential_target); blocks_movement.remove(*potential_target); let glyph = renderables.get_mut(*potential_target).unwrap(); glyph.glyph = rltk::to_cp437('/'); viewshed.dirty = true; } } if !map.blocked[destination_idx] { pos.x = min(map.width-1 , max(0, pos.x + delta_x)); pos.y = min(map.height-1, max(0, pos.y + delta_y)); entity_moved.insert(entity, EntityMoved{}).expect("Unable to insert marker"); viewshed.dirty = true; let mut ppos = ecs.write_resource::<Point>(); ppos.x = pos.x; ppos.y = pos.y; result = RunState::PlayerTurn; } } for m in swap_entities.iter() { let their_pos = positions.get_mut(m.0); if let Some(their_pos) = their_pos { their_pos.x = m.1; their_pos.y = m.2; } } result } }
This is essentially the same function as before, but we ensure that we return a RunState from it. If the player did in fact move, we return RunState::PlayerTurn. If the move wasn't valid, we return RunState::AwaitingInput - to indicate that we're still waiting for valid instructions.
In the player keyboard handler, we need to replace every call to try_move_player... with return try_move_player...:
#![allow(unused)] fn main() { ... match ctx.key { None => { return RunState::AwaitingInput } // Nothing happened Some(key) => match key { VirtualKeyCode::Left | VirtualKeyCode::Numpad4 | VirtualKeyCode::H => return try_move_player(-1, 0, &mut gs.ecs), VirtualKeyCode::Right | VirtualKeyCode::Numpad6 | VirtualKeyCode::L => return try_move_player(1, 0, &mut gs.ecs), VirtualKeyCode::Up | VirtualKeyCode::Numpad8 | VirtualKeyCode::K => return try_move_player(0, -1, &mut gs.ecs), VirtualKeyCode::Down | VirtualKeyCode::Numpad2 | VirtualKeyCode::J => return try_move_player(0, 1, &mut gs.ecs), // Diagonals VirtualKeyCode::Numpad9 | VirtualKeyCode::U => return try_move_player(1, -1, &mut gs.ecs), VirtualKeyCode::Numpad7 | VirtualKeyCode::Y => return try_move_player(-1, -1, &mut gs.ecs), VirtualKeyCode::Numpad3 | VirtualKeyCode::N => return try_move_player(1, 1, &mut gs.ecs), VirtualKeyCode::Numpad1 | VirtualKeyCode::B => return try_move_player(-1, 1, &mut gs.ecs), // Skip Turn VirtualKeyCode::Numpad5 | VirtualKeyCode::Space => return skip_turn(&mut gs.ecs), ... }
If you were to cargo run now, you'd notice that you no longer waste turns walking into walls.
Now that we've done that, we're in a good place to modify try_move_player to be able to return level transition instructions if the player has entered a staircase. Let's add a staircase check after movement, and return stair transitions if they apply:
#![allow(unused)] fn main() { if !map.blocked[destination_idx] { pos.x = min(map.width-1 , max(0, pos.x + delta_x)); pos.y = min(map.height-1, max(0, pos.y + delta_y)); entity_moved.insert(entity, EntityMoved{}).expect("Unable to insert marker"); viewshed.dirty = true; let mut ppos = ecs.write_resource::<Point>(); ppos.x = pos.x; ppos.y = pos.y; result = RunState::PlayerTurn; match map.tiles[destination_idx] { TileType::DownStairs => result = RunState::NextLevel, TileType::UpStairs => result = RunState::PreviousLevel, _ => {} } } }
Now you can change levels simply by running onto the exit.
A Word on Stair dancing
One thing a lot of roguelikes run into is "stair dancing". You see a scary monster, and you retreat up the staircase. Heal up, pop down and hit the monster a bit. Pop back up, and heal up. Since the monster is "frozen" on a later level, it won't chase you up the stairs (except in games that handle this, such as Dungeon Crawl Stone Soup!). This is probably undesirable for the overall game, but we're not going to fix it yet. A future chapter is planned that will make NPC AI a lot smarter in general (and introduce more tactical options), so we'll save this problem for later.
Wrap Up
That was another large chapter, but we've achieved something really useful: levels are persistent, and you can traverse the world enjoying the knowledge that the sword you left in the woods will still be there when you return. This goes a long way towards making a more believable, expansive game (and it starts to feel more "open world", even if it isn't!). We'll be adding in town portals in a future chapter, when the town becomes a more useful place to visit.
Next - to ensure that you aren't bored! - we'll be adding in the next level, the limestone caverns.
...
The source code for this chapter may be found here
Run this chapter's example with web assembly, in your browser (WebGL2 required)
Copyright (C) 2019, Herbert Wolverson.
The Limestone Caverns
About this tutorial
This tutorial is free and open source, and all code uses the MIT license - so you are free to do with it as you like. My hope is that you will enjoy the tutorial, and make great games!
If you enjoy this and would like me to keep writing, please consider supporting my Patreon.
The design document talks about the first real dungeon level being a network of limestone caverns. Limestone caves are amazing in real life; Gaping Gill in Yorkshire was one of my favorite places to visit as a kid (you may have seen it in Monty Python and the Holy Grail - the vorpal rabbit emerges from its entrance!). A trickle of water, given centuries to do its work, can carve out amazing caverns. The caves are predominantly made up of light gray rock, which wears smooth and reflective - giving amazing lighting effects!
Cheating to help with levels
While working on new levels, it's helpful to have a quick and easy way to get there! So we're going to introduce cheat mode, to let you quickly navigate the dungeon to see your creations. This will be a lot like the other UI elements (such as inventory management) we've created, so the first thing we need is to open main.rs and add a new RunState for showing the cheats menu:
#![allow(unused)] fn main() { #[derive(PartialEq, Copy, Clone)] pub enum RunState { AwaitingInput, ... ShowCheatMenu } }
Then, add the following to your big match statement of game states:
#![allow(unused)] fn main() { RunState::ShowCheatMenu => { let result = gui::show_cheat_mode(self, ctx); match result { gui::CheatMenuResult::Cancel => newrunstate = RunState::AwaitingInput, gui::CheatMenuResult::NoResponse => {} gui::CheatMenuResult::TeleportToExit => { self.goto_level(1); self.mapgen_next_state = Some(RunState::PreRun); newrunstate = RunState::MapGeneration; } } } }
This asks show_cheat_mode for a response, and uses the "next level" code (same as if the player activates a staircase) to advance if the user selected Teleport. We haven't written that function and enumeration yet, so we open gui.rs and add it:
#![allow(unused)] fn main() { #[derive(PartialEq, Copy, Clone)] pub enum CheatMenuResult { NoResponse, Cancel, TeleportToExit } pub fn show_cheat_mode(_gs : &mut State, ctx : &mut Rltk) -> CheatMenuResult { let count = 2; let y = (25 - (count / 2)) as i32; ctx.draw_box(15, y-2, 31, (count+3) as i32, RGB::named(rltk::WHITE), RGB::named(rltk::BLACK)); ctx.print_color(18, y-2, RGB::named(rltk::YELLOW), RGB::named(rltk::BLACK), "Cheating!"); ctx.print_color(18, y+count as i32+1, RGB::named(rltk::YELLOW), RGB::named(rltk::BLACK), "ESCAPE to cancel"); ctx.set(17, y, RGB::named(rltk::WHITE), RGB::named(rltk::BLACK), rltk::to_cp437('(')); ctx.set(18, y, RGB::named(rltk::YELLOW), RGB::named(rltk::BLACK), rltk::to_cp437('T')); ctx.set(19, y, RGB::named(rltk::WHITE), RGB::named(rltk::BLACK), rltk::to_cp437(')')); ctx.print(21, y, "Teleport to exit"); match ctx.key { None => CheatMenuResult::NoResponse, Some(key) => { match key { VirtualKeyCode::T => CheatMenuResult::TeleportToExit, VirtualKeyCode::Escape => CheatMenuResult::Cancel, _ => CheatMenuResult::NoResponse } } } } }
This should look familiar: it displays a cheat menu and offers the letter T for "Teleport to Exit".
Lastly, we need to add one more input to player.rs:
#![allow(unused)] fn main() { // Save and Quit VirtualKeyCode::Escape => return RunState::SaveGame, // Cheating! VirtualKeyCode::Backslash => return RunState::ShowCheatMenu, }
And there you go! If you cargo run now, you can press \ (backslash), and T - and teleport right into the next level. This will make it a lot easier to design our level!
Carving out the caverns
We're going to do another custom design on the limestone caverns, so open up map_builders/mod.rs and find level_builder (it should be at the end of the file):
#![allow(unused)] fn main() { pub fn level_builder(new_depth: i32, rng: &mut rltk::RandomNumberGenerator, width: i32, height: i32) -> BuilderChain { rltk::console::log(format!("Depth: {}", new_depth)); match new_depth { 1 => town_builder(new_depth, rng, width, height), 2 => forest_builder(new_depth, rng, width, height), 3 => limestone_cavern_builder(new_depth, rng, width, height), _ => random_builder(new_depth, rng, width, height) } } }
Also add this to the top:
#![allow(unused)] fn main() { mod limestone_cavern; use limestone_cavern::limestone_cavern_builder; }
We've added limestone_cavern_builder - so lets go ahead and create it! Make a new file, map_builders/limestone_cavern.rs and add the following:
#![allow(unused)] fn main() { use super::{BuilderChain, DrunkardsWalkBuilder, XStart, YStart, AreaStartingPosition, CullUnreachable, VoronoiSpawning, MetaMapBuilder, BuilderMap, TileType, DistantExit}; use rltk::RandomNumberGenerator; use crate::map; pub fn limestone_cavern_builder(new_depth: i32, _rng: &mut rltk::RandomNumberGenerator, width: i32, height: i32) -> BuilderChain { let mut chain = BuilderChain::new(new_depth, width, height, "Limestone Caverns"); chain.start_with(DrunkardsWalkBuilder::winding_passages()); chain.with(AreaStartingPosition::new(XStart::CENTER, YStart::CENTER)); chain.with(CullUnreachable::new()); chain.with(AreaStartingPosition::new(XStart::LEFT, YStart::CENTER)); chain.with(VoronoiSpawning::new()); chain.with(DistantExit::new()); chain } }
This is quite simple: we're building the map with a Drunkard's Walk, in "winding passages" mode. Then we set the start to the center, and cull unreachable areas. Next, we place the entrance on the left center, spawn with the Voronoi algorithm, and place the exit at a distant location.
This gets you a playable map! The monster choices aren't so good, but it works. This is a good example of the flexible map building system we've been using.
Theming the caverns
The cavern layout is a good start, but it doesn't look like a limestone cavern yet. Open up map/themes.rs and we'll rectify that! We'll start by modifying get_tile_glyph to know about this level:
#![allow(unused)] fn main() { pub fn tile_glyph(idx: usize, map : &Map) -> (rltk::FontCharType, RGB, RGB) { let (glyph, mut fg, mut bg) = match map.depth { 3 => get_limestone_cavern_glyph(idx, map), 2 => get_forest_glyph(idx, map), _ => get_tile_glyph_default(idx, map) }; }
Now we need to write get_limestone_cavern_glyph. We want it to look like a limestone cavern. Here's what I came up with (maybe the more artistically inclined can help!):
#![allow(unused)] fn main() { fn get_limestone_cavern_glyph(idx:usize, map: &Map) -> (rltk::FontCharType, RGB, RGB) { let glyph; let fg; let bg = RGB::from_f32(0., 0., 0.); match map.tiles[idx] { TileType::Wall => { glyph = rltk::to_cp437('▒'); fg = RGB::from_f32(0.7, 0.7, 0.7); } TileType::Bridge => { glyph = rltk::to_cp437('.'); fg = RGB::named(rltk::CHOCOLATE); } TileType::Road => { glyph = rltk::to_cp437('≡'); fg = RGB::named(rltk::YELLOW); } TileType::Grass => { glyph = rltk::to_cp437('"'); fg = RGB::named(rltk::GREEN); } TileType::ShallowWater => { glyph = rltk::to_cp437('░'); fg = RGB::named(rltk::CYAN); } TileType::DeepWater => { glyph = rltk::to_cp437('▓'); fg = RGB::named(rltk::BLUE); } TileType::Gravel => { glyph = rltk::to_cp437(';'); fg = RGB::from_f32(0.5, 0.5, 0.5); } TileType::DownStairs => { glyph = rltk::to_cp437('>'); fg = RGB::from_f32(0., 1.0, 1.0); } TileType::UpStairs => { glyph = rltk::to_cp437('<'); fg = RGB::from_f32(0., 1.0, 1.0); } _ => { glyph = rltk::to_cp437('░'); fg = RGB::from_f32(0.4, 0.4, 0.4); } } (glyph, fg, bg) } }
Not a bad start! The environment looks quite cave like (and not hewn stone), and the colors are a nice neutral lighter grey but not blindingly bright. It makes the other entities stand out nicely:

Just add water and gravel
We can further improve the map by adding some water (it's unusual for a cave network like this to not have some), and turn some of the floor tiles into gravel - to show boulders on the map. We could also add in some stalactites and stalagmites (giant rock pillars that form from dripping water slowly depositing calcium over the centuries) for flavor. So we'll first add a new layer to the builder (as the last step):
#![allow(unused)] fn main() { chain.with(CaveDecorator::new()); }
Then we need to write it:
#![allow(unused)] fn main() { pub struct CaveDecorator {} impl MetaMapBuilder for CaveDecorator { fn build_map(&mut self, rng: &mut rltk::RandomNumberGenerator, build_data : &mut BuilderMap) { self.build(rng, build_data); } } impl CaveDecorator { #[allow(dead_code)] pub fn new() -> Box<CaveDecorator> { Box::new(CaveDecorator{}) } fn build(&mut self, rng : &mut RandomNumberGenerator, build_data : &mut BuilderMap) { let old_map = build_data.map.clone(); for (idx,tt) in build_data.map.tiles.iter_mut().enumerate() { // Gravel Spawning if *tt == TileType::Floor && rng.roll_dice(1, 6)==1 { *tt = TileType::Gravel; } else if *tt == TileType::Floor && rng.roll_dice(1, 10)==1 { // Spawn passable pools *tt = TileType::ShallowWater; } else if *tt == TileType::Wall { // Spawn deep pools and stalactites let mut neighbors = 0; let x = idx as i32 % old_map.width; let y = idx as i32 / old_map.width; if x > 0 && old_map.tiles[idx-1] == TileType::Wall { neighbors += 1; } if x < old_map.width - 2 && old_map.tiles[idx+1] == TileType::Wall { neighbors += 1; } if y > 0 && old_map.tiles[idx-old_map.width as usize] == TileType::Wall { neighbors += 1; } if y < old_map.height - 2 && old_map.tiles[idx+old_map.width as usize] == TileType::Wall { neighbors += 1; } if neighbors == 2 { *tt = TileType::DeepWater; } else if neighbors == 1 { let roll = rng.roll_dice(1, 4); match roll { 1 => *tt = TileType::Stalactite, 2 => *tt = TileType::Stalagmite, _ => {} } } } } build_data.take_snapshot(); } } }
This works as follows:
- We iterate through all the tile types and map indices of the map. It's a mutable iterator - we want to be able to change the tiles.
- If a tile is a
Floor, we have a 1 in 6 chance of turning it into gravel. - If we didn't do that, we have a 1 in 10 chance of turning it into a shallow pool (still passable).
- If its a wall, we count how many other walls surround it.
- If there's 2 neighbors, we replace the tile with
DeepWater- nice dark water, not passable by the player. - If there is 1 neighbor, we roll a 4 sided dice. On a 1, we turn it into a stalactite; on a 2, we turn it into a stalagmite. Otherwise, we don't do anything.
This does require that we open map/tiletype.rs and introduce the new tile types:
#![allow(unused)] fn main() { #[derive(PartialEq, Eq, Hash, Copy, Clone, Serialize, Deserialize)] pub enum TileType { Wall, Stalactite, Stalagmite, Floor, DownStairs, Road, Grass, ShallowWater, DeepWater, WoodFloor, Bridge, Gravel, UpStairs } }
We make the new tile types block visibility:
#![allow(unused)] fn main() { pub fn tile_opaque(tt : TileType) -> bool { match tt { TileType::Wall | TileType::Stalactite | TileType::Stalagmite => true, _ => false } } }
And we add them to both the new limestone theme and the default theme in map/themes.rs:
#![allow(unused)] fn main() { TileType::Stalactite => { glyph = rltk::to_cp437('╨'); fg = RGB::from_f32(0.5, 0.5, 0.5); } TileType::Stalagmite => { glyph = rltk::to_cp437('╥'); fg = RGB::from_f32(0.5, 0.5, 0.5); } }
This gives a pretty pleasing looking, quite natural (and damp) cave:

Populating the caverns
The caverns are pretty playable as-is, but they don't really match what we've described in terms of NPCs. There are a few forest monsters and deer in the cave, which doesn't make a lot of sense! Let's start by opening spawns.rs and changing the depths on which some creatures appear to avoid this:
"spawn_table" : [
{ "name" : "Goblin", "weight" : 10, "min_depth" : 3, "max_depth" : 100 },
{ "name" : "Orc", "weight" : 1, "min_depth" : 3, "max_depth" : 100, "add_map_depth_to_weight" : true },
{ "name" : "Health Potion", "weight" : 7, "min_depth" : 0, "max_depth" : 100 },
{ "name" : "Fireball Scroll", "weight" : 2, "min_depth" : 0, "max_depth" : 100, "add_map_depth_to_weight" : true },
{ "name" : "Confusion Scroll", "weight" : 2, "min_depth" : 0, "max_depth" : 100, "add_map_depth_to_weight" : true },
{ "name" : "Magic Missile Scroll", "weight" : 4, "min_depth" : 0, "max_depth" : 100 },
{ "name" : "Dagger", "weight" : 3, "min_depth" : 0, "max_depth" : 100 },
{ "name" : "Shield", "weight" : 3, "min_depth" : 0, "max_depth" : 100 },
{ "name" : "Longsword", "weight" : 1, "min_depth" : 3, "max_depth" : 100 },
{ "name" : "Tower Shield", "weight" : 1, "min_depth" : 3, "max_depth" : 100 },
{ "name" : "Rations", "weight" : 10, "min_depth" : 0, "max_depth" : 100 },
{ "name" : "Magic Mapping Scroll", "weight" : 2, "min_depth" : 0, "max_depth" : 100 },
{ "name" : "Bear Trap", "weight" : 5, "min_depth" : 0, "max_depth" : 100 },
{ "name" : "Battleaxe", "weight" : 1, "min_depth" : 2, "max_depth" : 100 },
{ "name" : "Kobold", "weight" : 15, "min_depth" : 3, "max_depth" : 5 },
{ "name" : "Rat", "weight" : 15, "min_depth" : 2, "max_depth" : 2 },
{ "name" : "Mangy Wolf", "weight" : 13, "min_depth" : 2, "max_depth" : 2 },
{ "name" : "Deer", "weight" : 14, "min_depth" : 2, "max_depth" : 2 },
{ "name" : "Bandit", "weight" : 9, "min_depth" : 2, "max_depth" : 3 }
],
We've left bandits in the cave, because they may seek shelter there - but no more wolves, deer or rodents of unusual size (we're probably sick of them by now, anyway!). What else would you find in a cave? The d20 system encounter tables suggest a few:
Dire rats, fire beetles, human skeletons, giant centipedes, spider swarms, human zombies, chokers, skeletal champions, goblins, ghouls, giant spiders, cockatrice, gelatinous cube, rust monster, shadow, wight, stirges, darkmantles, troglodytes, bugbears, vargoilles,
gray oozes, mimcs and ogres (oh my)
That's quite the list! Thinking about this layer of the dungeon, a few of these make sense: Spiders will definitely like a nice dark area. "Stirges" are basically evil bats, so we should add bats. We have goblins and kobolds as well as the occasional orc. We already decided that we're sick of rats for now! I'm a big fan of gelatinous cubes, so I'd love to put them in, too! Many of the others are best left for a later level due to difficulty.
So let's add them to the spawn table:
{ "name" : "Bat", "weight" : 15, "min_depth" : 3, "max_depth" : 3 },
{ "name" : "Large Spider", "weight" : 3, "min_depth" : 3, "max_depth" : 3 },
{ "name" : "Gelatinous Cube", "weight" : 3, "min_depth" : 3, "max_depth" : 3 }
We're making bats really common, large spiders and gelatinous cubes really rare. Lets go ahead and add them into the mobs section of spawns.json:
{
"name" : "Bat",
"renderable": {
"glyph" : "b",
"fg" : "#995555",
"bg" : "#000000",
"order" : 1
},
"blocks_tile" : true,
"vision_range" : 6,
"ai" : "herbivore",
"attributes" : {
"Might" : 3,
"Fitness" : 3
},
"skills" : {
"Melee" : -1,
"Defense" : -1
},
"natural" : {
"armor_class" : 11,
"attacks" : [
{ "name" : "bite", "hit_bonus" : 0, "damage" : "1d4" }
]
}
},
{
"name" : "Large Spider",
"level" : 2,
"attributes" : {},
"renderable": {
"glyph" : "s",
"fg" : "#FF0000",
"bg" : "#000000",
"order" : 1
},
"blocks_tile" : true,
"vision_range" : 6,
"ai" : "carnivore",
"natural" : {
"armor_class" : 12,
"attacks" : [
{ "name" : "bite", "hit_bonus" : 1, "damage" : "1d12" }
]
}
},
{
"name" : "Gelatinous Cube",
"level" : 2,
"attributes" : {},
"renderable": {
"glyph" : "▄",
"fg" : "#FF0000",
"bg" : "#000000",
"order" : 1
},
"blocks_tile" : true,
"vision_range" : 4,
"ai" : "carnivore",
"natural" : {
"armor_class" : 12,
"attacks" : [
{ "name" : "engulf", "hit_bonus" : 0, "damage" : "1d8" }
]
}
}
So bats are harmless herbivores who largely run away from you. Spiders and cubes will hunt others down and eat them. We've also made them level 2 - so they are worth more experience, and will be harder to kill. It's likely that the player is ready for this challenge. So we can cargo run and give it a go!
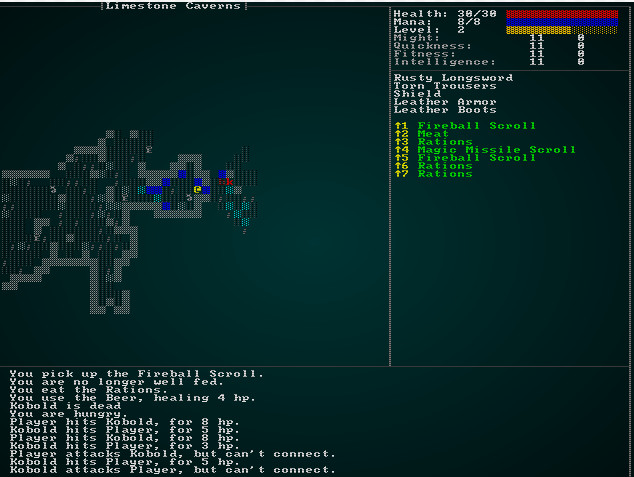
Not too bad! It's playable, the right monsters appear, and overall not a bad experience at all.
Lighting!
One of the things that makes limestone caverns so amazing is the lighting; you peer through the marble with the light from your helmet torch, casting shadows and giving everything an eerie look. We can add cosmetic lighting to the game without too much difficulty (it might make its way into a stealth system at some point!)
Let's start by making a new component, LightSource. In components.rs:
#![allow(unused)] fn main() { #[derive(Component, Serialize, Deserialize, Clone)] pub struct LightSource { pub color : RGB, pub range: i32 } }
As always, register your new component in main.rs and saveload_system.rs! The light source defines two values: color (the color of the light) and range - which will govern its intensity/fall-off. We also need to add light information to the map. In map/mod.rs:
#![allow(unused)] fn main() { #[derive(Default, Serialize, Deserialize, Clone)] pub struct Map { pub tiles : Vec<TileType>, pub width : i32, pub height : i32, pub revealed_tiles : Vec<bool>, pub visible_tiles : Vec<bool>, pub blocked : Vec<bool>, pub depth : i32, pub bloodstains : HashSet<usize>, pub view_blocked : HashSet<usize>, pub name : String, pub outdoors : bool, pub light : Vec<rltk::RGB>, #[serde(skip_serializing)] #[serde(skip_deserializing)] pub tile_content : Vec<Vec<Entity>> } }
There are two new values here: outdoors, which indicates "there's natural light, don't apply lighting", and light - which is a vector of RGB colors indicating the light levels on each tile. You'll also need to update the new constructor to include these:
#![allow(unused)] fn main() { pub fn new<S : ToString>(new_depth : i32, width: i32, height: i32, name: S) -> Map { let map_tile_count = (width*height) as usize; Map{ tiles : vec![TileType::Wall; map_tile_count], width, height, revealed_tiles : vec![false; map_tile_count], visible_tiles : vec![false; map_tile_count], blocked : vec![false; map_tile_count], tile_content : vec![Vec::new(); map_tile_count], depth: new_depth, bloodstains: HashSet::new(), view_blocked : HashSet::new(), name : name.to_string(), outdoors : true, light: vec![rltk::RGB::from_f32(0.0, 0.0, 0.0); map_tile_count] } } }
Notice that we're making outdoors the default mode - so lighting won't suddenly apply to all maps (potentially messing up what we've already done; it'd be hard to explain why you woke up in the morning and the sky is dark - well, that might be a story hook for another game!). We also initialize the lighting to all black, one color per tile.
Now, we'll adjust map/themes.rs to handle lighting. We're deliberately not darkening entities (so you can still spot them), just the map tiles:
#![allow(unused)] fn main() { pub fn tile_glyph(idx: usize, map : &Map) -> (rltk::FontCharType, RGB, RGB) { let (glyph, mut fg, mut bg) = match map.depth { 3 => get_limestone_cavern_glyph(idx, map), 2 => get_forest_glyph(idx, map), _ => get_tile_glyph_default(idx, map) }; if map.bloodstains.contains(&idx) { bg = RGB::from_f32(0.75, 0., 0.); } if !map.visible_tiles[idx] { fg = fg.to_greyscale(); bg = RGB::from_f32(0., 0., 0.); // Don't show stains out of visual range } else if !map.outdoors { fg = fg * map.light[idx]; bg = bg * map.light[idx]; } (glyph, fg, bg) } }
This is quite simple: if we can't see the tile, we'll still use greyscales. If we can see the tile, and outdoors is false - then we'll multiply the colors by the light intensity.
Next, let's give the player a light source. For now, we'll always give him/her/it a slightly yellow torch. In spawner.rs add this to the list of components built for the player:
#![allow(unused)] fn main() { .with(LightSource{ color: rltk::RGB::from_f32(1.0, 1.0, 0.5), range: 8 }) }
We'll also update our map_builders/limestone_caverns.rs to use lighting in the caves. At the very end of the custom builder, change take_snapshot to:
#![allow(unused)] fn main() { build_data.take_snapshot(); build_data.map.outdoors = false; }
Lastly, we need a system to actually calculate the lighting. Make a new file, lighting_system.rs:
#![allow(unused)] fn main() { use specs::prelude::*; use super::{Viewshed, Position, Map, LightSource}; use rltk::RGB; pub struct LightingSystem {} impl<'a> System<'a> for LightingSystem { #[allow(clippy::type_complexity)] type SystemData = ( WriteExpect<'a, Map>, ReadStorage<'a, Viewshed>, ReadStorage<'a, Position>, ReadStorage<'a, LightSource>); fn run(&mut self, data : Self::SystemData) { let (mut map, viewshed, positions, lighting) = data; if map.outdoors { return; } let black = RGB::from_f32(0.0, 0.0, 0.0); for l in map.light.iter_mut() { *l = black; } for (viewshed, pos, light) in (&viewshed, &positions, &lighting).join() { let light_point = rltk::Point::new(pos.x, pos.y); let range_f = light.range as f32; for t in viewshed.visible_tiles.iter() { if t.x > 0 && t.x < map.width && t.y > 0 && t.y < map.height { let idx = map.xy_idx(t.x, t.y); let distance = rltk::DistanceAlg::Pythagoras.distance2d(light_point, *t); let intensity = (range_f - distance) / range_f; map.light[idx] = map.light[idx] + (light.color * intensity); } } } } } }
This is a really simple system! If the map is outdoors, it simply returns. Otherwise:
- It sets the entire map lighting to be dark.
- It iterates all entities that have a position, viewshed and light source.
- For each of these entities, it iterates all visible tiles.
- It calculates the distance to the light source for the visible tile, and inverts it - so further from the light source is darker. This is then divided by the light's range, to scale it into the 0..1 range.
- This lighting amount if added to the tile's lighting.
Finally, we add the system to main.rs's run_systems function (as the last system to run):
#![allow(unused)] fn main() { let mut lighting = lighting_system::LightingSystem{}; lighting.run_now(&self.ecs); }
If you cargo run now, you have a functional lighting system!
All that remains is to let NPCs have light, too. In raws/mob_structs.rs, add a new class:
#![allow(unused)] fn main() { #[derive(Deserialize, Debug)] pub struct MobLight { pub range : i32, pub color : String } }
And add it into the main mob structure:
#![allow(unused)] fn main() { #[derive(Deserialize, Debug)] pub struct Mob { pub name : String, pub renderable : Option<Renderable>, pub blocks_tile : bool, pub vision_range : i32, pub ai : String, pub quips : Option<Vec<String>>, pub attributes : MobAttributes, pub skills : Option<HashMap<String, i32>>, pub level : Option<i32>, pub hp : Option<i32>, pub mana : Option<i32>, pub equipped : Option<Vec<String>>, pub natural : Option<MobNatural>, pub loot_table : Option<String>, pub light : Option<MobLight> } }
Now we can modify spawn_named_mob in raws/rawmaster.rs to support it:
#![allow(unused)] fn main() { if let Some(light) = &mob_template.light { eb = eb.with(LightSource{ range: light.range, color : rltk::RGB::from_hex(&light.color).expect("Bad color") }); } }
Let's modify the gelatinous cube to glow. In spawns.json:
{
"name" : "Gelatinous Cube",
"level" : 2,
"attributes" : {},
"renderable": {
"glyph" : "▄",
"fg" : "#FF0000",
"bg" : "#000000",
"order" : 1
},
"blocks_tile" : true,
"vision_range" : 4,
"ai" : "carnivore",
"natural" : {
"armor_class" : 12,
"attacks" : [
{ "name" : "engulf", "hit_bonus" : 0, "damage" : "1d8" }
]
},
"light" : {
"range" : 4,
"color" : "#550000"
}
}
We'll also give bandits a torch:
{
"name" : "Bandit",
"renderable": {
"glyph" : "☻",
"fg" : "#FF0000",
"bg" : "#000000",
"order" : 1
},
"blocks_tile" : true,
"vision_range" : 6,
"ai" : "melee",
"quips" : [ "Stand and deliver!", "Alright, hand it over" ],
"attributes" : {},
"equipped" : [ "Dagger", "Shield", "Leather Armor", "Leather Boots" ],
"light" : {
"range" : 6,
"color" : "#FFFF55"
}
},
Now, when you cargo run and roam the caverns - you will see light emitted from these entities. Here's a bandit with a torch:

Wrap Up
In this chapter, we've added a whole new level and theme - and lit the caverns! Not bad progress. The game is really starting to come together.
...
The source code for this chapter may be found here
Run this chapter's example with web assembly, in your browser (WebGL2 required)
Copyright (C) 2019, Herbert Wolverson.
AI Cleanup and Status Effects
About this tutorial
This tutorial is free and open source, and all code uses the MIT license - so you are free to do with it as you like. My hope is that you will enjoy the tutorial, and make great games!
If you enjoy this and would like me to keep writing, please consider supporting my Patreon.
In the design document, we indicated that we'd like the AI to be smarter than the average rock. We've also added quite a few AI-related systems as we've worked through the chapters and (you may have noticed) some things like consistently applying confusion effects (and occasional problems hitting a mob that just moved) have slipped through the cracks!
As we add complexity to our monsters, it would be good to get all of this straightened out, make it easier to support new features, and handle commonalities like movement consistently.
Chained Systems
Rather than try and do everything for an NPC in one system, we could break the process out into several steps. This is more typing, but has the advantage that each step is distinct, clear and does just one thing - making it much easier to debug. This is analogous to how we are handling WantsToMelee - we're indicating an intent and then handling it in its own step - which let us keep targeting and actually fighting separated.
Let's look at the steps, and see how they can be broken down:
- We determine that it is the NPC's turn.
- We check status effects - such as Confusion to determine if they can in fact go.
- The AI module for that AI type scans their surroundings, and determines if they want to move, attack or do nothing.
- Movement occurs, which updates various global statuses.
- Combat occurs, which can kill mobs or render them unable to act in the future.
Modularizing the AI
We already have quite a few AI systems, and this is just going to add more. So let's move AI into a module. Create a new folder, src/ai - this will be the new AI module. Create a mod.rs file, and put the following into it:
#![allow(unused)] fn main() { mod animal_ai_system; mod bystander_ai_system; mod monster_ai_system; pub use animal_ai_system::AnimalAI; pub use bystander_ai_system::BystanderAI; pub use monster_ai_system::MonsterAI; }
This tells it to use the other AI modules and share them all in the ai namespace. Now move animal_ai_system, bystander_ai_system and monster_ai_system from your src directory into src\ai. In the preamble to main.rs (where you have all the mod and use statements), remove the mod and use statements for these systems. Replace them with a single mod ai; line. Finally, you can cleanup run_systems to reference these systems via the ai namespace:
#![allow(unused)] fn main() { impl State { fn run_systems(&mut self) { let mut mapindex = MapIndexingSystem{}; mapindex.run_now(&self.ecs); let mut vis = VisibilitySystem{}; vis.run_now(&self.ecs); let mut mob = ai::MonsterAI{}; mob.run_now(&self.ecs); let mut animal = ai::AnimalAI{}; animal.run_now(&self.ecs); let mut bystander = ai::BystanderAI{}; bystander.run_now(&self.ecs); ... }
In your ai/X_system files you have lines that read use super::{...}. Replace the super with crate, to indicate that you want to use the components (and other types) from the parent crate.
If you cargo run now, you have exactly the same game as before - your refactor worked!
Determining Whose Turn It Is - Initiative/Energy Cost
So far, we've handles our turns in a strict but inflexible manner: the player goes, and then all the NPCs go. Back and forth, forever. This works pretty well, but it doesn't allow for much variety: you can't have something make an entity faster than the others, all actions take the same amount of time, and it would make things like haste and slow spells impossible to implement.
Many roguelike games use a variant of initiative or initiative cost to determine whose turn it is, so we'll go with something similar. We don't want to be too random, so you don't suddenly see things speed up and slow down, but we also want to be more flexible. We also want it to be a little random, so that all the NPCs don't act at the same time by default - giving basically what we have already. It would also be good to slow down wearers of heavy armor/weapons, and have users of light equipment go faster (dagger users can strike more frequently than claymore users!).
In components.rs (and registered in main.rs and saveload_system.rs), lets make a new Initiative component:
#![allow(unused)] fn main() { #[derive(Component, Debug, Serialize, Deserialize, Clone)] pub struct Initiative { pub current : i32 } }
We want the player to start with an initiative score (we'll go with 0, so they always start first). In spawners.rs, we simply add it to the player function as another component for the player:
#![allow(unused)] fn main() { .with(Initiative{current: 0}) }
We also want all NPCs to start with an initiative score. So in raws/rawmaster.rs, we add it to the spawn_named_mob function as another always-present component. We'll give mobs a starting initiative of 2 - so on the first turn they will all process just after the player (we'll worry about subsequent turns later).
#![allow(unused)] fn main() { // Initiative of 2 eb = eb.with(Initiative{current: 2}); }
That adds the component, but currently it doesn't do anything at all. We're going to start by making another new component in components.rs (and registering it in main.rs and saveload_system.rs), called MyTurn:
#![allow(unused)] fn main() { #[derive(Component, Debug, Serialize, Deserialize, Clone)] pub struct MyTurn {} }
The idea behind MyTurn components is that if you have the component, then it is your turn to act - and you should be included in AI/turn control (if the player has MyTurn then we wait for input). If you don't have it, then you don't get to act. We can also use it as a filter: so things like status effects can check to see if it is your turn and you are affected by a status, and they might determine that you have to skip your turn.
Now we should make a new - simple - system for handling initiative rolls. Make a new file, ai/initiative_system.rs:
#![allow(unused)] fn main() { use specs::prelude::*; use crate::{Initiative, Position, MyTurn, Attributes, RunState}; pub struct InitiativeSystem {} impl<'a> System<'a> for InitiativeSystem { #[allow(clippy::type_complexity)] type SystemData = ( WriteStorage<'a, Initiative>, ReadStorage<'a, Position>, WriteStorage<'a, MyTurn>, Entities<'a>, WriteExpect<'a, rltk::RandomNumberGenerator>, ReadStorage<'a, Attributes>, WriteExpect<'a, RunState>, ReadExpect<'a, Entity>); fn run(&mut self, data : Self::SystemData) { let (mut initiatives, positions, mut turns, entities, mut rng, attributes, mut runstate, player) = data; if *runstate != RunState::Ticking { return; } // We'll be adding Ticking in a moment; use MonsterTurn if you want to test in the meantime // Clear any remaining MyTurn we left by mistkae turns.clear(); // Roll initiative for (entity, initiative, _pos) in (&entities, &mut initiatives, &positions).join() { initiative.current -= 1; if initiative.current < 1 { // It's my turn! turns.insert(entity, MyTurn{}).expect("Unable to insert turn"); // Re-roll initiative.current = 6 + rng.roll_dice(1, 6); // Give a bonus for quickness if let Some(attr) = attributes.get(entity) { initiative.current -= attr.quickness.bonus; } // TODO: More initiative granting boosts/penalties will go here later // If its the player, we want to go to an AwaitingInput state if entity == *player { *runstate = RunState::AwaitingInput; } } } } } }
This is pretty simple:
- We first clear out any remaining
MyTurncomponents, in case we forgot to delete one (so entities don't zoom around). - We iterate all entities that have an
Initiativecomponent (indicating they can go at all) and aPositioncomponent (which we don't use, but indicates they are on the current map layer and can act). - We subtract one from the entity's current initiative.
- If the current initiative is 0 (or less, in case we messed up!), we apply a
MyTurncomponent to them. Then we re-roll their current initiative; we're going with6 + 1d6 + Quickness Bonusfor now. Notice how we've left a comment indicating that we're going to make this more complicated later! - If it is now the player's turn, we change the global
RunStatetoAwaitingInput- it's time to process the player's instructions.
We're also checking if it is the monster's turn; we'll actually be changing that - but I didn't want the system spinning rolling initiative over and over again if we test it!
Now we need to go into mod.rs and add mod initiative_system.rs; pub use initiative_system::InitiativeSystem; pair of lines to expose it to the rest of the program. Then we open up main.rs and add it to run_systems:
#![allow(unused)] fn main() { impl State { fn run_systems(&mut self) { let mut mapindex = MapIndexingSystem{}; mapindex.run_now(&self.ecs); let mut vis = VisibilitySystem{}; vis.run_now(&self.ecs); let mut initiative = ai::InitiativeSystem{}; initiative.run_now(&self.ecs); ... }
We've added it before the various AI functions run, but after we obtain a map index and visibility - so they have up-to-date data to work with.
Adjusting the game loop to use initiative
Open up main.rs and we'll edit RunState to get rid of the PlayerTurn and MonsterTurn entries - replacing them instead with Ticking. This is going to break a lot of code - but that's ok, we're actually simplifying AND gaining functionality, which is a win by most standards! Here's the new RunState:
#![allow(unused)] fn main() { #[derive(PartialEq, Copy, Clone)] pub enum RunState { AwaitingInput, PreRun, Ticking, ShowInventory, ShowDropItem, ShowTargeting { range : i32, item : Entity}, MainMenu { menu_selection : gui::MainMenuSelection }, SaveGame, NextLevel, PreviousLevel, ShowRemoveItem, GameOver, MagicMapReveal { row : i32 }, MapGeneration, ShowCheatMenu } }
In our main loop's match function, we can delete the MonsterTurn entry completely and adjust PlayerTurn to be a more generic Ticking state:
#![allow(unused)] fn main() { RunState::Ticking => { self.run_systems(); self.ecs.maintain(); match *self.ecs.fetch::<RunState>() { RunState::AwaitingInput => newrunstate = RunState::AwaitingInput, RunState::MagicMapReveal{ .. } => newrunstate = RunState::MagicMapReveal{ row: 0 }, _ => newrunstate = RunState::Ticking } } }
You'll also want to search main.rs for PlayerTurn and MonsterTurn; a lot of states return to one of these when they are done. They now want to return to Ticking.
Likewise, in player.rs there's a lot of places we return RunState::PlayerTurn - you'll want to change all of these to Ticking.
We'll modify the hunger clock to only tick on your turn. This actually becomes more simple; we simply join on MyTurn and can remove the entire "proceed" system:
#![allow(unused)] fn main() { use specs::prelude::*; use super::{HungerClock, RunState, HungerState, SufferDamage, gamelog::GameLog, MyTurn}; pub struct HungerSystem {} impl<'a> System<'a> for HungerSystem { #[allow(clippy::type_complexity)] type SystemData = ( Entities<'a>, WriteStorage<'a, HungerClock>, ReadExpect<'a, Entity>, // The player ReadExpect<'a, RunState>, WriteStorage<'a, SufferDamage>, WriteExpect<'a, GameLog>, ReadStorage<'a, MyTurn> ); fn run(&mut self, data : Self::SystemData) { let (entities, mut hunger_clock, player_entity, runstate, mut inflict_damage, mut log, turns) = data; for (entity, mut clock, _myturn) in (&entities, &mut hunger_clock, &turns).join() { clock.duration -= 1; if clock.duration < 1 { match clock.state { HungerState::WellFed => { clock.state = HungerState::Normal; clock.duration = 200; if entity == *player_entity { log.entries.push("You are no longer well fed.".to_string()); } } HungerState::Normal => { clock.state = HungerState::Hungry; clock.duration = 200; if entity == *player_entity { log.entries.push("You are hungry.".to_string()); } } HungerState::Hungry => { clock.state = HungerState::Starving; clock.duration = 200; if entity == *player_entity { log.entries.push("You are starving!".to_string()); } } HungerState::Starving => { // Inflict damage from hunger if entity == *player_entity { log.entries.push("Your hunger pangs are getting painful! You suffer 1 hp damage.".to_string()); } SufferDamage::new_damage(&mut inflict_damage, entity, 1, false); } } } } } } }
That leaves the files in ai with errors. We'll make the bare minimum of changes to make these run for now. Delete the lines that check the game state, and add a read storage for MyTurn. Add the turn to the join, so the entity only acts if it is their turn. So in ai/animal_ai_system.rs:
#![allow(unused)] fn main() { impl<'a> System<'a> for AnimalAI { #[allow(clippy::type_complexity)] type SystemData = ( WriteExpect<'a, Map>, ReadExpect<'a, Entity>, ReadExpect<'a, RunState>, Entities<'a>, WriteStorage<'a, Viewshed>, ReadStorage<'a, Herbivore>, ReadStorage<'a, Carnivore>, ReadStorage<'a, Item>, WriteStorage<'a, WantsToMelee>, WriteStorage<'a, EntityMoved>, WriteStorage<'a, Position>, ReadStorage<'a, MyTurn> ); fn run(&mut self, data : Self::SystemData) { let (mut map, player_entity, runstate, entities, mut viewshed, herbivore, carnivore, item, mut wants_to_melee, mut entity_moved, mut position, turns) = data; ... for (entity, mut viewshed, _herbivore, mut pos, _turn) in (&entities, &mut viewshed, &herbivore, &mut position, &turns).join() { ... for (entity, mut viewshed, _carnivore, mut pos, _turn) in (&entities, &mut viewshed, &carnivore, &mut position, &turns).join() { }
Likewise, in bystander_ai_system.rs:
#![allow(unused)] fn main() { impl<'a> System<'a> for BystanderAI { #[allow(clippy::type_complexity)] type SystemData = ( WriteExpect<'a, Map>, ReadExpect<'a, RunState>, Entities<'a>, WriteStorage<'a, Viewshed>, ReadStorage<'a, Bystander>, WriteStorage<'a, Position>, WriteStorage<'a, EntityMoved>, WriteExpect<'a, rltk::RandomNumberGenerator>, ReadExpect<'a, Point>, WriteExpect<'a, GameLog>, WriteStorage<'a, Quips>, ReadStorage<'a, Name>, ReadStorage<'a, MyTurn>); fn run(&mut self, data : Self::SystemData) { let (mut map, runstate, entities, mut viewshed, bystander, mut position, mut entity_moved, mut rng, player_pos, mut gamelog, mut quips, names, turns) = data; for (entity, mut viewshed,_bystander,mut pos, _turn) in (&entities, &mut viewshed, &bystander, &mut position, &turns).join() { ... }
And again in monster_ai_system.rs:
#![allow(unused)] fn main() { impl<'a> System<'a> for MonsterAI { #[allow(clippy::type_complexity)] type SystemData = ( WriteExpect<'a, Map>, ReadExpect<'a, Point>, ReadExpect<'a, Entity>, ReadExpect<'a, RunState>, Entities<'a>, WriteStorage<'a, Viewshed>, ReadStorage<'a, Monster>, WriteStorage<'a, Position>, WriteStorage<'a, WantsToMelee>, WriteStorage<'a, Confusion>, WriteExpect<'a, ParticleBuilder>, WriteStorage<'a, EntityMoved>, ReadStorage<'a, MyTurn>); fn run(&mut self, data : Self::SystemData) { let (mut map, player_pos, player_entity, runstate, entities, mut viewshed, monster, mut position, mut wants_to_melee, mut confused, mut particle_builder, mut entity_moved, turns) = data; for (entity, mut viewshed,_monster,mut pos, _turn) in (&entities, &mut viewshed, &monster, &mut position, &turns).join() { }
That takes care of the compilation errors! Now cargo run the game. It runs as before, just a little more slowly. We'll worry about performance once we have the basics going - so that's great progress, we have an initiative system!
Handling Status Effects
Right now, we check for confusion in the monster_ai_system - and actually forgot about it in bystanders, vendors and animals. Rather than copy/pasting the code everywhere, we should use this as an opportunity to create a system to handle status effect turn skipping, and clean up the other systems to benefit. Make a new file, ai/turn_status.rs:
#![allow(unused)] fn main() { use specs::prelude::*; use crate::{MyTurn, Confusion, RunState}; pub struct TurnStatusSystem {} impl<'a> System<'a> for TurnStatusSystem { #[allow(clippy::type_complexity)] type SystemData = ( WriteStorage<'a, MyTurn>, WriteStorage<'a, Confusion>, Entities<'a>, ReadExpect<'a, RunState>); fn run(&mut self, data : Self::SystemData) { let (mut turns, mut confusion, entities, runstate) = data; if *runstate != RunState::Ticking { return; } let mut not_my_turn : Vec<Entity> = Vec::new(); let mut not_confused : Vec<Entity> = Vec::new(); for (entity, _turn, confused) in (&entities, &mut turns, &mut confusion).join() { confused.turns -= 1; if confused.turns < 1 { not_confused.push(entity); } else { not_my_turn.push(entity); } } for e in not_my_turn { turns.remove(e); } for e in not_confused { confusion.remove(e); } } } }
This is pretty simple: it iterates everyone who is confused, and decrements their turn counter. If they are still confused, it takes away MyTurn. If they have recovered, it takes away Confusion. You need to add a mod and pub use statement for it in ai/mod.rs, and add it to your run_systems function in main.rs:
#![allow(unused)] fn main() { let mut initiative = ai::InitiativeSystem{}; initiative.run_now(&self.ecs); let mut turnstatus = ai::TurnStatusSystem{}; turnstatus.run_now(&self.ecs); }
This shows the new pattern we are using: systems do one thing, and can remove MyTurn to prevent future execution. You can also go into monster_ai_system and remove everything relating to confusion.
Quipping NPCs
Remember when we added bandits, we gave them some commentary to say for flavor? You may have noticed that they aren't actually speaking! That's because we handled quipping in the bystander AI - rather than as a general concept. Let's move the quipping into its own system. Make a new file, ai/quipping.rs:
#![allow(unused)] fn main() { use specs::prelude::*; use crate::{gamelog::GameLog, Quips, Name, MyTurn, Viewshed}; pub struct QuipSystem {} impl<'a> System<'a> for QuipSystem { #[allow(clippy::type_complexity)] type SystemData = ( WriteExpect<'a, GameLog>, WriteStorage<'a, Quips>, ReadStorage<'a, Name>, ReadStorage<'a, MyTurn>, ReadExpect<'a, rltk::Point>, ReadStorage<'a, Viewshed>, WriteExpect<'a, rltk::RandomNumberGenerator>); fn run(&mut self, data : Self::SystemData) { let (mut gamelog, mut quips, names, turns, player_pos, viewsheds, mut rng) = data; for (quip, name, viewshed, _turn) in (&mut quips, &names, &viewsheds, &turns).join() { if !quip.available.is_empty() && viewshed.visible_tiles.contains(&player_pos) && rng.roll_dice(1,6)==1 { let quip_index = if quip.available.len() == 1 { 0 } else { (rng.roll_dice(1, quip.available.len() as i32)-1) as usize }; gamelog.entries.push( format!("{} says \"{}\"", name.name, quip.available[quip_index]) ); quip.available.remove(quip_index); } } } } }
This is basically the quipping code from bystander_ai_system, so we don't really need to go over it in too much detail. You do want to add it into run_systems in main.rs so it functions (and add a mod and pub use statement in ai/mod.rs):
#![allow(unused)] fn main() { turnstatus.run_now(&self.ecs); let mut quipper = ai::QuipSystem{}; quipper.run_now(&self.ecs); }
Also go into bystander_ai_system.rs and remove all the quip code! It shortens it a lot, and if you cargo run now, Bandits can insult you. In fact, any NPC can be given quip lines now - and will merrily say things to you. Once again, we've made the system smaller and gained functionality. Another win!
Making AIs appear to think
Currently, we have a separate system for every type of AI - and wind up duplicating some code as a result. We also have some pretty unrealistic things going on: monsters remain completely static until they can see you, and forget all about you the moment you round a corner. Villagers move like random drunks, even when sober. Wolves hunt down deer - but again, only when they are visible. You can achieve a considerable increase in apparent AI intelligence (it's still quite dumb!) by giving NPCs goals - and having the goal last more than one turn. You can then switch the type-based decision making to be goal-based; helping the NPC achieve whatever it is that they want in life.
Let's take a moment to consider what our NPCs really want in life:
- Deer and other herbivores really want to eat grass, be left alone, and run away from things likely to kill them (which is everything, really; not a great place to be on the food chain).
- Monsters want to guard the dungeon, kill players, and otherwise lead a peaceful life.
- Wolves (and other carnivores) want to snack on players and herbivores.
- Gelatinous Cubes aren't really known for thinking much!
- Villagers really want to go about their daily lives, occasionally saying things to passing players.
- Vendors want to stay in their shops and sell you things in a future chapter update!
That doesn't really take into account transient objectives; an injured monster might want to get away from the fight, a monster might want to consider picking up the glowing Longsword of Doom that happens to be right next to them, and so on. It's a good start, though.
We can actually boil a lot of this down to a "state machine". You've seen those before: RunState makes the whole game a state, and each of the UI boxes returns a current state. In this case, we'll let an NPC have a state - which represents what they are trying to do right now, and if they have achieved it yet. We should be able to describe an AI's goals in terms of tags in the json raw file, and implement smaller sub-systems to make the AI behave somewhat believably.
Determining how an AI feels about other entities
A lot of decisions facing AIs revolve around: who is that, and how do I feel about them? If they are an enemy, I should either attack or flee (depending upon my personality). If I feel neutral towards them, then I don't really care about their presence. If I like them, I may even want to stick close by! Entering every entity's feelings towards every other entity would be a huge data-entry chore - every time you added an entity, you'd need to go and add them to every single other entity (and remember to remove/edit them everywhere if you remove them/want to change them). That's not a great idea!
Like a lot of games, we can resolve this with a simple faction system. NPCs (and the player) are members of a faction. The faction has feelings towards other factions (including a default). We can then do a simple faction lookup to see how an NPC feels about a potential target. We can also include faction information in the user interface, to help players understand what's going on.
We'll start with a faction table in spawns.json. Here's a first draft:
"faction_table" : [
{ "name" : "Player", "responses": { }},
{ "name" : "Mindless", "responses": { "Default" : "attack" } },
{ "name" : "Townsfolk", "responses" : { "Default" : "ignore" } },
{ "name" : "Bandits", "responses" : { "Default" : "attack" } },
{ "name" : "Cave Goblins", "responses" : { "Default" : "attack" } },
{ "name" : "Carnivores", "responses" : { "Default" : "attack" } },
{ "name" : "Herbivores", "responses" : { "Default" : "flee" } }
],
We'd also need to add an entry to each NPC, e.g.: "faction" : "Bandit".
To make this work, we need to create a new component to store faction membership. As always, it needs registration in main.rs and saveload_system.rs as well as definition in components.rs:
#![allow(unused)] fn main() { #[derive(Component, Debug, Serialize, Deserialize, Clone)] pub struct Faction { pub name : String } }
Let's start to use this by opening up spawner.rs and modifying the player function to always add the player to the "Player" faction:
#![allow(unused)] fn main() { .with(Faction{name : "Player".to_string() }) }
Now we need to load the faction table while we load the rest of the raw data. We'll make a new file, raws/faction_structs.rs to hold this information. Our goal is to mirror what we came up with for the JSON:
#![allow(unused)] fn main() { use serde::{Deserialize}; use std::collections::HashMap; #[derive(Deserialize, Debug)] pub struct FactionInfo { pub name : String, pub responses : HashMap<String, String> } }
In turn, we add it to the Raws structure in raws/mod.rs:
#![allow(unused)] fn main() { #[derive(Deserialize, Debug)] pub struct Raws { pub items : Vec<Item>, pub mobs : Vec<Mob>, pub props : Vec<Prop>, pub spawn_table : Vec<SpawnTableEntry>, pub loot_tables : Vec<LootTable>, pub faction_table : Vec<FactionInfo> } }
We also need to add it to the raw constructor in raws/rawmaster.rs:
#![allow(unused)] fn main() { impl RawMaster { pub fn empty() -> RawMaster { RawMaster { raws : Raws{ items: Vec::new(), mobs: Vec::new(), props: Vec::new(), spawn_table: Vec::new(), loot_tables: Vec::new(), faction_table : Vec::new(), }, item_index : HashMap::new(), mob_index : HashMap::new(), prop_index : HashMap::new(), loot_index : HashMap::new() } } }
We'll also want to add some indexing into Raws. We need a better way to represent reactions than a string, so lets add an enum to faction_structs.rs first:
#![allow(unused)] fn main() { #[derive(PartialEq, Eq, Hash, Copy, Clone)] pub enum Reaction { Ignore, Attack, Flee } }
Now we add an index for reactions to RawMaster:
#![allow(unused)] fn main() { pub struct RawMaster { raws : Raws, item_index : HashMap<String, usize>, mob_index : HashMap<String, usize>, prop_index : HashMap<String, usize>, loot_index : HashMap<String, usize>, faction_index : HashMap<String, HashMap<String, Reaction>> } }
Also add it to the RawMaster constructor as faction_index : HashMap::new(). Finally, we'll setup the index - open the load function and add this at the end:
#![allow(unused)] fn main() { for faction in self.raws.faction_table.iter() { let mut reactions : HashMap<String, Reaction> = HashMap::new(); for other in faction.responses.iter() { reactions.insert( other.0.clone(), match other.1.as_str() { "ignore" => Reaction::Ignore, "flee" => Reaction::Flee, _ => Reaction::Attack } ); } self.faction_index.insert(faction.name.clone(), reactions); } }
This iterates through all of the factions, and then through their reactions to other factions - building a HashMap of how they respond to each faction. These are then stored in the faction_index table.
So that loads the raw faction information, we still have to turn it into something readily usable in-game. We should also add a faction option to the mob_structs.rs:
#![allow(unused)] fn main() { #[derive(Deserialize, Debug)] pub struct Mob { pub name : String, pub renderable : Option<Renderable>, pub blocks_tile : bool, pub vision_range : i32, pub ai : String, pub quips : Option<Vec<String>>, pub attributes : MobAttributes, pub skills : Option<HashMap<String, i32>>, pub level : Option<i32>, pub hp : Option<i32>, pub mana : Option<i32>, pub equipped : Option<Vec<String>>, pub natural : Option<MobNatural>, pub loot_table : Option<String>, pub light : Option<MobLight>, pub faction : Option<String> } }
And in spawn_named_mob, add the component. If there isn't one, we'll automatically apply "mindless" to the mob:
#![allow(unused)] fn main() { if let Some(faction) = &mob_template.faction { eb = eb.with(Faction{ name: faction.clone() }); } else { eb = eb.with(Faction{ name : "Mindless".to_string() }) } }
Now in rawmaster.rs, we'll add one more function: to query the factions table to obtain a reaction about a faction:
#![allow(unused)] fn main() { pub fn faction_reaction(my_faction : &str, their_faction : &str, raws : &RawMaster) -> Reaction { if raws.faction_index.contains_key(my_faction) { let mf = &raws.faction_index[my_faction]; if mf.contains_key(their_faction) { return mf[their_faction]; } else if mf.contains_key("Default") { return mf["Default"]; } else { return Reaction::Ignore; } } Reaction::Ignore } }
So, given the name of my_faction and the other entity's faction (their_faction), we can query the faction table and return a reaction. We default to Ignore, if there isn't one (which shouldn't happen, since we default to Mindless).
Common AI task: handling adjacent entities
Pretty much every AI needs to know how to handle an adjacent entity. It might be an enemy (to attack or run away from), someone to ignore, etc. - but it needs to be handled. Rather than handling it separately in every AI module, lets build a common system to handle it. Let's make a new file, ai/adjacent_ai_system.rs (and add a mod and pub use entry for it in ai/mod.rs like the others):
#![allow(unused)] fn main() { use specs::prelude::*; use crate::{MyTurn, Faction, Position, Map, raws::Reaction, WantsToMelee}; pub struct AdjacentAI {} impl<'a> System<'a> for AdjacentAI { #[allow(clippy::type_complexity)] type SystemData = ( WriteStorage<'a, MyTurn>, ReadStorage<'a, Faction>, ReadStorage<'a, Position>, ReadExpect<'a, Map>, WriteStorage<'a, WantsToMelee>, Entities<'a>, ReadExpect<'a, Entity> ); fn run(&mut self, data : Self::SystemData) { let (mut turns, factions, positions, map, mut want_melee, entities, player) = data; let mut turn_done : Vec<Entity> = Vec::new(); for (entity, _turn, my_faction, pos) in (&entities, &turns, &factions, &positions).join() { if entity != *player { let mut reactions : Vec<(Entity, Reaction)> = Vec::new(); let idx = map.xy_idx(pos.x, pos.y); let w = map.width; let h = map.height; // Add possible reactions to adjacents for each direction if pos.x > 0 { evaluate(idx-1, &map, &factions, &my_faction.name, &mut reactions); } if pos.x < w-1 { evaluate(idx+1, &map, &factions, &my_faction.name, &mut reactions); } if pos.y > 0 { evaluate(idx-w as usize, &map, &factions, &my_faction.name, &mut reactions); } if pos.y < h-1 { evaluate(idx+w as usize, &map, &factions, &my_faction.name, &mut reactions); } if pos.y > 0 && pos.x > 0 { evaluate((idx-w as usize)-1, &map, &factions, &my_faction.name, &mut reactions); } if pos.y > 0 && pos.x < w-1 { evaluate((idx-w as usize)+1, &map, &factions, &my_faction.name, &mut reactions); } if pos.y < h-1 && pos.x > 0 { evaluate((idx+w as usize)-1, &map, &factions, &my_faction.name, &mut reactions); } if pos.y < h-1 && pos.x < w-1 { evaluate((idx+w as usize)+1, &map, &factions, &my_faction.name, &mut reactions); } let mut done = false; for reaction in reactions.iter() { if let Reaction::Attack = reaction.1 { want_melee.insert(entity, WantsToMelee{ target: reaction.0 }).expect("Error inserting melee"); done = true; } } if done { turn_done.push(entity); } } } // Remove turn marker for those that are done for done in turn_done.iter() { turns.remove(*done); } } } fn evaluate(idx : usize, map : &Map, factions : &ReadStorage<Faction>, my_faction : &str, reactions : &mut Vec<(Entity, Reaction)>) { for other_entity in map.tile_content[idx].iter() { if let Some(faction) = factions.get(*other_entity) { reactions.push(( *other_entity, crate::raws::faction_reaction(my_faction, &faction.name, &crate::raws::RAWS.lock().unwrap()) )); } } } }
This system works as follows:
- We query all entities with a faction, a position, and a turn and make sure we aren't modifying the player's behavior by checking the entity with the player entity resource.
- We query the map for all adjacent tiles, recording reactions to neighboring entities.
- We iterate the resulting reactions, if it is an
Attackreaction - we cancel their turn and initiate aWantsToMeleeresult.
To actually use this system, add it into run_systems in main.rs, before the MonsterAI:
#![allow(unused)] fn main() { let mut adjacent = ai::AdjacentAI{}; adjacent.run_now(&self.ecs); }
If you cargo run the game now, pandemonium erupts! Everyone is in the "mindless" faction, and as a result is hostile to everyone else! This is actually a great demo of how our engine can perform; despite combat going on from all quarters, it runs pretty well:
Restoring peace in the town
It's also not at all what we had in mind for a peaceful starting town. It might work for a zombie apocalypse, but that's best left to Cataclysm: Dark Days Ahead (an excellent game, by the way)! Fortunately, we can restore peace to the town by adding a "faction" : "Townsfolk" line to all of the town NPCs. Here's the barkeep as an example; you need to do the same for all of the towns-people:
{
"name" : "Barkeep",
"renderable": {
"glyph" : "☻",
"fg" : "#EE82EE",
"bg" : "#000000",
"order" : 1
},
"blocks_tile" : true,
"vision_range" : 4,
"ai" : "vendor",
"attributes" : {
"intelligence" : 13
},
"skills" : {
"Melee" : 2
},
"equipped" : [ "Cudgel", "Cloth Tunic", "Cloth Pants", "Slippers" ],
"faction" : "Townsfolk"
},
Once you've put those in, you can cargo run - and have peace in our time! Well, almost: if you watch the combat log, the rats lay into one another with a vengeance. Again, not quite what we intended. Open up spawns.json and lets add a faction for rats - and have them ignore one another. We'll add ignoring one another to a few other factions, too - so bandits aren't slaying one another for no reason:
"faction_table" : [
{ "name" : "Player", "responses": { }},
{ "name" : "Mindless", "responses": { "Default" : "attack" } },
{ "name" : "Townsfolk", "responses" : { "Default" : "ignore" } },
{ "name" : "Bandits", "responses" : { "Default" : "attack", "Bandits" : "ignore" } },
{ "name" : "Cave Goblins", "responses" : { "Default" : "attack", "Cave Goblins" : "ignore" } },
{ "name" : "Carnivores", "responses" : { "Default" : "attack", "Carnivores" : "ignore" } },
{ "name" : "Herbivores", "responses" : { "Default" : "flee", "Herbivores" : "ignore" } },
{ "name" : "Hungry Rodents", "responses": { "Default" : "attack", "Hungry Rodents" : "ignore" }}
],
Also, add the Rat to the Hungry Rodents faction:
{
"name" : "Rat",
"renderable": {
"glyph" : "r",
"fg" : "#FF0000",
"bg" : "#000000",
"order" : 1
},
"blocks_tile" : true,
"vision_range" : 8,
"ai" : "melee",
"attributes" : {
"Might" : 3,
"Fitness" : 3
},
"skills" : {
"Melee" : -1,
"Defense" : -1
},
"natural" : {
"armor_class" : 11,
"attacks" : [
{ "name" : "bite", "hit_bonus" : 0, "damage" : "1d4" }
]
},
"faction" : "Hungry Rodents"
},
cargo run now, and you'll see that the rats are leaving each other alone.
Responding to more distant entities
Responding to those next to you is a great first step, and actually helps with processing time (since adjacent enemies are processed without a costly search of the entire viewshed) - but if there isn't an adjacent enemy, the AI needs to look for a more distant one. If one is spotted that needs a reaction, we need some components to indicate intent. In components.rs (and registered in main.rs and saveload_system.rs):
#![allow(unused)] fn main() { #[derive(Component, Debug, Serialize, Deserialize, Clone)] pub struct WantsToApproach { pub idx : i32 } #[derive(Component, Debug, Serialize, Deserialize, Clone)] pub struct WantsToFlee { pub indices : Vec<usize> } }
These are intended to indicate what the AI would like to do: either approach a tile (an enemy), or flee from a list of enemy tiles.
We'll make another new system, ai/visible_ai_system.rs (and add it to mod and pub use in ai/mod.rs):
#![allow(unused)] fn main() { use specs::prelude::*; use crate::{MyTurn, Faction, Position, Map, raws::Reaction, Viewshed, WantsToFlee, WantsToApproach}; pub struct VisibleAI {} impl<'a> System<'a> for VisibleAI { #[allow(clippy::type_complexity)] type SystemData = ( ReadStorage<'a, MyTurn>, ReadStorage<'a, Faction>, ReadStorage<'a, Position>, ReadExpect<'a, Map>, WriteStorage<'a, WantsToApproach>, WriteStorage<'a, WantsToFlee>, Entities<'a>, ReadExpect<'a, Entity>, ReadStorage<'a, Viewshed> ); fn run(&mut self, data : Self::SystemData) { let (turns, factions, positions, map, mut want_approach, mut want_flee, entities, player, viewsheds) = data; for (entity, _turn, my_faction, pos, viewshed) in (&entities, &turns, &factions, &positions, &viewsheds).join() { if entity != *player { let my_idx = map.xy_idx(pos.x, pos.y); let mut reactions : Vec<(usize, Reaction)> = Vec::new(); let mut flee : Vec<usize> = Vec::new(); for visible_tile in viewshed.visible_tiles.iter() { let idx = map.xy_idx(visible_tile.x, visible_tile.y); if my_idx != idx { evaluate(idx, &map, &factions, &my_faction.name, &mut reactions); } } let mut done = false; for reaction in reactions.iter() { match reaction.1 { Reaction::Attack => { want_approach.insert(entity, WantsToApproach{ idx: reaction.0 as i32 }).expect("Unable to insert"); done = true; } Reaction::Flee => { flee.push(reaction.0); } _ => {} } } if !done && !flee.is_empty() { want_flee.insert(entity, WantsToFlee{ indices : flee }).expect("Unable to insert"); } } } } } fn evaluate(idx : usize, map : &Map, factions : &ReadStorage<Faction>, my_faction : &str, reactions : &mut Vec<(usize, Reaction)>) { for other_entity in map.tile_content[idx].iter() { if let Some(faction) = factions.get(*other_entity) { reactions.push(( idx, crate::raws::faction_reaction(my_faction, &faction.name, &crate::raws::RAWS.lock().unwrap()) )); } } } }
Remember that this won't run at all if we're already dealing with an adjacent enemy - so there's no need to worry about assigning melee. It also doesn't do anything - it triggers intent for other systems/services. So we don't have to worry about ending the turn. It simply scans every visible tile, and evaluates the available reactions to the tile's content. If it sees something it would like to attack, it set a WantsToApproach component. If it sees things from which it should flee, it populates a WantsToFlee structure.
You'll want to add this into run_systems in main.rs also, after the adjacency check:
#![allow(unused)] fn main() { let mut visible = ai::VisibleAI{}; visible.run_now(&self.ecs); }
Approaching
Now that we're flagging a desire to approach a tile (for whatever reason; currently because the occupant deserves a whacking), we can write a very simple system to handle this. Make a new file, ai/approach_ai_system.rs (and mod/pub use it in ai/mod.rs):
#![allow(unused)] fn main() { use specs::prelude::*; use crate::{MyTurn, WantsToApproach, Position, Map, Viewshed, EntityMoved}; pub struct ApproachAI {} impl<'a> System<'a> for ApproachAI { #[allow(clippy::type_complexity)] type SystemData = ( WriteStorage<'a, MyTurn>, WriteStorage<'a, WantsToApproach>, WriteStorage<'a, Position>, WriteExpect<'a, Map>, WriteStorage<'a, Viewshed>, WriteStorage<'a, EntityMoved>, Entities<'a> ); fn run(&mut self, data : Self::SystemData) { let (mut turns, mut want_approach, mut positions, mut map, mut viewsheds, mut entity_moved, entities) = data; let mut turn_done : Vec<Entity> = Vec::new(); for (entity, mut pos, approach, mut viewshed, _myturn) in (&entities, &mut positions, &want_approach, &mut viewsheds, &turns).join() { turn_done.push(entity); let path = rltk::a_star_search( map.xy_idx(pos.x, pos.y) as i32, map.xy_idx(approach.idx % map.width, approach.idx / map.width) as i32, &mut *map ); if path.success && path.steps.len()>1 { let mut idx = map.xy_idx(pos.x, pos.y); map.blocked[idx] = false; pos.x = path.steps[1] as i32 % map.width; pos.y = path.steps[1] as i32 / map.width; entity_moved.insert(entity, EntityMoved{}).expect("Unable to insert marker"); idx = map.xy_idx(pos.x, pos.y); map.blocked[idx] = true; viewshed.dirty = true; } } want_approach.clear(); // Remove turn marker for those that are done for done in turn_done.iter() { turns.remove(*done); } } } }
This is basically the same as the approach code from MonsterAI, but it applies to all approach requests - to any target. It also removes MyTurn when done, and removes all approach requests. Add it to run_systems in main.rs, after the distant AI handler:
#![allow(unused)] fn main() { let mut approach = ai::ApproachAI{}; approach.run_now(&self.ecs); }
Fleeing
We'll also want to implement a system for fleeing, mostly based on the fleeing code from our Animal AI. Make a new file, flee_ai_system.rs (and remember mod and pub use in ai/mod.rs):
#![allow(unused)] fn main() { use specs::prelude::*; use crate::{MyTurn, WantsToFlee, Position, Map, Viewshed, EntityMoved}; pub struct FleeAI {} impl<'a> System<'a> for FleeAI { #[allow(clippy::type_complexity)] type SystemData = ( WriteStorage<'a, MyTurn>, WriteStorage<'a, WantsToFlee>, WriteStorage<'a, Position>, WriteExpect<'a, Map>, WriteStorage<'a, Viewshed>, WriteStorage<'a, EntityMoved>, Entities<'a> ); fn run(&mut self, data : Self::SystemData) { let (mut turns, mut want_flee, mut positions, mut map, mut viewsheds, mut entity_moved, entities) = data; let mut turn_done : Vec<Entity> = Vec::new(); for (entity, mut pos, flee, mut viewshed, _myturn) in (&entities, &mut positions, &want_flee, &mut viewsheds, &turns).join() { turn_done.push(entity); let my_idx = map.xy_idx(pos.x, pos.y); map.populate_blocked(); let flee_map = rltk::DijkstraMap::new(map.width as usize, map.height as usize, &flee.indices, &*map, 100.0); let flee_target = rltk::DijkstraMap::find_highest_exit(&flee_map, my_idx, &*map); if let Some(flee_target) = flee_target { if !map.blocked[flee_target as usize] { map.blocked[my_idx] = false; map.blocked[flee_target as usize] = true; viewshed.dirty = true; pos.x = flee_target as i32 % map.width; pos.y = flee_target as i32 / map.width; entity_moved.insert(entity, EntityMoved{}).expect("Unable to insert marker"); } } } want_flee.clear(); // Remove turn marker for those that are done for done in turn_done.iter() { turns.remove(*done); } } } }
We also need to register in in run_systems (main.rs), after the approach system:
#![allow(unused)] fn main() { let mut flee = ai::FleeAI{}; flee.run_now(&self.ecs); }
For added effect, lets make Townsfolk run away from potentially hostile entities. In spawns.json:
{ "name" : "Townsfolk", "responses" : { "Default" : "flee", "Player" : "ignore", "Townsfolk" : "ignore" } },
If you cargo run and play now, monsters will approach and attack - and cowards will flee from hostiles.
Cleaning up
We're now performing the minimum AI performed by MonsterAI and much of the carnivore and herbivore handling in our generic systems, as well as giving townsfolk more intelligence than before! If you look at MonsterAI - there's nothing left that isn't performed already! So we can delete ai/monster_ai_system.rs, and remove it from run_systems (in main.rs) altogether! Once deleted, you should cargo run to see if the game is unchanged - it should be!
Likewise, the fleeing and approaching of ai/animal_ai_system.rs is now redundant. You can actually delete this system, too!
It would be a good idea to make sure that all NPCs have a faction (except for Gelatinous Cubes, who actually are mindless) now. You can check out the source code of spawns.json to see the changes: it's pretty obvious, everything now has a faction.
The remaining AI: Bystanders
So the remaining distinct AI module is the bystander, and they are doing just the one thing: moving randomly. This is actually a behavior that would fit well for deer, too (rather than just standing around). It would be nice if townsfolk showed slightly more intelligence, too.
Let's think about how our AI now works:
- Initiative determines if it's an NPC's turn.
- Status can take that away, depending upon effects being experienced.
- Adjacency determines immediate responses to nearby entities.
- Vision determines responses to slightly less nearby entities.
- Per-AI systems determine what the entity does now.
We could replace per-AI systems with a more generic set of "move options". These would govern what an NPC does if none of the other systems have caused it to act. Now let's think about how how we'd like townsfolk and others to move:
- Vendors stay in their shop.
- Patrons should stay in the shop they are patronizing.
- Drunk should stumble around at random. Deer should probably also move randomly, it just makes sense.
- Regular townsfolk should move between buildings, acting like they have a plan.
- Guards could patrol (we don't have any guards, but they would make sense). It might be nice for other monster types to patrol rather than staying static, also. Maybe bandits should roam the forest in search of victims.
- Hostiles should chase their target beyond visual range, but with some chance of escape.
Making a movement mode component
Let's make a new component (in components.rs, and registered in main.rs and saveload_system.rs) to capture movement mode. We'll start with the easy ones: static (not going anywhere), and random (wandering like a fool!). Note that you don't need to register the enum - just the component:
#![allow(unused)] fn main() { #[derive(Debug, Serialize, Deserialize, Clone, Eq, PartialEq, Hash)] pub enum Movement { Static, Random } #[derive(Component, Debug, Serialize, Deserialize, Clone)] pub struct MoveMode { pub mode : Movement } }
Now we'll open up raws/mob_structs.rs and edit it to capture a movement mode - and no longer provide an AI tag (since this will let us do-away with them completely):
#![allow(unused)] fn main() { #[derive(Deserialize, Debug)] pub struct Mob { pub name : String, pub renderable : Option<Renderable>, pub blocks_tile : bool, pub vision_range : i32, pub movement : String, pub quips : Option<Vec<String>>, pub attributes : MobAttributes, pub skills : Option<HashMap<String, i32>>, pub level : Option<i32>, pub hp : Option<i32>, pub mana : Option<i32>, pub equipped : Option<Vec<String>>, pub natural : Option<MobNatural>, pub loot_table : Option<String>, pub light : Option<MobLight>, pub faction : Option<String> } }
(We renamed ai to movement). This breaks a chunk of rawmaster; open up the spawn_named_mob function and replace the AI tag selection with:
#![allow(unused)] fn main() { match mob_template.movement.as_ref() { "random" => eb = eb.with(MoveMode{ mode: Movement::Random }), _ => eb = eb.with(MoveMode{ mode: Movement::Static }) } }
Now, we need a new system to handle "default" (i.e. we've tried everything else) movement. Make a new file, ai/default_move_system.rs (don't forget to mod and pub use it in ai/mod.rs!):
#![allow(unused)] fn main() { use specs::prelude::*; use crate::{MyTurn, MoveMode, Movement, Position, Map, Viewshed, EntityMoved}; pub struct DefaultMoveAI {} impl<'a> System<'a> for DefaultMoveAI { #[allow(clippy::type_complexity)] type SystemData = ( WriteStorage<'a, MyTurn>, ReadStorage<'a, MoveMode>, WriteStorage<'a, Position>, WriteExpect<'a, Map>, WriteStorage<'a, Viewshed>, WriteStorage<'a, EntityMoved>, WriteExpect<'a, rltk::RandomNumberGenerator>, Entities<'a> ); fn run(&mut self, data : Self::SystemData) { let (mut turns, move_mode, mut positions, mut map, mut viewsheds, mut entity_moved, mut rng, entities) = data; let mut turn_done : Vec<Entity> = Vec::new(); for (entity, mut pos, mode, mut viewshed, _myturn) in (&entities, &mut positions, &move_mode, &mut viewsheds, &turns).join() { turn_done.push(entity); match mode.mode { Movement::Static => {}, Movement::Random => { let mut x = pos.x; let mut y = pos.y; let move_roll = rng.roll_dice(1, 5); match move_roll { 1 => x -= 1, 2 => x += 1, 3 => y -= 1, 4 => y += 1, _ => {} } if x > 0 && x < map.width-1 && y > 0 && y < map.height-1 { let dest_idx = map.xy_idx(x, y); if !map.blocked[dest_idx] { let idx = map.xy_idx(pos.x, pos.y); map.blocked[idx] = false; pos.x = x; pos.y = y; entity_moved.insert(entity, EntityMoved{}).expect("Unable to insert marker"); map.blocked[dest_idx] = true; viewshed.dirty = true; } } } } } // Remove turn marker for those that are done for done in turn_done.iter() { turns.remove(*done); } } } }
Now open up main.rs, find run_systems and replace the call to BystanderAI with DefaultMoveAI:
#![allow(unused)] fn main() { let mut defaultmove = ai::DefaultMoveAI{}; defaultmove.run_now(&self.ecs); }
Finally, we need to open up spawns.json and replace all references to ai= in mobs with movement=. Choose static for all of them except for Patrons, herbivores and Drunks.
If you cargo run now, you'll see that everyone stands around - except for the random ones, who wander aimlessly.
One last thing for this segment: go ahead and delete the bystander_ai_system.rs file, and all references to it. We don't need it anymore!
Adding in waypoint-based movement
We mentioned that we'd like townsfolk to mill about, but not randomly. Open up components.rs, and add a mode to Movement:
#![allow(unused)] fn main() { #[derive(Debug, Serialize, Deserialize, Clone, Eq, PartialEq, Hash)] pub enum Movement { Static, Random, RandomWaypoint{ path : Option<Vec<usize>> } } }
Notice that we're using Rust's feature that enum is really a union in other languages, to add in an optional path for random movement. This represents where the AI is trying to go - or None if there isn't a current target (either because they just started, or they got there). We're hoping to not run an expensive A-Star search every turn, so we'll store the path - and keep following it until it is invalid.
Now in rawmaster.rs, we'll add it to the list of movement modes:
#![allow(unused)] fn main() { match mob_template.movement.as_ref() { "random" => eb = eb.with(MoveMode{ mode: Movement::Random }), "random_waypoint" => eb = eb.with(MoveMode{ mode: Movement::RandomWaypoint{ path: None } }), _ => eb = eb.with(MoveMode{ mode: Movement::Static }) } }
And in default_move_system.rs, we can add in the actual movement logic:
#![allow(unused)] fn main() { Movement::RandomWaypoint{path} => { if let Some(path) = path { // We have a target - go there let mut idx = map.xy_idx(pos.x, pos.y); if path.len()>1 { if !map.blocked[path[1] as usize] { map.blocked[idx] = false; pos.x = path[1] % map.width; pos.y = path[1] / map.width; entity_moved.insert(entity, EntityMoved{}).expect("Unable to insert marker"); idx = map.xy_idx(pos.x, pos.y); map.blocked[idx] = true; viewshed.dirty = true; path.remove(0); // Remove the first step in the path } // Otherwise we wait a turn to see if the path clears up } else { mode.mode = Movement::RandomWaypoint{ path : None }; } } else { let target_x = rng.roll_dice(1, map.width-2); let target_y = rng.roll_dice(1, map.height-2); let idx = map.xy_idx(target_x, target_y); if tile_walkable(map.tiles[idx]) { let path = rltk::a_star_search( map.xy_idx(pos.x, pos.y) as i32, map.xy_idx(target_x, target_y) as i32, &mut *map ); if path.success && path.steps.len()>1 { mode.mode = Movement::RandomWaypoint{ path: Some(path.steps) }; } } } }
This is a bit convoluted, so let's walk through it:
- We match on
RandomWaypointand capturepathas a variable (to access it inside the enum). - If a path exists:
- If it has more than one entry.
- If the next step isn't blocked.
- Actually perform the move by following the path.
- Remove the first entry from the path, so we keep following it.
- Wait a turn, the path may clear up
- If the next step isn't blocked.
- Give up and set no path.
- If it has more than one entry.
- If the path doesn't exist:
- Pick a random location.
- If the random location is walkable, path to it.
- If the path succeeded, store it as the AI's
path. - Otherwise, leave with no path - knowing we'll be back next turn to try another one.
If you cargo run now (and set some AI types in spawns.json to random_waypoint), you'll see that villagers now act like they have a plan - they move along paths. Because A-Star respects our movement costs, they even automatically prefer paths and roads! It looks much more realistic now.
Chasing the target
Our other stated goal is that once an AI starts to chase a target, it shouldn't give up just because it lost line-of-sight. On the other hand, it shouldn't have an omniscient view of the map and perfectly track its target either! It also needs to not be the default action - but should occur before defaults if it is an option.
We can accomplish this by creating a new component (in components.rs, remembering to register in main.rs and saveload_system.rs):
#![allow(unused)] fn main() { #[derive(Component, Debug, ConvertSaveload, Clone)] pub struct Chasing { pub target : Entity } }
Unfortunately, we're storing an Entity - so we need some extra boilerplate to make the serialization system happy:
rust
Now we can modify our visible_ai_system.rs file to add a Chasing component whenever it wants to chase after a target. There's a lot of small changes, so I've included the whole file:
#![allow(unused)] fn main() { use specs::prelude::*; use crate::{MyTurn, Faction, Position, Map, raws::Reaction, Viewshed, WantsToFlee, WantsToApproach, Chasing}; pub struct VisibleAI {} impl<'a> System<'a> for VisibleAI { #[allow(clippy::type_complexity)] type SystemData = ( ReadStorage<'a, MyTurn>, ReadStorage<'a, Faction>, ReadStorage<'a, Position>, ReadExpect<'a, Map>, WriteStorage<'a, WantsToApproach>, WriteStorage<'a, WantsToFlee>, Entities<'a>, ReadExpect<'a, Entity>, ReadStorage<'a, Viewshed>, WriteStorage<'a, Chasing> ); fn run(&mut self, data : Self::SystemData) { let (turns, factions, positions, map, mut want_approach, mut want_flee, entities, player, viewsheds, mut chasing) = data; for (entity, _turn, my_faction, pos, viewshed) in (&entities, &turns, &factions, &positions, &viewsheds).join() { if entity != *player { let my_idx = map.xy_idx(pos.x, pos.y); let mut reactions : Vec<(usize, Reaction, Entity)> = Vec::new(); let mut flee : Vec<usize> = Vec::new(); for visible_tile in viewshed.visible_tiles.iter() { let idx = map.xy_idx(visible_tile.x, visible_tile.y); if my_idx != idx { evaluate(idx, &map, &factions, &my_faction.name, &mut reactions); } } let mut done = false; for reaction in reactions.iter() { match reaction.1 { Reaction::Attack => { want_approach.insert(entity, WantsToApproach{ idx: reaction.0 as i32 }).expect("Unable to insert"); chasing.insert(entity, Chasing{ target: reaction.2}).expect("Unable to insert"); done = true; } Reaction::Flee => { flee.push(reaction.0); } _ => {} } } if !done && !flee.is_empty() { want_flee.insert(entity, WantsToFlee{ indices : flee }).expect("Unable to insert"); } } } } } fn evaluate(idx : usize, map : &Map, factions : &ReadStorage<Faction>, my_faction : &str, reactions : &mut Vec<(usize, Reaction, Entity)>) { for other_entity in map.tile_content[idx].iter() { if let Some(faction) = factions.get(*other_entity) { reactions.push(( idx, crate::raws::faction_reaction(my_faction, &faction.name, &crate::raws::RAWS.lock().unwrap()), *other_entity )); } } } }
That's a great start: when going after an NPC, we'll automatically start chasing them. Now, lets make a new system to handle chasing; create ai/chase_ai_system.rs (and mod, pub use in ai/mod.rs):
#![allow(unused)] fn main() { use specs::prelude::*; use crate::{MyTurn, Chasing, Position, Map, Viewshed, EntityMoved}; use std::collections::HashMap; pub struct ChaseAI {} impl<'a> System<'a> for ChaseAI { #[allow(clippy::type_complexity)] type SystemData = ( WriteStorage<'a, MyTurn>, WriteStorage<'a, Chasing>, WriteStorage<'a, Position>, WriteExpect<'a, Map>, WriteStorage<'a, Viewshed>, WriteStorage<'a, EntityMoved>, Entities<'a> ); fn run(&mut self, data : Self::SystemData) { let (mut turns, mut chasing, mut positions, mut map, mut viewsheds, mut entity_moved, entities) = data; let mut targets : HashMap<Entity, (i32, i32)> = HashMap::new(); let mut end_chase : Vec<Entity> = Vec::new(); for (entity, _turn, chasing) in (&entities, &turns, &chasing).join() { let target_pos = positions.get(chasing.target); if let Some(target_pos) = target_pos { targets.insert(entity, (target_pos.x, target_pos.y)); } else { end_chase.push(entity); } } for done in end_chase.iter() { chasing.remove(*done); } end_chase.clear(); let mut turn_done : Vec<Entity> = Vec::new(); for (entity, mut pos, _chase, mut viewshed, _myturn) in (&entities, &mut positions, &chasing, &mut viewsheds, &turns).join() { turn_done.push(entity); let target_pos = targets[&entity]; let path = rltk::a_star_search( map.xy_idx(pos.x, pos.y) as i32, map.xy_idx(target_pos.0, target_pos.1) as i32, &mut *map ); if path.success && path.steps.len()>1 && path.steps.len()<15 { let mut idx = map.xy_idx(pos.x, pos.y); map.blocked[idx] = false; pos.x = path.steps[1] as i32 % map.width; pos.y = path.steps[1] as i32 / map.width; entity_moved.insert(entity, EntityMoved{}).expect("Unable to insert marker"); idx = map.xy_idx(pos.x, pos.y); map.blocked[idx] = true; viewshed.dirty = true; turn_done.push(entity); } else { end_chase.push(entity); } } for done in end_chase.iter() { chasing.remove(*done); } for done in turn_done.iter() { turns.remove(*done); } } } }
This system ended up being more complicated than I hoped, becuase the borrow checker really didn't want me reaching into Position storage twice. So we ended up with the following:
- We iterate all entities that have a
Chasingcomponent, as well as a turn. We look to see if their target is valid, and if it is - we store it in a temporary HashMap. This gets around needing to look insidePositiontwice. If it isn't valid, we remove the component. - We iterate everyone who is still chasing, and path to their target. If the path succeeds, then it follows the path. If if doesn't, we remove the chasing component.
- We remove everyone who took a turn from the
MyTurnlist.
Add it into run_systems before the default movement system:
#![allow(unused)] fn main() { let mut approach = ai::ApproachAI{}; approach.run_now(&self.ecs); }
Removing per-AI tags
We're no longer using the Bystander, Monster, Carnivore, Herbivore and Vendor tags! Open up components.rs and delete them. You'll also need to delete their registration in main.rs and saveload_system.rs. Once they are gone, you will still see errors in player.rs; why? We used to use these tags to determine if we should attack or trade-places with an NPC. We can replace the failing code in try_move_player quite easily. First, remove the references to these components from your using statements. Then replace these two lines:
#![allow(unused)] fn main() { let bystanders = ecs.read_storage::<Bystander>(); let vendors = ecs.read_storage::<Vendor>(); }
with:
#![allow(unused)] fn main() { let factions = ecs.read_storage::<Faction>(); }
Then we replace the tag check with:
#![allow(unused)] fn main() { for potential_target in map.tile_content[destination_idx].iter() { let mut hostile = true; if combat_stats.get(*potential_target).is_some() { if let Some(faction) = factions.get(*potential_target) { let reaction = crate::raws::faction_reaction( &faction.name, "Player", &crate::raws::RAWS.lock().unwrap() ); if reaction != Reaction::Attack { hostile = false; } } } if !hostile { // Note that we want to move the bystander }
Notice that we're using the faction system we made earlier! There's one more fix to player.rs - deciding if we can heal because of nearby monsters. It's basically the same change - we check if an entity is hostile, and if it is it prohibits healing (because you are nervous/on-edge!):
#![allow(unused)] fn main() { fn skip_turn(ecs: &mut World) -> RunState { let player_entity = ecs.fetch::<Entity>(); let viewshed_components = ecs.read_storage::<Viewshed>(); let factions = ecs.read_storage::<Faction>(); let worldmap_resource = ecs.fetch::<Map>(); let mut can_heal = true; let viewshed = viewshed_components.get(*player_entity).unwrap(); for tile in viewshed.visible_tiles.iter() { let idx = worldmap_resource.xy_idx(tile.x, tile.y); for entity_id in worldmap_resource.tile_content[idx].iter() { let faction = factions.get(*entity_id); match faction { None => {} Some(faction) => { let reaction = crate::raws::faction_reaction( &faction.name, "Player", &crate::raws::RAWS.lock().unwrap() ); if reaction == Reaction::Attack { can_heal = false; } } } } } ... }
Distance Culling AI
We're currently spending a lot of CPU cycles on events far from the player. Performance is still ok, but this is sub-optimal for two reasons:
- We may just run around finding dead people if the factions are fighting while we are far away. It tells a better story to arrive as something is happening rather than just finding the aftermath.
- We don't want to waste our precious CPU cycles!
Let's open up initiative_system.rs and modify it to check the distance to the player, and not have a turn if they are far away:
#![allow(unused)] fn main() { use specs::prelude::*; use crate::{Initiative, Position, MyTurn, Attributes, RunState}; pub struct InitiativeSystem {} impl<'a> System<'a> for InitiativeSystem { #[allow(clippy::type_complexity)] type SystemData = ( WriteStorage<'a, Initiative>, ReadStorage<'a, Position>, WriteStorage<'a, MyTurn>, Entities<'a>, WriteExpect<'a, rltk::RandomNumberGenerator>, ReadStorage<'a, Attributes>, WriteExpect<'a, RunState>, ReadExpect<'a, Entity>, ReadExpect<'a, rltk::Point>); fn run(&mut self, data : Self::SystemData) { let (mut initiatives, positions, mut turns, entities, mut rng, attributes, mut runstate, player, player_pos) = data; if *runstate != RunState::Ticking { return; } // Clear any remaining MyTurn we left by mistkae turns.clear(); // Roll initiative for (entity, initiative, pos) in (&entities, &mut initiatives, &positions).join() { initiative.current -= 1; if initiative.current < 1 { let mut myturn = true; // Re-roll initiative.current = 6 + rng.roll_dice(1, 6); // Give a bonus for quickness if let Some(attr) = attributes.get(entity) { initiative.current -= attr.quickness.bonus; } // TODO: More initiative granting boosts/penalties will go here later // If its the player, we want to go to an AwaitingInput state if entity == *player { *runstate = RunState::AwaitingInput; } else { let distance = rltk::DistanceAlg::Pythagoras.distance2d(*player_pos, rltk::Point::new(pos.x, pos.y)); if distance > 20.0 { myturn = false; } } // It's my turn! if myturn { turns.insert(entity, MyTurn{}).expect("Unable to insert turn"); } } } } } }
Fixing Performance
You may have noticed a performance drop while we worked through this chapter. We've added a lot of functionality, so the systems seemed like the culprit - but they aren't! Our systems are actually running at a really good speed (one advantage of doing one thing per system: your CPU cache is very happy!). If you'd like to prove it, do a debug build, fire up a profiler (I use Very Sleepy on Windows) and attach it to the game!
The culprit is actually initiative. Not every entity is moving on the same tick anymore, so it's taking more cycles through the main loop to get to the player's turn. This is a small slowdown, but noticeable. Fortunately, you can fix it with a quick change to the main loop in main.rs:
#![allow(unused)] fn main() { RunState::Ticking => { while newrunstate == RunState::Ticking { self.run_systems(); self.ecs.maintain(); match *self.ecs.fetch::<RunState>() { RunState::AwaitingInput => newrunstate = RunState::AwaitingInput, RunState::MagicMapReveal{ .. } => newrunstate = RunState::MagicMapReveal{ row: 0 }, _ => newrunstate = RunState::Ticking } } } }
This runs all initiative cycles until it's the player's turn. It brings the game back up to full speed.
Wrap-Up
This has been a long chapter, for which I apologize - but it's been a really productive one! Instead of standing around or roaming completely randomly, AI now operates in layers - deciding first on adjacent targets, then visible targets, and then a default action. It can even hunt you down. This has gone a long way to make the AI feel smarter.
If you cargo run now, you can enjoy a much richer world!
...
The source code for this chapter may be found here
Run this chapter's example with web assembly, in your browser (WebGL2 required)
Copyright (C) 2019, Herbert Wolverson.
Spatial Mapping
About this tutorial
This tutorial is free and open source, and all code uses the MIT license - so you are free to do with it as you like. My hope is that you will enjoy the tutorial, and make great games!
If you enjoy this and would like me to keep writing, please consider supporting my Patreon.
You may have noticed that this chapter is "57A" by filename. Some problems emerged with the spatial indexing system, after the AI changes in chapter 57. Rather than change an already oversized chapter with what is a decent topic in and of itself, I decided that it would be better to insert a section. In this chapter, we're going to revise the map_indexing_system and associated data. We have a few goals:
- The stored locations of entities, and the "blocked" system should be easy to update mid-turn.
- We want to eliminate entities sharing a space.
- We want to fix the issue of not being able to enter a tile after an entity is slain.
- We'd like to retain good performance.
That's a fairly high bar!
Building a Spatial Indexing API
Rather than scattering map's tile_content, the blocked list, the periodically updated system, and calls to these data structures everywhere, it would be a lot cleaner to move it behind a unified API. We could then access the API, and functionality changes automatically get pulled in as things improve. That way, we just have to remember to call the API - not remember how it works.
We'll start by making a module. Create a src\spatial directory, and put an empty mod.rs file in it. Then we'll "stub out" our spatial back-end, adding some content:
#![allow(unused)] fn main() { use std::sync::Mutex; use specs::prelude::*; struct SpatialMap { blocked : Vec<bool>, tile_content : Vec<Vec<Entity>> } impl SpatialMap { fn new() -> Self { Self { blocked: Vec::new(), tile_content: Vec::new() } } } lazy_static! { static ref SPATIAL_MAP : Mutex<SpatialMap> = Mutex::new(SpatialMap::new()); } }
The SpatialMap struct contains the spatial information we are storing in Map. It's deliberately not public: we want to stop sharing the data directly, and use an API instead. Then we create a lazy_static: a mutex-protected global variable, and use that to store the spatial information. Storing it this way allows us to access it without burdening Specs' resources system - and makes it easier to offer access both from within systems and from the outside. Since we're mutex-protecting the spatial map, we also benefit from thread safety; that removes the resource from Specs' threading plan. This makes it easier for the program as a whole to use thread the dispatchers.
Map API Replacement
We'll need a way to resize the spatial map, when the map changes. In spatial/mod.rs:
#![allow(unused)] fn main() { pub fn set_size(map_tile_count: usize) { let mut lock = SPATIAL_MAP.lock().unwrap(); lock.blocked = vec![false; map_tile_count]; lock.tile_content = vec![Vec::new(); map_tile_count]; } }
That's a bit inefficient in that it reallocates - but we don't do it often, so it should be ok. We also need a way to clear the spatial contents:
#![allow(unused)] fn main() { pub fn clear() { let mut lock = SPATIAL_MAP.lock().unwrap(); lock.blocked.clear(); for content in lock.tile_content.iter_mut() { content.clear(); } } }
And we need an analogue for the map's current populate_blocked function (which builds a list of which tiles are blocked by terrain):
#![allow(unused)] fn main() { pub fn populate_blocked_from_map(map: &Map) { let mut lock = SPATIAL_MAP.lock().unwrap(); for (i,tile) in map.tiles.iter().enumerate() { lock.blocked[i] = !tile_walkable(*tile); } } }
Update the Map
Update the two map functions that handle spatial mapping to use the new API. In map/mod.rs:
#![allow(unused)] fn main() { pub fn populate_blocked(&mut self) { crate::spatial::populate_blocked_from_map(self); } pub fn clear_content_index(&mut self) { crate::spatial::clear(); } }
Populating the Spatial Index
We already have map_indexing_system.rs, handling initial (per-frame, so it doesn't get far out of sync) population of the spatial map. Since we're changing how we're storing the data, we also need to change the system. The indexing system performs two functions on the map's spatial data: it sets tiles as blocked, and it adds indexed entities. We've already created the clear and populate_blocked_from_map functions it needs. Replace the body of the MapIndexingSystem's run function with:
#![allow(unused)] fn main() { use super::{Map, Position, BlocksTile, spatial}; ... fn run(&mut self, data : Self::SystemData) { let (mut map, position, blockers, entities) = data; spatial::clear(); spatial::populate_blocked_from_map(&*map); for (entity, position) in (&entities, &position).join() { let idx = map.xy_idx(position.x, position.y); // If they block, update the blocking list let _p : Option<&BlocksTile> = blockers.get(entity); if let Some(_p) = _p { spatial::set_blocked(idx); } // Push the entity to the appropriate index slot. It's a Copy // type, so we don't need to clone it (we want to avoid moving it out of the ECS!) spatial::index_entity(entity, idx); } } }
In spatial/mod.rs, add the index_entity function:
#![allow(unused)] fn main() { pub fn index_entity(entity: Entity, idx: usize) { let mut lock = SPATIAL_MAP.lock().unwrap(); lock.tile_content[idx].push(entity); } }
The map's constructor also needs to tell the spatial system to resize itself. Add the following to the constructor:
#![allow(unused)] fn main() { pub fn new<S : ToString>(new_depth : i32, width: i32, height: i32, name: S) -> Map { let map_tile_count = (width*height) as usize; crate::spatial::set_size(map_tile_count); ... }
Remove the old spatial data from the map
Time to break stuff! This will cause issues throughout the source-base. Remove blocked and tile_content from the map. The new Map definition is as follows:
#![allow(unused)] fn main() { #[derive(Default, Serialize, Deserialize, Clone)] pub struct Map { pub tiles : Vec<TileType>, pub width : i32, pub height : i32, pub revealed_tiles : Vec<bool>, pub visible_tiles : Vec<bool>, pub depth : i32, pub bloodstains : HashSet<usize>, pub view_blocked : HashSet<usize>, pub name : String, pub outdoors : bool, pub light : Vec<rltk::RGB>, } }
You also need to remove these entries from the constructor:
#![allow(unused)] fn main() { pub fn new<S : ToString>(new_depth : i32, width: i32, height: i32, name: S) -> Map { let map_tile_count = (width*height) as usize; crate::spatial::set_size(map_tile_count); Map{ tiles : vec![TileType::Wall; map_tile_count], width, height, revealed_tiles : vec![false; map_tile_count], visible_tiles : vec![false; map_tile_count], depth: new_depth, bloodstains: HashSet::new(), view_blocked : HashSet::new(), name : name.to_string(), outdoors : true, light: vec![rltk::RGB::from_f32(0.0, 0.0, 0.0); map_tile_count] } } }
The is_exit_valid function in Map breaks, because it accesses blocked. In spatial/mod.rs we'll make a new function to provide this functionality:
#![allow(unused)] fn main() { pub fn is_blocked(idx: usize) -> bool { SPATIAL_MAP.lock().unwrap().blocked[idx] } }
This allows us to fix the map's is_exit_valid function:
#![allow(unused)] fn main() { fn is_exit_valid(&self, x:i32, y:i32) -> bool { if x < 1 || x > self.width-1 || y < 1 || y > self.height-1 { return false; } let idx = self.xy_idx(x, y); !crate::spatial::is_blocked(idx) } }
Fixing map/dungeon.rs
The get_map function in map/dungeon.rs creates a new (unused) tile_content entry. We don't need that anymore, so we'll remove it. The new function is:
#![allow(unused)] fn main() { pub fn get_map(&self, depth : i32) -> Option<Map> { if self.maps.contains_key(&depth) { let mut result = self.maps[&depth].clone(); Some(result) } else { None } } }
Fixing the AI
Looking through the AI functions, we're often querying tile_content directly. Since we're trying for an API now, we can't do that! The most common use-case is iterating the vector representing a tile. We'd like to avoid the mess that results from returning a lock, and then ensuring that it is freed - this leaks too much implementation detail from an API. Instead, we'll provide a means of iterating tile content with a closure. Add the following to spatial/mod.rs:
#![allow(unused)] fn main() { pub fn for_each_tile_content<F>(idx: usize, f: F) where F : Fn(Entity) { let lock = SPATIAL_MAP.lock().unwrap(); for entity in lock.tile_content[idx].iter() { f(*entity); } } }
The f variable is a generic parameter, using where to specify that it must be a mutable function that accepts an Entity as a parameter. This gives us a similar interface to for_each on iterators: you can run a function on each entity in a tile, relying on closure capture to let you handle local state when calling it.
Open up src/ai/adjacent_ai_system.rs. The evaluate function was broken by our change. With the new API, fixing it is quite straightforward:
#![allow(unused)] fn main() { fn evaluate(idx : usize, map : &Map, factions : &ReadStorage<Faction>, my_faction : &str, reactions : &mut Vec<(Entity, Reaction)>) { crate::spatial::for_each_tile_content(idx, |other_entity| { if let Some(faction) = factions.get(other_entity) { reactions.push(( other_entity, crate::raws::faction_reaction(my_faction, &faction.name, &crate::raws::RAWS.lock().unwrap()) )); } }); } }
I like this API - it's very similar to the old setup, but cleanly wrapped!
Approach API: Some Nasty Code!
If you were wondering why I defined the API, and then changed it: it's so that you can see how the sausage is made. API building like this is always an iterative process, and it's good to see how things evolve.
Look at src/ai/approach_ai_system.rs. The code is pretty gnarly: we're manually changing blocked when the entity moves. Worse, we may not be doing it right! It simply unsets blocked; if for some reason the tile were still blocked, the result would be incorrect. That won't work; we need a clean way of moving entities around, and preserving the blocked status.
Adding a BlocksTile check to everything whenever we move things is going to be slow, and pollute our already-large Specs lookups with even more references. Instead, we'll change how we are storing entites. We'll also change how we are storing blocked. In spatial/mod.rs:
#![allow(unused)] fn main() { struct SpatialMap { blocked : Vec<(bool, bool)>, tile_content : Vec<Vec<(Entity, bool)>> } }
The blocked vector now contains a tuple of two bools. The first is "does the map block it?", the second is "is it blocked by an entity?". This requires that we change a few other functions. We're also going to delete the set_blocked function and make it automatic from the populate_blocked_from_map and index_entity functions. Automatic is good: there are fewer opportunities to shoot one's foot!
#![allow(unused)] fn main() { pub fn set_size(map_tile_count: usize) { let mut lock = SPATIAL_MAP.lock().unwrap(); lock.blocked = vec![(false, false); map_tile_count]; lock.tile_content = vec![Vec::new(); map_tile_count]; } pub fn clear() { let mut lock = SPATIAL_MAP.lock().unwrap(); lock.blocked.iter_mut().for_each(|b| { b.0 = false; b.1 = false; }); for content in lock.tile_content.iter_mut() { content.clear(); } } pub fn populate_blocked_from_map(map: &Map) { let mut lock = SPATIAL_MAP.lock().unwrap(); for (i,tile) in map.tiles.iter().enumerate() { lock.blocked[i].0 = !tile_walkable(*tile); } } pub fn index_entity(entity: Entity, idx: usize, blocks_tile: bool) { let mut lock = SPATIAL_MAP.lock().unwrap(); lock.tile_content[idx].push((entity, blocks_tile)); if blocks_tile { lock.blocked[idx].1 = true; } } pub fn is_blocked(idx: usize) -> bool { let lock = SPATIAL_MAP.lock().unwrap(); lock.blocked[idx].0 || lock.blocked[idx].1 } pub fn for_each_tile_content<F>(idx: usize, mut f: F) where F : FnMut(Entity) { let lock = SPATIAL_MAP.lock().unwrap(); for entity in lock.tile_content[idx].iter() { f(entity.0); } } }
That requires that we tweak the map_indexing_system again. The great news is that it keeps getting shorter:
#![allow(unused)] fn main() { fn run(&mut self, data : Self::SystemData) { let (mut map, position, blockers, entities) = data; spatial::clear(); spatial::populate_blocked_from_map(&*map); for (entity, position) in (&entities, &position).join() { let idx = map.xy_idx(position.x, position.y); spatial::index_entity(entity, idx, blockers.get(entity).is_some()); } } }
So with that done, let's go back to approach_ai_system. Looking at the code, with the best of intentions we were trying to update blocked based on an entity having moved. We naievely cleared blocked from the source tile, and set it in the destination tile. We use that pattern a few times, so let's create an API function (in spatial/mod.rs) that actually works consistently:
#![allow(unused)] fn main() { pub fn move_entity(entity: Entity, moving_from: usize, moving_to: usize) { let mut lock = SPATIAL_MAP.lock().unwrap(); let mut entity_blocks = false; lock.tile_content[moving_from].retain(|(e, blocks) | { if *e == entity { entity_blocks = *blocks; false } else { true } }); lock.tile_content[moving_to].push((entity, entity_blocks)); // Recalculate blocks for both tiles let mut from_blocked = false; let mut to_blocked = false; lock.tile_content[moving_from].iter().for_each(|(_,blocks)| if *blocks { from_blocked = true; } ); lock.tile_content[moving_to].iter().for_each(|(_,blocks)| if *blocks { to_blocked = true; } ); lock.blocked[moving_from].1 = from_blocked; lock.blocked[moving_to].1 = to_blocked; } }
This allows us to fix ai/approach_ai_system.rs with a much cleaner bit of code:
#![allow(unused)] fn main() { if path.success && path.steps.len()>1 { let idx = map.xy_idx(pos.x, pos.y); pos.x = path.steps[1] as i32 % map.width; pos.y = path.steps[1] as i32 / map.width; entity_moved.insert(entity, EntityMoved{}).expect("Unable to insert marker"); let new_idx = map.xy_idx(pos.x, pos.y); crate::spatial::move_entity(entity, idx, new_idx); viewshed.dirty = true; } }
The file ai/chase_ai_system.rs has the same issue. The fix is nearly identical:
#![allow(unused)] fn main() { if path.success && path.steps.len()>1 && path.steps.len()<15 { let idx = map.xy_idx(pos.x, pos.y); pos.x = path.steps[1] as i32 % map.width; pos.y = path.steps[1] as i32 / map.width; entity_moved.insert(entity, EntityMoved{}).expect("Unable to insert marker"); let new_idx = map.xy_idx(pos.x, pos.y); viewshed.dirty = true; crate::spatial::move_entity(entity, idx, new_idx); turn_done.push(entity); } else { end_chase.push(entity); } }
Fixing up ai/default_move_system.rs
This file is a little more complicated. The first broken section both queries and updates the blocked index. Change it to:
#![allow(unused)] fn main() { if x > 0 && x < map.width-1 && y > 0 && y < map.height-1 { let dest_idx = map.xy_idx(x, y); if !crate::spatial::is_blocked(dest_idx) { let idx = map.xy_idx(pos.x, pos.y); pos.x = x; pos.y = y; entity_moved.insert(entity, EntityMoved{}).expect("Unable to insert marker"); crate::spatial::move_entity(entity, idx, dest_idx); viewshed.dirty = true; } } }
The RandomWaypoint option is a very similar change:
#![allow(unused)] fn main() { if path.len()>1 { if !crate::spatial::is_blocked(path[1] as usize) { pos.x = path[1] as i32 % map.width; pos.y = path[1] as i32 / map.width; entity_moved.insert(entity, EntityMoved{}).expect("Unable to insert marker"); let new_idx = map.xy_idx(pos.x, pos.y); crate::spatial::move_entity(entity, idx, new_idx); viewshed.dirty = true; path.remove(0); // Remove the first step in the path } // Otherwise we wait a turn to see if the path clears up } else { mode.mode = Movement::RandomWaypoint{ path : None }; } }
Fixing ai/flee_ai_system.rs
This is very similar to the default move change:
#![allow(unused)] fn main() { if let Some(flee_target) = flee_target { if !crate::spatial::is_blocked(flee_target as usize) { crate::spatial::move_entity(entity, my_idx, flee_target); viewshed.dirty = true; pos.x = flee_target as i32 % map.width; pos.y = flee_target as i32 / map.width; entity_moved.insert(entity, EntityMoved{}).expect("Unable to insert marker"); } } }
Fixing ai/visible_ai_system.rs
The AI's visibility system uses an evaluate function, like the one in the adjacent AI setup. It can be changed to use a closure:
#![allow(unused)] fn main() { fn evaluate(idx : usize, map : &Map, factions : &ReadStorage<Faction>, my_faction : &str, reactions : &mut Vec<(usize, Reaction, Entity)>) { crate::spatial::for_each_tile_content(idx, |other_entity| { if let Some(faction) = factions.get(other_entity) { reactions.push(( idx, crate::raws::faction_reaction(my_faction, &faction.name, &crate::raws::RAWS.lock().unwrap()), other_entity )); } }); } }
The various Inventory Systems
In inventory_system.rs, the ItemUseSystem performs a spatial lookup. This is another one that can be replaced with the closure system:
Change:
#![allow(unused)] fn main() { for mob in map.tile_content[idx].iter() { targets.push(*mob); } }
To:
#![allow(unused)] fn main() { crate::spatial::for_each_tile_content(idx, |mob| targets.push(mob) ); }
Further down, there's another one.
#![allow(unused)] fn main() { for mob in map.tile_content[idx].iter() { targets.push(*mob); } }
Becomes:
#![allow(unused)] fn main() { crate::spatial::for_each_tile_content(idx, |mob| targets.push(mob)); }
Fixing player.rs
The function try_move_player does a really big query of the spatial indexing system. It also sometimes returns mid-calculation, which our API doesn't currently support. We'll add a new function to our spatial/mod.rs file to enable this:
#![allow(unused)] fn main() { pub fn for_each_tile_content_with_gamemode<F>(idx: usize, mut f: F) -> RunState where F : FnMut(Entity)->Option<RunState> { let lock = SPATIAL_MAP.lock().unwrap(); for entity in lock.tile_content[idx].iter() { if let Some(rs) = f(entity.0) { return rs; } } RunState::AwaitingInput } }
This function runs like the other one, but accepts an optional game mode from the closure. If the game mode is Some(x), then it returns x. If it hasn't received any modes by the end, it returns AwaitingInput.
Replacing it with the new API is mostly a matter of using the new functions, and performing the index check inside the closure. Here's the new function:
#![allow(unused)] fn main() { pub fn try_move_player(delta_x: i32, delta_y: i32, ecs: &mut World) -> RunState { let mut positions = ecs.write_storage::<Position>(); let players = ecs.read_storage::<Player>(); let mut viewsheds = ecs.write_storage::<Viewshed>(); let entities = ecs.entities(); let combat_stats = ecs.read_storage::<Attributes>(); let map = ecs.fetch::<Map>(); let mut wants_to_melee = ecs.write_storage::<WantsToMelee>(); let mut entity_moved = ecs.write_storage::<EntityMoved>(); let mut doors = ecs.write_storage::<Door>(); let mut blocks_visibility = ecs.write_storage::<BlocksVisibility>(); let mut blocks_movement = ecs.write_storage::<BlocksTile>(); let mut renderables = ecs.write_storage::<Renderable>(); let factions = ecs.read_storage::<Faction>(); let mut result = RunState::AwaitingInput; let mut swap_entities : Vec<(Entity, i32, i32)> = Vec::new(); for (entity, _player, pos, viewshed) in (&entities, &players, &mut positions, &mut viewsheds).join() { if pos.x + delta_x < 1 || pos.x + delta_x > map.width-1 || pos.y + delta_y < 1 || pos.y + delta_y > map.height-1 { return RunState::AwaitingInput; } let destination_idx = map.xy_idx(pos.x + delta_x, pos.y + delta_y); result = crate::spatial::for_each_tile_content_with_gamemode(destination_idx, |potential_target| { let mut hostile = true; if combat_stats.get(potential_target).is_some() { if let Some(faction) = factions.get(potential_target) { let reaction = crate::raws::faction_reaction( &faction.name, "Player", &crate::raws::RAWS.lock().unwrap() ); if reaction != Reaction::Attack { hostile = false; } } } if !hostile { // Note that we want to move the bystander swap_entities.push((potential_target, pos.x, pos.y)); // Move the player pos.x = min(map.width-1 , max(0, pos.x + delta_x)); pos.y = min(map.height-1, max(0, pos.y + delta_y)); entity_moved.insert(entity, EntityMoved{}).expect("Unable to insert marker"); viewshed.dirty = true; let mut ppos = ecs.write_resource::<Point>(); ppos.x = pos.x; ppos.y = pos.y; return Some(RunState::Ticking); } else { let target = combat_stats.get(potential_target); if let Some(_target) = target { wants_to_melee.insert(entity, WantsToMelee{ target: potential_target }).expect("Add target failed"); return Some(RunState::Ticking); } } let door = doors.get_mut(potential_target); if let Some(door) = door { door.open = true; blocks_visibility.remove(potential_target); blocks_movement.remove(potential_target); let glyph = renderables.get_mut(potential_target).unwrap(); glyph.glyph = rltk::to_cp437('/'); viewshed.dirty = true; return Some(RunState::Ticking); } None }); if !crate::spatial::is_blocked(destination_idx) { let old_idx = map.xy_idx(pos.x, pos.y); pos.x = min(map.width-1 , max(0, pos.x + delta_x)); pos.y = min(map.height-1, max(0, pos.y + delta_y)); let new_idx = map.xy_idx(pos.x, pos.y); entity_moved.insert(entity, EntityMoved{}).expect("Unable to insert marker"); crate::spatial::move_entity(entity, old_idx, new_idx); viewshed.dirty = true; let mut ppos = ecs.write_resource::<Point>(); ppos.x = pos.x; ppos.y = pos.y; result = RunState::Ticking; match map.tiles[destination_idx] { TileType::DownStairs => result = RunState::NextLevel, TileType::UpStairs => result = RunState::PreviousLevel, _ => {} } } } for m in swap_entities.iter() { let their_pos = positions.get_mut(m.0); if let Some(their_pos) = their_pos { let old_idx = map.xy_idx(their_pos.x, their_pos.y); their_pos.x = m.1; their_pos.y = m.2; let new_idx = map.xy_idx(their_pos.x, their_pos.y); crate::spatial::move_entity(m.0, old_idx, new_idx); result = RunState::Ticking; } } result } }
Notice the TODO: we're going to want to look at that before we are done. We're moving entities around - and not updating the spatial map.
The skip_turn also needs to replace direct iteration of tile_content with the new closure-based setup:
#![allow(unused)] fn main() { crate::spatial::for_each_tile_content(idx, |entity_id| { let faction = factions.get(entity_id); match faction { None => {} Some(faction) => { let reaction = crate::raws::faction_reaction( &faction.name, "Player", &crate::raws::RAWS.lock().unwrap() ); if reaction == Reaction::Attack { can_heal = false; } } } }); }
Fixing the Trigger System
trigger_system.rs also needs some love. This is just another direct for loop replacement with the new closure:
#![allow(unused)] fn main() { crate::spatial::for_each_tile_content(idx, |entity_id| { if entity != entity_id { // Do not bother to check yourself for being a trap! let maybe_trigger = entry_trigger.get(entity_id); match maybe_trigger { None => {}, Some(_trigger) => { // We triggered it let name = names.get(entity_id); if let Some(name) = name { log.entries.push(format!("{} triggers!", &name.name)); } hidden.remove(entity_id); // The trap is no longer hidden // If the trap is damage inflicting, do it let damage = inflicts_damage.get(entity_id); if let Some(damage) = damage { particle_builder.request(pos.x, pos.y, rltk::RGB::named(rltk::ORANGE), rltk::RGB::named(rltk::BLACK), rltk::to_cp437('‼'), 200.0); SufferDamage::new_damage(&mut inflict_damage, entity, damage.damage, false); } // If it is single activation, it needs to be removed let sa = single_activation.get(entity_id); if let Some(_sa) = sa { remove_entities.push(entity_id); } } } } }); }
More of the same in the Visibility System
The visibility_system.rs needs a very similar fix. for e in map.tile_content[idx].iter() { and associated body becomes:
#![allow(unused)] fn main() { crate::spatial::for_each_tile_content(idx, |e| { let maybe_hidden = hidden.get(e); if let Some(_maybe_hidden) = maybe_hidden { if rng.roll_dice(1,24)==1 { let name = names.get(e); if let Some(name) = name { log.entries.push(format!("You spotted a {}.", &name.name)); } hidden.remove(e); } } }); }
Saving and Loading
The saveload_system.rs file also needs some tweaking. Replace:
#![allow(unused)] fn main() { worldmap.tile_content = vec![Vec::new(); (worldmap.height * worldmap.width) as usize]; }
With:
#![allow(unused)] fn main() { crate::spatial::set_size((worldmap.height * worldmap.width) as usize); }
If you cargo build, it now compiles! That's progress. Now cargo run the project, and see how it goes. The game runs at a decent speed, and is playable. There are still a few issues - we'll resolve these in turn.
Cleaning up the dead
We'll start with the "dead still bock tiles" problem. The problem occurs because entities don't go away until delete_the_dead is called, and the whole map reindexes. That may not occur in time to help with moving into the target tile. Add a new function to our spatial API (in spatial/mod.rs):
#![allow(unused)] fn main() { pub fn remove_entity(entity: Entity, idx: usize) { let mut lock = SPATIAL_MAP.lock().unwrap(); lock.tile_content[idx].retain(|(e, _)| *e != entity ); let mut from_blocked = false; lock.tile_content[idx].iter().for_each(|(_,blocks)| if *blocks { from_blocked = true; } ); lock.blocked[idx].1 = from_blocked; } }
Then modify the damage_system to handle removing entities on death:
#![allow(unused)] fn main() { if stats.hit_points.current < 1 && dmg.1 { xp_gain += stats.level * 100; if let Some(pos) = pos { let idx = map.xy_idx(pos.x, pos.y); crate::spatial::remove_entity(entity, idx); } } }
That sounds good - but running it shows that we still have the problem. A bit of heavy debugging showed that map_indexing_system is running inbetween the events, and restoring the incorrect data. We don't want the dead to show up on our indexed map, so we edit the indexing system to check. The fixed indexing system looks like this: we've added a check for dead people.
#![allow(unused)] fn main() { use specs::prelude::*; use super::{Map, Position, BlocksTile, Pools, spatial}; pub struct MapIndexingSystem {} impl<'a> System<'a> for MapIndexingSystem { type SystemData = ( ReadExpect<'a, Map>, ReadStorage<'a, Position>, ReadStorage<'a, BlocksTile>, ReadStorage<'a, Pools>, Entities<'a>,); fn run(&mut self, data : Self::SystemData) { let (map, position, blockers, pools, entities) = data; spatial::clear(); spatial::populate_blocked_from_map(&*map); for (entity, position) in (&entities, &position).join() { let mut alive = true; if let Some(pools) = pools.get(entity) { if pools.hit_points.current < 1 { alive = false; } } if alive { let idx = map.xy_idx(position.x, position.y); spatial::index_entity(entity, idx, blockers.get(entity).is_some()); } } } } }
You can now move into the space occupied by the recently deceased.
Handling entity swaps
Remember that we marked a TODO in the player handler, for when we want to swap entities positions? Let's get that figured out. Here's a version that updates the destinations:
#![allow(unused)] fn main() { for m in swap_entities.iter() { let their_pos = positions.get_mut(m.0); if let Some(their_pos) = their_pos { let old_idx = map.xy_idx(their_pos.x, their_pos.y); their_pos.x = m.1; their_pos.y = m.2; let new_idx = map.xy_idx(their_pos.x, their_pos.y); crate::spatial::move_entity(m.0, old_idx, new_idx); result = RunState::Ticking; } } }
Wrap-Up
It still isn't absolutely perfect, but it's a lot better. I played for a while, and on release mode it is zoomy. Issues with not being able to enter tiles are gone, hit detection is working. Equally importantly, we've cleaned up some hacky code.
Note: this chapter is in alpha. I'm still applying these fixes to subsequent chapters, and will update this when it is done.
...
The source code for this chapter may be found here
Run this chapter's example with web assembly, in your browser (WebGL2 required)
Copyright (C) 2019, Herbert Wolverson.
Item Stats
About this tutorial
This tutorial is free and open source, and all code uses the MIT license - so you are free to do with it as you like. My hope is that you will enjoy the tutorial, and make great games!
If you enjoy this and would like me to keep writing, please consider supporting my Patreon.
In the previous chapter we talked about using initiative to make heavy armor have a movement cost, and making some weapons faster than others. The design document also talks about vendors. Finally, what RPG/roguelike is complete without annoying "you are overburdened" messages (and accompanying speed penalties) to make you manage your inventory? These features all point in one direction: additional item statistics, and integrating them into the game systems.
Defining item information
We already have a component called Item; all items have it already, so it seems like the perfect place to add this information! Open up components.rs, and we'll edit the Item structure to include the information we need for initiative penalties, encumbrance and vendors:
#![allow(unused)] fn main() { #[derive(Component, Debug, Serialize, Deserialize, Clone)] pub struct Item { pub initiative_penalty : f32, pub weight_lbs : f32, pub base_value : f32 } }
So we're defining an initiative_penalty - which will be added to your initiative roll to slow you down when equipped (or used, in the case of weapons); weight_lbs - which defines how much the item weighs, in pounds; and base_value which is the base price of an item in gold pieces (decimal, so we can allow silver also).
We need a way to enter this information, so we open up raws/item_structs.rs and edit the Item structure:
#![allow(unused)] fn main() { #[derive(Deserialize, Debug)] pub struct Item { pub name : String, pub renderable : Option<Renderable>, pub consumable : Option<Consumable>, pub weapon : Option<Weapon>, pub wearable : Option<Wearable>, pub initiative_penalty : Option<f32>, pub weight_lbs : Option<f32>, pub base_value : Option<f32> } }
Note that we're making these optional - if you don't define them in the spawns.json file, they will default to zero. Lastly, we need to fix raws/rawmaster.rs's spawn_named_item function to load these values. Replace the line that adds an Item with:
#![allow(unused)] fn main() { eb = eb.with(crate::components::Item{ initiative_penalty : item_template.initiative_penalty.unwrap_or(0.0), weight_lbs : item_template.weight_lbs.unwrap_or(0.0), base_value : item_template.base_value.unwrap_or(0.0) }); }
This is taking advantage of Option's unwrap_or function - either it returns the wrapped value (if there is one), or it returns 0.0. Handy feature to save typing!
These values won't exist until you go into spawns.json and start adding them. I've been taking values from the roll20 compendium for weight and value, and pulling numbers out of the air for initiative penalty. I've entered them in the source code rather than repeat them all here. Here's an example:
{
"name" : "Longsword",
"renderable": {
"glyph" : "/",
"fg" : "#FFAAFF",
"bg" : "#000000",
"order" : 2
},
"weapon" : {
"range" : "melee",
"attribute" : "Might",
"base_damage" : "1d8",
"hit_bonus" : 0
},
"weight_lbs" : 3.0,
"base_value" : 15.0,
"initiative_penalty" : 2
},
Calculating encumbrance and initiative penalties
A simple approach would be to loop through every entity and total up their weight and initiative penalty every turn. The problem with this is that it is potentially rather slow; lots of entities have equipment (most of them!), and we really only need to recalculate it when something has changed. We use the same approach with visibility by marking it dirty. So lets start by extending Pools to include two fields for the totals. In components.rs:
#![allow(unused)] fn main() { #[derive(Component, Debug, Serialize, Deserialize, Clone)] pub struct Pools { pub hit_points : Pool, pub mana : Pool, pub xp : i32, pub level : i32, pub total_weight : f32, pub total_initiative_penalty : f32 } }
You'll need to open up spawner.rs and add these fields to the initial Pools setup for the Player (we'll use zeroes and rely on calculating it):
#![allow(unused)] fn main() { .with(Pools{ hit_points : Pool{ current: player_hp_at_level(11, 1), max: player_hp_at_level(11, 1) }, mana: Pool{ current: mana_at_level(11, 1), max: mana_at_level(11, 1) }, xp: 0, level: 1, total_weight : 0.0, total_initiative_penalty : 0.0 }) }
Likewise, in rawmaster.rs, spawn_named_mob needs to gain these fields in its Pools initialization:
#![allow(unused)] fn main() { let pools = Pools{ level: mob_level, xp: 0, hit_points : Pool{ current: mob_hp, max: mob_hp }, mana: Pool{current: mob_mana, max: mob_mana}, total_weight : 0.0, total_initiative_penalty : 0.0 }; eb = eb.with(pools); }
Now, we need a way to indicate to the game that equipment has changed. This can happen for all sorts of reasons, so we want to be as generic as possible! Open up components.rs, and make a new "tag" component (and then register it in main.rs and saveload_system.rs):
#![allow(unused)] fn main() { #[derive(Component, Debug, Serialize, Deserialize, Clone)] pub struct EquipmentChanged {} }
Open up spawner.rs and we'll start the player's life with this tag applied:
#![allow(unused)] fn main() { .with(EquipmentChanged{}) }
Likewise, in rawmaster.rs's spawn_named_mob, we'll do the same:
#![allow(unused)] fn main() { eb = eb.with(EquipmentChanged{}); }
Now, we'll make a new system to calculate this. Make a new file, ai/encumbrance_system.rs (and include mod and pub use statements in ai/mod.rs):
#![allow(unused)] fn main() { use specs::prelude::*; use crate::{EquipmentChanged, Item, InBackpack, Equipped, Pools, Attributes, gamelog::GameLog}; use std::collections::HashMap; pub struct EncumbranceSystem {} impl<'a> System<'a> for EncumbranceSystem { #[allow(clippy::type_complexity)] type SystemData = ( WriteStorage<'a, EquipmentChanged>, Entities<'a>, ReadStorage<'a, Item>, ReadStorage<'a, InBackpack>, ReadStorage<'a, Equipped>, WriteStorage<'a, Pools>, ReadStorage<'a, Attributes>, ReadExpect<'a, Entity>, WriteExpect<'a, GameLog> ); fn run(&mut self, data : Self::SystemData) { let (mut equip_dirty, entities, items, backpacks, wielded, mut pools, attributes, player, mut gamelog) = data; if equip_dirty.is_empty() { return; } // Build the map of who needs updating let mut to_update : HashMap<Entity, (f32, f32)> = HashMap::new(); // (weight, intiative) for (entity, _dirty) in (&entities, &equip_dirty).join() { to_update.insert(entity, (0.0, 0.0)); } // Remove all dirty statements equip_dirty.clear(); // Total up equipped items for (item, equipped) in (&items, &wielded).join() { if to_update.contains_key(&equipped.owner) { let totals = to_update.get_mut(&equipped.owner).unwrap(); totals.0 += item.weight_lbs; totals.1 += item.initiative_penalty; } } // Total up carried items for (item, carried) in (&items, &backpacks).join() { if to_update.contains_key(&carried.owner) { let totals = to_update.get_mut(&carried.owner).unwrap(); totals.0 += item.weight_lbs; totals.1 += item.initiative_penalty; } } // Apply the data to Pools for (entity, (weight, initiative)) in to_update.iter() { if let Some(pool) = pools.get_mut(*entity) { pool.total_weight = *weight; pool.total_initiative_penalty = *initiative; if let Some(attr) = attributes.get(*entity) { let carry_capacity_lbs = (attr.might.base + attr.might.modifiers) * 15; if pool.total_weight as i32 > carry_capacity_lbs { // Overburdened pool.total_initiative_penalty += 4.0; if *entity == *player { gamelog.entries.push("You are overburdened, and suffering an initiative penalty.".to_string()); } } } } } } } }
Let's walk through what this does:
- If we aren't in the
Tickingrun state, we return (no need to keep cycling when waiting for input!). - If there aren't any
EquipmentChangedentries, we return (no need to do the extra work if there's nothing to do). - We cycle through all entities with an
EquipmentChangedentry and store them in ato_updateHashMap, along with zeroes for weight and initiative. - We remove all
EquipmentChangedtags. - We cycle through all equipped items. If their owner is in the
to_updatelist, we add the weight and penalty of each item to that entity's total in theto_updatemap. - We cycle through all the carried items and do the same.
- We iterate through the
to_updatelist, using destructuring to make it easy to access the fields with nice names.- For each updated entity, we try to get their
Poolscomponent (skipping if we can't). - We set the pool's
total_weightandtotal_initiative_penaltyto the totals we've built. - We look to see if the entity has a
Mightattribute; if they do, we calculate total carry capacity as 15 pounds for each point of might (just like D&D!). - If they have exceeded their carrying capacity, we penalize them with an additional 4 points of initiative penalty (ouch). If it's the player, we announce their over-burdened state in the log file.
- For each updated entity, we try to get their
We also need to call the system in run_systems (in main.rs). Place it before the call to initiative:
#![allow(unused)] fn main() { let mut encumbrance = ai::EncumbranceSystem{}; encumbrance.run_now(&self.ecs); }
If you cargo run now, it will calculate encumbrance for everyone - once, and only once! We haven't added EquipmentChanged tags after changes. We need to update inventory_system.rs so that pickup, drop and use of items (which may destroy them) triggers an update.
The system for picking items up is a very simple change:
#![allow(unused)] fn main() { impl<'a> System<'a> for ItemCollectionSystem { #[allow(clippy::type_complexity)] type SystemData = ( ReadExpect<'a, Entity>, WriteExpect<'a, GameLog>, WriteStorage<'a, WantsToPickupItem>, WriteStorage<'a, Position>, ReadStorage<'a, Name>, WriteStorage<'a, InBackpack>, WriteStorage<'a, EquipmentChanged> ); fn run(&mut self, data : Self::SystemData) { let (player_entity, mut gamelog, mut wants_pickup, mut positions, names, mut backpack, mut dirty) = data; for pickup in wants_pickup.join() { positions.remove(pickup.item); backpack.insert(pickup.item, InBackpack{ owner: pickup.collected_by }).expect("Unable to insert backpack entry"); dirty.insert(pickup.collected_by, EquipmentChanged{}).expect("Unable to insert"); if pickup.collected_by == *player_entity { gamelog.entries.push(format!("You pick up the {}.", names.get(pickup.item).unwrap().name)); } } wants_pickup.clear(); } } }
We do pretty much the same for using an item:
#![allow(unused)] fn main() { impl<'a> System<'a> for ItemUseSystem { #[allow(clippy::type_complexity)] type SystemData = ( ReadExpect<'a, Entity>, WriteExpect<'a, GameLog>, WriteExpect<'a, Map>, Entities<'a>, WriteStorage<'a, WantsToUseItem>, ReadStorage<'a, Name>, ReadStorage<'a, Consumable>, ReadStorage<'a, ProvidesHealing>, ReadStorage<'a, InflictsDamage>, WriteStorage<'a, Pools>, WriteStorage<'a, SufferDamage>, ReadStorage<'a, AreaOfEffect>, WriteStorage<'a, Confusion>, ReadStorage<'a, Equippable>, WriteStorage<'a, Equipped>, WriteStorage<'a, InBackpack>, WriteExpect<'a, ParticleBuilder>, ReadStorage<'a, Position>, ReadStorage<'a, ProvidesFood>, WriteStorage<'a, HungerClock>, ReadStorage<'a, MagicMapper>, WriteExpect<'a, RunState>, WriteStorage<'a, EquipmentChanged> ); #[allow(clippy::cognitive_complexity)] fn run(&mut self, data : Self::SystemData) { let (player_entity, mut gamelog, map, entities, mut wants_use, names, consumables, healing, inflict_damage, mut combat_stats, mut suffer_damage, aoe, mut confused, equippable, mut equipped, mut backpack, mut particle_builder, positions, provides_food, mut hunger_clocks, magic_mapper, mut runstate, mut dirty) = data; for (entity, useitem) in (&entities, &wants_use).join() { dirty.insert(entity, EquipmentChanged{}); ... }
And for dropping an item:
#![allow(unused)] fn main() { impl<'a> System<'a> for ItemDropSystem { #[allow(clippy::type_complexity)] type SystemData = ( ReadExpect<'a, Entity>, WriteExpect<'a, GameLog>, Entities<'a>, WriteStorage<'a, WantsToDropItem>, ReadStorage<'a, Name>, WriteStorage<'a, Position>, WriteStorage<'a, InBackpack>, WriteStorage<'a, EquipmentChanged> ); fn run(&mut self, data : Self::SystemData) { let (player_entity, mut gamelog, entities, mut wants_drop, names, mut positions, mut backpack, mut dirty) = data; for (entity, to_drop) in (&entities, &wants_drop).join() { let mut dropper_pos : Position = Position{x:0, y:0}; { let dropped_pos = positions.get(entity).unwrap(); dropper_pos.x = dropped_pos.x; dropper_pos.y = dropped_pos.y; } positions.insert(to_drop.item, Position{ x : dropper_pos.x, y : dropper_pos.y }).expect("Unable to insert position"); backpack.remove(to_drop.item); dirty.insert(entity, EquipmentChanged{}).expect("Unable to insert"); if entity == *player_entity { gamelog.entries.push(format!("You drop the {}.", names.get(to_drop.item).unwrap().name)); } } wants_drop.clear(); } } }
If you cargo run, you can see in a debugger that modifiers are taking effect.
Showing the player what's going on
HOWEVER - It's very unlikely that your player has a debugger running! We should let the player see the effects of their actions, so they can plan accordingly. We'll modify the user interface in gui.rs (function draw_ui) to actually show the player what's happening.
First, we'll move the list of equipped items (and hotkeys beneath it) down by four lines (line 99 of the example source code):
#![allow(unused)] fn main() { // Equipped let mut y = 13; }
Why four? So we can have some whitespace, a line for initiative, a line for weight, and a future line for money when we get there! Let's actually print the information. Before the // Equipped comment:
#![allow(unused)] fn main() { // Initiative and weight ctx.print_color(50, 9, white, black, &format!("{:.0} lbs ({} lbs max)", player_pools.total_weight, (attr.might.base + attr.might.modifiers) * 15 ) ); ctx.print_color(50,10, white, black, &format!("Initiative Penalty: {:.0}", player_pools.total_initiative_penalty)); }
Note that the format! macro has {:.0} for the placeholder; that's telling Rust to format to zero decimal places (it's a float). If you cargo run now, you'll see that we're displaying our totals. If you drop items, the totals change:
Actually updating initiative
We're missing one rather important step: actually using the initiative penalty! Open up ai/initiative_system.rs and we'll rectify that. Remember the TODO statement we left in there? Now we have something to go there! First, we'll add Pools to the available reading resources:
#![allow(unused)] fn main() { impl<'a> System<'a> for InitiativeSystem { #[allow(clippy::type_complexity)] type SystemData = ( WriteStorage<'a, Initiative>, ReadStorage<'a, Position>, WriteStorage<'a, MyTurn>, Entities<'a>, WriteExpect<'a, rltk::RandomNumberGenerator>, ReadStorage<'a, Attributes>, WriteExpect<'a, RunState>, ReadExpect<'a, Entity>, ReadExpect<'a, rltk::Point>, ReadStorage<'a, Pools>); fn run(&mut self, data : Self::SystemData) { let (mut initiatives, positions, mut turns, entities, mut rng, attributes, mut runstate, player, player_pos, pools) = data; ... }
Then, we add the current total penalty to the initiative value:
#![allow(unused)] fn main() { // Apply pool penalty if let Some(pools) = pools.get(entity) { initiative.current += f32::floor(pools.total_initiative_penalty) as i32; } // TODO: More initiative granting boosts/penalties will go here later }
Alright - the initiative penalties take effect! You can play the game for a bit, and see how the values affect gameplay. You've made larger/more damaging weapons incur a speed penalty (along with heavier armor), so now the more equipped an entity is - the slower they go. This applies some balance to the game; fast dagger-wielders get more blows in relative to slower, armored longsword wielders. Equipment choice is no longer just about getting the biggest bonuses - it also affects speed/weight. In other words, it's a balancing act - giving the player multiple ways to optimize "their build" (if you get people posting "builds" about for your game, celebrate: it means they are really enjoying it!).
All About the Cash
We've added a base_value field to items, but aren't doing anything with it. In fact, we have no notion of currency whatsoever. Lets go with a simplified "gold pieces" system; gold is the major number (before the decimal point), silver is the fractional (with 10 silver to the gold). We'll not worry about smaller coinages.
In many ways, currency is a pool - just like hit points and similar. You spend it, gain it, and it's best handled as an abstract number rather than trying to track each individual coin (although that's quite possible with an ECS!). So we'll further extend the Pools component to specify gold:
#![allow(unused)] fn main() { #[derive(Component, Debug, Serialize, Deserialize, Clone)] pub struct Pools { pub hit_points : Pool, pub mana : Pool, pub xp : i32, pub level : i32, pub total_weight : f32, pub total_initiative_penalty : f32, pub gold : f32 } }
Applying it to pools means that the player, and all NPCs potentially have gold! Open up spawner.rs, and modify the player function to start the impoverished hero with no money at all:
#![allow(unused)] fn main() { .with(Pools{ hit_points : Pool{ current: player_hp_at_level(11, 1), max: player_hp_at_level(11, 1) }, mana: Pool{ current: mana_at_level(11, 1), max: mana_at_level(11, 1) }, xp: 0, level: 1, total_weight : 0.0, total_initiative_penalty : 0.0, gold : 0.0 }) }
NPCs should also carry gold, so you can liberate them from the burdens of mercantilist thought when slain! Open up raws/mob_structs.rs and we'll add a "gold" field to the NPC definition:
#![allow(unused)] fn main() { #[derive(Deserialize, Debug)] pub struct Mob { pub name : String, pub renderable : Option<Renderable>, pub blocks_tile : bool, pub vision_range : i32, pub movement : String, pub quips : Option<Vec<String>>, pub attributes : MobAttributes, pub skills : Option<HashMap<String, i32>>, pub level : Option<i32>, pub hp : Option<i32>, pub mana : Option<i32>, pub equipped : Option<Vec<String>>, pub natural : Option<MobNatural>, pub loot_table : Option<String>, pub light : Option<MobLight>, pub faction : Option<String>, pub gold : Option<String> } }
We've made gold an Option - so it doesn't have to be present (after all, why would a rat carry cash?). We've also made it a String - so it can be a dice roll rather than a specific number. It's dull to have bandits always drop one gold! Now we need to modify rawmaster.rs's spawn_named_mob function to actually apply gold to NPCs:
#![allow(unused)] fn main() { let pools = Pools{ level: mob_level, xp: 0, hit_points : Pool{ current: mob_hp, max: mob_hp }, mana: Pool{current: mob_mana, max: mob_mana}, total_weight : 0.0, total_initiative_penalty : 0.0, gold : if let Some(gold) = &mob_template.gold { let mut rng = rltk::RandomNumberGenerator::new(); let (n, d, b) = parse_dice_string(&gold); (rng.roll_dice(n, d) + b) as f32 } else { 0.0 } }; }
So we're telling the spawner: if there is no gold specified, use zero. Otherwise, parse the dice string and roll it - and use that number of gold pieces.
Next, when the player kills someone - we should loot their cash. You pretty much always want to pick money up, so there's no real need to drop it and make the player remember to collect it. In damage_system.rs, first add a new mutable variable next to xp_gain:
#![allow(unused)] fn main() { let mut xp_gain = 0; let mut gold_gain = 0.0f32; }
Then next to where we add XP:
#![allow(unused)] fn main() { if stats.hit_points.current < 1 && damage.from_player { xp_gain += stats.level * 100; gold_gain += stats.gold; } }
Then when we update the player's XP, we also update their gold:
#![allow(unused)] fn main() { if xp_gain != 0 || gold_gain != 0.0 { let mut player_stats = stats.get_mut(*player).unwrap(); let player_attributes = attributes.get(*player).unwrap(); player_stats.xp += xp_gain; player_stats.gold += gold_gain; }
Next, we should show the player how much gold they have. Open up gui.rs again, and next to where we put in weight and initiative we add one more line:
#![allow(unused)] fn main() { ctx.print_color(50,11, rltk::RGB::named(rltk::GOLD), black, &format!("Gold: {:.1}", player_pools.gold)); }
Lastly, we should give Bandits some gold. In spawns.json, open up the Bandit entry and apply gold:
{
"name" : "Bandit",
"renderable": {
"glyph" : "☻",
"fg" : "#FF0000",
"bg" : "#000000",
"order" : 1
},
"blocks_tile" : true,
"vision_range" : 6,
"movement" : "random_waypoint",
"quips" : [ "Stand and deliver!", "Alright, hand it over" ],
"attributes" : {},
"equipped" : [ "Dagger", "Shield", "Leather Armor", "Leather Boots" ],
"light" : {
"range" : 6,
"color" : "#FFFF55"
},
"faction" : "Bandits",
"gold" : "1d6"
},
(In the in the source code, I've also given gold to goblins, orcs and other humanoids. You should, too!)
If you cargo run now, you'll be able to gain gold by slaying enemies (you also see me equipping myself after slaying the bandit, initiative and weights update properly):
Trading with vendors
Another good way to gain gold (and free up your inventory) is to sell it to vendors. We'd like to keep the interface simple, so we want walking into a vendor to trigger a vendor screen. Let's modify the Barkeep entry to include a note that he's a) a vendor, and b) sells food.
{
"name" : "Barkeep",
"renderable": {
"glyph" : "☻",
"fg" : "#EE82EE",
"bg" : "#000000",
"order" : 1
},
"blocks_tile" : true,
"vision_range" : 4,
"movement" : "static",
"attributes" : {
"intelligence" : 13
},
"skills" : {
"Melee" : 2
},
"equipped" : [ "Cudgel", "Cloth Tunic", "Cloth Pants", "Slippers" ],
"faction" : "Townsfolk",
"gold" : "2d6",
"vendor" : [ "food" ]
},
We need to update raws/mob_structs.rs to support vendor tags being an option, that will contain a list of category strings:
#![allow(unused)] fn main() { #[derive(Deserialize, Debug)] pub struct Mob { pub name : String, pub renderable : Option<Renderable>, pub blocks_tile : bool, pub vision_range : i32, pub movement : String, pub quips : Option<Vec<String>>, pub attributes : MobAttributes, pub skills : Option<HashMap<String, i32>>, pub level : Option<i32>, pub hp : Option<i32>, pub mana : Option<i32>, pub equipped : Option<Vec<String>>, pub natural : Option<MobNatural>, pub loot_table : Option<String>, pub light : Option<MobLight>, pub faction : Option<String>, pub gold : Option<String>, pub vendor : Option<Vec<String>> } }
We'll also need to make a Vendor component. You may remember that we had one before, but it was tied to AI - this time, it's actually designed to handle buying/selling. Add it to components.rs (and register in main.rs and saveload_system.rs):
#![allow(unused)] fn main() { #[derive(Component, Debug, Serialize, Deserialize, Clone)] pub struct Vendor { pub categories : Vec<String> } }
A quick change to rawmaster.rs's spawn_named_mob makes this component attach to vendors:
#![allow(unused)] fn main() { if let Some(vendor) = &mob_template.vendor { eb = eb.with(Vendor{ categories : vendor.clone() }); } }
Let's open main.rs and add a new state to RunState:
#![allow(unused)] fn main() { #[derive(PartialEq, Copy, Clone)] pub enum VendorMode { Buy, Sell } #[derive(PartialEq, Copy, Clone)] pub enum RunState { AwaitingInput, PreRun, Ticking, ShowInventory, ShowDropItem, ShowTargeting { range : i32, item : Entity}, MainMenu { menu_selection : gui::MainMenuSelection }, SaveGame, NextLevel, PreviousLevel, ShowRemoveItem, GameOver, MagicMapReveal { row : i32 }, MapGeneration, ShowCheatMenu, ShowVendor { vendor: Entity, mode : VendorMode } } }
Now we need to update player.rs's try_move_player function to trigger vendor mode if we walk into a vendor:
#![allow(unused)] fn main() { ... let vendors = ecs.read_storage::<Vendor>(); let mut result = RunState::AwaitingInput; let mut swap_entities : Vec<(Entity, i32, i32)> = Vec::new(); for (entity, _player, pos, viewshed) in (&entities, &players, &mut positions, &mut viewsheds).join() { if pos.x + delta_x < 1 || pos.x + delta_x > map.width-1 || pos.y + delta_y < 1 || pos.y + delta_y > map.height-1 { return RunState::AwaitingInput; } let destination_idx = map.xy_idx(pos.x + delta_x, pos.y + delta_y); result = crate::spatial::for_each_tile_content_with_gamemode(destination_idx, |potential_target| { if let Some(_vendor) = vendors.get(potential_target) { return Some(RunState::ShowVendor{ vendor: potential_target, mode : VendorMode::Sell }); } ... }
We also need a way to determine what goods the vendor has for sale. In raws/item_structs.rs, we'll add a new optional field to item definitions: a vendor category:
#![allow(unused)] fn main() { #[derive(Deserialize, Debug)] pub struct Item { pub name : String, pub renderable : Option<Renderable>, pub consumable : Option<Consumable>, pub weapon : Option<Weapon>, pub wearable : Option<Wearable>, pub initiative_penalty : Option<f32>, pub weight_lbs : Option<f32>, pub base_value : Option<f32>, pub vendor_category : Option<String> } }
Go into spawns.json, and add a vendor category tag to Rations:
{
"name" : "Rations",
"renderable": {
"glyph" : "%",
"fg" : "#00FF00",
"bg" : "#000000",
"order" : 2
},
"consumable" : {
"effects" : {
"food" : ""
}
},
"weight_lbs" : 2.0,
"base_value" : 0.5,
"vendor_category" : "food"
},
Now we can add this function to raws/rawmaster.rs to retrieve items for sale in categories:
#![allow(unused)] fn main() { pub fn get_vendor_items(categories: &[String], raws : &RawMaster) -> Vec<(String, f32)> { let mut result : Vec<(String, f32)> = Vec::new(); for item in raws.raws.items.iter() { if let Some(cat) = &item.vendor_category { if categories.contains(cat) && item.base_value.is_some() { result.push(( item.name.clone(), item.base_value.unwrap() )); } } } result } }
We'll head over to gui.rs and create a new function, show_vendor_menu, along with two helper functions and an enum! Let's start with the enum:
#![allow(unused)] fn main() { #[derive(PartialEq, Copy, Clone)] pub enum VendorResult { NoResponse, Cancel, Sell, BuyMode, SellMode, Buy } }
This represents the choices the player may make when talking to a vendor: nothing, cancel the conversation, buy or sell an item, and switch between buy and sell modes.
The function to display items for sale is very similar to the UI for dropping an item (it's a modified copy):
#![allow(unused)] fn main() { fn vendor_sell_menu(gs : &mut State, ctx : &mut Rltk, _vendor : Entity, _mode : VendorMode) -> (VendorResult, Option<Entity>, Option<String>, Option<f32>) { let player_entity = gs.ecs.fetch::<Entity>(); let names = gs.ecs.read_storage::<Name>(); let backpack = gs.ecs.read_storage::<InBackpack>(); let items = gs.ecs.read_storage::<Item>(); let entities = gs.ecs.entities(); let inventory = (&backpack, &names).join().filter(|item| item.0.owner == *player_entity ); let count = inventory.count(); let mut y = (25 - (count / 2)) as i32; ctx.draw_box(15, y-2, 51, (count+3) as i32, RGB::named(rltk::WHITE), RGB::named(rltk::BLACK)); ctx.print_color(18, y-2, RGB::named(rltk::YELLOW), RGB::named(rltk::BLACK), "Sell Which Item? (space to switch to buy mode)"); ctx.print_color(18, y+count as i32+1, RGB::named(rltk::YELLOW), RGB::named(rltk::BLACK), "ESCAPE to cancel"); let mut equippable : Vec<Entity> = Vec::new(); let mut j = 0; for (entity, _pack, name, item) in (&entities, &backpack, &names, &items).join().filter(|item| item.1.owner == *player_entity ) { ctx.set(17, y, RGB::named(rltk::WHITE), RGB::named(rltk::BLACK), rltk::to_cp437('(')); ctx.set(18, y, RGB::named(rltk::YELLOW), RGB::named(rltk::BLACK), 97+j as rltk::FontCharType); ctx.set(19, y, RGB::named(rltk::WHITE), RGB::named(rltk::BLACK), rltk::to_cp437(')')); ctx.print(21, y, &name.name.to_string()); ctx.print(50, y, &format!("{:.1} gp", item.base_value * 0.8)); equippable.push(entity); y += 1; j += 1; } match ctx.key { None => (VendorResult::NoResponse, None, None, None), Some(key) => { match key { VirtualKeyCode::Space => { (VendorResult::BuyMode, None, None, None) } VirtualKeyCode::Escape => { (VendorResult::Cancel, None, None, None) } _ => { let selection = rltk::letter_to_option(key); if selection > -1 && selection < count as i32 { return (VendorResult::Sell, Some(equippable[selection as usize]), None, None); } (VendorResult::NoResponse, None, None, None) } } } } } }
Buying is also similar, but instead of querying a backpack we use the get_vendor_items function we wrote earlier to obtain a list of things to sell:
#![allow(unused)] fn main() { fn vendor_buy_menu(gs : &mut State, ctx : &mut Rltk, vendor : Entity, _mode : VendorMode) -> (VendorResult, Option<Entity>, Option<String>, Option<f32>) { use crate::raws::*; let vendors = gs.ecs.read_storage::<Vendor>(); let inventory = crate::raws::get_vendor_items(&vendors.get(vendor).unwrap().categories, &RAWS.lock().unwrap()); let count = inventory.len(); let mut y = (25 - (count / 2)) as i32; ctx.draw_box(15, y-2, 51, (count+3) as i32, RGB::named(rltk::WHITE), RGB::named(rltk::BLACK)); ctx.print_color(18, y-2, RGB::named(rltk::YELLOW), RGB::named(rltk::BLACK), "Buy Which Item? (space to switch to sell mode)"); ctx.print_color(18, y+count as i32+1, RGB::named(rltk::YELLOW), RGB::named(rltk::BLACK), "ESCAPE to cancel"); for (j,sale) in inventory.iter().enumerate() { ctx.set(17, y, RGB::named(rltk::WHITE), RGB::named(rltk::BLACK), rltk::to_cp437('(')); ctx.set(18, y, RGB::named(rltk::YELLOW), RGB::named(rltk::BLACK), 97+j as rltk::FontCharType); ctx.set(19, y, RGB::named(rltk::WHITE), RGB::named(rltk::BLACK), rltk::to_cp437(')')); ctx.print(21, y, &sale.0); ctx.print(50, y, &format!("{:.1} gp", sale.1 * 1.2)); y += 1; } match ctx.key { None => (VendorResult::NoResponse, None, None, None), Some(key) => { match key { VirtualKeyCode::Space => { (VendorResult::SellMode, None, None, None) } VirtualKeyCode::Escape => { (VendorResult::Cancel, None, None, None) } _ => { let selection = rltk::letter_to_option(key); if selection > -1 && selection < count as i32 { return (VendorResult::Buy, None, Some(inventory[selection as usize].0.clone()), Some(inventory[selection as usize].1)); } (VendorResult::NoResponse, None, None, None) } } } } } }
Finally, we offer a public function that simply directs to the relevant mode:
#![allow(unused)] fn main() { pub fn show_vendor_menu(gs : &mut State, ctx : &mut Rltk, vendor : Entity, mode : VendorMode) -> (VendorResult, Option<Entity>, Option<String>, Option<f32>) { match mode { VendorMode::Buy => vendor_buy_menu(gs, ctx, vendor, mode), VendorMode::Sell => vendor_sell_menu(gs, ctx, vendor, mode) } } }
Back in main.rs, we need to add vending to the game's overall state machine:
#![allow(unused)] fn main() { RunState::ShowVendor{vendor, mode} => { let result = gui::show_vendor_menu(self, ctx, vendor, mode); match result.0 { gui::VendorResult::Cancel => newrunstate = RunState::AwaitingInput, gui::VendorResult::NoResponse => {} gui::VendorResult::Sell => { let price = self.ecs.read_storage::<Item>().get(result.1.unwrap()).unwrap().base_value * 0.8; self.ecs.write_storage::<Pools>().get_mut(*self.ecs.fetch::<Entity>()).unwrap().gold += price; self.ecs.delete_entity(result.1.unwrap()).expect("Unable to delete"); } gui::VendorResult::Buy => { let tag = result.2.unwrap(); let price = result.3.unwrap(); let mut pools = self.ecs.write_storage::<Pools>(); let player_pools = pools.get_mut(*self.ecs.fetch::<Entity>()).unwrap(); if player_pools.gold >= price { player_pools.gold -= price; std::mem::drop(pools); let player_entity = *self.ecs.fetch::<Entity>(); crate::raws::spawn_named_item(&RAWS.lock().unwrap(), &mut self.ecs, &tag, SpawnType::Carried{ by: player_entity }); } } gui::VendorResult::BuyMode => newrunstate = RunState::ShowVendor{ vendor, mode: VendorMode::Buy }, gui::VendorResult::SellMode => newrunstate = RunState::ShowVendor{ vendor, mode: VendorMode::Sell } } } }
You can now buy and sell goods from vendors! The UI could use a little more improvement (for a future chapter!), but the functionality is there. Now you have a reason to pickup useless loot and cash!
Lastly, going through spawns.json to add items to vendor categories is a great idea - and setting vendors to sell these categories. You've seen Rations as an example - now it's time to go hog-wild on items! In the source code, I've filled out what I think to be reasonable defaults.
Wrap-Up
The game now has money, buying and selling! That gives a great reason to get back to the town, and pick up otherwise useless items. The game also now has inventory weight and encumbrance, and a benefit to using smaller weapons. This has laid the groundwork for a much deeper game.
...
The source code for this chapter may be found here
Run this chapter's example with web assembly, in your browser (WebGL2 required)
Copyright (C) 2019, Herbert Wolverson.
Deeper Caverns
About this tutorial
This tutorial is free and open source, and all code uses the MIT license - so you are free to do with it as you like. My hope is that you will enjoy the tutorial, and make great games!
If you enjoy this and would like me to keep writing, please consider supporting my Patreon.
We have the first layer of the limestone caverns looking pretty good. We know from the design document that the caverns give way to a dwarven fortress, but it seems reasonable to enjoy our cavern renderer for a little longer. Let's build a deeper caves level, focused on an orc and goblin camp, with peripheral wild monsters.
More cheating!
Now's a good time to add a little more cheat functionality to make working on later levels easier.
Heal-on-demand
It sucks when you die, when all you wanted was to check out your new level design! So we'll add a new cheat option: healing. Open up gui.rs, and edit cheat_menu and the associated result type:
#![allow(unused)] fn main() { #[derive(PartialEq, Copy, Clone)] pub enum CheatMenuResult { NoResponse, Cancel, TeleportToExit, Heal } pub fn show_cheat_mode(_gs : &mut State, ctx : &mut Rltk) -> CheatMenuResult { let count = 2; let mut y = (25 - (count / 2)) as i32; ctx.draw_box(15, y-2, 31, (count+3) as i32, RGB::named(rltk::WHITE), RGB::named(rltk::BLACK)); ctx.print_color(18, y-2, RGB::named(rltk::YELLOW), RGB::named(rltk::BLACK), "Cheating!"); ctx.print_color(18, y+count as i32+1, RGB::named(rltk::YELLOW), RGB::named(rltk::BLACK), "ESCAPE to cancel"); ctx.set(17, y, RGB::named(rltk::WHITE), RGB::named(rltk::BLACK), rltk::to_cp437('(')); ctx.set(18, y, RGB::named(rltk::YELLOW), RGB::named(rltk::BLACK), rltk::to_cp437('T')); ctx.set(19, y, RGB::named(rltk::WHITE), RGB::named(rltk::BLACK), rltk::to_cp437(')')); ctx.print(21, y, "Teleport to next level"); y += 1; ctx.set(17, y, RGB::named(rltk::WHITE), RGB::named(rltk::BLACK), rltk::to_cp437('(')); ctx.set(18, y, RGB::named(rltk::YELLOW), RGB::named(rltk::BLACK), rltk::to_cp437('H')); ctx.set(19, y, RGB::named(rltk::WHITE), RGB::named(rltk::BLACK), rltk::to_cp437(')')); ctx.print(21, y, "Heal all wounds"); match ctx.key { None => CheatMenuResult::NoResponse, Some(key) => { match key { VirtualKeyCode::T => CheatMenuResult::TeleportToExit, VirtualKeyCode::H => CheatMenuResult::Heal, VirtualKeyCode::Escape => CheatMenuResult::Cancel, _ => CheatMenuResult::NoResponse } } } } }
Then visit main.rs, and in the cheat handler add support for healing:
#![allow(unused)] fn main() { gui::CheatMenuResult::Heal => { let player = self.ecs.fetch::<Entity>(); let mut pools = self.ecs.write_storage::<Pools>(); let mut player_pools = pools.get_mut(*player).unwrap(); player_pools.hit_points.current = player_pools.hit_points.max; newrunstate = RunState::AwaitingInput; } }
With that in place, you are two keypresses away from free healing whenever you need it! This should make it easier to explore our later levels:
Reveal All and God Mode
Another handy feature would be to reveal the map, especially if you just want to validate your map building. Turning off death altogether would also be a great way to make sure that all of the map is where you think it should be! So first, we'll add two more menu items and their handlers:
#![allow(unused)] fn main() { #[derive(PartialEq, Copy, Clone)] pub enum CheatMenuResult { NoResponse, Cancel, TeleportToExit, Heal, Reveal, GodMode } pub fn show_cheat_mode(_gs : &mut State, ctx : &mut Rltk) -> CheatMenuResult { let count = 4; let mut y = (25 - (count / 2)) as i32; ctx.draw_box(15, y-2, 31, (count+3) as i32, RGB::named(rltk::WHITE), RGB::named(rltk::BLACK)); ctx.print_color(18, y-2, RGB::named(rltk::YELLOW), RGB::named(rltk::BLACK), "Cheating!"); ctx.print_color(18, y+count as i32+1, RGB::named(rltk::YELLOW), RGB::named(rltk::BLACK), "ESCAPE to cancel"); ctx.set(17, y, RGB::named(rltk::WHITE), RGB::named(rltk::BLACK), rltk::to_cp437('(')); ctx.set(18, y, RGB::named(rltk::YELLOW), RGB::named(rltk::BLACK), rltk::to_cp437('T')); ctx.set(19, y, RGB::named(rltk::WHITE), RGB::named(rltk::BLACK), rltk::to_cp437(')')); ctx.print(21, y, "Teleport to next level"); y += 1; ctx.set(17, y, RGB::named(rltk::WHITE), RGB::named(rltk::BLACK), rltk::to_cp437('(')); ctx.set(18, y, RGB::named(rltk::YELLOW), RGB::named(rltk::BLACK), rltk::to_cp437('H')); ctx.set(19, y, RGB::named(rltk::WHITE), RGB::named(rltk::BLACK), rltk::to_cp437(')')); ctx.print(21, y, "Heal all wounds"); y += 1; ctx.set(17, y, RGB::named(rltk::WHITE), RGB::named(rltk::BLACK), rltk::to_cp437('(')); ctx.set(18, y, RGB::named(rltk::YELLOW), RGB::named(rltk::BLACK), rltk::to_cp437('R')); ctx.set(19, y, RGB::named(rltk::WHITE), RGB::named(rltk::BLACK), rltk::to_cp437(')')); ctx.print(21, y, "Reveal the map"); y += 1; ctx.set(17, y, RGB::named(rltk::WHITE), RGB::named(rltk::BLACK), rltk::to_cp437('(')); ctx.set(18, y, RGB::named(rltk::YELLOW), RGB::named(rltk::BLACK), rltk::to_cp437('G')); ctx.set(19, y, RGB::named(rltk::WHITE), RGB::named(rltk::BLACK), rltk::to_cp437(')')); ctx.print(21, y, "God Mode (No Death)"); match ctx.key { None => CheatMenuResult::NoResponse, Some(key) => { match key { VirtualKeyCode::T => CheatMenuResult::TeleportToExit, VirtualKeyCode::H => CheatMenuResult::Heal, VirtualKeyCode::R => CheatMenuResult::Reveal, VirtualKeyCode::G => CheatMenuResult::GodMode, VirtualKeyCode::Escape => CheatMenuResult::Cancel, _ => CheatMenuResult::NoResponse } } } } }
Now we need to handle this in main.rs:
#![allow(unused)] fn main() { gui::CheatMenuResult::Reveal => { let mut map = self.ecs.fetch_mut::<Map>(); for v in map.revealed_tiles.iter_mut() { *v = true; } newrunstate = RunState::AwaitingInput; } gui::CheatMenuResult::GodMode => { let player = self.ecs.fetch::<Entity>(); let mut pools = self.ecs.write_storage::<Pools>(); let mut player_pools = pools.get_mut(*player).unwrap(); player_pools.god_mode = true; newrunstate = RunState::AwaitingInput; } }
Reveal is really simple: set every tile on the map to revealed. God Mode is setting a variable in the Pools component that doesn't exist yet, so open up components.rs and we'll add it:
#![allow(unused)] fn main() { #[derive(Component, Debug, Serialize, Deserialize, Clone)] pub struct Pools { pub hit_points : Pool, pub mana : Pool, pub xp : i32, pub level : i32, pub total_weight : f32, pub total_initiative_penalty : f32, pub gold : f32, pub god_mode : bool } }
We need to set god_mode to false in spawner.rs and raws/rawmaster.rs functions that create Pools objects. Lastly, a quick tweak to damage_system.rs turns off damage for deities:
#![allow(unused)] fn main() { ... for (entity, mut stats, damage) in (&entities, &mut stats, &damage).join() { if !stats.god_mode { stats.hit_points.current -= damage.amount.iter().sum::<i32>(); } ... }
Now you can reveal the map at any time, and turn off the ability to suffer damage:
This makes it much easier to work on later-game content without having to play through over and over again (it's a good idea to play through from time to time and find bugs, though).
Deep caverns basic layout
The deep caverns should still look natural, but should also feature a central area in which the goblinoids can camp. The Diffusion-Limited Aggregation algorithm we worked on in a previous chapter, specifically the "central attractor" mode, provides pretty much exactly what we want for basic layout:
In map_builders/mod.rs, we'll start by creating a new entry for level 4:
#![allow(unused)] fn main() { pub fn level_builder(new_depth: i32, rng: &mut rltk::RandomNumberGenerator, width: i32, height: i32) -> BuilderChain { rltk::console::log(format!("Depth: {}", new_depth)); match new_depth { 1 => town_builder(new_depth, rng, width, height), 2 => forest_builder(new_depth, rng, width, height), 3 => limestone_cavern_builder(new_depth, rng, width, height), 4 => limestone_deep_cavern_builder(new_depth, rng, width, height), _ => random_builder(new_depth, rng, width, height) } } }
In map/themes.rs, we'll tell this level to also be limestone themed:
#![allow(unused)] fn main() { pub fn tile_glyph(idx: usize, map : &Map) -> (rltk::FontCharType, RGB, RGB) { let (glyph, mut fg, mut bg) = match map.depth { 4 => get_limestone_cavern_glyph(idx, map), 3 => get_limestone_cavern_glyph(idx, map), 2 => get_forest_glyph(idx, map), _ => get_tile_glyph_default(idx, map) }; }
Then in map_builders/limestone_cavern.rs we can add the new function. This is a good start:
#![allow(unused)] fn main() { pub fn limestone_deep_cavern_builder(new_depth: i32, _rng: &mut rltk::RandomNumberGenerator, width: i32, height: i32) -> BuilderChain { let mut chain = BuilderChain::new(new_depth, width, height, "Deep Limestone Caverns"); chain.start_with(DLABuilder::central_attractor()); chain.with(AreaStartingPosition::new(XStart::LEFT, YStart::TOP)); chain.with(VoronoiSpawning::new()); chain.with(DistantExit::new()); chain.with(CaveDecorator::new()); chain } }
This actually gets us a pretty playable level; we could stop here and not be ashamed (although we clearly need to add some more monsters). We're not done yet, though! We'd like there to be an orc camp at the center of the map. This sounds like a job for a prefab! Open up map_builders/prefab_builder/prefab_sections.rs and we'll add a new sectional:
#![allow(unused)] fn main() { #[allow(dead_code)] pub const ORC_CAMP : PrefabSection = PrefabSection{ template : ORC_CAMP_TXT, width: 12, height: 12, placement: ( HorizontalPlacement::Center, VerticalPlacement::Center ) }; #[allow(dead_code)] const ORC_CAMP_TXT : &str = " ≈≈≈≈o≈≈≈≈≈ ≈☼ ☼≈ ≈ g ≈ ≈ ≈ ≈ g ≈ o O o ≈ ≈ ≈ g ≈ ≈ g ≈ ≈☼ ☼≈ ≈≈≈≈o≈≈≈≈≈ "; }
There's some new glyphs in here, so we also need to open up map_builders/prefab_builder/mod.rs, find the char_to_map function and add them in. The squiggles are meant to be water (providing a guarded moat), the sun symbols watch-fires. The capital O is an orc boss. So we add those to the match function:
#![allow(unused)] fn main() { '≈' => build_data.map.tiles[idx] = TileType::DeepWater, 'O' => { build_data.map.tiles[idx] = TileType::Floor; build_data.spawn_list.push((idx, "Orc Leader".to_string())); } '☼' => { build_data.map.tiles[idx] = TileType::Floor; build_data.spawn_list.push((idx, "Watch Fire".to_string())); } }
Then we modify the build-chain (in limestone_deep_cavern_builder) to include this:
#![allow(unused)] fn main() { pub fn limestone_deep_cavern_builder(new_depth: i32, _rng: &mut rltk::RandomNumberGenerator, width: i32, height: i32) -> BuilderChain { let mut chain = BuilderChain::new(new_depth, width, height, "Deep Limestone Caverns"); chain.start_with(DLABuilder::central_attractor()); chain.with(AreaStartingPosition::new(XStart::LEFT, YStart::TOP)); chain.with(VoronoiSpawning::new()); chain.with(DistantExit::new()); chain.with(CaveDecorator::new()); chain.with(PrefabBuilder::sectional(super::prefab_builder::prefab_sections::ORC_CAMP)); chain } }
We need to add in the missing entities, also. "Watch Fire" and "Orc Leader" are new. So we open up spawns.json and add them in. The Watch Fire is a prop:
{
"name" : "Watch Fire",
"renderable": {
"glyph" : "☼",
"fg" : "#FFFF55",
"bg" : "#000000",
"order" : 2
},
"hidden" : false,
"light" : {
"range" : 6,
"color" : "#FFFF55"
},
"entry_trigger" : {
"effects" : {
"damage" : "6"
}
}
}
The light entry is new! We haven't had props generate light before (but it makes sense; a dark watch fire would be quite odd). It also does damage on entry, which makes sense - walking into a fire is rarely good for your health. Supporting the light requires a couple of quick changes. Open up raws/prop_structs.rs and add the option for a light entry to props:
#![allow(unused)] fn main() { #[derive(Deserialize, Debug)] pub struct Prop { pub name : String, pub renderable : Option<Renderable>, pub hidden : Option<bool>, pub blocks_tile : Option<bool>, pub blocks_visibility : Option<bool>, pub door_open : Option<bool>, pub entry_trigger : Option<EntryTrigger>, pub light : Option<super::mob_structs::MobLight>, } }
We've reused MobLight from mobs, since it's the same thing. Now open up raws/raw_master.rs and we'll edit spawn_named_prop to include this option:
#![allow(unused)] fn main() { if let Some(light) = &prop_template.light { eb = eb.with(LightSource{ range: light.range, color : rltk::RGB::from_hex(&light.color).expect("Bad color") }); eb = eb.with(Viewshed{ range: light.range, dirty: true, visible_tiles: Vec::new() }); } }
If you remember, our lighting code uses a visibility plot to determine where it can light - so the prop needs a viewshed. That's ok, our ECS has our back and will handle it (and after the first plot, it'll never recalculate - since the prop won't move).
Lastly, our Orc Leader goes in the "mobs" section of spawns.json:
{
"name" : "Orc Leader",
"renderable": {
"glyph" : "O",
"fg" : "#FF0000",
"bg" : "#000000",
"order" : 1
},
"blocks_tile" : true,
"vision_range" : 8,
"movement" : "static",
"attributes" : {},
"faction" : "Cave Goblins",
"gold" : "3d8",
"equipped" : [ "Battleaxe", "Tower Shield", "Leather Armor", "Leather Boots" ],
"level" : 2
},
He should be a challenge, but you get good cash and nice weapons/armor from him if you win.
If you cargo run now, you'll see that we have the fort in position (I'm using god mode in the graphic):
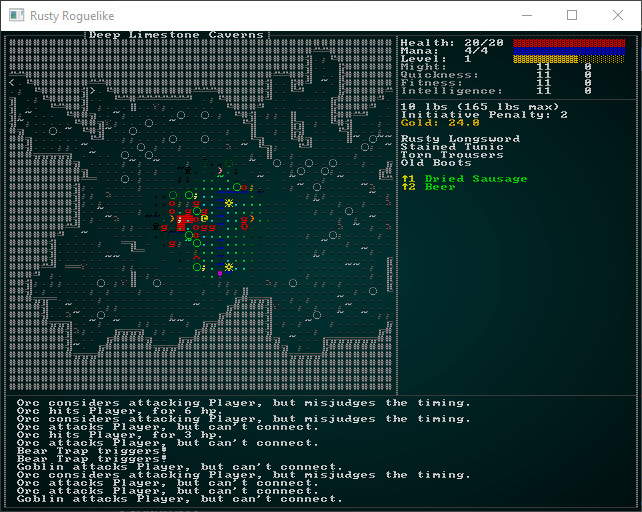
So the prefab is there - but there's a real problem: the player is completely overrun with orcs and goblins! While that may be realistic, it gives the player very little chance to survive reaching this level. Even with clever play, that type of onslaught in a relatively open map is likely to prove fatal in no time. So for now, we'll adjust the spawn table in spawns.json:
"spawn_table" : [
{ "name" : "Goblin", "weight" : 10, "min_depth" : 3, "max_depth" : 4 },
{ "name" : "Orc", "weight" : 1, "min_depth" : 4, "max_depth" : 100 },
{ "name" : "Health Potion", "weight" : 7, "min_depth" : 0, "max_depth" : 100 },
{ "name" : "Fireball Scroll", "weight" : 2, "min_depth" : 0, "max_depth" : 100, "add_map_depth_to_weight" : true },
{ "name" : "Confusion Scroll", "weight" : 2, "min_depth" : 0, "max_depth" : 100, "add_map_depth_to_weight" : true },
{ "name" : "Magic Missile Scroll", "weight" : 4, "min_depth" : 0, "max_depth" : 100 },
{ "name" : "Dagger", "weight" : 3, "min_depth" : 0, "max_depth" : 100 },
{ "name" : "Shield", "weight" : 3, "min_depth" : 0, "max_depth" : 100 },
{ "name" : "Longsword", "weight" : 1, "min_depth" : 3, "max_depth" : 100 },
{ "name" : "Tower Shield", "weight" : 1, "min_depth" : 3, "max_depth" : 100 },
{ "name" : "Rations", "weight" : 10, "min_depth" : 0, "max_depth" : 100 },
{ "name" : "Magic Mapping Scroll", "weight" : 2, "min_depth" : 0, "max_depth" : 100 },
{ "name" : "Bear Trap", "weight" : 5, "min_depth" : 0, "max_depth" : 100 },
{ "name" : "Battleaxe", "weight" : 1, "min_depth" : 2, "max_depth" : 100 },
{ "name" : "Kobold", "weight" : 15, "min_depth" : 3, "max_depth" : 3 },
{ "name" : "Rat", "weight" : 15, "min_depth" : 2, "max_depth" : 2 },
{ "name" : "Mangy Wolf", "weight" : 13, "min_depth" : 2, "max_depth" : 2 },
{ "name" : "Deer", "weight" : 14, "min_depth" : 2, "max_depth" : 2 },
{ "name" : "Bandit", "weight" : 9, "min_depth" : 2, "max_depth" : 3 },
{ "name" : "Bat", "weight" : 15, "min_depth" : 3, "max_depth" : 3 },
{ "name" : "Large Spider", "weight" : 3, "min_depth" : 3, "max_depth" : 3 },
{ "name" : "Gelatinous Cube", "weight" : 3, "min_depth" : 3, "max_depth" : 3 }
],
We've removed the add_map_depth_to_weight from Orcs, so they aren't everywhere, constrained other critters to not appearing on this level. Since we know we're adding an entire fort in the middle, this makes sense: you are more likely to get helpful drops now, and more open spaces.
There's also a visual problem. The dark-blue deep water is nice, but it's basically invisible in grey-scale mode - and hard to see if your monitor brightness isn't turned up. Lets add a bit of green to it, so it is more visible. In map/themes.rs (get_limestone_cavern_glyph function):
#![allow(unused)] fn main() { TileType::DeepWater => { glyph = rltk::to_cp437('▓'); fg = RGB::from_f32(0.2, 0.2, 1.0); } }
That's quite a bit better:
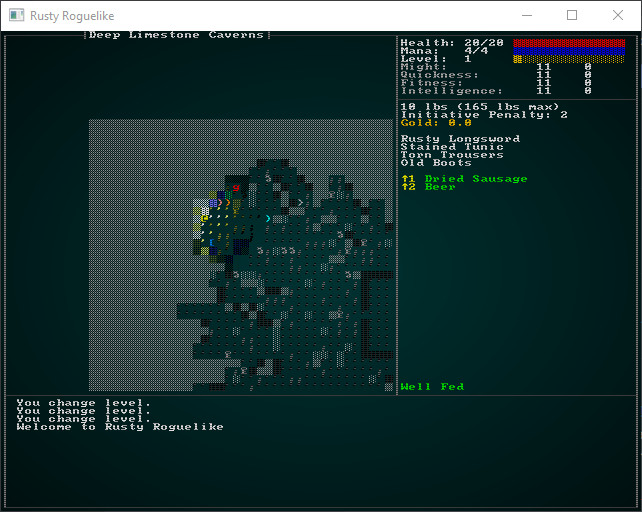
A few more spawns
Let's take a moment to introduce some better armor and weaponry to the level, and make it possible to spawn. The player is starting to face some real challenge, so they need some possible improvements! We'll start by adding chainmail to spawns.json:
{
"name" : "Chainmail Armor",
"renderable": {
"glyph" : "[",
"fg" : "#00FF00",
"bg" : "#000000",
"order" : 2
},
"wearable" : {
"slot" : "Torso",
"armor_class" : 2.0
},
"weight_lbs" : 20.0,
"base_value" : 50.0,
"initiative_penalty" : 1.0,
"vendor_category" : "armor"
},
{
"name" : "Chain Coif",
"renderable": {
"glyph" : "[",
"fg" : "#00FF00",
"bg" : "#000000",
"order" : 2
},
"wearable" : {
"slot" : "Head",
"armor_class" : 1.0
},
"weight_lbs" : 5.0,
"base_value" : 20.0,
"initiative_penalty" : 0.5,
"vendor_category" : "armor"
},
By including vendor_category, these items have become available for sale - so if your player gets enough cash, they can buy them (if they take the time to go home!). Lets also make them drop occasionally from level 4 onwards. In the spawn_table of spawns.json:
{ "name" : "Leather Armor", "weight" : 1, "min_depth" : 2, "max_depth" : 100 },
{ "name" : "Leather Boots", "weight" : 1, "min_depth" : 2, "max_depth" : 100 },
{ "name" : "Chainmail Armor", "weight" : 1, "min_depth" : 4, "max_depth" : 100 },
{ "name" : "Chain Coif", "weight" : 1, "min_depth" : 4, "max_depth" : 100 },
We're also allowing leather armor to appear as a treasure drop. That should help with difficulty!
Wrap-Up
Another level down (more improvements are possible; they are always possible), and the game is taking shape! You can now hew your way through the forest, hack your way through a level of limestone caves, and slash around a deep cave with an orc fortress. That's starting to sound like an adventure!
...
The source code for this chapter may be found here
Run this chapter's example with web assembly, in your browser (WebGL2 required)
Copyright (C) 2019, Herbert Wolverson.
Transition: Caverns to Dwarf Fortress
About this tutorial
This tutorial is free and open source, and all code uses the MIT license - so you are free to do with it as you like. My hope is that you will enjoy the tutorial, and make great games!
If you enjoy this and would like me to keep writing, please consider supporting my Patreon.
The design document talks about the caverns giving way to a carefully hewn dwarven fortress - now occupied by vile beasts and a dragon. It would be very jarring to go down a level and suddenly be inside a boxy dwarven fort - so this level will be all about the transition.
Let's start with the theme. We want to split the map between the limestone cavern look, and the dungeon look - so we add a new entry to themes.rs's tile_glyph function that does just that:
#![allow(unused)] fn main() { pub fn tile_glyph(idx: usize, map : &Map) -> (rltk::FontCharType, RGB, RGB) { let (glyph, mut fg, mut bg) = match map.depth { 5 => { let x = idx as i32 % map.width; if x < map.width/2 { get_limestone_cavern_glyph(idx, map) } else { get_tile_glyph_default(idx, map) } } ... }
Now we'll open map_builders/mod.rs and call a new build function:
#![allow(unused)] fn main() { pub fn level_builder(new_depth: i32, rng: &mut rltk::RandomNumberGenerator, width: i32, height: i32) -> BuilderChain { rltk::console::log(format!("Depth: {}", new_depth)); match new_depth { 1 => town_builder(new_depth, rng, width, height), 2 => forest_builder(new_depth, rng, width, height), 3 => limestone_cavern_builder(new_depth, rng, width, height), 4 => limestone_deep_cavern_builder(new_depth, rng, width, height), 5 => limestone_transition_builder(new_depth, rng, width, height), _ => random_builder(new_depth, rng, width, height) } } }
Open up limestone_cavern.rs and we'll make a new function:
#![allow(unused)] fn main() { pub fn limestone_transition_builder(new_depth: i32, _rng: &mut rltk::RandomNumberGenerator, width: i32, height: i32) -> BuilderChain { let mut chain = BuilderChain::new(new_depth, width, height, "Dwarf Fort - Upper Reaches"); chain.start_with(CellularAutomataBuilder::new()); chain.with(WaveformCollapseBuilder::new()); chain.with(AreaStartingPosition::new(XStart::CENTER, YStart::CENTER)); chain.with(CullUnreachable::new()); chain.with(AreaStartingPosition::new(XStart::LEFT, YStart::CENTER)); chain.with(VoronoiSpawning::new()); chain.with(CaveDecorator::new()); chain } }
This is pretty simple: it makes a cellular automata map, and then convolutes it with waveform collapse; we've covered these in previous chapters, so they should be familiar. It achieves half of what we want: an open, natural looking dungeon. But we'll need more work to generate the dwarven half! Let's add some more steps:
#![allow(unused)] fn main() { pub fn limestone_transition_builder(new_depth: i32, _rng: &mut rltk::RandomNumberGenerator, width: i32, height: i32) -> BuilderChain { let mut chain = BuilderChain::new(new_depth, width, height, "Dwarf Fort - Upper Reaches"); chain.start_with(CellularAutomataBuilder::new()); chain.with(WaveformCollapseBuilder::new()); chain.with(AreaStartingPosition::new(XStart::CENTER, YStart::CENTER)); chain.with(CullUnreachable::new()); chain.with(AreaStartingPosition::new(XStart::LEFT, YStart::CENTER)); chain.with(VoronoiSpawning::new()); chain.with(CaveDecorator::new()); chain.with(CaveTransition::new()); chain.with(AreaStartingPosition::new(XStart::LEFT, YStart::CENTER)); chain.with(DistantExit::new()); chain } }
So now we go through the same map generation, call an as-yet-unwritten CaveTransition builder, and reset start and end points. So what goes into the CaveTransition?
#![allow(unused)] fn main() { pub struct CaveTransition {} impl MetaMapBuilder for CaveTransition { fn build_map(&mut self, rng: &mut rltk::RandomNumberGenerator, build_data : &mut BuilderMap) { self.build(rng, build_data); } } impl CaveTransition { #[allow(dead_code)] pub fn new() -> Box<CaveTransition> { Box::new(CaveTransition{}) } fn build(&mut self, rng : &mut RandomNumberGenerator, build_data : &mut BuilderMap) { build_data.map.depth = 5; build_data.take_snapshot(); // Build a BSP-based dungeon let mut builder = BuilderChain::new(5, build_data.width, build_data.height, "New Map"); builder.start_with(BspDungeonBuilder::new()); builder.with(RoomDrawer::new()); builder.with(RoomSorter::new(RoomSort::RIGHTMOST)); builder.with(NearestCorridors::new()); builder.with(RoomExploder::new()); builder.with(RoomBasedSpawner::new()); builder.build_map(rng); // Add the history to our history for h in builder.build_data.history.iter() { build_data.history.push(h.clone()); } build_data.take_snapshot(); // Copy the right half of the BSP map into our map for x in build_data.map.width / 2 .. build_data.map.width { for y in 0 .. build_data.map.height { let idx = build_data.map.xy_idx(x, y); build_data.map.tiles[idx] = builder.build_data.map.tiles[idx]; } } build_data.take_snapshot(); // Keep Voronoi spawn data from the left half of the map let w = build_data.map.width; build_data.spawn_list.retain(|s| { let x = s.0 as i32 / w; x < w / 2 }); // Keep room spawn data from the right half of the map for s in builder.build_data.spawn_list.iter() { let x = s.0 as i32 / w; if x > w / 2 { build_data.spawn_list.push(s.clone()); } } } } }
So there's all the usual boilerplate to make a builder, and then we get to the build function. Lets walk through it:
- We start by resetting the level's depth. There's a bug in the Wave Function Collapse that made that necessary (it'll be fixed in a revision to this chapter).
- Then we make a new builder! It's set to generate a pretty normal BSP-based dungeon with short, direct corridors and then erode the rooms.
- We run the builder, and copy its history onto the end of our history - so we can see the steps it took, as well.
- We copy the entire right half of the BSP map onto the map we're actually building.
- We remove all spawns from the current map that are in the right half of the map.
- We copy all spawns from the BSP map to the current map, if they are in the right half of the map.
The result of all of this? A split dungeon!
We're relying on the odds of there not being anything connecting the two halves being very low. Just to be sure, let's also add an unreachable culling cycle and remove the waveform collapse - it makes the map too likely to not have an exit:
#![allow(unused)] fn main() { pub fn limestone_transition_builder(new_depth: i32, _rng: &mut rltk::RandomNumberGenerator, width: i32, height: i32) -> BuilderChain { let mut chain = BuilderChain::new(new_depth, width, height, "Dwarf Fort - Upper Reaches"); chain.start_with(CellularAutomataBuilder::new()); chain.with(AreaStartingPosition::new(XStart::CENTER, YStart::CENTER)); chain.with(CullUnreachable::new()); chain.with(AreaStartingPosition::new(XStart::LEFT, YStart::CENTER)); chain.with(VoronoiSpawning::new()); chain.with(CaveDecorator::new()); chain.with(CaveTransition::new()); chain.with(AreaStartingPosition::new(XStart::LEFT, YStart::CENTER)); chain.with(CullUnreachable::new()); chain.with(AreaEndingPosition::new(XEnd::RIGHT, YEnd::CENTER)); chain } }
Wait - AreaEndingPosition is new! I wanted a way to guarantee that the exit was in the right side of the map, so I made a new builder layer. It's just like AreaStartingPosition, but sets a staircase instead of a starting point. It's in the file map_builders/area_ending_point.rs:
#![allow(unused)] fn main() { use super::{MetaMapBuilder, BuilderMap, TileType}; use crate::map; use rltk::RandomNumberGenerator; #[allow(dead_code)] pub enum XEnd { LEFT, CENTER, RIGHT } #[allow(dead_code)] pub enum YEnd{ TOP, CENTER, BOTTOM } pub struct AreaEndingPosition { x : XEnd, y : YEnd } impl MetaMapBuilder for AreaEndingPosition { fn build_map(&mut self, rng: &mut rltk::RandomNumberGenerator, build_data : &mut BuilderMap) { self.build(rng, build_data); } } impl AreaEndingPosition { #[allow(dead_code)] pub fn new(x : XEnd, y : YEnd) -> Box<AreaEndingPosition> { Box::new(AreaEndingPosition{ x, y }) } fn build(&mut self, _rng : &mut RandomNumberGenerator, build_data : &mut BuilderMap) { let seed_x; let seed_y; match self.x { XEnd::LEFT => seed_x = 1, XEnd::CENTER => seed_x = build_data.map.width / 2, XEnd::RIGHT => seed_x = build_data.map.width - 2 } match self.y { YEnd::TOP => seed_y = 1, YEnd::CENTER => seed_y = build_data.map.height / 2, YEnd::BOTTOM => seed_y = build_data.map.height - 2 } let mut available_floors : Vec<(usize, f32)> = Vec::new(); for (idx, tiletype) in build_data.map.tiles.iter().enumerate() { if map::tile_walkable(*tiletype) { available_floors.push( ( idx, rltk::DistanceAlg::PythagorasSquared.distance2d( rltk::Point::new(idx as i32 % build_data.map.width, idx as i32 / build_data.map.width), rltk::Point::new(seed_x, seed_y) ) ) ); } } if available_floors.is_empty() { panic!("No valid floors to start on"); } available_floors.sort_by(|a,b| a.1.partial_cmp(&b.1).unwrap()); build_data.map.tiles[available_floors[0].0] = TileType::DownStairs; } } }
So putting all of this together and running it - you have a dungeon pretty much in line with what we were aiming for:
Populating our new level
The level is basically empty, other than various drops such as rations! We limited the drops on the previous level, which is good - we want to start transitioning towards a more "monster" based level here. The fort apparently fell because of a nasty dragon (as opposed to the friendly type!), so more draconic minions make sense. Hopefully, the player will be approaching level 3 or 4 by now, so we can throw some harder mobs at them without making the game impossible.
In spawns.json, in the spawn_table section - let's add some placeholder spawns for dragon-like things:
{ "name" : "Dragon Wyrmling", "weight" : 1, "min_depth" : 5, "max_depth" : 7 },
{ "name" : "Lizardman", "weight" : 10, "min_depth" : 5, "max_depth" : 7 },
{ "name" : "Giant Lizard", "weight" : 4, "min_depth" : 5, "max_depth" : 7 }
Remembering that this used to be a dwarven region, let's also add some things that a dwarf might leave behind:
{ "name" : "Rock Golem", "weight" : 4, "min_depth" : 5, "max_depth" : 7 },
{ "name" : "Stonefall Trap", "weight" : 4, "min_depth" : 5, "max_depth" : 7 },
{ "name" : "Landmine", "weight" : 1, "min_depth" : 5, "max_depth" : 7 }
Dwarves are also known for their armor and weaponry, so a few placeholders for their gear sounds good:
{ "name" : "Breastplate", "weight" : 7, "min_depth" : 5, "max_depth" : 7 },
{ "name" : "War Axe", "weight" : 7, "min_depth" : 5, "max_depth" : 7 },
{ "name" : "Dwarf-Steel Shirt", "weight" : 1, "min_depth" : 5, "max_depth" : 7 }
That's a good 9 new entities to create! We'll start by building them using the systems we already have, and in a future chapter we'll add some special effects to them. (The "Dwarf-Steel" used to be "mithril" - but the Tolkien Foundation used to be known for being a little lawyer-happy over that word. So Dwarf-Steel it is!)
Dragon-like creatures
We'll start by giving them a new faction in spawns.json:
{ "name" : "Wyrm", "responses": { "Default" : "attack", "Wyrm" : "ignore" }}
We'll also extrapolate a little and come up with a few things they may drop as loot (for loot_tables):
{ "name" : "Wyrms",
"drops" : [
{ "name" : "Dragon Scale", "weight" : 10 },
{ "name" : "Meat", "weight" : 10 }
]
}
Now, let's get into the mobs section and make our baby dragons:
{
"name" : "Dragon Wyrmling",
"renderable": {
"glyph" : "d",
"fg" : "#FF0000",
"bg" : "#000000",
"order" : 1
},
"blocks_tile" : true,
"vision_range" : 12,
"movement" : "random_waypoint",
"attributes" : {
"might" : 3,
"fitness" : 3
},
"skills" : {
"Melee" : 15,
"Defense" : 14
},
"natural" : {
"armor_class" : 15,
"attacks" : [
{ "name" : "bite", "hit_bonus" : 4, "damage" : "1d10+2" }
]
},
"loot_table" : "Wyrms",
"faction" : "Wyrm",
"level" : 3,
"gold" : "3d6"
}
Even without special abilities, that's a mighty foe! TODO
We should definitely counteract the awesome nature of the young dragons by making the lizardmen and giant lizards rather weak in comparison (since there are likely to be many more of them):
{
"name" : "Lizardman",
"renderable": {
"glyph" : "l",
"fg" : "#FF0000",
"bg" : "#000000",
"order" : 1
},
"blocks_tile" : true,
"vision_range" : 4,
"movement" : "random_waypoint",
"attributes" : {},
"faction" : "Wyrm",
"gold" : "1d12",
"level" : 2
},
{
"name" : "Giant Lizard",
"renderable": {
"glyph" : "l",
"fg" : "#FFFF00",
"bg" : "#000000",
"order" : 1
},
"blocks_tile" : true,
"vision_range" : 4,
"movement" : "random",
"attributes" : {},
"faction" : "Wyrm",
"level" : 2,
"loot_table" : "Animal"
}
We also need to add "dragon scales" as a nicely rewarding commodity. In the items section of spawns.json:
{
"name" : "Dragon Scale",
"renderable": {
"glyph" : "ß",
"fg" : "#FFD700",
"bg" : "#000000",
"order" : 2
},
"weight_lbs" : 2.0,
"base_value" : 75.0
},
Dwarven Spawns
Since the dwarves are dead (presumably they dug too deep, again...), we just have some leftovers of their civilization to deal with. Golems, traps and landmines (oh my!). Lets make a new faction for the golems; they shouldn't like the dragons very much, but lets be nice to the player and have them be ignored:
{ "name" : "Dwarven Remnant", "responses": { "Default" : "attack", "Player" : "ignore", "Dwarven Remnant" : "ignore" }}
This lets us build a relatively formidable golem. It can be formidable, because it will be fighting the lizards:
{
"name" : "Rock Golem",
"renderable": {
"glyph" : "g",
"fg" : "#AAAAAA",
"bg" : "#000000",
"order" : 1
},
"blocks_tile" : true,
"vision_range" : 6,
"movement" : "random_waypoint",
"attributes" : {},
"faction" : "Dwarven Remnant",
"level" : 3
}
The stone-fall trap and landmines are like an extra-dangerous bear trap:
{
"name" : "Stonefall Trap",
"renderable": {
"glyph" : "^",
"fg" : "#FF0000",
"bg" : "#000000",
"order" : 2
},
"hidden" : true,
"entry_trigger" : {
"effects" : {
"damage" : "12",
"single_activation" : "1"
}
}
},
{
"name" : "Landmine",
"renderable": {
"glyph" : "^",
"fg" : "#FF0000",
"bg" : "#000000",
"order" : 2
},
"hidden" : true,
"entry_trigger" : {
"effects" : {
"damage" : "18",
"single_activation" : "1"
}
}
},
Dwarf Loot
These are just more items for the items section of spawns.json:
{
"name" : "Breastplate",
"renderable": {
"glyph" : "[",
"fg" : "#00FF00",
"bg" : "#000000",
"order" : 2
},
"wearable" : {
"slot" : "Torso",
"armor_class" : 3.0
},
"weight_lbs" : 25.0,
"base_value" : 100.0,
"initiative_penalty" : 2.0,
"vendor_category" : "armor"
},
{
"name" : "Dwarf-Steel Shirt",
"renderable": {
"glyph" : "[",
"fg" : "#00FF00",
"bg" : "#000000",
"order" : 2
},
"wearable" : {
"slot" : "Torso",
"armor_class" : 3.0
},
"weight_lbs" : 5.0,
"base_value" : 500.0,
"initiative_penalty" : 0.0,
"vendor_category" : "armor"
},
{
"name" : "War Axe",
"renderable": {
"glyph" : "¶",
"fg" : "#FF55FF",
"bg" : "#000000",
"order" : 2
},
"weapon" : {
"range" : "melee",
"attribute" : "might",
"base_damage" : "1d12",
"hit_bonus" : 0
},
"weight_lbs" : 4.0,
"base_value" : 100.0,
"initiative_penalty" : 2,
"vendor_category" : "weapon"
},
Wrap-Up
The level is still a bit too likely to murder you, but it works. We'll be making things a bit easier in the coming chapters, so we'll leave the difficulty at "iron man" for now!
...
The source code for this chapter may be found here
Run this chapter's example with web assembly, in your browser (WebGL2 required)
Copyright (C) 2019, Herbert Wolverson.
Town Portals
About this tutorial
This tutorial is free and open source, and all code uses the MIT license - so you are free to do with it as you like. My hope is that you will enjoy the tutorial, and make great games!
If you enjoy this and would like me to keep writing, please consider supporting my Patreon.
We mentioned town portals in the design document, and it's becoming obvious how they would help: it's a real slog to travel back to town to sell your hard-earned loot (and possibly save up for upgrades to help against the itty-bitty draconic murderers!).
The basic idea of a town portal scroll is simple: you cast the spell, a portal opens and takes you back to town. You do your thing in town, and return to the portal - and it teleports you right back to where you were. Depending upon the game, it may heal the monsters on the level while they are gone. Generally, monsters don't follow you through the portal (if they did, you could kill the town with a well-placed portal!).
Spawning town portal scrolls
We should start by defining them in spawns.json as another item:
{
"name" : "Town Portal Scroll",
"renderable": {
"glyph" : ")",
"fg" : "#AAAAFF",
"bg" : "#000000",
"order" : 2
},
"consumable" : {
"effects" : {
"town_portal" : ""
}
},
"weight_lbs" : 0.5,
"base_value" : 20.0,
"vendor_category" : "alchemy"
},
We should also make them reasonably common in the spawn table:
{ "name" : "Town Portal Scroll", "weight" : 4, "min_depth" : 0, "max_depth" : 100 },
That's enough to get them into the game: they spawn as drops, and are purchasable from the alchemist in town (admittedly that doesn't help you when you need one, but with some planning it can help!).
Implementing town portals
The next stage is to make town portals do something. We already added an "effects" tag, causing it to be consumed on use and look for that tag. The other effects use a component to indicate what happens; so we'll open components.rs and make a new component type (and register in main.rs and saveload_system.rs):
#![allow(unused)] fn main() { #[derive(Component, Debug, Serialize, Deserialize, Clone)] pub struct TownPortal {} }
We also need to open up rawmaster.rs, and edit spawn_named_item to add the tag:
#![allow(unused)] fn main() { if let Some(consumable) = &item_template.consumable { eb = eb.with(crate::components::Consumable{}); for effect in consumable.effects.iter() { let effect_name = effect.0.as_str(); match effect_name { "provides_healing" => { eb = eb.with(ProvidesHealing{ heal_amount: effect.1.parse::<i32>().unwrap() }) } "ranged" => { eb = eb.with(Ranged{ range: effect.1.parse::<i32>().unwrap() }) }, "damage" => { eb = eb.with(InflictsDamage{ damage : effect.1.parse::<i32>().unwrap() }) } "area_of_effect" => { eb = eb.with(AreaOfEffect{ radius: effect.1.parse::<i32>().unwrap() }) } "confusion" => { eb = eb.with(Confusion{ turns: effect.1.parse::<i32>().unwrap() }) } "magic_mapping" => { eb = eb.with(MagicMapper{}) } "town_portal" => { eb = eb.with(TownPortal{}) } "food" => { eb = eb.with(ProvidesFood{}) } _ => { rltk::console::log(format!("Warning: consumable effect {} not implemented.", effect_name)); } } } } }
All of our level transitions thus far have occurred via RunState in main.rs. So in main.rs, we'll add a new state:
#![allow(unused)] fn main() { #[derive(PartialEq, Copy, Clone)] pub enum RunState { AwaitingInput, PreRun, Ticking, ShowInventory, ShowDropItem, ShowTargeting { range : i32, item : Entity}, MainMenu { menu_selection : gui::MainMenuSelection }, SaveGame, NextLevel, PreviousLevel, TownPortal, ShowRemoveItem, GameOver, MagicMapReveal { row : i32 }, MapGeneration, ShowCheatMenu, ShowVendor { vendor: Entity, mode : VendorMode } } }
So that marks the effect. Now we need to make it function! Open up inventory_system.rs and we'll want to edit ItemUseSystem. After magic mapping, the following code simply logs an event, consumes the item and changes the game state:
#![allow(unused)] fn main() { // If its a town portal... if let Some(_townportal) = town_portal.get(useitem.item) { if map.depth == 1 { gamelog.entries.push("You are already in town, so the scroll does nothing.".to_string()); } else { used_item = true; gamelog.entries.push("You are telported back to town!".to_string()); *runstate = RunState::TownPortal; } } }
That leaves handling the state in main.rs:
#![allow(unused)] fn main() { RunState::TownPortal => { // Spawn the portal spawner::spawn_town_portal(&mut self.ecs); // Transition let map_depth = self.ecs.fetch::<Map>().depth; let destination_offset = 0 - (map_depth-1); self.goto_level(destination_offset); self.mapgen_next_state = Some(RunState::PreRun); newrunstate = RunState::MapGeneration; } }
So this is relatively straight-forward: it calls the as-yet-unwritten spawn_town_portal function, retrieves the depth, and uses the same logic as NextLevel and PreviousLevel to switch to the town level (the offset calculated to result in a depth of 1).
We also need to modify the Ticking handler to allow TownPortal to escape from the loop:
#![allow(unused)] fn main() { RunState::Ticking => { while newrunstate == RunState::Ticking { self.run_systems(); self.ecs.maintain(); match *self.ecs.fetch::<RunState>() { RunState::AwaitingInput => newrunstate = RunState::AwaitingInput, RunState::MagicMapReveal{ .. } => newrunstate = RunState::MagicMapReveal{ row: 0 }, RunState::TownPortal => newrunstate = RunState::TownPortal, _ => newrunstate = RunState::Ticking } } } }
The rabbit hole naturally leads us to spawner.rs, and the spawn_town_portal function. Let's write it:
#![allow(unused)] fn main() { pub fn spawn_town_portal(ecs: &mut World) { // Get current position & depth let map = ecs.fetch::<Map>(); let player_depth = map.depth; let player_pos = ecs.fetch::<rltk::Point>(); let player_x = player_pos.x; let player_y = player_pos.y; std::mem::drop(player_pos); std::mem::drop(map); // Find part of the town for the portal let dm = ecs.fetch::<MasterDungeonMap>(); let town_map = dm.get_map(1).unwrap(); let mut stairs_idx = 0; for (idx, tt) in town_map.tiles.iter().enumerate() { if *tt == TileType::DownStairs { stairs_idx = idx; } } let portal_x = (stairs_idx as i32 % town_map.width)-2; let portal_y = stairs_idx as i32 / town_map.width; std::mem::drop(dm); // Spawn the portal itself ecs.create_entity() .with(OtherLevelPosition { x: portal_x, y: portal_y, depth: 1 }) .with(Renderable { glyph: rltk::to_cp437('♥'), fg: RGB::named(rltk::CYAN), bg: RGB::named(rltk::BLACK), render_order: 0 }) .with(EntryTrigger{}) .with(TeleportTo{ x: player_x, y: player_y, depth: player_depth, player_only: true }) .with(Name{ name : "Town Portal".to_string() }) .with(SingleActivation{}) .build(); } }
This is a busy function, so we'll step through it:
- We retrieve the player's depth and position, and then drop access to the resources (to prevent the borrow from continuing).
- We look up the town map in the
MasterDungeonMap, and find the spawn point. We move two tiles to the west, and store that asportal_xandportal_y. We then drop access to the dungeon map, again to avoid keeping the borrow. - We create an entity for the portal. We give it an
OtherLevelPosition, indicating that it is in the town - at the coordinates we calculated. We give it aRenderable(a cyan heart), aName(so it shows up in tooltips). We also give it anEntryTrigger- so entering it will trigger an effect. Finally, we give it aTeleportTocomponent; we haven't written that yet, but you can see we're specifying destination coordinates (back to where the player started). There's also aplayer_onlysetting - if the teleporter works for everyone, town drunks might walk into the portal by mistake leading to the (hilarious) situation where they teleport into dungeons and die horribly. To avoid that, we'll make this teleporter only affect the player!
Since we've used it, we better make TeleportTo in components.rs (and registered in main.rs and saveload_system.rs). It's pretty simple:
#![allow(unused)] fn main() { #[derive(Component, Debug, Serialize, Deserialize, Clone)] pub struct TeleportTo { pub x: i32, pub y: i32, pub depth: i32, pub player_only : bool } }
We'll worry about making teleporters work in a moment.
To help test the systems, we'll start the player with a town portal scroll. In spawner.rs, we'll modify player:
#![allow(unused)] fn main() { spawn_named_entity(&RAWS.lock().unwrap(), ecs, "Town Portal Scroll", SpawnType::Carried{by : player}); }
If you cargo run now, you start with a Town Portal Scroll. Trying to use it in town gives you a "does nothing" message. Going to another level and then using it teleports you right back to town, with a portal present - exactly what we had in mind (but with no way back, yet):
Implementing teleporters
Now we need to make the portal go back to your point-of-origin in the dungeon. Since we've implemented triggers that can have TeleportTo, it's worth taking the time to make teleport triggers more general (so you could have teleport traps, for example - or inter-room teleporters, or even a portal to the final level). There's actually a lot to consider here:
- Teleporters can affect anyone who enters the tile, unless you've flagged them as "player only".
- Teleporting could happen across the current level, in which case it's like a regular move.
- Teleporting could also happen across levels, in which case there are two possibilities:
- The player is teleporting, and we need to adjust game state like other level transitions.
- Another entity is teleporting, in which case we need to remove its
Positioncomponent and add anOtherLevelPositioncomponent so they are in-place when the player goes there.
Cleaning up movement in general
We're seeing more and more places implement the same basic movement code: clear blocked, move, restore blocked. You can find this all over the place, and adding in teleporting is just going to make it more complicated (as will other systems as we make a bigger game). This makes it far too easy to forget to update something, and also convolutes lots of systems with mutable position and map access - when movement is the only reason they need write access.
We've used intent based components for most other actions - movement should be no different. Open up components.rs, and we'll make some new components (and register them in main.rs and saveload_system.rs):
#![allow(unused)] fn main() { #[derive(Component, Debug, Serialize, Deserialize, Clone)] pub struct ApplyMove { pub dest_idx : usize } #[derive(Component, Debug, Serialize, Deserialize, Clone)] pub struct ApplyTeleport { pub dest_x : i32, pub dest_y : i32, pub dest_depth : i32 } }
To handle these, let's make a new system file - movement_system.rs:
#![allow(unused)] fn main() { use specs::prelude::*; use super::{Map, Position, BlocksTile, ApplyMove, ApplyTeleport, OtherLevelPosition, EntityMoved, Viewshed}; pub struct MovementSystem {} impl<'a> System<'a> for MovementSystem { #[allow(clippy::type_complexity)] type SystemData = ( WriteExpect<'a, Map>, WriteStorage<'a, Position>, ReadStorage<'a, BlocksTile>, Entities<'a>, WriteStorage<'a, ApplyMove>, WriteStorage<'a, ApplyTeleport>, WriteStorage<'a, OtherLevelPosition>, WriteStorage<'a, EntityMoved>, WriteStorage<'a, Viewshed>, ReadExpect<'a, Entity>); fn run(&mut self, data : Self::SystemData) { let (mut map, mut position, blockers, entities, mut apply_move, mut apply_teleport, mut other_level, mut moved, mut viewsheds, player_entity) = data; // Apply teleports for (entity, teleport) in (&entities, &apply_teleport).join() { if teleport.dest_depth == map.depth { apply_move.insert(entity, ApplyMove{ dest_idx: map.xy_idx(teleport.dest_x, teleport.dest_y) }) .expect("Unable to insert"); } else if entity == *player_entity { // It's the player - we have a mess rltk::console::log(format!("Not implemented yet.")); } else if let Some(pos) = position.get(entity) { let idx = map.xy_idx(pos.x, pos.y); let dest_idx = map.xy_idx(teleport.dest_x, teleport.dest_y); crate::spatial::move_entity(entity, idx, dest_idx); other_level.insert(entity, OtherLevelPosition{ x: teleport.dest_x, y: teleport.dest_y, depth: teleport.dest_depth }) .expect("Unable to insert"); position.remove(entity); } } apply_teleport.clear(); // Apply broad movement for (entity, movement, mut pos) in (&entities, &apply_move, &mut position).join() { let start_idx = map.xy_idx(pos.x, pos.y); let dest_idx = movement.dest_idx as usize; crate::spatial::move_entity(entity, start_idx, dest_idx); pos.x = movement.dest_idx as i32 % map.width; pos.y = movement.dest_idx as i32 / map.width; if let Some(vs) = viewsheds.get_mut(entity) { vs.dirty = true; } moved.insert(entity, EntityMoved{}).expect("Unable to insert"); } apply_move.clear(); } } }
This is a meaty system, but should be quite familiar to you - it doesn't do very much that we haven't done before, it just centralizes it in one place. Let's walk through it:
- We iterate all entities that are marked as teleporting.
- If its a teleport on the current depth, we add an
apply_movecomponent to indicate that we're moving across the map. - If it isn't a local teleport:
- If its the player, we give up for now (the code is later in this chapter).
- If it isn't the player, we remove their
Positioncomponent and add anOtherLevelPositioncomponent to move the entity to the teleport destination.
- If its a teleport on the current depth, we add an
- We remove all teleport intentions, since we've processed them.
- We iterate all entities with an
ApplyMovecomponent.- We obtain the start and destination indices for the move.
- If the entity blocks the tile, we clear the blocking in the source tile, and set the blocking status in the destination tile.
- We move the entity to the destination.
- If the entity has a viewshed, we mark it as dirty.
- We apply an
EntityMovedcomponent.
You'll notice that this is almost exactly what we've been doing in other systems - but it is a little more conditional: an entity without a viewshed can move, an entity that doesn't block tiles won't.
We can then update ai/approach_system.rs, ai/chase_ai_system.rs, ai/default_move_system.rs, and ai/flee_ai_system.rs to no longer calculate movement, but instead set an ApplyMove component to the entity they are considering. This greatly simplifies the systems, removing a lot of write access and several entire component accesses! The systems haven't changed their logic - just their functionality. Rather than copy/pasting them all here, you can check the source - otherwise this will be a chapter of record length!
Finally, we need to add movement into run_systems in main.rs. Add it after defaultmove and before triggers:
#![allow(unused)] fn main() { defaultmove.run_now(&self.ecs); let mut moving = movement_system::MovementSystem{}; moving.run_now(&self.ecs); let mut triggers = trigger_system::TriggerSystem{}; }
Once those changes are made, you can cargo run - and see that things behave as they did before.
Making player teleports work
Instead of just printing "Not Supported Yet!" when the player enters a teleporter, we should actually teleport them! The reason this was special-cased in movement_system.rs is that we've always handled level transitions in the main loop (because they touch a lot of game state). So to make this function, we're going to need another state in main.rs:
#![allow(unused)] fn main() { #[derive(PartialEq, Copy, Clone)] pub enum RunState { AwaitingInput, PreRun, Ticking, ShowInventory, ShowDropItem, ShowTargeting { range : i32, item : Entity}, MainMenu { menu_selection : gui::MainMenuSelection }, SaveGame, NextLevel, PreviousLevel, TownPortal, ShowRemoveItem, GameOver, MagicMapReveal { row : i32 }, MapGeneration, ShowCheatMenu, ShowVendor { vendor: Entity, mode : VendorMode }, TeleportingToOtherLevel { x: i32, y: i32, depth: i32 } } }
Now we can open up movement_system.rs and make some simple changes to have the system send out a RunState change:
#![allow(unused)] fn main() { impl<'a> System<'a> for MovementSystem { #[allow(clippy::type_complexity)] type SystemData = ( WriteExpect<'a, Map>, WriteStorage<'a, Position>, ReadStorage<'a, BlocksTile>, Entities<'a>, WriteStorage<'a, ApplyMove>, WriteStorage<'a, ApplyTeleport>, WriteStorage<'a, OtherLevelPosition>, WriteStorage<'a, EntityMoved>, WriteStorage<'a, Viewshed>, ReadExpect<'a, Entity>, WriteExpect<'a, RunState>); fn run(&mut self, data : Self::SystemData) { let (mut map, mut position, blockers, entities, mut apply_move, mut apply_teleport, mut other_level, mut moved, mut viewsheds, player_entity, mut runstate) = data; // Apply teleports for (entity, teleport) in (&entities, &apply_teleport).join() { if teleport.dest_depth == map.depth { apply_move.insert(entity, ApplyMove{ dest_idx: map.xy_idx(teleport.dest_x, teleport.dest_y) }) .expect("Unable to insert"); } else if entity == *player_entity { *runstate = RunState::TeleportingToOtherLevel{ x: teleport.dest_x, y: teleport.dest_y, depth: teleport.dest_depth }; ... }
Over in main.rs, lets modify the Ticking state to also accept TeleportingToOtherLevel as an exit condition:
#![allow(unused)] fn main() { RunState::Ticking => { while newrunstate == RunState::Ticking { self.run_systems(); self.ecs.maintain(); match *self.ecs.fetch::<RunState>() { RunState::AwaitingInput => newrunstate = RunState::AwaitingInput, RunState::MagicMapReveal{ .. } => newrunstate = RunState::MagicMapReveal{ row: 0 }, RunState::TownPortal => newrunstate = RunState::TownPortal, RunState::TeleportingToOtherLevel{ x, y, depth } => newrunstate = RunState::TeleportingToOtherLevel{ x, y, depth }, _ => newrunstate = RunState::Ticking } } } }
Now in trigger_system.rs we need to make a few changes to actually call the teleport when triggered:
#![allow(unused)] fn main() { impl<'a> System<'a> for TriggerSystem { #[allow(clippy::type_complexity)] type SystemData = ( ReadExpect<'a, Map>, WriteStorage<'a, EntityMoved>, ReadStorage<'a, Position>, ReadStorage<'a, EntryTrigger>, WriteStorage<'a, Hidden>, ReadStorage<'a, Name>, Entities<'a>, WriteExpect<'a, GameLog>, ReadStorage<'a, InflictsDamage>, WriteExpect<'a, ParticleBuilder>, WriteStorage<'a, SufferDamage>, ReadStorage<'a, SingleActivation>, ReadStorage<'a, TeleportTo>, WriteStorage<'a, ApplyTeleport>, ReadExpect<'a, Entity>); fn run(&mut self, data : Self::SystemData) { let (map, mut entity_moved, position, entry_trigger, mut hidden, names, entities, mut log, inflicts_damage, mut particle_builder, mut inflict_damage, single_activation, teleporters, mut apply_teleport, player_entity) = data; ... // If its a teleporter, then do that if let Some(teleport) = teleporters.get(*entity_id) { if (teleport.player_only && entity == *player_entity) || !teleport.player_only { apply_teleport.insert(entity, ApplyTeleport{ dest_x : teleport.x, dest_y : teleport.y, dest_depth : teleport.depth }).expect("Unable to insert"); } } }
With that in place, we need to finish up main.rs and add TeleportingToOtherLevel to the main loop:
#![allow(unused)] fn main() { RunState::TeleportingToOtherLevel{x, y, depth} => { self.goto_level(depth-1); let player_entity = self.ecs.fetch::<Entity>(); if let Some(pos) = self.ecs.write_storage::<Position>().get_mut(*player_entity) { pos.x = x; pos.y = y; } let mut ppos = self.ecs.fetch_mut::<rltk::Point>(); ppos.x = x; ppos.y = y; self.mapgen_next_state = Some(RunState::PreRun); newrunstate = RunState::MapGeneration; } }
So this sends the player to the specified level, updates their Position component, and updates the stored player position (overriding stair case finding).
If you cargo run now, you have a working town portal!
Humorous Aside
Let's see what happens when we remove the player_only and SingleActivation safeguards from a town portal. In spawner.rs:
#![allow(unused)] fn main() { ecs.create_entity() .with(OtherLevelPosition { x: portal_x, y: portal_y, depth: 1 }) .with(Renderable { glyph: rltk::to_cp437('♥'), fg: RGB::named(rltk::CYAN), bg: RGB::named(rltk::BLACK), render_order: 0 }) .with(EntryTrigger{}) .with(TeleportTo{ x: player_x, y: player_y, depth: player_depth, player_only: false }) // .with(SingleActivation{}) .with(Name{ name : "Town Portal".to_string() }) .build(); }
Now cargo run, find a dangerous spot, and town portal home. Sit around for a while, until a few innocent townsfolk have fallen into the portal. Then follow the portal back, and the bewildered townspeople suffer horrible deaths!
I included this as an illustration as to why we put the safeguards in!
Make sure you remove these comment tags when you're done watching what happens!
Wrap-Up
In this chapter, we started creating town portals - and wound up with a generic teleport system and a cleaned up movement system. This gives a lot more tactical options for the player, and enables "grab loot, return and sell it" play mechanics (as seen in Diablo). We're getting much closer to the game described in the design document!
...
The source code for this chapter may be found here
Run this chapter's example with web assembly, in your browser (WebGL2 required)
Copyright (C) 2019, Herbert Wolverson.
Magic Items and Item Identification
About this tutorial
This tutorial is free and open source, and all code uses the MIT license - so you are free to do with it as you like. My hope is that you will enjoy the tutorial, and make great games!
If you enjoy this and would like me to keep writing, please consider supporting my Patreon.
Magical items are a mainstay of both D&D and roguelikes. From the humble "Sword +1", to mighty "Holy Avenger" - and back again to "Cursed Backbiter" - items helped to define the genre. In roguelikes, it's also traditional to not automatically know what items are; you find an "Unidentified Longsword", and have no idea what it does (or if is cursed) until you find a way to identify it. You find a "Scroll of cat walked on keyboard" (the unpronounceable names seem to be a feature!), and until you identify or read it - you don't know what to expect. Some games turn this into entire meta-games - gambling on frequency, vendor prices and similar to give you clues as to what you just found. Even Diablo, the most mainstream roguelike (even if it went real-time!) of them all has retained this play feature - but tends to make Identify scrolls extremely plentiful (as well as helpful old Scotsmen).
Classes of magic item
It's common in modern games to differentiate magic items as being magical, rare or legendary (along with item sets, which we won't go into yet). These are typically differentiated by color, so you can tell at a glance if an item is even worth considering. This also gives an opportunity to denote that something is a magic item - so we'll open up components.rs (and register in main.rs and saveload_system.rs) and make MagicItem:
#![allow(unused)] fn main() { #[derive(Debug, Serialize, Deserialize, Clone, Eq, PartialEq, Hash)] pub enum MagicItemClass { Common, Rare, Legendary } #[derive(Component, Debug, Serialize, Deserialize, Clone)] pub struct MagicItem { pub class : MagicItemClass } }
The next step is to let items be denoted as magical, and having one of these classes. Add the following to raws/item_structs.rs:
#![allow(unused)] fn main() { #[derive(Deserialize, Debug)] pub struct Item { pub name : String, pub renderable : Option<Renderable>, pub consumable : Option<Consumable>, pub weapon : Option<Weapon>, pub wearable : Option<Wearable>, pub initiative_penalty : Option<f32>, pub weight_lbs : Option<f32>, pub base_value : Option<f32>, pub vendor_category : Option<String>, pub magic : Option<MagicItem> } #[derive(Deserialize, Debug)] pub struct MagicItem { pub class: String } }
Why are we using a full struct here, rather than just a string? We're going to want to specify more information here later in the chapter as we start to flesh out magical items.
You can now decorate items in spawns.json, for example:
{
"name" : "Health Potion",
"renderable": {
"glyph" : "!",
"fg" : "#FF00FF",
"bg" : "#000000",
"order" : 2
},
"consumable" : {
"effects" : { "provides_healing" : "8" }
},
"weight_lbs" : 0.5,
"base_value" : 50.0,
"vendor_category" : "alchemy",
"magic" : { "class" : "common" }
},
I've added the common magic tag to the magical scrolls and potions already in the JSON list, see the source for details - it's pretty straightforward at this point. Next up, we need to modify spawn_named_item in raws/rawmaster.rs to apply the appropriate component tags:
#![allow(unused)] fn main() { if let Some(magic) = &item_template.magic { let class = match magic.class.as_str() { "rare" => MagicItemClass::Rare, "legendary" => MagicItemClass::Legendary, _ => MagicItemClass::Common }; eb = eb.with(MagicItem{ class }); } }
Now that we have this data, we need to use it. For now, we'll just want to set the display color of item names whenever they appear in the GUI - to give a better idea of magic item value (just like all those MMO games!). In gui.rs, we'll make a generic function for this purpose:
#![allow(unused)] fn main() { pub fn get_item_color(ecs : &World, item : Entity) -> RGB { if let Some(magic) = ecs.read_storage::<MagicItem>().get(item) { match magic.class { MagicItemClass::Common => return RGB::from_f32(0.5, 1.0, 0.5), MagicItemClass::Rare => return RGB::from_f32(0.0, 1.0, 1.0), MagicItemClass::Legendary => return RGB::from_f32(0.71, 0.15, 0.93) } } RGB::from_f32(1.0, 1.0, 1.0) } }
Now we need to go through all of the functions in gui.rs that display an item name, and replace the hard-coded color with a call to this function. In draw_ui (line 121 of gui.rs), expand the equipped list a little:
#![allow(unused)] fn main() { // Equipped let mut y = 13; let entities = ecs.entities(); let equipped = ecs.read_storage::<Equipped>(); let name = ecs.read_storage::<Name>(); for (entity, equipped_by, item_name) in (&entities, &equipped, &name).join() { if equipped_by.owner == *player_entity { ctx.print_color(50, y, get_item_color(ecs, entity), black, &item_name.name); y += 1; } } }
The same change in the consumables section:
#![allow(unused)] fn main() { ctx.print_color(53, y, get_item_color(ecs, entity), black, &item_name.name); }
We're going to leave tooltips alone, improving them (and the log) are the subject of a (currently hypothetical) future chapter. In show_inventory (around line 321), drop_item_menu (around line 373), remove_item_menu (around line 417), and vendor_sell_menu (around line 660):
#![allow(unused)] fn main() { ctx.print_color(21, y, get_item_color(&gs.ecs, entity), RGB::from_f32(0.0, 0.0, 0.0), &name.name.to_string()); }
Be warned: these lines will change again once we add item identification!
With that in place, if you cargo run you will see your Town Portal Scroll is now nicely highlighted as a common magical item:
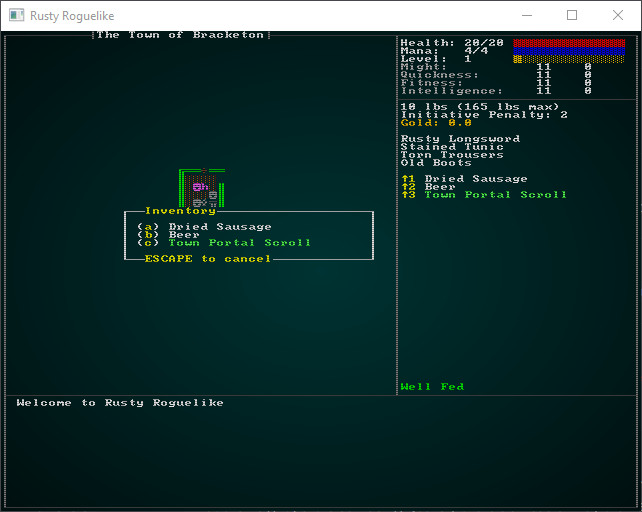
Identification: Scrolls
It's pretty common in Roguelikes for potions to have thoroughly unpronounceable names when you don't know what they do. Presumably, this represents some sort of guttural utterings that trigger the magical effect (and as much fun as it would be to build a giant grammar around this, the tutorial would be even bigger!). So a Scroll of Lorem Ipsum might be any of the scrolls in the game, and it's up to you to decide to identify by using it (a gamble, it may not be what you want at all!), get it identified, or just ignore it because you don't like the risk.
Let's start by opening up spawner.rs, going to the player function and removing the line that gives a free Town Portal. It's overly generous, and would mean you'd have to start knowing what it is!
So here's the fun part: if we were to simply assign an unidentified name to scrolls, players could simply learn the names - and identification would be little more than a memory game. So we need to assign the names when the game starts (and not when the raw files load, since you may play more than once per session). Let's start in raws/item_structs.rs and add another field to MagicItem indicating that "this is a scroll, and should use scroll naming."
#![allow(unused)] fn main() { #[derive(Deserialize, Debug)] pub struct MagicItem { pub class: String, pub naming: String } }
Now we have to go through spawns.json and add naming tags to our "magic" entries. I've opted for "scroll" for naming scrolls (and left the others as empty strings for now). For example, here's the magic missile scroll:
{
"name" : "Magic Missile Scroll",
"renderable": {
"glyph" : ")",
"fg" : "#00FFFF",
"bg" : "#000000",
"order" : 2
},
"consumable" : {
"effects" : {
"ranged" : "6",
"damage" : "20"
}
},
"weight_lbs" : 0.5,
"base_value" : 50.0,
"vendor_category" : "alchemy",
"magic" : { "class" : "common", "naming" : "scroll" }
},
We already have a structure that persists through the whole game (but remains a global resource), and resets whenever we change level: the MasterDungeonMap. It makes some sense to use this to store state about the whole game, since it's already the dungeon master! We're also already serializing it, which helps a lot! So we'll open up map/dungeon.rs and add in a couple of structures:
#![allow(unused)] fn main() { #[derive(Default, Serialize, Deserialize, Clone)] pub struct MasterDungeonMap { maps : HashMap<i32, Map>, identified_items : HashSet<String>, scroll_mappings : HashMap<String, String> } }
We also have to update the constructor to provide empty values (for now):
#![allow(unused)] fn main() { impl MasterDungeonMap { pub fn new() -> MasterDungeonMap { MasterDungeonMap{ maps: HashMap::new() , pub identified_items : HashSet::new(), pub scroll_mappings : HashMap::new() } } }
The idea is that when an item is identified, we'll put its name tag into identified_items, providing a fast way to tell if an item has been identified yet. scroll_mappings is intended to map the actual name of a scroll with a randomized name. These will then persist for the duration of the game session (and be included in save games, automatically!). In order to populate the scroll mappings, we need a way to get hold of the item names tagged as scrolls in the raw files. So in raws/rawmaster.rs, we'll make a new function:
#![allow(unused)] fn main() { pub fn get_scroll_tags() -> Vec<String> { let raws = &super::RAWS.lock().unwrap(); let mut result = Vec::new(); for item in raws.raws.items.iter() { if let Some(magic) = &item.magic { if &magic.naming == "scroll" { result.push(item.name.clone()); } } } result } }
This obtains access to the global raws, iterates through all items looking for magical items that have the scroll naming convention, and returns the names as a vector of strings. We won't be doing it often, so we won't try and be clever with performance (cloning all those strings is a little on the slow side). So now in map/dungeon.rs we further extend the constructor to make scroll name mappings:
#![allow(unused)] fn main() { impl MasterDungeonMap { pub fn new() -> MasterDungeonMap { let mut dm = MasterDungeonMap{ maps: HashMap::new() , identified_items : HashSet::new(), scroll_mappings : HashMap::new() }; let mut rng = rltk::RandomNumberGenerator::new(); for scroll_tag in crate::raws::get_scroll_tags().iter() { let masked_name = make_scroll_name(&mut rng); dm.scroll_mappings.insert(scroll_tag.to_string(), masked_name); } dm } }
This references a new function, make_scroll_name which looks like this:
#![allow(unused)] fn main() { fn make_scroll_name(rng: &mut rltk::RandomNumberGenerator) -> String { let length = 4 + rng.roll_dice(1, 4); let mut name = "Scroll of ".to_string(); for i in 0..length { if i % 2 == 0 { name += match rng.roll_dice(1, 5) { 1 => "a", 2 => "e", 3 => "i", 4 => "o", _ => "u" } } else { name += match rng.roll_dice(1, 21) { 1 => "b", 2 => "c", 3 => "d", 4 => "f", 5 => "g", 6 => "h", 7 => "j", 8 => "k", 9 => "l", 10 => "m", 11 => "n", 12 => "p", 13 => "q", 14 => "r", 15 => "s", 16 => "t", 17 => "v", 18 => "w", 19 => "x", 20 => "y", _ => "z" } } } name } }
This function starts with the stem "Scroll of ", and then adds random letters. Every other letter is a vowel, with consonants in-between. This gets you nonsense, but it's pronounceable nonsense such as iladi or omuruxo. It doesn't give any clue as to the nature of the underlying scroll.
Next, we need a way to denote that an entity has an obfuscated name. We'll make a new component for this task, so in components.rs (and register in main.rs and saveload_system.rs) we add:
#![allow(unused)] fn main() { #[derive(Component, Debug, Serialize, Deserialize, Clone)] pub struct ObfuscatedName { pub name : String } }
We'll also need to add these tags when we spawn an item, so in raws/rawmaster.rs we add the following to spawn_named_item. First, up at the top, we copy the name mapping (to avoid borrowing problems):
#![allow(unused)] fn main() { let item_template = &raws.raws.items[raws.item_index[key]]; let scroll_names = ecs.fetch::<crate::map::MasterDungeonMap>().scroll_mappings.clone(); let mut eb = ecs.create_entity().marked::<SimpleMarker<SerializeMe>>(); }
Then we extend the magic handler:
#![allow(unused)] fn main() { if let Some(magic) = &item_template.magic { let class = match magic.class.as_str() { "rare" => MagicItemClass::Rare, "legendary" => MagicItemClass::Legendary, _ => MagicItemClass::Common }; eb = eb.with(MagicItem{ class }); #[allow(clippy::single_match)] // To stop Clippy whining until we add more match magic.naming.as_str() { "scroll" => { eb = eb.with(ObfuscatedName{ name : scroll_names[&item_template.name].clone() }); } _ => {} } } }
Now, we return to gui.rs and make a new function to obtain an item's display name:
#![allow(unused)] fn main() { pub fn get_item_display_name(ecs: &World, item : Entity) -> String { if let Some(name) = ecs.read_storage::<Name>().get(item) { if ecs.read_storage::<MagicItem>().get(item).is_some() { let dm = ecs.fetch::<crate::map::MasterDungeonMap>(); if dm.identified_items.contains(&name.name) { name.name.clone() } else if let Some(obfuscated) = ecs.read_storage::<ObfuscatedName>().get(item) { obfuscated.name.clone() } else { "Unidentified magic item".to_string() } } else { name.name.clone() } } else { "Nameless item (bug)".to_string() } } }
And once again, we need to go through all the places in gui.rs that reference an item's name and change them to use this function. In draw_ui, this actually shortens some code since we don't need the actual Name component anymore:
#![allow(unused)] fn main() { // Equipped let mut y = 13; let entities = ecs.entities(); let equipped = ecs.read_storage::<Equipped>(); for (entity, equipped_by) in (&entities, &equipped).join() { if equipped_by.owner == *player_entity { ctx.print_color(50, y, get_item_color(ecs, entity), black, &get_item_display_name(ecs, entity)); y += 1; } } // Consumables y += 1; let yellow = RGB::named(rltk::YELLOW); let consumables = ecs.read_storage::<Consumable>(); let backpack = ecs.read_storage::<InBackpack>(); let mut index = 1; for (entity, carried_by, _consumable) in (&entities, &backpack, &consumables).join() { if carried_by.owner == *player_entity && index < 10 { ctx.print_color(50, y, yellow, black, &format!("↑{}", index)); ctx.print_color(53, y, get_item_color(ecs, entity), black, &get_item_display_name(ecs, entity)); y += 1; index += 1; } } }
Once again, we're going to worry about tooltips later (although we will tweak them later to not reveal the actual identity of an object!). The other ones we changed earlier change to ctx.print_color(21, y, get_item_color(&gs.ecs, entity), RGB::from_f32(0.0, 0.0, 0.0), &get_item_display_name(&gs.ecs, entity));, and can trim out some of the name components also.
Once that's done, if you cargo run the project scrolls you find will display obfuscated names:
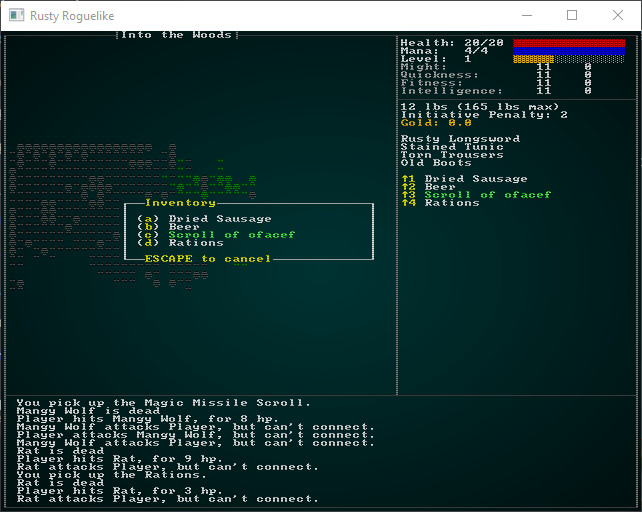
Identifying obfuscated scrolls
Now that we're properly hiding them, lets introduce a mechanism for identifying scrolls. The most obvious is if you use a scroll, it should be identified - and all existing/future instances of that scroll type become identified. The identified_items list handles the future, but we'll have to do some extra work to handle the existing ones. We're going to have quite a few potential identifications occur - when you use an identify magic (eventually), when you use or equip an item, when you buy one (since you know you are buying a Magic Mapping scroll, it makes sense that you identify it) - and probably more as we progress.
We'll handle this with a new component to indicate that an item may have been identified, and a system to process the data. First, in components.rs (and register in main.rs and saveload_system.rs):
#![allow(unused)] fn main() { #[derive(Component, Debug, Serialize, Deserialize, Clone)] pub struct IdentifiedItem { pub name : String } }
Now we'll go to the various places we already have that can identify an item, and attach this component to the player when they use an item. First, extend inventory_system.rs to be able to write to the appropriate storage:
#![allow(unused)] fn main() { impl<'a> System<'a> for ItemUseSystem { #[allow(clippy::type_complexity)] type SystemData = ( ReadExpect<'a, Entity>, WriteExpect<'a, GameLog>, WriteExpect<'a, Map>, Entities<'a>, WriteStorage<'a, WantsToUseItem>, ReadStorage<'a, Name>, ReadStorage<'a, Consumable>, ReadStorage<'a, ProvidesHealing>, ReadStorage<'a, InflictsDamage>, WriteStorage<'a, Pools>, WriteStorage<'a, SufferDamage>, ReadStorage<'a, AreaOfEffect>, WriteStorage<'a, Confusion>, ReadStorage<'a, Equippable>, WriteStorage<'a, Equipped>, WriteStorage<'a, InBackpack>, WriteExpect<'a, ParticleBuilder>, ReadStorage<'a, Position>, ReadStorage<'a, ProvidesFood>, WriteStorage<'a, HungerClock>, ReadStorage<'a, MagicMapper>, WriteExpect<'a, RunState>, WriteStorage<'a, EquipmentChanged>, ReadStorage<'a, TownPortal>, WriteStorage<'a, IdentifiedItem> ); #[allow(clippy::cognitive_complexity)] fn run(&mut self, data : Self::SystemData) { let (player_entity, mut gamelog, map, entities, mut wants_use, names, consumables, healing, inflict_damage, mut combat_stats, mut suffer_damage, aoe, mut confused, equippable, mut equipped, mut backpack, mut particle_builder, positions, provides_food, mut hunger_clocks, magic_mapper, mut runstate, mut dirty, town_portal, mut identified_item) = data; ... }
Then, after targeting (line 113):
#![allow(unused)] fn main() { // Identify if entity == *player_entity { identified_item.insert(entity, IdentifiedItem{ name: names.get(useitem.item).unwrap().name.clone() }) .expect("Unable to insert"); } }
Also, in main.rs where we handle spawning items that were purchased we should identify those, also:
#![allow(unused)] fn main() { gui::VendorResult::Buy => { let tag = result.2.unwrap(); let price = result.3.unwrap(); let mut pools = self.ecs.write_storage::<Pools>(); let player_entity = self.ecs.fetch::<Entity>(); let mut identified = self.ecs.write_storage::<IdentifiedItem>(); identified.insert(*player_entity, IdentifiedItem{ name : tag.clone() }).expect("Unable to insert"); std::mem::drop(identified); let player_pools = pools.get_mut(*player_entity).unwrap(); std::mem::drop(player_entity); if player_pools.gold >= price { player_pools.gold -= price; std::mem::drop(pools); let player_entity = *self.ecs.fetch::<Entity>(); crate::raws::spawn_named_item(&RAWS.lock().unwrap(), &mut self.ecs, &tag, SpawnType::Carried{ by: player_entity }); } } }
Now that we're adding the components, we need to read them and do something with the knowledge!
We need one more helper function in raws/rawmaster.rs to help this process:
#![allow(unused)] fn main() { pub fn is_tag_magic(tag : &str) -> bool { let raws = &super::RAWS.lock().unwrap(); if raws.item_index.contains_key(tag) { let item_template = &raws.raws.items[raws.item_index[tag]]; item_template.magic.is_some() } else { false } } }
Since identifying items is purely an inventory matter, we'll add another system into the already-large inventory_system.rs (spot the hint that we're going to make it into a module, one day?):
#![allow(unused)] fn main() { pub struct ItemIdentificationSystem {} impl<'a> System<'a> for ItemIdentificationSystem { #[allow(clippy::type_complexity)] type SystemData = ( ReadStorage<'a, crate::components::Player>, WriteStorage<'a, IdentifiedItem>, WriteExpect<'a, crate::map::MasterDungeonMap>, ReadStorage<'a, Item>, ReadStorage<'a, Name>, WriteStorage<'a, ObfuscatedName>, Entities<'a> ); fn run(&mut self, data : Self::SystemData) { let (player, mut identified, mut dm, items, names, mut obfuscated_names, entities) = data; for (_p, id) in (&player, &identified).join() { if !dm.identified_items.contains(&id.name) && crate::raws::is_tag_magic(&id.name) { dm.identified_items.insert(id.name.clone()); for (entity, _item, name) in (&entities, &items, &names).join() { if name.name == id.name { obfuscated_names.remove(entity); } } } } // Clean up identified.clear(); } } }
We'll also want to modify spawn_named_item in raws/rawmaster.rs to not obfuscate names of items we already recognize. We'll start by also obtaining an identified item list:
#![allow(unused)] fn main() { let dm = ecs.fetch::<crate::map::MasterDungeonMap>(); let scroll_names = dm.scroll_mappings.clone(); let identified = dm.identified_items.clone(); std::mem::drop(dm); }
Then we'll make name obfuscation conditional upon now knowing what the item is:
#![allow(unused)] fn main() { if !identified.contains(&item_template.name) { #[allow(clippy::single_match)] // To stop Clippy whining until we add more match magic.naming.as_str() { "scroll" => { eb = eb.with(ObfuscatedName{ name : scroll_names[&item_template.name].clone() }); } _ => {} } } }
Finally, we'll add it to run_systems in main.rs:
#![allow(unused)] fn main() { let mut item_id = inventory_system::ItemIdentificationSystem{}; item_id.run_now(&self.ecs); }
So if you cargo run now, you'll be able to identify items by using or buying them.
Obfuscating Potions
We can use a very similar setup for potions, but we need to think about how they are named. Typically, potions combine some adjectives with the word potion: "viscous black potion", "swirling green potion", etc. Fortunately, we've now built a lot of the infrastructure framework - so it's a matter of plugging the details in.
We'll start by opening spawns.json, and annotating our health potion with the naming convention "potion":
"items" : [
{
"name" : "Health Potion",
"renderable": {
"glyph" : "!",
"fg" : "#FF00FF",
"bg" : "#000000",
"order" : 2
},
"consumable" : {
"effects" : { "provides_healing" : "8" }
},
"weight_lbs" : 0.5,
"base_value" : 50.0,
"vendor_category" : "alchemy",
"magic" : { "class" : "common", "naming" : "potion" }
},
...
Then, in raws/rawmaster.rs we'll repeat the get_scroll_tags functionality - but for potions. We want to retrieve all items with a "potion" naming scheme - we'll need it to generate potion names. Here's the new function:
#![allow(unused)] fn main() { pub fn get_potion_tags() -> Vec<String> { let raws = &super::RAWS.lock().unwrap(); let mut result = Vec::new(); for item in raws.raws.items.iter() { if let Some(magic) = &item.magic { if &magic.naming == "potion" { result.push(item.name.clone()); } } } result } }
Now we'll revisit map/dungeon.rs and visit the MasterDungeonMap. We need to add a structure for storing potion names (and add it to the constructor). It'll be just like the scroll mapping:
#![allow(unused)] fn main() { #[derive(Default, Serialize, Deserialize, Clone)] pub struct MasterDungeonMap { maps : HashMap<i32, Map>, pub identified_items : HashSet<String>, pub scroll_mappings : HashMap<String, String>, pub potion_mappings : HashMap<String, String> } impl MasterDungeonMap { pub fn new() -> MasterDungeonMap { let mut dm = MasterDungeonMap{ maps: HashMap::new() , identified_items : HashSet::new(), scroll_mappings : HashMap::new(), potion_mappings : HashMap::new() }; ... }
Now, underneath the make_scroll_name function we're going to define some arrays of string constants. These represent the available descriptors for potions; you can (and should!) add/edit these to fit the game you want to make:
#![allow(unused)] fn main() { const POTION_COLORS: &[&str] = &["Red", "Orange", "Yellow", "Green", "Brown", "Indigo", "Violet"]; const POTION_ADJECTIVES : &[&str] = &["Swirling", "Effervescent", "Slimey", "Oiley", "Viscous", "Smelly", "Glowing"]; }
We'll also need a function to combine these to make names, including duplicate checking (to ensure that we never have two potion types with the same name):
#![allow(unused)] fn main() { fn make_potion_name(rng: &mut rltk::RandomNumberGenerator, used_names : &mut HashSet<String>) -> String { loop { let mut name : String = POTION_ADJECTIVES[rng.roll_dice(1, POTION_ADJECTIVES.len() as i32) as usize -1].to_string(); name += " "; name += POTION_COLORS[rng.roll_dice(1, POTION_COLORS.len() as i32) as usize -1]; name += " Potion"; if !used_names.contains(&name) { used_names.insert(name.clone()); return name; } } } }
Then in the MasterDungeonMap constructor, we repeat the scroll logic - but with our new naming scheme, and HashSet to avoid duplicated names:
#![allow(unused)] fn main() { let mut used_potion_names : HashSet<String> = HashSet::new(); for potion_tag in crate::raws::get_potion_tags().iter() { let masked_name = make_potion_name(&mut rng, &mut used_potion_names); dm.potion_mappings.insert(potion_tag.to_string(), masked_name); } }
That gives us a nice random set of names; in the test I just ran, Health Potion's obfuscated name was Slimey Violet Potion. Doesn't sound delicious!
The last thing we need to do is to add an ObfuscatedName component to potion spawns. In raws/rawmaster.rs, we already did this for scrolls - so we duplicate the functionality for potions:
#![allow(unused)] fn main() { let scroll_names = dm.scroll_mappings.clone(); let potion_names = dm.potion_mappings.clone(); ... if !identified.contains(&item_template.name) { match magic.naming.as_str() { "scroll" => { eb = eb.with(ObfuscatedName{ name : scroll_names[&item_template.name].clone() }); } "potion" => { eb = eb.with(ObfuscatedName{ name: potion_names[&item_template.name].clone() }); } _ => {} } } }
We've done all the remaining hard work! So now if you cargo run, walk around and find a potion, you will find it has an obfuscated name:
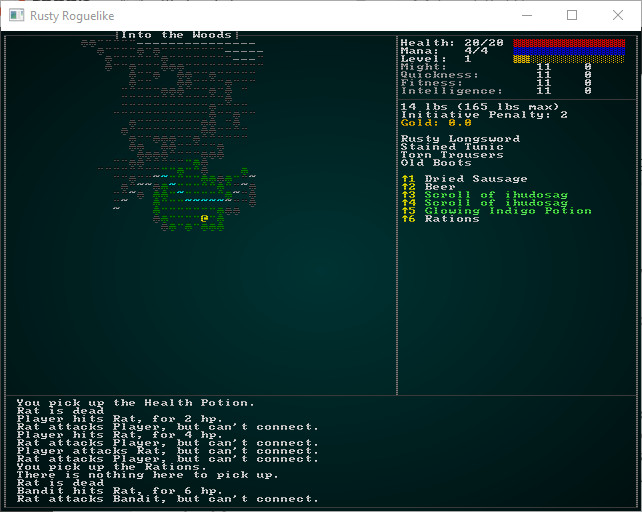
Other magic items
We should also support other magical items, without a special naming scheme. Let's open up spawns.json and define a magical Longsword +1 and give it a generic name in the naming scheme:
{
"name" : "Longsword +1",
"renderable": {
"glyph" : "/",
"fg" : "#FFAAFF",
"bg" : "#000000",
"order" : 2
},
"weapon" : {
"range" : "melee",
"attribute" : "might",
"base_damage" : "1d8+1",
"hit_bonus" : 1
},
"weight_lbs" : 2.0,
"base_value" : 100.0,
"initiative_penalty" : 1,
"vendor_category" : "weapon",
"magic" : { "class" : "common", "naming" : "Unidentified Longsword" }
},
See how we've adjusted the stats to reflect its magical status? It hits more frequently, does more damage, weighs less, is worth more gold and has less of an initiative penalty. That'd be a good find! We should also add it to the spawn table; we'll give it a stupidly high likelihood of appearing for now, so we can test it:
{ "name" : "Longsword +1", "weight" : 100, "min_depth" : 3, "max_depth" : 100 },
We aren't generating any new names, so there's no need to build a naming system into dungeon.rs (unless you want to - it's always good to make your own game, rather than mine!) - so we'll jump straight into spawn_named_items in raws/rawmaster.rs and extend the magical item code to include the specified name if no name is provided:
#![allow(unused)] fn main() { if !identified.contains(&item_template.name) { match magic.naming.as_str() { "scroll" => { eb = eb.with(ObfuscatedName{ name : scroll_names[&item_template.name].clone() }); } "potion" => { eb = eb.with(ObfuscatedName{ name: potion_names[&item_template.name].clone() }); } _ => { eb = eb.with(ObfuscatedName{ name : magic.naming.clone() }); } } } }
If you cargo run now, and rush to level 3 (I use the cheats, backslash is your friend) you are highly likely to find a magical longsword:
Clean Up
We should change the magical longsword's spawn weight back down to something reasonable, and make common longswords more frequent. In spawns.json:
{ "name" : "Longsword", "weight" : 2, "min_depth" : 3, "max_depth" : 100 },
{ "name" : "Longsword +1", "weight" : 1, "min_depth" : 3, "max_depth" : 100 },
Also, if you've given the character any free items in spawner.rs, go ahead and remove them (unless you want them to be ubiquitous)!
Tool-tips
We've still got an issue to handle. If you mouse-over an item, it displays its actual name - rather than its obfuscated name. Open up gui.rs, and we'll fix that. Fortunately, it's pretty easy now that we've built the name framework! We can remove names altogether from the ECS structures, and just pass the entity and ECS to the get_item_display_name to obtain a name for the entity:
#![allow(unused)] fn main() { fn draw_tooltips(ecs: &World, ctx : &mut Rltk) { use rltk::to_cp437; let (min_x, _max_x, min_y, _max_y) = camera::get_screen_bounds(ecs, ctx); let map = ecs.fetch::<Map>(); let positions = ecs.read_storage::<Position>(); let hidden = ecs.read_storage::<Hidden>(); let attributes = ecs.read_storage::<Attributes>(); let pools = ecs.read_storage::<Pools>(); let entities = ecs.entities(); let mouse_pos = ctx.mouse_pos(); let mut mouse_map_pos = mouse_pos; mouse_map_pos.0 += min_x - 1; mouse_map_pos.1 += min_y - 1; if mouse_pos.0 < 1 || mouse_pos.0 > 49 || mouse_pos.1 < 1 || mouse_pos.1 > 40 { return; } if mouse_map_pos.0 >= map.width-1 || mouse_map_pos.1 >= map.height-1 || mouse_map_pos.0 < 1 || mouse_map_pos.1 < 1 { return; } if !map.visible_tiles[map.xy_idx(mouse_map_pos.0, mouse_map_pos.1)] { return; } let mut tip_boxes : Vec<Tooltip> = Vec::new(); for (entity, position, _hidden) in (&entities, &positions, !&hidden).join() { if position.x == mouse_map_pos.0 && position.y == mouse_map_pos.1 { let mut tip = Tooltip::new(); tip.add(get_item_display_name(ecs, entity)); ... }
If you mouse-over things now, you'll see the obfuscated name. You could even use this to obfuscate NPC names if you feel like integrating spies into your game!
Information leakage via the log
There's another glaring problem: if you watch the log while you pickup or drop an item, it shows the item's real name! The issues all occur in inventory_system.rs, so we'll take our "outside the ECS" function from gui.rs and adapt it to work inside systems. Here's the function:
#![allow(unused)] fn main() { fn obfuscate_name( item: Entity, names: &ReadStorage::<Name>, magic_items : &ReadStorage::<MagicItem>, obfuscated_names : &ReadStorage::<ObfuscatedName>, dm : &MasterDungeonMap, ) -> String { if let Some(name) = names.get(item) { if magic_items.get(item).is_some() { if dm.identified_items.contains(&name.name) { name.name.clone() } else if let Some(obfuscated) = obfuscated_names.get(item) { obfuscated.name.clone() } else { "Unidentified magic item".to_string() } } else { name.name.clone() } } else { "Nameless item (bug)".to_string() } } }
Then we can change the ItemCollectionSystem to use it. There's a fair number of additional systems involved:
#![allow(unused)] fn main() { pub struct ItemCollectionSystem {} impl<'a> System<'a> for ItemCollectionSystem { #[allow(clippy::type_complexity)] type SystemData = ( ReadExpect<'a, Entity>, WriteExpect<'a, GameLog>, WriteStorage<'a, WantsToPickupItem>, WriteStorage<'a, Position>, ReadStorage<'a, Name>, WriteStorage<'a, InBackpack>, WriteStorage<'a, EquipmentChanged>, ReadStorage<'a, MagicItem>, ReadStorage<'a, ObfuscatedName>, ReadExpect<'a, MasterDungeonMap> ); fn run(&mut self, data : Self::SystemData) { let (player_entity, mut gamelog, mut wants_pickup, mut positions, names, mut backpack, mut dirty, magic_items, obfuscated_names, dm) = data; for pickup in wants_pickup.join() { positions.remove(pickup.item); backpack.insert(pickup.item, InBackpack{ owner: pickup.collected_by }).expect("Unable to insert backpack entry"); dirty.insert(pickup.collected_by, EquipmentChanged{}).expect("Unable to insert"); if pickup.collected_by == *player_entity { gamelog.entries.push( format!( "You pick up the {}.", obfuscate_name(pickup.item, &names, &magic_items, &obfuscated_names, &dm) ) ); } } wants_pickup.clear(); } } }
Likewise, we need to adjust the item dropping system:
#![allow(unused)] fn main() { pub struct ItemDropSystem {} impl<'a> System<'a> for ItemDropSystem { #[allow(clippy::type_complexity)] type SystemData = ( ReadExpect<'a, Entity>, WriteExpect<'a, GameLog>, Entities<'a>, WriteStorage<'a, WantsToDropItem>, ReadStorage<'a, Name>, WriteStorage<'a, Position>, WriteStorage<'a, InBackpack>, WriteStorage<'a, EquipmentChanged>, ReadStorage<'a, MagicItem>, ReadStorage<'a, ObfuscatedName>, ReadExpect<'a, MasterDungeonMap> ); fn run(&mut self, data : Self::SystemData) { let (player_entity, mut gamelog, entities, mut wants_drop, names, mut positions, mut backpack, mut dirty, magic_items, obfuscated_names, dm) = data; for (entity, to_drop) in (&entities, &wants_drop).join() { let mut dropper_pos : Position = Position{x:0, y:0}; { let dropped_pos = positions.get(entity).unwrap(); dropper_pos.x = dropped_pos.x; dropper_pos.y = dropped_pos.y; } positions.insert(to_drop.item, Position{ x : dropper_pos.x, y : dropper_pos.y }).expect("Unable to insert position"); backpack.remove(to_drop.item); dirty.insert(entity, EquipmentChanged{}).expect("Unable to insert"); if entity == *player_entity { gamelog.entries.push( format!( "You drop the {}.", obfuscate_name(to_drop.item, &names, &magic_items, &obfuscated_names, &dm) ) ); } } wants_drop.clear(); } } }
Fixing item colors
Another issue is that we've color coded various magical items. A sharp-eyed player could know that a "scroll of blah" is actually a fireball scroll because of the color! The solution is to go through spawns.json and make sure that items have the same color.
Wrap-Up
This gets us the basics of the item identification mini-game. We've not touched cursed items, yet - that's for a future chapter (after we clear up some issues with our item systems; more on that in the next chapter).
...
The source code for this chapter may be found here
Run this chapter's example with web assembly, in your browser (WebGL2 required)
Copyright (C) 2019, Herbert Wolverson.
Effects
About this tutorial
This tutorial is free and open source, and all code uses the MIT license - so you are free to do with it as you like. My hope is that you will enjoy the tutorial, and make great games!
If you enjoy this and would like me to keep writing, please consider supporting my Patreon.
In the last chapter, we added item identification to magical items - and it became clear that potentially there are lots of items we could create. Our inventory system is seriously overloaded - it does way too much in one place, ranging from equipping/unequipping items to the guts of making magic missile spells fly. Worse, we've silently run into a wall: Specs limits the number of data stores you can pass into a system (and will probably continue to do so until Rust supports C++ style variadic parameter packs). We could just hack around that problem, but it would be far better to solve the problem once and for all by implementing a more generic solution. It also lets us solve a problem we don't know we have yet: handling effects from things other than items, such as spells (or traps that do zany things, etc.). This is also an opportunity to fix a bug you may not have noticed; an entity can only have one component of a given type, so if two things have issued damage to a component in a given tick - only the one piece of damage actually happens!
What is an effect?
To properly model effects, we need to think about what they are. An effect is something doing something. It might be a sword hitting a target, a spell summoning a great demon from Abyss, or a wand clearing summoning a bunch of flowers - pretty much anything, really! We want to keep the ability for things to cause more than one effect (if you added multiple components to an item, it would fire all of them - that's a good thing; a staff of thunder and lightning could easily have two or more effects!). So from this, we can deduce:
- An effect does one thing - but the source of an effect might spawn multiple effects. An effect, therefore, is a good candidate to be its own
Entity. - An effect has a source: someone has to get experience points if it kills someone, for example. It also needs to have the option to not have a source - it might be purely environmental.
- An effect has one or more targets; it might be self-targeted, targeted on one other, or an area-of-effect. Targets are therefore either an entity or a location.
- An effect might trigger the creation of other effects in a chain (think chain lightning, for example).
- An effect does something, but we don't really want to specify exactly what in the early planning stages!
- We want effects to be sourced from multiple places: using an item, triggering a trap, a monster's special attack, a magical weapon's "proc" effect, casting a spell, or even environmental effects!
So, we're not asking for much! Fortunately, this is well within what we can manage with an ECS. We're going to stretch the "S" (Systems) a little and use a more generic factory model to actually create the effects - and then reap the benefits of a relatively generic setup once we have that in place.
Inventory System: Quick Clean Up
Before we get too far in, we should take a moment to break up the inventory system into a module. We'll retain exactly the functionality it already has (for now), but it's a monster - and monsters are generally better handled in chunks! Make a new folder, src/inventory_system and move inventory_system.rs into it - and rename it mod.rs. That converts it into a multi-file module. (Those steps are actually enough to get you a runnable setup - this is a good illustration of how modules work in Rust; a file named inventory_system.rs is a module, and so is inventory_system/mod.rs).
Now open up inventory_system/mod.rs, and you'll see that it has a bunch of systems in it:
ItemCollectionSystemItemUseSystemItemDropSystemItemRemoveSystemItemIdentificationSystem
We're going to make a new file for each of these, cut the systems code out of mod.rs and paste it into its own file. We'll need to copy the use part of mod.rs to the top of these files, and then trim out what we aren't using. At the end, we'll add mod X, use X::SystemName lines in mod.rs to tell the compiler that the module is sharing these systems. This would be a huge chapter if I pasted in each of these changes, and since the largest - ItemUseSystem is going to change drastically, that would be a rather large waste of space. Instead, we'll go through the first - and you can check the source code to see the rest.
For example, we make a new file inventory_system/collection_system.rs:
#![allow(unused)] fn main() { use specs::prelude::*; use super::{WantsToPickupItem, Name, InBackpack, Position, gamelog::GameLog, EquipmentChanged }; pub struct ItemCollectionSystem {} impl<'a> System<'a> for ItemCollectionSystem { #[allow(clippy::type_complexity)] type SystemData = ( ReadExpect<'a, Entity>, WriteExpect<'a, GameLog>, WriteStorage<'a, WantsToPickupItem>, WriteStorage<'a, Position>, ReadStorage<'a, Name>, WriteStorage<'a, InBackpack>, WriteStorage<'a, EquipmentChanged> ); fn run(&mut self, data : Self::SystemData) { let (player_entity, mut gamelog, mut wants_pickup, mut positions, names, mut backpack, mut dirty) = data; for pickup in wants_pickup.join() { positions.remove(pickup.item); backpack.insert(pickup.item, InBackpack{ owner: pickup.collected_by }).expect("Unable to insert backpack entry"); dirty.insert(pickup.collected_by, EquipmentChanged{}).expect("Unable to insert"); if pickup.collected_by == *player_entity { gamelog.entries.push(format!("You pick up the {}.", names.get(pickup.item).unwrap().name)); } } wants_pickup.clear(); } } }
This is exactly the code from the original system, which is why we aren't repeating all of them here. The only difference is that we've gone through the use super:: list at the top and trimmed out what we aren't using. You can do the same for inventory_system/drop_system.rs, inventory_system/identification_system.rs, inventory_system/remove_system.rs and use_system.rs. Then you tie them together into inventory_system/mod.rs:
#![allow(unused)] fn main() { use super::{WantsToPickupItem, Name, InBackpack, Position, gamelog, WantsToUseItem, Consumable, ProvidesHealing, WantsToDropItem, InflictsDamage, Map, SufferDamage, AreaOfEffect, Confusion, Equippable, Equipped, WantsToRemoveItem, particle_system, ProvidesFood, HungerClock, HungerState, MagicMapper, RunState, Pools, EquipmentChanged, TownPortal, IdentifiedItem, Item, ObfuscatedName}; mod collection_system; pub use collection_system::ItemCollectionSystem; mod use_system; pub use use_system::ItemUseSystem; mod drop_system; pub use drop_system::ItemDropSystem; mod remove_system; pub use remove_system::ItemRemoveSystem; mod identification_system; pub use identification_system::ItemIdentificationSystem; }
We've tweaked a couple of use paths to make the other components happy, and then added a pair of mod (to use the file) and pub use (to share it with the rest of the project).
If all went well, cargo run will give you the exact same game we had before! It should even compile a bit faster.
A new effects module
We'll start with the basics. Make a new folder, src/effects and place a single file in it called mod.rs. As you've seen before, this creates a basic module named effects. Now for the fun part; we need to be able to add effects from anywhere, including within a system: so passing in the World isn't available. However, spawning effects will need full World access! So, we're going to make a queueing system. Calls in enqueue an effect, and a later scan of the queue causes effects to fire. This is basically a message passing system, and you'll often find something similar codified into big game engines. So here's a very simple effects/mod.rs (also add pub mod effects; to the use list in main.rs to include it in your compilation and make it available to other modules):
#![allow(unused)] fn main() { use std::sync::Mutex; use specs::prelude::*; use std::collections::VecDeque; lazy_static! { pub static ref EFFECT_QUEUE : Mutex<VecDeque<EffectSpawner>> = Mutex::new(VecDeque::new()); } pub enum EffectType { Damage { amount : i32 } } #[derive(Clone)] pub enum Targets { Single { target : Entity }, Area { target: Vec<Entity> } } pub struct EffectSpawner { pub creator : Option<Entity>, pub effect_type : EffectType, pub targets : Targets } pub fn add_effect(creator : Option<Entity>, effect_type: EffectType, targets : Targets) { EFFECT_QUEUE .lock() .unwrap() .push_back(EffectSpawner{ creator, effect_type, targets }); } }
If you are using an IDE, it will complain that none of this is used. That's ok, we're building basic functionality first! The VecDeque is new; it's a queue (actually a double-ended queue) with a vector behind it for performance. It lets you add to either end, and pop results off of it. See the documentation to learn more about it.
Enqueueing Damage
Let's start with a relatively simple one. Currently, whenever an entity is damaged we assign it a SufferDamage component. That works ok, but has the problem we discussed earlier - there can only be one source of damage at a time. We want to concurrently murder our player in many ways (only slightly kidding)! So we'll extend the base to permit inserting damage. We'll change EffectType to have a Damage type:
#![allow(unused)] fn main() { pub enum EffectType { Damage { amount : i32 } } }
Notice that we're not storing the victim or the originator - those are covered in the source and target parts of the message. Now we search our code to see where we use SufferDamage components. The most important users are the hunger system, melee system, item use system and trigger system: they can all cause damage to occur. Open up melee_combat_system.rs and find the following line (it's line 106 in my source code):
#![allow(unused)] fn main() { SufferDamage::new_damage(&mut inflict_damage, wants_melee.target, damage, from_player: entity == *player_entity); }
We can replace this with a call to insert into the queue:
#![allow(unused)] fn main() { add_effect( Some(entity), EffectType::Damage{ amount: damage }, Targets::Single{ target: wants_melee.target } ); }
We can also remove all references to inflict_damage from the system, since we aren't using it anymore.
We should do the same for trigger_system.rs. We can replace the following line:
#![allow(unused)] fn main() { SufferDamage::new_damage(&mut inflict_damage, entity, damage.damage, false); }
With:
#![allow(unused)] fn main() { add_effect( None, EffectType::Damage{ amount: damage.damage }, Targets::Single{ target: entity } ); }
Once again, we can also get rid of all references to SufferDamage.
We'll ignore item_use_system for a minute (we'll get to it in a moment, I promise).
Applying Damage
So now if you hit something, you are adding damage to the queue (and nothing else happens). The next step is to read the effects queue and do something with it. We're going to adopt a dispatcher model for this: read the queue, and dispatch commands to the relevant places. We'll start with the skeleton; in effects/mod.rs we add the following function:
#![allow(unused)] fn main() { pub fn run_effects_queue(ecs : &mut World) { loop { let effect : Option<EffectSpawner> = EFFECT_QUEUE.lock().unwrap().pop_front(); if let Some(effect) = effect { // target_applicator(ecs, &effect); // Uncomment when we write this! } else { break; } } } }
This is very minimal! It acquires a lock just long enough to pop the first message from the queue, and if it has a value - does something with it. It then repeats the lock/pop cycle until the queue is completely empty. This is a useful pattern: the lock is only held for just long enough to read the queue, so if any systems inside want to add to the queue you won't experience a "deadlock" (two systems perpetually waiting for queue access).
It doesn't do anything with the data, yet - but this shows you how to drain the queue one message at a time. We're taking in the World, because we expect to be modifying it. We should add a call to use this function; in main.rs find run_systems and add it almost at the very end (with particles and lighting after it):
#![allow(unused)] fn main() { effects::run_effects_queue(&mut self.ecs); let mut particles = particle_system::ParticleSpawnSystem{}; particles.run_now(&self.ecs); let mut lighting = lighting_system::LightingSystem{}; lighting.run_now(&self.ecs); }
Now that we're draining the queue, lets do something with it. In effects/mod.rs, we'll add in the commented-out function target_applicator. The idea is to take the TargetType, and extend it into calls that handle it (the function has a high "fan out" - meaning we'll call it a lot, and it will call many other functions). There's a few different ways we can affect a target, so here's several related functions:
#![allow(unused)] fn main() { fn target_applicator(ecs : &mut World, effect : &EffectSpawner) { match &effect.targets { Targets::Tile{tile_idx} => affect_tile(ecs, effect, *tile_idx), Targets::Tiles{tiles} => tiles.iter().for_each(|tile_idx| affect_tile(ecs, effect, *tile_idx)), Targets::Single{target} => affect_entity(ecs, effect, *target), Targets::TargetList{targets} => targets.iter().for_each(|entity| affect_entity(ecs, effect, *entity)), } } fn tile_effect_hits_entities(effect: &EffectType) -> bool { match effect { EffectType::Damage{..} => true } } fn affect_tile(ecs: &mut World, effect: &EffectSpawner, tile_idx : i32) { if tile_effect_hits_entities(&effect.effect_type) { let content = ecs.fetch::<Map>().tile_content[tile_idx as usize].clone(); content.iter().for_each(|entity| affect_entity(ecs, effect, *entity)); } // TODO: Run the effect } fn affect_entity(ecs: &mut World, effect: &EffectSpawner, target: Entity) { // TODO: Run the effect } }
There's a lot to unwrap here, but it gives a very generic mechanism for handling effect targeting. Let's step through it:
target_applicatoris called.- It matches on the
targetsfield of the effect:- If it is a
Tiletarget type, it callsTargets::tilewith the index of the target tile.affect_tilecalls another function,tile_effect_hits_entitieswhich looks at the requested effect type and determines if it should be applied to entities inside the tile. Right now, we only haveDamage- which makes sense to pass on to entities, so it currently always returns true.- If it does affect entities in the tile, then it retrieves the tile content from the map - and calls
affect_entityon each entity in the tile. We'll look at that in a moment. - If there is something to do with the tile, it happens here. Right now, it's a
TODOcomment.
- If it is a
Tilestarget type, it iterates through all of the tiles in the list, callingaffect_tileon each of them in turn - just like a single tile (above), but covering each of them. - If it is a
Singleentity target, it callsaffect_entityfor that target. - If it a
TargetList(a list of target entities), it callsaffect_entityfor each of those target entities in turn.
- If it is a
So this framework lets us have an effect that can hit a tile (and optionally everyone in it), a set of tiles (again, optionally including the contents), a single entity, or a list of entities. You can describe pretty much any targeting mechanism with that!
Next, in the run_effects_queue function, uncomment the caller (so our hard work actually runs!):
#![allow(unused)] fn main() { pub fn run_effects_queue(ecs : &mut World) { loop { let effect : Option<EffectSpawner> = EFFECT_QUEUE.lock().unwrap().pop_front(); if let Some(effect) = effect { target_applicator(ecs, &effect); } else { break; } } } }
Going back to the Damage type we are implementing, we need to implement it! We'll make a new file, effects/damage.rs and put code to apply damage into it. Damage is a one-shot, non-persistent thing - so we'll handle it immediately. Here's the bare-bones:
#![allow(unused)] fn main() { use specs::prelude::*; use super::*; use crate::components::Pools; pub fn inflict_damage(ecs: &mut World, damage: &EffectSpawner, target: Entity) { let mut pools = ecs.write_storage::<Pools>(); if let Some(pool) = pools.get_mut(target) { if !pool.god_mode { if let EffectType::Damage{amount} = damage.effect_type { pool.hit_points.current -= amount; } } } } }
Notice that we're not handling blood stains, experience points or anything of the like! We are, however, applying the damage. If you cargo run now, you can engage in melee (and not gain any benefits to doing so).
Blood for the blood god!
Our previous version spawned bloodstains whenever we inflicted damage. It would have been easy enough to include this in the inflict_damage function above, but we may have a use for bloodstains elsewhere! We also need to verify that our effects message queue really is smart enough to handle insertions during events. So we're going to make bloodstains an effect. We'll add it into the EffectType enum in effects/mod.rs:
#![allow(unused)] fn main() { pub enum EffectType { Damage { amount : i32 }, Bloodstain } }
Bloodstains have no effect on entities in the (now messy) tile, so we'll update tile_effect_hits_entities to have a default of not doing anything (this way we can keep adding cosmetic effects without having to remember to add it each time):
#![allow(unused)] fn main() { fn tile_effect_hits_entities(effect: &EffectType) -> bool { match effect { EffectType::Damage{..} => true, _ => false } } }
Likewise, affect_entity can ignore the event - and other cosmetic events:
#![allow(unused)] fn main() { fn affect_entity(ecs: &mut World, effect: &EffectSpawner, target: Entity) { match &effect.effect_type { EffectType::Damage{..} => damage::inflict_damage(ecs, effect, target), _ => {} } } }
We do want it to affect a tile, so we'll update affect_tile to call a bloodstain function.
#![allow(unused)] fn main() { fn affect_tile(ecs: &mut World, effect: &EffectSpawner, tile_idx : i32) { if tile_effect_hits_entities(&effect.effect_type) { let content = ecs.fetch::<Map>().tile_content[tile_idx as usize].clone(); content.iter().for_each(|entity| affect_entity(ecs, effect, *entity)); } match &effect.effect_type { EffectType::Bloodstain => damage::bloodstain(ecs, tile_idx), _ => {} } } }
Now, in effects/damage.rs we'll write the bloodstain code:
#![allow(unused)] fn main() { pub fn bloodstain(ecs: &mut World, tile_idx : i32) { let mut map = ecs.fetch_mut::<Map>(); map.bloodstains.insert(tile_idx as usize); } }
We'll also update inflict_damage to spawn a bloodstain:
#![allow(unused)] fn main() { pub fn inflict_damage(ecs: &mut World, damage: &EffectSpawner, target: Entity) { let mut pools = ecs.write_storage::<Pools>(); if let Some(pool) = pools.get_mut(target) { if !pool.god_mode { if let EffectType::Damage{amount} = damage.effect_type { pool.hit_points.current -= amount; if let Some(tile_idx) = entity_position(ecs, target) { add_effect(None, EffectType::Bloodstain, Targets::Tile{tile_idx}); } } } } } }
The relevant code asks a mystery function, entity_position for data - if it returns a value, it inserts an effect of the Bloodstain type with the tile index. So what is this function? We're going to be targeting a lot, so we should make some helper functions to make the process easier for the caller. Make a new file, effects/targeting.rs and place the following into it:
#![allow(unused)] fn main() { use specs::prelude::*; use crate::components::Position; use crate::map::Map; pub fn entity_position(ecs: &World, target: Entity) -> Option<i32> { if let Some(pos) = ecs.read_storage::<Position>().get(target) { let map = ecs.fetch::<Map>(); return Some(map.xy_idx(pos.x, pos.y) as i32); } None } }
Now in effects/mods.rs add a couple of lines to expose the targeting helpers to consumers of the effects module:
#![allow(unused)] fn main() { mod targeting; pub use targeting::*; }
So what does this do? It follows a pattern we've used a lot: it checks to see if the entity has a position. If it does, then it obtains the tile index from the global map and returns it - otherwise, it returns None.
If you cargo run now, and attack an innocent rodent you will see blood! We've proven that the events system doesn't deadlock, and we've added an easy way to add bloodstains. You can call that event from anywhere, and blood shall rain!
Particulate Matter
You've probably noticed that when an entity takes damage, we spawn a particle. Particles are something else we can use a lot, so it makes sense to have them as an event type also. Whenever we've applied damage so far, we've flashed an orange indicator over the victim. We might as well codify that in the damage system (and leave it open for improvement in a later chapter). It's likely that we'll want to launch particles for other purposes, too - so we'll come up with another quite generic setup.
We'll start in effects/mod.rs and extend EffectType to include particles:
#![allow(unused)] fn main() { pub enum EffectType { Damage { amount : i32 }, Bloodstain, Particle { glyph: rltk::FontCharType, fg : rltk::RGB, bg: rltk::RGB, lifespan: f32 } } }
You'll notice that once again, we aren't specifying where the particle goes; we'll leave that to the targeting system. Now we'll make a function to actually spawn particles. In the name of clarity, we'll put it in its own file; in a new file effects/particles.rs add the following:
#![allow(unused)] fn main() { use specs::prelude::*; use super::*; use crate::particle_system::ParticleBuilder; use crate::map::Map; pub fn particle_to_tile(ecs: &mut World, tile_idx : i32, effect: &EffectSpawner) { if let EffectType::Particle{ glyph, fg, bg, lifespan } = effect.effect_type { let map = ecs.fetch::<Map>(); let mut particle_builder = ecs.fetch_mut::<ParticleBuilder>(); particle_builder.request( tile_idx % map.width, tile_idx / map.width, fg, bg, glyph, lifespan ); } } }
This is basically the same as our other calls to ParticleBuilder, but using the contents of the message to define what to build. Now we'll go back to effects/mod.rs and add a mod particles; to the using list at the top. Then we'll extend the affect_tile to call it:
#![allow(unused)] fn main() { fn affect_tile(ecs: &mut World, effect: &EffectSpawner, tile_idx : i32) { if tile_effect_hits_entities(&effect.effect_type) { let content = ecs.fetch::<Map>().tile_content[tile_idx as usize].clone(); content.iter().for_each(|entity| affect_entity(ecs, effect, *entity)); } match &effect.effect_type { EffectType::Bloodstain => damage::bloodstain(ecs, tile_idx), EffectType::Particle{..} => particles::particle_to_tile(ecs, tile_idx, &effect), _ => {} } } }
It would also be really handy to be able to attach a particle to an entity, even if it doesn't actually have much effect. There's been a few cases where we've retrieved a Position component just to place an effect, so this could let us simplify the code a bit! So we extend affect_entity like this:
#![allow(unused)] fn main() { fn affect_entity(ecs: &mut World, effect: &EffectSpawner, target: Entity) { match &effect.effect_type { EffectType::Damage{..} => damage::inflict_damage(ecs, effect, target), EffectType::Bloodstain{..} => if let Some(pos) = entity_position(ecs, target) { damage::bloodstain(ecs, pos) }, EffectType::Particle{..} => if let Some(pos) = entity_position(ecs, target) { particles::particle_to_tile(ecs, pos, &effect) }, _ => {} } } }
So now we can open up effects/damage.rs and both clean-up the bloodstain code and apply a damage particle:
#![allow(unused)] fn main() { pub fn inflict_damage(ecs: &mut World, damage: &EffectSpawner, target: Entity) { let mut pools = ecs.write_storage::<Pools>(); if let Some(pool) = pools.get_mut(target) { if !pool.god_mode { if let EffectType::Damage{amount} = damage.effect_type { pool.hit_points.current -= amount; add_effect(None, EffectType::Bloodstain, Targets::Single{target}); add_effect(None, EffectType::Particle{ glyph: rltk::to_cp437('‼'), fg : rltk::RGB::named(rltk::ORANGE), bg : rltk::RGB::named(rltk::BLACK), lifespan: 200.0 }, Targets::Single{target} ); } } } } }
Now open up melee_combat_system.rs. We can simplify it a bit by removing the particle call on damage, and replace the other calls to ParticleBuilder with effect calls. This lets us get rid of the whole reference to the particle system, positions AND the player entity! This is the kind of improvement I wanted: systems are simplifying down to what they should focus on! See the source for the changes; they are too long to include in the body text here.
If you cargo run now, you'll see particles if you damage something - and bloodstains should still work.
Experience Points
So we're missing some important stuff, still: when you kill a monster, it should drop loot/cash, give experience points and so on. Rather than pollute the "damage" function with too much extraneous stuff (on the principle of a function doing one thing well), lets add a new EffectType - EntityDeath:
#![allow(unused)] fn main() { pub enum EffectType { Damage { amount : i32 }, Bloodstain, Particle { glyph: rltk::FontCharType, fg : rltk::RGB, bg: rltk::RGB, lifespan: f32 }, EntityDeath } }
Now in inflict_damage, we'll emit this event if the entity died:
#![allow(unused)] fn main() { if pool.hit_points.current < 1 { add_effect(damage.creator, EffectType::EntityDeath, Targets::Single{target}); } }
We'll also make a new function; this is the same as the code in damage_system (we'll be removing most of the system when we've taken care of item usage):
#![allow(unused)] fn main() { pub fn death(ecs: &mut World, effect: &EffectSpawner, target : Entity) { let mut xp_gain = 0; let mut gold_gain = 0.0f32; let mut pools = ecs.write_storage::<Pools>(); let attributes = ecs.read_storage::<Attributes>(); let mut map = ecs.fetch_mut::<Map>(); if let Some(pos) = entity_position(ecs, target) { crate::spatial::remove_entity(target, pos as usize); } if let Some(source) = effect.creator { if ecs.read_storage::<Player>().get(source).is_some() { if let Some(stats) = pools.get(target) { xp_gain += stats.level * 100; gold_gain += stats.gold; } if xp_gain != 0 || gold_gain != 0.0 { let mut log = ecs.fetch_mut::<GameLog>(); let mut player_stats = pools.get_mut(source).unwrap(); let player_attributes = attributes.get(source).unwrap(); player_stats.xp += xp_gain; player_stats.gold += gold_gain; if player_stats.xp >= player_stats.level * 1000 { // We've gone up a level! player_stats.level += 1; log.entries.push(format!("Congratulations, you are now level {}", player_stats.level)); player_stats.hit_points.max = player_hp_at_level( player_attributes.fitness.base + player_attributes.fitness.modifiers, player_stats.level ); player_stats.hit_points.current = player_stats.hit_points.max; player_stats.mana.max = mana_at_level( player_attributes.intelligence.base + player_attributes.intelligence.modifiers, player_stats.level ); player_stats.mana.current = player_stats.mana.max; let player_pos = ecs.fetch::<rltk::Point>(); for i in 0..10 { if player_pos.y - i > 1 { add_effect(None, EffectType::Particle{ glyph: rltk::to_cp437('░'), fg : rltk::RGB::named(rltk::GOLD), bg : rltk::RGB::named(rltk::BLACK), lifespan: 400.0 }, Targets::Tile{ tile_idx : map.xy_idx(player_pos.x, player_pos.y - i) as i32 } ); } } } } } } } }
Lastly, we add the effect to affect_entity:
#![allow(unused)] fn main() { fn affect_entity(ecs: &mut World, effect: &EffectSpawner, target: Entity) { match &effect.effect_type { EffectType::Damage{..} => damage::inflict_damage(ecs, effect, target), EffectType::EntityDeath => damage::death(ecs, effect, target), EffectType::Bloodstain{..} => if let Some(pos) = entity_position(ecs, target) { damage::bloodstain(ecs, pos) }, EffectType::Particle{..} => if let Some(pos) = entity_position(ecs, target) { particles::particle_to_tile(ecs, pos, &effect) }, _ => {} } } }
So now if you cargo run the project, we're back to where we were - but with a much more flexible system for particles, damage (which now stacks!) and killing things in general.
Item effects
Now that we have the basics of an effects system (and have cleaned up damage), it's time to really think about how items (and triggers) should work. We want them to be generic enough that you can put together entities Lego-style and build something interesting. We also want to stop defining effects in multiple places; currently we list trigger effects in one system, item effects in another - if we add spells, we'll have yet another place to debug!
We'll start by taking a look at the item usage system (inventory_system/use_system.rs). It's HUGE, and does far too much in one place. It handles targeting, identification, equipment switching, firing off effects for using an item and destruction of consumables! That was good for building a toy game to test with, but it doesn't scale to a "real" game.
For part of this - and in the spirit of using an ECS - we'll make some more systems, and have them do one thing well.
Moving Equipment Around
Equipping (and swapping) items is currently in the item usage system because it fits there from a user interface perspective: you "use" a sword, and the logical way to use it is to hold it (and put away whatever you had in your hand). Having it be part of the item usage system makes the system overly confusing, though - the system simply does too much (and targeting really isn't an issue, since you are using it on yourself).
So we'll make a new system in the file inventory_system/use_equip.rs and move the functionality over to it. This leads to a compact new system:
#![allow(unused)] fn main() { use specs::prelude::*; use super::{Name, InBackpack, gamelog::GameLog, WantsToUseItem, Equippable, Equipped, EquipmentChanged}; pub struct ItemEquipOnUse {} impl<'a> System<'a> for ItemEquipOnUse { #[allow(clippy::type_complexity)] type SystemData = ( ReadExpect<'a, Entity>, WriteExpect<'a, GameLog>, Entities<'a>, WriteStorage<'a, WantsToUseItem>, ReadStorage<'a, Name>, ReadStorage<'a, Equippable>, WriteStorage<'a, Equipped>, WriteStorage<'a, InBackpack>, WriteStorage<'a, EquipmentChanged> ); #[allow(clippy::cognitive_complexity)] fn run(&mut self, data : Self::SystemData) { let (player_entity, mut gamelog, entities, mut wants_use, names, equippable, mut equipped, mut backpack, mut dirty) = data; let mut remove_use : Vec<Entity> = Vec::new(); for (target, useitem) in (&entities, &wants_use).join() { // If it is equippable, then we want to equip it - and unequip whatever else was in that slot if let Some(can_equip) = equippable.get(useitem.item) { let target_slot = can_equip.slot; // Remove any items the target has in the item's slot let mut to_unequip : Vec<Entity> = Vec::new(); for (item_entity, already_equipped, name) in (&entities, &equipped, &names).join() { if already_equipped.owner == target && already_equipped.slot == target_slot { to_unequip.push(item_entity); if target == *player_entity { gamelog.entries.push(format!("You unequip {}.", name.name)); } } } for item in to_unequip.iter() { equipped.remove(*item); backpack.insert(*item, InBackpack{ owner: target }).expect("Unable to insert backpack entry"); } // Wield the item equipped.insert(useitem.item, Equipped{ owner: target, slot: target_slot }).expect("Unable to insert equipped component"); backpack.remove(useitem.item); if target == *player_entity { gamelog.entries.push(format!("You equip {}.", names.get(useitem.item).unwrap().name)); } // Done with item remove_use.push(target); } } remove_use.iter().for_each(|e| { dirty.insert(*e, EquipmentChanged{}).expect("Unable to insert"); wants_use.remove(*e).expect("Unable to remove"); }); } } }
Now go into use_system.rs and delete the same block. Finally, pop over to main.rs and add the system into run_systems (just before the current use system call):
#![allow(unused)] fn main() { let mut itemequip = inventory_system::ItemEquipOnUse{}; itemequip.run_now(&self.ecs); ... let mut itemuse = ItemUseSystem{}; }
Go ahead and cargo run and switch some equipment around to make sure it still works. That's good progress - we can remove three complete component storages from our use_system!
Item effects
Now that we've cleaned up inventory management into its own system, it's time to really cut to the meat of this change: item usage with effects. The goal is to have a system that understands items, but can "fan out" into generic code that we can reuse for every other effect use. We'll start in effects/mod.rs by adding an effect type for "I want to use an item":
#![allow(unused)] fn main() { #[derive(Debug)] pub enum EffectType { Damage { amount : i32 }, Bloodstain, Particle { glyph: rltk::FontCharType, fg : rltk::RGB, bg: rltk::RGB, lifespan: f32 }, EntityDeath, ItemUse { item: Entity }, } }
We want these to work a little differently than regular effects (consumable use has to be handled, and targeting passes through to the actual effects rather than directly from the item). We'll add it into target_applicator:
#![allow(unused)] fn main() { fn target_applicator(ecs : &mut World, effect : &EffectSpawner) { if let EffectType::ItemUse{item} = effect.effect_type { triggers::item_trigger(effect.creator, item, &effect.targets, ecs); } else { match &effect.targets { Targets::Tile{tile_idx} => affect_tile(ecs, effect, *tile_idx), Targets::Tiles{tiles} => tiles.iter().for_each(|tile_idx| affect_tile(ecs, effect, *tile_idx)), Targets::Single{target} => affect_entity(ecs, effect, *target), Targets::TargetList{targets} => targets.iter().for_each(|entity| affect_entity(ecs, effect, *entity)), } } } }
This "short circuits" the calling tree, so it handles items once (the items can then emit other events into the queue, so it all gets handled). Since we've called it, now we have to write triggers:item_trigger! Make a new file, effects/triggers.rs (and in mod.rs add a mod triggers;):
#![allow(unused)] fn main() { pub fn item_trigger(creator : Option<Entity>, item: Entity, targets : &Targets, ecs: &mut World) { // Use the item via the generic system event_trigger(creator, item, targets, ecs); // If it was a consumable, then it gets deleted if ecs.read_storage::<Consumable>().get(item).is_some() { ecs.entities().delete(item).expect("Delete Failed"); } } }
This function is the reason we have to handle items differently: it calls event_trigger (a local, private function) to spawn all the item's effects - and then if the item is a consumable it deletes it. Let's make a skeletal event_trigger function:
#![allow(unused)] fn main() { fn event_trigger(creator : Option<Entity>, entity: Entity, targets : &Targets, ecs: &mut World) { let mut gamelog = ecs.fetch_mut::<GameLog>(); } }
So this doesn't do anything - but the game can now compile and you can see that when you use an item it is correctly deleted. It provides enough of a placeholder to allow us to fix up the inventory system!
Use System Cleanup
The inventory_system/use_system.rs file was the root cause of this cleanup, and we now have enough of a framework to make it into a reasonably small, lean system! We just need it to mark your equipment as having changed, build the appropriate Targets list, and add a usage event. Here's the entire new system:
#![allow(unused)] fn main() { use specs::prelude::*; use super::{Name, WantsToUseItem,Map, AreaOfEffect, EquipmentChanged, IdentifiedItem}; use crate::effects::*; pub struct ItemUseSystem {} impl<'a> System<'a> for ItemUseSystem { #[allow(clippy::type_complexity)] type SystemData = ( ReadExpect<'a, Entity>, WriteExpect<'a, Map>, Entities<'a>, WriteStorage<'a, WantsToUseItem>, ReadStorage<'a, Name>, ReadStorage<'a, AreaOfEffect>, WriteStorage<'a, EquipmentChanged>, WriteStorage<'a, IdentifiedItem> ); #[allow(clippy::cognitive_complexity)] fn run(&mut self, data : Self::SystemData) { let (player_entity, map, entities, mut wants_use, names, aoe, mut dirty, mut identified_item) = data; for (entity, useitem) in (&entities, &wants_use).join() { dirty.insert(entity, EquipmentChanged{}).expect("Unable to insert"); // Identify if entity == *player_entity { identified_item.insert(entity, IdentifiedItem{ name: names.get(useitem.item).unwrap().name.clone() }) .expect("Unable to insert"); } // Call the effects system add_effect( Some(entity), EffectType::ItemUse{ item : useitem.item }, match useitem.target { None => Targets::Single{ target: *player_entity }, Some(target) => { if let Some(aoe) = aoe.get(useitem.item) { Targets::Tiles{ tiles: aoe_tiles(&*map, target, aoe.radius) } } else { Targets::Tile{ tile_idx : map.xy_idx(target.x, target.y) as i32 } } } } ); } wants_use.clear(); } } }
That's a big improvement! MUCH smaller, and quite easy to follow.
Now we need to work through the various item-related events and make them function.
Feeding Time
We'll start with food. Any item with a ProvidesFood component tag sets the eater's hunger clock back to Well Fed. We'll start by adding an event type for this:
#![allow(unused)] fn main() { #[derive(Debug)] pub enum EffectType { Damage { amount : i32 }, Bloodstain, Particle { glyph: rltk::FontCharType, fg : rltk::RGB, bg: rltk::RGB, lifespan: f32 }, EntityDeath, ItemUse { item: Entity }, WellFed, } }
Now, we'll make a new file - effects/hunger.rs and put the meat of handling this into it (don't forget to add mod hunger; in effects/mod.rs!):
#![allow(unused)] fn main() { use specs::prelude::*; use super::*; use crate::components::{HungerClock, HungerState}; pub fn well_fed(ecs: &mut World, _damage: &EffectSpawner, target: Entity) { if let Some(hc) = ecs.write_storage::<HungerClock>().get_mut(target) { hc.state = HungerState::WellFed; hc.duration = 20; } } }
Very simple, and straight out of the original code. We need food to affect entities rather than just locations (in case you make something like a vending machine that hands out food over an area!):
#![allow(unused)] fn main() { fn tile_effect_hits_entities(effect: &EffectType) -> bool { match effect { EffectType::Damage{..} => true, EffectType::WellFed => true, _ => false } } }
We also need to call the function:
#![allow(unused)] fn main() { fn affect_entity(ecs: &mut World, effect: &EffectSpawner, target: Entity) { match &effect.effect_type { EffectType::Damage{..} => damage::inflict_damage(ecs, effect, target), EffectType::EntityDeath => damage::death(ecs, effect, target), EffectType::Bloodstain{..} => if let Some(pos) = entity_position(ecs, target) { damage::bloodstain(ecs, pos) }, EffectType::Particle{..} => if let Some(pos) = entity_position(ecs, target) { particles::particle_to_tile(ecs, pos, &effect) }, EffectType::WellFed => hunger::well_fed(ecs, effect, target), _ => {} } } }
Finally, we need to add it into the event_trigger function in effects/triggers.rs:
#![allow(unused)] fn main() { fn event_trigger(creator : Option<Entity>, entity: Entity, targets : &Targets, ecs: &mut World) { let mut gamelog = ecs.fetch_mut::<GameLog>(); // Providing food if ecs.read_storage::<ProvidesFood>().get(entity).is_some() { add_effect(creator, EffectType::WellFed, targets.clone()); let names = ecs.read_storage::<Name>(); gamelog.entries.push(format!("You eat the {}.", names.get(entity).unwrap().name)); } } }
If you cargo run now, you can eat your rations and be well fed once more.
Magic Mapping
Magic Mapping is a bit of a special case, because of the need to switch back to the user interface for an update. It's also pretty simple, so we'll handle it entirely inside event_trigger:
#![allow(unused)] fn main() { // Magic mapper if ecs.read_storage::<MagicMapper>().get(entity).is_some() { let mut runstate = ecs.fetch_mut::<RunState>(); gamelog.entries.push("The map is revealed to you!".to_string()); *runstate = RunState::MagicMapReveal{ row : 0}; } }
Just like the code in the old item usage system: it sets the run-state to MagicMapReveal and plays a log message. You can cargo run and magic mapping will work now.
Town Portals
Town Portals are also a bit of a special case, so we'll also handle them in event_trigger:
#![allow(unused)] fn main() { // Town Portal if ecs.read_storage::<TownPortal>().get(entity).is_some() { let map = ecs.fetch::<Map>(); if map.depth == 1 { gamelog.entries.push("You are already in town, so the scroll does nothing.".to_string()); } else { gamelog.entries.push("You are telported back to town!".to_string()); let mut runstate = ecs.fetch_mut::<RunState>(); *runstate = RunState::TownPortal; } } }
Once again, this is basically the old code - relocated.
Healing
Healing is a more generic effect, and it's likely that we'll use it in multiple places. It's easy to imagine a prop with an entry-trigger that heals you (a magical restoration zone, a cybernetic repair shop - your imagination is the limit!), or items that heal on use (such as potions). So we'll add Healing into the effect types in mod.rs:
#![allow(unused)] fn main() { #[derive(Debug)] pub enum EffectType { Damage { amount : i32 }, Bloodstain, Particle { glyph: rltk::FontCharType, fg : rltk::RGB, bg: rltk::RGB, lifespan: f32 }, EntityDeath, ItemUse { item: Entity }, WellFed, Healing { amount : i32 }, Confusion { turns : i32 } } }
Healing affects entities and not tiles, so we'll mark that:
#![allow(unused)] fn main() { fn tile_effect_hits_entities(effect: &EffectType) -> bool { match effect { EffectType::Damage{..} => true, EffectType::WellFed => true, EffectType::Healing{..} => true, _ => false } } }
Since healing is basically reversed damage, we'll add a function to handle healing into our effects/damage.rs file:
#![allow(unused)] fn main() { pub fn heal_damage(ecs: &mut World, heal: &EffectSpawner, target: Entity) { let mut pools = ecs.write_storage::<Pools>(); if let Some(pool) = pools.get_mut(target) { if let EffectType::Healing{amount} = heal.effect_type { pool.hit_points.current = i32::min(pool.hit_points.max, pool.hit_points.current + amount); add_effect(None, EffectType::Particle{ glyph: rltk::to_cp437('‼'), fg : rltk::RGB::named(rltk::GREEN), bg : rltk::RGB::named(rltk::BLACK), lifespan: 200.0 }, Targets::Single{target} ); } } } }
This is similar to the old healing code, but we've added in a green particle to show that the entity was healed. Now we need to teach affect_entity in mod.rs to apply healing:
#![allow(unused)] fn main() { fn affect_entity(ecs: &mut World, effect: &EffectSpawner, target: Entity) { match &effect.effect_type { EffectType::Damage{..} => damage::inflict_damage(ecs, effect, target), EffectType::EntityDeath => damage::death(ecs, effect, target), EffectType::Bloodstain{..} => if let Some(pos) = entity_position(ecs, target) { damage::bloodstain(ecs, pos) }, EffectType::Particle{..} => if let Some(pos) = entity_position(ecs, target) { particles::particle_to_tile(ecs, pos, &effect) }, EffectType::WellFed => hunger::well_fed(ecs, effect, target), EffectType::Healing{..} => damage::heal_damage(ecs, effect, target), _ => {} } } }
Finally, we add support for ProvidesHealing tags in the event_trigger function:
#![allow(unused)] fn main() { // Healing if let Some(heal) = ecs.read_storage::<ProvidesHealing>().get(entity) { add_effect(creator, EffectType::Healing{amount: heal.heal_amount}, targets.clone()); } }
If you cargo run now, your potions of healing now work.
Damage
We've already written the majority of what we need to handle damage, so we can just add it into event_trigger:
#![allow(unused)] fn main() { // Damage if let Some(damage) = ecs.read_storage::<InflictsDamage>().get(entity) { add_effect(creator, EffectType::Damage{ amount: damage.damage }, targets.clone()); } }
Since we've already covered area of effect and similar via targeting, and the damage code comes from the melee revamp - this will make magic missile, fireball and similar work.
Confusion
Confusion needs to be handled in a similar manner to hunger. We add an event type:
#![allow(unused)] fn main() { #[derive(Debug)] pub enum EffectType { Damage { amount : i32 }, Bloodstain, Particle { glyph: rltk::FontCharType, fg : rltk::RGB, bg: rltk::RGB, lifespan: f32 }, EntityDeath, ItemUse { item: Entity }, WellFed, Healing { amount : i32 }, Confusion { turns : i32 } } }
Mark it as affecting entities:
#![allow(unused)] fn main() { fn tile_effect_hits_entities(effect: &EffectType) -> bool { match effect { EffectType::Damage{..} => true, EffectType::WellFed => true, EffectType::Healing{..} => true, EffectType::Confusion{..} => true, _ => false } } }
Add a method to the damage.rs file:
#![allow(unused)] fn main() { pub fn add_confusion(ecs: &mut World, effect: &EffectSpawner, target: Entity) { if let EffectType::Confusion{turns} = &effect.effect_type { ecs.write_storage::<Confusion>().insert(target, Confusion{ turns: *turns }).expect("Unable to insert status"); } } }
Include it in affect_entity:
#![allow(unused)] fn main() { fn affect_entity(ecs: &mut World, effect: &EffectSpawner, target: Entity) { match &effect.effect_type { EffectType::Damage{..} => damage::inflict_damage(ecs, effect, target), EffectType::EntityDeath => damage::death(ecs, effect, target), EffectType::Bloodstain{..} => if let Some(pos) = entity_position(ecs, target) { damage::bloodstain(ecs, pos) }, EffectType::Particle{..} => if let Some(pos) = entity_position(ecs, target) { particles::particle_to_tile(ecs, pos, &effect) }, EffectType::WellFed => hunger::well_fed(ecs, effect, target), EffectType::Healing{..} => damage::heal_damage(ecs, effect, target), EffectType::Confusion{..} => damage::add_confusion(ecs, effect, target), _ => {} } } }
And lastly, support it in event_trigger:
#![allow(unused)] fn main() { // Confusion if let Some(confusion) = ecs.read_storage::<Confusion>().get(entity) { add_effect(creator, EffectType::Confusion{ turns : confusion.turns }, targets.clone()); } }
That's enough to get confusion effects working.
Triggers
Now that we've got a working system for items (it's really flexible; you can mix and match tags as you want and all the effects fire), we need to do the same for triggers. We'll start by giving them an entry point into the effects API, just like we did for items. In effects/mod.rs we'll further extend the item effects enum:
#![allow(unused)] fn main() { #[derive(Debug)] pub enum EffectType { Damage { amount : i32 }, Bloodstain, Particle { glyph: rltk::FontCharType, fg : rltk::RGB, bg: rltk::RGB, lifespan: f32 }, EntityDeath, ItemUse { item: Entity }, WellFed, Healing { amount : i32 }, Confusion { turns : i32 }, TriggerFire { trigger: Entity } } }
We'll also special-case its activation:
#![allow(unused)] fn main() { fn target_applicator(ecs : &mut World, effect : &EffectSpawner) { if let EffectType::ItemUse{item} = effect.effect_type { triggers::item_trigger(effect.creator, item, &effect.targets, ecs); } else if let EffectType::TriggerFire{trigger} = effect.effect_type { triggers::trigger(effect.creator, trigger, &effect.targets, ecs); } else { match &effect.targets { Targets::Tile{tile_idx} => affect_tile(ecs, effect, *tile_idx), Targets::Tiles{tiles} => tiles.iter().for_each(|tile_idx| affect_tile(ecs, effect, *tile_idx)), Targets::Single{target} => affect_entity(ecs, effect, *target), Targets::TargetList{targets} => targets.iter().for_each(|entity| affect_entity(ecs, effect, *entity)), } } } }
Now in effects/triggers.rs we need to add trigger as a public function:
#![allow(unused)] fn main() { pub fn trigger(creator : Option<Entity>, trigger: Entity, targets : &Targets, ecs: &mut World) { // The triggering item is no longer hidden ecs.write_storage::<Hidden>().remove(trigger); // Use the item via the generic system event_trigger(creator, trigger, targets, ecs); // If it was a single activation, then it gets deleted if ecs.read_storage::<SingleActivation>().get(trigger).is_some() { ecs.entities().delete(trigger).expect("Delete Failed"); } } }
Now that we have a framework in place, we can get into trigger_system.rs. Just like the item effects, it can be simplified greatly; we really just need to check that an activation happened - and call the events system:
#![allow(unused)] fn main() { use specs::prelude::*; use super::{EntityMoved, Position, EntryTrigger, Map, Name, gamelog::GameLog, effects::*, AreaOfEffect}; pub struct TriggerSystem {} impl<'a> System<'a> for TriggerSystem { #[allow(clippy::type_complexity)] type SystemData = ( ReadExpect<'a, Map>, WriteStorage<'a, EntityMoved>, ReadStorage<'a, Position>, ReadStorage<'a, EntryTrigger>, ReadStorage<'a, Name>, Entities<'a>, WriteExpect<'a, GameLog>, ReadStorage<'a, AreaOfEffect>); fn run(&mut self, data : Self::SystemData) { let (map, mut entity_moved, position, entry_trigger, names, entities, mut log, area_of_effect) = data; // Iterate the entities that moved and their final position for (entity, mut _entity_moved, pos) in (&entities, &mut entity_moved, &position).join() { let idx = map.xy_idx(pos.x, pos.y); for entity_id in map.tile_content[idx].iter() { if entity != *entity_id { // Do not bother to check yourself for being a trap! let maybe_trigger = entry_trigger.get(*entity_id); match maybe_trigger { None => {}, Some(_trigger) => { // We triggered it let name = names.get(*entity_id); if let Some(name) = name { log.entries.push(format!("{} triggers!", &name.name)); } // Call the effects system add_effect( Some(entity), EffectType::TriggerFire{ trigger : *entity_id }, if let Some(aoe) = area_of_effect.get(*entity_id) { Targets::Tiles{ tiles : aoe_tiles(&*map, rltk::Point::new(pos.x, pos.y), aoe.radius) } } else { Targets::Tile{ tile_idx: idx as i32 } } ); } } } } } // Remove all entity movement markers entity_moved.clear(); } } }
There's only one trigger we haven't already implemented as an effect: teleportation. Let's add that as an effect type in effects/mod.rs:
#![allow(unused)] fn main() { #[derive(Debug)] pub enum EffectType { Damage { amount : i32 }, Bloodstain, Particle { glyph: rltk::FontCharType, fg : rltk::RGB, bg: rltk::RGB, lifespan: f32 }, EntityDeath, ItemUse { item: Entity }, WellFed, Healing { amount : i32 }, Confusion { turns : i32 }, TriggerFire { trigger: Entity }, TeleportTo { x:i32, y:i32, depth: i32, player_only : bool } } }
It affects entities, so we'll mark that fact:
#![allow(unused)] fn main() { fn tile_effect_hits_entities(effect: &EffectType) -> bool { match effect { EffectType::Damage{..} => true, EffectType::WellFed => true, EffectType::Healing{..} => true, EffectType::Confusion{..} => true, EffectType::TeleportTo{..} => true, _ => false } } }
And affect_entity should call it:
#![allow(unused)] fn main() { fn affect_entity(ecs: &mut World, effect: &EffectSpawner, target: Entity) { match &effect.effect_type { EffectType::Damage{..} => damage::inflict_damage(ecs, effect, target), EffectType::EntityDeath => damage::death(ecs, effect, target), EffectType::Bloodstain{..} => if let Some(pos) = entity_position(ecs, target) { damage::bloodstain(ecs, pos) }, EffectType::Particle{..} => if let Some(pos) = entity_position(ecs, target) { particles::particle_to_tile(ecs, pos, &effect) }, EffectType::WellFed => hunger::well_fed(ecs, effect, target), EffectType::Healing{..} => damage::heal_damage(ecs, effect, target), EffectType::Confusion{..} => damage::add_confusion(ecs, effect, target), EffectType::TeleportTo{..} => movement::apply_teleport(ecs, effect, target), _ => {} } } }
We also need to add it to event_trigger in effects/triggers.rs:
#![allow(unused)] fn main() { // Teleport if let Some(teleport) = ecs.read_storage::<TeleportTo>().get(entity) { add_effect( creator, EffectType::TeleportTo{ x : teleport.x, y : teleport.y, depth: teleport.depth, player_only: teleport.player_only }, targets.clone() ); } }
Finally, we'll implement it. Make a new file, effects/movement.rs and paste the following into it:
#![allow(unused)] fn main() { use specs::prelude::*; use super::*; use crate::components::{ApplyTeleport}; pub fn apply_teleport(ecs: &mut World, destination: &EffectSpawner, target: Entity) { let player_entity = ecs.fetch::<Entity>(); if let EffectType::TeleportTo{x, y, depth, player_only} = &destination.effect_type { if !player_only || target == *player_entity { let mut apply_teleport = ecs.write_storage::<ApplyTeleport>(); apply_teleport.insert(target, ApplyTeleport{ dest_x : *x, dest_y : *y, dest_depth : *depth }).expect("Unable to insert"); } } } }
Now cargo run the project, and go forth and try some triggers. Town portal and traps being the obvious ones. You should be able to use portals and suffer trap damage, just as before.
Limiting single use to when it did something
You may have noticed that we're taking your Town Portal scroll away, even if it didn't activate. We're taking away a teleporter even if it didn't actually fire (because it's player only). That needs fixing! We'll modify event_trigger to return bool - true if it did something, false if it didn't. Here's a version that does just that:
#![allow(unused)] fn main() { fn event_trigger(creator : Option<Entity>, entity: Entity, targets : &Targets, ecs: &mut World) -> bool { let mut did_something = false; let mut gamelog = ecs.fetch_mut::<GameLog>(); // Providing food if ecs.read_storage::<ProvidesFood>().get(entity).is_some() { add_effect(creator, EffectType::WellFed, targets.clone()); let names = ecs.read_storage::<Name>(); gamelog.entries.push(format!("You eat the {}.", names.get(entity).unwrap().name)); did_something = true; } // Magic mapper if ecs.read_storage::<MagicMapper>().get(entity).is_some() { let mut runstate = ecs.fetch_mut::<RunState>(); gamelog.entries.push("The map is revealed to you!".to_string()); *runstate = RunState::MagicMapReveal{ row : 0}; did_something = true; } // Town Portal if ecs.read_storage::<TownPortal>().get(entity).is_some() { let map = ecs.fetch::<Map>(); if map.depth == 1 { gamelog.entries.push("You are already in town, so the scroll does nothing.".to_string()); } else { gamelog.entries.push("You are telported back to town!".to_string()); let mut runstate = ecs.fetch_mut::<RunState>(); *runstate = RunState::TownPortal; did_something = true; } } // Healing if let Some(heal) = ecs.read_storage::<ProvidesHealing>().get(entity) { add_effect(creator, EffectType::Healing{amount: heal.heal_amount}, targets.clone()); did_something = true; } // Damage if let Some(damage) = ecs.read_storage::<InflictsDamage>().get(entity) { add_effect(creator, EffectType::Damage{ amount: damage.damage }, targets.clone()); did_something = true; } // Confusion if let Some(confusion) = ecs.read_storage::<Confusion>().get(entity) { add_effect(creator, EffectType::Confusion{ turns : confusion.turns }, targets.clone()); did_something = true; } // Teleport if let Some(teleport) = ecs.read_storage::<TeleportTo>().get(entity) { add_effect( creator, EffectType::TeleportTo{ x : teleport.x, y : teleport.y, depth: teleport.depth, player_only: teleport.player_only }, targets.clone() ); did_something = true; } did_something } }
Now we need to modify our entry-points to only delete an item that was actually used:
#![allow(unused)] fn main() { pub fn item_trigger(creator : Option<Entity>, item: Entity, targets : &Targets, ecs: &mut World) { // Use the item via the generic system let did_something = event_trigger(creator, item, targets, ecs); // If it was a consumable, then it gets deleted if did_something && ecs.read_storage::<Consumable>().get(item).is_some() { ecs.entities().delete(item).expect("Delete Failed"); } } pub fn trigger(creator : Option<Entity>, trigger: Entity, targets : &Targets, ecs: &mut World) { // The triggering item is no longer hidden ecs.write_storage::<Hidden>().remove(trigger); // Use the item via the generic system let did_something = event_trigger(creator, trigger, targets, ecs); // If it was a single activation, then it gets deleted if did_something && ecs.read_storage::<SingleActivation>().get(trigger).is_some() { ecs.entities().delete(trigger).expect("Delete Failed"); } } }
Cleaning Up
Now that we've got this system in place, we can clean up all manner of other systems. The first thing we can do is delete the SufferDamage component from components.rs (and remove it from main.rs and saveload_system.rs). Removing this causes the compiler to find a few places we're inflicting damage without using the effects system!
In hunger_system.rs, we can replace the SufferDamage code with:
#![allow(unused)] fn main() { HungerState::Starving => { // Inflict damage from hunger if entity == *player_entity { log.entries.push("Your hunger pangs are getting painful! You suffer 1 hp damage.".to_string()); } add_effect( None, EffectType::Damage{ amount: 1}, Targets::Single{ target: entity } ); } }
We can also open damage_system.rs and remove the actual DamageSystem (but keep delete_the_dead). We also need to remove it from run_systems in main.rs.
Common spawning code
In raws/rawmaster.rs, we're still parsing the possible effects of items repeatedly. Unfortunately, passing EntityBuilder objects (the eb) around causes some lifetime issues that make the Rust compiler reject what looks like perfectly valid code. So we'll work around that with a macro. Before spawn_named_item:
#![allow(unused)] fn main() { macro_rules! apply_effects { ( $effects:expr, $eb:expr ) => { for effect in $effects.iter() { let effect_name = effect.0.as_str(); match effect_name { "provides_healing" => $eb = $eb.with(ProvidesHealing{ heal_amount: effect.1.parse::<i32>().unwrap() }), "ranged" => $eb = $eb.with(Ranged{ range: effect.1.parse::<i32>().unwrap() }), "damage" => $eb = $eb.with(InflictsDamage{ damage : effect.1.parse::<i32>().unwrap() }), "area_of_effect" => $eb = $eb.with(AreaOfEffect{ radius: effect.1.parse::<i32>().unwrap() }), "confusion" => $eb = $eb.with(Confusion{ turns: effect.1.parse::<i32>().unwrap() }), "magic_mapping" => $eb = $eb.with(MagicMapper{}), "town_portal" => $eb = $eb.with(TownPortal{}), "food" => $eb = $eb.with(ProvidesFood{}), "single_activation" => $eb = $eb.with(SingleActivation{}), _ => rltk::console::log(format!("Warning: consumable effect {} not implemented.", effect_name)) } } }; } }
So this is just like a function, but it follows the rather convoluted macro syntax. Basically, we define the macro to expect effects and eb as expressions - that is, we don't really care what they are, we'll do text-substitution (before compiling) to insert them into the emitted code. (Macros are basically copy/pasted into your code at the call site, but with the expressions substituted). Digging down into spawn_named_item, you'll see that in the consumables section we are using this code. We can now replace it with:
#![allow(unused)] fn main() { if let Some(consumable) = &item_template.consumable { eb = eb.with(crate::components::Consumable{}); apply_effects!(consumable.effects, eb); } }
If we go down to spawn_named_prop, you'll see we're doing basically the same thing:
#![allow(unused)] fn main() { for effect in entry_trigger.effects.iter() { match effect.0.as_str() { "damage" => { eb = eb.with(InflictsDamage{ damage : effect.1.parse::<i32>().unwrap() }) } "single_activation" => { eb = eb.with(SingleActivation{}) } _ => {} } } }
We can now replace that with another call to the macro:
#![allow(unused)] fn main() { if let Some(entry_trigger) = &prop_template.entry_trigger { eb = eb.with(EntryTrigger{}); apply_effects!(entry_trigger.effects, eb); } }
We'll undoubtedly add more later - for weapons "proccing", spells firing, and items that aren't consumed on use. Making this change has meant that the same definition JSON works for both entry triggers and for consumable effects - so any effect that can work with one can work with the other.
Some examples of how this helps
Let's add a new prop to the temple: an altar that heals you. Open up map_builders/town.rs and find the build_temple function. Add an Altar to the list of props:
#![allow(unused)] fn main() { fn build_temple(&mut self, building: &(i32, i32, i32, i32), build_data : &mut BuilderMap, rng: &mut rltk::RandomNumberGenerator) { // Place items let mut to_place : Vec<&str> = vec!["Priest", "Altar", "Parishioner", "Parishioner", "Chair", "Chair", "Candle", "Candle"]; self.random_building_spawn(building, build_data, rng, &mut to_place, 0); } }
Now in spawns.json, we add the Altar to the props list:
{
"name" : "Altar",
"renderable": {
"glyph" : "╫",
"fg" : "#55FF55",
"bg" : "#000000",
"order" : 2
},
"hidden" : false,
"entry_trigger" : {
"effects" : {
"provides_healing" : "100"
}
}
},
You can cargo run the project now, lose some hit points and go to the temple for a free heal. We implemented it with no additional code, because we're sharing the effect properties from other items. From now on, as we add effects - we can implement them anywhere quite readily.
Restoring visual effects to Magic Missile and Fireball
A side-effect of our refactor is that you no longer get a fiery effect when you cast fireball (just damage indicators). You also don't get a pretty line when you zap with magic missile, or a marker when you confuse someone. This is deliberate - the previous area-of-effect code showed a fireball effect for any AoE attack! We can make a more flexible system by supporting effects as part of the item definition.
Let's start by decorating the two scrolls in spawns.json with what we want them to do:
{
"name" : "Magic Missile Scroll",
"renderable": {
"glyph" : ")",
"fg" : "#00FFFF",
"bg" : "#000000",
"order" : 2
},
"consumable" : {
"effects" : {
"ranged" : "6",
"damage" : "20",
"particle_line" : "*;#00FFFF;200.0"
}
},
"weight_lbs" : 0.5,
"base_value" : 50.0,
"vendor_category" : "alchemy",
"magic" : { "class" : "common", "naming" : "scroll" }
},
{
"name" : "Fireball Scroll",
"renderable": {
"glyph" : ")",
"fg" : "#FFA500",
"bg" : "#000000",
"order" : 2
},
"consumable" : {
"effects" : {
"ranged" : "6",
"damage" : "20",
"area_of_effect" : "3",
"particle" : "*;#FFA500;200.0"
}
},
"weight_lbs" : 0.5,
"base_value" : 100.0,
"vendor_category" : "alchemy",
"magic" : { "class" : "common", "naming" : "scroll" }
},
We've added two new entries - particle and particle_line. They both take a rather cryptic string (because we're passing parameters as strings). It's a semi-colon delimited list. The first parameter is the glyph, the second the color in RGB format, and the last the lifetime.
Now we need a couple of new components (in components.rs, and registered in main.rs and saveload_system.rs) to store this information:
#![allow(unused)] fn main() { #[derive(Component, Serialize, Deserialize, Clone)] pub struct SpawnParticleLine { pub glyph : rltk::FontCharType, pub color : RGB, pub lifetime_ms : f32 } #[derive(Component, Serialize, Deserialize, Clone)] pub struct SpawnParticleBurst { pub glyph : rltk::FontCharType, pub color : RGB, pub lifetime_ms : f32 } }
Now in raws/rawmaster.rs we need to parse this as an effect and attach the new components:
#![allow(unused)] fn main() { fn parse_particle_line(n : &str) -> SpawnParticleLine { let tokens : Vec<_> = n.split(';').collect(); SpawnParticleLine{ glyph : rltk::to_cp437(tokens[0].chars().next().unwrap()), color : rltk::RGB::from_hex(tokens[1]).expect("Bad RGB"), lifetime_ms : tokens[2].parse::<f32>().unwrap() } } fn parse_particle(n : &str) -> SpawnParticleBurst { let tokens : Vec<_> = n.split(';').collect(); SpawnParticleBurst{ glyph : rltk::to_cp437(tokens[0].chars().next().unwrap()), color : rltk::RGB::from_hex(tokens[1]).expect("Bad RGB"), lifetime_ms : tokens[2].parse::<f32>().unwrap() } } macro_rules! apply_effects { ( $effects:expr, $eb:expr ) => { for effect in $effects.iter() { let effect_name = effect.0.as_str(); match effect_name { "provides_healing" => $eb = $eb.with(ProvidesHealing{ heal_amount: effect.1.parse::<i32>().unwrap() }), "ranged" => $eb = $eb.with(Ranged{ range: effect.1.parse::<i32>().unwrap() }), "damage" => $eb = $eb.with(InflictsDamage{ damage : effect.1.parse::<i32>().unwrap() }), "area_of_effect" => $eb = $eb.with(AreaOfEffect{ radius: effect.1.parse::<i32>().unwrap() }), "confusion" => $eb = $eb.with(Confusion{ turns: effect.1.parse::<i32>().unwrap() }), "magic_mapping" => $eb = $eb.with(MagicMapper{}), "town_portal" => $eb = $eb.with(TownPortal{}), "food" => $eb = $eb.with(ProvidesFood{}), "single_activation" => $eb = $eb.with(SingleActivation{}), "particle_line" => $eb = $eb.with(parse_particle_line(&effect.1)), "particle" => $eb = $eb.with(parse_particle(&effect.1)), _ => rltk::console::log(format!("Warning: consumable effect {} not implemented.", effect_name)) } } }; } }
Implementing the particle burst is as simple as going into effects/triggers.rs and adding the following at the beginning of the event_trigger function (so it fires before damage, making the damage indicators still appear):
#![allow(unused)] fn main() { fn event_trigger(creator : Option<Entity>, entity: Entity, targets : &Targets, ecs: &mut World) -> bool { let mut did_something = false; let mut gamelog = ecs.fetch_mut::<GameLog>(); // Simple particle spawn if let Some(part) = ecs.read_storage::<SpawnParticleBurst>().get(entity) { add_effect( creator, EffectType::Particle{ glyph : part.glyph, fg : part.color, bg : rltk::RGB::named(rltk::BLACK), lifespan : part.lifetime_ms }, targets.clone() ); } ... }
Line particle spawns are more difficult, but not too bad. One issue is that we don't actually know where the item is! We'll rectify that; in effects/targeting.rs we add a new function:
#![allow(unused)] fn main() { pub fn find_item_position(ecs: &World, target: Entity) -> Option<i32> { let positions = ecs.read_storage::<Position>(); let map = ecs.fetch::<Map>(); // Easy - it has a position if let Some(pos) = positions.get(target) { return Some(map.xy_idx(pos.x, pos.y) as i32); } // Maybe it is carried? if let Some(carried) = ecs.read_storage::<InBackpack>().get(target) { if let Some(pos) = positions.get(carried.owner) { return Some(map.xy_idx(pos.x, pos.y) as i32); } } // Maybe it is equipped? if let Some(equipped) = ecs.read_storage::<Equipped>().get(target) { if let Some(pos) = positions.get(equipped.owner) { return Some(map.xy_idx(pos.x, pos.y) as i32); } } // No idea - give up None } }
This function first checks to see if the item has a position (because it's on the ground). If it does, it returns it. Then it looks to see if it is in a backpack; if it is, it tries to return the position of the backpack owner. Repeat for equipped items. If it still doesn't know, it returns None.
We can add the following into our event_trigger function to handle line spawning for each targeting case:
#![allow(unused)] fn main() { // Line particle spawn if let Some(part) = ecs.read_storage::<SpawnParticleLine>().get(entity) { if let Some(start_pos) = targeting::find_item_position(ecs, entity) { match targets { Targets::Tile{tile_idx} => spawn_line_particles(ecs, start_pos, *tile_idx, part), Targets::Tiles{tiles} => tiles.iter().for_each(|tile_idx| spawn_line_particles(ecs, start_pos, *tile_idx, part)), Targets::Single{ target } => { if let Some(end_pos) = entity_position(ecs, *target) { spawn_line_particles(ecs, start_pos, end_pos, part); } } Targets::TargetList{ targets } => { targets.iter().for_each(|target| { if let Some(end_pos) = entity_position(ecs, *target) { spawn_line_particles(ecs, start_pos, end_pos, part); } }); } } } } }
Each case calls spawn_line_particles, so lets write that too:
#![allow(unused)] fn main() { fn spawn_line_particles(ecs:&World, start: i32, end: i32, part: &SpawnParticleLine) { let map = ecs.fetch::<Map>(); let start_pt = rltk::Point::new(start % map.width, end / map.width); let end_pt = rltk::Point::new(end % map.width, end / map.width); let line = rltk::line2d(rltk::LineAlg::Bresenham, start_pt, end_pt); for pt in line.iter() { add_effect( None, EffectType::Particle{ glyph : part.glyph, fg : part.color, bg : rltk::RGB::named(rltk::BLACK), lifespan : part.lifetime_ms }, Targets::Tile{ tile_idx : map.xy_idx(pt.x, pt.y) as i32} ); } } }
This is quite simple: it plots a line between start and end, and places a particle on each tile.
You can now cargo run and enjoy the effects of fireball and magic missile.
Wrap-Up
This has been a big chapter of changes that don't do a lot on the surface. We've gained a lot, however:
- The Inventory System is now easy to follow.
- The generic effects system can now apply any effect to an item or trigger, and can be readily extended with new items without running into
Specslimitations. - There's a lot less distribution of responsibility: systems no longer need to remember to show a particle for damage, or even need to know about how particles work - they just request them. Systems can often not worry about position, and apply positional effects (including AoE) in a consistent manner.
- We've now got a flexible enough system to let us build big, cohesive effects - without worrying too much about the details.
This chapter has been a good example of the limitations of an ECS - and how to use that to your advantage. By using components as flags, we can easily compose effects - a potion that heals you and confuses you is as simple as combining two tags. However, Specs doesn't really play well with systems that read a ton of data storages at once - so we worked around it by adding messaging on top of the system. This is pretty common: even Amethyst, the ECS-based engine, also implements a message-passing system for this purpose.
...
The source code for this chapter may be found here
Run this chapter's example with web assembly, in your browser (WebGL2 required)
Copyright (C) 2019, Herbert Wolverson.
Cursed Items and Mitigation Thereof
About this tutorial
This tutorial is free and open source, and all code uses the MIT license - so you are free to do with it as you like. My hope is that you will enjoy the tutorial, and make great games!
If you enjoy this and would like me to keep writing, please consider supporting my Patreon.
Now that we have a solid magical items framework, it's time to add in cursed items. These are a mainstay of the Roguelike genre, albeit one that if over-used can really annoy your players! Cursed items are part of the item identification mini-game: they provide a risk to equipping/using an item before you know what it does. If there's no risk to equipping everything you find, the player will do just that to find out what they are - and the mini-game is pointless. On the other hand, if there are too many cursed items, the player will become extremely conservative in item use and won't touch things until they know for sure what they are. So, like many things in life, it's a tough balance to strike.
Your Basic Longsword -1
As a simple example, we'll start by implementing a cursed longsword. We already have a Longsword +1, so it's relatively easy to define the JSON (from spawns.json) for one that has penalties instead of benefits:
{
"name" : "Longsword -1",
"renderable": {
"glyph" : "/",
"fg" : "#FFAAFF",
"bg" : "#000000",
"order" : 2
},
"weapon" : {
"range" : "melee",
"attribute" : "might",
"base_damage" : "1d8-1",
"hit_bonus" : -1
},
"weight_lbs" : 2.0,
"base_value" : 100.0,
"initiative_penalty" : 3,
"vendor_category" : "weapon",
"magic" : { "class" : "common", "naming" : "Unidentified Longsword", "cursed" : true }
},
You'll notice that there's a to-hit and damage penalty, more of an initiative penalty, and we've added cursed: true to the magic section. Most of this already just works, but the cursed part is new. To start supporting this, we open up raws/item_structs.rs and add in template support:
#![allow(unused)] fn main() { #[derive(Deserialize, Debug)] pub struct MagicItem { pub class: String, pub naming: String, pub cursed: Option<bool> } }
We've made it an Option - so you don't have to specify it for non-cursed items. Now we need a new component to indicate that an item is, in fact, cursed. In components.rs (and registered in main.rs and saveload_system.rs):
#![allow(unused)] fn main() { #[derive(Component, Debug, Serialize, Deserialize, Clone)] pub struct CursedItem {} }
Next up, we'll adjust spawn_named_item in raws/rawmaster.rs to handle adding the CursedItem component to cursed items:
#![allow(unused)] fn main() { if let Some(magic) = &item_template.magic { let class = match magic.class.as_str() { "rare" => MagicItemClass::Rare, "legendary" => MagicItemClass::Legendary, _ => MagicItemClass::Common }; eb = eb.with(MagicItem{ class }); if !identified.contains(&item_template.name) { match magic.naming.as_str() { "scroll" => { eb = eb.with(ObfuscatedName{ name : scroll_names[&item_template.name].clone() }); } "potion" => { eb = eb.with(ObfuscatedName{ name: potion_names[&item_template.name].clone() }); } _ => { eb = eb.with(ObfuscatedName{ name : magic.naming.clone() }); } } } if let Some(cursed) = magic.cursed { if cursed { eb = eb.with(CursedItem{}); } } } }
Let's pop back to spawns.json and give them a chance to spawn. For now, we'll make them appear everywhere so it's easy to test them:
{ "name" : "Longsword -1", "weight" : 100, "min_depth" : 1, "max_depth" : 100 },
That gets us far enough that you can run the game, and cursed longswords will appear and have poor combat performance. Identification already works, so equipping a cursed sword tells you what it is - but there's absolutely no penalty for doing so, other than it having poor stats when you use it. That's a great start!
Letting the player know that it's cursed
In gui.rs, we carefully color items by class in get_item_color. We'd like cursed items to go red - but only if you know that they are cursed (so you don't look at your inventory list and see "oh, that's cursed - better not equip it!"). So let's modify that function to provide this functionality:
#![allow(unused)] fn main() { pub fn get_item_color(ecs : &World, item : Entity) -> RGB { let dm = ecs.fetch::<crate::map::MasterDungeonMap>(); if let Some(name) = ecs.read_storage::<Name>().get(item) { if ecs.read_storage::<CursedItem>().get(item).is_some() && dm.identified_items.contains(&name.name) { return RGB::from_f32(1.0, 0.0, 0.0); } } if let Some(magic) = ecs.read_storage::<MagicItem>().get(item) { match magic.class { MagicItemClass::Common => return RGB::from_f32(0.5, 1.0, 0.5), MagicItemClass::Rare => return RGB::from_f32(0.0, 1.0, 1.0), MagicItemClass::Legendary => return RGB::from_f32(0.71, 0.15, 0.93) } } RGB::from_f32(1.0, 1.0, 1.0) } }
Preventing the unequipping of cursed items
The easy case for preventing removal is in the inventory_system/remove_system.rs: it simply takes an item and puts it into your backpack. We can just make this conditional, and we're good to go! Here's the source code for the system:
#![allow(unused)] fn main() { use specs::prelude::*; use super::{InBackpack, Equipped, WantsToRemoveItem, CursedItem, Name}; pub struct ItemRemoveSystem {} impl<'a> System<'a> for ItemRemoveSystem { #[allow(clippy::type_complexity)] type SystemData = ( Entities<'a>, WriteStorage<'a, WantsToRemoveItem>, WriteStorage<'a, Equipped>, WriteStorage<'a, InBackpack>, ReadStorage<'a, CursedItem>, WriteExpect<'a, crate::gamelog::GameLog>, ReadStorage<'a, Name> ); fn run(&mut self, data : Self::SystemData) { let (entities, mut wants_remove, mut equipped, mut backpack, cursed, mut gamelog, names) = data; for (entity, to_remove) in (&entities, &wants_remove).join() { if cursed.get(to_remove.item).is_some() { gamelog.entries.push(format!("You cannot remove {}, it is cursed", names.get(to_remove.item).unwrap().name)); } else { equipped.remove(to_remove.item); backpack.insert(to_remove.item, InBackpack{ owner: entity }).expect("Unable to insert backpack"); } } wants_remove.clear(); } } }
The case of equip_use.rs is a bit more complicated. We equip the item, scan for items to replace and unequip the replacement item. We'll have to change this around a bit: look for what to remove, see if its cursed (and cancel if it is, with a message), and then if it is still valid actually perform the swap. We also want to not identify the item if you can't equip it, to avoid giving a fun backdoor in which you equip a cursed item and then use it to identify all the other cursed items! We can adjust the system like this:
#![allow(unused)] fn main() { use specs::prelude::*; use super::{Name, InBackpack, gamelog::GameLog, WantsToUseItem, Equippable, Equipped, EquipmentChanged, IdentifiedItem, CursedItem}; pub struct ItemEquipOnUse {} impl<'a> System<'a> for ItemEquipOnUse { #[allow(clippy::type_complexity)] type SystemData = ( ReadExpect<'a, Entity>, WriteExpect<'a, GameLog>, Entities<'a>, WriteStorage<'a, WantsToUseItem>, ReadStorage<'a, Name>, ReadStorage<'a, Equippable>, WriteStorage<'a, Equipped>, WriteStorage<'a, InBackpack>, WriteStorage<'a, EquipmentChanged>, WriteStorage<'a, IdentifiedItem>, ReadStorage<'a, CursedItem> ); #[allow(clippy::cognitive_complexity)] fn run(&mut self, data : Self::SystemData) { let (player_entity, mut gamelog, entities, mut wants_use, names, equippable, mut equipped, mut backpack, mut dirty, mut identified_item, cursed) = data; let mut remove_use : Vec<Entity> = Vec::new(); for (target, useitem) in (&entities, &wants_use).join() { // If it is equippable, then we want to equip it - and unequip whatever else was in that slot if let Some(can_equip) = equippable.get(useitem.item) { let target_slot = can_equip.slot; // Remove any items the target has in the item's slot let mut can_equip = true; let mut log_entries : Vec<String> = Vec::new(); let mut to_unequip : Vec<Entity> = Vec::new(); for (item_entity, already_equipped, name) in (&entities, &equipped, &names).join() { if already_equipped.owner == target && already_equipped.slot == target_slot { if cursed.get(item_entity).is_some() { can_equip = false; gamelog.entries.push(format!("You cannot unequip {}, it is cursed.", name.name)); } else { to_unequip.push(item_entity); if target == *player_entity { log_entries.push(format!("You unequip {}.", name.name)); } } } } if can_equip { // Identify the item if target == *player_entity { identified_item.insert(target, IdentifiedItem{ name: names.get(useitem.item).unwrap().name.clone() }) .expect("Unable to insert"); } for item in to_unequip.iter() { equipped.remove(*item); backpack.insert(*item, InBackpack{ owner: target }).expect("Unable to insert backpack entry"); } for le in log_entries.iter() { gamelog.entries.push(le.to_string()); } // Wield the item equipped.insert(useitem.item, Equipped{ owner: target, slot: target_slot }).expect("Unable to insert equipped component"); backpack.remove(useitem.item); if target == *player_entity { gamelog.entries.push(format!("You equip {}.", names.get(useitem.item).unwrap().name)); } } // Done with item remove_use.push(target); } } remove_use.iter().for_each(|e| { dirty.insert(*e, EquipmentChanged{}).expect("Unable to insert"); wants_use.remove(*e).expect("Unable to remove"); }); } } }
We've moved identification down beneath the item scanning, and added a can_use bool; if the switch would result in unequipping a cursed item, we cancel the job. If you cargo run the project now, you will find that there's no way to remove cursed equipment once it is wielded:

Removing Curses
Now that the player can accidentally curse themselves, it would be a good idea to give them a way to recover from their mistake! Let's add the traditional Scroll of Remove Curse. In spawns.json, we'll start out by defining what we want:
{
"name" : "Remove Curse Scroll",
"renderable": {
"glyph" : ")",
"fg" : "#FFAAAA",
"bg" : "#000000",
"order" : 2
},
"consumable" : {
"effects" : {
"remove_curse" : ""
}
},
"weight_lbs" : 0.5,
"base_value" : 50.0,
"vendor_category" : "alchemy",
"magic" : { "class" : "common", "naming" : "scroll" }
},
We should also allow it to spawn:
{ "name" : "Remove Curse Scroll", "weight" : 4, "min_depth" : 0, "max_depth" : 100 },
The only new thing there is the effect: remove_curse. We'll handle it like other effects, so we start by making a new component to represent "this X triggers curse removal". In components.rs (and registered in main.rs and saveload_system.rs):
#![allow(unused)] fn main() { #[derive(Component, Debug, Serialize, Deserialize, Clone)] pub struct ProvidesRemoveCurse {} }
Now in raws/rawmaster.rs, we'll add it to the effects spawn list (so it remains a generic ability; you could have a shrine that removes curses for example):
#![allow(unused)] fn main() { macro_rules! apply_effects { ( $effects:expr, $eb:expr ) => { for effect in $effects.iter() { let effect_name = effect.0.as_str(); match effect_name { "provides_healing" => $eb = $eb.with(ProvidesHealing{ heal_amount: effect.1.parse::<i32>().unwrap() }), "ranged" => $eb = $eb.with(Ranged{ range: effect.1.parse::<i32>().unwrap() }), "damage" => $eb = $eb.with(InflictsDamage{ damage : effect.1.parse::<i32>().unwrap() }), "area_of_effect" => $eb = $eb.with(AreaOfEffect{ radius: effect.1.parse::<i32>().unwrap() }), "confusion" => $eb = $eb.with(Confusion{ turns: effect.1.parse::<i32>().unwrap() }), "magic_mapping" => $eb = $eb.with(MagicMapper{}), "town_portal" => $eb = $eb.with(TownPortal{}), "food" => $eb = $eb.with(ProvidesFood{}), "single_activation" => $eb = $eb.with(SingleActivation{}), "particle_line" => $eb = $eb.with(parse_particle_line(&effect.1)), "particle" => $eb = $eb.with(parse_particle(&effect.1)), "remove_curse" => $eb = $eb.with(ProvidesRemoveCurse{}), _ => rltk::console::log(format!("Warning: consumable effect {} not implemented.", effect_name)) } } }; } }
Now that we have remove curse items correctly tagged, all the remains is to make them function! When you use the scroll, it should show you all the items that you know are cursed, and let you pick one to de-fang. This will require a new RunState, so we'll add that in main.rs and add a place-holder to the run-loop so the program compiles:
#![allow(unused)] fn main() { #[derive(PartialEq, Copy, Clone)] pub enum RunState { AwaitingInput, PreRun, Ticking, ShowInventory, ShowDropItem, ShowTargeting { range : i32, item : Entity}, MainMenu { menu_selection : gui::MainMenuSelection }, SaveGame, NextLevel, PreviousLevel, TownPortal, ShowRemoveItem, GameOver, MagicMapReveal { row : i32 }, MapGeneration, ShowCheatMenu, ShowVendor { vendor: Entity, mode : VendorMode }, TeleportingToOtherLevel { x: i32, y: i32, depth: i32 }, ShowRemoveCurse } ... RunState::ShowRemoveCurse => {} }
We'll also add it to the Ticking escape clauses:
#![allow(unused)] fn main() { RunState::Ticking => { while newrunstate == RunState::Ticking { self.run_systems(); self.ecs.maintain(); match *self.ecs.fetch::<RunState>() { RunState::AwaitingInput => newrunstate = RunState::AwaitingInput, RunState::MagicMapReveal{ .. } => newrunstate = RunState::MagicMapReveal{ row: 0 }, RunState::TownPortal => newrunstate = RunState::TownPortal, RunState::TeleportingToOtherLevel{ x, y, depth } => newrunstate = RunState::TeleportingToOtherLevel{ x, y, depth }, RunState::ShowRemoveCurse => newrunstate = RunState::ShowRemoveCurse, _ => newrunstate = RunState::Ticking } } } }
Now we'll open up effects/triggers.rs and support the run-state transition (I put it after magic mapping):
#![allow(unused)] fn main() { // Remove Curse if ecs.read_storage::<ProvidesRemoveCurse>().get(entity).is_some() { let mut runstate = ecs.fetch_mut::<RunState>(); *runstate = RunState::ShowRemoveCurse; did_something = true; } }
So now we have to go into gui.rs and make another item list system. We'll use the item drop/remove systems as a template, but replace the selection list with an iterator that removes non-cursed items and items that are cursed but you don't know it yet:
#![allow(unused)] fn main() { pub fn remove_curse_menu(gs : &mut State, ctx : &mut Rltk) -> (ItemMenuResult, Option<Entity>) { let player_entity = gs.ecs.fetch::<Entity>(); let equipped = gs.ecs.read_storage::<Equipped>(); let backpack = gs.ecs.read_storage::<InBackpack>(); let entities = gs.ecs.entities(); let items = gs.ecs.read_storage::<Item>(); let cursed = gs.ecs.read_storage::<CursedItem>(); let names = gs.ecs.read_storage::<Name>(); let dm = gs.ecs.fetch::<MasterDungeonMap>(); let build_cursed_iterator = || { (&entities, &items, &cursed).join().filter(|(item_entity,_item,_cursed)| { let mut keep = false; if let Some(bp) = backpack.get(*item_entity) { if bp.owner == *player_entity { if let Some(name) = names.get(*item_entity) { if dm.identified_items.contains(&name.name) { keep = true; } } } } // It's equipped, so we know it's cursed if let Some(equip) = equipped.get(*item_entity) { if equip.owner == *player_entity { keep = true; } } keep }) }; let count = build_cursed_iterator().count(); let mut y = (25 - (count / 2)) as i32; ctx.draw_box(15, y-2, 31, (count+3) as i32, RGB::named(rltk::WHITE), RGB::named(rltk::BLACK)); ctx.print_color(18, y-2, RGB::named(rltk::YELLOW), RGB::named(rltk::BLACK), "Remove Curse From Which Item?"); ctx.print_color(18, y+ count as i32+1, RGB::named(rltk::YELLOW), RGB::named(rltk::BLACK), "ESCAPE to cancel"); let mut equippable : Vec<Entity> = Vec::new(); for (j, (entity, _item, _cursed)) in build_cursed_iterator().enumerate() { ctx.set(17, y, RGB::named(rltk::WHITE), RGB::named(rltk::BLACK), rltk::to_cp437('(')); ctx.set(18, y, RGB::named(rltk::YELLOW), RGB::named(rltk::BLACK), 97+j as rltk::FontCharType); ctx.set(19, y, RGB::named(rltk::WHITE), RGB::named(rltk::BLACK), rltk::to_cp437(')')); ctx.print_color(21, y, get_item_color(&gs.ecs, entity), RGB::from_f32(0.0, 0.0, 0.0), &get_item_display_name(&gs.ecs, entity)); equippable.push(entity); y += 1; } match ctx.key { None => (ItemMenuResult::NoResponse, None), Some(key) => { match key { VirtualKeyCode::Escape => { (ItemMenuResult::Cancel, None) } _ => { let selection = rltk::letter_to_option(key); if selection > -1 && selection < count as i32 { return (ItemMenuResult::Selected, Some(equippable[selection as usize])); } (ItemMenuResult::NoResponse, None) } } } } } }
Then in main.rs, we just need to finish the logic:
#![allow(unused)] fn main() { RunState::ShowRemoveCurse => { let result = gui::remove_curse_menu(self, ctx); match result.0 { gui::ItemMenuResult::Cancel => newrunstate = RunState::AwaitingInput, gui::ItemMenuResult::NoResponse => {} gui::ItemMenuResult::Selected => { let item_entity = result.1.unwrap(); self.ecs.write_storage::<CursedItem>().remove(item_entity); newrunstate = RunState::Ticking; } } } }
You can now cargo run, find a cursed sword (they are everywhere), equip it, and use a Remove Curse scroll to free yourself from its grip.
Identification Items
It would also be helpful if you could find a humble Identification Scroll and use it to identify magical items before you try them! This is almost exactly the same process as remove curse. Let's start by building the item in spawns.json:
{
"name" : "Identify Scroll",
"renderable": {
"glyph" : ")",
"fg" : "#FFAAAA",
"bg" : "#000000",
"order" : 2
},
"consumable" : {
"effects" : {
"identify" : ""
}
},
"weight_lbs" : 0.5,
"base_value" : 50.0,
"vendor_category" : "alchemy",
"magic" : { "class" : "common", "naming" : "scroll" }
},
Once again, we need a new component to represent the power. In components.rs (and registered in main.rs and saveload_system.rs):
#![allow(unused)] fn main() { #[derive(Component, Debug, Serialize, Deserialize, Clone)] pub struct ProvidesIdentification {} }
Just like before, we then need to add it as an effect in raws/rawmaster.rs:
#![allow(unused)] fn main() { macro_rules! apply_effects { ( $effects:expr, $eb:expr ) => { for effect in $effects.iter() { let effect_name = effect.0.as_str(); match effect_name { "provides_healing" => $eb = $eb.with(ProvidesHealing{ heal_amount: effect.1.parse::<i32>().unwrap() }), "ranged" => $eb = $eb.with(Ranged{ range: effect.1.parse::<i32>().unwrap() }), "damage" => $eb = $eb.with(InflictsDamage{ damage : effect.1.parse::<i32>().unwrap() }), "area_of_effect" => $eb = $eb.with(AreaOfEffect{ radius: effect.1.parse::<i32>().unwrap() }), "confusion" => $eb = $eb.with(Confusion{ turns: effect.1.parse::<i32>().unwrap() }), "magic_mapping" => $eb = $eb.with(MagicMapper{}), "town_portal" => $eb = $eb.with(TownPortal{}), "food" => $eb = $eb.with(ProvidesFood{}), "single_activation" => $eb = $eb.with(SingleActivation{}), "particle_line" => $eb = $eb.with(parse_particle_line(&effect.1)), "particle" => $eb = $eb.with(parse_particle(&effect.1)), "remove_curse" => $eb = $eb.with(ProvidesRemoveCurse{}), "identify" => $eb = $eb.with(ProvidesIdentification{}), _ => rltk::console::log(format!("Warning: consumable effect {} not implemented.", effect_name)) } } }; } }
Next, we'll handle it in the effects/triggers.rs file:
#![allow(unused)] fn main() { // Identify Item if ecs.read_storage::<ProvidesIdentification>().get(entity).is_some() { let mut runstate = ecs.fetch_mut::<RunState>(); *runstate = RunState::ShowIdentify; did_something = true; } }
And we'll pop over to main.rs and add ShowIdentify as a RunState:
#![allow(unused)] fn main() { #[derive(PartialEq, Copy, Clone)] pub enum RunState { AwaitingInput, PreRun, Ticking, ShowInventory, ShowDropItem, ShowTargeting { range : i32, item : Entity}, MainMenu { menu_selection : gui::MainMenuSelection }, SaveGame, NextLevel, PreviousLevel, TownPortal, ShowRemoveItem, GameOver, MagicMapReveal { row : i32 }, MapGeneration, ShowCheatMenu, ShowVendor { vendor: Entity, mode : VendorMode }, TeleportingToOtherLevel { x: i32, y: i32, depth: i32 }, ShowRemoveCurse, ShowIdentify } }
Add it as an escape clause:
#![allow(unused)] fn main() { RunState::Ticking => { while newrunstate == RunState::Ticking { self.run_systems(); self.ecs.maintain(); match *self.ecs.fetch::<RunState>() { RunState::AwaitingInput => newrunstate = RunState::AwaitingInput, RunState::MagicMapReveal{ .. } => newrunstate = RunState::MagicMapReveal{ row: 0 }, RunState::TownPortal => newrunstate = RunState::TownPortal, RunState::TeleportingToOtherLevel{ x, y, depth } => newrunstate = RunState::TeleportingToOtherLevel{ x, y, depth }, RunState::ShowRemoveCurse => newrunstate = RunState::ShowRemoveCurse, RunState::ShowIdentify => newrunstate = RunState::ShowIdentify, _ => newrunstate = RunState::Ticking } } } }
And handle it in our tick system:
#![allow(unused)] fn main() { RunState::ShowIdentify => { let result = gui::identify_menu(self, ctx); match result.0 { gui::ItemMenuResult::Cancel => newrunstate = RunState::AwaitingInput, gui::ItemMenuResult::NoResponse => {} gui::ItemMenuResult::Selected => { let item_entity = result.1.unwrap(); if let Some(name) = self.ecs.read_storage::<Name>().get(item_entity) { let mut dm = self.ecs.fetch_mut::<MasterDungeonMap>(); dm.identified_items.insert(name.name.clone()); } newrunstate = RunState::Ticking; } } } }
Finally, open up gui.rs and provide the menu function:
#![allow(unused)] fn main() { pub fn identify_menu(gs : &mut State, ctx : &mut Rltk) -> (ItemMenuResult, Option<Entity>) { let player_entity = gs.ecs.fetch::<Entity>(); let equipped = gs.ecs.read_storage::<Equipped>(); let backpack = gs.ecs.read_storage::<InBackpack>(); let entities = gs.ecs.entities(); let items = gs.ecs.read_storage::<Item>(); let names = gs.ecs.read_storage::<Name>(); let dm = gs.ecs.fetch::<MasterDungeonMap>(); let obfuscated = gs.ecs.read_storage::<ObfuscatedName>(); let build_cursed_iterator = || { (&entities, &items).join().filter(|(item_entity,_item)| { let mut keep = false; if let Some(bp) = backpack.get(*item_entity) { if bp.owner == *player_entity { if let Some(name) = names.get(*item_entity) { if obfuscated.get(*item_entity).is_some() && !dm.identified_items.contains(&name.name) { keep = true; } } } } // It's equipped, so we know it's cursed if let Some(equip) = equipped.get(*item_entity) { if equip.owner == *player_entity { if let Some(name) = names.get(*item_entity) { if obfuscated.get(*item_entity).is_some() && !dm.identified_items.contains(&name.name) { keep = true; } } } } keep }) }; let count = build_cursed_iterator().count(); let mut y = (25 - (count / 2)) as i32; ctx.draw_box(15, y-2, 31, (count+3) as i32, RGB::named(rltk::WHITE), RGB::named(rltk::BLACK)); ctx.print_color(18, y-2, RGB::named(rltk::YELLOW), RGB::named(rltk::BLACK), "Identify Which Item?"); ctx.print_color(18, y+ count as i32+1, RGB::named(rltk::YELLOW), RGB::named(rltk::BLACK), "ESCAPE to cancel"); let mut equippable : Vec<Entity> = Vec::new(); for (j, (entity, _item)) in build_cursed_iterator().enumerate() { ctx.set(17, y, RGB::named(rltk::WHITE), RGB::named(rltk::BLACK), rltk::to_cp437('(')); ctx.set(18, y, RGB::named(rltk::YELLOW), RGB::named(rltk::BLACK), 97+j as rltk::FontCharType); ctx.set(19, y, RGB::named(rltk::WHITE), RGB::named(rltk::BLACK), rltk::to_cp437(')')); ctx.print_color(21, y, get_item_color(&gs.ecs, entity), RGB::from_f32(0.0, 0.0, 0.0), &get_item_display_name(&gs.ecs, entity)); equippable.push(entity); y += 1; } match ctx.key { None => (ItemMenuResult::NoResponse, None), Some(key) => { match key { VirtualKeyCode::Escape => { (ItemMenuResult::Cancel, None) } _ => { let selection = rltk::letter_to_option(key); if selection > -1 && selection < count as i32 { return (ItemMenuResult::Selected, Some(equippable[selection as usize])); } (ItemMenuResult::NoResponse, None) } } } } } }
You can now identify items!
Fixing spawn weightings before we forget
Before we forget, we don't really want to litter the entire landscape with cursed swords. Pop into spawns.json and we'll change the cursed longsword to have the same spawn characteristics as the +1 longsword:
{ "name" : "Longsword -1", "weight" : 1, "min_depth" : 3, "max_depth" : 100 },
Wrap-Up
This chapter has added cursed items, remove curse scrolls and item identification scrolls. That's not bad, we're getting pretty close to a completed item system!
...
The source code for this chapter may be found here
Run this chapter's example with web assembly, in your browser (WebGL2 required)
Copyright (C) 2019, Herbert Wolverson.
Items that Affect Attributes, and Better Status Effects
About this tutorial
This tutorial is free and open source, and all code uses the MIT license - so you are free to do with it as you like. My hope is that you will enjoy the tutorial, and make great games!
If you enjoy this and would like me to keep writing, please consider supporting my Patreon.
There are still a few common item types that we aren't supporting, yet. This chapter will finish that up, and lay the framework for spellcasting (in the next chapter).
Items that improve attributes
A common type of item frequently round in D&D-likes are items that enhance (or reduce!) your attributes. For example, Gauntlets of Ogre Power grant a might bonus or a Hat of Wizardry grants intelligence. We have most of the framework in place to support these items, so let's go the final mile to make them work! Open up spawns.json, and we'll define what the gauntlets might look like:
{
"name" : "Gauntlets of Ogre Power",
"renderable": {
"glyph" : "[",
"fg" : "#00FF00",
"bg" : "#000000",
"order" : 2
},
"wearable" : {
"slot" : "Hands",
"armor_class" : 0.1,
"might" : 5
},
"weight_lbs" : 1.0,
"base_value" : 300.0,
"initiative_penalty" : 0.0,
"vendor_category" : "armor",
"magic" : { "class" : "common", "naming" : "Unidentified Gauntlets" },
"attributes" : { "might" : 5 }
}
Why didn't we just add this to "wearable"? We might want to grant an attribute boost to other things! To support loading this - and other attribute boosts - we need to edit item_structs.rs:
#![allow(unused)] fn main() { #[derive(Deserialize, Debug)] pub struct Item { pub name : String, pub renderable : Option<Renderable>, pub consumable : Option<Consumable>, pub weapon : Option<Weapon>, pub wearable : Option<Wearable>, pub initiative_penalty : Option<f32>, pub weight_lbs : Option<f32>, pub base_value : Option<f32>, pub vendor_category : Option<String>, pub magic : Option<MagicItem>, pub attributes : Option<ItemAttributeBonus> } ... #[derive(Deserialize, Debug)] pub struct ItemAttributeBonus { pub might : Option<i32>, pub fitness : Option<i32>, pub quickness : Option<i32>, pub intelligence : Option<i32> } }
As we've done before, we'll need a component to support this data. In components.rs (and registered in main.rs and saveload_system.rs):
#![allow(unused)] fn main() { #[derive(Component, Debug, Serialize, Deserialize, Clone)] pub struct AttributeBonus { pub might : Option<i32>, pub fitness : Option<i32>, pub quickness : Option<i32>, pub intelligence : Option<i32> } }
And we'll modify raws/rawmaster.rs's function spawn_named_item to support adding this component type:
#![allow(unused)] fn main() { if let Some(ab) = &item_template.attributes { eb = eb.with(AttributeBonus{ might : ab.might, fitness : ab.fitness, quickness : ab.quickness, intelligence : ab.intelligence, }); } }
Now that the component can be applied to an item, lets put it into the spawn table as ridiculously common to make testing easy:
{ "name" : "Gauntlets of Ogre Power", "weight" : 100, "min_depth" : 0, "max_depth" : 100 },
Finally, we need to make it actually do something. We're doing something very similar in ai/encumbrance_system.rs - so that's the natural place to slot it in. We'll add a lot to the system, so here's the whole thing:
#![allow(unused)] fn main() { use specs::prelude::*; use crate::{EquipmentChanged, Item, InBackpack, Equipped, Pools, Attributes, gamelog::GameLog, AttributeBonus, gamesystem::attr_bonus}; use std::collections::HashMap; pub struct EncumbranceSystem {} impl<'a> System<'a> for EncumbranceSystem { #[allow(clippy::type_complexity)] type SystemData = ( WriteStorage<'a, EquipmentChanged>, Entities<'a>, ReadStorage<'a, Item>, ReadStorage<'a, InBackpack>, ReadStorage<'a, Equipped>, WriteStorage<'a, Pools>, WriteStorage<'a, Attributes>, ReadExpect<'a, Entity>, WriteExpect<'a, GameLog>, ReadStorage<'a, AttributeBonus> ); fn run(&mut self, data : Self::SystemData) { let (mut equip_dirty, entities, items, backpacks, wielded, mut pools, mut attributes, player, mut gamelog, attrbonus) = data; if equip_dirty.is_empty() { return; } struct ItemUpdate { weight : f32, initiative : f32, might : i32, fitness : i32, quickness : i32, intelligence : i32 } // Build the map of who needs updating let mut to_update : HashMap<Entity, ItemUpdate> = HashMap::new(); // (weight, intiative) for (entity, _dirty) in (&entities, &equip_dirty).join() { to_update.insert(entity, ItemUpdate{ weight: 0.0, initiative: 0.0, might: 0, fitness: 0, quickness: 0, intelligence: 0 }); } // Remove all dirty statements equip_dirty.clear(); // Total up equipped items for (item, equipped, entity) in (&items, &wielded, &entities).join() { if to_update.contains_key(&equipped.owner) { let totals = to_update.get_mut(&equipped.owner).unwrap(); totals.weight += item.weight_lbs; totals.initiative += item.initiative_penalty; if let Some(attr) = attrbonus.get(entity) { totals.might += attr.might.unwrap_or(0); totals.fitness += attr.fitness.unwrap_or(0); totals.quickness += attr.quickness.unwrap_or(0); totals.intelligence += attr.intelligence.unwrap_or(0); } } } // Total up carried items for (item, carried, entity) in (&items, &backpacks, &entities).join() { if to_update.contains_key(&carried.owner) { let totals = to_update.get_mut(&carried.owner).unwrap(); totals.weight += item.weight_lbs; totals.initiative += item.initiative_penalty; } } // Apply the data to Pools for (entity, item) in to_update.iter() { if let Some(pool) = pools.get_mut(*entity) { pool.total_weight = item.weight; pool.total_initiative_penalty = item.initiative; if let Some(attr) = attributes.get_mut(*entity) { attr.might.modifiers = item.might; attr.fitness.modifiers = item.fitness; attr.quickness.modifiers = item.quickness; attr.intelligence.modifiers = item.intelligence; attr.might.bonus = attr_bonus(attr.might.base + attr.might.modifiers); attr.fitness.bonus = attr_bonus(attr.fitness.base + attr.fitness.modifiers); attr.quickness.bonus = attr_bonus(attr.quickness.base + attr.quickness.modifiers); attr.intelligence.bonus = attr_bonus(attr.intelligence.base + attr.intelligence.modifiers); let carry_capacity_lbs = (attr.might.base + attr.might.modifiers) * 15; if pool.total_weight as i32 > carry_capacity_lbs { // Overburdened pool.total_initiative_penalty += 4.0; if *entity == *player { gamelog.entries.push("You are overburdened, and suffering an initiative penalty.".to_string()); } } } } } } } }
So this is mostly the same logic as before, but we've changed quite a few things:
- Instead of a tuple holding our weight and initiative effects, we've added a
structto hold all of the things we want to add up. Rust is nice, you can declare a struct inside a function if you only need it once! - Just like before, we add up weights for all items, and initiative penalties for equipped items.
- We also add up attribute bonuses/penalties for each item if they have them.
- Then we apply them to the
modifiersportion of the attributes, and recalculate the bonuses.
The great thing is that because the other systems that use these attributes are already looking at bonuses (and the GUI is looking at modifiers for display), a lot of things just work (and not entirely in the Bethesda sense of the phrase... yeah, I actually enjoy Fallout 76 but it would be nice if things actually did just work!).
Now, if you cargo run the project you can find Gauntlets of Ogre Power and equip them for the bonus - and then remove them to take it away:
Charged items
Not all items crumble to dust when you use them. A potion vial might hold more than one dose, a magical rod might cast its effect multiple times (as usual, your imagination is the limit!). Let's make a new item, the Rod Of Fireballs. In spawns.json, we'll define the basics; it's basically a scroll of fireball, but with charges:
{
"name" : "Rod of Fireballs",
"renderable": {
"glyph" : "/",
"fg" : "#FFAAAA",
"bg" : "#000000",
"order" : 2
},
"consumable" : {
"effects" : {
"ranged" : "6",
"damage" : "20",
"area_of_effect" : "3",
"particle" : "▓;#FFA500;200.0"
},
"charges" : 5
},
"weight_lbs" : 0.5,
"base_value" : 500.0,
"vendor_category" : "alchemy",
"magic" : { "class" : "common", "naming" : "Unidentified Rod" }
}
We'll need to extend the item definition in raws/item_structs.rs to handle the new data:
#![allow(unused)] fn main() { #[derive(Deserialize, Debug)] pub struct Consumable { pub effects : HashMap<String, String>, pub charges : Option<i32> } }
We'll also extend the Consumable component in components.rs:
#![allow(unused)] fn main() { #[derive(Component, Debug, Serialize, Deserialize, Clone)] pub struct Consumable { pub max_charges : i32, pub charges : i32 } }
Note that we're storing both the max and the current number. That's so we can allow recharging later. We'll need to extend raws/rawmaster.rs to apply this information:
#![allow(unused)] fn main() { if let Some(consumable) = &item_template.consumable { let max_charges = consumable.charges.unwrap_or(1); eb = eb.with(crate::components::Consumable{ max_charges, charges : max_charges }); apply_effects!(consumable.effects, eb); } }
Now we need to make consumables with charges make use of them. That means not self-destructing if max_charges is greater than 1, only firing if there are charges remaining, and decrementing the charge count after usage. Fortunately, this is an easy change to effects/triggers.rs's item_trigger function:
#![allow(unused)] fn main() { pub fn item_trigger(creator : Option<Entity>, item: Entity, targets : &Targets, ecs: &mut World) { // Check charges if let Some(c) = ecs.write_storage::<Consumable>().get_mut(item) { if c.charges < 1 { // Cancel let mut gamelog = ecs.fetch_mut::<GameLog>(); gamelog.entries.push(format!("{} is out of charges!", ecs.read_storage::<Name>().get(item).unwrap().name)); return; } else { c.charges -= 1; } } // Use the item via the generic system let did_something = event_trigger(creator, item, targets, ecs); // If it was a consumable, then it gets deleted if did_something { if let Some(c) = ecs.read_storage::<Consumable>().get(item) { if c.max_charges == 0 { ecs.entities().delete(item).expect("Delete Failed"); } } } } }
That gets you a multi-use Rod of Fireballs! However, we should have some way to let the player know if charges remain - to help out with item management. After all, it really sucks to point your rod at a mighty dragon and hear a "fut" sound as it eats you. We'll go into gui.rs and extend get_item_display_name:
#![allow(unused)] fn main() { pub fn get_item_display_name(ecs: &World, item : Entity) -> String { if let Some(name) = ecs.read_storage::<Name>().get(item) { if ecs.read_storage::<MagicItem>().get(item).is_some() { let dm = ecs.fetch::<crate::map::MasterDungeonMap>(); if dm.identified_items.contains(&name.name) { if let Some(c) = ecs.read_storage::<Consumable>().get(item) { if c.max_charges > 1 { format!("{} ({})", name.name.clone(), c.charges).to_string() } else { name.name.clone() } } else { name.name.clone() } } else if let Some(obfuscated) = ecs.read_storage::<ObfuscatedName>().get(item) { obfuscated.name.clone() } else { "Unidentified magic item".to_string() } } else { name.name.clone() } } else { "Nameless item (bug)".to_string() } } }
So the function is basically unchanged, but once we've determined that an item is magical AND identified, we look to see if it has charges. If it does, we append the number of charges in parentheses to the item name in the display list.
If you cargo run the project now, you can find your Rod of Fireballs and blast away until you run out of charges:

Status Effects
Right now, we're handling status effects on a case-by-base basis, and it's relatively unusual to apply them. Most deep roguelikes have lots of possible effects - ranging from hallucinating on mushrooms to moving at super speed after drinking some brown goop! We've left these until now because they dovetail nicely into the other things we've been doing in this chapter.
Up until this chapter, we've added Confusion as a tag to the target - and relied upon the tag to store the duration. That's not really in the spirit of an ECS! Rather, Confusion is an entity effect that applies to a target for a duration number of turns. As usual, examining the taxonomy is a great way to figure out what entity/component groups something should have. So we'll visit components.rs and make two new components (also registering them in main.rs and saveload_system.rs), and modify the Confusion component to match this:
#![allow(unused)] fn main() { #[derive(Component, Debug, Serialize, Deserialize, Clone)] pub struct Confusion {} #[derive(Component, Debug, Serialize, Deserialize, Clone)] pub struct Duration { pub turns : i32 } #[derive(Component, Debug, ConvertSaveload, Clone)] pub struct StatusEffect { pub target : Entity } }
Also because we're storing an Entity, we need to write a wrapper to keep serialization happy:
rust
That's all well and good - but we've broken a few things! Everything that expected Confusion to have a turns field is now complaining.
We'll start in raws/rawmaster.rs and separate the effect from the duration:
#![allow(unused)] fn main() { "confusion" => { $eb = $eb.with(Confusion{}); $eb = $eb.with(Duration{ turns: effect.1.parse::<i32>().unwrap() }); } }
In effects/triggers.rs we'll make the duration take from the Duration component of the effect:
#![allow(unused)] fn main() { // Confusion if let Some(confusion) = ecs.read_storage::<Confusion>().get(entity) { if let Some(duration) = ecs.read_storage::<Duration>().get(entity) { add_effect(creator, EffectType::Confusion{ turns : duration.turns }, targets.clone()); did_something = true; } } }
We'll change effects/damage.rs's confusion function to match the new scheme of things:
#![allow(unused)] fn main() { pub fn add_confusion(ecs: &mut World, effect: &EffectSpawner, target: Entity) { if let EffectType::Confusion{turns} = &effect.effect_type { ecs.create_entity() .with(StatusEffect{ target }) .with(Confusion{}) .with(Duration{ turns : *turns}) .with(Name{ name : "Confusion".to_string() }) .marked::<SimpleMarker<SerializeMe>>() .build(); } } }
That leaves ai/effect_status.rs. We'll change this to no longer worry about durations at all, and simply check for the presence of an effect - and if its Confusion, take away the target's turn:
#![allow(unused)] fn main() { use specs::prelude::*; use crate::{MyTurn, Confusion, RunState, StatusEffect}; use std::collections::HashSet; pub struct TurnStatusSystem {} impl<'a> System<'a> for TurnStatusSystem { #[allow(clippy::type_complexity)] type SystemData = ( WriteStorage<'a, MyTurn>, ReadStorage<'a, Confusion>, Entities<'a>, ReadExpect<'a, RunState>, ReadStorage<'a, StatusEffect> ); fn run(&mut self, data : Self::SystemData) { let (mut turns, confusion, entities, runstate, statuses) = data; if *runstate != RunState::Ticking { return; } // Collect a set of all entities whose turn it is let mut entity_turns = HashSet::new(); for (entity, _turn) in (&entities, &turns).join() { entity_turns.insert(entity); } // Find status effects affecting entities whose turn it is let mut not_my_turn : Vec<Entity> = Vec::new(); for (effect_entity, status_effect) in (&entities, &statuses).join() { if entity_turns.contains(&status_effect.target) { // Skip turn for confusion if confusion.get(effect_entity).is_some() { not_my_turn.push(status_effect.target); } } } for e in not_my_turn { turns.remove(e); } } } }
If you cargo run, this will work - but there's one glaring problem: once confused, you are confused forever (or until someone puts you out of your misery). That's not quite what we had in mind. We've de-coupled the effect's duration from the effect taking place (which is a good thing!), but that means we have to handle durations!
Here's an interesting conundrum: status effects are there own entities, but don't have an Initiative. Turns are relative, since entities can operate at different speeds. So when do we want to handle duration? The answer is the player's turn; time may be relative, but from the player's point of view turns are quite well defined. In effect, the rest of the world is speeding up when you are slowed - because we don't want to force the player to sit and be bored while the world chugs around them. Since we are switching to player control in the ai/initiative_system.rs - we'll handle it in there:
#![allow(unused)] fn main() { use specs::prelude::*; use crate::{Initiative, Position, MyTurn, Attributes, RunState, Pools, Duration, EquipmentChanged, StatusEffect}; pub struct InitiativeSystem {} impl<'a> System<'a> for InitiativeSystem { #[allow(clippy::type_complexity)] type SystemData = ( WriteStorage<'a, Initiative>, ReadStorage<'a, Position>, WriteStorage<'a, MyTurn>, Entities<'a>, WriteExpect<'a, rltk::RandomNumberGenerator>, ReadStorage<'a, Attributes>, WriteExpect<'a, RunState>, ReadExpect<'a, Entity>, ReadExpect<'a, rltk::Point>, ReadStorage<'a, Pools>, WriteStorage<'a, Duration>, WriteStorage<'a, EquipmentChanged>, ReadStorage<'a, StatusEffect> ); fn run(&mut self, data : Self::SystemData) { let (mut initiatives, positions, mut turns, entities, mut rng, attributes, mut runstate, player, player_pos, pools, mut durations, mut dirty, statuses) = data; if *runstate != RunState::Ticking { return; } // Clear any remaining MyTurn we left by mistkae turns.clear(); // Roll initiative for (entity, initiative, pos) in (&entities, &mut initiatives, &positions).join() { initiative.current -= 1; if initiative.current < 1 { let mut myturn = true; // Re-roll initiative.current = 6 + rng.roll_dice(1, 6); // Give a bonus for quickness if let Some(attr) = attributes.get(entity) { initiative.current -= attr.quickness.bonus; } // Apply pool penalty if let Some(pools) = pools.get(entity) { initiative.current += f32::floor(pools.total_initiative_penalty) as i32; } // TODO: More initiative granting boosts/penalties will go here later // If its the player, we want to go to an AwaitingInput state if entity == *player { // Give control to the player *runstate = RunState::AwaitingInput; } else { let distance = rltk::DistanceAlg::Pythagoras.distance2d(*player_pos, rltk::Point::new(pos.x, pos.y)); if distance > 20.0 { myturn = false; } } // It's my turn! if myturn { turns.insert(entity, MyTurn{}).expect("Unable to insert turn"); } } } // Handle durations if *runstate == RunState::AwaitingInput { for (effect_entity, duration, status) in (&entities, &mut durations, &statuses).join() { duration.turns -= 1; if duration.turns < 1 { dirty.insert(status.target, EquipmentChanged{}).expect("Unable to insert"); entities.delete(effect_entity).expect("Unable to delete"); } } } } } }
The system is basically unchanged, but we've added a few more accessors into different component storages - and added the "Handle durations" section at the end. This simply joins entities that have a duration and a status effect, and decrements the duration. If the duration is complete, it marks the status's target as dirty (so any recalculation that needs to happen will happen), and deletes the status effect entity.
Displaying Player Status
Now that we have a generic status effect system, we should modify the UI to show ongoing statuses. Hunger is handled differently, so we'll keep it there - but let's finish that portion of gui.rs. In draw_ui, replace the Status section with:
#![allow(unused)] fn main() { // Status let mut y = 44; let hunger = ecs.read_storage::<HungerClock>(); let hc = hunger.get(*player_entity).unwrap(); match hc.state { HungerState::WellFed => { ctx.print_color(50, y, RGB::named(rltk::GREEN), RGB::named(rltk::BLACK), "Well Fed"); y -= 1; } HungerState::Normal => {} HungerState::Hungry => { ctx.print_color(50, y, RGB::named(rltk::ORANGE), RGB::named(rltk::BLACK), "Hungry"); y -= 1; } HungerState::Starving => { ctx.print_color(50, y, RGB::named(rltk::RED), RGB::named(rltk::BLACK), "Starving"); y -= 1; } } let statuses = ecs.read_storage::<StatusEffect>(); let durations = ecs.read_storage::<Duration>(); let names = ecs.read_storage::<Name>(); for (status, duration, name) in (&statuses, &durations, &names).join() { if status.target == *player_entity { ctx.print_color( 50, y, RGB::named(rltk::RED), RGB::named(rltk::BLACK), &format!("{} ({})", name.name, duration.turns) ); y -= 1; } } }
This is very similar to what we had before, but we are storing y as a variable - so the list of status effects can grow upwards. Then we query the ECS for entities that have a status, duration and name - and if it is targeting the player, we use that to display the status.
Displaying Mob Status
It would also be nice to have some indication that status effects are applying to NPCs. There are two levels to this - we can display the status in the tooltip, and also use particles to indicate what's going on in regular play.
To handle tooltips, open up gui.rs and go to the draw_tooltips function. Underneath "Comment on Pools", add the following:
#![allow(unused)] fn main() { // Status effects let statuses = ecs.read_storage::<StatusEffect>(); let durations = ecs.read_storage::<Duration>(); let names = ecs.read_storage::<Name>(); for (status, duration, name) in (&statuses, &durations, &names).join() { if status.target == entity { tip.add(format!("{} ({})", name.name, duration.turns)); } } }
So now if you confuse a monster, it displays the effect in the tooltip. That's a good start to explaining why a monster isn't moving!
The other half is to display a particle when a turn is lost to confusion. We'll add a call to the effects system to request a particle! In ai/turn_status.rs expand the confusion section:
#![allow(unused)] fn main() { // Skip turn for confusion if confusion.get(effect_entity).is_some() { add_effect( None, EffectType::Particle{ glyph : rltk::to_cp437('?'), fg : rltk::RGB::named(rltk::CYAN), bg : rltk::RGB::named(rltk::BLACK), lifespan: 200.0 }, Targets::Single{ target:status_effect.target } ); not_my_turn.push(status_effect.target); } }
So if you cargo run the project now, you can see confusion in action:
Hangovers
Going back to the design document, we mentioned that you start with a hangover. We can finally implement it! Since you start the game with a hangover, open up spawner.rs and add the following to the end of the player spawn to make a hangover entity:
#![allow(unused)] fn main() { // Starting hangover ecs.create_entity() .with(StatusEffect{ target : player }) .with(Duration{ turns:10 }) .with(Name{ name: "Hangover".to_string() }) .with(AttributeBonus{ might : Some(-1), fitness : None, quickness : Some(-1), intelligence : Some(-1) }) .marked::<SimpleMarker<SerializeMe>>() .build(); }
Being hungover sucks! You are weaker, slower and less intelligent. Or you will be, once we modify the encumbrance system (it really needs a new name) to handle attribute changes from statuses. The system needs one small improvement:
#![allow(unused)] fn main() { // Total up status effect modifiers for (status, attr) in (&statuses, &attrbonus).join() { if to_update.contains_key(&status.target) { let totals = to_update.get_mut(&status.target).unwrap(); totals.might += attr.might.unwrap_or(0); totals.fitness += attr.fitness.unwrap_or(0); totals.quickness += attr.quickness.unwrap_or(0); totals.intelligence += attr.intelligence.unwrap_or(0); } } }
This shows the real reason for having a hangover system: it lets us safely test effects changing your attributes and make sure the expiration works!
If you cargo run the game now, you can watch the hangover in effect and wearing off:
Potion of Strength
Now that we have all of this, let's use it to build a strength potion (I always picture the old Asterix The Gaul comics). In spawns.json, we define the new potion:
{
"name" : "Strength Potion",
"renderable": {
"glyph" : "!",
"fg" : "#FF00FF",
"bg" : "#000000",
"order" : 2
},
"consumable" : {
"effects" : { "particle" : "!;#FF0000;200.0" }
},
"weight_lbs" : 0.5,
"base_value" : 50.0,
"vendor_category" : "alchemy",
"magic" : { "class" : "common", "naming" : "potion" },
"attributes" : { "might" : 5 }
},
There's nothing new here: we're going to show a particle effect, and we've attached an attributes section just like the others to the potion. We are going to have to tweak the effects system to know how to apply transient attribute effects, however. In effects/mod.rs, we'll add a new effect type:
#![allow(unused)] fn main() { #[derive(Debug)] pub enum EffectType { Damage { amount : i32 }, Bloodstain, Particle { glyph: rltk::FontCharType, fg : rltk::RGB, bg: rltk::RGB, lifespan: f32 }, EntityDeath, ItemUse { item: Entity }, WellFed, Healing { amount : i32 }, Confusion { turns : i32 }, TriggerFire { trigger: Entity }, TeleportTo { x:i32, y:i32, depth: i32, player_only : bool }, AttributeEffect { bonus : AttributeBonus, name : String, duration : i32 } } }
We'll mark it as affecting entities:
#![allow(unused)] fn main() { fn tile_effect_hits_entities(effect: &EffectType) -> bool { match effect { EffectType::Damage{..} => true, EffectType::WellFed => true, EffectType::Healing{..} => true, EffectType::Confusion{..} => true, EffectType::TeleportTo{..} => true, EffectType::AttributeEffect{..} => true, _ => false } } }
And tell it to call a new function we haven't written yet:
#![allow(unused)] fn main() { fn affect_entity(ecs: &mut World, effect: &EffectSpawner, target: Entity) { match &effect.effect_type { EffectType::Damage{..} => damage::inflict_damage(ecs, effect, target), EffectType::EntityDeath => damage::death(ecs, effect, target), EffectType::Bloodstain{..} => if let Some(pos) = entity_position(ecs, target) { damage::bloodstain(ecs, pos) }, EffectType::Particle{..} => if let Some(pos) = entity_position(ecs, target) { particles::particle_to_tile(ecs, pos, &effect) }, EffectType::WellFed => hunger::well_fed(ecs, effect, target), EffectType::Healing{..} => damage::heal_damage(ecs, effect, target), EffectType::Confusion{..} => damage::add_confusion(ecs, effect, target), EffectType::TeleportTo{..} => movement::apply_teleport(ecs, effect, target), EffectType::AttributeEffect{..} => damage::attribute_effect(ecs, effect, target), _ => {} } } }
Now we need to go into effects/damage.rs and write the new function:
#![allow(unused)] fn main() { pub fn attribute_effect(ecs: &mut World, effect: &EffectSpawner, target: Entity) { if let EffectType::AttributeEffect{bonus, name, duration} = &effect.effect_type { ecs.create_entity() .with(StatusEffect{ target }) .with(bonus.clone()) .with(Duration { turns : *duration }) .with(Name { name : name.clone() }) .marked::<SimpleMarker<SerializeMe>>() .build(); ecs.write_storage::<EquipmentChanged>().insert(target, EquipmentChanged{}).expect("Insert failed"); } } }
All that remains is to open up effects/triggers.rs and add attribute bonus effects as a trigger type:
#![allow(unused)] fn main() { // Attribute Modifiers if let Some(attr) = ecs.read_storage::<AttributeBonus>().get(entity) { add_effect( creator, EffectType::AttributeEffect{ bonus : attr.clone(), duration : 10, name : ecs.read_storage::<Name>().get(entity).unwrap().name.clone() }, targets.clone() ); did_something = true; } }
This is similar to the other triggers - it makes another event fire, this time with the attribute effect in place. You can cargo run now, and strength potions are working in the game. Here's a screenshot of drinking one while still hungover, showing you that effects now correctly stack:
Wrap Up
And there we have it: a status effects system that is nice and generic, and a system to let items fire them - as well as provide attribute bonuses and penalties. That wraps up the items system for now. In the next chapter, we'll move onto magic spells - which will use many of the foundations we've built in these chapters.
...
The source code for this chapter may be found here
Run this chapter's example with web assembly, in your browser (WebGL2 required)
Copyright (C) 2019, Herbert Wolverson.
Magic Spells - or Finally A Use For That Blue Mana Bar
About this tutorial
This tutorial is free and open source, and all code uses the MIT license - so you are free to do with it as you like. My hope is that you will enjoy the tutorial, and make great games!
If you enjoy this and would like me to keep writing, please consider supporting my Patreon.
The last few chapters have been building up to making this one possible: spellcasting. We've had a blue mana bar onscreen for quite a while, now we make it do something useful!
Knowing Spells
Spellcasting is an optional way to play the game - you can do quite well bashing things if you prefer. It's a common feature in roleplaying games that you can't cast a spell until you know it; you study hard, learn the gestures and incantations and can now unleash your mighty magical powers on the world.
The first implication of this is that an entity needs to be able to know spells. A nice side-effect of this is that it gives a convenient way for us to adds special attacks to monsters - we'll cover that later. For now, we'll add a new component to components.rs (and register in main.rs and saveload_system.rs):
#![allow(unused)] fn main() { #[derive(Debug, Serialize, Deserialize, Clone)] pub struct KnownSpell { pub display_name : String, pub mana_cost : i32 } #[derive(Component, Debug, Serialize, Deserialize, Clone)] pub struct KnownSpells { pub spells : Vec<KnownSpell> } }
We'll also add it to spawner.rs's player function. Eventually, we'll blank the spells list (just set it to Vec::new(), but for now we're going to add Zap as a placeholder):
#![allow(unused)] fn main() { .with(KnownSpells{ spells : vec![ KnownSpell{ display_name : "Zap".to_string(), mana_cost: 1 } ] }) }
If you'll remember back in section 4.9, we specified that the user interface should list spells you can cast. Our intended interface looked like this:
Now we have the data required to fill this out! Open up gui.rs, and find the part of draw_ui that renders consumables. Right underneath it, insert the following code:
#![allow(unused)] fn main() { // Spells y += 1; let blue = RGB::named(rltk::CYAN); let known_spells_storage = ecs.read_storage::<KnownSpells>(); let known_spells = &known_spells_storage.get(*player_entity).unwrap().spells; let mut index = 1; for spell in known_spells.iter() { ctx.print_color(50, y, blue, black, &format!("^{}", index)); ctx.print_color(53, y, blue, black, &format!("{} ({})", spell.display_name, spell.mana_cost)); index += 1; y += 1; } }
This reads the KnownSpells component (the player must have one), extracts the list and uses it to render spells with hotkey listings. We've made the blue into a cyan for readability, but it looks about right:
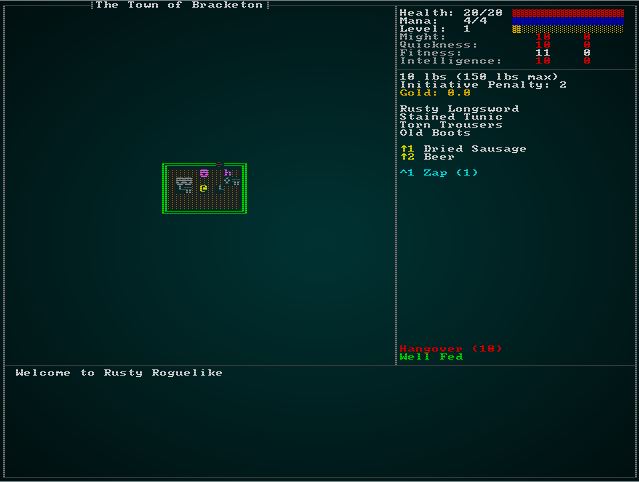
Casting Spells
Displaying the spells is a good start, but we need to be able to actually cast (or try to cast) them! You may remember in player.rs we handled consumable hotkeys. We'll use a very similar system to handle spell hotkeys. In player_input, add the following:
#![allow(unused)] fn main() { if ctx.control && ctx.key.is_some() { let key : Option<i32> = match ctx.key.unwrap() { VirtualKeyCode::Key1 => Some(1), VirtualKeyCode::Key2 => Some(2), VirtualKeyCode::Key3 => Some(3), VirtualKeyCode::Key4 => Some(4), VirtualKeyCode::Key5 => Some(5), VirtualKeyCode::Key6 => Some(6), VirtualKeyCode::Key7 => Some(7), VirtualKeyCode::Key8 => Some(8), VirtualKeyCode::Key9 => Some(9), _ => None }; if let Some(key) = key { return use_spell_hotkey(gs, key-1); } } }
That's just like the consumable hotkey code (a wise user would refactor some of this into a function, but we'll keep it separated for clarity in the tutorial). It calls use_spell_hotkey - which we haven't written yet! Let's go ahead and make a start:
#![allow(unused)] fn main() { fn use_spell_hotkey(gs: &mut State, key: i32) -> RunState { use super::KnownSpells; let player_entity = gs.ecs.fetch::<Entity>(); let known_spells_storage = gs.ecs.read_storage::<KnownSpells>(); let known_spells = &known_spells_storage.get(*player_entity).unwrap().spells; if (key as usize) < known_spells.len() { let pools = gs.ecs.read_storage::<Pools>(); let player_pools = pools.get(*player_entity).unwrap(); if player_pools.mana.current >= known_spells[key as usize].mana_cost { // TODO: Cast the Spell } else { let mut gamelog = gs.ecs.fetch_mut::<GameLog>(); gamelog.entries.push("You don't have enough mana to cast that!".to_string()); } } RunState::Ticking } }
Notice the big TODO in there! We need to put some infrastructure in place before we can actually make the spell-casting happen.
Defining our Zap Spell
The primary reason we hit a bit of a wall there is that we haven't actually told the engine what a Zap spell does. We've defined everything else in our raw spawns.json file, so lets go ahead and make a new spells section:
"spells" : [
{
"name" : "Zap",
"effects" : {
"ranged" : "6",
"damage" : "5",
"particle_line" : "▓;#00FFFF;200.0"
}
}
]
Let's extend our raws system to be able to read this, and make it available for use in-game. We'll start with a new file, raws/spell_structs.rs which will define what a spell looks like to the JSON system:
#![allow(unused)] fn main() { use serde::{Deserialize}; use std::collections::HashMap; #[derive(Deserialize, Debug)] pub struct Spell { pub name : String, pub effects : HashMap<String, String> } }
Now we'll add mod spells; pub use spells::Spell; to raws/mod.rs and extend the Raws struct to include it:
#![allow(unused)] fn main() { mod spell_structs; pub use spell_structs::Spell; ... #[derive(Deserialize, Debug)] pub struct Raws { pub items : Vec<Item>, pub mobs : Vec<Mob>, pub props : Vec<Prop>, pub spawn_table : Vec<SpawnTableEntry>, pub loot_tables : Vec<LootTable>, pub faction_table : Vec<FactionInfo>, pub spells : Vec<Spell> } }
Now that we've made the field, we should add it to the empty() system in raws/rawmaster.rs. We'll also add an index, just like the other raw types:
#![allow(unused)] fn main() { pub struct RawMaster { raws : Raws, item_index : HashMap<String, usize>, mob_index : HashMap<String, usize>, prop_index : HashMap<String, usize>, loot_index : HashMap<String, usize>, faction_index : HashMap<String, HashMap<String, Reaction>>, spell_index : HashMap<String, usize> } impl RawMaster { pub fn empty() -> RawMaster { RawMaster { raws : Raws{ items: Vec::new(), mobs: Vec::new(), props: Vec::new(), spawn_table: Vec::new(), loot_tables: Vec::new(), faction_table : Vec::new(), spells : Vec::new() }, item_index : HashMap::new(), mob_index : HashMap::new(), prop_index : HashMap::new(), loot_index : HashMap::new(), faction_index : HashMap::new(), spell_index : HashMap::new() } } }
And in load, we need to populate the index:
#![allow(unused)] fn main() { for (i,spell) in self.raws.spells.iter().enumerate() { self.spell_index.insert(spell.name.clone(), i); } }
We're tying the spell design very heavily to the existing item effects system, but now we hit another minor issue: we're not actually spawning spells as entities - in some cases, they just go straight into the effects system. However, it would be nice to keep using all of the effect code we've written. So we're going to spawn template entities for spells. This allows us to find the spell template, and use the existing code to spawn its results. First, in components.rs (and registered in main.rs and saveload_system.rs), we'll make a new SpellTemplate component:
#![allow(unused)] fn main() { #[derive(Component, Debug, Serialize, Deserialize, Clone)] pub struct SpellTemplate { pub mana_cost : i32 } }
In raws/rawmaster.rs we'll need a new function: spawn_named_spell:
#![allow(unused)] fn main() { pub fn spawn_named_spell(raws: &RawMaster, ecs : &mut World, key : &str) -> Option<Entity> { if raws.spell_index.contains_key(key) { let spell_template = &raws.raws.spells[raws.spell_index[key]]; let mut eb = ecs.create_entity().marked::<SimpleMarker<SerializeMe>>(); eb = eb.with(SpellTemplate{ mana_cost : spell_template.mana_cost }); eb = eb.with(Name{ name : spell_template.name.clone() }); apply_effects!(spell_template.effects, eb); return Some(eb.build()); } None } }
This is simple: we create a new entity, mark it for serialization and as a spell template, give it a name, and use our existing effects! macro to fill out the blanks. Then we return the entity.
We want to do this for all spells when a new game starts. We'll start by adding a function to raws/rawmaster.rs to call it for all spells:
#![allow(unused)] fn main() { pub fn spawn_all_spells(ecs : &mut World) { let raws = &super::RAWS.lock().unwrap(); for spell in raws.raws.spells.iter() { spawn_named_spell(raws, ecs, &spell.name); } } }
Since the player only spawns once, we'll call it at the beginning of spawner.rs's player function. That guarantees that it will be present, since not having a player is a fatal bug (and a sad thing!):
#![allow(unused)] fn main() { pub fn player(ecs : &mut World, player_x : i32, player_y : i32) -> Entity { spawn_all_spells(ecs); ... }
Finally, we're going to add a utility function (to raws/rawmaster.rs) to help us find a spell entity. It's pretty straightforward:
#![allow(unused)] fn main() { pub fn find_spell_entity(ecs : &World, name : &str) -> Option<Entity> { let names = ecs.read_storage::<Name>(); let spell_templates = ecs.read_storage::<SpellTemplate>(); let entities = ecs.entities(); for (entity, sname, _template) in (&entities, &names, &spell_templates).join() { if name == sname.name { return Some(entity); } } None } }
Enqueueing Zap
Now that we have Zap defined as a spell template, we can finish up the spell_hotkeys system we started earlier. First, we'll need a component to indicate a desire to cast a spell. In components.rs (and registered in main.rs and saveload_system.rs):
#![allow(unused)] fn main() { #[derive(Component, Debug, ConvertSaveload, Clone)] pub struct WantsToCastSpell { pub spell : Entity, pub target : Option<rltk::Point> } }
This gives us enough to finish up spellcasting in player.rs:
#![allow(unused)] fn main() { fn use_spell_hotkey(gs: &mut State, key: i32) -> RunState { use super::KnownSpells; use super::raws::find_spell_entity; let player_entity = gs.ecs.fetch::<Entity>(); let known_spells_storage = gs.ecs.read_storage::<KnownSpells>(); let known_spells = &known_spells_storage.get(*player_entity).unwrap().spells; if (key as usize) < known_spells.len() { let pools = gs.ecs.read_storage::<Pools>(); let player_pools = pools.get(*player_entity).unwrap(); if player_pools.mana.current >= known_spells[key as usize].mana_cost { if let Some(spell_entity) = find_spell_entity(&gs.ecs, &known_spells[key as usize].display_name) { use crate::components::Ranged; if let Some(ranged) = gs.ecs.read_storage::<Ranged>().get(spell_entity) { return RunState::ShowTargeting{ range: ranged.range, item: spell_entity }; }; let mut intent = gs.ecs.write_storage::<WantsToCastSpell>(); intent.insert( *player_entity, WantsToCastSpell{ spell: spell_entity, target: None } ).expect("Unable to insert intent"); return RunState::Ticking; } } else { let mut gamelog = gs.ecs.fetch_mut::<GameLog>(); gamelog.entries.push("You don't have enough mana to cast that!".to_string()); } } RunState::Ticking } }
You'll notice that we're re-using ShowTargeting - but with a spell entity instead of an item. We need to adjust the conditions in main.rs to handle this:
#![allow(unused)] fn main() { RunState::ShowTargeting{range, item} => { let result = gui::ranged_target(self, ctx, range); match result.0 { gui::ItemMenuResult::Cancel => newrunstate = RunState::AwaitingInput, gui::ItemMenuResult::NoResponse => {} gui::ItemMenuResult::Selected => { if self.ecs.read_storage::<SpellTemplate>().get(item).is_some() { let mut intent = self.ecs.write_storage::<WantsToCastSpell>(); intent.insert(*self.ecs.fetch::<Entity>(), WantsToCastSpell{ spell: item, target: result.1 }).expect("Unable to insert intent"); newrunstate = RunState::Ticking; } else { let mut intent = self.ecs.write_storage::<WantsToUseItem>(); intent.insert(*self.ecs.fetch::<Entity>(), WantsToUseItem{ item, target: result.1 }).expect("Unable to insert intent"); newrunstate = RunState::Ticking; } } } } }
So when a target is selected, it looks at the item entity - if it has a spell component, it launches a WantsToCastSpell - otherwise it sticks with WantsToUseItem.
You've hopefully noticed that we're not actually using WantsToCastSpell anywhere! We'll need another system to handle it. It's basically the same as using an item, so we'll add it in next to it. In inventory_system/use_system.rs, we'll add a second system:
#![allow(unused)] fn main() { use specs::prelude::*; use super::{Name, WantsToUseItem,Map, AreaOfEffect, EquipmentChanged, IdentifiedItem, WantsToCastSpell}; use crate::effects::*; ... // The ItemUseSystem goes here ... pub struct SpellUseSystem {} impl<'a> System<'a> for SpellUseSystem { #[allow(clippy::type_complexity)] type SystemData = ( ReadExpect<'a, Entity>, WriteExpect<'a, Map>, Entities<'a>, WriteStorage<'a, WantsToCastSpell>, ReadStorage<'a, Name>, ReadStorage<'a, AreaOfEffect>, WriteStorage<'a, EquipmentChanged>, WriteStorage<'a, IdentifiedItem> ); #[allow(clippy::cognitive_complexity)] fn run(&mut self, data : Self::SystemData) { let (player_entity, map, entities, mut wants_use, names, aoe, mut dirty, mut identified_item) = data; for (entity, useitem) in (&entities, &wants_use).join() { dirty.insert(entity, EquipmentChanged{}).expect("Unable to insert"); // Identify if entity == *player_entity { identified_item.insert(entity, IdentifiedItem{ name: names.get(useitem.spell).unwrap().name.clone() }) .expect("Unable to insert"); } // Call the effects system add_effect( Some(entity), EffectType::SpellUse{ spell : useitem.spell }, match useitem.target { None => Targets::Single{ target: *player_entity }, Some(target) => { if let Some(aoe) = aoe.get(useitem.spell) { Targets::Tiles{ tiles: aoe_tiles(&*map, target, aoe.radius) } } else { Targets::Tile{ tile_idx : map.xy_idx(target.x, target.y) as i32 } } } } ); } wants_use.clear(); } } }
This is very similar to the ItemUseSystem, but takes WantsToCastSpell as input. It then sends an EffectType::SpellUse to the effects system. We haven't written that yet - so let's do that. We'll start by adding it to the EffectType enumeration:
#![allow(unused)] fn main() { #[derive(Debug)] pub enum EffectType { Damage { amount : i32 }, Bloodstain, Particle { glyph: rltk::FontCharType, fg : rltk::RGB, bg: rltk::RGB, lifespan: f32 }, EntityDeath, ItemUse { item: Entity }, SpellUse { spell: Entity }, WellFed, Healing { amount : i32 }, Confusion { turns : i32 }, TriggerFire { trigger: Entity }, TeleportTo { x:i32, y:i32, depth: i32, player_only : bool }, AttributeEffect { bonus : AttributeBonus, name : String, duration : i32 } } }
Then we need to add it into the spell_applicator function:
#![allow(unused)] fn main() { fn target_applicator(ecs : &mut World, effect : &EffectSpawner) { if let EffectType::ItemUse{item} = effect.effect_type { triggers::item_trigger(effect.creator, item, &effect.targets, ecs); } else if let EffectType::SpellUse{spell} = effect.effect_type { triggers::spell_trigger(effect.creator, spell, &effect.targets, ecs); } else if let EffectType::TriggerFire{trigger} = effect.effect_type { triggers::trigger(effect.creator, trigger, &effect.targets, ecs); } else { match &effect.targets { Targets::Tile{tile_idx} => affect_tile(ecs, effect, *tile_idx), Targets::Tiles{tiles} => tiles.iter().for_each(|tile_idx| affect_tile(ecs, effect, *tile_idx)), Targets::Single{target} => affect_entity(ecs, effect, *target), Targets::TargetList{targets} => targets.iter().for_each(|entity| affect_entity(ecs, effect, *entity)), } } } }
This is sending spell-casting to a new trigger function, spell_trigger. This is defined in triggers.rs:
#![allow(unused)] fn main() { pub fn spell_trigger(creator : Option<Entity>, spell: Entity, targets : &Targets, ecs: &mut World) { if let Some(template) = ecs.read_storage::<SpellTemplate>().get(spell) { let mut pools = ecs.write_storage::<Pools>(); if let Some(caster) = creator { if let Some(pool) = pools.get_mut(caster) { if template.mana_cost <= pool.mana.current { pool.mana.current -= template.mana_cost; } } } } event_trigger(creator, spell, targets, ecs); } }
This is relatively simple. It:
- Checks that there is a spell template attached to the input.
- Obtains the caster's pools, to gain access to their mana.
- Reduces the caster's mana by the cost of the spell.
- Sends the spell over to the effects system - which we've already written.
We'll also want to fix a visual issue. Previously, find_item_position (in effects/targeting.rs) has always sufficed for figuring out where to start some visual effects. Since the item is now a spell template - and has no position - visual effects aren't going to work. We'll add an additional parameter - owner - to the function and it can fall back to the owner's position:
#![allow(unused)] fn main() { pub fn find_item_position(ecs: &World, target: Entity, creator: Option<Entity>) -> Option<i32> { let positions = ecs.read_storage::<Position>(); let map = ecs.fetch::<Map>(); // Easy - it has a position if let Some(pos) = positions.get(target) { return Some(map.xy_idx(pos.x, pos.y) as i32); } // Maybe it is carried? if let Some(carried) = ecs.read_storage::<InBackpack>().get(target) { if let Some(pos) = positions.get(carried.owner) { return Some(map.xy_idx(pos.x, pos.y) as i32); } } // Maybe it is equipped? if let Some(equipped) = ecs.read_storage::<Equipped>().get(target) { if let Some(pos) = positions.get(equipped.owner) { return Some(map.xy_idx(pos.x, pos.y) as i32); } } // Maybe the creator has a position? if let Some(creator) = creator { if let Some(pos) = positions.get(creator) { return Some(map.xy_idx(pos.x, pos.y) as i32); } } // No idea - give up None } }
Then we just need to make a small change in event_trigger (in effects/triggers.rs):
#![allow(unused)] fn main() { // Line particle spawn if let Some(part) = ecs.read_storage::<SpawnParticleLine>().get(entity) { ... }
And there you have it. If you cargo run now, you can press ctrl+1 to zap people!
Restoring Mana
You may notice that you never actually get your mana back, right now. You get to zap a few times (4 by default), and then you're done. While that's very 1st Edition D&D-like, it's not a lot of fun for a video game. On the other hand, spells are powerful - so we don't want it to be too easy to be the Energizer Bunny of magic!
Mana Potions
A good start would be to provide Mana Potions to restore your magical thirst. In spawns.json:
{
"name" : "Mana Potion",
"renderable": {
"glyph" : "!",
"fg" : "#FF00FF",
"bg" : "#000000",
"order" : 2
},
"consumable" : {
"effects" : { "provides_mana" : "4" }
},
"weight_lbs" : 0.5,
"base_value" : 50.0,
"vendor_category" : "alchemy",
"magic" : { "class" : "common", "naming" : "potion" }
},
And make them a plentiful spawn:
{ "name" : "Mana Potion", "weight" : 7, "min_depth" : 0, "max_depth" : 100 },
We don't have support for provides_mana yet, so we'll need to make a component for it. In components.rs (and main.rs and saveload_system.rs):
#![allow(unused)] fn main() { #[derive(Component, Debug, Serialize, Deserialize, Clone)] pub struct ProvidesMana { pub mana_amount : i32 } }
And in raws/rawmaster.rs we add it as a spawn effect:
#![allow(unused)] fn main() { macro_rules! apply_effects { ( $effects:expr, $eb:expr ) => { for effect in $effects.iter() { let effect_name = effect.0.as_str(); match effect_name { "provides_healing" => $eb = $eb.with(ProvidesHealing{ heal_amount: effect.1.parse::<i32>().unwrap() }), "provides_mana" => $eb = $eb.with(ProvidesMana{ mana_amount: effect.1.parse::<i32>().unwrap() }), "ranged" => $eb = $eb.with(Ranged{ range: effect.1.parse::<i32>().unwrap() }), "damage" => $eb = $eb.with(InflictsDamage{ damage : effect.1.parse::<i32>().unwrap() }), "area_of_effect" => $eb = $eb.with(AreaOfEffect{ radius: effect.1.parse::<i32>().unwrap() }), "confusion" => { $eb = $eb.with(Confusion{}); $eb = $eb.with(Duration{ turns: effect.1.parse::<i32>().unwrap() }); } "magic_mapping" => $eb = $eb.with(MagicMapper{}), "town_portal" => $eb = $eb.with(TownPortal{}), "food" => $eb = $eb.with(ProvidesFood{}), "single_activation" => $eb = $eb.with(SingleActivation{}), "particle_line" => $eb = $eb.with(parse_particle_line(&effect.1)), "particle" => $eb = $eb.with(parse_particle(&effect.1)), "remove_curse" => $eb = $eb.with(ProvidesRemoveCurse{}), "identify" => $eb = $eb.with(ProvidesIdentification{}), _ => rltk::console::log(format!("Warning: consumable effect {} not implemented.", effect_name)) } } }; } }
That creates the component (you should be used to this by now!), so we also need to handle the effect of using it. We'll start by making a new EffectType in effects/mod.rs:
#![allow(unused)] fn main() { #[derive(Debug)] pub enum EffectType { Damage { amount : i32 }, Bloodstain, Particle { glyph: rltk::FontCharType, fg : rltk::RGB, bg: rltk::RGB, lifespan: f32 }, EntityDeath, ItemUse { item: Entity }, SpellUse { spell: Entity }, WellFed, Healing { amount : i32 }, Mana { amount : i32 }, Confusion { turns : i32 }, TriggerFire { trigger: Entity }, TeleportTo { x:i32, y:i32, depth: i32, player_only : bool }, AttributeEffect { bonus : AttributeBonus, name : String, duration : i32 } } }
We'll mark it as affecting entities:
#![allow(unused)] fn main() { fn tile_effect_hits_entities(effect: &EffectType) -> bool { match effect { EffectType::Damage{..} => true, EffectType::WellFed => true, EffectType::Healing{..} => true, EffectType::Mana{..} => true, EffectType::Confusion{..} => true, EffectType::TeleportTo{..} => true, EffectType::AttributeEffect{..} => true, _ => false } } }
And include it in our affect_entities function:
#![allow(unused)] fn main() { fn affect_entity(ecs: &mut World, effect: &EffectSpawner, target: Entity) { match &effect.effect_type { EffectType::Damage{..} => damage::inflict_damage(ecs, effect, target), EffectType::EntityDeath => damage::death(ecs, effect, target), EffectType::Bloodstain{..} => if let Some(pos) = entity_position(ecs, target) { damage::bloodstain(ecs, pos) }, EffectType::Particle{..} => if let Some(pos) = entity_position(ecs, target) { particles::particle_to_tile(ecs, pos, &effect) }, EffectType::WellFed => hunger::well_fed(ecs, effect, target), EffectType::Healing{..} => damage::heal_damage(ecs, effect, target), EffectType::Mana{..} => damage::restore_mana(ecs, effect, target), EffectType::Confusion{..} => damage::add_confusion(ecs, effect, target), EffectType::TeleportTo{..} => movement::apply_teleport(ecs, effect, target), EffectType::AttributeEffect{..} => damage::attribute_effect(ecs, effect, target), _ => {} } } }
Add the following to the triggers list in effects/triggers.rs (right underneath Healing):
#![allow(unused)] fn main() { // Mana if let Some(mana) = ecs.read_storage::<ProvidesMana>().get(entity) { add_effect(creator, EffectType::Mana{amount: mana.mana_amount}, targets.clone()); did_something = true; } }
Finally, we need to implement restore_mana in effects/damage.rs:
#![allow(unused)] fn main() { pub fn restore_mana(ecs: &mut World, mana: &EffectSpawner, target: Entity) { let mut pools = ecs.write_storage::<Pools>(); if let Some(pool) = pools.get_mut(target) { if let EffectType::Mana{amount} = mana.effect_type { pool.mana.current = i32::min(pool.mana.max, pool.mana.current + amount); add_effect(None, EffectType::Particle{ glyph: rltk::to_cp437('‼'), fg : rltk::RGB::named(rltk::BLUE), bg : rltk::RGB::named(rltk::BLACK), lifespan: 200.0 }, Targets::Single{target} ); } } } }
This is pretty much the same as our healing effect - but with Mana instead of Hit Points.
So if you cargo run now, you have a decent chance of fining potions that restore your mana.
Mana Over Time
We already support giving the player health over time, if they rest away from enemies. It makes sense to do the same for mana, but we want it to be much slower. Mana is powerful - with a ranged zap, you can inflict a bunch of damage with relatively little risk (although positioning is still key, since a wounded enemy can still hurt you). So we want to restore the player's mana when they rest - but very slowly. In player.rs, the skip_turn function handles restoring health. Let's expand the healing portion to sometimes restore a bit of Mana as well:
#![allow(unused)] fn main() { if can_heal { let mut health_components = ecs.write_storage::<Pools>(); let pools = health_components.get_mut(*player_entity).unwrap(); pools.hit_points.current = i32::min(pools.hit_points.current + 1, pools.hit_points.max); let mut rng = ecs.fetch_mut::<rltk::RandomNumberGenerator>(); if rng.roll_dice(1,6)==1 { pools.mana.current = i32::min(pools.mana.current + 1, pools.mana.max); } } }
This gives a 1 in 6 chance of restoring some mana when you rest, if you are eligible for healing.
Learning Spells
The sky really is the limit when it comes to designing spell effects. You can happily play with it all night (I did!). We're going to start by going into spawner.rs and removing the starting spell - you don't start with any at all:
#![allow(unused)] fn main() { .with(KnownSpells{ spells : Vec::new() }) }
Now we'll introduce our first spell-book, and make it a spawnable treasure. Let's define our first book in spawns.json:
{
"name" : "Beginner's Magic",
"renderable": {
"glyph" : "¶",
"fg" : "#FF00FF",
"bg" : "#000000",
"order" : 2
},
"consumable" : {
"effects" : { "teach_spell" : "Zap" }
},
"weight_lbs" : 0.5,
"base_value" : 50.0,
"vendor_category" : "alchemy"
},
Once again, 90% of this is already written. The new part is the effect, teach_spells. We'll need a component to represent this effect, so once again in components.rs (and registered in main.rs / saveload_system.rs):
#![allow(unused)] fn main() { #[derive(Component, Debug, Serialize, Deserialize, Clone)] pub struct TeachesSpell { pub spell : String } }
Now we'll add it into the effects system inside raws/rawmaster.rs:
#![allow(unused)] fn main() { "teach_spell" => $eb = $eb.with(TeachesSpell{ spell: effect.1.to_string() }), }
Finally, we need to integrate it into our effects/triggers.rs system as another effect:
#![allow(unused)] fn main() { // Learn spells if let Some(spell) = ecs.read_storage::<TeachesSpell>().get(entity) { if let Some(known) = ecs.write_storage::<KnownSpells>().get_mut(creator.unwrap()) { if let Some(spell_entity) = crate::raws::find_spell_entity(ecs, &spell.spell) { if let Some(spell_info) = ecs.read_storage::<SpellTemplate>().get(spell_entity) { let mut already_known = false; known.spells.iter().for_each(|s| if s.display_name == spell.spell { already_known = true }); if !already_known { known.spells.push(KnownSpell{ display_name: spell.spell.clone(), mana_cost : spell_info.mana_cost }); } } } } did_something = true; } }
This is a big chain of if let, but it makes sense: we make sure that the item teaches a spell, then we find the student's list of known spells, then we find the spell's template - and if all of that worked, we check to see if they already know the spell, and learn it if they did not. Then we mark did_something, so the book destructs.
For testing purposes, open up spawns.json and lets make the spell-book appear everywhere:
{ "name" : "A Beginner's Guide to Magic", "weight" : 200, "min_depth" : 0, "max_depth" : 100 },
Now cargo run the project, you should have no trouble finding a book and learning to Zap things!
Remember to lower the weight to something reasonable when you're done.
{ "name" : "A Beginner's Guide to Magic", "weight" : 5, "min_depth" : 0, "max_depth" : 100 },
Putting this all together - Poison
It's been a long road through a few chapters of making a generic effects system. Before we move back to the fun part of finishing our game (maps and monsters!), it would be good to put it all together - combined with one new (small) system - to show what we've achieved. To that end, we're going to add two types of poison - a damage over time (DOT) and a slowing venom. We'll make it available as an unfortunate potion choice (which will become useful in the future!), an attack scroll, a spell, and as something spiders can inflict upon their victims. The amazing part is that now we have a unified system, this really isn't too hard!
Slow, Hate and Damage Over Time Effects
We'll start by making two new components to represent the effects. In components.rs (and registered in main.rs and saveload_system.rs):
#![allow(unused)] fn main() { #[derive(Component, Debug, Serialize, Deserialize, Clone)] pub struct Slow { pub initiative_penalty : f32 } #[derive(Component, Debug, Serialize, Deserialize, Clone)] pub struct DamageOverTime { pub damage : i32 } }
Next, we'll open raws/rawmaster.rs and add these as loadable effect types:
#![allow(unused)] fn main() { macro_rules! apply_effects { ( $effects:expr, $eb:expr ) => { for effect in $effects.iter() { let effect_name = effect.0.as_str(); match effect_name { "provides_healing" => $eb = $eb.with(ProvidesHealing{ heal_amount: effect.1.parse::<i32>().unwrap() }), "provides_mana" => $eb = $eb.with(ProvidesMana{ mana_amount: effect.1.parse::<i32>().unwrap() }), "teach_spell" => $eb = $eb.with(TeachesSpell{ spell: effect.1.to_string() }), "ranged" => $eb = $eb.with(Ranged{ range: effect.1.parse::<i32>().unwrap() }), "damage" => $eb = $eb.with(InflictsDamage{ damage : effect.1.parse::<i32>().unwrap() }), "area_of_effect" => $eb = $eb.with(AreaOfEffect{ radius: effect.1.parse::<i32>().unwrap() }), "confusion" => { $eb = $eb.with(Confusion{}); $eb = $eb.with(Duration{ turns: effect.1.parse::<i32>().unwrap() }); } "magic_mapping" => $eb = $eb.with(MagicMapper{}), "town_portal" => $eb = $eb.with(TownPortal{}), "food" => $eb = $eb.with(ProvidesFood{}), "single_activation" => $eb = $eb.with(SingleActivation{}), "particle_line" => $eb = $eb.with(parse_particle_line(&effect.1)), "particle" => $eb = $eb.with(parse_particle(&effect.1)), "remove_curse" => $eb = $eb.with(ProvidesRemoveCurse{}), "identify" => $eb = $eb.with(ProvidesIdentification{}), "slow" => $eb = $eb.with(Slow{ initiative_penalty : effect.1.parse::<f32>().unwrap() }), "damage_over_time" => $eb = $eb.with( DamageOverTime { damage : effect.1.parse::<i32>().unwrap() } ), _ => rltk::console::log(format!("Warning: consumable effect {} not implemented.", effect_name)) } } }; } }
So now Slow and DamageOverTime are recognized as effects in the various raw file entries, and can have their components applied. Next up, we need to teach the effects system to apply it. We'll start in effects/mod.rs adding them to the EffectType enum:
#![allow(unused)] fn main() { #[derive(Debug)] pub enum EffectType { Damage { amount : i32 }, Bloodstain, Particle { glyph: rltk::FontCharType, fg : rltk::RGB, bg: rltk::RGB, lifespan: f32 }, EntityDeath, ItemUse { item: Entity }, SpellUse { spell: Entity }, WellFed, Healing { amount : i32 }, Mana { amount : i32 }, Confusion { turns : i32 }, TriggerFire { trigger: Entity }, TeleportTo { x:i32, y:i32, depth: i32, player_only : bool }, AttributeEffect { bonus : AttributeBonus, name : String, duration : i32 }, Slow { initiative_penalty : f32 }, DamageOverTime { damage : i32 } } }
In the same file, we need to indicate that they apply to entities:
#![allow(unused)] fn main() { fn tile_effect_hits_entities(effect: &EffectType) -> bool { match effect { EffectType::Damage{..} => true, EffectType::WellFed => true, EffectType::Healing{..} => true, EffectType::Mana{..} => true, EffectType::Confusion{..} => true, EffectType::TeleportTo{..} => true, EffectType::AttributeEffect{..} => true, EffectType::Slow{..} => true, EffectType::DamageOverTime{..} => true, _ => false } } }
We also need the routing table in affect_entity to direct them correctly:
#![allow(unused)] fn main() { fn affect_entity(ecs: &mut World, effect: &EffectSpawner, target: Entity) { match &effect.effect_type { EffectType::Damage{..} => damage::inflict_damage(ecs, effect, target), EffectType::EntityDeath => damage::death(ecs, effect, target), EffectType::Bloodstain{..} => if let Some(pos) = entity_position(ecs, target) { damage::bloodstain(ecs, pos) }, EffectType::Particle{..} => if let Some(pos) = entity_position(ecs, target) { particles::particle_to_tile(ecs, pos, &effect) }, EffectType::WellFed => hunger::well_fed(ecs, effect, target), EffectType::Healing{..} => damage::heal_damage(ecs, effect, target), EffectType::Mana{..} => damage::restore_mana(ecs, effect, target), EffectType::Confusion{..} => damage::add_confusion(ecs, effect, target), EffectType::TeleportTo{..} => movement::apply_teleport(ecs, effect, target), EffectType::AttributeEffect{..} => damage::attribute_effect(ecs, effect, target), EffectType::Slow{..} => damage::slow(ecs, effect, target), EffectType::DamageOverTime{..} => damage::damage_over_time(ecs, effect, target), _ => {} } } }
In turn, this requires that we create two new functions in effects/damage.rs to match the ones we just called:
#![allow(unused)] fn main() { pub fn slow(ecs: &mut World, effect: &EffectSpawner, target: Entity) { if let EffectType::Slow{initiative_penalty} = &effect.effect_type { ecs.create_entity() .with(StatusEffect{ target }) .with(Slow{ initiative_penalty : *initiative_penalty }) .with(Duration{ turns : 5}) .with( if *initiative_penalty > 0.0 { Name{ name : "Slowed".to_string() } } else { Name{ name : "Hasted".to_string() } } ) .marked::<SimpleMarker<SerializeMe>>() .build(); } } pub fn damage_over_time(ecs: &mut World, effect: &EffectSpawner, target: Entity) { if let EffectType::DamageOverTime{damage} = &effect.effect_type { ecs.create_entity() .with(StatusEffect{ target }) .with(DamageOverTime{ damage : *damage }) .with(Duration{ turns : 5}) .with(Name{ name : "Damage Over Time".to_string() }) .marked::<SimpleMarker<SerializeMe>>() .build(); } } }
You'll notice that both of these are similar to Confusion - they apply a status effect. Now we need to handle the effects in the effects/triggers.rs file - in the event_trigger function:
#![allow(unused)] fn main() { // Slow if let Some(slow) = ecs.read_storage::<Slow>().get(entity) { add_effect(creator, EffectType::Slow{ initiative_penalty : slow.initiative_penalty }, targets.clone()); did_something = true; } // Damage Over Time if let Some(damage) = ecs.read_storage::<DamageOverTime>().get(entity) { add_effect(creator, EffectType::DamageOverTime{ damage : damage.damage }, targets.clone()); did_something = true; } }
Finally, we need the status effects to have their way with the victim! The first Slow effect makes sense to handle in the ai/encumbrance_system.rs file. Right after we handle attribute effects, add:
#![allow(unused)] fn main() { // Total up haste/slow for (status, slow) in (&statuses, &slowed).join() { if to_update.contains_key(&status.target) { let totals = to_update.get_mut(&status.target).unwrap(); totals.initiative += slow.initiative_penalty; } } }
We'll add DamageOverTime support to the duration tick (it could be a separate system, but we're already iterating over the status effects at the right time - so we may as well combine them). Extend the duration check in ai/initiative_system.rs to include it:
#![allow(unused)] fn main() { impl<'a> System<'a> for InitiativeSystem { #[allow(clippy::type_complexity)] type SystemData = ( WriteStorage<'a, Initiative>, ReadStorage<'a, Position>, WriteStorage<'a, MyTurn>, Entities<'a>, WriteExpect<'a, rltk::RandomNumberGenerator>, ReadStorage<'a, Attributes>, WriteExpect<'a, RunState>, ReadExpect<'a, Entity>, ReadExpect<'a, rltk::Point>, ReadStorage<'a, Pools>, WriteStorage<'a, Duration>, WriteStorage<'a, EquipmentChanged>, ReadStorage<'a, StatusEffect>, ReadStorage<'a, DamageOverTime> ); fn run(&mut self, data : Self::SystemData) { let (mut initiatives, positions, mut turns, entities, mut rng, attributes, mut runstate, player, player_pos, pools, mut durations, mut dirty, statuses, dots) = data; ... // Handle durations if *runstate == RunState::AwaitingInput { use crate::effects::*; for (effect_entity, duration, status) in (&entities, &mut durations, &statuses).join() { if entities.is_alive(status.target) { duration.turns -= 1; if let Some(dot) = dots.get(effect_entity) { add_effect( None, EffectType::Damage{ amount : dot.damage }, Targets::Single{ target : status.target } ); } if duration.turns < 1 { dirty.insert(status.target, EquipmentChanged{}).expect("Unable to insert"); entities.delete(effect_entity).expect("Unable to delete"); } } } } }
There's one new concept in that code: is_alive. Status effects might out-live their target, so we only want to apply them if the target is still a valid entity. Otherwise, the game will crash!
Just Add Items
That's all that's required to make the two effects functional - now we just need to add them to some items and spells. Lets add three potions that demonstrate what we've just done:
{ "name" : "Poison Potion", "weight" : 100, "min_depth" : 0, "max_depth" : 100 },
{ "name" : "Slow Potion", "weight" : 100, "min_depth" : 0, "max_depth" : 100 },
{ "name" : "Haste Potion", "weight" : 100, "min_depth" : 0, "max_depth" : 100 },
...
{
"name" : "Poison Potion",
"renderable": {
"glyph" : "!",
"fg" : "#FF00FF",
"bg" : "#000000",
"order" : 2
},
"consumable" : {
"effects" : { "damage_over_time" : "2" }
},
"weight_lbs" : 0.5,
"base_value" : 50.0,
"vendor_category" : "alchemy",
"magic" : { "class" : "common", "naming" : "potion" }
},
{
"name" : "Slow Potion",
"renderable": {
"glyph" : "!",
"fg" : "#FF00FF",
"bg" : "#000000",
"order" : 2
},
"consumable" : {
"effects" : { "slow" : "2.0" }
},
"weight_lbs" : 0.5,
"base_value" : 50.0,
"vendor_category" : "alchemy",
"magic" : { "class" : "common", "naming" : "potion" }
},
{
"name" : "Haste Potion",
"renderable": {
"glyph" : "!",
"fg" : "#FF00FF",
"bg" : "#000000",
"order" : 2
},
"consumable" : {
"effects" : { "slow" : "-2.0" }
},
"weight_lbs" : 0.5,
"base_value" : 100.0,
"vendor_category" : "alchemy",
"magic" : { "class" : "common", "naming" : "potion" }
},
Notice that we've given them really high spawn chances - we'll correct that once we know they work! If you cargo run now, you'll find the potions in the woods - and they will damage/haste/slow you as you'd expect. This demonstrates:
- Our generic potion naming is correctly obfuscating new potions.
- Our slow/damage-over-time effects are applying to self-used items.
- We can make these effects function for potions just by adding them to the
spawns.jsonfile now. You could even use negative damage for a heal-over-time effect.
Now to show off the system, let's also make a Scroll of Web and a Rod of Venom:
{
"name" : "Web Scroll",
"renderable": {
"glyph" : ")",
"fg" : "#FFAAAA",
"bg" : "#000000",
"order" : 2
},
"consumable" : {
"effects" : {
"ranged" : "6",
"slow" : "10.0",
"area_of_effect" : "3",
"particle_line" : "☼;#FFFFFF;200.0"
}
},
"weight_lbs" : 0.5,
"base_value" : 500.0,
"vendor_category" : "alchemy",
"magic" : { "class" : "common", "naming" : "scroll" }
},
{
"name" : "Rod of Venom",
"renderable": {
"glyph" : "/",
"fg" : "#FFAAAA",
"bg" : "#000000",
"order" : 2
},
"consumable" : {
"effects" : {
"ranged" : "6",
"damage_over_time" : "1",
"particle_line" : "▓;#00FF00;200.0"
},
"charges" : 5
},
"weight_lbs" : 0.5,
"base_value" : 500.0,
"vendor_category" : "alchemy",
"magic" : { "class" : "common", "naming" : "Unidentified Rod" }
}
We'll make these common spawns and bring the potions down to reasonable values:
{ "name" : "Poison Potion", "weight" : 3, "min_depth" : 0, "max_depth" : 100 },
{ "name" : "Slow Potion", "weight" : 3, "min_depth" : 0, "max_depth" : 100 },
{ "name" : "Haste Potion", "weight" : 3, "min_depth" : 0, "max_depth" : 100 },
{ "name" : "Web Scroll", "weight" : 100, "min_depth" : 0, "max_depth" : 100 },
{ "name" : "Rod of Venom", "weight" : 100, "min_depth" : 0, "max_depth" : 100 },
If we cargo run now and find the new scroll and rod, we can inflict poison and area-of-effect slowness (which is basically a web!) on our unsuspecting victims! Once again, we've proven the system to be pretty flexible:
- You can also apply the new effects to scrolls and rods, and the naming system continues to work.
- The effects apply to both area-of-effect and single target victims.
To continue demonstrating out flexible effects system, we'll add two spells - Venom and Web, and a couple of books from which to learn them - Arachnophilia 101 and Venom 101. In the Spells section of spawns.json, we can add:
{
"name" : "Web",
"mana_cost" : 2,
"effects" : {
"ranged" : "6",
"slow" : "10",
"area_of_effect" : "3",
"particle_line" : "☼;#FFFFFF;400.0"
}
},
{
"name" : "Venom",
"mana_cost" : 2,
"effects" : {
"ranged" : "6",
"damage_over_time" : "4",
"particle_line" : "▓;#00FF00;400.0"
}
}
We'll add the book just like the beginner's magic book:
{
"name" : "Arachnophilia 101",
"renderable": {
"glyph" : "¶",
"fg" : "#FF00FF",
"bg" : "#000000",
"order" : 2
},
"consumable" : {
"effects" : { "teach_spell" : "Web" }
},
"weight_lbs" : 0.5,
"base_value" : 50.0,
"vendor_category" : "alchemy"
},
{
"name" : "Venom 101",
"renderable": {
"glyph" : "¶",
"fg" : "#FF00FF",
"bg" : "#000000",
"order" : 2
},
"consumable" : {
"effects" : { "teach_spell" : "Venom" }
},
"weight_lbs" : 0.5,
"base_value" : 50.0,
"vendor_category" : "alchemy"
},
And we'll fix the spawn probabilities:
{ "name" : "Web Scroll", "weight" : 2, "min_depth" : 0, "max_depth" : 100 },
{ "name" : "Rod of Venom", "weight" : 2, "min_depth" : 0, "max_depth" : 100 },
{ "name" : "Arachnophilia 101", "weight" : 100, "min_depth" : 0, "max_depth" : 100 },
{ "name" : "Venom 101", "weight" : 100, "min_depth" : 0, "max_depth" : 100 },
Once again, if you cargo run the project - you can run around learning these spells - and inflict them upon your foes! We've validated:
- Our spell learning system is flexible.
- The effects system continues to apply these effects appropriately, this time via spellcasting.
More effect triggers
The testing we've done in this chapter section has shown us the power of what we've built: a single system can provide effects for items and spells, supporting multiple target types and additional effects on top of them. That's really great, and shows off what you can do with an ECS (and a messaging system on top). It seems like to really put the cherry on top of the system there are two more circumstances in which effects should fire:
- As "proc" effects after a weapon hits (so a "dagger of venom" might poison the target).
- As special abilities for enemies (I promised you we were getting there! Not quite yet, though...)
Damage Procs
Let's start with "proc" effects on weapons. Thinking about it, weapon procs can either affect the target or the caster (you might have a sword that heals you when you hit something, for example - or you might want to apply a damage-over-time to the target with your extra-sharp sword). They shouldn't always proc - so there needs to be a chance (which could be 100%) for it to happen. And they need to have an effect, which can conveniently use the effect system we've painstakingly defined. Let's put this together in spawns.json into a Dagger of Venom:
{
"name" : "Dagger of Venom",
"renderable": {
"glyph" : "/",
"fg" : "#FFAAAA",
"bg" : "#000000",
"order" : 2
},
"weapon" : {
"range" : "melee",
"attribute" : "Quickness",
"base_damage" : "1d4+1",
"hit_bonus" : 1,
"proc_chance" : 0.5,
"proc_target" : "Target",
"proc_effects" : { "damage_over_time" : "2" }
},
"weight_lbs" : 1.0,
"base_value" : 2.0,
"initiative_penalty" : -1,
"vendor_category" : "weapon",
"magic" : { "class" : "common", "naming" : "Unidentified Dagger" }
},
To make this, I copy/pasted a basic Dagger and gave it a hit/damage/initiative bonus. I then added in some new fields: proc_chance, proc_target and proc_effects. The effects system can take care of the effects with a little bit of help. First, we need to extend the "weapon" structure in raws/item_structs.rs to handle the extra fields:
#![allow(unused)] fn main() { #[derive(Deserialize, Debug)] pub struct Weapon { pub range: String, pub attribute: String, pub base_damage: String, pub hit_bonus: i32, pub proc_chance : Option<f32>, pub proc_target : Option<String>, pub proc_effects : Option<HashMap<String, String>> } }
Now, we'll add these fields into the MeleeWeapon component type (in components.rs):
#![allow(unused)] fn main() { #[derive(Component, Serialize, Deserialize, Clone)] pub struct MeleeWeapon { pub attribute : WeaponAttribute, pub damage_n_dice : i32, pub damage_die_type : i32, pub damage_bonus : i32, pub hit_bonus : i32, pub proc_chance : Option<f32>, pub proc_target : Option<String>, } }
We also need to instantiate that data when we are reading about the weapon. We can extend the weapon section of spawn_named_item in raws/rawmaster.rs quite easily:
#![allow(unused)] fn main() { if let Some(weapon) = &item_template.weapon { eb = eb.with(Equippable{ slot: EquipmentSlot::Melee }); let (n_dice, die_type, bonus) = parse_dice_string(&weapon.base_damage); let mut wpn = MeleeWeapon{ attribute : WeaponAttribute::Might, damage_n_dice : n_dice, damage_die_type : die_type, damage_bonus : bonus, hit_bonus : weapon.hit_bonus, proc_chance : weapon.proc_chance, proc_target : weapon.proc_target.clone() }; match weapon.attribute.as_str() { "Quickness" => wpn.attribute = WeaponAttribute::Quickness, _ => wpn.attribute = WeaponAttribute::Might } eb = eb.with(wpn); if let Some(proc_effects) =& weapon.proc_effects { apply_effects!(proc_effects, eb); } } }
Now we need to make the proc effect happen (or not, it's random!). We have a bit of work to do in melee_combat_system.rs. First, when we spawn the default weapon (unarmed), we need the new fields:
#![allow(unused)] fn main() { // Define the basic unarmed attack - overridden by wielding check below if a weapon is equipped let mut weapon_info = MeleeWeapon{ attribute : WeaponAttribute::Might, hit_bonus : 0, damage_n_dice : 1, damage_die_type : 4, damage_bonus : 0, proc_chance : None, proc_target : None }; }
Where we find the wielded weapon, we also need to store the entity (so we have access to the effects components):
#![allow(unused)] fn main() { let mut weapon_entity : Option<Entity> = None; for (weaponentity,wielded,melee) in (&entities, &equipped_items, &meleeweapons).join() { if wielded.owner == entity && wielded.slot == EquipmentSlot::Melee { weapon_info = melee.clone(); weapon_entity = Some(weaponentity); } } }
Then, after add_effect for a successful hit we add in the weapon "proccing":
#![allow(unused)] fn main() { log.entries.push(format!("{} hits {}, for {} hp.", &name.name, &target_name.name, damage)); // Proc effects if let Some(chance) = &weapon_info.proc_chance { if rng.roll_dice(1, 100) <= (chance * 100.0) as i32 { let effect_target = if weapon_info.proc_target.unwrap() == "Self" { Targets::Single{ target: entity } } else { Targets::Single { target : wants_melee.target } }; add_effect( Some(entity), EffectType::ItemUse{ item: weapon_entity.unwrap() }, effect_target ) } } }
This is pretty simple: it rolls a 100 sided dice, and uses the fractional "proc chance" as a percentage chance of it taking place. If it does take place, it sets the effect target to the wielder or target depending upon the proc effect, and calls the add_effect system to launch it.
Remember to put Dagger of Venom into your spawn table:
{ "name" : "Dagger of Venom", "weight" : 100, "min_depth" : 0, "max_depth" : 100 },
If you cargo run now, you can find a dagger - and sometimes you can poison your victim. Again, we've really shown off the power of the ECS/messaging system here: with a little extension, our entire effects system also works for weapon procs!
Enemy Spellcasting/Ability Use
With the exception of magical weapons (which will benefit whomever swings them), the effects system is pretty asymmetrical right now. Mobs can't send most of these effects back at you. It's pretty common in roguelikes for monsters to use the same rules as the player (this is actually a low-value objective in the Berlin Interpretation we are attempting to implement). We won't attempt to make monsters use whatever items they may spawn with (yet!), but we will give them the ability to cast spells - as special attacks. Lets give Large Spiders the ability to slow you in a web, with the Web spell we defined above. As usual, we'll start in the JSON file deciding what this should look like:
{
"name" : "Large Spider",
"level" : 2,
"attributes" : {},
"renderable": {
"glyph" : "s",
"fg" : "#FF0000",
"bg" : "#000000",
"order" : 1
},
"blocks_tile" : true,
"vision_range" : 6,
"movement" : "static",
"natural" : {
"armor_class" : 12,
"attacks" : [
{ "name" : "bite", "hit_bonus" : 1, "damage" : "1d12" }
]
},
"abilities" : [
{ "spell" : "Web", "chance" : 0.2, "range" : 6.0, "min_range" : 3.0 }
],
"faction" : "Carnivores"
},
This is the same Large Spider as before, but we've added an abilities section listing that it has a 20% chance of deciding to make a web. We'll need to extend raws/mob_structs.rs to support this:
#![allow(unused)] fn main() { #[derive(Deserialize, Debug)] pub struct Mob { pub name : String, pub renderable : Option<Renderable>, pub blocks_tile : bool, pub vision_range : i32, pub movement : String, pub quips : Option<Vec<String>>, pub attributes : MobAttributes, pub skills : Option<HashMap<String, i32>>, pub level : Option<i32>, pub hp : Option<i32>, pub mana : Option<i32>, pub equipped : Option<Vec<String>>, pub natural : Option<MobNatural>, pub loot_table : Option<String>, pub light : Option<MobLight>, pub faction : Option<String>, pub gold : Option<String>, pub vendor : Option<Vec<String>>, pub abilities : Option<Vec<MobAbility>> } #[derive(Deserialize, Debug)] pub struct MobAbility { pub spell : String, pub chance : f32, pub range : f32, pub min_range : f32 } }
Let's make a new component to hold this data for monsters (and anything else with special abilities). In components.rs (and the usual registration in main.rs and saveload_system.rs; you only need to register the component SpecialAbilities):
#![allow(unused)] fn main() { #[derive(Debug, Serialize, Deserialize, Clone)] pub struct SpecialAbility { pub spell : String, pub chance : f32, pub range : f32, pub min_range : f32 } #[derive(Component, Debug, Serialize, Deserialize, Clone)] pub struct SpecialAbilities { pub abilities : Vec<SpecialAbility> } }
Now we go to raws/rawmaster.rs to attach the component in the spawn_named_mob function. Right before the build() call, we can add-in special abilities:
#![allow(unused)] fn main() { if let Some(ability_list) = &mob_template.abilities { let mut a = SpecialAbilities { abilities : Vec::new() }; for ability in ability_list.iter() { a.abilities.push( SpecialAbility{ chance : ability.chance, spell : ability.spell.clone(), range : ability.range, min_range : ability.min_range } ); } eb = eb.with(a); } }
Now that we've created the component, we should give monsters a chance to use their new-found abilities. The visible_ai_system can easily be modified for this:
#![allow(unused)] fn main() { use specs::prelude::*; use crate::{MyTurn, Faction, Position, Map, raws::Reaction, Viewshed, WantsToFlee, WantsToApproach, Chasing, SpecialAbilities, WantsToCastSpell, Name, SpellTemplate}; pub struct VisibleAI {} impl<'a> System<'a> for VisibleAI { #[allow(clippy::type_complexity)] type SystemData = ( ReadStorage<'a, MyTurn>, ReadStorage<'a, Faction>, ReadStorage<'a, Position>, ReadExpect<'a, Map>, WriteStorage<'a, WantsToApproach>, WriteStorage<'a, WantsToFlee>, Entities<'a>, ReadExpect<'a, Entity>, ReadStorage<'a, Viewshed>, WriteStorage<'a, Chasing>, ReadStorage<'a, SpecialAbilities>, WriteExpect<'a, rltk::RandomNumberGenerator>, WriteStorage<'a, WantsToCastSpell>, ReadStorage<'a, Name>, ReadStorage<'a, SpellTemplate> ); fn run(&mut self, data : Self::SystemData) { let (turns, factions, positions, map, mut want_approach, mut want_flee, entities, player, viewsheds, mut chasing, abilities, mut rng, mut casting, names, spells) = data; for (entity, _turn, my_faction, pos, viewshed) in (&entities, &turns, &factions, &positions, &viewsheds).join() { if entity != *player { let my_idx = map.xy_idx(pos.x, pos.y); let mut reactions : Vec<(usize, Reaction, Entity)> = Vec::new(); let mut flee : Vec<usize> = Vec::new(); for visible_tile in viewshed.visible_tiles.iter() { let idx = map.xy_idx(visible_tile.x, visible_tile.y); if my_idx != idx { evaluate(idx, &map, &factions, &my_faction.name, &mut reactions); } } let mut done = false; for reaction in reactions.iter() { match reaction.1 { Reaction::Attack => { if let Some(abilities) = abilities.get(entity) { let range = rltk::DistanceAlg::Pythagoras.distance2d( rltk::Point::new(pos.x, pos.y), rltk::Point::new(reaction.0 as i32 % map.width, reaction.0 as i32 / map.width) ); for ability in abilities.abilities.iter() { if range >= ability.min_range && range <= ability.range && rng.roll_dice(1,100) >= (ability.chance * 100.0) as i32 { use crate::raws::find_spell_entity_by_name; casting.insert( entity, WantsToCastSpell{ spell : find_spell_entity_by_name(&ability.spell, &names, &spells, &entities).unwrap(), target : Some(rltk::Point::new(reaction.0 as i32 % map.width, reaction.0 as i32 / map.width))} ).expect("Unable to insert"); done = true; } } } if !done { want_approach.insert(entity, WantsToApproach{ idx: reaction.0 as i32 }).expect("Unable to insert"); chasing.insert(entity, Chasing{ target: reaction.2}).expect("Unable to insert"); done = true; } } Reaction::Flee => { flee.push(reaction.0); } _ => {} } } if !done && !flee.is_empty() { want_flee.insert(entity, WantsToFlee{ indices : flee }).expect("Unable to insert"); } } } } } }
There's one trick here: find_spell_entity_by_name; because we are inside a system, we can't just pass a World parameter. So I added an in-system version to raws/rawmaster.rs:
#![allow(unused)] fn main() { pub fn find_spell_entity_by_name( name : &str, names : &ReadStorage::<Name>, spell_templates : &ReadStorage::<SpellTemplate>, entities : &Entities) -> Option<Entity> { for (entity, sname, _template) in (entities, names, spell_templates).join() { if name == sname.name { return Some(entity); } } None } }
Once that's in place, you can cargo run - and Spiders can hit you with webs!
Wrap Up
This is the last of the item effects mini-series: we've accomplished our objectives! There is now a single pipeline for defining effects, and they can be applied by:
- Casting a spell (which you can learn from books)
- Using a scroll
- Drinking a potion
- A weapon "proc" effect on hit
- Monster special abilities
These effects can:
- Target a single tile,
- Target a single entity,
- Target an area of effect,
- Target multiple entities
The effects can also be chained, allowing you to specify visual effects and other things to go off when the effect is triggered. We're down to relatively minimal effort to add new effects to creatures, and only a bit of work to add new effects as they are needed. This will help with the upcoming chapter, which will feature an acid breath-weapon wielding Dragon in his lair.
...
The source code for this chapter may be found here
Run this chapter's example with web assembly, in your browser (WebGL2 required)
Copyright (C) 2019, Herbert Wolverson.
Enter The Dragon
About this tutorial
This tutorial is free and open source, and all code uses the MIT license - so you are free to do with it as you like. My hope is that you will enjoy the tutorial, and make great games!
If you enjoy this and would like me to keep writing, please consider supporting my Patreon.
Now that we have spells and more advanced item abilities, the player might just be able to survive the first layer of the dwarven fortress we build back in section 4.17! Also, now that NPCs can use special abilities - we should be able to model the evil dragon who (according our design document) occupies the dwarven fortress! This chapter will be all about building the dragon's lair, populating it, and making the dragon a scary - but beatable - foe.
Building the Lair
According to the design document, level six used to be a mighty Dwarven Fortress - but has been occupied by a nasty black dragon who just loves eating adventurers (and presumably dealt with the dwarves of yore). That implies that what we want is a corridor-based dungeon - Dwarves tend to love that, but eroded and blasted into a dragon's lair.
To assist with this, we'll re-enable watching map generation. In main.rs, change the toggle to true:
#![allow(unused)] fn main() { const SHOW_MAPGEN_VISUALIZER : bool = true; }
Next, we'll put together a skeleton to build the level. In map_builders/mod.rs, add the following:
#![allow(unused)] fn main() { mod dwarf_fort_builder; use dwarf_fort_builder::*; }
And update the function at the end:
#![allow(unused)] fn main() { pub fn level_builder(new_depth: i32, rng: &mut rltk::RandomNumberGenerator, width: i32, height: i32) -> BuilderChain { rltk::console::log(format!("Depth: {}", new_depth)); match new_depth { 1 => town_builder(new_depth, rng, width, height), 2 => forest_builder(new_depth, rng, width, height), 3 => limestone_cavern_builder(new_depth, rng, width, height), 4 => limestone_deep_cavern_builder(new_depth, rng, width, height), 5 => limestone_transition_builder(new_depth, rng, width, height), 6 => dwarf_fort_builder(new_depth, rng, width, height), _ => random_builder(new_depth, rng, width, height) } } }
Now, we'll make a new file - map_builders/dwarf_fort.rs and put a minimal BSP-based room dungeon in it:
#![allow(unused)] fn main() { use super::{BuilderChain, XStart, YStart, AreaStartingPosition, RoomSorter, RoomSort, CullUnreachable, VoronoiSpawning, BspDungeonBuilder, DistantExit, BspCorridors, CorridorSpawner, RoomDrawer}; pub fn dwarf_fort_builder(new_depth: i32, _rng: &mut rltk::RandomNumberGenerator, width: i32, height: i32) -> BuilderChain { let mut chain = BuilderChain::new(new_depth, width, height, "Dwarven Fortress"); chain.start_with(BspDungeonBuilder::new()); chain.with(RoomSorter::new(RoomSort::CENTRAL)); chain.with(RoomDrawer::new()); chain.with(BspCorridors::new()); chain.with(CorridorSpawner::new()); chain.with(AreaStartingPosition::new(XStart::LEFT, YStart::TOP)); chain.with(CullUnreachable::new()); chain.with(AreaEndingPosition::new(XEnd::RIGHT, YEnd::BOTTOM)); chain.with(VoronoiSpawning::new()); chain.with(DistantExit::new()); chain } }
This gets you a very basic room-based dungeon:
That's a good start, but not really what we're looking for. It's obviously man (dwarf!) made, but it doesn't have the "scary dragon lives here" vibe going on. So we'll also make a scary looking map with a larger central area, and merge the two together. We want a somewhat sinister feel, so we'll make a custom builder layer to generate a DLA Insectoid map and marge it in:
#![allow(unused)] fn main() { pub struct DragonsLair {} impl MetaMapBuilder for DragonsLair { fn build_map(&mut self, rng: &mut rltk::RandomNumberGenerator, build_data : &mut BuilderMap) { self.build(rng, build_data); } } impl DragonsLair { #[allow(dead_code)] pub fn new() -> Box<DragonsLair> { Box::new(DragonsLair{}) } fn build(&mut self, rng : &mut RandomNumberGenerator, build_data : &mut BuilderMap) { build_data.map.depth = 7; build_data.take_snapshot(); let mut builder = BuilderChain::new(6, build_data.width, build_data.height, "New Map"); builder.start_with(DLABuilder::insectoid()); builder.build_map(rng); // Add the history to our history for h in builder.build_data.history.iter() { build_data.history.push(h.clone()); } build_data.take_snapshot(); // Merge the maps for (idx, tt) in build_data.map.tiles.iter_mut().enumerate() { if *tt == TileType::Wall && builder.build_data.map.tiles[idx] == TileType::Floor { *tt = TileType::Floor; } } build_data.take_snapshot(); } } }
And we'll add it into our builder function:
#![allow(unused)] fn main() { pub fn dwarf_fort_builder(new_depth: i32, _rng: &mut rltk::RandomNumberGenerator, width: i32, height: i32) -> BuilderChain { let mut chain = BuilderChain::new(new_depth, width, height, "Dwarven Fortress"); chain.start_with(BspDungeonBuilder::new()); chain.with(RoomSorter::new(RoomSort::CENTRAL)); chain.with(RoomDrawer::new()); chain.with(BspCorridors::new()); chain.with(CorridorSpawner::new()); chain.with(DragonsLair::new()); chain.with(AreaStartingPosition::new(XStart::LEFT, YStart::TOP)); chain.with(CullUnreachable::new()); chain.with(AreaEndingPosition::new(XEnd::RIGHT, YEnd::BOTTOM)); chain.with(VoronoiSpawning::new()); chain.with(DistantExit::new()); chain } }
This gives a much more appropriate map:
You'll notice that we're starting at one diagonal corner, and ending at the other - to make it hard for the player to completely avoid the middle!
General Spawns
If you cargo run right now, you'll notice that the level is mostly full of items - free loot! - and not so many monsters. There's actually two things going on here: we're weighting items and mobs in the same table, and we've added a lot of items recently (relative to mobs and props) - and there aren't that many mobs permitted on this level to begin with. As we add more and more items, the issue is only going to get worse! So let's fix it.
Let's start by opening up raws/rawmaster.rs and add a new function to determine what type of spawn an entry is:
#![allow(unused)] fn main() { pub enum SpawnTableType { Item, Mob, Prop } pub fn spawn_type_by_name(raws: &RawMaster, key : &str) -> SpawnTableType { if raws.item_index.contains_key(key) { SpawnTableType::Item } else if raws.mob_index.contains_key(key) { SpawnTableType::Mob } else { SpawnTableType::Prop } } }
We'll add a new MasterTable structure to the random_table.rs file. This acts as a holder for tables, sorted by item type. We're also going to fix some of the odd layout of the previous version:
#![allow(unused)] fn main() { use rltk::RandomNumberGenerator; use crate::raws::{SpawnTableType, spawn_type_by_name, RawMaster}; pub struct RandomEntry { name : String, weight : i32 } impl RandomEntry { pub fn new<S:ToString>(name: S, weight: i32) -> RandomEntry { RandomEntry{ name: name.to_string(), weight } } } #[derive(Default)] pub struct MasterTable { items : RandomTable, mobs : RandomTable, props : RandomTable } impl MasterTable { pub fn new() -> MasterTable { MasterTable{ items : RandomTable::new(), mobs : RandomTable::new(), props : RandomTable::new() } } pub fn add<S:ToString>(&mut self, name : S, weight: i32, raws: &RawMaster) { match spawn_type_by_name(raws, &name.to_string()) { SpawnTableType::Item => self.items.add(name, weight), SpawnTableType::Mob => self.mobs.add(name, weight), SpawnTableType::Prop => self.props.add(name, weight), } } pub fn roll(&self, rng : &mut RandomNumberGenerator) -> String { let roll = rng.roll_dice(1, 4); match roll { 1 => self.items.roll(rng), 2 => self.props.roll(rng), 3 => self.mobs.roll(rng), _ => "None".to_string() } } } #[derive(Default)] pub struct RandomTable { entries : Vec<RandomEntry>, total_weight : i32 } impl RandomTable { pub fn new() -> RandomTable { RandomTable{ entries: Vec::new(), total_weight: 0 } } pub fn add<S:ToString>(&mut self, name : S, weight: i32) { if weight > 0 { self.total_weight += weight; self.entries.push(RandomEntry::new(name.to_string(), weight)); } } pub fn roll(&self, rng : &mut RandomNumberGenerator) -> String { if self.total_weight == 0 { return "None".to_string(); } let mut roll = rng.roll_dice(1, self.total_weight)-1; let mut index : usize = 0; while roll > 0 { if roll < self.entries[index].weight { return self.entries[index].name.clone(); } roll -= self.entries[index].weight; index += 1; } "None".to_string() } } }
As you can see, this divides the available spawns by type - and then rolls for which table to use, before it rolls on the table itself. Now in rawmaster.rs, we'll modify the get_spawn_table_for_depth function to use the master table:
#![allow(unused)] fn main() { pub fn get_spawn_table_for_depth(raws: &RawMaster, depth: i32) -> MasterTable { use super::SpawnTableEntry; let available_options : Vec<&SpawnTableEntry> = raws.raws.spawn_table .iter() .filter(|a| depth >= a.min_depth && depth <= a.max_depth) .collect(); let mut rt = MasterTable::new(); for e in available_options.iter() { let mut weight = e.weight; if e.add_map_depth_to_weight.is_some() { weight += depth; } rt.add(e.name.clone(), weight, raws); } rt } }
Since we've implemented basically the same interface for the MasterTable, we can mostly keep the existing code - and just use the new type instead. In spawner.rs, we also need to change one function signature:
#![allow(unused)] fn main() { fn room_table(map_depth: i32) -> MasterTable { get_spawn_table_for_depth(&RAWS.lock().unwrap(), map_depth) } }
If you cargo run now, there's a much better balance of monsters and items (on ALL levels!).
Enter The Dragon
This level is dominated by a black dragon. Checking our D&D rules, these are fearsome enormous lizards of incredible physical might, razor-sharp teeth and claws, and a horrible acid breath that burns the flesh from your bones. With an introduction like that, the dragon had better be pretty fearsome! He also needs to be possible to beat, by a player with 5 levels under their belt. Slaying the dragon really should give some pretty amazing rewards, too. It should also be possible to sneak around the dragon if you are careful!
In spawns.json, we'll make a start at sketching out what the dragon looks like:
{
"name" : "Black Dragon",
"renderable": {
"glyph" : "D",
"fg" : "#FF0000",
"bg" : "#000000",
"order" : 1
},
"blocks_tile" : true,
"vision_range" : 12,
"movement" : "static",
"attributes" : {
"might" : 13,
"fitness" : 13
},
"skills" : {
"Melee" : 18,
"Defense" : 16
},
"natural" : {
"armor_class" : 17,
"attacks" : [
{ "name" : "bite", "hit_bonus" : 4, "damage" : "1d10+2" },
{ "name" : "left_claw", "hit_bonus" : 2, "damage" : "1d10" },
{ "name" : "right_claw", "hit_bonus" : 2, "damage" : "1d10" }
]
},
"loot_table" : "Wyrms",
"faction" : "Wyrm",
"level" : 6,
"gold" : "10d6",
"abilities" : [
{ "spell" : "Acid Breath", "chance" : 0.2, "range" : 8.0, "min_range" : 2.0 }
]
},
We'll also need to define an Acid Breath effect:
{
"name" : "Acid Breath",
"mana_cost" : 2,
"effects" : {
"ranged" : "6",
"damage" : "10",
"area_of_effect" : "3",
"particle" : "☼;#00FF00;400.0"
}
}
Now we need to actually spawn the dragon. We don't want to put the dragon into our spawn table - that would make him appear randomly, and potentially in the wrong level. That ruins his reputation as a boss! We also don't want him to be surrounded by friends - that would be too difficult for the player (and draw focus away from the boss fight).
In dwarf_fort_builder.rs, we'll add another layer to the spawn generation:
#![allow(unused)] fn main() { pub struct DragonSpawner {} impl MetaMapBuilder for DragonSpawner { fn build_map(&mut self, rng: &mut rltk::RandomNumberGenerator, build_data : &mut BuilderMap) { self.build(rng, build_data); } } impl DragonSpawner { #[allow(dead_code)] pub fn new() -> Box<DragonSpawner> { Box::new(DragonSpawner{}) } fn build(&mut self, _rng : &mut RandomNumberGenerator, build_data : &mut BuilderMap) { // Find a central location that isn't occupied let seed_x = build_data.map.width / 2; let seed_y = build_data.map.height / 2; let mut available_floors : Vec<(usize, f32)> = Vec::new(); for (idx, tiletype) in build_data.map.tiles.iter().enumerate() { if crate::map::tile_walkable(*tiletype) { available_floors.push( ( idx, rltk::DistanceAlg::PythagorasSquared.distance2d( rltk::Point::new(idx as i32 % build_data.map.width, idx as i32 / build_data.map.width), rltk::Point::new(seed_x, seed_y) ) ) ); } } if available_floors.is_empty() { panic!("No valid floors to start on"); } available_floors.sort_by(|a,b| a.1.partial_cmp(&b.1).unwrap()); let start_x = available_floors[0].0 as i32 % build_data.map.width; let start_y = available_floors[0].0 as i32 / build_data.map.width; let dragon_pt = rltk::Point::new(start_x, start_y); // Remove all spawns within 25 tiles of the drake let w = build_data.map.width as i32; build_data.spawn_list.retain(|spawn| { let spawn_pt = rltk::Point::new( spawn.0 as i32 % w, spawn.0 as i32 / w ); let distance = rltk::DistanceAlg::Pythagoras.distance2d(dragon_pt, spawn_pt); distance > 25.0 }); // Add the dragon let dragon_idx = build_data.map.xy_idx(start_x, start_y); build_data.spawn_list.push((dragon_idx, "Black Dragon".to_string())); } } }
This function is quite straight-forward, and very similar to ones we've written before. We find an open space close to the map's center, and then remove all mob spawns that are less than 25 tiles from the center point (keeping mobs away from the middle). We then spawn the black dragon in the middle.
Let's pop over to main.rs and temporarily change one line in the main function:
#![allow(unused)] fn main() { gs.generate_world_map(6, 0); }
That starts you on the dragon lair level (remember to change this back when we're done!), so you don't have to navigate the other levels to complete it. Now cargo run the project, use the cheat (backslash followed by g) to enable God Mode - and explore the level. It looks pretty good, but the dragon is so powerful that it takes ages to slay them - and if you watch the damage log, the player is pretty certain to die! With a bit of practice, though - you can take down the dragon with a combination of spells and item use. So we'll let it stand for now.
Go ahead and change the main function back:
#![allow(unused)] fn main() { gs.generate_world_map(1, 0); }
The Dragon isn't very scary
If you play the game, the dragon is quite lethal. He doesn't, however, have much of a visceral impact - he's just a red D symbol that sometimes fires a green cloud at you. That's a decent imagination trigger, and you can even look at his tooltip to know that D is for Dragon - but it seems like we can do better than that. Also, Dragons are really rather large - and it's a bit odd that a Dragon takes up the same amount of map space as a sheep.
We'll start by adding a new component to represent larger entities:
#![allow(unused)] fn main() { #[derive(Component, ConvertSaveload, Clone)] pub struct TileSize { pub x: i32, pub y: i32, } }
As usual, we won't forget to register it in main.rs and saveload_system.rs! We'll also allow you to specify a size for entities in the JSON file. In raws/item_structs.rs, we'll extend Renderable (remember, we re-use it for other types):
#![allow(unused)] fn main() { #[derive(Deserialize, Debug)] pub struct Renderable { pub glyph: String, pub fg : String, pub bg : String, pub order: i32, pub x_size : Option<i32>, pub y_size : Option<i32> } }
We've made the new fields optional - so our existing code will work. Now in raws/rawmaster.rs, find the spawn_named_mob function section that adds a Renderable component to the entity (it's around line 418 in my source code). If a size was specified, we need to add a TileSize component:
#![allow(unused)] fn main() { // Renderable if let Some(renderable) = &mob_template.renderable { eb = eb.with(get_renderable_component(renderable)); if renderable.x_size.is_some() || renderable.y_size.is_some() { eb = eb.with(TileSize{ x : renderable.x_size.unwrap_or(1), y : renderable.y_size.unwrap_or(1) }); } } }
Now, we'll go into spawns.json and add the extra size to the dragon:
{
"name" : "Black Dragon",
"renderable": {
"glyph" : "D",
"fg" : "#FF0000",
"bg" : "#000000",
"order" : 1,
"x_size" : 2,
"y_size" : 2
},
...
With the housekeeping taken care of, we need to be able to render larger entities to the map. Open up camera.rs and we'll amend the rendering like this:
#![allow(unused)] fn main() { // Render entities let positions = ecs.read_storage::<Position>(); let renderables = ecs.read_storage::<Renderable>(); let hidden = ecs.read_storage::<Hidden>(); let map = ecs.fetch::<Map>(); let sizes = ecs.read_storage::<TileSize>(); let entities = ecs.entities(); let mut data = (&positions, &renderables, &entities, !&hidden).join().collect::<Vec<_>>(); data.sort_by(|&a, &b| b.1.render_order.cmp(&a.1.render_order) ); for (pos, render, entity, _hidden) in data.iter() { if let Some(size) = sizes.get(*entity) { for cy in 0 .. size.y { for cx in 0 .. size.x { let tile_x = cx + pos.x; let tile_y = cy + pos.y; let idx = map.xy_idx(tile_x, tile_y); if map.visible_tiles[idx] { let entity_screen_x = (cx + pos.x) - min_x; let entity_screen_y = (cy + pos.y) - min_y; if entity_screen_x > 0 && entity_screen_x < map_width && entity_screen_y > 0 && entity_screen_y < map_height { ctx.set(entity_screen_x + 1, entity_screen_y + 1, render.fg, render.bg, render.glyph); } } } } } else { let idx = map.xy_idx(pos.x, pos.y); if map.visible_tiles[idx] { let entity_screen_x = pos.x - min_x; let entity_screen_y = pos.y - min_y; if entity_screen_x > 0 && entity_screen_x < map_width && entity_screen_y > 0 && entity_screen_y < map_height { ctx.set(entity_screen_x + 1, entity_screen_y + 1, render.fg, render.bg, render.glyph); } } } } }
So how does this work? We check to see if the entity we are rendering has a TileSize component, using the if let syntax for match assignment. If it does, we render each tile individually for their specified size. If it doesn't, we render exactly as before. Note that we're bounds and visibility checking each tile; that's not the fastest approach, but does guaranty that if you can see part of the Dragon, it will be rendered.
If you cargo run now, you'll find yourself facing off with a much bigger Dragon:
Selecting the Dragon
If you actually engage with the dragon in combat, a bunch of problems appear:
- For ranged attacks, you can only target the top-left tile of the dragon. That includes area-of-effect.
- Melee also only affects the Dragon's top-left tile.
- You can actually walk through the other dragon tiles.
- The Dragon can clip through terrain and still walk down narrow hallways. He might be good at folding up his wings!
Fortunately, we can solve a lot of this with the map_indexing_system. The system needs to be expanded to take into account multi-tile entities, and store an entry for each tile occupied by the entity:
#![allow(unused)] fn main() { use specs::prelude::*; use super::{Map, Position, BlocksTile, Pools, spatial, TileSize}; pub struct MapIndexingSystem {} impl<'a> System<'a> for MapIndexingSystem { #[allow(clippy::type_complexity)] type SystemData = ( ReadExpect<'a, Map>, ReadStorage<'a, Position>, ReadStorage<'a, BlocksTile>, ReadStorage<'a, Pools>, ReadStorage<'a, TileSize>, Entities<'a>,); fn run(&mut self, data : Self::SystemData) { let (map, position, blockers, pools, sizes, entities) = data; spatial::clear(); spatial::populate_blocked_from_map(&*map); for (entity, position) in (&entities, &position).join() { let mut alive = true; if let Some(pools) = pools.get(entity) { if pools.hit_points.current < 1 { alive = false; } } if alive { if let Some(size) = sizes.get(entity) { // Multi-tile for y in position.y .. position.y + size.y { for x in position.x .. position.x + size.x { if x > 0 && x < map.width-1 && y > 0 && y < map.height-1 { let idx = map.xy_idx(x, y); spatial::index_entity(entity, idx, blockers.get(entity).is_some()); } } } } else { // Single tile let idx = map.xy_idx(position.x, position.y); spatial::index_entity(entity, idx, blockers.get(entity).is_some()); } } } } } }
This solves several problems: you can now attack any part of the dragon, all of the dragon's body blocks others from moving through it, and ranged targeting works against any of its tiles. Tool-tips however, stubbornly still don't work - you can only get information from the Dragon's top left tile. Fortunately, it's easy to switch the tooltips system to use the map.tile_content structure rather than repeatedly iterating positions. It probably performs better, too. In gui.rs, replace the start of the function with:
#![allow(unused)] fn main() { fn draw_tooltips(ecs: &World, ctx : &mut Rltk) { use rltk::to_cp437; use rltk::Algorithm2D; let (min_x, _max_x, min_y, _max_y) = camera::get_screen_bounds(ecs, ctx); let map = ecs.fetch::<Map>(); let hidden = ecs.read_storage::<Hidden>(); let attributes = ecs.read_storage::<Attributes>(); let pools = ecs.read_storage::<Pools>(); let mouse_pos = ctx.mouse_pos(); let mut mouse_map_pos = mouse_pos; mouse_map_pos.0 += min_x - 1; mouse_map_pos.1 += min_y - 1; if mouse_pos.0 < 1 || mouse_pos.0 > 49 || mouse_pos.1 < 1 || mouse_pos.1 > 40 { return; } if mouse_map_pos.0 >= map.width-1 || mouse_map_pos.1 >= map.height-1 || mouse_map_pos.0 < 1 || mouse_map_pos.1 < 1 { return; } if !map.in_bounds(rltk::Point::new(mouse_map_pos.0, mouse_map_pos.1)) { return; } let mouse_idx = map.xy_idx(mouse_map_pos.0, mouse_map_pos.1); if !map.visible_tiles[mouse_idx] { return; } let mut tip_boxes : Vec<Tooltip> = Vec::new(); for entity in map.tile_content[mouse_idx].iter().filter(|e| hidden.get(**e).is_none()) { ... }
Now you can use tooltips to identify the Dragon, and target any part of it. Just to show how generic the code is, here's a screenshot with a truly enormous drake:
You probably noticed the dragon died really easily. What happened?
- The dragon isn't immune to his own breath weapon, so being in the breath radius inflicted damage upon the poor beast.
- The area-of-effect system meant that the Dragon was hit repeatedly - several tiles were within the radius, so for each tile - the Dragon took damage. That's not entirely unrealistic (you'd expect a fireball to hit more surface area on a large target), but is definitely an unexpected consequence! Area-of-effect poison or web would stack one status effect per tile on the poor victim, also.
It's an interesting question as to whether we want area-of-effect to hit the caster in general; it makes for a good balance on Fireball (and is an old D&D saw - careful not to hit yourself), but it can definitely lead to unexpected effects.
Fortunately, we can cure the first part - attacking yourself - with a simple change to effects/damage.rs:
#![allow(unused)] fn main() { pub fn inflict_damage(ecs: &mut World, damage: &EffectSpawner, target: Entity) { let mut pools = ecs.write_storage::<Pools>(); if let Some(pool) = pools.get_mut(target) { if !pool.god_mode { if let Some(creator) = damage.creator { if creator == target { return; } } ... }
Area-of-effect spells no longer obliterate the caster, but can still hit friendlies. That's a decent compromise! We'll also add de-duplication to our effects system. It's probably a good idea, anyway. Open up effects/mod.rs and we'll get started. First, we need to include HashSet as an imported type:
#![allow(unused)] fn main() { use std::collections::{HashSet, VecDeque}; }
Next, we'll add a dedupe field to the EffectSpawner type:
#![allow(unused)] fn main() { #[derive(Debug)] pub struct EffectSpawner { pub creator : Option<Entity>, pub effect_type : EffectType, pub targets : Targets, dedupe : HashSet<Entity> } }
And modify the add_effect function to include one:
#![allow(unused)] fn main() { pub fn add_effect(creator : Option<Entity>, effect_type: EffectType, targets : Targets) { EFFECT_QUEUE .lock() .unwrap() .push_back(EffectSpawner{ creator, effect_type, targets, dedupe : HashSet::new() }); } }
Next, we need to modify a bunch of locations to make the referenced effect mutable - as in, it can be changed:
#![allow(unused)] fn main() { pub fn run_effects_queue(ecs : &mut World) { loop { let effect : Option<EffectSpawner> = EFFECT_QUEUE.lock().unwrap().pop_front(); if let Some(mut effect) = effect { target_applicator(ecs, &mut effect); } else { break; } } } fn target_applicator(ecs : &mut World, effect : &mut EffectSpawner) { if let EffectType::ItemUse{item} = effect.effect_type { triggers::item_trigger(effect.creator, item, &effect.targets, ecs); } else if let EffectType::SpellUse{spell} = effect.effect_type { triggers::spell_trigger(effect.creator, spell, &effect.targets, ecs); } else if let EffectType::TriggerFire{trigger} = effect.effect_type { triggers::trigger(effect.creator, trigger, &effect.targets, ecs); } else { match &effect.targets.clone() { Targets::Tile{tile_idx} => affect_tile(ecs, effect, *tile_idx), Targets::Tiles{tiles} => tiles.iter().for_each(|tile_idx| affect_tile(ecs, effect, *tile_idx)), Targets::Single{target} => affect_entity(ecs, effect, *target), Targets::TargetList{targets} => targets.iter().for_each(|entity| affect_entity(ecs, effect, *entity)), } } } fn affect_tile(ecs: &mut World, effect: &mut EffectSpawner, tile_idx : i32) { ... } }
Finally, let's add duplicate prevention to affect_entity:
#![allow(unused)] fn main() { fn affect_entity(ecs: &mut World, effect: &mut EffectSpawner, target: Entity) { if effect.dedupe.contains(&target) { return; } effect.dedupe.insert(target); match &effect.effect_type { EffectType::Damage{..} => damage::inflict_damage(ecs, effect, target), EffectType::EntityDeath => damage::death(ecs, effect, target), EffectType::Bloodstain{..} => if let Some(pos) = entity_position(ecs, target) { damage::bloodstain(ecs, pos) }, EffectType::Particle{..} => if let Some(pos) = entity_position(ecs, target) { particles::particle_to_tile(ecs, pos, &effect) }, EffectType::WellFed => hunger::well_fed(ecs, effect, target), EffectType::Healing{..} => damage::heal_damage(ecs, effect, target), EffectType::Mana{..} => damage::restore_mana(ecs, effect, target), EffectType::Confusion{..} => damage::add_confusion(ecs, effect, target), EffectType::TeleportTo{..} => movement::apply_teleport(ecs, effect, target), EffectType::AttributeEffect{..} => damage::attribute_effect(ecs, effect, target), EffectType::Slow{..} => damage::slow(ecs, effect, target), EffectType::DamageOverTime{..} => damage::damage_over_time(ecs, effect, target), _ => {} } } }
If you cargo run now, the dragon won't affect themselves at all. If you launch fireballs at the dragon (I modified spawner.rs temporarily to start with a Rod of Fireballs to test it!), it affects the Dragon just the once. Excellent!
Letting the dragon attack from any tile
Another issue that you may have noticed is that the dragon can only attack you from its "head" (the top-left tile). I like to think of Dragons as having catlike agility (I tend to think of them being a lot like cats in general!), so that won't work! We'll start out with a helper function. Open up the venerable rect.rs (we haven't touched it since the beginning!), and we'll add a new function to it:
#![allow(unused)] fn main() { use std::collections::HashSet; ... pub fn get_all_tiles(&self) -> HashSet<(i32,i32)> { let mut result = HashSet::new(); for y in self.y1 .. self.y2 { for x in self.x1 .. self.x2 { result.insert((x,y)); } } result } }
This returns a HashSet of tiles that are within the rectangle. Very simple, and hopefully optimizes into quite a fast function! Now we go into ai/adjacent_ai_system.rs. We'll modify the system to also query TileSize:
#![allow(unused)] fn main() { impl<'a> System<'a> for AdjacentAI { #[allow(clippy::type_complexity)] type SystemData = ( WriteStorage<'a, MyTurn>, ReadStorage<'a, Faction>, ReadStorage<'a, Position>, ReadExpect<'a, Map>, WriteStorage<'a, WantsToMelee>, Entities<'a>, ReadExpect<'a, Entity>, ReadStorage<'a, TileSize> ); fn run(&mut self, data : Self::SystemData) { let (mut turns, factions, positions, map, mut want_melee, entities, player, sizes) = data; }
Then we'll check to see if there's an irregular size (and use the old code if there isn't) - and do some rectangle math to find the adjacent tiles otherwise:
#![allow(unused)] fn main() { fn run(&mut self, data : Self::SystemData) { let (mut turns, factions, positions, map, mut want_melee, entities, player, sizes) = data; let mut turn_done : Vec<Entity> = Vec::new(); for (entity, _turn, my_faction, pos) in (&entities, &turns, &factions, &positions).join() { if entity != *player { let mut reactions : Vec<(Entity, Reaction)> = Vec::new(); let idx = map.xy_idx(pos.x, pos.y); let w = map.width; let h = map.height; if let Some(size) = sizes.get(entity) { use crate::rect::Rect; let mob_rect = Rect::new(pos.x, pos.y, size.x, size.y).get_all_tiles(); let parent_rect = Rect::new(pos.x -1, pos.y -1, size.x+2, size.y + 2); parent_rect.get_all_tiles().iter().filter(|t| !mob_rect.contains(t)).for_each(|t| { if t.0 > 0 && t.0 < w-1 && t.1 > 0 && t.1 < h-1 { let target_idx = map.xy_idx(t.0, t.1); evaluate(target_idx, &map, &factions, &my_faction.name, &mut reactions); } }); } else { // Add possible reactions to adjacents for each direction if pos.x > 0 { evaluate(idx-1, &map, &factions, &my_faction.name, &mut reactions); } if pos.x < w-1 { evaluate(idx+1, &map, &factions, &my_faction.name, &mut reactions); } if pos.y > 0 { evaluate(idx-w as usize, &map, &factions, &my_faction.name, &mut reactions); } if pos.y < h-1 { evaluate(idx+w as usize, &map, &factions, &my_faction.name, &mut reactions); } if pos.y > 0 && pos.x > 0 { evaluate((idx-w as usize)-1, &map, &factions, &my_faction.name, &mut reactions); } if pos.y > 0 && pos.x < w-1 { evaluate((idx-w as usize)+1, &map, &factions, &my_faction.name, &mut reactions); } if pos.y < h-1 && pos.x > 0 { evaluate((idx+w as usize)-1, &map, &factions, &my_faction.name, &mut reactions); } if pos.y < h-1 && pos.x < w-1 { evaluate((idx+w as usize)+1, &map, &factions, &my_faction.name, &mut reactions); } } ... }
Walking through this:
- We start with the same setup as before.
- We use
if letto obtain a tile size if there is one. - We setup a
mob_rectthat is equal to the position and dimensions of the mob, and obtain the Set of tiles it covers. - We setup a
parent_rectthat is one tile larger in all directions. - We call
parent_rect.get_all_tiles()and transform it into an iterator. Then wefilterit to only include tiles that aren't inmob_rect- so we have all adjacent tiles. - Then we use
for_eachon the resultant set of tiles, make sure that the tiles are within the map, and add them to callevaluateon them.
If you cargo run now, the dragon can attack you as you walk around it.
Clipping The Dragon's Wings
Another issue is that Dragon can follow you down narrow corridors, even though it doesn't fit. Path-finding for large entities is often problematic in games; Dwarf Fortress ended up with a nasty completely separate system for wagons! Let's hope we can do better than that. Our movement system largely relies upon the blocked structure inside maps, so we need a way to add blockage information for entities larger than one tile. In map/mod.rs, we add the following:
#![allow(unused)] fn main() { pub fn populate_blocked_multi(&mut self, width : i32, height : i32) { self.populate_blocked(); for y in 1 .. self.height-1 { for x in 1 .. self.width - 1 { let idx = self.xy_idx(x, y); if !crate::spatial::is_blocked(idx) { for cy in 0..height { for cx in 0..width { let tx = x + cx; let ty = y + cy; if tx < self.width-1 && ty < self.height-1 { let tidx = self.xy_idx(tx, ty); if crate::spatial::is_blocked(tidx) { crate::spatial::set_blocked(idx, true); } } else { crate::spatial::set_blocked(idx, true); } } } } } } } }
I'd caution against that many nested loops, but at least it has escape clauses! So what does this do:
- It starts by building the
blockedinformation for all tiles, using the existingpopulate_blockedfunction. - It then iterates the map, and if a tile isn't blocked:
- It iterates each tile within the size of the entity, added to the current coordinate.
- If any of those tiles are blocked, it sets the tile to be examined as blocked also.
So the net result is that you get a map of places the large entity can stand. Now we need to plug that into ai/chase_ai_system.rs:
#![allow(unused)] fn main() { ... turn_done.push(entity); let target_pos = targets[&entity]; let path; if let Some(size) = sizes.get(entity) { let mut map_copy = map.clone(); map_copy.populate_blocked_multi(size.x, size.y); path = rltk::a_star_search( map_copy.xy_idx(pos.x, pos.y) as i32, map_copy.xy_idx(target_pos.0, target_pos.1) as i32, &mut map_copy ); } else { path = rltk::a_star_search( map.xy_idx(pos.x, pos.y) as i32, map.xy_idx(target_pos.0, target_pos.1) as i32, &mut *map ); } if path.success && path.steps.len()>1 && path.steps.len()<15 { ... }
So we've changed the value of path to be the same code as before for 1x1 entities, but to take a clone of the map for large entities and use the new populate_blocked_multi function to add blocks appropriate for a creature of this size.
If you cargo run now, you can escape from the dragon by taking narrow passageways.
So why this much work?
So why did we spend so much time making irregular sized objects work so generically, when we could have special cased the black dragon? It's so that we can make more big things later. :-)
A word of caution: it's always tempting to do this for everything, but remember the YAGNI rule: You Ain't Gonna Need It. If you don't really have a good reason to implement a feature, hold off until you either need it or it makes sense! (Fun aside: I first heard of this rule by a fellow with the username of TANSAAFL. Took me ages to realize he "there ain't no such thing as a free lunch.")
Worrying about balance / Playtesting
Now for the hard part. It's a good time to play through levels 1 through 6 a few times, see how far you get, and see what problems you encounter. Here's a few things I noticed:
- I ran into deer being far more annoying than intended, so for now I've removed them from the spawn table.
- Rats can't actually damage you! Changing their might to 7 gives a minimal penalty, but makes them occasionally do some damage.
- Healing potions need to spawn a lot more frequently! I changed their spawn weight to 15. I encountered several occasions in which I really needed an emergency heal.
- The game is a little too hard; you are really at the mercy of the Random Number Generator. You can be doing really well, and a bandit with good dice rolls slaughters you mercilessly - even after you've managed to get some armor on and leveled up! I decided to do two things to rectify this:
I gave the player 20 hit points per level instead of 10, by changing player_hp_per_level and player_hp_at_level in gamessytem.rs:
#![allow(unused)] fn main() { pub fn player_hp_per_level(fitness: i32) -> i32 { 15 + attr_bonus(fitness) } pub fn player_hp_at_level(fitness:i32, level:i32) -> i32 { 15 + (player_hp_per_level(fitness) * level) } }
In effects/damage.rs where we handle leveling up, I gave the player some more reason to level up! A random attribute and all skills improve. So leveling up makes you faster, stronger and more damaging. It also makes you harder to hit. Here's the code:
#![allow(unused)] fn main() { if xp_gain != 0 || gold_gain != 0.0 { let mut log = ecs.fetch_mut::<GameLog>(); let mut player_stats = pools.get_mut(source).unwrap(); let mut player_attributes = attributes.get_mut(source).unwrap(); player_stats.xp += xp_gain; player_stats.gold += gold_gain; if player_stats.xp >= player_stats.level * 1000 { // We've gone up a level! player_stats.level += 1; log.entries.push(format!("Congratulations, you are now level {}", player_stats.level)); // Improve a random attribute let mut rng = ecs.fetch_mut::<rltk::RandomNumberGenerator>(); let attr_to_boost = rng.roll_dice(1, 4); match attr_to_boost { 1 => { player_attributes.might.base += 1; log.entries.push("You feel stronger!".to_string()); } 2 => { player_attributes.fitness.base += 1; log.entries.push("You feel healthier!".to_string()); } 3 => { player_attributes.quickness.base += 1; log.entries.push("You feel quicker!".to_string()); } _ => { player_attributes.intelligence.base += 1; log.entries.push("You feel smarter!".to_string()); } } // Improve all skills let mut skills = ecs.write_storage::<Skills>(); let player_skills = skills.get_mut(*ecs.fetch::<Entity>()).unwrap(); for sk in player_skills.skills.iter_mut() { *sk.1 += 1; } ecs.write_storage::<EquipmentChanged>() .insert( *ecs.fetch::<Entity>(), EquipmentChanged{}) .expect("Insert Failed"); player_stats.hit_points.max = player_hp_at_level( player_attributes.fitness.base + player_attributes.fitness.modifiers, player_stats.level ); player_stats.hit_points.current = player_stats.hit_points.max; player_stats.mana.max = mana_at_level( player_attributes.intelligence.base + player_attributes.intelligence.modifiers, player_stats.level ); player_stats.mana.current = player_stats.mana.max; let player_pos = ecs.fetch::<rltk::Point>(); let map = ecs.fetch::<Map>(); for i in 0..10 { if player_pos.y - i > 1 { add_effect(None, EffectType::Particle{ glyph: rltk::to_cp437('░'), fg : rltk::RGB::named(rltk::GOLD), bg : rltk::RGB::named(rltk::BLACK), lifespan: 400.0 }, Targets::Tile{ tile_idx : map.xy_idx(player_pos.x, player_pos.y - i) as i32 } ); } } } } }
Playing again after these changes made for a much easier game - and one in which I felt like I could progress (but still faced a real risk of death). The dragon still beat me, but it was a very close fight - and I nearly won! So I played a few more times, and was victorious once I found a strategy of spell and item use that rewarded me. That's great - that's the type of play a roguelike should have!
I also found that in the earlier levels, I would die if I didn't pay attention - but would generally be victorious if I put my mind to it.
Wrap Up
So in this chapter, we've built a dragon's lair - and populated it with a nasty dragon. He's just about beatable, but you'll really have to put your mind to it.
...
The source code for this chapter may be found here
Run this chapter's example with web assembly, in your browser (WebGL2 required)
Copyright (C) 2019, Herbert Wolverson.
Mushroom Forest
About this tutorial
This tutorial is free and open source, and all code uses the MIT license - so you are free to do with it as you like. My hope is that you will enjoy the tutorial, and make great games!
If you enjoy this and would like me to keep writing, please consider supporting my Patreon.
The design document says that once you've conquered the dragon in the fortress, you proceed into a vast mushroom forest. This is an interesting transition: we've done forests before, but we want to make the mushroom forest different from the Into The Woods level. On this level, we also want to transition between the fortress and the forest - so we'll need another layered approach.
We'll start by adding a new function to the level builder in map_builder/mod.rs:
#![allow(unused)] fn main() { mod mushroom_forest; use mushroom_forest::*; ... pub fn level_builder(new_depth: i32, rng: &mut rltk::RandomNumberGenerator, width: i32, height: i32) -> BuilderChain { rltk::console::log(format!("Depth: {}", new_depth)); match new_depth { 1 => town_builder(new_depth, rng, width, height), 2 => forest_builder(new_depth, rng, width, height), 3 => limestone_cavern_builder(new_depth, rng, width, height), 4 => limestone_deep_cavern_builder(new_depth, rng, width, height), 5 => limestone_transition_builder(new_depth, rng, width, height), 6 => dwarf_fort_builder(new_depth, rng, width, height), 7 => mushroom_entrance(new_depth, rng, width, height), _ => random_builder(new_depth, rng, width, height) } } }
Now we'll make a new file, map_builder/mushroom_forest.rs:
#![allow(unused)] fn main() { use super::{BuilderChain, XStart, YStart, AreaStartingPosition, CullUnreachable, VoronoiSpawning, AreaEndingPosition, XEnd, YEnd, CellularAutomataBuilder, PrefabBuilder, WaveformCollapseBuilder}; use crate::map_builders::prefab_builder::prefab_sections::UNDERGROUND_FORT; pub fn mushroom_entrance(new_depth: i32, _rng: &mut rltk::RandomNumberGenerator, width: i32, height: i32) -> BuilderChain { let mut chain = BuilderChain::new(new_depth, width, height, "Into The Mushroom Grove"); chain.start_with(CellularAutomataBuilder::new()); chain.with(WaveformCollapseBuilder::new()); chain.with(AreaStartingPosition::new(XStart::CENTER, YStart::CENTER)); chain.with(CullUnreachable::new()); chain.with(AreaStartingPosition::new(XStart::RIGHT, YStart::CENTER)); chain.with(AreaEndingPosition::new(XEnd::LEFT, YEnd::CENTER)); chain.with(VoronoiSpawning::new()); chain.with(PrefabBuilder::sectional(UNDERGROUND_FORT)); chain } }
This should look familiar: we're using the cellular automata again - but mixing it up with some wave function collapse, and then adding a fort edge on top of it. This gives a pretty decent start for a forest template, albeit one that needs visual work (and a population):
Theming the mushroom grove
We've used split themes before (for entering the fortress), so it shouldn't be a surprise that we'll be opening up map/themes.rs and adding another one! In this case, we want the fortress theme to apply to the fortifications on the East of the map, and a new mushroom grove look to apply to the rest.
We can update tile_glyph to look like this:
#![allow(unused)] fn main() { pub fn tile_glyph(idx: usize, map : &Map) -> (rltk::FontCharType, RGB, RGB) { let (glyph, mut fg, mut bg) = match map.depth { 7 => { let x = idx as i32 % map.width; if x > map.width-16 { get_tile_glyph_default(idx, map) } else { get_mushroom_glyph(idx, map) } } 5 => { let x = idx as i32 % map.width; if x < map.width/2 { get_limestone_cavern_glyph(idx, map) } else { get_tile_glyph_default(idx, map) } } 4 => get_limestone_cavern_glyph(idx, map), 3 => get_limestone_cavern_glyph(idx, map), 2 => get_forest_glyph(idx, map), _ => get_tile_glyph_default(idx, map) }; ... }
The get_mushroom_glyph function is basically the same as get_forest_glyph, but changed to look more like a mushroom grove from the game Dwarf Fortress (yay, Plump Helmets!):
#![allow(unused)] fn main() { fn get_mushroom_glyph(idx:usize, map: &Map) -> (rltk::FontCharType, RGB, RGB) { let glyph; let fg; let bg = RGB::from_f32(0., 0., 0.); match map.tiles[idx] { TileType::Wall => { glyph = rltk::to_cp437('♠'); fg = RGB::from_f32(1.0, 0.0, 1.0); } TileType::Bridge => { glyph = rltk::to_cp437('.'); fg = RGB::named(rltk::GREEN); } TileType::Road => { glyph = rltk::to_cp437('≡'); fg = RGB::named(rltk::CHOCOLATE); } TileType::Grass => { glyph = rltk::to_cp437('"'); fg = RGB::named(rltk::GREEN); } TileType::ShallowWater => { glyph = rltk::to_cp437('~'); fg = RGB::named(rltk::CYAN); } TileType::DeepWater => { glyph = rltk::to_cp437('~'); fg = RGB::named(rltk::BLUE); } TileType::Gravel => { glyph = rltk::to_cp437(';'); fg = RGB::from_f32(0.5, 0.5, 0.5); } TileType::DownStairs => { glyph = rltk::to_cp437('>'); fg = RGB::from_f32(0., 1.0, 1.0); } TileType::UpStairs => { glyph = rltk::to_cp437('<'); fg = RGB::from_f32(0., 1.0, 1.0); } _ => { glyph = rltk::to_cp437('"'); fg = RGB::from_f32(0.0, 0.6, 0.0); } } (glyph, fg, bg) } }
This gives a slightly trippy but quite nice world view:
Populating the mushroom groves
I started by editing spawns.json to remove dragon wyrmlings from this level; the lizardmen and giant lizards can stay, but we're switching gears away from lizardmen now! What do you expect to find in a mystical, subterranean mushroom forest? Since they don't exist in real life, that's a bit of an open-ended question! I'd like to focus on a few natural hazards, a new type of monster, and a bit more in the way of loot. The player just finished a major boss fight, so it's a good idea to lower the gear a bit and give them some time to recuperate.
Natural Hazards
Let's start by adding some hazards. Mushrooms frequently give off spores, and it's a common theme for the spores to have interesting effects on the player (and anyone else who triggers them!). It's actually an interesting question as to whether these are props or NPCs; they react to spotting a player in an NPC-like fashion, but don't really move or do much other than set off effects - more like a prop (but unlike a prop, you don't have to stand on them for them to take effect).
Exploding Fire-cap Mushrooms
Let's start by adding an exploding mushroom. In spawns.json (in the monsters section):
{
"name" : "Firecap Mushroom",
"renderable": {
"glyph" : "♠",
"fg" : "#FFAA50",
"bg" : "#000000",
"order" : 1
},
"blocks_tile" : true,
"vision_range" : 3,
"movement" : "static",
"attributes" : {},
"faction" : "Fungi",
"level" : 1,
"abilities" : [
{ "spell" : "Explode", "chance" : 1.0, "range" : 3.0, "min_range" : 0.0 }
]
}
So we've given it a nice mushroom glyph, and made it orange (which seems appropriate). It has a short visual range, since I've never pictured fungi as having the best eyesight (or even eyes, really). It's in a faction Fungi, which doesn't exist yet, and has a spell ability to Explode, which also doesn't exist yet!
Let's go ahead and add it to the faction table:
{ "name" : "Fungi", "responses": { "Default" : "attack", "Fungi" : "ignore" }}
We'll also make a start at defining the Explode power. In the spells section of spawns.json:
{
"name" : "Explode",
"mana_cost" : 1,
"effects" : {
"ranged" : "3",
"damage" : "20",
"area_of_effect" : "3",
"particle" : "▒;#FFAA50;400.0",
"single_activation" : "1"
}
}
Almost all of this is stuff we've already built into the effects system: it has a range of 3, an area of effect and single_activation. We've not used this tag for anything other than trap props before, but it gets the message across - the mushroom can explode just the once, and will be destroyed in the process. We already support attaching the tag in raws/rawmaster.rs - so nothing to do there. We do need to extend the effects system to allow the self-destruct sequence to operate. In effects/triggers.rs, we need to extend spell_trigger to support self-destruction:
#![allow(unused)] fn main() { pub fn spell_trigger(creator : Option<Entity>, spell: Entity, targets : &Targets, ecs: &mut World) { let mut self_destruct = false; if let Some(template) = ecs.read_storage::<SpellTemplate>().get(spell) { let mut pools = ecs.write_storage::<Pools>(); if let Some(caster) = creator { if let Some(pool) = pools.get_mut(caster) { if template.mana_cost <= pool.mana.current { pool.mana.current -= template.mana_cost; } } } if let Some(_destruct) = ecs.read_storage::<SingleActivation>().get(spell) { self_destruct = true; } } event_trigger(creator, spell, targets, ecs); if self_destruct && creator.is_some() { ecs.entities().delete(creator.unwrap()).expect("Unable to delete owner"); } } }
So this is pretty much the previous code, but with an addition check to see if the spell deletes the caster - and if it does, it removes the caster immediately after the explosion goes off.
We should also make them spawn on the mushroom levels. In the spawn table section of spawns.json:
{ "name" : "Firecap Mushroom", "weight" : 10, "min_depth" : 7, "max_depth" : 9 },
If you cargo run now, the mushrooms detonate when you approach:
There's a slight problem that the lizardmen and the fungi are fighting, which doesn't make a lot of sense. So we'll update their factions to prevent this:
{ "name" : "Wyrm", "responses": { "Default" : "attack", "Wyrm" : "ignore", "Fungi" : "ignore" }},
{ "name" : "Fungi", "responses": { "Default" : "attack", "Fungi" : "ignore", "Wyrm" : "ignore" }}
It would also be really nice if the fungi exploded on death; if you have some together, this could give a really fun chain reaction (and could be extended to exploding barrels on another level!). We'll add an annotation to the mushroom:
{
"name" : "Firecap Mushroom",
"renderable": {
"glyph" : "♠",
"fg" : "#FFAA50",
"bg" : "#000000",
"order" : 1
},
"blocks_tile" : true,
"vision_range" : 3,
"movement" : "static",
"attributes" : {},
"faction" : "Fungi",
"level" : 1
"abilities" : [
{ "spell" : "Explode", "chance" : 1.0, "range" : 3.0, "min_range" : 0.0 }
],
"on_death" : [
{ "spell" : "Explode", "chance" : 1.0, "range" : 0.0, "min_range" : 0.0 }
]
}
So, now we have an on_death trigger to implement. We'll start in raws/mob_structs.rs in order to support this JSON tag. We're re-using the spell tag, even though range is meaningless - just to help keep things consistent. So we just need to add the one line to the raw structure:
#![allow(unused)] fn main() { #[derive(Deserialize, Debug)] pub struct Mob { pub name : String, pub renderable : Option<Renderable>, pub blocks_tile : bool, pub vision_range : i32, pub movement : String, pub quips : Option<Vec<String>>, pub attributes : MobAttributes, pub skills : Option<HashMap<String, i32>>, pub level : Option<i32>, pub hp : Option<i32>, pub mana : Option<i32>, pub equipped : Option<Vec<String>>, pub natural : Option<MobNatural>, pub loot_table : Option<String>, pub light : Option<MobLight>, pub faction : Option<String>, pub gold : Option<String>, pub vendor : Option<Vec<String>>, pub abilities : Option<Vec<MobAbility>>, pub on_death : Option<Vec<MobAbility>> } }
We'll also need a new component in which to store on_death event triggers. We can re-use some of the SpecialAbilities code to keep it simple. In components.rs (and registered in main.rs and saveload_system.rs):
#![allow(unused)] fn main() { #[derive(Component, Debug, Serialize, Deserialize, Clone)] pub struct OnDeath { pub abilities : Vec<SpecialAbility> } }
Then we add some code to raws/rawmaster.rs's spawn_named_mob to instantiate it. It's just like the special abilities code - so place it next to it:
#![allow(unused)] fn main() { if let Some(ability_list) = &mob_template.on_death { let mut a = OnDeath{ abilities : Vec::new() }; for ability in ability_list.iter() { a.abilities.push( SpecialAbility{ chance : ability.chance, spell : ability.spell.clone(), range : ability.range, min_range : ability.min_range } ); } eb = eb.with(a); } }
Finally, we need to make on_death events actually fire. If you add this to the end of the delete_the_dead function in damage_system.rs (right before the final entity deletion), you get a nice staggered effect with a boom right after a mushroom is slain:
#![allow(unused)] fn main() { // Fire death events use crate::effects::*; use crate::Map; use crate::components::{OnDeath, AreaOfEffect}; for victim in dead.iter() { let death_effects = ecs.read_storage::<OnDeath>(); if let Some(death_effect) = death_effects.get(*victim) { let mut rng = ecs.fetch_mut::<rltk::RandomNumberGenerator>(); for effect in death_effect.abilities.iter() { if rng.roll_dice(1,100) <= (effect.chance * 100.0) as i32 { let map = ecs.fetch::<Map>(); if let Some(pos) = ecs.read_storage::<Position>().get(*victim) { let spell_entity = crate::raws::find_spell_entity(ecs, &effect.spell).unwrap(); let tile_idx = map.xy_idx(pos.x, pos.y); let target = if let Some(aoe) = ecs.read_storage::<AreaOfEffect>().get(spell_entity) { Targets::Tiles { tiles : aoe_tiles(&map, rltk::Point::new(pos.x, pos.y), aoe.radius) } } else { Targets::Tile{ tile_idx : tile_idx as i32 } }; add_effect( None, EffectType::SpellUse{ spell: crate::raws::find_spell_entity( ecs, &effect.spell ).unwrap() }, target ); } } } } } }
There's one other problem evident; when the mushroom explodes, the explosion is centered on the player not the mushroom. Let's make a new component to represent overriding spell targeting to always target self. In components.rs (and, as always, registered in main.rs and saveload_system.rs):
#![allow(unused)] fn main() { #[derive(Component, Debug, Serialize, Deserialize, Clone)] pub struct AlwaysTargetsSelf {} }
We'll add it into the effects macro in raws/rawmaster.rs:
#![allow(unused)] fn main() { "target_self" => $eb = $eb.with( AlwaysTargetsSelf{} ), }
We should apply it to the Explode ability in spawns.json:
{
"name" : "Explode",
"mana_cost" : 1,
"effects" : {
"ranged" : "3",
"damage" : "20",
"area_of_effect" : "3",
"particle" : "▒;#FFAA50;400.0",
"single_activation" : "1",
"target_self" : "1"
}
}
Lastly, we need to modify the spell_trigger in effects/triggers.rs to be able to modify the targeting choice:
#![allow(unused)] fn main() { pub fn spell_trigger(creator : Option<Entity>, spell: Entity, targets : &Targets, ecs: &mut World) { let mut targeting = targets.clone(); let mut self_destruct = false; if let Some(template) = ecs.read_storage::<SpellTemplate>().get(spell) { let mut pools = ecs.write_storage::<Pools>(); if let Some(caster) = creator { if let Some(pool) = pools.get_mut(caster) { if template.mana_cost <= pool.mana.current { pool.mana.current -= template.mana_cost; } } // Handle self-targeting override if ecs.read_storage::<AlwaysTargetsSelf>().get(spell).is_some() { if let Some(pos) = ecs.read_storage::<Position>().get(caster) { let map = ecs.fetch::<Map>(); targeting = if let Some(aoe) = ecs.read_storage::<AreaOfEffect>().get(spell) { Targets::Tiles { tiles : aoe_tiles(&map, rltk::Point::new(pos.x, pos.y), aoe.radius) } } else { Targets::Tile{ tile_idx : map.xy_idx(pos.x, pos.y) as i32 } } } } } if let Some(_destruct) = ecs.read_storage::<SingleActivation>().get(spell) { self_destruct = true; } } event_trigger(creator, spell, &targeting, ecs); if self_destruct && creator.is_some() { ecs.entities().delete(creator.unwrap()).expect("Unable to delete owner"); } } }
To demonstrate the monster we just created, I upped the mushroom's spawn density to 300 - and changed the explosion radius to 6. Here goes:
Changing the settings back is probably a good idea! It's really tempting to make a level of chained-mushrooms for a domino-like explosion rippling throughout the level at this point - but that's probably more fun to watch than to play!
Confusion Shrooms
Another obvious effect is mushrooms whose spores sow confusion. We have everything we need to implement them!
In the monsters section of spawns.json, we define the basic mushroom:
{
"name" : "Sporecap Mushroom",
"renderable": {
"glyph" : "♠",
"fg" : "#00AAFF",
"bg" : "#000000",
"order" : 1
},
"blocks_tile" : true,
"vision_range" : 3,
"movement" : "static",
"attributes" : {},
"faction" : "Fungi",
"level" : 1,
"abilities" : [
{ "spell" : "ConfusionCloud", "chance" : 1.0, "range" : 3.0, "min_range" : 0.0 }
],
"on_death" : [
{ "spell" : "ConfusionCloud", "chance" : 1.0, "range" : 0.0, "min_range" : 0.0 }
]
}
In the spawn weights, we make them common in the fungal grove:
{ "name" : "Sporecap Mushroom", "weight" : 10, "min_depth" : 7, "max_depth" : 9 },
And we can define the spell as follows:
{
"name" : "ConfusionCloud",
"mana_cost" : 1,
"effects" : {
"ranged" : "3",
"confusion" : "4",
"area_of_effect" : "3",
"particle" : "?;#FFFF00;400.0",
"single_activation" : "1",
"target_self" : "1"
}
}
No additional code required! If you cargo run now, you'll get blue mushrooms exploding in confusing goodness:
Poison gas mushrooms
We'll add one more mushroom type: a death-cap mushroom that spreads poisonous spores! Once again, we have everything we need for this. We define the mushroom as a monster in spawns.json:
{
"name" : "Deathcap Mushroom",
"renderable": {
"glyph" : "♠",
"fg" : "#55FF55",
"bg" : "#000000",
"order" : 1
},
"blocks_tile" : true,
"vision_range" : 3,
"movement" : "static",
"attributes" : {},
"faction" : "Fungi",
"level" : 1,
"abilities" : [
{ "spell" : "PoisonCloud", "chance" : 1.0, "range" : 3.0, "min_range" : 0.0 }
],
"on_death" : [
{ "spell" : "PoisonCloud", "chance" : 1.0, "range" : 0.0, "min_range" : 0.0 }
]
}
Make it spawn:
{ "name" : "Deathcap Mushroom", "weight" : 7, "min_depth" : 7, "max_depth" : 9 },
And define the spell effect:
{
"name" : "PoisonCloud",
"mana_cost" : 1,
"effects" : {
"ranged" : "3",
"damage_over_time" : "4",
"area_of_effect" : "3",
"particle" : "*;#00FF00;400.0",
"single_activation" : "1",
"target_self" : "1"
}
}
And voila - you have poisonous mushroom spore clouds.
Fungus grove monsters
We don't just want to cover the player in spores. There's some lizardmen to worry about, but it would make sense for a few monsters to also dwell in the groves. A couple sprang to mind: fungus men, with whom you can do battle - and eat their corpses, and a beast that roams around chewing on fungus (or players) all day long. We could also introduce "spore zombies" - people whose brain have been overtaken by the fungus and seek only to slay its foes (there are some disturbing parasites that take over their hosts in similar manners, so it's not as unrealistic as it sounds!).
Fungus Men
Let's start with the fungus people. In spawns.json, we can define them as a regular class of foe:
{
"name" : "Fungus Man",
"renderable": {
"glyph" : "f",
"fg" : "#FF0000",
"bg" : "#000000",
"order" : 1
},
"blocks_tile" : true,
"vision_range" : 8,
"movement" : "random_waypoint",
"attributes" : {},
"faction" : "Fungi",
"gold" : "2d8",
"level" : 4,
"loot_table" : "Animal"
}
We'll also make them spawn:
{ "name" : "Fungus Man", "weight" : 8, "min_depth" : 7, "max_depth" : 9 },
This adds in fungus people, who drop meat. You probably don't want to think too much about the flavor.
Spore Zombies
Again, we'll start with a basic mob definition. We can't have everything doing funky things - that'd overwhelm the player:
{
"name" : "Spore Zombie",
"renderable": {
"glyph" : "z",
"fg" : "#FF0000",
"bg" : "#000000",
"order" : 1
},
"blocks_tile" : true,
"vision_range" : 8,
"movement" : "random_waypoint",
"attributes" : {},
"faction" : "Fungi",
"gold" : "2d8",
"level" : 5
}
We also need to make them spawn:
{ "name" : "Spore Zombie", "weight" : 7, "min_depth" : 7, "max_depth" : 9 },
Fungus Beasts
We'll pattern the beasts after other animals, but put them in the "Fungi" faction:
{
"name" : "Fungal Beast",
"renderable": {
"glyph" : "F",
"fg" : "#995555",
"bg" : "#000000",
"order" : 1
},
"blocks_tile" : true,
"vision_range" : 6,
"movement" : "random",
"attributes" : {},
"natural" : {
"armor_class" : 11,
"attacks" : [
{ "name" : "bite", "hit_bonus" : 0, "damage" : "1d4" }
]
},
"faction" : "Fungi"
}
We also need to make them spawn:
{ "name" : "Fungal Beast", "weight" : 9, "min_depth" : 7, "max_depth" : 9 },
If you cargo run now, you have a level teeming with life and things that go boom!
A handful of items
As a reward for being perpetually gassed, gnawed on by zombies and chewed up by beats, it's about time to introduce some new items to the grove! Let's consider a few new items the player may encounter.
A simple boost is a better longsword:
{
"name" : "Longsword +2",
"renderable": {
"glyph" : "/",
"fg" : "#FFAAFF",
"bg" : "#000000",
"order" : 2
},
"weapon" : {
"range" : "melee",
"attribute" : "might",
"base_damage" : "1d8+2",
"hit_bonus" : 2
},
"weight_lbs" : 1.0,
"base_value" : 100.0,
"initiative_penalty" : 0,
"vendor_category" : "weapon",
"magic" : { "class" : "common", "naming" : "Unidentified Longsword" }
},
And of course, add it to the spawn list:
{ "name" : "Longsword +2", "weight" : 1, "min_depth" : 7, "max_depth" : 100 },
Another easy one is a magical breastplate:
{
"name" : "Breastplate +1",
"renderable": {
"glyph" : "[",
"fg" : "#00FF00",
"bg" : "#000000",
"order" : 2
},
"wearable" : {
"slot" : "Torso",
"armor_class" : 4.0
},
"weight_lbs" : 20.0,
"base_value" : 200.0,
"initiative_penalty" : 1.0,
"vendor_category" : "armor",
"magic" : { "class" : "common", "naming" : "Unidentified Breastplate" }
},
Again, it also needs to be spawnable:
{ "name" : "Breastplate +1", "weight" : 1, "min_depth" : 7, "max_depth" : 100 },
Likewise, it's easy to take the basic Tower Shield and offer an improved version:
{
"name" : "Tower Shield +1",
"renderable": {
"glyph" : "[",
"fg" : "#00FFFF",
"bg" : "#000000",
"order" : 2
},
"wearable" : {
"slot" : "Shield",
"armor_class" : 3.0
},
"weight_lbs" : 45.0,
"base_value" : 30.0,
"initiative_penalty" : 0.0,
"vendor_category" : "armor"
},
Of course, it also requires some spawn data:
{ "name" : "Tower Shield +1", "weight" : 1, "min_depth" : 7, "max_depth" : 100 },
We should also consider filling some of the unused equipment slots. We have quite a few Torso-oriented items, and very little to fill other slots. In the name of completeness, we should add a few!
Head Items
Currently, we only have the one head item: the chain coif. It would make sense to have a head item for each of the major categories of armor we've been using so far: cloth, leather, chain (we have that one!) and plate.
The item definitions are:
{
"name" : "Cloth Cap",
"renderable": {
"glyph" : "[",
"fg" : "#00FF00",
"bg" : "#000000",
"order" : 2
},
"wearable" : {
"slot" : "Head",
"armor_class" : 0.2
},
"weight_lbs" : 0.25,
"base_value" : 5.0,
"initiative_penalty" : 0.1,
"vendor_category" : "armor"
},
{
"name" : "Leather Cap",
"renderable": {
"glyph" : "[",
"fg" : "#00FF00",
"bg" : "#000000",
"order" : 2
},
"wearable" : {
"slot" : "Head",
"armor_class" : 0.4
},
"weight_lbs" : 0.5,
"base_value" : 10.0,
"initiative_penalty" : 0.2,
"vendor_category" : "armor"
},
{
"name" : "Chain Coif",
"renderable": {
"glyph" : "[",
"fg" : "#00FF00",
"bg" : "#000000",
"order" : 2
},
"wearable" : {
"slot" : "Head",
"armor_class" : 1.0
},
"weight_lbs" : 5.0,
"base_value" : 20.0,
"initiative_penalty" : 0.5,
"vendor_category" : "armor"
},
{
"name" : "Steel Helm",
"renderable": {
"glyph" : "[",
"fg" : "#00FF00",
"bg" : "#000000",
"order" : 2
},
"wearable" : {
"slot" : "Head",
"armor_class" : 2.0
},
"weight_lbs" : 15.0,
"base_value" : 100.0,
"initiative_penalty" : 1.0,
"vendor_category" : "armor"
},
And here's updated spawn information for them:
{ "name" : "Cloth Cap", "weight" : 5, "min_depth" : 4, "max_depth" : 100 },
{ "name" : "Leather Cap", "weight" : 4, "min_depth" : 4, "max_depth" : 100 },
{ "name" : "Chain Coif", "weight" : 3, "min_depth" : 4, "max_depth" : 100 },
{ "name" : "Steel Helm", "weight" : 2, "min_depth" : 4, "max_depth" : 100 },
Leg Items
We also have a few leg items right now, but not many: we have torn trousers and cloth pants. Let's also expand those to include leather, chain and steel.
{
"name" : "Leather Pants",
"renderable": {
"glyph" : "[",
"fg" : "#00FFFF",
"bg" : "#000000",
"order" : 2
},
"wearable" : {
"slot" : "Legs",
"armor_class" : 0.2
},
"weight_lbs" : 5.0,
"base_value" : 25.0,
"initiative_penalty" : 0.2,
"vendor_category" : "clothes"
},
{
"name" : "Chain Leggings",
"renderable": {
"glyph" : "[",
"fg" : "#00FFFF",
"bg" : "#000000",
"order" : 2
},
"wearable" : {
"slot" : "Legs",
"armor_class" : 0.3
},
"weight_lbs" : 10.0,
"base_value" : 50.0,
"initiative_penalty" : 0.3,
"vendor_category" : "clothes"
},
{
"name" : "Steel Greaves",
"renderable": {
"glyph" : "[",
"fg" : "#00FFFF",
"bg" : "#000000",
"order" : 2
},
"wearable" : {
"slot" : "Legs",
"armor_class" : 0.5
},
"weight_lbs" : 20.0,
"base_value" : 100.0,
"initiative_penalty" : 0.5,
"vendor_category" : "clothes"
},
Likewise, we need to give them spawn data:
{ "name" : "Cloth Pants", "weight" : 6, "min_depth" : 1, "max_depth" : 100 },
{ "name" : "Leather Pants", "weight" : 5, "min_depth" : 1, "max_depth" : 100 },
{ "name" : "Chain Leggings", "weight" : 4, "min_depth" : 1, "max_depth" : 100 },
{ "name" : "Steel Greaves", "weight" : 3, "min_depth" : 5, "max_depth" : 100 },
Foot Items
Likewise, our story for foot armor is quite limited. We have old boots, slippers, and leather boots. We should add a chain and plate option to these, too:
{
"name" : "Leather Boots",
"renderable": {
"glyph" : "[",
"fg" : "#00FF00",
"bg" : "#000000",
"order" : 2
},
"wearable" : {
"slot" : "Feet",
"armor_class" : 0.2
},
"weight_lbs" : 2.0,
"base_value" : 5.0,
"initiative_penalty" : 0.25,
"vendor_category" : "clothes"
},
{
"name" : "Chain Boots",
"renderable": {
"glyph" : "[",
"fg" : "#00FF00",
"bg" : "#000000",
"order" : 2
},
"wearable" : {
"slot" : "Feet",
"armor_class" : 0.3
},
"weight_lbs" : 3.0,
"base_value" : 10.0,
"initiative_penalty" : 0.25,
"vendor_category" : "armor"
},
{
"name" : "Steel Boots",
"renderable": {
"glyph" : "[",
"fg" : "#00FF00",
"bg" : "#000000",
"order" : 2
},
"wearable" : {
"slot" : "Feet",
"armor_class" : 0.5
},
"weight_lbs" : 5.0,
"base_value" : 10.0,
"initiative_penalty" : 0.4,
"vendor_category" : "armor"
},
And some spawn information:
{ "name" : "Leather Boots", "weight" : 5, "min_depth" : 1, "max_depth" : 100 },
{ "name" : "Chain Boots", "weight" : 4, "min_depth" : 3, "max_depth" : 100 },
{ "name" : "Steel Boots", "weight" : 2, "min_depth" : 5, "max_depth" : 100 },
Hand Items
Our hand armor story is really poor right now: we have gauntlets of ogre power and nothing else! Lets add some "normal" gloves as well to round things out:
{
"name" : "Cloth Gloves",
"renderable": {
"glyph" : "[",
"fg" : "#FF9999",
"bg" : "#000000",
"order" : 2
},
"wearable" : {
"slot" : "Hands",
"armor_class" : 0.1
},
"weight_lbs" : 0.5,
"base_value" : 1.0,
"initiative_penalty" : 0.1,
"vendor_category" : "clothes"
},
{
"name" : "Leather Gloves",
"renderable": {
"glyph" : "[",
"fg" : "#FF9999",
"bg" : "#000000",
"order" : 2
},
"wearable" : {
"slot" : "Hands",
"armor_class" : 0.2
},
"weight_lbs" : 1.0,
"base_value" : 1.0,
"initiative_penalty" : 0.1,
"vendor_category" : "clothes"
},
{
"name" : "Chain Gloves",
"renderable": {
"glyph" : "[",
"fg" : "#FF9999",
"bg" : "#000000",
"order" : 2
},
"wearable" : {
"slot" : "Hands",
"armor_class" : 0.3
},
"weight_lbs" : 2.0,
"base_value" : 10.0,
"initiative_penalty" : 0.2,
"vendor_category" : "clothes"
},
{
"name" : "Steel Gloves",
"renderable": {
"glyph" : "[",
"fg" : "#FF9999",
"bg" : "#000000",
"order" : 2
},
"wearable" : {
"slot" : "Hands",
"armor_class" : 0.5
},
"weight_lbs" : 5.0,
"base_value" : 10.0,
"initiative_penalty" : 0.3,
"vendor_category" : "clothes"
},
And of course, some spawn data:
{ "name" : "Cloth Gloves", "weight" : 6, "min_depth" : 1, "max_depth" : 100 },
{ "name" : "Leather Gloves", "weight" : 5, "min_depth" : 1, "max_depth" : 100 },
{ "name" : "Chain Gloves", "weight" : 3, "min_depth" : 1, "max_depth" : 100 },
{ "name" : "Steel Gloves", "weight" : 2, "min_depth" : 5, "max_depth" : 100 },
Wrap Up
And there we have it - a working fort-to-mushroom grove transition level, and a fleshed out item table. In the next chapter, we'll continue to make progress on fulfilling the design document with the remainder of the mushroom forest, and a bit more work on making the item story better.
...
The source code for this chapter may be found here
Run this chapter's example with web assembly, in your browser (WebGL2 required)
Copyright (C) 2019, Herbert Wolverson.
Deep Mushroom Forest
About this tutorial
This tutorial is free and open source, and all code uses the MIT license - so you are free to do with it as you like. My hope is that you will enjoy the tutorial, and make great games!
If you enjoy this and would like me to keep writing, please consider supporting my Patreon.
This chapter will add another level of mushroom grove to the game, this time without a dwarven fortress. It'll also add the final mushroom level, which according to the design document gives way to a dark elven city. Finally, we'll further improve our item story by automating some of the drudge-work going with adding magical and cursed items.
Building the mushroom forest
We'll start by opening up map_builders/mod.rs and adding another line to the map builder calls:
#![allow(unused)] fn main() { pub fn level_builder(new_depth: i32, rng: &mut rltk::RandomNumberGenerator, width: i32, height: i32) -> BuilderChain { rltk::console::log(format!("Depth: {}", new_depth)); match new_depth { 1 => town_builder(new_depth, rng, width, height), 2 => forest_builder(new_depth, rng, width, height), 3 => limestone_cavern_builder(new_depth, rng, width, height), 4 => limestone_deep_cavern_builder(new_depth, rng, width, height), 5 => limestone_transition_builder(new_depth, rng, width, height), 6 => dwarf_fort_builder(new_depth, rng, width, height), 7 => mushroom_entrance(new_depth, rng, width, height), 8 => mushroom_builder(new_depth, rng, width, height), _ => random_builder(new_depth, rng, width, height) } } }
Then we'll open up map_builders/mushroom_forest.rs and stub in a basic map builder for the level:
#![allow(unused)] fn main() { pub fn mushroom_builder(new_depth: i32, _rng: &mut rltk::RandomNumberGenerator, width: i32, height: i32) -> BuilderChain { let mut chain = BuilderChain::new(new_depth, width, height, "Into The Mushroom Grove"); chain.start_with(CellularAutomataBuilder::new()); chain.with(WaveformCollapseBuilder::new()); chain.with(AreaStartingPosition::new(XStart::CENTER, YStart::CENTER)); chain.with(CullUnreachable::new()); chain.with(AreaStartingPosition::new(XStart::RIGHT, YStart::CENTER)); chain.with(AreaEndingPosition::new(XEnd::LEFT, YEnd::CENTER)); chain.with(VoronoiSpawning::new()); chain } }
This is basically the same as the other mushroom builder, but without the prefab overlay. If you go into main.rs and change the starting level:
#![allow(unused)] fn main() { gs.generate_world_map(8, 0); rltk::main_loop(context, gs) }
And cargo run, you get a pretty passable level. It's retained the mob spawns from our previous level, because we carefully included them in our spawn level ranges.
End of the Fungal Forest
Once again, we'll add another level into map_builders/mod.rs:
#![allow(unused)] fn main() { pub fn level_builder(new_depth: i32, rng: &mut rltk::RandomNumberGenerator, width: i32, height: i32) -> BuilderChain { rltk::console::log(format!("Depth: {}", new_depth)); match new_depth { 1 => town_builder(new_depth, rng, width, height), 2 => forest_builder(new_depth, rng, width, height), 3 => limestone_cavern_builder(new_depth, rng, width, height), 4 => limestone_deep_cavern_builder(new_depth, rng, width, height), 5 => limestone_transition_builder(new_depth, rng, width, height), 6 => dwarf_fort_builder(new_depth, rng, width, height), 7 => mushroom_entrance(new_depth, rng, width, height), 8 => mushroom_builder(new_depth, rng, width, height), 9 => mushroom_exit(new_depth, rng, width, height), _ => random_builder(new_depth, rng, width, height) } } }
And give it the same code to start with as the mushroom_builder:
#![allow(unused)] fn main() { pub fn mushroom_exit(new_depth: i32, _rng: &mut rltk::RandomNumberGenerator, width: i32, height: i32) -> BuilderChain { let mut chain = BuilderChain::new(new_depth, width, height, "Into The Mushroom Grove"); chain.start_with(CellularAutomataBuilder::new()); chain.with(WaveformCollapseBuilder::new()); chain.with(AreaStartingPosition::new(XStart::CENTER, YStart::CENTER)); chain.with(CullUnreachable::new()); chain.with(AreaStartingPosition::new(XStart::RIGHT, YStart::CENTER)); chain.with(AreaEndingPosition::new(XEnd::LEFT, YEnd::CENTER)); chain.with(VoronoiSpawning::new()); chain } }
We'll also hit up main.rs to make us start on this level:
#![allow(unused)] fn main() { gs.generate_world_map(9, 0); }
Two identical (design-wise; the content will vary due to procedural generation) levels in a row is pretty dull, and we need to convey the idea that there is an entrance to a dark elven city here. We'll start by adding a new prefab sectional to the map:
#![allow(unused)] fn main() { #[allow(dead_code)] pub const DROW_ENTRY : PrefabSection = PrefabSection{ template : DROW_ENTRY_TXT, width: 12, height: 10, placement: ( HorizontalPlacement::Center, VerticalPlacement::Center ) }; #[allow(dead_code)] const DROW_ENTRY_TXT : &str = " ######### # > # # e # e # e # ######### "; }
Be careful with spaces: there are spaces all around the prefab that are meant to be there - to ensure that it has a "gutter" around it. Now we modify our mushroom_exit function to spawn it:
#![allow(unused)] fn main() { pub fn mushroom_exit(new_depth: i32, _rng: &mut rltk::RandomNumberGenerator, width: i32, height: i32) -> BuilderChain { let mut chain = BuilderChain::new(new_depth, width, height, "Into The Mushroom Grove"); chain.start_with(CellularAutomataBuilder::new()); chain.with(WaveformCollapseBuilder::new()); chain.with(AreaStartingPosition::new(XStart::CENTER, YStart::CENTER)); chain.with(CullUnreachable::new()); chain.with(AreaStartingPosition::new(XStart::RIGHT, YStart::CENTER)); chain.with(AreaEndingPosition::new(XEnd::LEFT, YEnd::CENTER)); chain.with(VoronoiSpawning::new()); chain.with(PrefabBuilder::sectional(DROW_ENTRY)); chain } }
Unknown glyph loading map: e
You can cargo run and find the exit in the middle now, but there are no dark elves! The "e" spawns nothing at all, and generates a warning. That's fine - we haven't implemented any dark elves yet. In map_builders/prefab_builder/mod.rs, we'll add e to mean "Dark Elf" in the loader file:
#![allow(unused)] fn main() { fn char_to_map(&mut self, ch : char, idx: usize, build_data : &mut BuilderMap) { // Bounds check if idx >= build_data.map.tiles.len()-1 { return; } match ch { ' ' => build_data.map.tiles[idx] = TileType::Floor, '#' => build_data.map.tiles[idx] = TileType::Wall, '≈' => build_data.map.tiles[idx] = TileType::DeepWater, '@' => { let x = idx as i32 % build_data.map.width; let y = idx as i32 / build_data.map.width; build_data.map.tiles[idx] = TileType::Floor; build_data.starting_position = Some(Position{ x:x as i32, y:y as i32 }); } '>' => build_data.map.tiles[idx] = TileType::DownStairs, 'e' => { build_data.map.tiles[idx] = TileType::Floor; build_data.spawn_list.push((idx, "Dark Elf".to_string())); } 'g' => { build_data.map.tiles[idx] = TileType::Floor; build_data.spawn_list.push((idx, "Goblin".to_string())); } 'o' => { build_data.map.tiles[idx] = TileType::Floor; build_data.spawn_list.push((idx, "Orc".to_string())); } 'O' => { build_data.map.tiles[idx] = TileType::Floor; build_data.spawn_list.push((idx, "Orc Leader".to_string())); } '^' => { build_data.map.tiles[idx] = TileType::Floor; build_data.spawn_list.push((idx, "Bear Trap".to_string())); } '%' => { build_data.map.tiles[idx] = TileType::Floor; build_data.spawn_list.push((idx, "Rations".to_string())); } '!' => { build_data.map.tiles[idx] = TileType::Floor; build_data.spawn_list.push((idx, "Health Potion".to_string())); } '☼' => { build_data.map.tiles[idx] = TileType::Floor; build_data.spawn_list.push((idx, "Watch Fire".to_string())); } _ => { rltk::console::log(format!("Unknown glyph loading map: {}", (ch as u8) as char)); } } } }
If you cargo run, the error is now replaced with WARNING: We don't know how to spawn [Dark Elf]! - that's progress.
To solve this, we'll define dark elves! Let's start with a very simple spawns.json entry:
{
"name" : "Dark Elf",
"renderable": {
"glyph" : "e",
"fg" : "#FF0000",
"bg" : "#000000",
"order" : 1
},
"blocks_tile" : true,
"vision_range" : 8,
"movement" : "random_waypoint",
"attributes" : {},
"equipped" : [ "Dagger", "Shield", "Leather Armor", "Leather Boots" ],
"faction" : "DarkElf",
"gold" : "3d6",
"level" : 6
},
We'll also give them a faction entry:
{ "name" : "DarkElf", "responses" : { "Default" : "attack", "DarkElf" : "ignore" } }
If you cargo run now, you'll have some moderately powerful dark elves to deal with. The thing is, they aren't very "dark elfy": they are basically reskinned bandits. What do you think of when you think "dark elf" (other than Drizzt Do'Urden, whose copyright owners would smite me from afar if I included him)? They are quite evil, magical, fast-moving, and generally quite formidable. They also tend to have their own dark technology, and pepper their enemies with ranged weaponry!
We aren't going to support ranged weaponry until the next chapter, but we can take some steps to make them more dark elven. Let's give them a more dark-elf sounding set of items. In the equipped tag, we'll go with:
"equipped" : [ "Scimitar", "Buckler", "Drow Chain", "Drow Leggings", "Drow Boots" ],
We'll also need to make item entries for these. We'll make the scimitar basically a longsword, but a little nicer:
{
"name" : "Scimitar",
"renderable": {
"glyph" : "/",
"fg" : "#FFAAFF",
"bg" : "#000000",
"order" : 2
},
"weapon" : {
"range" : "melee",
"attribute" : "might",
"base_damage" : "1d6+2",
"hit_bonus" : 1
},
"weight_lbs" : 2.5,
"base_value" : 25.0,
"initiative_penalty" : 1,
"vendor_category" : "weapon"
},
We'll follow the trend for the Drow Armor: it's basically chain armor, but with much less initiative penalty:
{
"name" : "Drow Leggings",
"renderable": {
"glyph" : "[",
"fg" : "#00FFFF",
"bg" : "#000000",
"order" : 2
},
"wearable" : {
"slot" : "Legs",
"armor_class" : 0.4
},
"weight_lbs" : 10.0,
"base_value" : 50.0,
"initiative_penalty" : 0.1,
"vendor_category" : "clothes"
},
{
"name" : "Drow Chain",
"renderable": {
"glyph" : "[",
"fg" : "#00FF00",
"bg" : "#000000",
"order" : 2
},
"wearable" : {
"slot" : "Torso",
"armor_class" : 3.0
},
"weight_lbs" : 5.0,
"base_value" : 50.0,
"initiative_penalty" : 0.0,
"vendor_category" : "armor"
},
{
"name" : "Drow Boots",
"renderable": {
"glyph" : "[",
"fg" : "#00FF00",
"bg" : "#000000",
"order" : 2
},
"wearable" : {
"slot" : "Feet",
"armor_class" : 0.4
},
"weight_lbs" : 2.0,
"base_value" : 10.0,
"initiative_penalty" : 0.1,
"vendor_category" : "armor"
},
The result of these is that they are fast - they have much less initiative penalty than a similarly armored player. The other nice thing is that you can kill one, take their stuff - and have the same benefit!
At this point, we've added two playable levels - in only a few lines of code. Reaping the benefits of working so hard on a generic system! So now, let's make things a little more generic - and save ourselves some typing.
Procedurally Generated Magical Items
We've been adding "Longsword +1", "Longsword -1", etc. quite a bit. We could sit and laboriously type out every magical variant of every item, and we'd have a pretty playable game. OR - we could automate some of the grunt work!
What if we could append a "template" attribute to a weapon definition in spawns.json, and have it automatically generate the variants for us? This isn't as far-fetched as it sounds. Let's sketch out what we'd like:
{
"name" : "Longsword",
"renderable": {
"glyph" : "/",
"fg" : "#FFAAFF",
"bg" : "#000000",
"order" : 2
},
"weapon" : {
"range" : "melee",
"attribute" : "might",
"base_damage" : "1d8",
"hit_bonus" : 0
},
"weight_lbs" : 3.0,
"base_value" : 15.0,
"initiative_penalty" : 2,
"vendor_category" : "weapon",
"template_magic" : {
"unidentified_name" : "Unidentified Longsword",
"bonus_min" : 1,
"bonus_max" : 5,
"include_cursed" : true
}
},
So we've added a template_magic section, describing the types of items we'd like to add. We need to extend raws/item_structs.rs to support loading this information:
#![allow(unused)] fn main() { #[derive(Deserialize, Debug, Clone)] pub struct Item { pub name : String, pub renderable : Option<Renderable>, pub consumable : Option<Consumable>, pub weapon : Option<Weapon>, pub wearable : Option<Wearable>, pub initiative_penalty : Option<f32>, pub weight_lbs : Option<f32>, pub base_value : Option<f32>, pub vendor_category : Option<String>, pub magic : Option<MagicItem>, pub attributes : Option<ItemAttributeBonus>, pub template_magic : Option<ItemMagicTemplate> } ... #[derive(Deserialize, Debug, Clone)] pub struct ItemMagicTemplate { pub unidentified_name: String, pub bonus_min: i32, pub bonus_max: i32, pub include_cursed: bool } }
That's enough to load the extra information - it just doesn't do anything. We also need to go through and add Clone to the #[derive] list for all the structures in that file. We'll be using clone() to make a copy to then modify for each variant.
Unlike other additions, this doesn't modify our spawn_named_item function in rawmaster.rs; we want to modify the raw file templates before we get to spawning. Instead, we're going to post-process the item list built by the load function itself (including modifying the spawns list). At the top of the function, we'll read through every item and if it has the template attached (and is a weapon or armor item), we'll add it to a list to process:
#![allow(unused)] fn main() { pub fn load(&mut self, raws : Raws) { self.raws = raws; self.item_index = HashMap::new(); let mut used_names : HashSet<String> = HashSet::new(); struct NewMagicItem { name : String, bonus : i32 } let mut items_to_build : Vec<NewMagicItem> = Vec::new(); for (i,item) in self.raws.items.iter().enumerate() { if used_names.contains(&item.name) { rltk::console::log(format!("WARNING - duplicate item name in raws [{}]", item.name)); } self.item_index.insert(item.name.clone(), i); used_names.insert(item.name.clone()); if let Some(template) = &item.template_magic { if item.weapon.is_some() || item.wearable.is_some() { if template.include_cursed { items_to_build.push(NewMagicItem{ name : item.name.clone(), bonus : -1 }); } for bonus in template.bonus_min ..= template.bonus_max { items_to_build.push(NewMagicItem{ name : item.name.clone(), bonus }); } } else { rltk::console::log(format!("{} is marked as templated, but isn't a weapon or armor.", item.name)); } } } }
Then, after we're done with reading the items we'll add a loop to the end to create these items:
#![allow(unused)] fn main() { for nmw in items_to_build.iter() { let base_item_index = self.item_index[&nmw.name]; let mut base_item_copy = self.raws.items[base_item_index].clone(); if nmw.bonus == -1 { base_item_copy.name = format!("{} -1", nmw.name); } else { base_item_copy.name = format!("{} +{}", nmw.name, nmw.bonus); } base_item_copy.magic = Some(super::MagicItem{ class : match nmw.bonus { 2 => "rare".to_string(), 3 => "rare".to_string(), 4 => "rare".to_string(), 5 => "legendary".to_string(), _ => "common".to_string() }, naming : base_item_copy.template_magic.as_ref().unwrap().unidentified_name.clone(), cursed: if nmw.bonus == -1 { Some(true) } else { None } }); if let Some(initiative_penalty) = base_item_copy.initiative_penalty.as_mut() { *initiative_penalty -= nmw.bonus as f32; } if let Some(base_value) = base_item_copy.base_value.as_mut() { *base_value += (nmw.bonus as f32 + 1.0) * 50.0; } if let Some(mut weapon) = base_item_copy.weapon.as_mut() { weapon.hit_bonus += nmw.bonus; let (n,die,plus) = parse_dice_string(&weapon.base_damage); let final_bonus = plus+nmw.bonus; if final_bonus > 0 { weapon.base_damage = format!("{}d{}+{}", n, die, final_bonus); } else if final_bonus < 0 { weapon.base_damage = format!("{}d{}-{}", n, die, i32::abs(final_bonus)); } } if let Some(mut armor) = base_item_copy.wearable.as_mut() { armor.armor_class += nmw.bonus as f32; } let real_name = base_item_copy.name.clone(); self.raws.items.push(base_item_copy); self.item_index.insert(real_name.clone(), self.raws.items.len()-1); self.raws.spawn_table.push(super::SpawnTableEntry{ name : real_name.clone(), weight : 10 - i32::abs(nmw.bonus), min_depth : 1 + i32::abs((nmw.bonus-1)*3), max_depth : 100, add_map_depth_to_weight : None }); } }
So this loops through all of the "Longsword +1", "Longsword -1", "Longsword +2" etc. that we created during the initial parsing. It then:
- Takes a copy of the original item.
- If the bonus is
-1, it renames it "Item -x"; otherwise it renamed it "Item +x" where x is the bonus. - It creates a new
magicentry for the item, and sets the common/rare/legendary status by bonus and sets the cursed flag as appropriate. - If the item has an initiative penalty, it subtracts the bonus from it (making cursed items worse, magical items better).
- It ups the base value by bonus +1 * 50 gold.
- If its a weapon, it adds the bonus to the
to_hitbonus and damage dice. It does the damage dice by reformatting the dice number. - If its armor, it adds the bonus to the armor class.
- It then inserts the new item into the spawn table, with a lower weight for better items and better items appearing later in the dungeon.
If you check the online source code - I've gone through and removed all the +1, +2 and simple cursed armor and weapons - and appended the template_magic to each of them. This results in the generation of 168 new items! That's a LOT better than typing them all in.
If you cargo run now, you'll find gradually improving magical items of all types throughout the dungeon. Nicer items appear as you get deeper into the dungeon, so there's a nice ramp-up in player power.
Trait Items
With the dagger of venom, we introduced a new type of item: one that inflicts an effect when you hit. Given that this can be any effect in the game, there's a lot of possibilities for effects! Manually adding in all of the effects would take a while - it's probably quicker to come up with a generic system, and have real variety in our items as a result (as well as not forgetting to add them!).
Let's get started by adding a new section to spawns.json, dedicated to weapon traits:
"weapon_traits" : [
{
"name" : "Venomous",
"effects" : { "damage_over_time" : "2" }
}
]
We'll add more traits later, for now we'll focus on making the system work at all! To read the data, we'll make a new file, raws/weapon_traits.rs (don't get confused by Rust traits and weapon traits; they aren't the same thing at all). We'll put in enough structure to allow Serde to read the JSON file:
#![allow(unused)] fn main() { use serde::{Deserialize}; use std::collections::HashMap; #[derive(Deserialize, Debug)] pub struct WeaponTrait { pub name : String, pub effects : HashMap<String, String> } }
Now we need to extend the data in raws/mod.rs to include it. At the top of the file, include:
#![allow(unused)] fn main() { mod weapon_traits; pub use weapon_traits::*; }
And then we'll add it into the Raws structure, just like we did for spells:
#![allow(unused)] fn main() { #[derive(Deserialize, Debug)] pub struct Raws { pub items : Vec<Item>, pub mobs : Vec<Mob>, pub props : Vec<Prop>, pub spawn_table : Vec<SpawnTableEntry>, pub loot_tables : Vec<LootTable>, pub faction_table : Vec<FactionInfo>, pub spells : Vec<Spell>, pub weapon_traits : Vec<WeaponTrait> } }
In turn, we have to extend the constructor in raws/rawmaster.rs to include an empty traits list:
#![allow(unused)] fn main() { impl RawMaster { pub fn empty() -> RawMaster { RawMaster { raws : Raws{ items: Vec::new(), mobs: Vec::new(), props: Vec::new(), spawn_table: Vec::new(), loot_tables: Vec::new(), faction_table : Vec::new(), spells : Vec::new(), weapon_traits : Vec::new() }, item_index : HashMap::new(), mob_index : HashMap::new(), prop_index : HashMap::new(), loot_index : HashMap::new(), faction_index : HashMap::new(), spell_index : HashMap::new() } } ... }
Thanks to the magic of Serde, that's all there is to actually loading the data! Now for the hard part: procedurally generating magic items that feature one or more traits. To avoid repeating ourselves, we're going to separate the code we wrote previously into reusable functions:
#![allow(unused)] fn main() { // Put this above the raws implementation struct NewMagicItem { name : String, bonus : i32 } ... // Inside the raws implementation fn append_magic_template(items_to_build : &mut Vec<NewMagicItem>, item : &super::Item) { if let Some(template) = &item.template_magic { if item.weapon.is_some() || item.wearable.is_some() { if template.include_cursed { items_to_build.push(NewMagicItem{ name : item.name.clone(), bonus : -1 }); } for bonus in template.bonus_min ..= template.bonus_max { items_to_build.push(NewMagicItem{ name : item.name.clone(), bonus }); } } else { rltk::console::log(format!("{} is marked as templated, but isn't a weapon or armor.", item.name)); } } } fn build_base_magic_item(&self, nmw : &NewMagicItem) -> super::Item { let base_item_index = self.item_index[&nmw.name]; let mut base_item_copy = self.raws.items[base_item_index].clone(); base_item_copy.vendor_category = None; // Don't sell magic items! if nmw.bonus == -1 { base_item_copy.name = format!("{} -1", nmw.name); } else { base_item_copy.name = format!("{} +{}", nmw.name, nmw.bonus); } base_item_copy.magic = Some(super::MagicItem{ class : match nmw.bonus { 2 => "rare".to_string(), 3 => "rare".to_string(), 4 => "rare".to_string(), 5 => "legendary".to_string(), _ => "common".to_string() }, naming : base_item_copy.template_magic.as_ref().unwrap().unidentified_name.clone(), cursed: if nmw.bonus == -1 { Some(true) } else { None } }); if let Some(initiative_penalty) = base_item_copy.initiative_penalty.as_mut() { *initiative_penalty -= nmw.bonus as f32; } if let Some(base_value) = base_item_copy.base_value.as_mut() { *base_value += (nmw.bonus as f32 + 1.0) * 50.0; } if let Some(mut weapon) = base_item_copy.weapon.as_mut() { weapon.hit_bonus += nmw.bonus; let (n,die,plus) = parse_dice_string(&weapon.base_damage); let final_bonus = plus+nmw.bonus; if final_bonus > 0 { weapon.base_damage = format!("{}d{}+{}", n, die, final_bonus); } else if final_bonus < 0 { weapon.base_damage = format!("{}d{}-{}", n, die, i32::abs(final_bonus)); } } if let Some(mut armor) = base_item_copy.wearable.as_mut() { armor.armor_class += nmw.bonus as f32; } base_item_copy } fn build_magic_weapon_or_armor(&mut self, items_to_build : &[NewMagicItem]) { for nmw in items_to_build.iter() { let base_item_copy = self.build_base_magic_item(&nmw); let real_name = base_item_copy.name.clone(); self.raws.items.push(base_item_copy); self.item_index.insert(real_name.clone(), self.raws.items.len()-1); self.raws.spawn_table.push(super::SpawnTableEntry{ name : real_name.clone(), weight : 10 - i32::abs(nmw.bonus), min_depth : 1 + i32::abs((nmw.bonus-1)*3), max_depth : 100, add_map_depth_to_weight : None }); } } fn build_traited_weapons(&mut self, items_to_build : &[NewMagicItem]) { items_to_build.iter().filter(|i| i.bonus > 0).for_each(|nmw| { for wt in self.raws.weapon_traits.iter() { let mut base_item_copy = self.build_base_magic_item(&nmw); if let Some(mut weapon) = base_item_copy.weapon.as_mut() { base_item_copy.name = format!("{} {}", wt.name, base_item_copy.name); if let Some(base_value) = base_item_copy.base_value.as_mut() { *base_value *= 2.0; } weapon.proc_chance = Some(0.25); weapon.proc_effects = Some(wt.effects.clone()); let real_name = base_item_copy.name.clone(); self.raws.items.push(base_item_copy); self.item_index.insert(real_name.clone(), self.raws.items.len()-1); self.raws.spawn_table.push(super::SpawnTableEntry{ name : real_name.clone(), weight : 9 - i32::abs(nmw.bonus), min_depth : 2 + i32::abs((nmw.bonus-1)*3), max_depth : 100, add_map_depth_to_weight : None }); } } }); } pub fn load(&mut self, raws : Raws) { self.raws = raws; self.item_index = HashMap::new(); let mut used_names : HashSet<String> = HashSet::new(); let mut items_to_build = Vec::new(); for (i,item) in self.raws.items.iter().enumerate() { if used_names.contains(&item.name) { rltk::console::log(format!("WARNING - duplicate item name in raws [{}]", item.name)); } self.item_index.insert(item.name.clone(), i); used_names.insert(item.name.clone()); RawMaster::append_magic_template(&mut items_to_build, item); } for (i,mob) in self.raws.mobs.iter().enumerate() { if used_names.contains(&mob.name) { rltk::console::log(format!("WARNING - duplicate mob name in raws [{}]", mob.name)); } self.mob_index.insert(mob.name.clone(), i); used_names.insert(mob.name.clone()); } for (i,prop) in self.raws.props.iter().enumerate() { if used_names.contains(&prop.name) { rltk::console::log(format!("WARNING - duplicate prop name in raws [{}]", prop.name)); } self.prop_index.insert(prop.name.clone(), i); used_names.insert(prop.name.clone()); } for spawn in self.raws.spawn_table.iter() { if !used_names.contains(&spawn.name) { rltk::console::log(format!("WARNING - Spawn tables references unspecified entity {}", spawn.name)); } } for (i,loot) in self.raws.loot_tables.iter().enumerate() { self.loot_index.insert(loot.name.clone(), i); } for faction in self.raws.faction_table.iter() { let mut reactions : HashMap<String, Reaction> = HashMap::new(); for other in faction.responses.iter() { reactions.insert( other.0.clone(), match other.1.as_str() { "ignore" => Reaction::Ignore, "flee" => Reaction::Flee, _ => Reaction::Attack } ); } self.faction_index.insert(faction.name.clone(), reactions); } for (i,spell) in self.raws.spells.iter().enumerate() { self.spell_index.insert(spell.name.clone(), i); } self.build_magic_weapon_or_armor(&items_to_build); self.build_traited_weapons(&items_to_build); } }
You'll notice that there is a new function in there build_traited_weapons. This iterates through the magic items, filtering weapons only - and only those with a bonus (I don't really want to get into what a cursed venomous dagger does, just yet). It reads through all of the traits and makes a (rarer) version of each magical weapon with that trait applied.
Let's go ahead and add one more trait to spawns.json:
"weapon_traits" : [
{
"name" : "Venomous",
"effects" : { "damage_over_time" : "2" }
},
{
"name" : "Dazzling",
"effects" : { "confusion" : "2" }
}
]
If you cargo run and play now, you'll sometimes find such wonders as Dazzling Longsword +1, or Venomous Dagger +2.
Wrap-Up
In this chapter, we've built ourselves a mushroom grove level, and a second level transitioning to the dark elven stronghold. We've started to add dark elves, and to power-up (and save typing) we're automatically generating magical items from -1 to +5. We then generated "traited" versions of the same weapons. Now there's a huge amount of variety between runs, which should keep the gear-oriented player happy. There's also a nice progression of levels, and we're ready to tackle the dark elven city - and ranged weaponry!
...
The source code for this chapter may be found here
Run this chapter's example with web assembly, in your browser (WebGL2 required)
Copyright (C) 2019, Herbert Wolverson.
Missiles and Ranged Attacks
About this tutorial
This tutorial is free and open source, and all code uses the MIT license - so you are free to do with it as you like. My hope is that you will enjoy the tutorial, and make great games!
If you enjoy this and would like me to keep writing, please consider supporting my Patreon.
When you read fiction involving dark elves, they typically sneakily fire missile weapons from the darkness. That's actually why they were included in this tutorial book: they give a great excuse to branch into the wonderful world of ranged combat. We already have a bit of that: spell effects can happen at range, but the targeting system is a little clunky - and not at all ergonomic for an archery duel. So in this chapter, we're going to introduce ranged weaponry and make the dark elves a little scarier. We're also going to try and make the particle effects for missiles better, so the player can see what's going on.
Introducing ranged weapons
We're going to cheat a little and not worry about ammunition; some games count every arrow, and for a ranged-combat character there can be a heavy emphasis on keeping one's quiver full. We're going to focus on the ranged weaponry side, and assume that ammunition is plentiful; that's not the most realistic option, but it keeps things manageable!
Defining the Shortbow
Let's start by opening up spawns.json and making a an entry for a shortbow:
{
"name" : "Shortbow",
"renderable": {
"glyph" : ")",
"fg" : "#FFAAAA",
"bg" : "#000000",
"order" : 2
},
"weapon" : {
"range" : "4",
"attribute" : "Quickness",
"base_damage" : "1d4",
"hit_bonus" : 0
},
"weight_lbs" : 2.0,
"base_value" : 5.0,
"initiative_penalty" : 1,
"vendor_category" : "weapon"
},
You'll notice that this is very similar to the dagger entry; in fact, I copy/pasted it, and then changed "range" from "melee" to "4"! I also removed the templated magic section for now, to keep things straightforward. Now we open up components.rs, and take a look at MeleeWeapon - with a view to making a ranged weapon. Unfortunately, we see a design mistake! The damage is all inside the weapon, so if we make a generic RangedWeapon component, we'll be repeating ourselves. It's generally a good idea not to type the same thing twice, so we'll change the name of MeleeWeapon to Weapon - and add in a range field. If it doesn't have a range (it's an Option), then it's melee-only:
#![allow(unused)] fn main() { #[derive(Component, Serialize, Deserialize, Clone)] pub struct Weapon { pub range : Option<i32>, pub attribute : WeaponAttribute, pub damage_n_dice : i32, pub damage_die_type : i32, pub damage_bonus : i32, pub hit_bonus : i32, pub proc_chance : Option<f32>, pub proc_target : Option<String>, } }
You'll need to open up main.rs, saveload_system.rs and change MeleeWeapon to Weapon. A few other bits of code just broke, too. In melee_combat_system.rs, simply replace all instances of MeleeWeapon with Weapon. You'll also need to add range to the dummy weapon created to handle natural attacks:
#![allow(unused)] fn main() { let mut weapon_info = Weapon{ range: None, attribute : WeaponAttribute::Might, hit_bonus : 0, damage_n_dice : 1, damage_die_type : 4, damage_bonus : 0, proc_chance : None, proc_target : None }; }
To make it compile and run as before, you can change one section of raws/rawmaster.rs:
#![allow(unused)] fn main() { let mut wpn = Weapon{ range : None, attribute : WeaponAttribute::Might, damage_n_dice : n_dice, damage_die_type : die_type, damage_bonus : bonus, hit_bonus : weapon.hit_bonus, proc_chance : weapon.proc_chance, proc_target : weapon.proc_target.clone() }; }
That's enough to get the old code running once again, and has a significant virtue: we've kept the weapon code basically the same, so all of the "trait" and "magic template" systems still work. There's one significant limitation, though: shortbows are still a melee weapon!
We can open up raws/rawmaster.rs and change the same piece of code to instantiate a range if there is one. That's a good start - at least the game has the option of knowing that it's a ranged weapon!
#![allow(unused)] fn main() { let mut wpn = Weapon{ range : if weapon.range == "melee" { None } else { Some(weapon.range.parse::<i32>().expect("Not a number")) }, attribute : WeaponAttribute::Might, damage_n_dice : n_dice, damage_die_type : die_type, damage_bonus : bonus, hit_bonus : weapon.hit_bonus, proc_chance : weapon.proc_chance, proc_target : weapon.proc_target.clone() }; }
Letting the player shoot things
So now we know that a weapon is a ranged weapon, which is a great start. Let's go into spawner.rs and start the player with a short bow. We probably won't keep it, but it gives a good basis on which to build:
#![allow(unused)] fn main() { spawn_named_entity(&RAWS.lock().unwrap(), ecs, "Rusty Longsword", SpawnType::Equipped{by : player}); spawn_named_entity(&RAWS.lock().unwrap(), ecs, "Dried Sausage", SpawnType::Carried{by : player} ); spawn_named_entity(&RAWS.lock().unwrap(), ecs, "Beer", SpawnType::Carried{by : player}); spawn_named_entity(&RAWS.lock().unwrap(), ecs, "Stained Tunic", SpawnType::Equipped{by : player}); spawn_named_entity(&RAWS.lock().unwrap(), ecs, "Torn Trousers", SpawnType::Equipped{by : player}); spawn_named_entity(&RAWS.lock().unwrap(), ecs, "Old Boots", SpawnType::Equipped{by : player}); spawn_named_entity(&RAWS.lock().unwrap(), ecs, "Shortbow", SpawnType::Carried{by : player}); }
We've started with it in the backpack, so the player still has to make a conscious decision to switch to using ranged weaponry (we've done enough melee work that shooting things shouldn't be the default!) - but this saves us from having to run around looking for one while we test the system we're building. Go ahead and cargo run to quickly test that you can equip your new bow. You can't shoot anything yet, but you can at least equip it (and be confident that we didn't break too much with the component change).
The hardest part of ranged weaponry is that it has a target: something you are shooting at. We want target selection to be easy, lest the player not figure out how to shoot things! Let's start by showing the player information about the weapon they have equipped - and if it has a range, we'll include that. In gui.rs, find the part where we iterate through equipped items and display them (it's around line 162 in my version). We'll extend it a bit:
#![allow(unused)] fn main() { // Equipped let mut y = 13; let entities = ecs.entities(); let equipped = ecs.read_storage::<Equipped>(); let weapon = ecs.read_storage::<Weapon>(); for (entity, equipped_by) in (&entities, &equipped).join() { if equipped_by.owner == *player_entity { let name = get_item_display_name(ecs, entity); ctx.print_color(50, y, get_item_color(ecs, entity), black, &name); y += 1; if let Some(weapon) = weapon.get(entity) { let mut weapon_info = if weapon.damage_bonus < 0 { format!("┤ {} ({}d{}{})", &name, weapon.damage_n_dice, weapon.damage_die_type, weapon.damage_bonus) } else if weapon.damage_bonus == 0 { format!("┤ {} ({}d{})", &name, weapon.damage_n_dice, weapon.damage_die_type) } else { format!("┤ {} ({}d{}+{})", &name, weapon.damage_n_dice, weapon.damage_die_type, weapon.damage_bonus) }; if let Some(range) = weapon.range { weapon_info += &format!(" (range: {}, F to fire)", range); } weapon_info += " ├"; ctx.print_color(3, 45, yellow, black, &weapon_info); } } } }
This is a good start, because now we're telling the user that they have a ranged weapon (and generally showing immediate results of a weapon upgrade is good!):
So, now to let the player easily target enemies! We'll start by making a Target component. In components.rs (and, as usual, registered in main.rs and saveload_system.rs):
#![allow(unused)] fn main() { #[derive(Component, Debug, Serialize, Deserialize, Clone)] pub struct Target {} }
The idea is simple: we'll attach a Target to whomever we are currently targeting. We should highlight the target on the map; so we go over to camera.rs and add the following to the entity render code:
#![allow(unused)] fn main() { // Render entities let positions = ecs.read_storage::<Position>(); let renderables = ecs.read_storage::<Renderable>(); let hidden = ecs.read_storage::<Hidden>(); let map = ecs.fetch::<Map>(); let sizes = ecs.read_storage::<TileSize>(); let entities = ecs.entities(); let targets = ecs.read_storage::<Target>(); let mut data = (&positions, &renderables, &entities, !&hidden).join().collect::<Vec<_>>(); data.sort_by(|&a, &b| b.1.render_order.cmp(&a.1.render_order) ); for (pos, render, entity, _hidden) in data.iter() { if let Some(size) = sizes.get(*entity) { for cy in 0 .. size.y { for cx in 0 .. size.x { let tile_x = cx + pos.x; let tile_y = cy + pos.y; let idx = map.xy_idx(tile_x, tile_y); if map.visible_tiles[idx] { let entity_screen_x = (cx + pos.x) - min_x; let entity_screen_y = (cy + pos.y) - min_y; if entity_screen_x > 0 && entity_screen_x < map_width && entity_screen_y > 0 && entity_screen_y < map_height { ctx.set(entity_screen_x + 1, entity_screen_y + 1, render.fg, render.bg, render.glyph); } } } } } else { let idx = map.xy_idx(pos.x, pos.y); if map.visible_tiles[idx] { let entity_screen_x = pos.x - min_x; let entity_screen_y = pos.y - min_y; if entity_screen_x > 0 && entity_screen_x < map_width && entity_screen_y > 0 && entity_screen_y < map_height { ctx.set(entity_screen_x + 1, entity_screen_y + 1, render.fg, render.bg, render.glyph); } } } if targets.get(*entity).is_some() { let entity_screen_x = pos.x - min_x; let entity_screen_y = pos.y - min_y; ctx.set(entity_screen_x , entity_screen_y + 1, rltk::RGB::named(rltk::RED), rltk::RGB::named(rltk::YELLOW), rltk::to_cp437('[')); ctx.set(entity_screen_x +2, entity_screen_y + 1, rltk::RGB::named(rltk::RED), rltk::RGB::named(rltk::YELLOW), rltk::to_cp437(']')); } } }
This code is checking each entity we render to see if it is being targeted, and renders brightly colored brackets around it if it is. We should also provide some hints as to how to use the targeting system, so over in gui.rs we amend our ranged weapon code as follows:
#![allow(unused)] fn main() { if let Some(weapon) = weapon.get(entity) { let mut weapon_info = if weapon.damage_bonus < 0 { format!("┤ {} ({}d{}{})", &name, weapon.damage_n_dice, weapon.damage_die_type, weapon.damage_bonus) } else if weapon.damage_bonus == 0 { format!("┤ {} ({}d{})", &name, weapon.damage_n_dice, weapon.damage_die_type) } else { format!("┤ {} ({}d{}+{})", &name, weapon.damage_n_dice, weapon.damage_die_type, weapon.damage_bonus) }; if let Some(range) = weapon.range { weapon_info += &format!(" (range: {}, F to fire, V cycle targets)", range); } weapon_info += " ├"; ctx.print_color(3, 45, yellow, black, &weapon_info); } }
We're telling the user to press V to change targets, so we need to implement that functionality! Before we do that, we need to come up with a default targeting scheme. Since we're worrying about the player's target, we'll head to player.rs and add some new functions. The first determines what entities are eligible for targeting:
#![allow(unused)] fn main() { fn get_player_target_list(ecs : &mut World) -> Vec<(f32,Entity)> { let mut possible_targets : Vec<(f32,Entity)> = Vec::new(); let viewsheds = ecs.read_storage::<Viewshed>(); let player_entity = ecs.fetch::<Entity>(); let equipped = ecs.read_storage::<Equipped>(); let weapon = ecs.read_storage::<Weapon>(); let map = ecs.fetch::<Map>(); let positions = ecs.read_storage::<Position>(); let factions = ecs.read_storage::<Faction>(); for (equipped, weapon) in (&equipped, &weapon).join() { if equipped.owner == *player_entity && weapon.range.is_some() { let range = weapon.range.unwrap(); if let Some(vs) = viewsheds.get(*player_entity) { let player_pos = positions.get(*player_entity).unwrap(); for tile_point in vs.visible_tiles.iter() { let tile_idx = map.xy_idx(tile_point.x, tile_point.y); let distance_to_target = rltk::DistanceAlg::Pythagoras.distance2d(*tile_point, rltk::Point::new(player_pos.x, player_pos.y)); if distance_to_target < range as f32 { crate::spatial::for_each_tile_content(tile_idx, |possible_target| { if possible_target != *player_entity && factions.get(possible_target).is_some() { possible_targets.push((distance_to_target, possible_target)); } }); } } } } } possible_targets.sort_by(|a,b| a.0.partial_cmp(&b.0).unwrap()); possible_targets } }
This is a slightly convoluted function, so let's step through it:
- We make an empty results list, containing targetable entities and their distance from the player.
- We iterate through equipped weapons, looking to see if the player has a ranged weapon.
- If they do, we note down its range.
- Then we look at their viewshed, and check that each tile is in range of the weapon.
- If it is in range, we look at entities in that tile via the
tile_contentsystem. If the entity is, in fact, a valid target (they have aFactionmembership), we add them to the possible targets list. - We sort the possible targets list by range.
Now we need to select a new target when the player moves. We'll pick the closest, on the basis that you are more likely to target an immediate threat. The following function accomplishes this:
#![allow(unused)] fn main() { pub fn end_turn_targeting(ecs: &mut World) { let possible_targets = get_player_target_list(ecs); let mut targets = ecs.write_storage::<Target>(); targets.clear(); if !possible_targets.is_empty() { targets.insert(possible_targets[0].1, Target{}).expect("Insert fail"); } } }
We want the start of a new turn to call this function. So we head over into main.rs, and amend the game loop to catch the start of new turns and call this function:
#![allow(unused)] fn main() { RunState::Ticking => { let mut should_change_target = false; while newrunstate == RunState::Ticking { self.run_systems(); self.ecs.maintain(); match *self.ecs.fetch::<RunState>() { RunState::AwaitingInput => { newrunstate = RunState::AwaitingInput; should_change_target = true; } RunState::MagicMapReveal{ .. } => newrunstate = RunState::MagicMapReveal{ row: 0 }, RunState::TownPortal => newrunstate = RunState::TownPortal, RunState::TeleportingToOtherLevel{ x, y, depth } => newrunstate = RunState::TeleportingToOtherLevel{ x, y, depth }, RunState::ShowRemoveCurse => newrunstate = RunState::ShowRemoveCurse, RunState::ShowIdentify => newrunstate = RunState::ShowIdentify, _ => newrunstate = RunState::Ticking } } if should_change_target { player::end_turn_targeting(&mut self.ecs); } } }
Now we'll return to player.rs and add another function to cycle targets:
#![allow(unused)] fn main() { fn cycle_target(ecs: &mut World) { let possible_targets = get_player_target_list(ecs); let mut targets = ecs.write_storage::<Target>(); let entities = ecs.entities(); let mut current_target : Option<Entity> = None; for (e,_t) in (&entities, &targets).join() { current_target = Some(e); } targets.clear(); if let Some(current_target) = current_target { if !possible_targets.len() > 1 { let mut index = 0; for (i, target) in possible_targets.iter().enumerate() { if target.1 == current_target { index = i; } } if index > possible_targets.len()-2 { targets.insert(possible_targets[0].1, Target{}); } else { targets.insert(possible_targets[index+1].1, Target{}); } } } } }
This is a long function, but I left it long for clarity. It finds the index of the current target in the current targeting list. If there are multiple targets, it selects the next one in the list. If it was at the end of the list, it moves back to the beginning. Now we need to capture presses of V and call this function. In the player_input function, we'll add a new section:
#![allow(unused)] fn main() { // Ranged VirtualKeyCode::V => { cycle_target(&mut gs.ecs); return RunState::AwaitingInput; } }
If you cargo run now, you can equip your bow and start targeting:
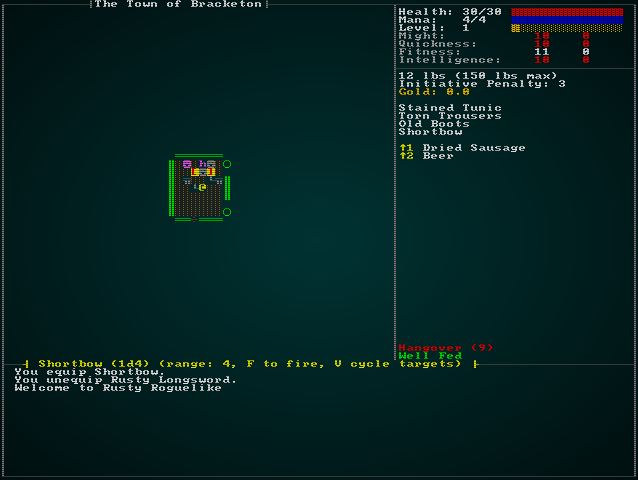
Shooting Things
We have a well-established pattern for combat: flag the action with a WantsToMelee component, and then it is picked up in the MeleeCombatSystem. We've used a similar pattern for wanting to approach, use skills or items - so it just makes sense that we'll do the same again for wanting to shoot. In components.rs (and registered in main.rs and saveload_system.rs), we'll add the following:
#![allow(unused)] fn main() { #[derive(Component, Debug, ConvertSaveload, Clone)] pub struct WantsToShoot { pub target : Entity } }
We'll also want to make a new system, and store it in ranged_combat_system.rs. It's basically a cut-and-paste of the melee_combat_system, but looking for WantsToShoot instead:
#![allow(unused)] fn main() { use specs::prelude::*; use super::{Attributes, Skills, WantsToShoot, Name, gamelog::GameLog, HungerClock, HungerState, Pools, skill_bonus, Skill, Equipped, Weapon, EquipmentSlot, WeaponAttribute, Wearable, NaturalAttackDefense, effects::*, Map, Position}; use rltk::{to_cp437, RGB, Point}; pub struct RangedCombatSystem {} impl<'a> System<'a> for RangedCombatSystem { #[allow(clippy::type_complexity)] type SystemData = ( Entities<'a>, WriteExpect<'a, GameLog>, WriteStorage<'a, WantsToShoot>, ReadStorage<'a, Name>, ReadStorage<'a, Attributes>, ReadStorage<'a, Skills>, ReadStorage<'a, HungerClock>, ReadStorage<'a, Pools>, WriteExpect<'a, rltk::RandomNumberGenerator>, ReadStorage<'a, Equipped>, ReadStorage<'a, Weapon>, ReadStorage<'a, Wearable>, ReadStorage<'a, NaturalAttackDefense>, ReadStorage<'a, Position>, ReadExpect<'a, Map> ); fn run(&mut self, data : Self::SystemData) { let (entities, mut log, mut wants_shoot, names, attributes, skills, hunger_clock, pools, mut rng, equipped_items, weapon, wearables, natural, positions, map) = data; for (entity, wants_shoot, name, attacker_attributes, attacker_skills, attacker_pools) in (&entities, &wants_shoot, &names, &attributes, &skills, &pools).join() { // Are the attacker and defender alive? Only attack if they are let target_pools = pools.get(wants_shoot.target).unwrap(); let target_attributes = attributes.get(wants_shoot.target).unwrap(); let target_skills = skills.get(wants_shoot.target).unwrap(); if attacker_pools.hit_points.current > 0 && target_pools.hit_points.current > 0 { let target_name = names.get(wants_shoot.target).unwrap(); // Fire projectile effect let apos = positions.get(entity).unwrap(); let dpos = positions.get(wants_shoot.target).unwrap(); add_effect( None, EffectType::ParticleProjectile{ glyph: to_cp437('*'), fg : RGB::named(rltk::CYAN), bg : RGB::named(rltk::BLACK), lifespan : 300.0, speed: 50.0, path: rltk::line2d( rltk::LineAlg::Bresenham, Point::new(apos.x, apos.y), Point::new(dpos.x, dpos.y) ) }, Targets::Tile{tile_idx : map.xy_idx(apos.x, apos.y) as i32} ); // Define the basic unarmed attack - overridden by wielding check below if a weapon is equipped let mut weapon_info = Weapon{ range: None, attribute : WeaponAttribute::Might, hit_bonus : 0, damage_n_dice : 1, damage_die_type : 4, damage_bonus : 0, proc_chance : None, proc_target : None }; if let Some(nat) = natural.get(entity) { if !nat.attacks.is_empty() { let attack_index = if nat.attacks.len()==1 { 0 } else { rng.roll_dice(1, nat.attacks.len() as i32) as usize -1 }; weapon_info.hit_bonus = nat.attacks[attack_index].hit_bonus; weapon_info.damage_n_dice = nat.attacks[attack_index].damage_n_dice; weapon_info.damage_die_type = nat.attacks[attack_index].damage_die_type; weapon_info.damage_bonus = nat.attacks[attack_index].damage_bonus; } } let mut weapon_entity : Option<Entity> = None; for (weaponentity,wielded,melee) in (&entities, &equipped_items, &weapon).join() { if wielded.owner == entity && wielded.slot == EquipmentSlot::Melee { weapon_info = melee.clone(); weapon_entity = Some(weaponentity); } } let natural_roll = rng.roll_dice(1, 20); let attribute_hit_bonus = if weapon_info.attribute == WeaponAttribute::Might { attacker_attributes.might.bonus } else { attacker_attributes.quickness.bonus}; let skill_hit_bonus = skill_bonus(Skill::Melee, &*attacker_skills); let weapon_hit_bonus = weapon_info.hit_bonus; let mut status_hit_bonus = 0; if let Some(hc) = hunger_clock.get(entity) { // Well-Fed grants +1 if hc.state == HungerState::WellFed { status_hit_bonus += 1; } } let modified_hit_roll = natural_roll + attribute_hit_bonus + skill_hit_bonus + weapon_hit_bonus + status_hit_bonus; //println!("Natural roll: {}", natural_roll); //println!("Modified hit roll: {}", modified_hit_roll); let mut armor_item_bonus_f = 0.0; for (wielded,armor) in (&equipped_items, &wearables).join() { if wielded.owner == wants_shoot.target { armor_item_bonus_f += armor.armor_class; } } let base_armor_class = match natural.get(wants_shoot.target) { None => 10, Some(nat) => nat.armor_class.unwrap_or(10) }; let armor_quickness_bonus = target_attributes.quickness.bonus; let armor_skill_bonus = skill_bonus(Skill::Defense, &*target_skills); let armor_item_bonus = armor_item_bonus_f as i32; let armor_class = base_armor_class + armor_quickness_bonus + armor_skill_bonus + armor_item_bonus; //println!("Armor class: {}", armor_class); if natural_roll != 1 && (natural_roll == 20 || modified_hit_roll > armor_class) { // Target hit! Until we support weapons, we're going with 1d4 let base_damage = rng.roll_dice(weapon_info.damage_n_dice, weapon_info.damage_die_type); let attr_damage_bonus = attacker_attributes.might.bonus; let skill_damage_bonus = skill_bonus(Skill::Melee, &*attacker_skills); let weapon_damage_bonus = weapon_info.damage_bonus; let damage = i32::max(0, base_damage + attr_damage_bonus + skill_damage_bonus + weapon_damage_bonus); /*println!("Damage: {} + {}attr + {}skill + {}weapon = {}", base_damage, attr_damage_bonus, skill_damage_bonus, weapon_damage_bonus, damage );*/ add_effect( Some(entity), EffectType::Damage{ amount: damage }, Targets::Single{ target: wants_shoot.target } ); log.entries.push(format!("{} hits {}, for {} hp.", &name.name, &target_name.name, damage)); // Proc effects if let Some(chance) = &weapon_info.proc_chance { let roll = rng.roll_dice(1, 100); //println!("Roll {}, Chance {}", roll, chance); if roll <= (chance * 100.0) as i32 { //println!("Proc!"); let effect_target = if weapon_info.proc_target.unwrap() == "Self" { Targets::Single{ target: entity } } else { Targets::Single { target : wants_shoot.target } }; add_effect( Some(entity), EffectType::ItemUse{ item: weapon_entity.unwrap() }, effect_target ) } } } else if natural_roll == 1 { // Natural 1 miss log.entries.push(format!("{} considers attacking {}, but misjudges the timing.", name.name, target_name.name)); add_effect( None, EffectType::Particle{ glyph: rltk::to_cp437('‼'), fg: rltk::RGB::named(rltk::BLUE), bg : rltk::RGB::named(rltk::BLACK), lifespan: 200.0 }, Targets::Single{ target: wants_shoot.target } ); } else { // Miss log.entries.push(format!("{} attacks {}, but can't connect.", name.name, target_name.name)); add_effect( None, EffectType::Particle{ glyph: rltk::to_cp437('‼'), fg: rltk::RGB::named(rltk::CYAN), bg : rltk::RGB::named(rltk::BLACK), lifespan: 200.0 }, Targets::Single{ target: wants_shoot.target } ); } } } wants_shoot.clear(); } } }
Most of this is straight out of the previous system. You'll also want to add in into run_systems in main.rs; right after melee is a good spot:
#![allow(unused)] fn main() { let mut ranged = RangedCombatSystem{}; ranged.run_now(&self.ecs); }
The eagle-eyed reader will have noticed that we also snuck in an extra add_effect call, this time invoking an EffectType::ParticleProjectile. This isn't essential, but displaying a flying projectile really brings out the flavor in a ranged battle. So far, our particles have been stationary, so lets add in some "juice" to them!
In components.rs, we'll update the ParticleLifetime component to include an optional animation:
#![allow(unused)] fn main() { #[derive(Serialize, Deserialize, Clone)] pub struct ParticleAnimation { pub step_time : f32, pub path : Vec<Point>, pub current_step : usize, pub timer : f32 } #[derive(Component, Serialize, Deserialize, Clone)] pub struct ParticleLifetime { pub lifetime_ms : f32, pub animation : Option<ParticleAnimation> } }
This adds a step_time - how long should the particle dwell on each step. A path - a vector of Points listing each step along the way. current_step and timer will be used to track the projectile's progress.
You'll want to go into particle_system.rs and modify the particle spawning to include None by default:
#![allow(unused)] fn main() { particles.insert(p, ParticleLifetime{ lifetime_ms: new_particle.lifetime, animation: None }).expect("Unable to insert lifetime"); }
While we're here, we'll rename the culling function (cull_dead_particles) to update_particles - better reflecting what it does. We'll also add in some logic to see if there is animation, and have it update its position along the animation track:
#![allow(unused)] fn main() { pub fn update_particles(ecs : &mut World, ctx : &Rltk) { let mut dead_particles : Vec<Entity> = Vec::new(); { // Age out particles let mut particles = ecs.write_storage::<ParticleLifetime>(); let entities = ecs.entities(); let map = ecs.fetch::<Map>(); for (entity, mut particle) in (&entities, &mut particles).join() { if let Some(animation) = &mut particle.animation { animation.timer += ctx.frame_time_ms; if animation.timer > animation.step_time && animation.current_step < animation.path.len()-2 { animation.current_step += 1; if let Some(pos) = ecs.write_storage::<Position>().get_mut(entity) { pos.x = animation.path[animation.current_step].x; pos.y = animation.path[animation.current_step].y; } } } particle.lifetime_ms -= ctx.frame_time_ms; if particle.lifetime_ms < 0.0 { dead_particles.push(entity); } } } for dead in dead_particles.iter() { ecs.delete_entity(*dead).expect("Particle will not die"); } } }
Open up main.rs again, and search for cull_dead_particles and replace it with update_particles.
That's enough to actually animate the particles and still have them vanish when done, but we need to update the Effects system to spawn the new type of particle. In effects/mod.rs, we'll extend the EffectType enum to include the new one:
#![allow(unused)] fn main() { #[derive(Debug)] pub enum EffectType { ... ParticleProjectile { glyph: rltk::FontCharType, fg : rltk::RGB, bg: rltk::RGB, lifespan: f32, speed: f32, path: Vec<Point> }, ... }
We also have to update affect_tile in the same file:
#![allow(unused)] fn main() { fn affect_tile(ecs: &mut World, effect: &mut EffectSpawner, tile_idx : i32) { if tile_effect_hits_entities(&effect.effect_type) { let content = ecs.fetch::<Map>().tile_content[tile_idx as usize].clone(); content.iter().for_each(|entity| affect_entity(ecs, effect, *entity)); } match &effect.effect_type { EffectType::Bloodstain => damage::bloodstain(ecs, tile_idx), EffectType::Particle{..} => particles::particle_to_tile(ecs, tile_idx, &effect), EffectType::ParticleProjectile{..} => particles::projectile(ecs, tile_idx, &effect), _ => {} } } }
This calls into particles::projectile, so open up effects/particles.rs and we'll add the function:
#![allow(unused)] fn main() { pub fn projectile(ecs: &mut World, tile_idx : i32, effect: &EffectSpawner) { if let EffectType::ParticleProjectile{ glyph, fg, bg, lifespan, speed, path } = &effect.effect_type { let map = ecs.fetch::<Map>(); let x = tile_idx % map.width; let y = tile_idx / map.width; std::mem::drop(map); ecs.create_entity() .with(Position{ x, y }) .with(Renderable{ fg: *fg, bg: *bg, glyph: *glyph, render_order: 0 }) .with(ParticleLifetime{ lifetime_ms: path.len() as f32 * speed, animation: Some(ParticleAnimation{ step_time: *speed, path: path.to_vec(), current_step: 0, timer: 0.0 }) }) .build(); } } }
If you cargo run the project now, you can target and shoot things - and enjoy a bit of animation:
Making Monsters Shoot Back
Only the player having a bow is more than a little unfair. It also takes a lot of challenge out of the game: you can shoot things as they approach you, but they can't fire back. Let's add a new monster, the Bandit Archer. It's mostly a copy of the Bandit, but they have a short bow instead of a dagger. In spawns.json:
{ "name" : "Bandit Archer", "weight" : 9, "min_depth" : 2, "max_depth" : 3 },
...
{
"name" : "Bandit Archer",
"renderable": {
"glyph" : "☻",
"fg" : "#FF5500",
"bg" : "#000000",
"order" : 1
},
"blocks_tile" : true,
"vision_range" : 6,
"movement" : "random_waypoint",
"quips" : [ "Stand and deliver!", "Alright, hand it over" ],
"attributes" : {},
"equipped" : [ "Shortbow", "Shield", "Leather Armor", "Leather Boots" ],
"light" : {
"range" : 6,
"color" : "#FFFF55"
},
"faction" : "Bandits",
"gold" : "1d6"
},
We've changed their color slightly, and added a Shortbow to their equipment list. We already support equipment spawning, so that should be enough for the bow to appear in their equipment - but they don't know how to use it. We already handle spellcasting (and things like dragon breath) in ai/visible_ai_systems.rs - so that's a logical place to consider adding shooting. We can add it quite simply: check to see if there is a ranged weapon equipped, and if there is - check range and generate a WantsToShoot. We'll modify the reaction Attack:
#![allow(unused)] fn main() { Reaction::Attack => { let range = rltk::DistanceAlg::Pythagoras.distance2d( rltk::Point::new(pos.x, pos.y), rltk::Point::new(reaction.0 as i32 % map.width, reaction.0 as i32 / map.width) ); if let Some(abilities) = abilities.get(entity) { for ability in abilities.abilities.iter() { if range >= ability.min_range && range <= ability.range && rng.roll_dice(1,100) <= (ability.chance * 100.0) as i32 { use crate::raws::find_spell_entity_by_name; casting.insert( entity, WantsToCastSpell{ spell : find_spell_entity_by_name(&ability.spell, &names, &spells, &entities).unwrap(), target : Some(rltk::Point::new(reaction.0 as i32 % map.width, reaction.0 as i32 / map.width))} ).expect("Unable to insert"); done = true; } } } if !done { for (weapon, equip) in (&weapons, &equipped).join() { if let Some(wrange) = weapon.range { if equip.owner == entity { rltk::console::log(format!("Owner found. Ranges: {}/{}", wrange, range)); if wrange >= range as i32 { rltk::console::log("Inserting shoot"); wants_shoot.insert(entity, WantsToShoot{ target: reaction.2 }).expect("Insert fail"); done = true; } } } } } ... }
If you cargo run now, the bandits shoot back!
Templating magical bows
Add the shortbow to your spawn list:
{ "name" : "Shortbow", "weight" : 2, "min_depth" : 3, "max_depth" : 100 },
You can also add magical templating to it:
{
"name" : "Shortbow",
"renderable": {
"glyph" : ")",
"fg" : "#FFAAAA",
"bg" : "#000000",
"order" : 2
},
"weapon" : {
"range" : "4",
"attribute" : "Quickness",
"base_damage" : "1d4",
"hit_bonus" : 0
},
"weight_lbs" : 2.0,
"base_value" : 5.0,
"initiative_penalty" : 1,
"vendor_category" : "weapon",
"template_magic" : {
"unidentified_name" : "Unidentified Shortbow",
"bonus_min" : 1,
"bonus_max" : 5,
"include_cursed" : true
}
},
Making Dark Elves Scarier
So now we can introduce some goblin archers, to make the caves a little scarier. We won't introduce any ranged weapons in the dragon/lizard levels, to even the odds a little (the game just got easier!). We can cut-and-paste a goblin just like we did for the bandit:
{
"name" : "Goblin Archer",
"renderable": {
"glyph" : "g",
"fg" : "#FFFF00",
"bg" : "#000000",
"order" : 1
},
"blocks_tile" : true,
"vision_range" : 8,
"movement" : "static",
"attributes" : {},
"faction" : "Cave Goblins",
"gold" : "1d6",
"equipped" : [ "Shortbow", "Leather Armor", "Leather Boots" ],
},
And that brings us to our goal when we started the chapter. We wanted to give Dark Elves hand-crossbows. We'll start by generating the new weapon type in spawns.json:
{
"name" : "Hand Crossbow",
"renderable": {
"glyph" : ")",
"fg" : "#FFAAAA",
"bg" : "#000000",
"order" : 2
},
"weapon" : {
"range" : "6",
"attribute" : "Quickness",
"base_damage" : "1d6",
"hit_bonus" : 0
},
"weight_lbs" : 2.0,
"base_value" : 5.0,
"initiative_penalty" : 1,
"vendor_category" : "weapon",
"template_magic" : {
"unidentified_name" : "Unidentified Hand Crossbow",
"bonus_min" : 1,
"bonus_max" : 5,
"include_cursed" : true
}
},
We should also add it to the spawns table, but only for dark elf levels:
{ "name" : "Hand Crossbow", "weight" : 2, "min_depth" : 9, "max_depth" : 11 }
Finally, we give it to the dark elves:
{
"name" : "Dark Elf",
"renderable": {
"glyph" : "e",
"fg" : "#FF0000",
"bg" : "#000000",
"order" : 1
},
"blocks_tile" : true,
"vision_range" : 8,
"movement" : "random_waypoint",
"attributes" : {},
"equipped" : [ "Hand Crossbow", "Scimitar", "Buckler", "Drow Chain", "Drow Leggings", "Drow Boots" ],
"faction" : "DarkElf",
"gold" : "3d6",
"level" : 6
},
And that's it! When you reach the Dark Elves guarding the entrance to their city - they can now shoot you. We'll flesh out the city in the next chapter.
...
The source code for this chapter may be found here
Run this chapter's example with web assembly, in your browser (WebGL2 required)
Copyright (C) 2019, Herbert Wolverson.
Improved Logging and Counting Achievement
About this tutorial
This tutorial is free and open source, and all code uses the MIT license - so you are free to do with it as you like. My hope is that you will enjoy the tutorial, and make great games!
If you enjoy this and would like me to keep writing, please consider supporting my Patreon.
Most Roguelikes make a big deal of the game log. It gets rolled into the morgue file at the end (detailed description of how your run went), it is used to show what's going on in the world, and is invaluable to the hardcore player. We've been using a pretty simple logging setup (thanks to Mark McCaskey's hard work, it's no longer horribly slow). In this chapter, we'll build a good logging system - and use it as the basis for an achievements and progress tracking system. We'll also make the logging GUI a little better.
Currently, we add to the game log with a direct call to the data structure. It looks something like this:
#![allow(unused)] fn main() { log.entries.push(format!("{} hits {}, for {} hp.", &name.name, &target_name.name, damage)); }
This isn't a great way to do it: it requires that you have direct access to the log, doesn't provide any formatting whatsoever, and requires that systems know about how the log works internally. We are also not serializing the log as part of saving the game (and de-serializing when we load). Lastly, there's a lot of things we're not logging but could be; that's because including the log as a resource is quite annoying. Like the effects system, it should be seamless, easy, and thread-safe (if you aren't using WASM!).
This chapter will correct these flaws.
Building an API
We'll start by making a new directory, src/gamelog. We'll move the contents of src/gamelog.rs into it and rename the file mod.rs - in other words, we make a new module. This should continue to function - the module hasn't changed name.
Append the following to mod.rs:
#![allow(unused)] fn main() { pub struct LogFragment { pub color : RGB, pub text : String } }
The new LogFragment type will store pieces of a log entry. Each piece can have some text and a color, allowing for rich, colorful log entries. A group of them together can make up a log line.
Next, we'll make another new file - this time named src/gamelog/logstore.rs. Paste the following into it:
#![allow(unused)] fn main() { use std::sync::Mutex; use super::LogFragment; use rltk::prelude::*; lazy_static! { static ref LOG : Mutex<Vec<Vec<LogFragment>>> = Mutex::new(Vec::new()); } pub fn append_fragment(fragment : LogFragment) { LOG.lock().unwrap().push(vec![fragment]); } pub fn append_entry(fragments : Vec<LogFragment>) { LOG.lock().unwrap().push(fragments); } pub fn clear_log() { LOG.lock().unwrap().clear(); } pub fn log_display() -> TextBuilder { let mut buf = TextBuilder::empty(); LOG.lock().unwrap().iter().rev().take(12).for_each(|log| { log.iter().for_each(|frag| { buf.fg(frag.color); buf.line_wrap(&frag.text); }); buf.ln(); }); buf } }
There's quite a bit to digest here:
- At the core, we're using
lazy_staticto define a global log entry store. It's a vector of vectors, this time making up fragments. So the outer vector is lines in the log, the inner vector constitutes the fragments that make up the log. It's protected by aMutex, making it safe to use in a threaded environment. append_fragmentlocks the log, and appends a single fragment as a new line.append_entrylocks the log, and appends a vector of fragments (a new line).clear_logdoes what it says on the label: it empties the log.log_displaybuilds an RLTKTextBuilderobject, which is a safe way to build lots of text together for rendering, taking into account things like line wrapping. It takes 12 entries, because that's the largest log we can display.
In mod.rs, add the following three lines to take care of using the module and exporting parts of it:
#![allow(unused)] fn main() { mod logstore; use logstore::*; pub use logstore::{clear_log, log_display}; }
That lets us greatly simplify displaying the log. Open gui.rs, and find the log drawing code (it's line 248 on the example). Replace the log drawing with:
#![allow(unused)] fn main() { // Draw the log let mut block = TextBlock::new(1, 46, 79, 58); block.print(&gamelog::log_display()); block.render(&mut rltk::BACKEND_INTERNAL.lock().consoles[0].console); }
This specifies the exact location of the log text block, as an RLTK TextBlock object. Then it prints the results of log_display() to the block, and renders it onto console zero (the console we are using).
Now, we need a way to add text to the log. The builder pattern is a natural fit; most of the time, we are gradually building up detail in a log entry. Create another file, src/gamelog/builder.rs:
#![allow(unused)] fn main() { use rltk::prelude::*; use super::{LogFragment, append_entry}; pub struct Logger { current_color : RGB, fragments : Vec<LogFragment> } impl Logger { pub fn new() -> Self { Logger{ current_color : RGB::named(rltk::WHITE), fragments : Vec::new() } } pub fn color(mut self, color: (u8, u8, u8)) -> Self { self.current_color = RGB::named(color); self } pub fn append<T: ToString>(mut self, text : T) -> Self { self.fragments.push( LogFragment{ color : self.current_color, text : text.to_string() } ); self } pub fn log(self) { append_entry(self.fragments) } } }
This defines a new type, Logger. It keeps track of the current output color, and current list of fragments that make up a log entry. The new function makes a new one, while log submits it to the mutex-protected global variable. You can call color to change the current writing color, and append to add a string (we're using ToString, so no more messy to_string() calls everywhere!).
In gamelog/mod.rs, we want to use and export this module:
#![allow(unused)] fn main() { mod builder; pub use builder::*; }
To see it in action, open main.rs and find the lines where we add a new log file to the resources list, along with the line "Welcome to Rusty Roguelike". For now, we'll keep the original - and make use of the new setup to start the log:
#![allow(unused)] fn main() { gs.ecs.insert(gamelog::GameLog{ entries : vec!["Welcome to Rusty Roguelike".to_string()] }); gamelog::clear_log(); gamelog::Logger::new() .append("Welcome to") .color(rltk::CYAN) .append("Rusty Roguelike") .log(); }
That's nice and clean: no need to obtain a resource, and the text/color appending is easy to read! If you cargo run now, you'll see a single log entry displayed in color:
Enforcing API usage
Now it's time to break things. In src/gamelog/mod.rs, delete the following:
#![allow(unused)] fn main() { pub struct GameLog { pub entries : Vec<String> } }
If you're using an IDE, your project just became a sea of red! We just erased the old way of logging - so every reference to the old log is now a compilation failure. That's ok, because we want to transition to the new system.
Starting with main.rs, we can delete the references to the old log. Delete the new log line, as well as all of the logging information we added before. Find the generate_world_map function, and move the initial log clearing/setup there:
#![allow(unused)] fn main() { fn generate_world_map(&mut self, new_depth : i32, offset: i32) { self.mapgen_index = 0; self.mapgen_timer = 0.0; self.mapgen_history.clear(); let map_building_info = map::level_transition(&mut self.ecs, new_depth, offset); if let Some(history) = map_building_info { self.mapgen_history = history; } else { map::thaw_level_entities(&mut self.ecs); } gamelog::clear_log(); gamelog::Logger::new() .append("Welcome to") .color(rltk::CYAN) .append("Rusty Roguelike") .log(); } }
If you cargo build the project now, you'll have lots of errors. We need to work our way through and update all of the logging references to use the new system.
Using the API
Open src/inventory_system/collection_system.rs. In the use statement, remove the reference to gamelog::GameLog (it doesn't exist anymore). Remove the WriteExpect looking for a the game log (and the matching mut gamelog in the tuple). Replace the gamelog.push statement with:
#![allow(unused)] fn main() { crate::gamelog::Logger::new() .append("You pick up the") .color(rltk::CYAN) .append( super::obfuscate_name(pickup.item, &names, &magic_items, &obfuscated_names, &dm) ) .log(); }
You need to make basically the same changes to src/inventory_system/drop_system.rs. After deleting the import and resource, the log message system becomes:
#![allow(unused)] fn main() { if entity == *player_entity { crate::gamelog::Logger::new() .append("You drop the") .color(rltk::CYAN) .append( super::obfuscate_name(to_drop.item, &names, &magic_items, &obfuscated_names, &dm) ) .log(); } }
Likewise, in src/inventory_system/equip_use.rs, delete the gamelog. Also delete the log_entries variable and the loop appending it. There's quite a few log entries to clean up:
#![allow(unused)] fn main() { // Cursed item unequipping crate::gamelog::Logger::new() .append("You cannot unequip") .color(rltk::CYAN) .append(&name.name) .color(rltk::WHITE) .append("- it is cursed!") .log(); can_equip = false; ... // Unequipped item crate::gamelog::Logger::new() .append("You unequip") .color(rltk::CYAN) .append(&name.name) .log(); ... // Wield crate::gamelog::Logger::new() .append("You equip") .color(rltk::CYAN) .append(&names.get(useitem.item).unwrap().name) .log(); }
Likewise, the file src/hunger_system.rs needs updating. Once again, remove the gamelog and replace the log.push lines with equivalents using the new system.
#![allow(unused)] fn main() { crate::gamelog::Logger::new() .color(rltk::ORANGE) .append("You are no longer well fed") .log(); ... crate::gamelog::Logger::new() .color(rltk::ORANGE) .append("You are hungry") .log(); ... crate::gamelog::Logger::new() .color(rltk::RED) .append("You are starving!") .log(); ... crate::gamelog::Logger::new() .color(rltk::RED) .append("Your hunger pangs are getting painful! You suffer 1 hp damage.") .log(); }
src/trigger_system.rs needs the same treatment. Once again, remove gamelog and replace the log entries. We'll use a bit of color highlighting to emphasize traps:
#![allow(unused)] fn main() { crate::gamelog::Logger::new() .color(rltk::RED) .append(&name.name) .color(rltk::WHITE) .append("triggers!") .log(); }
src/ai/quipping.rs needs the exact same treatment. Remove gamelog, and replace the logging call with:
#![allow(unused)] fn main() { crate::gamelog::Logger::new() .color(rltk::YELLOW) .append(&name.name) .color(rltk::WHITE) .append("says") .color(rltk::CYAN) .append(&quip.available[quip_index]) .log(); }
src/ai/encumbrance_system.rs has the same changes. Once again, gamelog must go away - and the log append is replaced with:
#![allow(unused)] fn main() { crate::gamelog::Logger::new() .color(rltk::ORANGE) .append("You are overburdened, and suffering an initiative penalty.") .log(); }
src/effects/damage.rs logs slightly differently, but we can unify the mechanism now. Start by removing the use crate::gamelog::GameLog; line. Then replace all of the log_entries.push lines with lines that use the new Logger interface:
#![allow(unused)] fn main() { crate::gamelog::Logger::new() .color(rltk::MAGENTA) .append("Congratulations, you are now level") .append(format!("{}", player_stats.level)) .log(); ... crate::gamelog::Logger::new().color(rltk::GREEN).append("You feel stronger!").log(); ... crate::gamelog::Logger::new().color(rltk::GREEN).append("You feel healthier!").log(); ... crate::gamelog::Logger::new().color(rltk::GREEN).append("You feel quicker!").log(); ... crate::gamelog::Logger::new().color(rltk::GREEN).append("You feel smarter!").log(); }
It is the same again in src\effects\trigger.rs; remove GameLog and replace the log code with:
#![allow(unused)] fn main() { crate::gamelog::Logger::new() .color(rltk::CYAN) .append(&ecs.read_storage::<Name>().get(item).unwrap().name) .color(rltk::WHITE) .append("is out of charges!") .log(); ... crate::gamelog::Logger::new() .append("You eat the") .color(rltk::CYAN) .append(&names.get(entity).unwrap().name) .log(); ... crate::gamelog::Logger::new().append("The map is revealed to you!").log(); ... crate::gamelog::Logger::new().append("You are already in town, so the scroll does nothing.").log(); ... crate::gamelog::Logger::new().append("You are telported back to town!").log(); ... Once again, `src/player.rs` is more of the same. Remove `GameLog`, and replace the log entries with the new builder syntax: ```rust crate::gamelog::Logger::new() .append("You fire at") .color(rltk::CYAN) .append(&name.name) .log(); ... crate::gamelog::Logger::new().append("There is no way down from here.").log(); ... crate::gamelog::Logger::new().append("There is no way up from here.").log(); ... None => crate::gamelog::Logger::new().append("There is nothing here to pick up.").log(), ... crate::gamelog::Logger::new().append("You don't have enough mana to cast that!").log(); }
It's the same again in visibility_system.rs. Once again, delete GameLog and replace log pushes with:
#![allow(unused)] fn main() { crate::gamelog::Logger::new() .append("You spotted:") .color(rltk::RED) .append(&name.name) .log(); }
Once again, melee_combat_system.rs needs the same changes: no more GameLog, and update the text output to use the new building system:
#![allow(unused)] fn main() { crate::gamelog::Logger::new() .color(rltk::YELLOW) .append(&name.name) .color(rltk::WHITE) .append("hits") .color(rltk::YELLOW) .append(&target_name.name) .color(rltk::WHITE) .append("for") .color(rltk::RED) .append(format!("{}", damage)) .color(rltk::WHITE) .append("hp.") .log(); ... crate::gamelog::Logger::new() .color(rltk::CYAN) .append(&name.name) .color(rltk::WHITE) .append("considers attacking") .color(rltk::CYAN) .append(&target_name.name) .color(rltk::WHITE) .append("but misjudges the timing!") .log(); ... crate::gamelog::Logger::new() .color(rltk::CYAN) .append(&name.name) .color(rltk::WHITE) .append("attacks") .color(rltk::CYAN) .append(&target_name.name) .color(rltk::WHITE) .append("but can't connect.") .log(); }
You should have a pretty good understanding of the changes requires by now. If you check the source code, I've made the changes to all the other instances of gamelog.
Once you've made all the changes, you can cargo run your game - and see a brightly colored log:
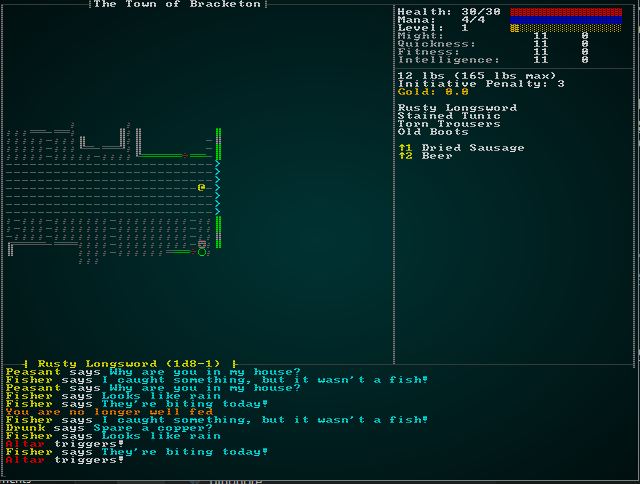
Making common logging tasks easier
While going through the code, upading log entries - a lot of commonalities appeared. It would be good to enforce some style consistency (and reduce the amount of typing required). We'll add some methods to our log builder (in src/gamelog/builder.rs) to help:
#![allow(unused)] fn main() { pub fn npc_name<T: ToString>(mut self, text : T) -> Self { self.fragments.push( LogFragment{ color : RGB::named(rltk::YELLOW), text : text.to_string() } ); self } pub fn item_name<T: ToString>(mut self, text : T) -> Self { self.fragments.push( LogFragment{ color : RGB::named(rltk::CYAN), text : text.to_string() } ); self } pub fn damage(mut self, damage: i32) -> Self { self.fragments.push( LogFragment{ color : RGB::named(rltk::RED), text : format!("{}", damage).to_string() } ); self } }
Now we can go through and update some of the log entry code again, using the easier syntax. For example, in src\ai\quipping.rs we can replace:
#![allow(unused)] fn main() { crate::gamelog::Logger::new() .color(rltk::YELLOW) .append(&name.name) .color(rltk::WHITE) .append("says") .color(rltk::CYAN) .append(&quip.available[quip_index]) .log(); }
with:
#![allow(unused)] fn main() { crate::gamelog::Logger::new() .npc_name(&name.name) .append("says") .npc_name(&quip.available[quip_index]) .log(); }
Or in melee_combat_system.rs, one can greatly shorted the damage announcement:
#![allow(unused)] fn main() { crate::gamelog::Logger::new() .npc_name(&name.name) .append("hits") .npc_name(&target_name.name) .append("for") .damage(damage) .append("hp.") .log(); }
Once again, I've gone through the project source code and applied these enhancements.
Saving and Loading the Log
To make saving and loading the log easier, we'll add two helper functions to gamelog/logstore.rs:
#![allow(unused)] fn main() { pub fn clone_log() -> Vec<Vec<crate::gamelog::LogFragment>> { LOG.lock().unwrap().clone() } pub fn restore_log(log : &mut Vec<Vec<crate::gamelog::LogFragment>>) { LOG.lock().unwrap().clear(); LOG.lock().unwrap().append(log); } }
The first provides a cloned copy of the log. The second empties the log, and appends a new one. You need to open up gamelog/mod.rs and add these to the exported functions list:
#![allow(unused)] fn main() { pub use logstore::{clear_log, log_display, clone_log, restore_log}; }
While you're here, we need to add some derivations to the LogFragment structure:
#![allow(unused)] fn main() { use serde::{Serialize, Deserialize}; #[derive(Serialize, Deserialize, Clone)] pub struct LogFragment { pub color : RGB, pub text : String } }
Now open components.rs, and modify the DMSerializationHelper structure to include a log:
#![allow(unused)] fn main() { #[derive(Component, Serialize, Deserialize, Clone)] pub struct DMSerializationHelper { pub map : super::map::MasterDungeonMap, pub log : Vec<Vec<crate::gamelog::LogFragment>> } }
Open saveload_system.rs, and we'll include the log when we serialize the map:
#![allow(unused)] fn main() { let savehelper2 = ecs .create_entity() .with(DMSerializationHelper{ map : dungeon_master, log: crate::gamelog::clone_log() }) .marked::<SimpleMarker<SerializeMe>>() .build(); }
And when we de-serialize the map, we'll also restore the log:
#![allow(unused)] fn main() { for (e,h) in (&entities, &helper2).join() { let mut dungeonmaster = ecs.write_resource::<super::map::MasterDungeonMap>(); *dungeonmaster = h.map.clone(); deleteme2 = Some(e); crate::gamelog::restore_log(&mut h.log.clone()); } }
That's all there is to saving/loading the log: it works well with Serde (it may be a bit slow on full JSON), but it works well.
Counting Events
As a step towards achievements, we need to be able to count relevant events. Make a new file, src/gamelog/events.rs, and paste in the following:
#![allow(unused)] fn main() { use std::collections::HashMap; use std::sync::Mutex; lazy_static! { static ref EVENTS : Mutex<HashMap<String, i32>> = Mutex::new(HashMap::new()); } pub fn clear_events() { EVENTS.lock().unwrap().clear(); } pub fn record_event<T: ToString>(event: T, n : i32) { let event_name = event.to_string(); let mut events_lock = EVENTS.lock(); let mut events = events_lock.as_mut().unwrap(); if let Some(e) = events.get_mut(&event_name) { *e += n; } else { events.insert(event_name, n); } } pub fn get_event_count<T: ToString>(event: T) -> i32 { let event_name = event.to_string(); let events_lock = EVENTS.lock(); let events = events_lock.unwrap(); if let Some(e) = events.get(&event_name) { *e } else { 0 } } }
This is similar to how we are storing the log: it's a "lazy static", with a mutex safety wrapper. Inside is a HashMap, indexed by event name and containing a counter. record_event adds an event to the running total (or creates a new one if it doesn't exist). get_event_count returns either 0, or the total of the named counter.
In main.rs, find the main loop handler for RunState::AwaitingInput - and we'll extend it to count the number of turns the player has survived:
#![allow(unused)] fn main() { RunState::AwaitingInput => { newrunstate = player_input(self, ctx); if newrunstate != RunState::AwaitingInput { crate::gamelog::record_event("Turn", 1); } } }
We should also clear the counter state at the end of generate_world_map:
#![allow(unused)] fn main() { fn generate_world_map(&mut self, new_depth : i32, offset: i32) { self.mapgen_index = 0; self.mapgen_timer = 0.0; self.mapgen_history.clear(); let map_building_info = map::level_transition(&mut self.ecs, new_depth, offset); if let Some(history) = map_building_info { self.mapgen_history = history; } else { map::thaw_level_entities(&mut self.ecs); } gamelog::clear_log(); gamelog::Logger::new() .append("Welcome to") .color(rltk::CYAN) .append("Rusty Roguelike") .log(); gamelog::clear_events(); } }
To demonstrate that it works, let's display the number of turns the player survived on their death screen. In gui.rs, open the function game_over and add a turn counter:
#![allow(unused)] fn main() { pub fn game_over(ctx : &mut Rltk) -> GameOverResult { ctx.print_color_centered(15, RGB::named(rltk::YELLOW), RGB::named(rltk::BLACK), "Your journey has ended!"); ctx.print_color_centered(17, RGB::named(rltk::WHITE), RGB::named(rltk::BLACK), "One day, we'll tell you all about how you did."); ctx.print_color_centered(18, RGB::named(rltk::WHITE), RGB::named(rltk::BLACK), "That day, sadly, is not in this chapter.."); ctx.print_color_centered(19, RGB::named(rltk::WHITE), RGB::named(rltk::BLACK), &format!("You lived for {} turns.", crate::gamelog::get_event_count("Turn"))); ctx.print_color_centered(21, RGB::named(rltk::MAGENTA), RGB::named(rltk::BLACK), "Press any key to return to the menu."); match ctx.key { None => GameOverResult::NoSelection, Some(_) => GameOverResult::QuitToMenu } } }
If you cargo run now, your turns are counted. Here's the results of a run in which I tried to get killed:
Bracket Goes Quantity Surveying
This is a very flexible system: you can count pretty much anything you like, from anywhere! Let's log how much damage the player takes throughout their game. Open src/effects/damage.rs and modify the function inflict_damage:
#![allow(unused)] fn main() { pub fn inflict_damage(ecs: &mut World, damage: &EffectSpawner, target: Entity) { let mut pools = ecs.write_storage::<Pools>(); let player_entity = ecs.fetch::<Entity>(); if let Some(pool) = pools.get_mut(target) { if !pool.god_mode { if let Some(creator) = damage.creator { if creator == target { return; } } if let EffectType::Damage{amount} = damage.effect_type { pool.hit_points.current -= amount; add_effect(None, EffectType::Bloodstain, Targets::Single{target}); add_effect(None, EffectType::Particle{ glyph: rltk::to_cp437('‼'), fg : rltk::RGB::named(rltk::ORANGE), bg : rltk::RGB::named(rltk::BLACK), lifespan: 200.0 }, Targets::Single{target} ); if target == *player_entity { crate::gamelog::record_event("Damage Taken", amount); } if damage.creator == *player_entity { crate::gamelog::record_event("Damage Inflicted", amount); } if pool.hit_points.current < 1 { add_effect(damage.creator, EffectType::EntityDeath, Targets::Single{target}); } } } } } }
We'll again modify gui.rs's game_over function to display damage taken:
#![allow(unused)] fn main() { pub fn inflict_damage(ecs: &mut World, damage: &EffectSpawner, target: Entity) { let mut pools = ecs.write_storage::<Pools>(); let player_entity = ecs.fetch::<Entity>(); if let Some(pool) = pools.get_mut(target) { if !pool.god_mode { if let Some(creator) = damage.creator { if creator == target { return; } } if let EffectType::Damage{amount} = damage.effect_type { pool.hit_points.current -= amount; add_effect(None, EffectType::Bloodstain, Targets::Single{target}); add_effect(None, EffectType::Particle{ glyph: rltk::to_cp437('‼'), fg : rltk::RGB::named(rltk::ORANGE), bg : rltk::RGB::named(rltk::BLACK), lifespan: 200.0 }, Targets::Single{target} ); if target == *player_entity { crate::gamelog::record_event("Damage Taken", amount); } if let Some(creator) = damage.creator { if creator == *player_entity { crate::gamelog::record_event("Damage Inflicted", amount); } } if pool.hit_points.current < 1 { add_effect(damage.creator, EffectType::EntityDeath, Targets::Single{target}); } } } } } }
Dying now shows you how much damage you suffered throughout your run:
You can, of course, extend this to your heart's content. Pretty much everything quantifiable is now trackable, should you so desire.
Saving and Loading Counters
Add two more functions to src/gamelog/events.rs:
#![allow(unused)] fn main() { pub fn clone_events() -> HashMap<String, i32> { EVENTS.lock().unwrap().clone() } pub fn load_events(events : HashMap<String, i32>) { EVENTS.lock().unwrap().clear(); events.iter().for_each(|(k,v)| { EVENTS.lock().unwrap().insert(k.to_string(), *v); }); } }
Now open components.rs, and modify DMSerializationHelper:
#![allow(unused)] fn main() { #[derive(Component, Serialize, Deserialize, Clone)] pub struct DMSerializationHelper { pub map : super::map::MasterDungeonMap, pub log : Vec<Vec<crate::gamelog::LogFragment>>, pub events : HashMap<String, i32> } }
Then in saveload_system.rs, we can include the cloned events in our serialization:
#![allow(unused)] fn main() { let savehelper2 = ecs .create_entity() .with(DMSerializationHelper{ map : dungeon_master, log: crate::gamelog::clone_log(), events : crate::gamelog::clone_events() }) .marked::<SimpleMarker<SerializeMe>>() .build(); }
And import the events when we de-serialize:
#![allow(unused)] fn main() { for (e,h) in (&entities, &helper2).join() { let mut dungeonmaster = ecs.write_resource::<super::map::MasterDungeonMap>(); *dungeonmaster = h.map.clone(); deleteme2 = Some(e); crate::gamelog::restore_log(&mut h.log.clone()); crate::gamelog::load_events(h.events.clone()); } }
Wrap-Up
We now have nicely colored logs, and counters of the player's achievement. This leaves us one step shy of Steam (or XBOX) style achievements - which we will cover in a coming chapter.
The source code for this chapter may be found here
Run this chapter's example with web assembly, in your browser (WebGL2 required)
Copyright (C) 2019, Herbert Wolverson.
Text Layers
About this tutorial
This tutorial is free and open source, and all code uses the MIT license - so you are free to do with it as you like. My hope is that you will enjoy the tutorial, and make great games!
If you enjoy this and would like me to keep writing, please consider supporting my Patreon.
The default 8x8 font can get quite hard to read for large blocks of text, especially when combined with post-processing effects. RLTK's graphical console modes (basically everything except curses) supports displaying multiple consoles on the same screen, optionally with different fonts. RLTK ships with a VGA font (8x16), which is much easier to read. We'll use that, but only for the log.
Initialization with a second layer in a VGA font is easy (see RLTK example 2 for details). Expand the builder code in main.rs:
#![allow(unused)] fn main() { let mut context = RltkBuilder::simple(80, 60) .with_title("Roguelike Tutorial") .with_font("vga8x16.png", 8, 16) .with_sparse_console(80, 30, "vga8x16.png") .build()?; }
The main loop's "clear screen" needs to be expanded to clear both layers. In main.rs (the tick function), we have a bit of code we haven't touched in 70 chapters - clearing the screen at the beginning of a frame. Now we want to clear both consoles:
#![allow(unused)] fn main() { ctx.set_active_console(1); ctx.cls(); ctx.set_active_console(0); ctx.cls(); }
I ran into some problems with the TextBlock component and multiple consoles, so I wrote a replacement. In src/gamelog/logstore.rs we remove the display_log function and add a replacement:
#![allow(unused)] fn main() { pub fn print_log(console: &mut Box<dyn Console>, pos: Point) { let mut y = pos.y; let mut x = pos.x; LOG.lock().unwrap().iter().rev().take(6).for_each(|log| { log.iter().for_each(|frag| { console.print_color(x, y, frag.color, RGB::named(rltk::BLACK), &frag.text); x += frag.text.len() as i32; x += 1; }); y += 1; x = pos.x; }); } }
And correct the exports in src/gamelog/mod.rs:
#![allow(unused)] fn main() { pub use logstore::{clear_log, clone_log, restore_log, print_log}; }
Since the new code handles rendering, it's very easy to draw the log file! Change the log render in gui.rs:
#![allow(unused)] fn main() { // Draw the log gamelog::print_log(&mut rltk::BACKEND_INTERNAL.lock().consoles[1].console, Point::new(1, 23)); }
If you cargo run now, you'll see a much easier to read log section:
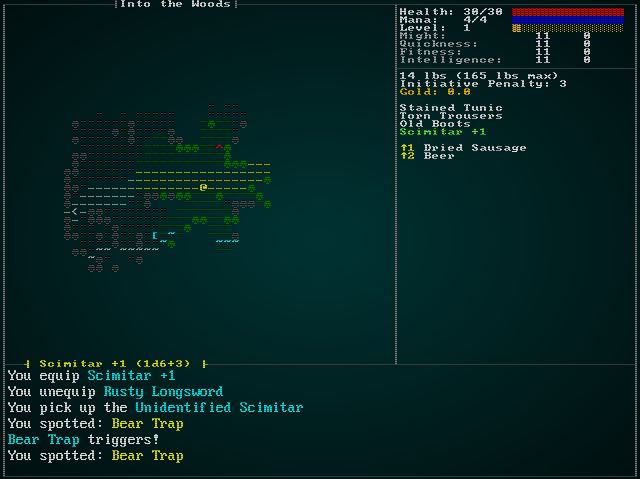
Let's Clean Up the GUI Code
Since we're working on the GUI, now would be a good time to clean it up. It would be nice to add some mouse support, too. We'll start by turning gui.rs into a multi-file module. It's huge, so breaking it up is a win in-and-of itself! Make a new folder, src/gui and move the gui.rs file into it. Then rename that file mod.rs. The game will work as before.
Then we do some rearranging:
- Make a new file,
gui/item_render.rs. Addmod item_render; pub use item_render::*;togui/mod.rs, and move the functionsget_item_colorandget_item_display_nameinto it. - RLTK now supports drawing hollow boxes, so we can delete the
draw_hollow_boxfunction. Replace calls todraw_hollow_box(ctx, ...)withctx.draw_hollow_box(...). - Make a new file,
gui/hud.rs. Addmod hud; pub use hud::*;togui/mod.rs. Move the following functions into it:draw_attribute,draw_ui. - Make a new file,
gui/tooltips.rs. Addmod tooltips; pub use tooltips::*;togui/mod.rs. Move theTooltipstruct and implementation into it, along with the functiondraw_tooltips. You'll have to make that functionpub. - Make a new file,
gui/inventory_menu.rs. Addmod inventory_menu; pub use inventory_menu::*;togui/mod.rs. Move the inventory menu code into there. - It's the same again for item dropping. Make
gui/drop_item_menu.rs, addmod drop_item_menu; pub use drop_item_menu::*;tomod.rsand move the item dropping menu. - Rinse and repeat for
gui/remove_item_menu.rsand the move item code. - Repeat once again for
gui/remove_curse_menu.rs. - Again - this time
gui/identify_menu.rs,gui/ranged_target.rs,gui/main_menu.rs,gui/game_over_menu.rs,gui/cheat_menu.rsandgui/vendor_menu.rs.
There's a lot of import cleanup, also. I recommend referring to the source code if you aren't sure what's needed. Once that's all done, the gui/mod.rs doesn't contain any functionality: just pointers to the individual files.
The game should run as it did before: but your compile times have improved (especially on incremental builds)!
While we're cleaning up - the camera
It's bugged me for a couple of chapters that camera.rs isn't in the map module. Let's move it there. Move the file into the map folder. Add the line pub mod camera; to map/mod.rs. This leaves a few references to cleanup:
- Remove
pub mod camera;frommain.rs. - Change
use super::touse crate::inmap/camera.rs.
Batched Rendering
RLTK recently gained a new rendering feature: the ability to render in batches. This makes rendering compatible with systems (you can't add RLTK as a resource, it has too many thread-unsafe features). We're not going to tackle systems in this chapter, but we will switch to the new rendering path. It's a bit faster, and overall cleaner. The good news is that you can large mix and match the two styles while you switch over.
Start by enabling the system. At the very end of tick in main.rs, add a single line:
#![allow(unused)] fn main() { rltk::render_draw_buffer(ctx); }
This tells RLTK to submit any draw buffers it has accumulated to the screen. By adding this first, we ensure that anything we switch over will be rendered.
Batching the camera
Open map/camera.rs. Replace the use rltk:: line with use rltk::prelude::*;. Now that RLTK supports a prelude, we should use it! Then, as the first line of render_camera, add the following:
#![allow(unused)] fn main() { let mut draw_batch = DrawBatch::new(); }
This requests that RLTK create a new "draw batch". These are high-performance, pooled objects that collect drawing instructions and can then be submitted in one go. This is really cache-friendly, and often results in significant improvements in performance.
Replace the first set command with draw_batch.set:
#![allow(unused)] fn main() { // FROM ctx.set(x as i32+1, y as i32+1, fg, bg, glyph); // TO draw_batch.set( Point::new(x+1, y+1), ColorPair::new(fg, bg), glyph ); }
You'll want to work through, and make the same change for all of the drawing calls. Add a new line at the very end:
#![allow(unused)] fn main() { draw_batch.submit(0); }
This submits the map render as a batch. The completed function looks like this:
#![allow(unused)] fn main() { pub fn render_camera(ecs: &World, ctx : &mut Rltk) { let mut draw_batch = DrawBatch::new(); let map = ecs.fetch::<Map>(); let (min_x, max_x, min_y, max_y) = get_screen_bounds(ecs, ctx); // Render the Map let map_width = map.width-1; let map_height = map.height-1; for (y,ty) in (min_y .. max_y).enumerate() { for (x,tx) in (min_x .. max_x).enumerate() { if tx > 0 && tx < map_width && ty > 0 && ty < map_height { let idx = map.xy_idx(tx, ty); if map.revealed_tiles[idx] { let (glyph, fg, bg) = tile_glyph(idx, &*map); draw_batch.set( Point::new(x+1, y+1), ColorPair::new(fg, bg), glyph ); } } else if SHOW_BOUNDARIES { draw_batch.set( Point::new(x+1, y+1), ColorPair::new(RGB::named(rltk::GRAY), RGB::named(rltk::BLACK)), to_cp437('·') ); } } } // Render entities let positions = ecs.read_storage::<Position>(); let renderables = ecs.read_storage::<Renderable>(); let hidden = ecs.read_storage::<Hidden>(); let map = ecs.fetch::<Map>(); let sizes = ecs.read_storage::<TileSize>(); let entities = ecs.entities(); let targets = ecs.read_storage::<Target>(); let mut data = (&positions, &renderables, &entities, !&hidden).join().collect::<Vec<_>>(); data.sort_by(|&a, &b| b.1.render_order.cmp(&a.1.render_order) ); for (pos, render, entity, _hidden) in data.iter() { if let Some(size) = sizes.get(*entity) { for cy in 0 .. size.y { for cx in 0 .. size.x { let tile_x = cx + pos.x; let tile_y = cy + pos.y; let idx = map.xy_idx(tile_x, tile_y); if map.visible_tiles[idx] { let entity_screen_x = (cx + pos.x) - min_x; let entity_screen_y = (cy + pos.y) - min_y; if entity_screen_x > 0 && entity_screen_x < map_width && entity_screen_y > 0 && entity_screen_y < map_height { draw_batch.set( Point::new(entity_screen_x + 1, entity_screen_y + 1), ColorPair::new(render.fg, render.bg), render.glyph ); } } } } } else { let idx = map.xy_idx(pos.x, pos.y); if map.visible_tiles[idx] { let entity_screen_x = pos.x - min_x; let entity_screen_y = pos.y - min_y; if entity_screen_x > 0 && entity_screen_x < map_width && entity_screen_y > 0 && entity_screen_y < map_height { draw_batch.set( Point::new(entity_screen_x + 1, entity_screen_y + 1), ColorPair::new(render.fg, render.bg), render.glyph ); } } } if targets.get(*entity).is_some() { let entity_screen_x = pos.x - min_x; let entity_screen_y = pos.y - min_y; draw_batch.set( Point::new(entity_screen_x , entity_screen_y + 1), ColorPair::new(RGB::named(rltk::RED), RGB::named(rltk::YELLOW)), to_cp437('[') ); draw_batch.set( Point::new(entity_screen_x +2, entity_screen_y + 1), ColorPair::new(RGB::named(rltk::RED), RGB::named(rltk::YELLOW)), to_cp437(']') ); } } draw_batch.submit(0); } }
If you cargo run now, it is mostly the same as before: but tool-tips that normally appear on top of the map aren't visible (they are underneath because we submitted at the end).
Batching the GUI
We'll start with gui/hud.rs because it's the messiest! Add a let mut draw_batch = DrawBatch::new(); to the beginning, and a draw_batch.submit(5000); to the end. Why 5,000? There are 80x60 (4,800) possible tiles in the map. The provided number acts as a sort: so we're guaranteeing that we'll draw the GUI after the map. Then it's a matter of converting the ctx calls to equivalent batch calls. It's also a good time to break the giant draw_gui function into smaller pieces. The completely refactor gui/hud.rs looks like this:
#![allow(unused)] fn main() { use rltk::prelude::*; use specs::prelude::*; use crate::{Pools, Map, Name, InBackpack, Equipped, HungerClock, HungerState, Attributes, Attribute, Consumable, StatusEffect, Duration, KnownSpells, Weapon, gamelog }; use super::{draw_tooltips, get_item_display_name, get_item_color}; fn draw_attribute(name : &str, attribute : &Attribute, y : i32, draw_batch: &mut DrawBatch) { let black = RGB::named(rltk::BLACK); let attr_gray : RGB = RGB::from_hex("#CCCCCC").expect("Oops"); draw_batch.print_color(Point::new(50, y), name, ColorPair::new(attr_gray, black)); let color : RGB = if attribute.modifiers < 0 { RGB::from_f32(1.0, 0.0, 0.0) } else if attribute.modifiers == 0 { RGB::named(rltk::WHITE) } else { RGB::from_f32(0.0, 1.0, 0.0) }; draw_batch.print_color(Point::new(67, y), &format!("{}", attribute.base + attribute.modifiers), ColorPair::new(color, black)); draw_batch.print_color(Point::new(73, y), &format!("{}", attribute.bonus), ColorPair::new(color, black)); if attribute.bonus > 0 { draw_batch.set(Point::new(72, y), ColorPair::new(color, black), to_cp437('+')); } } fn box_framework(draw_batch : &mut DrawBatch) { let box_gray : RGB = RGB::from_hex("#999999").expect("Oops"); let black = RGB::named(rltk::BLACK); draw_batch.draw_hollow_box(Rect::with_size(0, 0, 79, 59), ColorPair::new(box_gray, black)); // Overall box draw_batch.draw_hollow_box(Rect::with_size(0, 0, 49, 45), ColorPair::new(box_gray, black)); // Map box draw_batch.draw_hollow_box(Rect::with_size(0, 45, 79, 14), ColorPair::new(box_gray, black)); // Log box draw_batch.draw_hollow_box(Rect::with_size(49, 0, 30, 8), ColorPair::new(box_gray, black)); // Top-right panel // Draw box connectors draw_batch.set(Point::new(0, 45), ColorPair::new(box_gray, black), to_cp437('├')); draw_batch.set(Point::new(49, 8), ColorPair::new(box_gray, black), to_cp437('├')); draw_batch.set(Point::new(49, 0), ColorPair::new(box_gray, black), to_cp437('┬')); draw_batch.set(Point::new(49, 45), ColorPair::new(box_gray, black), to_cp437('┴')); draw_batch.set(Point::new(79, 8), ColorPair::new(box_gray, black), to_cp437('┤')); draw_batch.set(Point::new(79, 45), ColorPair::new(box_gray, black), to_cp437('┤')); } pub fn map_label(ecs: &World, draw_batch: &mut DrawBatch) { let box_gray : RGB = RGB::from_hex("#999999").expect("Oops"); let black = RGB::named(rltk::BLACK); let white = RGB::named(rltk::WHITE); let map = ecs.fetch::<Map>(); let name_length = map.name.len() + 2; let x_pos = (22 - (name_length / 2)) as i32; draw_batch.set(Point::new(x_pos, 0), ColorPair::new(box_gray, black), to_cp437('┤')); draw_batch.set(Point::new(x_pos + name_length as i32 - 1, 0), ColorPair::new(box_gray, black), to_cp437('├')); draw_batch.print_color(Point::new(x_pos+1, 0), &map.name, ColorPair::new(white, black)); } fn draw_stats(ecs: &World, draw_batch: &mut DrawBatch, player_entity: &Entity) { let black = RGB::named(rltk::BLACK); let white = RGB::named(rltk::WHITE); let pools = ecs.read_storage::<Pools>(); let player_pools = pools.get(*player_entity).unwrap(); let health = format!("Health: {}/{}", player_pools.hit_points.current, player_pools.hit_points.max); let mana = format!("Mana: {}/{}", player_pools.mana.current, player_pools.mana.max); let xp = format!("Level: {}", player_pools.level); draw_batch.print_color(Point::new(50, 1), &health, ColorPair::new(white, black)); draw_batch.print_color(Point::new(50, 2), &mana, ColorPair::new(white, black)); draw_batch.print_color(Point::new(50, 3), &xp, ColorPair::new(white, black)); draw_batch.bar_horizontal( Point::new(64, 1), 14, player_pools.hit_points.current, player_pools.hit_points.max, ColorPair::new(RGB::named(rltk::RED), RGB::named(rltk::BLACK)) ); draw_batch.bar_horizontal( Point::new(64, 2), 14, player_pools.mana.current, player_pools.mana.max, ColorPair::new(RGB::named(rltk::BLUE), RGB::named(rltk::BLACK)) ); let xp_level_start = (player_pools.level-1) * 1000; draw_batch.bar_horizontal( Point::new(64, 3), 14, player_pools.xp - xp_level_start, 1000, ColorPair::new(RGB::named(rltk::GOLD), RGB::named(rltk::BLACK)) ); } fn draw_attributes(ecs: &World, draw_batch: &mut DrawBatch, player_entity: &Entity) { let attributes = ecs.read_storage::<Attributes>(); let attr = attributes.get(*player_entity).unwrap(); draw_attribute("Might:", &attr.might, 4, draw_batch); draw_attribute("Quickness:", &attr.quickness, 5, draw_batch); draw_attribute("Fitness:", &attr.fitness, 6, draw_batch); draw_attribute("Intelligence:", &attr.intelligence, 7, draw_batch); } fn initiative_weight(ecs: &World, draw_batch: &mut DrawBatch, player_entity: &Entity) { let attributes = ecs.read_storage::<Attributes>(); let attr = attributes.get(*player_entity).unwrap(); let black = RGB::named(rltk::BLACK); let white = RGB::named(rltk::WHITE); let pools = ecs.read_storage::<Pools>(); let player_pools = pools.get(*player_entity).unwrap(); draw_batch.print_color( Point::new(50, 9), &format!("{:.0} lbs ({} lbs max)", player_pools.total_weight, (attr.might.base + attr.might.modifiers) * 15 ), ColorPair::new(white, black) ); draw_batch.print_color( Point::new(50,10), &format!("Initiative Penalty: {:.0}", player_pools.total_initiative_penalty), ColorPair::new(white, black) ); draw_batch.print_color( Point::new(50,11), &format!("Gold: {:.1}", player_pools.gold), ColorPair::new(RGB::named(rltk::GOLD), black) ); } fn equipped(ecs: &World, draw_batch: &mut DrawBatch, player_entity: &Entity) -> i32 { let black = RGB::named(rltk::BLACK); let yellow = RGB::named(rltk::YELLOW); let mut y = 13; let entities = ecs.entities(); let equipped = ecs.read_storage::<Equipped>(); let weapon = ecs.read_storage::<Weapon>(); for (entity, equipped_by) in (&entities, &equipped).join() { if equipped_by.owner == *player_entity { let name = get_item_display_name(ecs, entity); draw_batch.print_color( Point::new(50, y), &name, ColorPair::new(get_item_color(ecs, entity), black)); y += 1; if let Some(weapon) = weapon.get(entity) { let mut weapon_info = if weapon.damage_bonus < 0 { format!("┤ {} ({}d{}{})", &name, weapon.damage_n_dice, weapon.damage_die_type, weapon.damage_bonus) } else if weapon.damage_bonus == 0 { format!("┤ {} ({}d{})", &name, weapon.damage_n_dice, weapon.damage_die_type) } else { format!("┤ {} ({}d{}+{})", &name, weapon.damage_n_dice, weapon.damage_die_type, weapon.damage_bonus) }; if let Some(range) = weapon.range { weapon_info += &format!(" (range: {}, F to fire, V cycle targets)", range); } weapon_info += " ├"; draw_batch.print_color( Point::new(3, 45), &weapon_info, ColorPair::new(yellow, black)); } } } y } fn consumables(ecs: &World, draw_batch: &mut DrawBatch, player_entity: &Entity, mut y : i32) -> i32 { y += 1; let black = RGB::named(rltk::BLACK); let yellow = RGB::named(rltk::YELLOW); let entities = ecs.entities(); let consumables = ecs.read_storage::<Consumable>(); let backpack = ecs.read_storage::<InBackpack>(); let mut index = 1; for (entity, carried_by, _consumable) in (&entities, &backpack, &consumables).join() { if carried_by.owner == *player_entity && index < 10 { draw_batch.print_color( Point::new(50, y), &format!("↑{}", index), ColorPair::new(yellow, black) ); draw_batch.print_color( Point::new(53, y), &get_item_display_name(ecs, entity), ColorPair::new(get_item_color(ecs, entity), black) ); y += 1; index += 1; } } y } fn spells(ecs: &World, draw_batch: &mut DrawBatch, player_entity: &Entity, mut y : i32) -> i32 { y += 1; let black = RGB::named(rltk::BLACK); let blue = RGB::named(rltk::CYAN); let known_spells_storage = ecs.read_storage::<KnownSpells>(); let known_spells = &known_spells_storage.get(*player_entity).unwrap().spells; let mut index = 1; for spell in known_spells.iter() { draw_batch.print_color( Point::new(50, y), &format!("^{}", index), ColorPair::new(blue, black) ); draw_batch.print_color( Point::new(53, y), &format!("{} ({})", &spell.display_name, spell.mana_cost), ColorPair::new(blue, black) ); index += 1; y += 1; } y } fn status(ecs: &World, draw_batch: &mut DrawBatch, player_entity: &Entity) { let mut y = 44; let hunger = ecs.read_storage::<HungerClock>(); let hc = hunger.get(*player_entity).unwrap(); match hc.state { HungerState::WellFed => { draw_batch.print_color( Point::new(50, y), "Well Fed", ColorPair::new(RGB::named(rltk::GREEN), RGB::named(rltk::BLACK)) ); y -= 1; } HungerState::Normal => {} HungerState::Hungry => { draw_batch.print_color( Point::new(50, y), "Hungry", ColorPair::new(RGB::named(rltk::ORANGE), RGB::named(rltk::BLACK)) ); y -= 1; } HungerState::Starving => { draw_batch.print_color( Point::new(50, y), "Starving", ColorPair::new(RGB::named(rltk::RED), RGB::named(rltk::BLACK)) ); y -= 1; } } let statuses = ecs.read_storage::<StatusEffect>(); let durations = ecs.read_storage::<Duration>(); let names = ecs.read_storage::<Name>(); for (status, duration, name) in (&statuses, &durations, &names).join() { if status.target == *player_entity { draw_batch.print_color( Point::new(50, y), &format!("{} ({})", name.name, duration.turns), ColorPair::new(RGB::named(rltk::RED), RGB::named(rltk::BLACK)), ); y -= 1; } } } pub fn draw_ui(ecs: &World, ctx : &mut Rltk) { let mut draw_batch = DrawBatch::new(); let player_entity = ecs.fetch::<Entity>(); box_framework(&mut draw_batch); map_label(ecs, &mut draw_batch); draw_stats(ecs, &mut draw_batch, &player_entity); draw_attributes(ecs, &mut draw_batch, &player_entity); initiative_weight(ecs, &mut draw_batch, &player_entity); let mut y = equipped(ecs, &mut draw_batch, &player_entity); y += consumables(ecs, &mut draw_batch, &player_entity, y); spells(ecs, &mut draw_batch, &player_entity, y); status(ecs, &mut draw_batch, &player_entity); gamelog::print_log(&mut rltk::BACKEND_INTERNAL.lock().consoles[1].console, Point::new(1, 23)); draw_tooltips(ecs, ctx); draw_batch.submit(5000); } }
Batching the menus
There's a lot of shared functionality between our various menus that could be combined into helper functions. With batching in mind, we'll first build a new module gui/menus.rs to hold the common functionality:
#![allow(unused)] fn main() { use rltk::prelude::*; pub fn menu_box<T: ToString>(draw_batch: &mut DrawBatch, x: i32, y: i32, width: i32, title: T) { draw_batch.draw_box( Rect::with_size(x, y-2, 31, width), ColorPair::new(RGB::named(rltk::WHITE), RGB::named(rltk::BLACK)) ); draw_batch.print_color( Point::new(18, y-2), &title.to_string(), ColorPair::new(RGB::named(rltk::MAGENTA), RGB::named(rltk::BLACK)) ); } pub fn menu_option<T:ToString>(draw_batch: &mut DrawBatch, x: i32, y: i32, hotkey: rltk::FontCharType, text: T) { draw_batch.set( Point::new(x, y), ColorPair::new(RGB::named(rltk::WHITE), RGB::named(rltk::BLACK)), rltk::to_cp437('(') ); draw_batch.set( Point::new(x+1, y), ColorPair::new(RGB::named(rltk::YELLOW), RGB::named(rltk::BLACK)), hotkey ); draw_batch.set( Point::new(x+2, y), ColorPair::new(RGB::named(rltk::WHITE), RGB::named(rltk::BLACK)), rltk::to_cp437(')') ); draw_batch.print_color( Point::new(x+5, y), &text.to_string(), ColorPair::new(RGB::named(rltk::YELLOW), RGB::named(rltk::BLACK)) ); } }
Don't forget to modify gui/mod.rs to expose the functionality:
#![allow(unused)] fn main() { mod menus; pub use menus::*; }
Cheat Menu
With the new helper, the gui/cheat_menur.rs file is an easy refactor:
#![allow(unused)] fn main() { use rltk::prelude::*; use crate::State; use super::{menu_option, menu_box}; #[derive(PartialEq, Copy, Clone)] pub enum CheatMenuResult { NoResponse, Cancel, TeleportToExit, Heal, Reveal, GodMode } pub fn show_cheat_mode(_gs : &mut State, ctx : &mut Rltk) -> CheatMenuResult { let mut draw_batch = DrawBatch::new(); let count = 4; let mut y = (25 - (count / 2)) as i32; menu_box(&mut draw_batch, 15, y, (count+3) as i32, "Cheating!"); draw_batch.print_color( Point::new(18, y+count as i32+1), "ESCAPE to cancel", ColorPair::new(RGB::named(rltk::YELLOW), RGB::named(rltk::BLACK)) ); menu_option(&mut draw_batch, 17, y, rltk::to_cp437('T'), "Teleport to next level"); y += 1; menu_option(&mut draw_batch, 17, y, rltk::to_cp437('H'), "Heal all wounds"); y += 1; menu_option(&mut draw_batch, 17, y, rltk::to_cp437('R'), "Reveal the map"); y += 1; menu_option(&mut draw_batch, 17, y, rltk::to_cp437('G'), "God Mode (No Death)"); draw_batch.submit(6000); match ctx.key { None => CheatMenuResult::NoResponse, Some(key) => { match key { VirtualKeyCode::T => CheatMenuResult::TeleportToExit, VirtualKeyCode::H => CheatMenuResult::Heal, VirtualKeyCode::R => CheatMenuResult::Reveal, VirtualKeyCode::G => CheatMenuResult::GodMode, VirtualKeyCode::Escape => CheatMenuResult::Cancel, _ => CheatMenuResult::NoResponse } } } } }
Drop Item Menu
For the various item menus, another helper is useful to reduce duplicated code. In gui/menus.rs add the following:
#![allow(unused)] fn main() { pub fn item_result_menu<S: ToString>( draw_batch: &mut DrawBatch, title: S, count: usize, items: &[(Entity, String)], key: Option<VirtualKeyCode> ) -> (ItemMenuResult, Option<Entity>) { let mut y = (25 - (count / 2)) as i32; draw_batch.draw_box( Rect::with_size(15, y-2, 31, (count+3) as i32), ColorPair::new(RGB::named(rltk::WHITE), RGB::named(rltk::BLACK)) ); draw_batch.print_color( Point::new(18, y-2), &title.to_string(), ColorPair::new(RGB::named(rltk::YELLOW), RGB::named(rltk::BLACK)) ); draw_batch.print_color( Point::new(18, y+count as i32+1), "ESCAPE to cancel", ColorPair::new(RGB::named(rltk::YELLOW), RGB::named(rltk::BLACK)) ); let mut item_list : Vec<Entity> = Vec::new(); let mut j = 0; for item in items { menu_option(draw_batch, 17, y, 97+j as rltk::FontCharType, &item.1); item_list.push(item.0); y += 1; j += 1; } match key { None => (ItemMenuResult::NoResponse, None), Some(key) => { match key { VirtualKeyCode::Escape => { (ItemMenuResult::Cancel, None) } _ => { let selection = rltk::letter_to_option(key); if selection > -1 && selection < count as i32 { return (ItemMenuResult::Selected, Some(item_list[selection as usize])); } (ItemMenuResult::NoResponse, None) } } } } } }
This is basically a generic version of our other menus that return an ItemMenuResult. We can use it to significantly simplify gui/drop_item_menu.rs:
#![allow(unused)] fn main() { use rltk::prelude::*; use specs::prelude::*; use crate::{State, InBackpack}; use super::{get_item_display_name, ItemMenuResult, item_result_menu}; pub fn drop_item_menu(gs : &mut State, ctx : &mut Rltk) -> (ItemMenuResult, Option<Entity>) { let mut draw_batch = DrawBatch::new(); let player_entity = gs.ecs.fetch::<Entity>(); let backpack = gs.ecs.read_storage::<InBackpack>(); let entities = gs.ecs.entities(); let mut items : Vec<(Entity, String)> = Vec::new(); (&entities, &backpack).join() .filter(|item| item.1.owner == *player_entity ) .for_each(|item| { items.push((item.0, get_item_display_name(&gs.ecs, item.0))) }); let result = item_result_menu( &mut draw_batch, "Drop which item?", items.len(), &items, ctx.key ); draw_batch.submit(6000); result } }
Remove Item Menu
The same helper code makes gui/remove_item_menu.rs shorter, also:
#![allow(unused)] fn main() { use rltk::prelude::*; use specs::prelude::*; use crate::{State, Equipped }; use super::{get_item_display_name, ItemMenuResult, item_result_menu}; pub fn remove_item_menu(gs : &mut State, ctx : &mut Rltk) -> (ItemMenuResult, Option<Entity>) { let mut draw_batch = DrawBatch::new(); let player_entity = gs.ecs.fetch::<Entity>(); let backpack = gs.ecs.read_storage::<Equipped>(); let entities = gs.ecs.entities(); let mut items : Vec<(Entity, String)> = Vec::new(); (&entities, &backpack).join() .filter(|item| item.1.owner == *player_entity ) .for_each(|item| { items.push((item.0, get_item_display_name(&gs.ecs, item.0))) }); let result = item_result_menu( &mut draw_batch, "Remove which item?", items.len(), &items, ctx.key ); draw_batch.submit(6000); result } }
Inventory Menu
Once again, our helper greatly simplifies the inventory menu. We can replace gui/inventory_menu.rs with:
#![allow(unused)] fn main() { use rltk::prelude::*; use specs::prelude::*; use crate::{State, InBackpack }; use super::{get_item_display_name, item_result_menu}; #[derive(PartialEq, Copy, Clone)] pub enum ItemMenuResult { Cancel, NoResponse, Selected } pub fn show_inventory(gs : &mut State, ctx : &mut Rltk) -> (ItemMenuResult, Option<Entity>) { let player_entity = gs.ecs.fetch::<Entity>(); let backpack = gs.ecs.read_storage::<InBackpack>(); let entities = gs.ecs.entities(); let mut draw_batch = DrawBatch::new(); let mut items : Vec<(Entity, String)> = Vec::new(); (&entities, &backpack).join() .filter(|item| item.1.owner == *player_entity ) .for_each(|item| { items.push((item.0, get_item_display_name(&gs.ecs, item.0))) }); let result = item_result_menu( &mut draw_batch, "Inventory", items.len(), &items, ctx.key ); draw_batch.submit(6000); result } }
Identify Menu
The helper is somewhat useful in shortening the gui/identify_menu.rs also - but the complex filter is still rather long. Replace the file contents with the following:
#![allow(unused)] fn main() { use rltk::prelude::*; use specs::prelude::*; use crate::{Name, State, InBackpack, Equipped, MasterDungeonMap, Item, ObfuscatedName }; use super::{get_item_display_name, item_result_menu, ItemMenuResult}; pub fn identify_menu(gs : &mut State, ctx : &mut Rltk) -> (ItemMenuResult, Option<Entity>) { let mut draw_batch = DrawBatch::new(); let player_entity = gs.ecs.fetch::<Entity>(); let equipped = gs.ecs.read_storage::<Equipped>(); let backpack = gs.ecs.read_storage::<InBackpack>(); let entities = gs.ecs.entities(); let item_components = gs.ecs.read_storage::<Item>(); let names = gs.ecs.read_storage::<Name>(); let dm = gs.ecs.fetch::<MasterDungeonMap>(); let obfuscated = gs.ecs.read_storage::<ObfuscatedName>(); let mut items : Vec<(Entity, String)> = Vec::new(); (&entities, &item_components).join() .filter(|(item_entity,_item)| { let mut keep = false; if let Some(bp) = backpack.get(*item_entity) { if bp.owner == *player_entity { if let Some(name) = names.get(*item_entity) { if obfuscated.get(*item_entity).is_some() && !dm.identified_items.contains(&name.name) { keep = true; } } } } // It's equipped, so we know it's cursed if let Some(equip) = equipped.get(*item_entity) { if equip.owner == *player_entity { if let Some(name) = names.get(*item_entity) { if obfuscated.get(*item_entity).is_some() && !dm.identified_items.contains(&name.name) { keep = true; } } } } keep }) .for_each(|item| { items.push((item.0, get_item_display_name(&gs.ecs, item.0))) }); let result = item_result_menu( &mut draw_batch, "Inventory", items.len(), &items, ctx.key ); draw_batch.submit(6000); result } }
Remove Curse Menu
The remove curse menu is very similar to the identification menu, so the same principles apply. Replace gui/remove_curse_menu.rs with:
#![allow(unused)] fn main() { use rltk::prelude::*; use specs::prelude::*; use crate::{Name, State, InBackpack, Equipped, MasterDungeonMap, CursedItem, Item }; use super::{get_item_display_name, item_result_menu, ItemMenuResult}; pub fn remove_curse_menu(gs : &mut State, ctx : &mut Rltk) -> (ItemMenuResult, Option<Entity>) { let player_entity = gs.ecs.fetch::<Entity>(); let equipped = gs.ecs.read_storage::<Equipped>(); let backpack = gs.ecs.read_storage::<InBackpack>(); let entities = gs.ecs.entities(); let item_components = gs.ecs.read_storage::<Item>(); let cursed = gs.ecs.read_storage::<CursedItem>(); let names = gs.ecs.read_storage::<Name>(); let dm = gs.ecs.fetch::<MasterDungeonMap>(); let mut draw_batch = DrawBatch::new(); let mut items : Vec<(Entity, String)> = Vec::new(); (&entities, &item_components, &cursed).join() .filter(|(item_entity,_item,_cursed)| { let mut keep = false; if let Some(bp) = backpack.get(*item_entity) { if bp.owner == *player_entity { if let Some(name) = names.get(*item_entity) { if dm.identified_items.contains(&name.name) { keep = true; } } } } // It's equipped, so we know it's cursed if let Some(equip) = equipped.get(*item_entity) { if equip.owner == *player_entity { keep = true; } } keep }) .for_each(|item| { items.push((item.0, get_item_display_name(&gs.ecs, item.0))) }); let result = item_result_menu( &mut draw_batch, "Inventory", items.len(), &items, ctx.key ); draw_batch.submit(6000); result } }
Game Over Menu
The game over menu is a simple ctx to DrawBatch port. In gui/game_over_menu.rs:
#![allow(unused)] fn main() { use rltk::prelude::*; #[derive(PartialEq, Copy, Clone)] pub enum GameOverResult { NoSelection, QuitToMenu } pub fn game_over(ctx : &mut Rltk) -> GameOverResult { let mut draw_batch = DrawBatch::new(); draw_batch.print_color_centered( 15, "Your journey has ended!", ColorPair::new(RGB::named(rltk::YELLOW), RGB::named(rltk::BLACK)) ); draw_batch.print_color_centered( 17, "One day, we'll tell you all about how you did.", ColorPair::new(RGB::named(rltk::WHITE), RGB::named(rltk::BLACK)) ); draw_batch.print_color_centered( 18, "That day, sadly, is not in this chapter..", ColorPair::new(RGB::named(rltk::WHITE), RGB::named(rltk::BLACK)) ); draw_batch.print_color_centered( 19, &format!("You lived for {} turns.", crate::gamelog::get_event_count("Turn")), ColorPair::new(RGB::named(rltk::WHITE), RGB::named(rltk::BLACK)) ); draw_batch.print_color_centered( 20, &format!("You suffered {} points of damage.", crate::gamelog::get_event_count("Damage Taken")), ColorPair::new(RGB::named(rltk::RED), RGB::named(rltk::BLACK)) ); draw_batch.print_color_centered( 21, &format!("You inflicted {} points of damage.", crate::gamelog::get_event_count("Damage Inflicted")), ColorPair::new(RGB::named(rltk::RED), RGB::named(rltk::BLACK))); draw_batch.print_color_centered( 23, "Press any key to return to the menu.", ColorPair::new(RGB::named(rltk::MAGENTA), RGB::named(rltk::BLACK)) ); draw_batch.submit(6000); match ctx.key { None => GameOverResult::NoSelection, Some(_) => GameOverResult::QuitToMenu } } }
Ranged Targeting Menu
gui/ranged_target.rs is another simple conversion:
#![allow(unused)] fn main() { use rltk::prelude::*; use specs::prelude::*; use crate::{State, camera, Viewshed }; use super::ItemMenuResult; pub fn ranged_target(gs : &mut State, ctx : &mut Rltk, range : i32) -> (ItemMenuResult, Option<Point>) { let (min_x, max_x, min_y, max_y) = camera::get_screen_bounds(&gs.ecs, ctx); let player_entity = gs.ecs.fetch::<Entity>(); let player_pos = gs.ecs.fetch::<Point>(); let viewsheds = gs.ecs.read_storage::<Viewshed>(); let mut draw_batch = DrawBatch::new(); draw_batch.print_color( Point::new(5, 0), "Select Target:", ColorPair::new(RGB::named(rltk::YELLOW), RGB::named(rltk::BLACK)) ); // Highlight available target cells let mut available_cells = Vec::new(); let visible = viewsheds.get(*player_entity); if let Some(visible) = visible { // We have a viewshed for idx in visible.visible_tiles.iter() { let distance = rltk::DistanceAlg::Pythagoras.distance2d(*player_pos, *idx); if distance <= range as f32 { let screen_x = idx.x - min_x; let screen_y = idx.y - min_y; if screen_x > 1 && screen_x < (max_x - min_x)-1 && screen_y > 1 && screen_y < (max_y - min_y)-1 { draw_batch.set_bg(Point::new(screen_x, screen_y), RGB::named(rltk::BLUE)); available_cells.push(idx); } } } } else { return (ItemMenuResult::Cancel, None); } // Draw mouse cursor let mouse_pos = ctx.mouse_pos(); let mut mouse_map_pos = mouse_pos; mouse_map_pos.0 += min_x - 1; mouse_map_pos.1 += min_y - 1; let mut valid_target = false; for idx in available_cells.iter() { if idx.x == mouse_map_pos.0 && idx.y == mouse_map_pos.1 { valid_target = true; } } if valid_target { draw_batch.set_bg(Point::new(mouse_pos.0, mouse_pos.1), RGB::named(rltk::CYAN)); if ctx.left_click { return (ItemMenuResult::Selected, Some(Point::new(mouse_map_pos.0, mouse_map_pos.1))); } } else { draw_batch.set_bg(Point::new(mouse_pos.0, mouse_pos.1), RGB::named(rltk::RED)); if ctx.left_click { return (ItemMenuResult::Cancel, None); } } draw_batch.submit(5000); (ItemMenuResult::NoResponse, None) } }
Main Menu
The gui/main_menu.rs file is another simple conversion:
use rltk::prelude::*; use crate::{State, RunState, rex_assets::RexAssets }; #[derive(PartialEq, Copy, Clone)] pub enum MainMenuSelection { NewGame, LoadGame, Quit } #[derive(PartialEq, Copy, Clone)] pub enum MainMenuResult { NoSelection{ selected : MainMenuSelection }, Selected{ selected: MainMenuSelection } } pub fn main_menu(gs : &mut State, ctx : &mut Rltk) -> MainMenuResult { let mut draw_batch = DrawBatch::new(); let save_exists = crate::saveload_system::does_save_exist(); let runstate = gs.ecs.fetch::<RunState>(); let assets = gs.ecs.fetch::<RexAssets>(); ctx.render_xp_sprite(&assets.menu, 0, 0); draw_batch.draw_double_box(Rect::with_size(24, 18, 31, 10), ColorPair::new(RGB::named(rltk::WHEAT), RGB::named(rltk::BLACK))); draw_batch.print_color_centered(20, "Rust Roguelike Tutorial", ColorPair::new(RGB::named(rltk::YELLOW), RGB::named(rltk::BLACK))); draw_batch.print_color_centered(21, "by Herbert Wolverson", ColorPair::new(RGB::named(rltk::CYAN), RGB::named(rltk::BLACK))); draw_batch.print_color_centered(22, "Use Up/Down Arrows and Enter", ColorPair::new(RGB::named(rltk::GRAY), RGB::named(rltk::BLACK))); let mut y = 24; if let RunState::MainMenu{ menu_selection : selection } = *runstate { if selection == MainMenuSelection::NewGame { draw_batch.print_color_centered(y, "Begin New Game", ColorPair::new(RGB::named(rltk::MAGENTA), RGB::named(rltk::BLACK))); } else { draw_batch.print_color_centered(y, "Begin New Game", ColorPair::new(RGB::named(rltk::WHITE), RGB::named(rltk::BLACK))); } y += 1; if save_exists { if selection == MainMenuSelection::LoadGame { draw_batch.print_color_centered(y, "Load Game", ColorPair::new(RGB::named(rltk::MAGENTA), RGB::named(rltk::BLACK))); } else { draw_batch.print_color_centered(y, "Load Game", ColorPair::new(RGB::named(rltk::WHITE), RGB::named(rltk::BLACK))); } y += 1; } if selection == MainMenuSelection::Quit { draw_batch.print_color_centered(y, "Quit", ColorPair::new(RGB::named(rltk::MAGENTA), RGB::named(rltk::BLACK))); } else { draw_batch.print_color_centered(y, "Quit", ColorPair::new(RGB::named(rltk::WHITE), RGB::named(rltk::BLACK))); } draw_batch.submit(6000); match ctx.key { None => return MainMenuResult::NoSelection{ selected: selection }, Some(key) => { match key { VirtualKeyCode::Escape => { return MainMenuResult::NoSelection{ selected: MainMenuSelection::Quit } } VirtualKeyCode::Up => { let mut newselection; match selection { MainMenuSelection::NewGame => newselection = MainMenuSelection::Quit, MainMenuSelection::LoadGame => newselection = MainMenuSelection::NewGame, MainMenuSelection::Quit => newselection = MainMenuSelection::LoadGame } if newselection == MainMenuSelection::LoadGame && !save_exists { newselection = MainMenuSelection::NewGame; } return MainMenuResult::NoSelection{ selected: newselection } } VirtualKeyCode::Down => { let mut newselection; match selection { MainMenuSelection::NewGame => newselection = MainMenuSelection::LoadGame, MainMenuSelection::LoadGame => newselection = MainMenuSelection::Quit, MainMenuSelection::Quit => newselection = MainMenuSelection::NewGame } if newselection == MainMenuSelection::LoadGame && !save_exists { newselection = MainMenuSelection::Quit; } return MainMenuResult::NoSelection{ selected: newselection } } VirtualKeyCode::Return => return MainMenuResult::Selected{ selected : selection }, _ => return MainMenuResult::NoSelection{ selected: selection } } } } } MainMenuResult::NoSelection { selected: MainMenuSelection::NewGame } }
Vendor Menus
The vendor menus system takes a little more work, but not much. Our helpers aren't that useful here:
#![allow(unused)] fn main() { use rltk::prelude::*; use specs::prelude::*; use crate::{Name, State, InBackpack, VendorMode, Vendor, Item }; use super::{get_item_display_name, get_item_color, menu_box}; #[derive(PartialEq, Copy, Clone)] pub enum VendorResult { NoResponse, Cancel, Sell, BuyMode, SellMode, Buy } fn vendor_sell_menu(gs : &mut State, ctx : &mut Rltk, _vendor : Entity, _mode : VendorMode) -> (VendorResult, Option<Entity>, Option<String>, Option<f32>) { let mut draw_batch = DrawBatch::new(); let player_entity = gs.ecs.fetch::<Entity>(); let names = gs.ecs.read_storage::<Name>(); let backpack = gs.ecs.read_storage::<InBackpack>(); let items = gs.ecs.read_storage::<Item>(); let entities = gs.ecs.entities(); let inventory = (&backpack, &names).join().filter(|item| item.0.owner == *player_entity ); let count = inventory.count(); let mut y = (25 - (count / 2)) as i32; menu_box(&mut draw_batch, 15, y, (count+3) as i32, "Sell Which Item? (space to switch to buy mode)"); draw_batch.print_color( Point::new(18, y+count as i32+1), "ESCAPE to cancel", ColorPair::new(RGB::named(rltk::YELLOW), RGB::named(rltk::BLACK)) ); let mut equippable : Vec<Entity> = Vec::new(); let mut j = 0; for (entity, _pack, item) in (&entities, &backpack, &items).join().filter(|item| item.1.owner == *player_entity ) { draw_batch.set(Point::new(17, y), ColorPair::new(RGB::named(rltk::WHITE), RGB::named(rltk::BLACK)), rltk::to_cp437('(')); draw_batch.set(Point::new(18, y), ColorPair::new(RGB::named(rltk::YELLOW), RGB::named(rltk::BLACK)), 97+j as rltk::FontCharType); draw_batch.set(Point::new(19, y), ColorPair::new(RGB::named(rltk::WHITE), RGB::named(rltk::BLACK)), rltk::to_cp437(')')); draw_batch.print_color( Point::new(21, y), &get_item_display_name(&gs.ecs, entity), ColorPair::new(get_item_color(&gs.ecs, entity), RGB::from_f32(0.0, 0.0, 0.0)) ); draw_batch.print(Point::new(50, y), &format!("{:.1} gp", item.base_value * 0.8)); equippable.push(entity); y += 1; j += 1; } draw_batch.submit(6000); match ctx.key { None => (VendorResult::NoResponse, None, None, None), Some(key) => { match key { VirtualKeyCode::Space => { (VendorResult::BuyMode, None, None, None) } VirtualKeyCode::Escape => { (VendorResult::Cancel, None, None, None) } _ => { let selection = rltk::letter_to_option(key); if selection > -1 && selection < count as i32 { return (VendorResult::Sell, Some(equippable[selection as usize]), None, None); } (VendorResult::NoResponse, None, None, None) } } } } } fn vendor_buy_menu(gs : &mut State, ctx : &mut Rltk, vendor : Entity, _mode : VendorMode) -> (VendorResult, Option<Entity>, Option<String>, Option<f32>) { use crate::raws::*; let mut draw_batch = DrawBatch::new(); let vendors = gs.ecs.read_storage::<Vendor>(); let inventory = crate::raws::get_vendor_items(&vendors.get(vendor).unwrap().categories, &RAWS.lock().unwrap()); let count = inventory.len(); let mut y = (25 - (count / 2)) as i32; menu_box(&mut draw_batch, 15, y, (count+3) as i32, "Buy Which Item? (space to switch to sell mode)"); draw_batch.print_color( Point::new(18, y+count as i32+1), "ESCAPE to cancel", ColorPair::new(RGB::named(rltk::YELLOW), RGB::named(rltk::BLACK)) ); for (j,sale) in inventory.iter().enumerate() { draw_batch.set(Point::new(17, y), ColorPair::new(RGB::named(rltk::WHITE), RGB::named(rltk::BLACK)), rltk::to_cp437('(')); draw_batch.set(Point::new(18, y), ColorPair::new(RGB::named(rltk::YELLOW), RGB::named(rltk::BLACK)), 97+j as rltk::FontCharType); draw_batch.set(Point::new(19, y), ColorPair::new(RGB::named(rltk::WHITE), RGB::named(rltk::BLACK)), rltk::to_cp437(')')); draw_batch.print(Point::new(21, y), &sale.0); draw_batch.print(Point::new(50, y), &format!("{:.1} gp", sale.1 * 1.2)); y += 1; } draw_batch.submit(6000); match ctx.key { None => (VendorResult::NoResponse, None, None, None), Some(key) => { match key { VirtualKeyCode::Space => { (VendorResult::SellMode, None, None, None) } VirtualKeyCode::Escape => { (VendorResult::Cancel, None, None, None) } _ => { let selection = rltk::letter_to_option(key); if selection > -1 && selection < count as i32 { return (VendorResult::Buy, None, Some(inventory[selection as usize].0.clone()), Some(inventory[selection as usize].1)); } (VendorResult::NoResponse, None, None, None) } } } } } pub fn show_vendor_menu(gs : &mut State, ctx : &mut Rltk, vendor : Entity, mode : VendorMode) -> (VendorResult, Option<Entity>, Option<String>, Option<f32>) { match mode { VendorMode::Buy => vendor_buy_menu(gs, ctx, vendor, mode), VendorMode::Sell => vendor_sell_menu(gs, ctx, vendor, mode) } } }
Tooltips
gui/tooltip.rs is relatively easy also:
#![allow(unused)] fn main() { use rltk::prelude::*; use specs::prelude::*; use crate::{Pools, Map, Name, Hidden, camera, Attributes, StatusEffect, Duration }; use super::get_item_display_name; struct Tooltip { lines : Vec<String> } impl Tooltip { fn new() -> Tooltip { Tooltip { lines : Vec::new() } } fn add<S:ToString>(&mut self, line : S) { self.lines.push(line.to_string()); } fn width(&self) -> i32 { let mut max = 0; for s in self.lines.iter() { if s.len() > max { max = s.len(); } } max as i32 + 2i32 } fn height(&self) -> i32 { self.lines.len() as i32 + 2i32 } fn render(&self, draw_batch : &mut DrawBatch, x : i32, y : i32) { let box_gray : RGB = RGB::from_hex("#999999").expect("Oops"); let light_gray : RGB = RGB::from_hex("#DDDDDD").expect("Oops"); let white = RGB::named(rltk::WHITE); let black = RGB::named(rltk::BLACK); draw_batch.draw_box(Rect::with_size(x, y, self.width()-1, self.height()-1), ColorPair::new(white, box_gray)); for (i,s) in self.lines.iter().enumerate() { let col = if i == 0 { white } else { light_gray }; draw_batch.print_color(Point::new(x+1, y+i as i32+1), &s, ColorPair::new(col, black)); } } } pub fn draw_tooltips(ecs: &World, ctx : &mut Rltk) { let mut draw_batch = DrawBatch::new(); let (min_x, _max_x, min_y, _max_y) = camera::get_screen_bounds(ecs, ctx); let map = ecs.fetch::<Map>(); let hidden = ecs.read_storage::<Hidden>(); let attributes = ecs.read_storage::<Attributes>(); let pools = ecs.read_storage::<Pools>(); let mouse_pos = ctx.mouse_pos(); let mut mouse_map_pos = mouse_pos; mouse_map_pos.0 += min_x - 1; mouse_map_pos.1 += min_y - 1; if mouse_pos.0 < 1 || mouse_pos.0 > 49 || mouse_pos.1 < 1 || mouse_pos.1 > 40 { return; } if mouse_map_pos.0 >= map.width-1 || mouse_map_pos.1 >= map.height-1 || mouse_map_pos.0 < 1 || mouse_map_pos.1 < 1 { return; } if !map.in_bounds(rltk::Point::new(mouse_map_pos.0, mouse_map_pos.1)) { return; } let mouse_idx = map.xy_idx(mouse_map_pos.0, mouse_map_pos.1); if !map.visible_tiles[mouse_idx] { return; } let mut tip_boxes : Vec<Tooltip> = Vec::new(); for entity in map.tile_content[mouse_idx].iter().filter(|e| hidden.get(**e).is_none()) { let mut tip = Tooltip::new(); tip.add(get_item_display_name(ecs, *entity)); // Comment on attributes let attr = attributes.get(*entity); if let Some(attr) = attr { let mut s = "".to_string(); if attr.might.bonus < 0 { s += "Weak. " }; if attr.might.bonus > 0 { s += "Strong. " }; if attr.quickness.bonus < 0 { s += "Clumsy. " }; if attr.quickness.bonus > 0 { s += "Agile. " }; if attr.fitness.bonus < 0 { s += "Unheathy. " }; if attr.fitness.bonus > 0 { s += "Healthy." }; if attr.intelligence.bonus < 0 { s += "Unintelligent. "}; if attr.intelligence.bonus > 0 { s += "Smart. "}; if s.is_empty() { s = "Quite Average".to_string(); } tip.add(s); } // Comment on pools let stat = pools.get(*entity); if let Some(stat) = stat { tip.add(format!("Level: {}", stat.level)); } // Status effects let statuses = ecs.read_storage::<StatusEffect>(); let durations = ecs.read_storage::<Duration>(); let names = ecs.read_storage::<Name>(); for (status, duration, name) in (&statuses, &durations, &names).join() { if status.target == *entity { tip.add(format!("{} ({})", name.name, duration.turns)); } } tip_boxes.push(tip); } if tip_boxes.is_empty() { return; } let box_gray : RGB = RGB::from_hex("#999999").expect("Oops"); let white = RGB::named(rltk::WHITE); let arrow; let arrow_x; let arrow_y = mouse_pos.1; if mouse_pos.0 < 40 { // Render to the left arrow = to_cp437('→'); arrow_x = mouse_pos.0 - 1; } else { // Render to the right arrow = to_cp437('←'); arrow_x = mouse_pos.0 + 1; } draw_batch.set(Point::new(arrow_x, arrow_y), ColorPair::new(white, box_gray), arrow); let mut total_height = 0; for tt in tip_boxes.iter() { total_height += tt.height(); } let mut y = mouse_pos.1 - (total_height / 2); while y + (total_height/2) > 50 { y -= 1; } for tt in tip_boxes.iter() { let x = if mouse_pos.0 < 40 { mouse_pos.0 - (1 + tt.width()) } else { mouse_pos.0 + (1 + tt.width()) }; tt.render(&mut draw_batch, x, y); y += tt.height(); } draw_batch.submit(7000); } }
Wrap-Up
This chapter has been a little painful, but we've got our rendering using the new batching system - and nicely rendered larger log text. We'll build on this in future chapters, when we tackle systems (and concurrency).
The source code for this chapter may be found here
Run this chapter's example with web assembly, in your browser (WebGL2 required)
Copyright (C) 2019, Herbert Wolverson.
Scanning The Systems
About this tutorial
This tutorial is free and open source, and all code uses the MIT license - so you are free to do with it as you like. My hope is that you will enjoy the tutorial, and make great games!
If you enjoy this and would like me to keep writing, please consider supporting my Patreon.
Specs provides a really nice dispatcher system: it can automatically employ concurrency, making your game really zoom. So why aren't we using it? Web Assembly! WASM doesn't support threading in the same way as every other platform, and a Specs application compiled with a dispatcher to WASM dies hard on the first attempt to dispatch the systems. It isn't really fair on desktop applications to suffer from this. Also, the current run_systems isn't at all nice to look at:
#![allow(unused)] fn main() { fn run_systems(&mut self) { let mut mapindex = MapIndexingSystem{}; mapindex.run_now(&self.ecs); let mut vis = VisibilitySystem{}; vis.run_now(&self.ecs); ... // MANY more }
So the goal of this chapter is to build an interface that detects WASM, and falls back to a single-threaded dispatcher. If WASM isn't around, we'd like to use the Specs dispatcher. We'd also like a nicer interface to our systems - and not have to specify systems more than once.
Starting the Systems Module
To get started, we'll make a new directory: src/systems. This will hold the self-contained systems setup, but for now we're going to use it to start building a setup that can handle switching between Specs dispatch for native use, and a single-threaded invoker in WASM. In the new src/systems directory, make a file: mod.rs. You can leave it empty for now.
Warning: there's some moderately advanced macros and configuration here. Feel free to use it, and learn how it works later if needs-be. We're 73 chapters in, so my hope is that we're ready!
Make another new directory: src/systems/dispatcher. In that folder, place another empty mod.rs file.
Now go to main.rs and add a mod systems; line: this is designed to include it in the compilation (we'll worry about tidy usage later). Modify src/systems/mod.rs to include the line mod dispatcher - again, this is just to ensure that it gets compiled.
Generalizing Dispatch
With our specifications/idea, we know that we want a generic way to run the systems - and not care about which underlying setup is active (from the programming perspective). This sounds like a job for a trait - traits are (amongst other things) Rust's answer to polymorphism, inheritance (kinda) and interfaces. Add the following to src/systems/dispatcher/mod.rs:
#![allow(unused)] fn main() { use specs::prelude::World; use super::*; pub trait UnifiedDispatcher { fn run_now(&mut self, ecs : *mut World); } }
This specifies that our UnifiedDispatcher trait will offer a method called run_now, which takes itself (for state) and the ECS as a mutable parameter.
Single threaded dispatch
We'll start with the easy case. Add a new file, src/systems/dispatcher/single_thread.rs. In dispatcher/mod.rs, add the lines mod single_thread; pub use single_thread::*;.
Inside single_thread.rs, we're going to need some library support - so start with the following imports:
#![allow(unused)] fn main() { use super::super::*; use super::UnifiedDispatcher; use specs::prelude::*; }
Next, we need a place to store our systems. We're going to be passing the runnable targets in Specs-style (see below), but for single-threaded execution our goal is to run them in the order in which they were passed. Unlike the previous run_now, we're going to make the systems ahead of time and just iterate/execute them - rather than making them afresh each time. Let's start with the structure definition:
#![allow(unused)] fn main() { pub struct SingleThreadedDispatcher<'a> { pub systems : Vec<Box<dyn RunNow<'a>>> } }
There's a bit of added complexity for lifetimes here (we put the RunNow trait from Specs on the same lifetime as the structure), but it's simple enough: every system using Specs' systems functionality implements the RunNow trait. So we simply store a vector of boxed (since they vary by size, we have to use pointer indirection) RunNow traits.
Actually executing them is a bit more difficult. The following method works:
#![allow(unused)] fn main() { impl<'a> UnifiedDispatcher for SingleThreadedDispatcher<'a> { fn run_now(&mut self, ecs : *mut World) { unsafe { for sys in self.systems.iter_mut() { sys.run_now(&*ecs); } crate::effects::run_effects_queue(&mut *ecs); } } } }
There may be a better way to write this, but I kept running into lifetime problems. The World and the systems both tend to be effectively 'static - they live for the life of the program. Persuading Rust that this was the case gave me a day-long headache, until I finally decided to just use unsafe and trust myself to do the right thing!
Notice that we're taking World as a mutable pointer, not a regular mutable reference. De-referencing mutable pointers is inherently unsafe: Rust can't be sure that you aren't stomping all over lifetime guarantees. So the unsafe block is there to allow us to do just that. Since we add systems and never remove them, and calling systems without a working World is going to blow up anyway - we can get away with it. (If anyone wants to give me a safe implementation, I'll gladly use it!). The function simply iterates all the systems, and executes them - and runs the effects queue at the end.
So that's the relatively easy part. The hard part is that we want to take Specs' style dispatcher invocation - and turn it into useful systems data. We also want to do it in a way that will work for either dispatching type, AND we don't want to declare our systems more than once. After scratching my head for a while, I came up with a macro that generates a function:
#![allow(unused)] fn main() { macro_rules! construct_dispatcher { ( $( ( $type:ident, $name:expr, $deps:expr ) ),* ) => { fn new_dispatch() -> Box<dyn UnifiedDispatcher + 'static> { let mut dispatch = SingleThreadedDispatcher{ systems : Vec::new() }; $( dispatch.systems.push( Box::new( $type {} )); )* return Box::new(dispatch); } }; } }
Macros are always hard to teach; if you aren't careful, they start to look like Perl. They aren't so much generating code, as they are generating syntax - that will then "cook" into code during compilation. Looking at how Specs builds systems, each system gets a line like this:
#![allow(unused)] fn main() { .with(HelloWorld, "hello_world", &[]) }
So we are specifying three pieces of data per system: the system type, a name, and an array of strings specifying dependencies. For single-threaded use, we're actually going to ignore the last two (and trust the user to enter systems in the right order). Mapping this to the parameters portion of the macro, we have:
#![allow(unused)] fn main() { macro_rules! construct_dispatcher { ( $( ( $type:ident, $name:expr, $deps:expr ) ),* ) => { }
The $(...),* means "repeat the contents of this block, 0..n times. Then the three parameters are inside parentheses - making them a tuple. $type is the system's type - and is an identifier (rather than a pure type). $name and $deps are just expressions.
In the body of the macro:
#![allow(unused)] fn main() { ) => { fn new_dispatch() -> Box<dyn UnifiedDispatcher + 'static> { let mut dispatch = SingleThreadedDispatcher{ systems : Vec::new() }; $( dispatch.systems.push( Box::new( $type {} )); )* return Box::new(dispatch); } }; }
We define a new function, called new_dispatch. It returns a boxed, dynamic and 'static UnifiedDispatcher. (The macro doesn't define the function until you run it!). It starts by making a new instance of the SingleThreadedDispatcher with an empty systems vector. Then it iterates through each tuple, pushing an empty system into the vector. Finally, it returns the structure - with a box around it.
We aren't actually making the function yet - we just taught Rust how to do it. So in src/systems/dispatch/mod.rs we need to define it, along with the systems it needs to use:
#![allow(unused)] fn main() { #[macro_use] mod single_thread; pub use single_thread::*; construct_dispatcher!( (MapIndexingSystem, "map_index", &[]), (VisibilitySystem, "visibility", &[]), (EncumbranceSystem, "encumbrance", &[]), (InitiativeSystem, "initiative", &[]), (TurnStatusSystem, "turnstatus", &[]), (QuipSystem, "quips", &[]), (AdjacentAI, "adjacent", &[]), (VisibleAI, "visible", &[]), (ApproachAI, "approach", &[]), (FleeAI, "flee", &[]), (ChaseAI, "chase", &[]), (DefaultMoveAI, "default_move", &[]), (MovementSystem, "movement", &[]), (TriggerSystem, "triggers", &[]), (MeleeCombatSystem, "melee", &[]), (RangedCombatSystem, "ranged", &[]), (ItemCollectionSystem, "pickup", &[]), (ItemEquipOnUse, "equip", &[]), (ItemUseSystem, "use", &[]), (SpellUseSystem, "spells", &[]), (ItemIdentificationSystem, "itemid", &[]), (ItemDropSystem, "drop", &[]), (ItemRemoveSystem, "remove", &[]), (HungerSystem, "hunger", &[]), (ParticleSpawnSystem, "particle_spawn", &[]), (LightingSystem, "lighting", &[]) ); pub fn new() -> Box<dyn UnifiedDispatcher + 'static> { new_dispatch() } }
This defines a new() function that simply passes the results of calling new_dispatch. The macro call to construct_dispatcher! makes this function - with all of the system definitions (I included all of them).
Moving our systems
For easy access, I've moved all of our systems (just Specs systems) into the new systems module. You can see the implementation details in the source code. Moving them is actually pretty simple:
- Move the system (or system folder) into
systems. - Remove the
modandusestatements frommain.rsthat were looking for it. - In the system, replace
use super::withuse crate::. - Adjust
src/systems/mod.rsto compile (mod) andusethe system.
The completed src/systems/mod.rs looks like this. Notice we've added an easy-access new function to obtain a new systems dispatcher:
#![allow(unused)] fn main() { mod dispatcher; pub use dispatcher::UnifiedDispatcher; // System imports mod map_indexing_system; use map_indexing_system::MapIndexingSystem; mod visibility_system; use visibility_system::VisibilitySystem; mod ai; use ai::*; mod movement_system; use movement_system::MovementSystem; mod trigger_system; use trigger_system::TriggerSystem; mod melee_combat_system; use melee_combat_system::MeleeCombatSystem; mod ranged_combat_system; use ranged_combat_system::RangedCombatSystem; mod inventory_system; use inventory_system::*; mod hunger_system; use hunger_system::HungerSystem; pub mod particle_system; use particle_system::ParticleSpawnSystem; mod lighting_system; use lighting_system::LightingSystem; pub fn build() -> Box<dyn UnifiedDispatcher + 'static> { dispatcher::new() } }
The particle_system is a bit different in that it has other functions that are used elsewhere. You'll want to find these, and adjust their path to crate::systems::particle_system::.
Now open main.rs, and add the new dispatcher to the State:
#![allow(unused)] fn main() { pub struct State { pub ecs: World, mapgen_next_state : Option<RunState>, mapgen_history : Vec<Map>, mapgen_index : usize, mapgen_timer : f32, dispatcher : Box<dyn systems::UnifiedDispatcher + 'static> } }
State's initializer changes to (in fn main()):
#![allow(unused)] fn main() { let mut gs = State { ecs: World::new(), mapgen_next_state : Some(RunState::MainMenu{ menu_selection: gui::MainMenuSelection::NewGame }), mapgen_index : 0, mapgen_history: Vec::new(), mapgen_timer: 0.0, dispatcher: systems::build() }; }
We can now massively simplify our run_systems function:
#![allow(unused)] fn main() { impl State { fn run_systems(&mut self) { self.dispatcher.run_now(&mut self.ecs); self.ecs.maintain(); } } }
If you cargo run the project now, it will behave just as it did before: but the systems execution is now a bit more straightforward. It may even be a a little faster, since we're not remaking systems on every execution.
Multi-threaded dispatch
We've gained a bit of clarity and organization with the single-threaded dispatcher, but we're not yet unleashing Specs' power! Make a new file, src/systems/dispatcher/multi_thread.rs.
We'll start by making a new structure to hold a Specs dispatcher, and including some references:
#![allow(unused)] fn main() { use super::UnifiedDispatcher; use specs::prelude::*; pub struct MultiThreadedDispatcher { pub dispatcher: specs::Dispatcher<'static, 'static> } }
We also need to implement run_now (with the UnifiedDispatcher trait we created):
#![allow(unused)] fn main() { impl<'a> UnifiedDispatcher for MultiThreadedDispatcher { fn run_now(&mut self, ecs : *mut World) { unsafe { self.dispatcher.dispatch(&mut *ecs); crate::effects::run_effects_queue(&mut *ecs); } } } }
This is quite simple: it simply tells Specs to "dispatch" the dispatcher we are storing, and then executes the effects queue.
Once again, we need a macro to handle input:
#![allow(unused)] fn main() { macro_rules! construct_dispatcher { ( $( ( $type:ident, $name:expr, $deps:expr ) ),* ) => { fn new_dispatch() -> Box<dyn UnifiedDispatcher + 'static> { use specs::DispatcherBuilder; let dispatcher = DispatcherBuilder::new() $( .with($type{}, $name, $deps) )* .build(); let dispatch = MultiThreadedDispatcher{ dispatcher : dispatcher }; return Box::new(dispatch); } }; } }
This takes exactly the same input as the single-threaded version. That's deliberate: they are designed to be interchangeable. It also makes a new_dispatch function, with the same return type. If calls DispatchBuilder::new from Specs, and then iterates the macro parameters to add a .with(...) line for each set of system data. Finally, it calls .build and stores it in the MultiThreadedDispatcher struct - and returns itself in a box.
That's actually pretty simple, but leaves one big question: how do we know which one we are going to use? We pretty much only want to use the single-threaded version in WASM32, otherwise we'd like to take advantage of Specs' threading and efficiency. So we modify src/systems/dispatcher/mod.rs to include conditional compilation:
#![allow(unused)] fn main() { #[cfg(target_arch = "wasm32")] #[macro_use] mod single_thread; #[cfg(not(target_arch = "wasm32"))] #[macro_use] mod multi_thread; #[cfg(target_arch = "wasm32")] pub use single_thread::*; #[cfg(not(target_arch = "wasm32"))] pub use multi_thread::*; use specs::prelude::World; use super::*; pub trait UnifiedDispatcher { fn run_now(&mut self, ecs : *mut World); } construct_dispatcher!( (MapIndexingSystem, "map_index", &[]), (VisibilitySystem, "visibility", &[]), (EncumbranceSystem, "encumbrance", &[]), (InitiativeSystem, "initiative", &[]), (TurnStatusSystem, "turnstatus", &[]), (QuipSystem, "quips", &[]), (AdjacentAI, "adjacent", &[]), (VisibleAI, "visible", &[]), (ApproachAI, "approach", &[]), (FleeAI, "flee", &[]), (ChaseAI, "chase", &[]), (DefaultMoveAI, "default_move", &[]), (MovementSystem, "movement", &[]), (TriggerSystem, "triggers", &[]), (MeleeCombatSystem, "melee", &[]), (RangedCombatSystem, "ranged", &[]), (ItemCollectionSystem, "pickup", &[]), (ItemEquipOnUse, "equip", &[]), (ItemUseSystem, "use", &[]), (SpellUseSystem, "spells", &[]), (ItemIdentificationSystem, "itemid", &[]), (ItemDropSystem, "drop", &[]), (ItemRemoveSystem, "remove", &[]), (HungerSystem, "hunger", &[]), (ParticleSpawnSystem, "particle_spawn", &[]), (LightingSystem, "lighting", &[]) ); pub fn new() -> Box<dyn UnifiedDispatcher + 'static> { new_dispatch() } }
The single-threaded imports are preceded by a conditional compilation marker:
#![allow(unused)] fn main() { #[cfg(target_arch = "wasm32")] }
This says "only compile the accompanying line IF the target architecture is wasm32".
Likewise, the multi-threaded version has the opposite:
#![allow(unused)] fn main() { #[cfg(not(target_arch = "wasm32"))] }
We repeat these for both the mod and the use statements in the dispatcher. So if you are running WASM, you get #[macro_use] mod single_thread; use single_thread::*. If you are running natively, you get #[macro_use] mod multi_thread; use multi_thread::*. Rust won't compile a module that isn't included with a mod statement: so we only ever build one of the dispatcher strategies. Since we are then using it, the macro construct_dispatcher! is placed into our local (systems::dispatcher) namespace - so our call to the macro runs whichever version we connected to.
This is compile time dispatch, and is a very powerful setup. RLTK uses it internally a lot to customize itself for the various hardware back-ends.
So if you cargo run your project now - the game runs using a Specs dispatcher. If you fire up a system monitor, you can see that it is using multiple threads!
So why didn't it explode, when we added threads?
It's a common idiom that "I had a bug. I added 8 threads, and now I have 8 bugs." This can be very true, but Rust tries really hard to promote "fearless concurrency". Rust itself protects against data races - not allowing two systems to access/change the same data at the same time, which is a common source of bugs in some other languages. It doesn't protect against logical problems, however - such as a system requiring information from a previous system, only that other system hasn't run yet.
Specs takes the safety another step forward on your behalf. Here is the SystemData definition from our map indexing system:
#![allow(unused)] fn main() { WriteExpect<'a, Map>, ReadStorage<'a, Position>, ReadStorage<'a, BlocksTile>, ReadStorage<'a, TileSize>, Entities<'a> }
Remember how we are painstakingly specifying whether we want Write or Read access to resources and components? Specs actually uses this for scheduling. When it builds the dispatcher, it looks for Write access - and ensures that no two systems can have write access to the same data at once. It also ensures that reading data won't happen while it is locked for writing. However, systems can concurrently read data. So in this case, Specs guarantees that anything that needs to read the map will wait until the MapIndexingSystem is done writing to it.
This has the effect of building a dependency chain - and ordering systems logically. As a shortened example:
MapIndexingSystemwrites to the map, and readsPosition,BlocksTileandTileSize.VisibilitySystemwrites to the map,Viewshed,HiddenandRandomNumberGenerator. It readsPosition,Name, andBlocksVisibility.EncumbranceSystemwrites toEquipmentChanged,Pools,Attributesand reads fromItem,InBackpack,Equipped,Entity,AttributeBonus,StatusEffectandSlow.InitiativeSystemwrites toInitiative,MyTurn,RandomNumberGenerator,RunState,Duration,EquipmentChangedand reads fromPosition,Attributes,Entity,Point,Pools,StatusEffect,DamageOverTime.TurnStatusSystemwrites toMyTurn, and reads fromConfusion,RunState,StatusEffect.
We could keep enumerating through all of them, but that's a good illustration. From this, we can determine:
MapIndexingSystemlocks the map, so it can't run concurrently withVisibilitySystem. SinceMapIndexingSystemis defined first, it will run first.VisibilitySystemlocks the map, viewshed, hidden and RNG. So it has to wait for Visibility system.EncumbranceSystemlocks the RNG, so it has to wait untilVisibilitySystemis done.InitiativeSystemalso locks the RNG, so it has to wait until Encumbrance is done.TurnStatusSystemlocksMyTurn- and so doesInitiativeSystem. So it will have to wait until that system is done.
In other words: we aren't really multi-threading all that much yet! We are benefitting from efficiency gains by using Specs' dispatcher - so we've gained some benefit (it certainly feels faster in debug mode on my local computer!).
Quantifying "feels faster"
Let's add a framerate indicator to the screen, so we know if what we are doing is helping. We'll make it optional, as a compile-time flag (much like map debug displays). Next to the map flag in main.rs, add:
#![allow(unused)] fn main() { const SHOW_FPS : bool = true; }
At the very end of tick, where you submit the render batch - add the following line:
#![allow(unused)] fn main() { if SHOW_FPS { ctx.print(1, 59, &format!("FPS: {}", ctx.fps)); } }
If you cargo run now, you'll have an FPS counter at the bottom of the screen. On my system, it pretty much always reads 60. If you'd like to see how fast it can go, we need to turn off vsync. This is an easy change to the RLTK initialization in the main function:
#![allow(unused)] fn main() { let mut context = RltkBuilder::simple(80, 60) .with_title("Roguelike Tutorial") .with_font("vga8x16.png", 8, 16) .with_sparse_console(80, 30, "vga8x16.png") .with_vsync(false) .build(); }
Now it shows my frame-rate in the 200 region!
Threading the RNG
The RandomNumberGenerator being a writable resource is the single biggest cause of not being able to access concurrency in our system. It's used all over the place, and systems have to wait for one another to generate random numbers. We could simply use a local RNG whenever we need random numbers - but then we'd lose the ability to set a random seed (more on that in a future chapter!). Instead, we'll make a global random number generator and protect it with a mutex - so the program can get random numbers from the same source.
Let's make a new file, src/rng.rs. Add a pub mod rng; to main.rs, and we'll flesh out the random number wrapper as a lazy_static. We'll protect it with a Mutex, so it can be safely used from multiple threads:
#![allow(unused)] fn main() { use std::sync::Mutex; use rltk::prelude::*; lazy_static! { static ref RNG: Mutex<RandomNumberGenerator> = Mutex::new(RandomNumberGenerator::new()); } pub fn reseed(seed: u64) { *RNG.lock().unwrap() = RandomNumberGenerator::seeded(seed); } pub fn roll_dice(n:i32, die_type: i32) -> i32 { RNG.lock().unwrap().roll_dice(n, die_type) } pub fn range(min: i32, max: i32) -> i32 { RNG.lock().unwrap().range(min, max) } }
Now go into main.rs's main function, and delete the line:
#![allow(unused)] fn main() { gs.ecs.insert(rltk::RandomNumberGenerator::new()); }
The game will now crash whenever it tries to access the RNG resource! So we need to search the whole program finding times we've used the RNG - and replace them all with crate::rng::roll_dice or crate::rng::range. Otherwise, the syntax remains the same. This is a big change, of mostly the same code. See the source for a working version. (A nice side-effect is that we're no longer passing rng everywhere in the map builders; they are a lot cleaner!)
With that dependency resolved, we're now able to operate with a bit more concurrency. Your FPS should have improved, and if you watch in a process monitor we are a bit more threaded.
Wrap-Up
This chapter has greatly cleaned up our systems handling. It's faster, leaner and better looking - at the expense of a couple of unsafe blocks (well-managed), and a nasty macro. We've also made RNG a global, but safely wrapped it in a mutex. The result? The game runs at 1,300 FPS in release mode on my system, and is now benefiting from Specs' amazing threading capabilities. Even in single-threaded mode, it runs at a decent 1,100 FPS (on my system: a core i7).
The source code for this chapter may be found here
Run this chapter's example with web assembly, in your browser (WebGL2 required)
Copyright (C) 2019, Herbert Wolverson.
One Night in the City
About this tutorial
This tutorial is free and open source, and all code uses the MIT license - so you are free to do with it as you like. My hope is that you will enjoy the tutorial, and make great games!
If you enjoy this and would like me to keep writing, please consider supporting my Patreon.
The next level of the game is a dark elven city. The design document is a bit sparse on details, but here's what we know:
- It eventually leads to a portal to the Abyss.
- Dark elves are infighty, back-stabbing maniacs and should behave as such.
- Dark elven cities are surprisingly city-like, just deep underground.
- Lighting will be important.
Generating a basic city
The level_builder function in map_builders/mod.rs controls which map algorithm is called for a given level. Add a placeholder entry for a new map type:
#![allow(unused)] fn main() { pub fn level_builder(new_depth: i32, width: i32, height: i32) -> BuilderChain { rltk::console::log(format!("Depth: {}", new_depth)); match new_depth { 1 => town_builder(new_depth, width, height), 2 => forest_builder(new_depth, width, height), 3 => limestone_cavern_builder(new_depth, width, height), 4 => limestone_deep_cavern_builder(new_depth, width, height), 5 => limestone_transition_builder(new_depth, width, height), 6 => dwarf_fort_builder(new_depth, width, height), 7 => mushroom_entrance(new_depth, width, height), 8 => mushroom_builder(new_depth, width, height), 9 => mushroom_exit(new_depth, width, height), 10 => dark_elf_city(new_depth, width, height), _ => random_builder(new_depth, width, height) } } }
At the top of the same file, add imports for a new builder module:
#![allow(unused)] fn main() { mod dark_elves; use dark_elves::*; }
And create the new map_builders/dark_elves.rs file with a placeholder builder in it:
#![allow(unused)] fn main() { use super::{BuilderChain, XStart, YStart, AreaStartingPosition, CullUnreachable, VoronoiSpawning, AreaEndingPosition, XEnd, YEnd, BspInteriorBuilder }; pub fn dark_elf_city(new_depth: i32, width: i32, height: i32) -> BuilderChain { println!("Dark elf builder"); let mut chain = BuilderChain::new(new_depth, width, height, "Dark Elven City"); chain.start_with(BspInteriorBuilder::new()); chain.with(AreaStartingPosition::new(XStart::CENTER, YStart::CENTER)); chain.with(CullUnreachable::new()); chain.with(AreaStartingPosition::new(XStart::RIGHT, YStart::CENTER)); chain.with(AreaEndingPosition::new(XEnd::LEFT, YEnd::CENTER)); chain.with(VoronoiSpawning::new()); chain } }
That makes a not-at-all city like map (just a bsp interiors map) - but it's a good start. I chose this as the base builder because it doesn't waste any space. I like to imagine that the city is a big warren of interconnected rooms, with the poorer-elf housing in the dangerous spot (at the top). So we'll populate this level with relatively "normal" dark elves, and their slaves.
Adding some dark elves
If we just wanted to put dark elves everywhere, it would be as simple as adding one line to spawns.json in the spawn_table section:
{ "name" : "Dark Elf", "weight": 10, "min_depth": 10, "max_depth": 11 }
That's boring, so let's not do that. Our dark elves are split between Clan Arbat, Clan Barbo, and Clan Cirro (A, B, C, get it?). Thanks to the Abyssal influence of the Amulet of YALA, they are wrought with terrible infighting and war! We'll worry about differentiating the clans in a moment, for now lets make some entries to provide three groups of dark elves who hate one another.
In the factions section of spawns.json, create three new factions:
{ "name" : "DarkElfA", "responses" : { "Default" : "attack", "DarkElfA" : "ignore", "DarkElfB" : "attack", "DarkElfC" : "attack" } },
{ "name" : "DarkElfB", "responses" : { "Default" : "attack", "DarkElfB" : "ignore", "DarkElfA" : "attack", "DarkElfC" : "attack" } },
{ "name" : "DarkElfC", "responses" : { "Default" : "attack", "DarkElfC" : "ignore", "DarkElfA" : "attack", "DarkElfB" : "attack" } }
Notice how they ignore their own clan, and attack the others. That's the key to making a warzone! Our factions system already supports warring groups - we've just not used it extensively. Now find the mobs section, and duplicate the "Dark Elf" three times - once for each faction:
{
"name" : "Arbat Dark Elf",
"renderable": {
"glyph" : "e",
"fg" : "#FF0000",
"bg" : "#000000",
"order" : 1
},
"blocks_tile" : true,
"vision_range" : 8,
"movement" : "random_waypoint",
"attributes" : {},
"equipped" : [ "Hand Crossbow", "Scimitar", "Buckler", "Drow Chain", "Drow Leggings", "Drow Boots" ],
"faction" : "DarkElfA",
"gold" : "3d6",
"level" : 6
},
{
"name" : "Barbo Dark Elf",
"renderable": {
"glyph" : "e",
"fg" : "#FF0000",
"bg" : "#000000",
"order" : 1
},
"blocks_tile" : true,
"vision_range" : 8,
"movement" : "random_waypoint",
"attributes" : {},
"equipped" : [ "Hand Crossbow", "Scimitar", "Buckler", "Drow Chain", "Drow Leggings", "Drow Boots" ],
"faction" : "DarkElfB",
"gold" : "3d6",
"level" : 6
},
{
"name" : "Cirro Dark Elf",
"renderable": {
"glyph" : "e",
"fg" : "#FF0000",
"bg" : "#000000",
"order" : 1
},
"blocks_tile" : true,
"vision_range" : 8,
"movement" : "random_waypoint",
"attributes" : {},
"equipped" : [ "Hand Crossbow", "Scimitar", "Buckler", "Drow Chain", "Drow Leggings", "Drow Boots" ],
"faction" : "DarkElfC",
"gold" : "3d6",
"level" : 6
},
In the spawn table, we want them to appear on level 10:
{ "name" : "Arbat Dark Elf", "weight": 10, "min_depth": 10, "max_depth": 11 },
{ "name" : "Barbo Dark Elf", "weight": 10, "min_depth": 10, "max_depth": 11 },
{ "name" : "Cirro Dark Elf", "weight": 10, "min_depth": 10, "max_depth": 11 }
If you cargo run now, and cheat your way down to depth 10 (I recommend god mode, and teleport) - you find yourself in the midst of a warzone between three clans. There's combat everywhere, and they only pause killing one another long enough to murder the player. There's a lovely amount of mayhem - the gods of Chaos would be proud.
Clan Differentiation
It's kinda boring having all of the clans be identical. The basic "Dark Elf" can stay the same, but lets add a bit of flavor to make the clans feel differentiated.
Clan Arbat
We'll start by making Arbat a different color - a lighter red. Replace the "fg" attribute of their Dark Elves with #FFAAAA - a pinkish color. We'll take away their crossbows, also. They are a melee-oriented clan. Replace Scimitar with Scimitar +1. The modified Arbat Dark Elf looks like this:
{
"name" : "Arbat Dark Elf",
"renderable": {
"glyph" : "e",
"fg" : "#FFAAAA",
"bg" : "#000000",
"order" : 1
},
"blocks_tile" : true,
"vision_range" : 8,
"movement" : "random_waypoint",
"attributes" : {},
"equipped" : [ "Scimitar +1", "Buckler", "Drow Chain", "Drow Leggings", "Drow Boots" ],
"faction" : "DarkElfA",
"gold" : "3d6",
"level" : 6
},
Let's also give them leaders - tougher fighters:
{
"name" : "Arbat Dark Elf Leader",
"renderable": {
"glyph" : "E",
"fg" : "#FFAAAA",
"bg" : "#000000",
"order" : 1
},
"blocks_tile" : true,
"vision_range" : 8,
"movement" : "random_waypoint",
"attributes" : {},
"equipped" : [ "Scimitar +2", "Buckler +1", "Drow Chain", "Drow Leggings", "Drow Boots" ],
"faction" : "DarkElfA",
"gold" : "3d6",
"level" : 7
},
They also deserve some orc slaves:
{
"name" : "Arbat Orc Slave",
"renderable": {
"glyph" : "o",
"fg" : "#FFAAAA",
"bg" : "#000000",
"order" : 1
},
"blocks_tile" : true,
"vision_range" : 8,
"movement" : "static",
"attributes" : {},
"faction" : "DarkElfA",
"gold" : "1d8"
},
Finally, put these into the spawn table:
{ "name" : "Arbat Dark Elf", "weight": 10, "min_depth": 10, "max_depth": 11 },
{ "name" : "Arbat Dark Elf Leader", "weight": 7, "min_depth": 10, "max_depth": 11 },
{ "name" : "Arbat Orc Slave", "weight": 14, "min_depth": 10, "max_depth": 11 },
They are probably going to regret their melee focus, but we aren't too concerned for their health!
Clan Barbo
Conversely, we'll make Barbo quite missile oriented - and a little more scarce, because that's super-dangerous. We'll also give them a dagger instead of a scimitar, and change their color to orange:
{
"name" : "Barbo Dark Elf",
"renderable": {
"glyph" : "e",
"fg" : "#FF9900",
"bg" : "#000000",
"order" : 1
},
"blocks_tile" : true,
"vision_range" : 8,
"movement" : "random_waypoint",
"attributes" : {},
"equipped" : [ "Hand Crossbow +1", "Dagger", "Buckler", "Drow Chain", "Drow Leggings", "Drow Boots" ],
"faction" : "DarkElfB",
"gold" : "3d6",
"level" : 6
},
They also get some slaves - this time goblins, with a missile weapon:
{
"name" : "Barbo Goblin Archer",
"renderable": {
"glyph" : "g",
"fg" : "#FF9900",
"bg" : "#000000",
"order" : 1
},
"blocks_tile" : true,
"vision_range" : 8,
"movement" : "static",
"attributes" : {},
"faction" : "Cave Goblins",
"gold" : "1d6",
"equipped" : [ "Shortbow", "Leather Armor", "Leather Boots" ]
},
Finally, update the spawns table to include them:
{ "name" : "Barbo Dark Elf", "weight": 9, "min_depth": 10, "max_depth": 11 },
{ "name" : "Barbo Goblin Archer", "weight": 13, "min_depth": 10, "max_depth": 11 },
Clan Cirro
We're going to make Cirro powerful and rare. The basic Cirro Dark Elf looks like this:
{
"name" : "Cirro Dark Elf",
"renderable": {
"glyph" : "e",
"fg" : "#FF00FF",
"bg" : "#000000",
"order" : 1
},
"blocks_tile" : true,
"vision_range" : 8,
"movement" : "random_waypoint",
"attributes" : {},
"equipped" : [ "Hand Crossbow", "Scimitar", "Buckler", "Drow Chain", "Drow Leggings", "Drow Boots" ],
"faction" : "DarkElfC",
"gold" : "3d6",
"level" : 7
},
We'll also give them leaders - priestesses who can web you:
{
"name" : "Cirro Dark Priestess",
"renderable": {
"glyph" : "E",
"fg" : "#FF00FF",
"bg" : "#000000",
"order" : 1
},
"blocks_tile" : true,
"vision_range" : 8,
"movement" : "random_waypoint",
"attributes" : {},
"equipped" : [ "Hand Crossbow", "Scimitar", "Buckler", "Drow Chain", "Drow Leggings", "Drow Boots" ],
"faction" : "DarkElfC",
"gold" : "3d6",
"level" : 8,
"abilities" : [
{ "spell" : "Web", "chance" : 0.2, "range" : 6.0, "min_range" : 3.0 }
]
},
Instead of slaves, we'll give them spiders:
{
"name" : "Cirro Spider",
"level" : 3,
"attributes" : {},
"renderable": {
"glyph" : "s",
"fg" : "#FF00FF",
"bg" : "#000000",
"order" : 1
},
"blocks_tile" : true,
"vision_range" : 6,
"movement" : "static",
"natural" : {
"armor_class" : 12,
"attacks" : [
{ "name" : "bite", "hit_bonus" : 1, "damage" : "1d12" }
]
},
"abilities" : [
{ "spell" : "Web", "chance" : 0.2, "range" : 6.0, "min_range" : 3.0 }
],
"faction" : "DarkElfC"
},
This also requires a spawn table update:
{ "name" : "Cirro Dark Elf", "weight": 7, "min_depth": 10, "max_depth": 11 },
{ "name" : "Cirro Dark Priestess", "weight": 6, "min_depth": 10, "max_depth": 11 },
{ "name" : "Cirro Spider", "weight": 10, "min_depth": 10, "max_depth": 11 }
If you cargo run the project now, you'll find that the dark elves are murdering one another - and there's a good level of variety present.
Wrap-Up
This has been a short chapter: because most of the pre-requisites were already written. That's a good sign for the engine as a whole: we can now build a very different style of level without much in the way of new code. In the next chapter, we'll advance further into the dark elven city - trying to make more of an open city level. The mayhem will continue!
The source code for this chapter may be found here
Run this chapter's example with web assembly, in your browser (WebGL2 required)
Copyright (C) 2019, Herbert Wolverson.
One Night in the Plaza
About this tutorial
This tutorial is free and open source, and all code uses the MIT license - so you are free to do with it as you like. My hope is that you will enjoy the tutorial, and make great games!
If you enjoy this and would like me to keep writing, please consider supporting my Patreon.
The city level was deliberately messy: the hero is fighting through cramped, sprawling a Dark Elf under-city - facing different noble houses' troops who were also intent upon killing one another. It makes for fast-paced, tight combat. The last part of the city is the plaza - which is meant to offer more of a contrast. A park in the city holds a portal to the Abyss, and only the most affluent/influential dark elves can build here. So despite being underground, it's more of an outdoor city type of feeling.
So let's think a bit about what makes up the plaza level:
- A decent sized park, defended by some tough baddies. We can add something demonic here for the first time, since we're right next to a portal to their home.
- Some larger buildings.
- Statues, fountains and similar niceties.
Continuing to think about dark elves, they aren't really known for their civic planning. They are, at heart, a Chaotic species. So we want to avoid the feeling that they really planned out their city, and meticulously built it to make sense. In fact, not making sense adds to the surreality.
Generating the Plaza
Just like we have for other level builders, we need to add a placeholder builder for level 11. Open map_builders/mod.rs and add a call to dark_elf_plaza for level 11:
#![allow(unused)] fn main() { pub fn level_builder(new_depth: i32, width: i32, height: i32) -> BuilderChain { rltk::console::log(format!("Depth: {}", new_depth)); match new_depth { 1 => town_builder(new_depth, width, height), 2 => forest_builder(new_depth, width, height), 3 => limestone_cavern_builder(new_depth, width, height), 4 => limestone_deep_cavern_builder(new_depth, width, height), 5 => limestone_transition_builder(new_depth, width, height), 6 => dwarf_fort_builder(new_depth, width, height), 7 => mushroom_entrance(new_depth, width, height), 8 => mushroom_builder(new_depth, width, height), 9 => mushroom_exit(new_depth, width, height), 10 => dark_elf_city(new_depth, width, height), 11 => dark_elf_plaza(new_depth, width, height), _ => random_builder(new_depth, width, height) } } }
Now open map_builders/dark_elves.rs and create the new map builder function---dark_elf_plaza. We'll start with generating a BSP interior map; that'll change, but it's good to get something compiling:
#![allow(unused)] fn main() { pub fn dark_elf_plaza(new_depth: i32, width: i32, height: i32) -> BuilderChain { println!("Dark elf plaza builder"); let mut chain = BuilderChain::new(new_depth, width, height, "Dark Elven Plaza"); chain.start_with(BspInteriorBuilder::new()); chain.with(AreaStartingPosition::new(XStart::LEFT, YStart::CENTER)); chain.with(CullUnreachable::new()); chain.with(AreaEndingPosition::new(XEnd::RIGHT, YEnd::CENTER)); chain.with(VoronoiSpawning::new()); chain } }
Deliberately Poor City Planning
Now that we have the exact same map as the previous level, let's build a generator to create the plaza. We'll get started by making a boring, empty map - just to validate that our map builder is working. At the end of dark_elves.rs, paste in the following:
#![allow(unused)] fn main() { // Plaza Builder use super::{InitialMapBuilder, BuilderMap, TileType }; pub struct PlazaMapBuilder {} impl InitialMapBuilder for PlazaMapBuilder { #[allow(dead_code)] fn build_map(&mut self, build_data : &mut BuilderMap) { self.empty_map(build_data); } } impl PlazaMapBuilder { #[allow(dead_code)] pub fn new() -> Box<PlazaMapBuilder> { Box::new(PlazaMapBuilder{}) } fn empty_map(&mut self, build_data : &mut BuilderMap) { build_data.map.tiles.iter_mut().for_each(|t| *t = TileType::Floor); } } }
You also need to go into the dark_elf_plaza and change the initial builder to use it:
#![allow(unused)] fn main() { pub fn dark_elf_plaza(new_depth: i32, width: i32, height: i32) -> BuilderChain { println!("Dark elf plaza builder"); let mut chain = BuilderChain::new(new_depth, width, height, "Dark Elven Plaza"); chain.start_with(PlazaMapBuilder::new()); chain.with(AreaStartingPosition::new(XStart::LEFT, YStart::CENTER)); chain.with(CullUnreachable::new()); chain.with(AreaEndingPosition::new(XEnd::RIGHT, YEnd::CENTER)); chain.with(VoronoiSpawning::new()); chain } }
If you run the game now and teleport down to the last level, the "plaza" is a giant open space full of people killing both you and one another. I found it quite entertaining, but it's not what we want.
![]()
The plaza needs to be divided into zones, which contain plaza content. That's similar to what we did for Voronoi maps, but we aren't looking to create cellular walls - just areas in which to place content. Let's start by making a basic Voronoi cell area. Extend your map builder to call a new function named spawn_zones:
#![allow(unused)] fn main() { impl InitialMapBuilder for PlazaMapBuilder { #[allow(dead_code)] fn build_map(&mut self, build_data : &mut BuilderMap) { self.empty_map(build_data); self.spawn_zones(build_data); } } }
We'll start by taking our previous Voronoi code, and making it always have 32 seeds and use Pythagoras for distance:
#![allow(unused)] fn main() { fn spawn_zones(&mut self, build_data : &mut BuilderMap) { let mut voronoi_seeds : Vec<(usize, rltk::Point)> = Vec::new(); while voronoi_seeds.len() < 32 { let vx = crate::rng::roll_dice(1, build_data.map.width-1); let vy = crate::rng::roll_dice(1, build_data.map.height-1); let vidx = build_data.map.xy_idx(vx, vy); let candidate = (vidx, rltk::Point::new(vx, vy)); if !voronoi_seeds.contains(&candidate) { voronoi_seeds.push(candidate); } } let mut voronoi_distance = vec![(0, 0.0f32) ; 32]; let mut voronoi_membership : Vec<i32> = vec![0 ; build_data.map.width as usize * build_data.map.height as usize]; for (i, vid) in voronoi_membership.iter_mut().enumerate() { let x = i as i32 % build_data.map.width; let y = i as i32 / build_data.map.width; for (seed, pos) in voronoi_seeds.iter().enumerate() { let distance = rltk::DistanceAlg::PythagorasSquared.distance2d( rltk::Point::new(x, y), pos.1 ); voronoi_distance[seed] = (seed, distance); } voronoi_distance.sort_by(|a,b| a.1.partial_cmp(&b.1).unwrap()); *vid = voronoi_distance[0].0 as i32; } // Spawning code will go here } }
At the end of the new spawn_zones function, we have an array named voronoi_membership that categorizes every tile into one of 32 zones. The zones are guaranteed to be contiguous. Let's write some quick code to count the sizes of each zone to validate our work:
#![allow(unused)] fn main() { // Make a list of zone sizes and cull empty ones let mut zone_sizes : Vec<(i32, usize)> = Vec::with_capacity(32); for zone in 0..32 { let num_tiles = voronoi_membership.iter().filter(|z| **z == zone).count(); if num_tiles > 0 { zone_sizes.push((zone, num_tiles)); } } println!("{:?}", zone_sizes); }
This will give different results every time, but will give a good idea of how many zones we've created and how large they are. Here's the output from a quick test run:
[(0, 88), (1, 60), (2, 143), (3, 261), (4, 192), (5, 165), (6, 271), (7, 68), (8, 151), (9, 78), (10, 45), (11, 154), (12, 132), (13, 88), (14, 162), (15, 49), (16, 138), (17, 57), (18, 206), (19, 117), (20, 168), (21, 67), (22, 153), (23, 119), (24, 41), (25, 48), (26, 78), (27, 118), (28, 197), (29, 129), (30, 163), (31, 94)]
So we know that the zone creation works: there are 32 zones, none of which are excessively tiny - although some are quite large. Let's sort the list by size, descending:
#![allow(unused)] fn main() { zone_sizes.sort_by(|a,b| b.1.cmp(&a.1)); }
This yields a weighted "importance" map: the big zones are first, the smaller zones last. We'll use this to spawn content in order of importance. The big "portal park" is guaranteed to be the largest area. Here's the start of our creation system:
#![allow(unused)] fn main() { // Start making zonal terrain zone_sizes.iter().enumerate().for_each(|(i, (zone, _))| { match i { 0 => self.portal_park(build_data, &voronoi_membership, *zone), _ => {} } }); }
The placeholder signature for portal_park is as follows:
#![allow(unused)] fn main() { fn portal_park(&mut self, build_data : &mut BuilderMap, voronoi_membership: &[i32], zone: i32) { } }
We'll use this pattern to gradually populate the plaza. For now, we'll skip the portal park and add some other features first.
Solid Rock
Let's start with the simplest: we're going to turn some of the smaller zones into solid rock. These might be areas the elves haven't mined yet, or - more likely - they left them in place to hold the cavern up. We're going to use a feature we haven't touched before: a "match guard". You can make match work for "greater than" as follows:
#![allow(unused)] fn main() { // Start making zonal terrain zone_sizes.iter().enumerate().for_each(|(i, (zone, _))| { match i { 0 => self.portal_park(build_data, &voronoi_membership, *zone), i if i > 20 => self.fill_zone(build_data, &voronoi_membership, *zone, TileType::Wall), _ => {} } }); }
The actual fill_zone function is quite simple: it finds tiles in the zone and turns them into walls:
#![allow(unused)] fn main() { fn fill_zone(&mut self, build_data : &mut BuilderMap, voronoi_membership: &[i32], zone: i32, tile_type: TileType) { voronoi_membership .iter() .enumerate() .filter(|(_, tile_zone)| **tile_zone == zone) .for_each(|(idx, _)| build_data.map.tiles[idx] = tile_type); } }
This already injects a little life into our map:
Pools
Caves tend to be dank, wet places. The dark elves probably enjoy a few pools - plazas are known for magnificent pools! Let's extend the "default" matching to sometimes create zone pools:
#![allow(unused)] fn main() { // Start making zonal terrain zone_sizes.iter().enumerate().for_each(|(i, (zone, _))| { match i { 0 => self.portal_park(build_data, &voronoi_membership, *zone), i if i > 20 => self.fill_zone(build_data, &voronoi_membership, *zone, TileType::Wall), _ => { let roll = crate::rng::roll_dice(1, 6); match roll { 1 => self.fill_zone(build_data, &voronoi_membership, *zone, TileType::DeepWater), 2 => self.fill_zone(build_data, &voronoi_membership, *zone, TileType::ShallowWater), _ => {} } } } }); }
See how if we aren't matching anything else, we roll a dice? If it comes up 1 or 2, we add a pool of varying depth. Actually adding the pool is just like adding solid rock - but we add water instead.
The addition of some water features continues to bring the zone to life:
Stalactite Parks
Stalactites (and presumably their twin, stalagmites) can be a beautiful feature of real caves. They are a natural candidate for inclusion in a dark elf park. It would be nice to have a bit of color in the city, so let's surround them with grass. They are a carefully cultivated park, offering privacy for whatever dark elves do in their spare time (you don't want to know...).
Add it to the "unknown" zone options:
#![allow(unused)] fn main() { // Start making zonal terrain zone_sizes.iter().enumerate().for_each(|(i, (zone, _))| { match i { 0 => self.portal_park(build_data, &voronoi_membership, *zone), i if i > 20 => self.fill_zone(build_data, &voronoi_membership, *zone, TileType::Wall), _ => { let roll = crate::rng::roll_dice(1, 6); match roll { 1 => self.fill_zone(build_data, &voronoi_membership, *zone, TileType::DeepWater), 2 => self.fill_zone(build_data, &voronoi_membership, *zone, TileType::ShallowWater), 3 => self.stalactite_display(build_data, &voronoi_membership, *zone), _ => {} } } } }); }
And use a similar function to fill_zone to populate each tile in the zone with either grass or a stalactite:
#![allow(unused)] fn main() { fn stalactite_display(&mut self, build_data : &mut BuilderMap, voronoi_membership: &[i32], zone: i32) { voronoi_membership .iter() .enumerate() .filter(|(_, tile_zone)| **tile_zone == zone) .for_each(|(idx, _)| { build_data.map.tiles[idx] = match crate::rng::roll_dice(1,10) { 1 => TileType::Stalactite, 2 => TileType::Stalagmite, _ => TileType::Grass, }; }); } }
Parks & Sacrifice Areas
A few areas of vegetative cover, with seating adds to the park feel. These should be larger areas - that's the dominant theme of the zone. I don't really picture dark elves sitting around listening to a nice concert---so let's go with an altar in the middle, complete with bloodstains. Notice how we're using an "or" statement in our match to match both the 2nd and 3rd largest zones:
#![allow(unused)] fn main() { // Start making zonal terrain zone_sizes.iter().enumerate().for_each(|(i, (zone, _))| { match i { 0 => self.portal_park(build_data, &voronoi_membership, *zone), 1 | 2 => self.park(build_data, &voronoi_membership, *zone), i if i > 20 => self.fill_zone(build_data, &voronoi_membership, *zone, TileType::Wall), _ => { let roll = crate::rng::roll_dice(1, 6); match roll { 1 => self.fill_zone(build_data, &voronoi_membership, *zone, TileType::DeepWater), 2 => self.fill_zone(build_data, &voronoi_membership, *zone, TileType::ShallowWater), 3 => self.stalactite_display(build_data, &voronoi_membership, *zone), _ => {} } } } }); }
Actually populating the park is slightly more convoluted:
#![allow(unused)] fn main() { fn park(&mut self, build_data : &mut BuilderMap, voronoi_membership: &[i32], zone: i32, seeds: &[(usize, rltk::Point)]) { let zone_tiles : Vec<usize> = voronoi_membership .iter() .enumerate() .filter(|(_, tile_zone)| **tile_zone == zone) .map(|(idx, _)| idx) .collect(); // Start all grass zone_tiles.iter().for_each(|idx| build_data.map.tiles[*idx] = TileType::Grass); // Add a stone area in the middle let center = seeds[zone as usize].1; for y in center.y-2 ..= center.y+2 { for x in center.x-2 ..= center.x+2 { let idx = build_data.map.xy_idx(x, y); build_data.map.tiles[idx] = TileType::Road; if crate::rng::roll_dice(1,6) > 2 { build_data.map.bloodstains.insert(idx); } } } // With an altar at the center build_data.spawn_list.push(( build_data.map.xy_idx(center.x, center.y), "Altar".to_string() )); // And chairs for spectators zone_tiles.iter().for_each(|idx| { if build_data.map.tiles[*idx] == TileType::Grass && crate::rng::roll_dice(1, 6)==1 { build_data.spawn_list.push(( *idx, "Chair".to_string() )); } }); } }
We start by collecting a list of available tiles. Then we cover them all in nice grass. Find the center point of the Voronoi zone (it'll be the seed that generated it), and cover that area with road. Spawn an altar in the middle, some random blood stains and a bunch of chairs. It's all spawning we've done before - but pulled together to make a (not entirely pleasant) theme park.
The park areas look sufficiently chaotic:
Adding Walkways
At this point, there's no guaranty that you can actually traverse the map. It's entirely possible that water and walls will coincide in just the wrong way to block your progress. That's not a good thing! Let's use the system we encountered when we created the first Voronoi builder to identify edges between voronoi zones---and replace the edge tiles with roads. This ensures that there's a pathway between zones, as well as giving a nice honeycomb effect across the map.
Start by adding a call to the end of spawn_zones that calls the road builder:
#![allow(unused)] fn main() { // Clear the path self.make_roads(build_data, &voronoi_membership); }
Now we actually have to build some roads. Most of this code is the same as the voronoi edge detection. Instead of placing floors inside the zone, we're placing roads on the edge:
#![allow(unused)] fn main() { fn make_roads(&mut self, build_data : &mut BuilderMap, voronoi_membership: &[i32]) { for y in 1..build_data.map.height-1 { for x in 1..build_data.map.width-1 { let mut neighbors = 0; let my_idx = build_data.map.xy_idx(x, y); let my_seed = voronoi_membership[my_idx]; if voronoi_membership[build_data.map.xy_idx(x-1, y)] != my_seed { neighbors += 1; } if voronoi_membership[build_data.map.xy_idx(x+1, y)] != my_seed { neighbors += 1; } if voronoi_membership[build_data.map.xy_idx(x, y-1)] != my_seed { neighbors += 1; } if voronoi_membership[build_data.map.xy_idx(x, y+1)] != my_seed { neighbors += 1; } if neighbors > 1 { build_data.map.tiles[my_idx] = TileType::Road; } } } } }
With this in place, the map is passable. Roads delineate the edges, without looking too square:
Cleaning up the Spawns
Currently, the map is very chaotic --- and quite likely to kill you very fast. There's big open areas, chock full of baddies, traps (why would you build a trap in a park?), and items strewn around. Chaos is good, but there's such a thing as too much randomness. We'd like to have the map make some sense---in a random sort of way.
Let's start by completely removing the random entity spawner from the builder chain:
#![allow(unused)] fn main() { pub fn dark_elf_plaza(new_depth: i32, width: i32, height: i32) -> BuilderChain { println!("Dark elf plaza builder"); let mut chain = BuilderChain::new(new_depth, width, height, "Dark Elven Plaza"); chain.start_with(PlazaMapBuilder::new()); chain.with(AreaStartingPosition::new(XStart::LEFT, YStart::CENTER)); chain.with(CullUnreachable::new()); chain.with(AreaEndingPosition::new(XEnd::RIGHT, YEnd::CENTER)); chain } }
This gives you an enemy-free map, albeit one that still has some chairs and altars. This is a "theme park" map - so we're going to retain some control over what spawns in a given area. It will be light on assistance to the player---we're nearly at the end, so hopefully they stocked up!
Let's start by putting some monsters in the park/altar areas. One dark elf family or the other is there, leading to clusters of enemies. Now find the park function, and we'll extend the "add chairs" section:
#![allow(unused)] fn main() { // And chairs for spectators, and the spectators themselves let available_enemies = match crate::rng::roll_dice(1, 3) { 1 => vec![ "Arbat Dark Elf", "Arbat Dark Elf Leader", "Arbat Orc Slave", ], 2 => vec![ "Barbo Dark Elf", "Barbo Goblin Archer", ], _ => vec![ "Cirro Dark Elf", "Cirro Dark Priestess", "Cirro Spider", ] }; zone_tiles.iter().for_each(|idx| { if build_data.map.tiles[*idx] == TileType::Grass { match crate::rng::roll_dice(1, 10) { 1 => build_data.spawn_list.push(( *idx, "Chair".to_string() )), 2 => { let to_spawn = crate::rng::range(0, available_enemies.len() as i32); build_data.spawn_list.push(( *idx, available_enemies[to_spawn as usize].to_string() )); } _ => {} } } }); }
We're doing a couple of new things here. We're randomly assigning an owner to the park - A, B or C groups of Dark Elves. Then we make a list of available spawns for each, and spawn a few in that park. This ensures that the park starts as owned by one faction. Since they can often see one another, carnage will commence - but at least it's themed carnage.
We're going to leave the stalactite galleries and pools empty of enemies. They are just window dressing, and provide a quiet area to hide/rest (see? We're not being totally unfair!).
The Portal Park
Now that we've got the basic shape of the map down, it's time to focus on the park. The first thing to do is to stop the exit from spawning randomly. Change the basic map builder to not include exit placement:
#![allow(unused)] fn main() { pub fn dark_elf_plaza(new_depth: i32, width: i32, height: i32) -> BuilderChain { println!("Dark elf plaza builder"); let mut chain = BuilderChain::new(new_depth, width, height, "Dark Elven Plaza"); chain.start_with(PlazaMapBuilder::new()); chain.with(AreaStartingPosition::new(XStart::LEFT, YStart::CENTER)); chain.with(CullUnreachable::new()); chain } }
That leaves you with no exit at all. We want to place it in the middle of Portal Park. Let's extend the function signature to include the voronoi seeds, and use the seed point to place the exit---just like we did for other parks:
#![allow(unused)] fn main() { fn portal_park(&mut self, build_data : &mut BuilderMap, voronoi_membership: &[i32], zone: i32, seeds: &[(usize, rltk::Point)]) { let center = seeds[zone as usize].1; let idx = build_data.map.xy_idx(center.x, center.y); build_data.map.tiles[idx] = TileType::DownStairs; } }
Now, let's make the portal park stand out a bit by covering it in gravel:
#![allow(unused)] fn main() { fn portal_park(&mut self, build_data : &mut BuilderMap, voronoi_membership: &[i32], zone: i32, seeds: &[(usize, rltk::Point)]) { let zone_tiles : Vec<usize> = voronoi_membership .iter() .enumerate() .filter(|(_, tile_zone)| **tile_zone == zone) .map(|(idx, _)| idx) .collect(); // Start all gravel zone_tiles.iter().for_each(|idx| build_data.map.tiles[*idx] = TileType::Gravel); // Add the exit let center = seeds[zone as usize].1; let idx = build_data.map.xy_idx(center.x, center.y); build_data.map.tiles[idx] = TileType::DownStairs; } }
Next, we'll add some altars around the exit:
#![allow(unused)] fn main() { // Add some altars around the exit let altars = [ build_data.map.xy_idx(center.x - 2, center.y), build_data.map.xy_idx(center.x + 2, center.y), build_data.map.xy_idx(center.x, center.y - 2), build_data.map.xy_idx(center.x, center.y + 2), ]; altars.iter().for_each(|idx| build_data.spawn_list.push((*idx, "Altar".to_string()))); }
This gives a pretty good start at the exit to Abyss. You have the exit in the right place, creepy altars and a clearly marked approach. It's also devoid of risk (other than the elves killing one another all over the map).
Let's make the exit a little more challenging by adding a boss fight to the exit. It's the last big push before Abyss, so it's a natural spot for it. I randomly generated a demon name, and decided to name the boss "Vokoth". Let's spawn it one tile adjacent to th exit:
#![allow(unused)] fn main() { let demon_spawn = build_data.map.xy_idx(center.x+1, center.y+1); build_data.spawn_list.push((demon_spawn, "Vokoth".to_string())); }
This won't do anything at all until we define Vokoth! We want a tough baddie. Let's take a quick trip down memory lane in spawns.json and remind ourselves how we defined the black dragon:
{
"name" : "Black Dragon",
"renderable": {
"glyph" : "D",
"fg" : "#FF0000",
"bg" : "#000000",
"order" : 1,
"x_size" : 2,
"y_size" : 2
},
"blocks_tile" : true,
"vision_range" : 12,
"movement" : "static",
"attributes" : {
"might" : 13,
"fitness" : 13
},
"skills" : {
"Melee" : 18,
"Defense" : 16
},
"natural" : {
"armor_class" : 17,
"attacks" : [
{ "name" : "bite", "hit_bonus" : 4, "damage" : "1d10+2" },
{ "name" : "left_claw", "hit_bonus" : 2, "damage" : "1d10" },
{ "name" : "right_claw", "hit_bonus" : 2, "damage" : "1d10" }
]
},
"loot_table" : "Wyrms",
"faction" : "Wyrm",
"level" : 6,
"gold" : "20d10",
"abilities" : [
{ "spell" : "Acid Breath", "chance" : 0.2, "range" : 8.0, "min_range" : 2.0 }
]
},
That's a really tough monster, and makes for a good template for the Abyssal demon. Let's clone it (copy/paste time!) and build an entry for Vokoth:
{
"name" : "Vokoth",
"renderable": {
"glyph" : "&",
"fg" : "#FF0000",
"bg" : "#000000",
"order" : 1,
"x_size" : 2,
"y_size" : 2
},
"blocks_tile" : true,
"vision_range" : 6,
"movement" : "static",
"attributes" : {
"might" : 13,
"fitness" : 13
},
"skills" : {
"Melee" : 18,
"Defense" : 16
},
"natural" : {
"armor_class" : 17,
"attacks" : [
{ "name" : "whip", "hit_bonus" : 4, "damage" : "1d10+2" }
]
},
"loot_table" : "Wyrms",
"faction" : "Wyrm",
"level" : 8,
"gold" : "20d10",
"abilities" : []
}
Now if you play the game, you'll find yourself facing a nasty demon monster at the exit to Abyss.
Wrap-Up
We now have the second-to-last section done! You can battle your way down to the Dark Elf Plaza, and find the gateway to Abyss - but only if you can evade a hulking demon and a horde of elves---with very little in the way of help offered. Next up, we'll begin to build the Abyss.
The source code for this chapter may be found here
Run this chapter's example with web assembly, in your browser (WebGL2 required)
Copyright (C) 2019, Herbert Wolverson.
Contributors
About this tutorial
This tutorial is free and open source, and all code uses the MIT license - so you are free to do with it as you like. My hope is that you will enjoy the tutorial, and make great games!
If you enjoy this and would like me to keep writing, please consider supporting my Patreon.
The following people have contributed to this project:
- Herbert Wolverson, the primary author.
- Marius Gedminas provided some fixes to the visibility system, and chapter 5. Corrected a typo in chapter 7, fixed a Markdown error in chapter 7, fixed indentation in chapter 13, and a typo in chapter 18. He also fixed some code in my hunger clock to let monsters get hungry too, if we so desire.
- Ben Morrison fixed an issue in chapter 4, correctly matching room passing-by-reference with the accompanying source code.
- Tommi Jalkanen helped me remove some Dispatcher code that I'd accidentally left in place. He also found an issue with bounds checking on movement, for which I am eternally grateful!
- Gabriel Martinez helped me fix the Vi keys.
- Dominic D found some issues with chapter 7.
- FlorentKI found some dispatch code that hadn't been properly deleted, and helped fix up some code issues with dog-leg corridors.
- Zirael07 found numerous typos and missing bits of code.
- Tyler Vipond found a bunch of issues in chapters 7 and 9.
- JP Moresmau found a problem with the order in which systems were running, allowing you to run through mobs.
- toyboot4e found some typos and code improvements in the Wave Function Collapse system.
- Sebastian N. Kaupe fixed an issue with tool-tip whitespace.
- adamnemecek helped out with some whitespace issues.
- Kawzeg helped fix an out-of-bounds error in chapter 4.
- joguSD reminded me to fix my SSL certificate.
- Olivia Ifrim helped me fix some broken links to the Specs book.
- NielsRenard fixed my awful English for dropping items and helped with even more broken Specs book links. He also helped find an awful issue preventing one from suffering damage from more than one source in a turn.
- ZeroCity fixed a typo in Chapter 2 (
PositionnotPos). - Fuddles from the r/roguelikedev Discord pointed out an issue with structure naming.
- dethmuffin pointed out an inconsistency in chapter 9, in the new
ConvertSaveLoadcode. - Reddit user u/Koavf asked me to clarify the licensing for the project.
- Till Arnold fixed a small typo in chapter 5.
- pk helped remove some unused variable warnings.
- Vojta7 found a broken module reference and fixed it for me. He also found numerous typos in the WFC section and fixed them, too.
- skierpage fixed a lot of typos in chapter 2.
- Mark McCaskey provided a logging system that doesn't suck!
- Thibaut helped me fix some example code in chapter 7.
- Matteo Guglielmetti spotted a type error in the chapter 7 code and fixed it for me.
- Jubilee helped me fix up a bunch of links from
RLTKtobracket-lib, and a bunch of typos. - Rich Churcher helped me find/fix a few places that forgot to update the initialization code.
- Matteo Gugliemetti noticed that I was using
RunStatebefore I initialized it. - Luca Beltrami pointed out that I don't need
extern crateandmacro_useanymore. - HammerAndTongs noticed that the A* implementation also needs to implement
get_pathing_distance. - mdtro found a problem with the Chapter 7 code.
- pprobst noticed that tool-tips were revealing hidden monsters.
- Ben Doerr reminded me to remind you to run the new systems created in chapter 7.
- Charlie Hornsby helped with some text/code inconsistencies in chapter 1.
- ddalcino fixed some FOV issues.
- Remi Marchand helped fix some consistency issues in the text.
Supporters
I'd also like to take a moment to thank everyone who has sent me kind words, contributed with issue reports, and the following Patrons (from patreon.com):
- Aslan Magomadov
- Ben Gamble
- Boyd Trolinger
- Brian Bucklew
- Caleb C.
- Caleb M.
- Chad Thorenson
- Crocodylus Pontifex (great name!)
- David Hagerty
- Enrique Garcia
- Finn Günther
- Fredrik Holmqvist
- Galen Palmer
- George Madrid
- Jeffrey Lyne
- Josh Isaak
- Kenton Hamaluik
- KnightDave
- Kris Shamloo
- Matthew Bradford
- Mark Rowe
- Neikos
- Noah
- Oliver Uvman
- Oskar Edgren
- Pat LaBine
- Pedro Probst
- Pete Bevin
- Rafin de Castro
- Russel Myers
- Ryan Orlando
- Shane Sveller
- Simon Dickinson
- Snayff
- Steve Hyatt
- Teague Lasser
- Tom Leys
- Tommi Sinuvuo
- Torben Clasen
If I've missed your contribution, please let me know!
Copyright (C) 2019, Herbert Wolverson.
Licensing
About this tutorial
This tutorial is free and open source, and all code uses the MIT license - so you are free to do with it as you like. My hope is that you will enjoy the tutorial, and make great games!
If you enjoy this and would like me to keep writing, please consider supporting my Patreon.
The source code for this tutorial (and associated material) is licensed under the MIT license. This means:
- You can do pretty much whatever you want with it, including using it in projects under other licenses.
- You can't assume a warranty and sue me for trying to help. Please don't.
- You have to include a notice that you used MIT Licensed code written by Herbert Wolverson in your project.
- It's not required, but a link to this project would be appreciated. Let me know if you've used it, and I'll be thrilled to link back to your project in a "cool things people made with this tutorial" page!
The tutorial text/book is licensed under the Attribution-NonCommercial-ShareAlike 4.0 International license.
You are free to:
- Share - copy and redistribute the material in any medium or format.
- Adapt - remix, transform, and build upon the material for any purpose.
However, you have to:
- Retrain Attribution to me (Herbert Wolverson), the original author. I really don't want to wake up one morning and find my hard work labeled as being written by someone else.
- ShareAlike - If you remix, transform or build upon the material, you must distribute your contributions under the same license.
- NonCommercial - you may not use this material for commercial purposes. If you'd like to do that, please talk to me.
- No additional restrictions - You may not apply legal terms or technological measures that legally restrict others from doing anything the license permits.
If you don't like my license choices, let me know - I'll be happy to discuss it.
MIT License Text
Copyright 2019 Herbert Wolverson (DBA Bracket Productions)
Permission is hereby granted, free of charge, to any person obtaining a copy of this software and associated documentation files (the "Software"), to deal in the Software without restriction, including without limitation the rights to use, copy, modify, merge, publish, distribute, sublicense, and/or sell copies of the Software, and to permit persons to whom the Software is furnished to do so, subject to the following conditions:
The above copyright notice and this permission notice shall be included in all copies or substantial portions of the Software.
THE SOFTWARE IS PROVIDED "AS IS", WITHOUT WARRANTY OF ANY KIND, EXPRESS OR IMPLIED, INCLUDING BUT NOT LIMITED TO THE WARRANTIES OF MERCHANTABILITY, FITNESS FOR A PARTICULAR PURPOSE AND NONINFRINGEMENT. IN NO EVENT SHALL THE AUTHORS OR COPYRIGHT HOLDERS BE LIABLE FOR ANY CLAIM, DAMAGES OR OTHER LIABILITY, WHETHER IN AN ACTION OF CONTRACT, TORT OR OTHERWISE, ARISING FROM, OUT OF OR IN CONNECTION WITH THE SOFTWARE OR THE USE OR OTHER DEALINGS IN THE SOFTWARE.
Creative Commons BY_SA-4.0 Legal Terms
See https://creativecommons.org/licenses/by-nc-sa/4.0/legalcode for a nicely formatted, properly linked version. The linked version, hosted by creativecommons.org shall be considered authoritative - this is just a summary.
creative commons
Attribution-NonCommercial-ShareAlike 4.0 International
Creative Commons Corporation (“Creative Commons”) is not a law firm and does not provide legal services or legal advice. Distribution of Creative Commons public licenses does not create a lawyer-client or other relationship. Creative Commons makes its licenses and related information available on an “as-is” basis. Creative Commons gives no warranties regarding its licenses, any material licensed under their terms and conditions, or any related information. Creative Commons disclaims all liability for damages resulting from their use to the fullest extent possible.
Using Creative Commons Public Licenses
Creative Commons public licenses provide a standard set of terms and conditions that creators and other rights holders may use to share original works of authorship and other material subject to copyright and certain other rights specified in the public license below. The following considerations are for informational purposes only, are not exhaustive, and do not form part of our licenses.
-
Considerations for licensors: Our public licenses are intended for use by those authorized to give the public permission to use material in ways otherwise restricted by copyright and certain other rights. Our licenses are irrevocable. Licensors should read and understand the terms and conditions of the license they choose before applying it. Licensors should also secure all rights necessary before applying our licenses so that the public can reuse the material as expected. Licensors should clearly mark any material not subject to the license. This includes other CC-licensed material, or material used under an exception or limitation to copyright. More considerations for licensors.
-
Considerations for the public: By using one of our public licenses, a licensor grants the public permission to use the licensed material under specified terms and conditions. If the licensor’s permission is not necessary for any reason–for example, because of any applicable exception or limitation to copyright–then that use is not regulated by the license. Our licenses grant only permissions under copyright and certain other rights that a licensor has authority to grant. Use of the licensed material may still be restricted for other reasons, including because others have copyright or other rights in the material. A licensor may make special requests, such as asking that all changes be marked or described. Although not required by our licenses, you are encouraged to respect those requests where reasonable. More considerations for the public.
Creative Commons Attribution-NonCommercial-ShareAlike 4.0 International Public License
By exercising the Licensed Rights (defined below), You accept and agree to be bound by the terms and conditions of this Creative Commons Attribution-NonCommercial-ShareAlike 4.0 International Public License ("Public License"). To the extent this Public License may be interpreted as a contract, You are granted the Licensed Rights in consideration of Your acceptance of these terms and conditions, and the Licensor grants You such rights in consideration of benefits the Licensor receives from making the Licensed Material available under these terms and conditions.
Section 1 – Definitions.
a. Adapted Material means material subject to Copyright and Similar Rights that is derived from or based upon the Licensed Material and in which the Licensed Material is translated, altered, arranged, transformed, or otherwise modified in a manner requiring permission under the Copyright and Similar Rights held by the Licensor. For purposes of this Public License, where the Licensed Material is a musical work, performance, or sound recording, Adapted Material is always produced where the Licensed Material is synched in timed relation with a moving image.
b. Adapter's License means the license You apply to Your Copyright and Similar Rights in Your contributions to Adapted Material in accordance with the terms and conditions of this Public License.
c. BY-NC-SA Compatible License means a license listed at creativecommons.org/compatiblelicenses, approved by Creative Commons as essentially the equivalent of this Public License.
d. Copyright and Similar Rights means copyright and/or similar rights closely related to copyright including, without limitation, performance, broadcast, sound recording, and Sui Generis Database Rights, without regard to how the rights are labeled or categorized. For purposes of this Public License, the rights specified in Section 2(b)(1)-(2) are not Copyright and Similar Rights.
e. Effective Technological Measures means those measures that, in the absence of proper authority, may not be circumvented under laws fulfilling obligations under Article 11 of the WIPO Copyright Treaty adopted on December 20, 1996, and/or similar international agreements.
f. Exceptions and Limitations means fair use, fair dealing, and/or any other exception or limitation to Copyright and Similar Rights that applies to Your use of the Licensed Material.
g. License Elements means the license attributes listed in the name of a Creative Commons Public License. The License Elements of this Public License are Attribution, NonCommercial, and ShareAlike.
h. Licensed Material means the artistic or literary work, database, or other material to which the Licensor applied this Public License.
i. Licensed Rights means the rights granted to You subject to the terms and conditions of this Public License, which are limited to all Copyright and Similar Rights that apply to Your use of the Licensed Material and that the Licensor has authority to license.
j. Licensor means the individual(s) or entity(ies) granting rights under this Public License.
k. NonCommercial means not primarily intended for or directed towards commercial advantage or monetary compensation. For purposes of this Public License, the exchange of the Licensed Material for other material subject to Copyright and Similar Rights by digital file-sharing or similar means is NonCommercial provided there is no payment of monetary compensation in connection with the exchange.
l. Share means to provide material to the public by any means or process that requires permission under the Licensed Rights, such as reproduction, public display, public performance, distribution, dissemination, communication, or importation, and to make material available to the public including in ways that members of the public may access the material from a place and at a time individually chosen by them.
m. Sui Generis Database Rights means rights other than copyright resulting from Directive 96/9/EC of the European Parliament and of the Council of 11 March 1996 on the legal protection of databases, as amended and/or succeeded, as well as other essentially equivalent rights anywhere in the world.
n. You means the individual or entity exercising the Licensed Rights under this Public License. Your has a corresponding meaning.
Section 2 – Scope.
a. License grant.
-
Subject to the terms and conditions of this Public License, the Licensor hereby grants You a worldwide, royalty-free, non-sublicensable, non-exclusive, irrevocable license to exercise the Licensed Rights in the Licensed Material to:
A. reproduce and Share the Licensed Material, in whole or in part, for NonCommercial purposes only; and
B. produce, reproduce, and Share Adapted Material for NonCommercial purposes only.
-
Exceptions and Limitations. For the avoidance of doubt, where Exceptions and Limitations apply to Your use, this Public License does not apply, and You do not need to comply with its terms and conditions.
-
Term. The term of this Public License is specified in Section 6(a).
-
Media and formats; technical modifications allowed. The Licensor authorizes You to exercise the Licensed Rights in all media and formats whether now known or hereafter created, and to make technical modifications necessary to do so. The Licensor waives and/or agrees not to assert any right or authority to forbid You from making technical modifications necessary to exercise the Licensed Rights, including technical modifications necessary to circumvent Effective Technological Measures. For purposes of this Public License, simply making modifications authorized by this Section 2(a)(4) never produces Adapted Material.
-
Downstream recipients.
A. Offer from the Licensor – Licensed Material. Every recipient of the Licensed Material automatically receives an offer from the Licensor to exercise the Licensed Rights under the terms and conditions of this Public License.
B. Additional offer from the Licensor – Adapted Material. Every recipient of Adapted Material from You automatically receives an offer from the Licensor to exercise the Licensed Rights in the Adapted Material under the conditions of the Adapter’s License You apply.
C. No downstream restrictions. You may not offer or impose any additional or different terms or conditions on, or apply any Effective Technological Measures to, the Licensed Material if doing so restricts exercise of the Licensed Rights by any recipient of the Licensed Material.
-
No endorsement. Nothing in this Public License constitutes or may be construed as permission to assert or imply that You are, or that Your use of the Licensed Material is, connected with, or sponsored, endorsed, or granted official status by, the Licensor or others designated to receive attribution as provided in Section 3(a)(1)(A)(i).
b. Other rights.
-
Moral rights, such as the right of integrity, are not licensed under this Public License, nor are publicity, privacy, and/or other similar personality rights; however, to the extent possible, the Licensor waives and/or agrees not to assert any such rights held by the Licensor to the limited extent necessary to allow You to exercise the Licensed Rights, but not otherwise.
-
Patent and trademark rights are not licensed under this Public License.
-
To the extent possible, the Licensor waives any right to collect royalties from You for the exercise of the Licensed Rights, whether directly or through a collecting society under any voluntary or waivable statutory or compulsory licensing scheme. In all other cases the Licensor expressly reserves any right to collect such royalties, including when the Licensed Material is used other than for NonCommercial purposes.
Section 3 – License Conditions.
Your exercise of the Licensed Rights is expressly made subject to the following conditions.
a. Attribution.
-
If You Share the Licensed Material (including in modified form), You must:
A. retain the following if it is supplied by the Licensor with the Licensed Material:
i. identification of the creator(s) of the Licensed Material and any others designated to receive attribution, in any reasonable manner requested by the Licensor (including by pseudonym if designated);
ii. a copyright notice;
iii. a notice that refers to this Public License;
iv. a notice that refers to the disclaimer of warranties;
v. a URI or hyperlink to the Licensed Material to the extent reasonably practicable;
B. indicate if You modified the Licensed Material and retain an indication of any previous modifications; and
C. indicate the Licensed Material is licensed under this Public License, and include the text of, or the URI or hyperlink to, this Public License.
-
You may satisfy the conditions in Section 3(a)(1) in any reasonable manner based on the medium, means, and context in which You Share the Licensed Material. For example, it may be reasonable to satisfy the conditions by providing a URI or hyperlink to a resource that includes the required information.
-
If requested by the Licensor, You must remove any of the information required by Section 3(a)(1)(A) to the extent reasonably practicable.
b. ShareAlike.
In addition to the conditions in Section 3(a), if You Share Adapted Material You produce, the following conditions also apply.
-
The Adapter’s License You apply must be a Creative Commons license with the same License Elements, this version or later, or a BY-NC-SA Compatible License.
-
You must include the text of, or the URI or hyperlink to, the Adapter's License You apply. You may satisfy this condition in any reasonable manner based on the medium, means, and context in which You Share Adapted Material.
-
You may not offer or impose any additional or different terms or conditions on, or apply any Effective Technological Measures to, Adapted Material that restrict exercise of the rights granted under the Adapter's License You apply.
Section 4 – Sui Generis Database Rights.
Where the Licensed Rights include Sui Generis Database Rights that apply to Your use of the Licensed Material:
a. for the avoidance of doubt, Section 2(a)(1) grants You the right to extract, reuse, reproduce, and Share all or a substantial portion of the contents of the database for NonCommercial purposes only;
b. if You include all or a substantial portion of the database contents in a database in which You have Sui Generis Database Rights, then the database in which You have Sui Generis Database Rights (but not its individual contents) is Adapted Material, including for purposes of Section 3(b); and
c. You must comply with the conditions in Section 3(a) if You Share all or a substantial portion of the contents of the database.
For the avoidance of doubt, this Section 4 supplements and does not replace Your obligations under this Public License where the Licensed Rights include other Copyright and Similar Rights.
Section 5 – Disclaimer of Warranties and Limitation of Liability.
a. Unless otherwise separately undertaken by the Licensor, to the extent possible, the Licensor offers the Licensed Material as-is and as-available, and makes no representations or warranties of any kind concerning the Licensed Material, whether express, implied, statutory, or other. This includes, without limitation, warranties of title, merchantability, fitness for a particular purpose, non-infringement, absence of latent or other defects, accuracy, or the presence or absence of errors, whether or not known or discoverable. Where disclaimers of warranties are not allowed in full or in part, this disclaimer may not apply to You.
b. To the extent possible, in no event will the Licensor be liable to You on any legal theory (including, without limitation, negligence) or otherwise for any direct, special, indirect, incidental, consequential, punitive, exemplary, or other losses, costs, expenses, or damages arising out of this Public License or use of the Licensed Material, even if the Licensor has been advised of the possibility of such losses, costs, expenses, or damages. Where a limitation of liability is not allowed in full or in part, this limitation may not apply to You.
c. The disclaimer of warranties and limitation of liability provided above shall be interpreted in a manner that, to the extent possible, most closely approximates an absolute disclaimer and waiver of all liability.
Section 6 – Term and Termination.
a. This Public License applies for the term of the Copyright and Similar Rights licensed here. However, if You fail to comply with this Public License, then Your rights under this Public License terminate automatically.
b. Where Your right to use the Licensed Material has terminated under Section 6(a), it reinstates:
-
automatically as of the date the violation is cured, provided it is cured within 30 days of Your discovery of the violation; or
-
upon express reinstatement by the Licensor.
For the avoidance of doubt, this Section 6(b) does not affect any right the Licensor may have to seek remedies for Your violations of this Public License.
c. For the avoidance of doubt, the Licensor may also offer the Licensed Material under separate terms or conditions or stop distributing the Licensed Material at any time; however, doing so will not terminate this Public License.
d. Sections 1, 5, 6, 7, and 8 survive termination of this Public License.
Section 7 – Other Terms and Conditions.
a. The Licensor shall not be bound by any additional or different terms or conditions communicated by You unless expressly agreed.
b. Any arrangements, understandings, or agreements regarding the Licensed Material not stated herein are separate from and independent of the terms and conditions of this Public License.
Section 8 – Interpretation.
a. For the avoidance of doubt, this Public License does not, and shall not be interpreted to, reduce, limit, restrict, or impose conditions on any use of the Licensed Material that could lawfully be made without permission under this Public License.
b. To the extent possible, if any provision of this Public License is deemed unenforceable, it shall be automatically reformed to the minimum extent necessary to make it enforceable. If the provision cannot be reformed, it shall be severed from this Public License without affecting the enforceability of the remaining terms and conditions.
c. No term or condition of this Public License will be waived and no failure to comply consented to unless expressly agreed to by the Licensor.
d. Nothing in this Public License constitutes or may be interpreted as a limitation upon, or waiver of, any privileges and immunities that apply to the Licensor or You, including from the legal processes of any jurisdiction or authority.
Creative Commons is not a party to its public licenses. Notwithstanding, Creative Commons may elect to apply one of its public licenses to material it publishes and in those instances will be considered the “Licensor.” Except for the limited purpose of indicating that material is shared under a Creative Commons public license or as otherwise permitted by the Creative Commons policies published at creativecommons.org/policies, Creative Commons does not authorize the use of the trademark “Creative Commons” or any other trademark or logo of Creative Commons without its prior written consent including, without limitation, in connection with any unauthorized modifications to any of its public licenses or any other arrangements, understandings, or agreements concerning use of licensed material. For the avoidance of doubt, this paragraph does not form part of the public licenses.
Creative Commons may be contacted at creativecommons.org