REX Paint Main Menu
About this tutorial
This tutorial is free and open source, and all code uses the MIT license - so you are free to do with it as you like. My hope is that you will enjoy the tutorial, and make great games!
If you enjoy this and would like me to keep writing, please consider supporting my Patreon.
Our main menu is really boring, and not a good way to attract players! This chapter will spice it up a bit.
REX Paint
Grid Sage Games (the amazing u/Kyzrati on Reddit) provide a lovely tool for Codepage 437 image editing called REX Paint. RLTK has built-in support for using the output from this editor. As they used to say on the BBC's old kids show Blue Peter - here's one I made earlier.
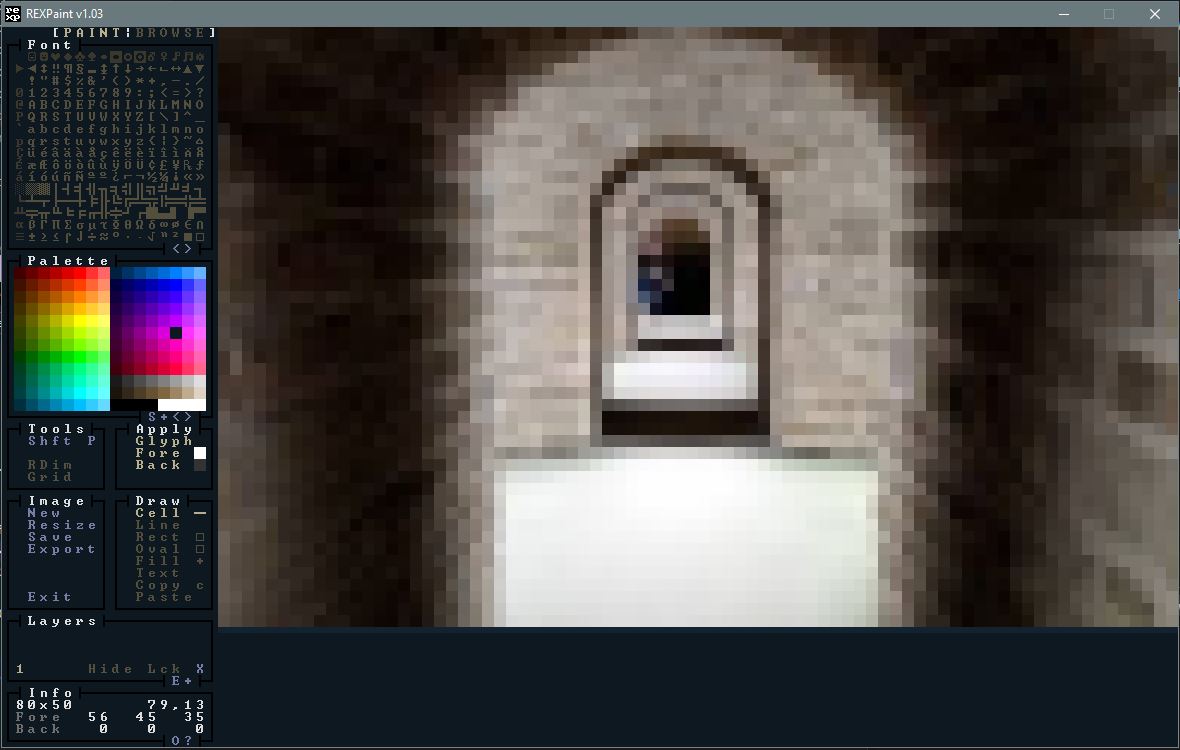
I cheated a bit; I found a CC0 image, resized it to 80x50 in the GIMP, and used a tool I wrote years ago to convert the PNG to a REX Paint file. Still, I like the result. You can find the REX Paint file in the resources folder.
Loading REX Assets
We'll introduce a new file, rex_assets.rs to store our REX sprites. The file looks like this:
#![allow(unused)]
fn main() {
use rltk::{rex::XpFile};

rltk::embedded_resource!(SMALL_DUNGEON, "../../resources/SmallDungeon_80x50.xp");

pub struct RexAssets {
    pub menu : XpFile
}

impl RexAssets {
    #[allow(clippy::new_without_default)]
    pub fn new() -> RexAssets {
        rltk::link_resource!(SMALL_DUNGEON, "../../resources/SmallDungeon_80x50.xp");

        RexAssets{
            menu : XpFile::from_resource("../../resources/SmallDungeon_80x50.xp").unwrap()
        }
    }
}
}
Very simple - it defines a structure, and loads the dungeon graphic into it when new is called. We'll also insert it into Specs as a resource so we can access our sprites anywhere. There are some new concepts here:
- We're using
rltk::embedded_resource!to include the file in our binary. This gets around having to ship the binary with your executable (and makes life easier inwasmland). #[allow(clippy::new_without_default)]tells the linter to stop telling me to write a default implementation, when we don't need one!rltk::link_resource!is the second-half the the embedded resource; the first stores it in memory, this one tells RLTK where to find it.menu : XpFile::from_resource("../../resources/SmallDungeon_80x50.xp").unwrap()loads the Rex paint file from memory.
In main.rs:
#![allow(unused)]
fn main() {
gs.ecs.insert(rex_assets::RexAssets::new());
}
Now we open up gui.rs and find the main_menu function. We'll add two lines before we start printing menu content:
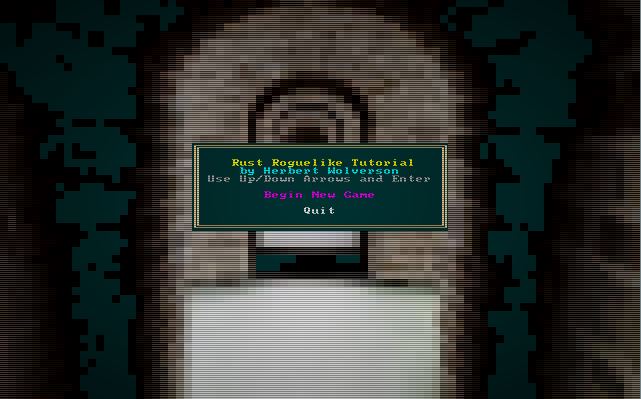
#![allow(unused)]
fn main() {
let assets = gs.ecs.fetch::<RexAssets>();
ctx.render_xp_sprite(&assets.menu, 0, 0);
}
The result (cargo run to see it) is a good start at a menu!

Improving the look of the menu - adding a box and borders
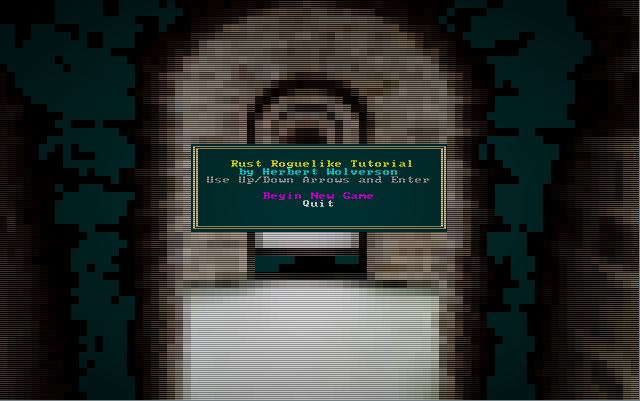
To make it look a little snazzier, we'll work on spacing - and add a box for the menu and text. Replace the current title rendering code with:
#![allow(unused)]
fn main() {
ctx.draw_box_double(24, 18, 31, 10, RGB::named(rltk::WHEAT), RGB::named(rltk::BLACK));
ctx.print_color_centered(20, RGB::named(rltk::YELLOW), RGB::named(rltk::BLACK), "Rust Roguelike Tutorial");
ctx.print_color_centered(21, RGB::named(rltk::CYAN), RGB::named(rltk::BLACK), "by Herbert Wolverson");
ctx.print_color_centered(22, RGB::named(rltk::GRAY), RGB::named(rltk::BLACK), "Use Up/Down Arrows and Enter");
}
If you cargo run now, your menu looks like this:
That's quite a bit better!
Fixing the spacing
You'll notice that if you don't have a saved game to load, there is an annoying gap between menu items. This is an easy fix, by keeping track of the y position we have used while we render the menu. Here's the new menu rendering code:
#![allow(unused)]
fn main() {
let mut y = 24;
    if let RunState::MainMenu{ menu_selection : selection } = *runstate {
        if selection == MainMenuSelection::NewGame {
            ctx.print_color_centered(y, RGB::named(rltk::MAGENTA), RGB::named(rltk::BLACK), "Begin New Game");
        } else {
            ctx.print_color_centered(y, RGB::named(rltk::WHITE), RGB::named(rltk::BLACK), "Begin New Game");
        }
        y += 1;

        if save_exists {
            if selection == MainMenuSelection::LoadGame {
                ctx.print_color_centered(y, RGB::named(rltk::MAGENTA), RGB::named(rltk::BLACK), "Load Game");
            } else {
                ctx.print_color_centered(y, RGB::named(rltk::WHITE), RGB::named(rltk::BLACK), "Load Game");
            }
            y += 1;
        }

        if selection == MainMenuSelection::Quit {
            ctx.print_color_centered(y, RGB::named(rltk::MAGENTA), RGB::named(rltk::BLACK), "Quit");
        } else {
            ctx.print_color_centered(y, RGB::named(rltk::WHITE), RGB::named(rltk::BLACK), "Quit");
        }
    ...
}
If you cargo run now, it looks better:
The source code for this chapter may be found here
Run this chapter's example with web assembly, in your browser (WebGL2 required)
Copyright (C) 2019, Herbert Wolverson.