Chapter 1 : Hello Rust
About this tutorial
This tutorial is free and open source, and all code uses the MIT license - so you are free to do with it as you like. My hope is that you will enjoy the tutorial, and make great games!
If you enjoy this and would like me to keep writing, please consider supporting my Patreon.

This tutorial is primarily about learning to make roguelikes (and by extension other games), but it should also help you get used to Rust and RLTK - The Roguelike Tool Kit we'll be using to provide input/output. Even if you don't want to use Rust, my hope is that you can benefit from the structure, ideas and general game development advice.
Why Rust?
Rust first appeared in 2010, but has only relatively recently hit "stable" status - that is, code you write is pretty unlikely to stop working when the language changes now. Development is very much ongoing, with whole new sections of the language (such as the asynchronous system) still appearing/stabilizing. This tutorial will stay away from the bleeding edge of development - it should be stable.
Rust was designed to be a "better systems language" - that is, low-level like C++, but with far fewer opportunities to shoot yourself in the foot, a focus on avoiding the many "gotchas" that make C++ development difficult, and a massive focus on memory and thread safety: it's designed to be really difficult to write a program that corrupts its memory, or suffers from race conditions (it's not impossible, but you have to try!). It is rapidly gaining traction, with everyone from Mozilla to Microsoft showing interest - and an ever expanding number of tools being written in it.
Rust is also designed to have a better ecosystem than C++. Cargo provides a complete package manager (so do vcpkg, conan, etc. in C++ land, but cargo is well-integrated), a complete build system (similar to cmake, make, meson, etc. - but standardized). It doesn't run on as many platforms as C or C++, but the list is ever-growing.
I tried Rust (after urging from friends), and found that while it doesn't replace C++ in my daily toolbox - there are times that it really helped get a project out of the door. It's syntax takes a bit of getting used to, but it really does drop in nicely to existing infrastructure.
Learning Rust
If you've used other programming languages, then there's a lot of help available!
- The Rust Programming Language Book provides an excellent top-down introduction to the language.
- Learn Rust by Example is closer to my preferred way of learning (I'm already experienced in a number of languages), providing common usage examples for most of the topics you are likely to encounter.
- 24 Days of Rust provides a somewhat web-focused 24-day course on learning Rust.
- Rust's Ownership Model for JavaScript Developers should be helpful if you are coming from JS or another very-high-level language.
If you find that you need something that isn't in there, it's quite likely that someone has written a crate ("package" in every other language, but cargo deals with crates...) to help. Once you have a working environment, you can type cargo search <my term> to look for crates that help. You can also head to crates.io to see a full list of crates that are on offer in Cargo - complete with documentation and examples.
If you are completely new to programming, then a piece of bad news: Rust is a relatively young language, so there isn't a lot of "learn programming from scratch with Rust" material out there - yet. You may find it easier to start with a higher-level language, and then move "down" (closer to the metal, as it were) to Rust. The tutorials/guides linked above should get you started if you decide to take the plunge, however.
Getting Rust
On most platforms, rustup is enough to get you a working Rust toolchain. On Windows, it's an easy download - and you get a working Rust environment when it is done. On Unix-derived systems (such as Linux, and OS X) it provides some command-line instructions to install the environment.
Once it is installed, verify that it is working by typing cargo --version on your command line. You should see something like cargo 1.36.0 (c4fcfb725 2019-05-15) (the version will change over time).
Getting comfortable with a development environment
You want to make a directory/folder for your development work (I personally use users/herbert/dev/rust - but that's a personal choice. It really can be anywhere you like!). You'll also want a text editor. I'm a fan of Visual Studio Code, but you can use whatever you are comfortable with. If you do use Visual Studio Code, I recommend the following extensions:
Better TOML: makes reading toml files nice; Rust uses them a lotC/C++: uses the C++ debugger system to debug Rust codeRust (rls): not the fastest, but thorough syntax highlighting and error checking as you go.
Once you've picked your environment, open up an editor and navigate to your new folder (in VS Code, File -> Open Folder and choose the folder).
Creating a project
Now that you are in your chosen folder, you want to open a terminal/console window there. In VS Code, this is Terminal -> New Terminal. Otherwise, open a command line as normal and cd to your folder.
Rust has a built-in package manager called cargo. Cargo can make project templates for you! So to create your new project, type cargo init hellorust. After a moment, a new folder has appeared in your project - titled hellorust.
It will contain the following files and directories:
src\main.rs
Cargo.toml
.gitignore
These are:
- The
.gitignoreis handy if you are using git - it stops you from accidentally putting files into the git repository that don't need to be there. If you aren't using git, you can ignore it. src\main.rsis a simple Rust "hello world" program source.Cargo.tomldefines your project, and how it should be built.
Quick Rust Introduction - The Anatomy of Hello World
The auto-generated main.rs file looks like this:
fn main() {
    println!("Hello, world!");
}
If you've used other programming languages, this should look somewhat familiar - but the syntax/keywords are probably different. Rust started out as a mashup between ML and C, with the intent to create a flexible "systems" language (meaning: you can write bare-metal code for your CPU without needing a virtual machine like Java or C# do). Along the way, it inherited a lot of syntax from the two languages. I found the syntax looked awful for the first week of using it, and came quite naturally after that. Just like a human language, it takes a while for your brain to key into the syntax and layout.
So what does this all mean?
fnis Rust's keyword for function. In JavaScript or Java, this would readfunction main(). In C, it would readvoid main()(even thoughmainis meant to return anintin C). In C#, it would bestatic void Main(...).mainis the name of the function. In this case, the name is a special case: the operating system needs to know what to run first when it loads a program into memory - and Rust will do the extra work to markmainas the first function. You generally need amainfunction if you want your program to do anything, unless you are making a library (a collection of functions for other programs to use).- The
()is the function arguments or parameters. In this case, there aren't any - so we just use empty opening and closing parentheses. - The
{indicates the start of a block. In this case, the block is the body of the function. Everything within the{and}is the content of the function: instructions for it to run, in turn. Blocks also denote scope - so anything you declare inside the function has its access limited to that function. In other words, if you make a variable inside a function calledcheese- it won't be visible from inside a function calledmouse(and vice versa). There are ways around this, and we'll cover them as we build our game. println!is a macro. You can tell Rust macros because they have an!after their name. You can learn all about macros here; for now, you just need to know that they are special functions that are parsed into other code during compilation. Printing to the screen can be quite complicated - you might want to say more than "hello world" - and theprintln!macro covers a lot of formatting cases. (If you are familiar with C++, it's equivalent tostd::fmt. Most languages have their own string formatting system, since programmers tend to have to output a lot of text!)- The final
}closes the block started in4.
Go ahead and type cargo run. After some compilation, if everything is working you will be greeted with "Hello World" on your terminal.
Useful cargo commands
Cargo is quite the tool! You can learn a bit about it from the Learn Rust book, and everything about it from The Cargo Book if you are interested.
You'll be interacting with cargo a lot while you work in Rust. If you initialize your program with cargo init, your program is a cargo crate. Compilation, testing, running, updating - Cargo can help you with all of it. It even sets up git for you by default.
You may find the following cargo features handy:
cargo initcreates a new project. That's what you used to make the hello world program. If you really don't want to be usinggit, you can typecargo init --vcs none (projectname).cargo builddownloads all dependencies for a project and compiles them, and then compiles your program. It doesn't actually run your program - but this is a good way to quickly find compiler errors.cargo updatewill fetch new versions of the crates you listed in yourcargo.tomlfile (see below).cargo cleancan be used to delete all of the intermediate work files for your project, freeing up a bunch of disk space. They will automatically download and recompile the next time you run/build your project. Occasionally, acargo cleancan help when things aren't working properly - particularly IDE integration.cargo verify-projectwill tell you if your Cargo settings are correct.cargo installcan be used to install programs via Cargo. This is helpful for installing tools that you need.
Cargo also supports extensions - that is, plugins that make it do even more. There are some that you may find particularly useful:
- Cargo can reformat all your source code to look like standard Rust from the Rust manuals. You need to type
rustup component add rustfmtonce to install the tool. After that's done, you can typecargo fmtto format your code at any time. - If you'd like to work with the
mdbookformat - used for this book! - cargo can help with that, too. Just once, you need to runcargo install mdbookto add the tools to your system. After that,mdbook buildwill build a book project,mdbook initwill make a new one, andmdbook servewill give you a local webserver to view your work! You can learn all aboutmdbookon their documentation page. - Cargo can also integrate with a "linter" - called
Clippy. Clippy is a little pedantic (just like his Microsoft Office namesake!). Just the once, runrustup component add clippy. You can now typecargo clippyat any time to see suggestions for what may be wrong with your code!
Making a new project
Lets modify the newly created "hello world" project to make use of RLTK - the Roguelike Toolkit.
Setup Cargo.toml
The auto-generated Cargo file will look like this:
[package]
name = "helloworld"
version = "0.1.0"
authors = ["Your name if it knows it"]
edition = "2018"

# See more keys and their definitions at https://doc.rust-lang.org/cargo/reference/manifest.html

[dependencies]
Go ahead and make sure that your name is correct! Next, we're going to ask Cargo to use RLTK - the Roguelike toolkit library. Rust makes this very easy. Adjust the dependencies section to look like this:
[dependencies]
rltk = { version = "0.8.0" }
We're telling it that the package is named rltk, and is available in Cargo - so we just have to give it a version. You can do cargo search rltk to see the latest version at any time, or go to the crate webpage.
It's a good idea to occasionally run cargo update - this will update the libraries used by your program.
Hello Rust - RLTK Style!
Go ahead and replace the contents of src\main.rs with:
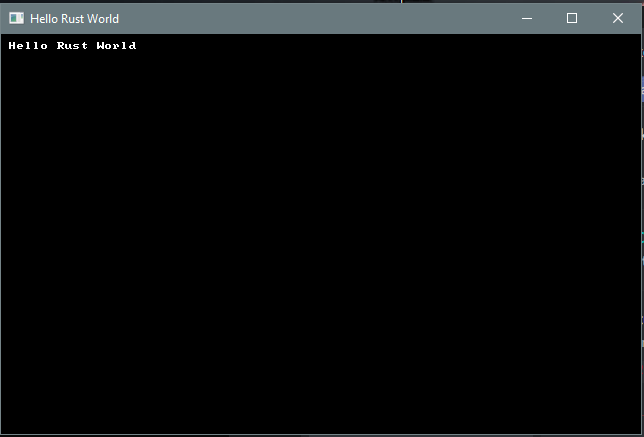
use rltk::{Rltk, GameState};

struct State {}
impl GameState for State {
    fn tick(&mut self, ctx : &mut Rltk) {
        ctx.cls();
        ctx.print(1, 1, "Hello Rust World");
    }
}

fn main() -> rltk::BError {
    use rltk::RltkBuilder;
    let context = RltkBuilder::simple80x50()
        .with_title("Roguelike Tutorial")
        .build()?;
    let gs = State{ };
    rltk::main_loop(context, gs)
}
Now create a new folder called resources. RLTK needs a few files to run, and this is where we put them. Download resources.zip, and unzip it into this folder. Be careful to have resources/backing.fs (etc.) and not resources/resources/backing.fs.
Save, and go back to the terminal. Type cargo run, and you will be greeted with a console window showing Hello Rust.
If you're new to Rust, you are probably wondering what exactly the Hello Rust code does, and why it is there - so we'll take a moment to go through it.
- The first line is equivalent to C++'s
#includeor C#'susing. It simply tells the compiler that we are going to requireRltkandGameStatetypes from the namespacerltk. You used to need an additionalextern crateline here, but the most recent version of Rust can now figure it out for you. - With
struct State{}, we are creating a newstructure. Structures are like Records in Pascal, or Classes in many other languages: you can store a bunch of data inside them, and you can also attach "methods" (functions) to them. In this case, we don't actually need any data - we just need a place to attach code. If you'd like to learn more about Structs, this is the Rust Book chapter on the topic impl GameState for Stateis quite a mouthful! We're telling Rust that ourStatestructure implements the traitGameState. Traits are like interfaces or base classes in other languages: they setup a structure for you to implement in your own code, which can then interact with the library that provides them - without that library having to know anything else about your code. In this case,GameStateis a trait provided by RLTK. RLTK requires that you have one - it uses it to call into your program on each frame. You can learn about traits in this chapter of the Rust book.fn tick(&mut self, ctx : &mut Rltk)is a function definition. We're inside the trait implementation scope, so we are implementing the function for the trait - so it has to match the type required by the trait. Functions are a basic building block of Rust, I recommend the Rust book chapter on the topic.- In this case,
fn tickmeans "make a function, called tick" (it's called "tick" because it "ticks" with each frame that is rendered; it's common in game programming to refer to each iteration as a tick). - It doesn't end with an
-> type, so it is equivalent to avoidfunction in C - it doesn't return any data once called. The parameters can also benefit from a little explanation. &mut selfmeans "this function requires access to the parent structure, and may change it" (themutis short for "mutable" - meaning it can change variables inside the structure - "state"). You can also have functions in a structure that just have&self- meaning, we can see the content of the structure, but can't change it. If you omit the&selfaltogether, the function can't see the structure at all - but can be called as if the structure was a namespace (you see this a lot with functions callednew- they make a new copy of the structure for you).ctx: &mut Rltkmeans "pass in a variable calledctx" (ctxis an abbreviation for "context"). The colon indicates that we're specifying what type of variable it must be.&means "pass a reference" - which is a pointer to an existing copy of the variable. The variable isn't copied, you are working on the version that was passed in; if you make a change, you are changing the original. The Rust Book explains this better than I can.mutonce again indicates that this is a "mutable" reference: you are allowed to make changes to the context.- Finally
Rltkis the type of the variable you are receiving. In this case, it's astructdefined inside theRLTKlibrary that provides various things you can do to the screen.
- In this case,
ctx.cls();says "call theclsfunction provided by the variablectx.clsis a common abbreviation for "clear the screen" - we're telling our context that it should clear the virtual terminal. It's a good idea to do this at the beginning of a frame, unless you specifically don't want to.ctx.print(1, 1, "Hello Rust World");is asking the context to print "Hello Rust World" at the location (1,1).- Now we get to
fn main(). Every program has amainfunction: it tells the operating system where to start the program. -
is an example of calling a function from inside ause rltk::RltkBuilder; let context = RltkBuilder::simple80x50() .with_title("Roguelike Tutorial") .build()?;struct- where that struct doesn't take a "self" function. In other languages, this would be called a constructor. We're calling the functionsimple80x50(which is a builder provided by RLTK to make a terminal 80 characters wide by 50 characters high. The window title is "Roguelike Tutorial". let gs = State{ };is an example of a variable assignment (see The Rust Book). We're making a new variable calledgs(short for "game state"), and setting it to be a copy of theStatestruct we defined above.rltk::main_loop(context, gs)calls into therltknamespace, activating a function calledmain_loop. It needs both thecontextand theGameStatewe made earlier - so we pass those along. RLTK tries to take some of the complexity of running a GUI/game application away, and provides this wrapper. The function now takes over control of the program, and will call yourtickfunction (see above) every time the program "ticks" - that is, finishes one cycle and moves to the next. This can happen 60 or more times per second!
Hopefully that made some sense!
Playing with the tutorials
You'd probably like to play with the tutorial code without having to type it all in! The good news is that it is up on GitHub for your perusal. You need to have git installed (RustUp should have helped you with that). Choose where you would like to have the tutorials, and open a terminal:
cd <path to tutorials>
git clone https://github.com/thebracket/rustrogueliketutorial .
After a while, this will download the complete tutorial (including the source code for this book!). It is laid out as follows (this isn't complete!):
───book
├───chapter-01-hellorust
├───chapter-02-helloecs
├───chapter-03-walkmap
├───chapter-04-newmap
├───chapter-05-fov
├───resources
├───src
What's here?
- The
bookfolder contains the source code for this book. You can ignore it, unless you feel like correcting my spelling! - Each chapter's example code is contained in
chapter-xy-namefolders; for example,chapter-01-hellorust. - The
srcfolder contains a simple script to remind you to change to a chapter folder before running anything. resourceshas the contents of the ZIP file you downloaded for this example. All the chapter folders are preconfigured to use this.Cargo.tomlis setup to include all of the tutorials as "workspace entries" - they share dependencies, so it won't eat your whole drive re-downloading everything each time you use it.
To run an example, open your terminal and:
cd <where you put the tutorials>
cd chapter-01-hellorust
cargo run
If you are using Visual Studio Code, you can instead use File -> Open Folder to open the whole directory that you checked out. Using the inbuilt terminal, you can simply cd to each example and cargo run it.
Accessing Tutorial Source Code
You can get to the source code for all of the tutorials at https://github.com/thebracket/rustrogueliketutorial.
Updating the Tutorial
I update this tutorial a lot - adding chapters, fixing issues, etc. You will periodically want to open the tutorial directory, and type git pull. This tells git (the source control manager) to go to the Github repository and look for what's new. It will then download everything that has changed, and you once again have up-to-date tutorials.
Updating Your Project
You may find that rltk_rs or another package has updated, and you would like the latest version. From your project's folder, you can type cargo update to update everything. You can type cargo update --dryrun to see what it would like to update, and not change anything (people update their crates a lot - so this can be a big list!).
Updating Rust Itself
I don't recommend running this from inside Visual Studio Code or another IDE, but if you'd like to ensure that you have the most recent release of Rust (and associated tools), you can type rustup self update. This updates the Rust update tools (I know that sounds rather recursive). You can then type rustup update and install the latest versions of all of the tools.
Getting Help
There's a number of ways to get help:
- Feel free to contact me (I'm
@herberticuson Twitter) if you have any questions, ideas for improvements, or things you'd like me to add. - The fine people on /r/rust are VERY helpful with Rust language issues.
- The awesome people of /r/roguelikedev are VERY helpful when it comes to Roguelike issues. Their Discord is pretty active, too.
Run this chapter's example with web assembly, in your browser (WebGL2 required)
Copyright (C) 2019, Herbert Wolverson.