Particle Effects in ASCII
About this tutorial
This tutorial is free and open source, and all code uses the MIT license - so you are free to do with it as you like. My hope is that you will enjoy the tutorial, and make great games!
If you enjoy this and would like me to keep writing, please consider supporting my Patreon.

There's no real visual feedback for your actions - you hit something, and it either goes away, or it doesn't. Bloodstains give a good impression of what previously happened in a location - but it would be nice to give some sort of instant reaction to your actions. These need to be fast, non-blocking (so you don't have to wait for the animation to finish to keep playing), and not too intrusive. Particles are a good fit for this, so we'll implement a simple ASCII/CP437 particle system.
Particle component
As usual, we'll start out by thinking about what a particle is. Typically it has a position, something to render, and a lifetime (so it goes away). We've already written two out of three of those, so lets go ahead and create a ParticleLifetime component. In components.rs:
#![allow(unused)]
fn main() {
#[derive(Component, Serialize, Deserialize, Clone)]
pub struct ParticleLifetime {
    pub lifetime_ms : f32
}
}
We have to register this in all the usual places: main.rs and saveload_system.rs (twice).
Grouping particle code together
We'll make a new file, particle_system.rs. It won't be a regular system, because we need access to the RLTK Context object - but it will have to provide services to other systems.
The first thing to support is making particles vanish after their lifetime. So we start with the following in particle_system.rs:
#![allow(unused)]
fn main() {
use specs::prelude::*;
use super::{ Rltk, ParticleLifetime};

pub fn cull_dead_particles(ecs : &mut World, ctx : &Rltk) {
    let mut dead_particles : Vec<Entity> = Vec::new();
    {
        // Age out particles
        let mut particles = ecs.write_storage::<ParticleLifetime>();
        let entities = ecs.entities();
        for (entity, mut particle) in (&entities, &mut particles).join() {
            particle.lifetime_ms -= ctx.frame_time_ms;
            if particle.lifetime_ms < 0.0 {
                dead_particles.push(entity);
            }
        }
    }
    for dead in dead_particles.iter() {
        ecs.delete_entity(*dead).expect("Particle will not die");
    }
}
}
Then we modify the render loop in main.rs to call it:
#![allow(unused)]
fn main() {
ctx.cls();
particle_system::cull_dead_particles(&mut self.ecs, ctx);
}
Spawning particles via a service
Let's extend particle_system.rs to offer a builder system: you obtain a ParticleBuilder and add requests to it, and then create your particles as a batch together. We'll offer the particle system as a resource - so it's available anywhere. This avoids having to add much intrusive code into each system, and lets us handle the actual particle spawning as a single (fast) batch.
Our basic ParticleBuilder looks like this. We haven't done anything to actually add any particles yet, but this provides the requestor service:
#![allow(unused)]
fn main() {
struct ParticleRequest {
    x: i32,
    y: i32,
    fg: RGB,
    bg: RGB,
    glyph: rltk::FontCharType,
    lifetime: f32
}

pub struct ParticleBuilder {
    requests : Vec<ParticleRequest>
}

impl ParticleBuilder {
    #[allow(clippy::new_without_default)]
    pub fn new() -> ParticleBuilder {
        ParticleBuilder{ requests : Vec::new() }
    }

    pub fn request(&mut self, x:i32, y:i32, fg: RGB, bg:RGB, glyph: rltk::FontCharType, lifetime: f32) {
        self.requests.push(
            ParticleRequest{
                x, y, fg, bg, glyph, lifetime
            }
        );
    }
}
}
In main.rs, we'll turn it into a resource:
#![allow(unused)]
fn main() {
gs.ecs.insert(particle_system::ParticleBuilder::new());
}
Now, we'll return to particle_system.rs and build an actual system to spawn particles. The system looks like this:
#![allow(unused)]
fn main() {
pub struct ParticleSpawnSystem {}

impl<'a> System<'a> for ParticleSpawnSystem {
    #[allow(clippy::type_complexity)]
    type SystemData = (
                        Entities<'a>,
                        WriteStorage<'a, Position>,
                        WriteStorage<'a, Renderable>,
                        WriteStorage<'a, ParticleLifetime>,
                        WriteExpect<'a, ParticleBuilder>
                      );

    fn run(&mut self, data : Self::SystemData) {
        let (entities, mut positions, mut renderables, mut particles, mut particle_builder) = data;
        for new_particle in particle_builder.requests.iter() {
            let p = entities.create();
            positions.insert(p, Position{ x: new_particle.x, y: new_particle.y }).expect("Unable to inser position");
            renderables.insert(p, Renderable{ fg: new_particle.fg, bg: new_particle.bg, glyph: new_particle.glyph, render_order: 0 }).expect("Unable to insert renderable");
            particles.insert(p, ParticleLifetime{ lifetime_ms: new_particle.lifetime }).expect("Unable to insert lifetime");
        }

        particle_builder.requests.clear();
    }
}
}
This is a very simple service: it iterates the requests, and creates an entity for each particle with the component parameters from the request. Then it clears the builder list. The last step is to add it to the system schedule in main.rs:
#![allow(unused)]
fn main() {
impl State {
    fn run_systems(&mut self) {
        let mut vis = VisibilitySystem{};
        vis.run_now(&self.ecs);
        let mut mob = MonsterAI{};
        mob.run_now(&self.ecs);
        let mut mapindex = MapIndexingSystem{};
        mapindex.run_now(&self.ecs);
        let mut melee = MeleeCombatSystem{};
        melee.run_now(&self.ecs);
        let mut damage = DamageSystem{};
        damage.run_now(&self.ecs);
        let mut pickup = ItemCollectionSystem{};
        pickup.run_now(&self.ecs);
        let mut itemuse = ItemUseSystem{};
        itemuse.run_now(&self.ecs);
        let mut drop_items = ItemDropSystem{};
        drop_items.run_now(&self.ecs);
        let mut item_remove = ItemRemoveSystem{};
        item_remove.run_now(&self.ecs);
        let mut particles = particle_system::ParticleSpawnSystem{};
        particles.run_now(&self.ecs);

        self.ecs.maintain();
    }
}
}
We've made it depend upon likely particle spawners. We'll have to be a little careful to avoid accidentally making it concurrent with anything that might add to it.
Actually spawning some particles for combat
Lets start by spawning a particle whenever someone attacks. Open up melee_combat_system.rs, and we'll add ParticleBuilder to the list of requested resources for the system. First, the includes:
#![allow(unused)]
fn main() {
use super::{CombatStats, WantsToMelee, Name, SufferDamage, gamelog::GameLog, MeleePowerBonus, DefenseBonus, Equipped,
    particle_system::ParticleBuilder, Position};
}
Then, a WriteExpect to be able to write to the resource:
#![allow(unused)]
fn main() {
type SystemData = ( Entities<'a>,
    WriteExpect<'a, GameLog>,
    WriteStorage<'a, WantsToMelee>,
    ReadStorage<'a, Name>,
    ReadStorage<'a, CombatStats>,
    WriteStorage<'a, SufferDamage>,
    ReadStorage<'a, MeleePowerBonus>,
    ReadStorage<'a, DefenseBonus>,
    ReadStorage<'a, Equipped>,
    WriteExpect<'a, ParticleBuilder>,
    ReadStorage<'a, Position>
);
}
And the expanded list of resources for the run method itself:
#![allow(unused)]
fn main() {
let (entities, mut log, mut wants_melee, names, combat_stats, mut inflict_damage,
    melee_power_bonuses, defense_bonuses, equipped, mut particle_builder, positions) = data;
}
Finally, we'll add the request:
#![allow(unused)]
fn main() {
let pos = positions.get(wants_melee.target);
if let Some(pos) = pos {
    particle_builder.request(pos.x, pos.y, rltk::RGB::named(rltk::ORANGE), rltk::RGB::named(rltk::BLACK), rltk::to_cp437('‼'), 200.0);
}

let damage = i32::max(0, (stats.power + offensive_bonus) - (target_stats.defense + defensive_bonus));
}
If you cargo run now, you'll see a relatively subtle particle feedback to show that melee combat occurred. This definitely helps with the feel of gameplay, and is sufficiently non-intrusive that we aren't making our other systems too confusing.
Adding effects to item use
It would be great to add similar effects to item use, so lets do it! In inventory_system.rs, we'll expand the ItemUseSystem introduction to include the ParticleBuilder:
#![allow(unused)]
fn main() {
impl<'a> System<'a> for ItemUseSystem {
    #[allow(clippy::type_complexity)]
    type SystemData = ( ReadExpect<'a, Entity>,
                        WriteExpect<'a, GameLog>,
                        ReadExpect<'a, Map>,
                        Entities<'a>,
                        WriteStorage<'a, WantsToUseItem>,
                        ReadStorage<'a, Name>,
                        ReadStorage<'a, Consumable>,
                        ReadStorage<'a, ProvidesHealing>,
                        ReadStorage<'a, InflictsDamage>,
                        WriteStorage<'a, CombatStats>,
                        WriteStorage<'a, SufferDamage>,
                        ReadStorage<'a, AreaOfEffect>,
                        WriteStorage<'a, Confusion>,
                        ReadStorage<'a, Equippable>,
                        WriteStorage<'a, Equipped>,
                        WriteStorage<'a, InBackpack>,
                        WriteExpect<'a, ParticleBuilder>,
                        ReadStorage<'a, Position>
                      );

    #[allow(clippy::cognitive_complexity)]
    fn run(&mut self, data : Self::SystemData) {
        let (player_entity, mut gamelog, map, entities, mut wants_use, names,
            consumables, healing, inflict_damage, mut combat_stats, mut suffer_damage,
            aoe, mut confused, equippable, mut equipped, mut backpack, mut particle_builder, positions) = data;
}
We'll start by showing a heart when you drink a healing potion. In the healing section:
#![allow(unused)]
fn main() {
stats.hp = i32::min(stats.max_hp, stats.hp + healer.heal_amount);
if entity == *player_entity {
    gamelog.entries.push(format!("You use the {}, healing {} hp.", names.get(useitem.item).unwrap().name, healer.heal_amount));
}
used_item = true;

let pos = positions.get(*target);
if let Some(pos) = pos {
    particle_builder.request(pos.x, pos.y, rltk::RGB::named(rltk::GREEN), rltk::RGB::named(rltk::BLACK), rltk::to_cp437('♥'), 200.0);
}
}
We can use a similar effect for confusion - only with a magenta question mark. In the confusion section:
#![allow(unused)]
fn main() {
gamelog.entries.push(format!("You use {} on {}, confusing them.", item_name.name, mob_name.name));

let pos = positions.get(*mob);
if let Some(pos) = pos {
    particle_builder.request(pos.x, pos.y, rltk::RGB::named(rltk::MAGENTA), rltk::RGB::named(rltk::BLACK), rltk::to_cp437('?'), 200.0);
}
}
We should also use a particle to indicate that damage was inflicted. In the damage section of the system:
#![allow(unused)]
fn main() {
gamelog.entries.push(format!("You use {} on {}, inflicting {} hp.", item_name.name, mob_name.name, damage.damage));

let pos = positions.get(*mob);
if let Some(pos) = pos {
    particle_builder.request(pos.x, pos.y, rltk::RGB::named(rltk::RED), rltk::RGB::named(rltk::BLACK), rltk::to_cp437('‼'), 200.0);
}
}
Lastly, if an effect hits a whole area (for example, a fireball) it would be good to indicate what the area is. In the targeting section of the system, add:
#![allow(unused)]
fn main() {
for mob in map.tile_content[idx].iter() {
    targets.push(*mob);
}
particle_builder.request(tile_idx.x, tile_idx.y, rltk::RGB::named(rltk::ORANGE), rltk::RGB::named(rltk::BLACK), rltk::to_cp437('░'), 200.0);
}
That wasn't too hard, was it? If you cargo run your project now, you'll see various visual effects firing.
Adding an indicator for missing a turn due to confusion
Lastly, we'll repeat the confused effect on monsters when it is their turn and they skip due to being confused. This should make it less confusing as to why they stand around. In monster_ai_system.rs, we first modify the system header to request the appropriate helper:
#![allow(unused)]
fn main() {
impl<'a> System<'a> for MonsterAI {
    #[allow(clippy::type_complexity)]
    type SystemData = ( WriteExpect<'a, Map>,
                        ReadExpect<'a, Point>,
                        ReadExpect<'a, Entity>,
                        ReadExpect<'a, RunState>,
                        Entities<'a>,
                        WriteStorage<'a, Viewshed>,
                        ReadStorage<'a, Monster>,
                        WriteStorage<'a, Position>,
                        WriteStorage<'a, WantsToMelee>,
                        WriteStorage<'a, Confusion>,
                        WriteExpect<'a, ParticleBuilder>);

    fn run(&mut self, data : Self::SystemData) {
        let (mut map, player_pos, player_entity, runstate, entities, mut viewshed,
            monster, mut position, mut wants_to_melee, mut confused, mut particle_builder) = data;
}
Then we add in a request at the end of the confusion test:
#![allow(unused)]
fn main() {
can_act = false;

particle_builder.request(pos.x, pos.y, rltk::RGB::named(rltk::MAGENTA),
                    rltk::RGB::named(rltk::BLACK), rltk::to_cp437('?'), 200.0);
}
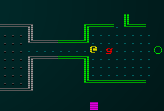
We don't need to worry about getting the Position component here, because we already get it as part of the loop. If you cargo run your project now, and find a confusion scroll - you have visual feedback as to why a goblin isn't chasing you anymore:
Wrap Up
That's it for visual effects for now. We've given the game a much more visceral feel, with feedback given for actions. That's a big improvement, and goes a long way to modernizing an ASCII interface!
The source code for this chapter may be found here
Run this chapter's example with web assembly, in your browser (WebGL2 required)
Copyright (C) 2019, Herbert Wolverson.