This tutorial is free and open source, and all code uses the MIT license - so you are free to do with it as you like. My hope is that you will enjoy the tutorial, and make great games!
If you enjoy this and would like me to keep writing, please consider supporting my Patreon.
Starting Template and Build
At the very start of the jam, I grabbed a handy template I like to keep around for basic ASCII/CodePage 437 based roguelikes. I wound up modifying it a bit to fit the "no systems, no threads" constraints - but the basic template lets me get started quickly. This section will go over the template and how it got me started.
Creating a project and building dependencies
I started the project by finding my home directory, and running cargo init secbot. This creates the usual "Hello, World" command-line program and makes a basic Cargo.toml file. Very basic stuff, but a necessary start.
I then opened up Cargo.toml and added in the dependencies I knew I'd need, set the project name, and cleaned up the default comments. Cargo.toml looks like this, now:
[package]
name = "secbot"
version = "0.1.0"
authors = ["Herbert Wolverson <herberticus@gmail.com>"]
edition = "2018"

[dependencies]
bracket-lib = { git = "https://github.com/amethyst/bracket-lib.git" }
legion = { version = "0.3.1", default-features = false, features = ["wasm-bindgen"] }
lazy_static = "1.4.0"
If you read the early commits in the repo, you'll notice that I goofed and committed a local path to my
bracket-libsource code rather than the Git repo. The two are the same, and I've fixed it in the tutorial. If you're wondering why I used the git version rather than the published crate, it's because of a bug in random number generation in WASM. I have a fix for this ready to go, but didn't have time to publish the crate before the 7-day challenge started.
Hello, Bracket-lib!
Next up was opening src/main.rs and pasting in "Hello, Bracket" from the Flappy Dragon chapter of my book. I've written this so many times now that I can do it in my sleep; one of the perks of writing a book and the library it uses. The "hello bracket" source looks like this:
use bracket_lib::prelude::*;

struct State {}

impl GameState for State {
    fn tick(&mut self, ctx: &mut BTerm) {
        ctx.cls();
        ctx.print(1, 1, "Hello, Bracket Terminal!");
    }
}

fn main() -> BError {
    let context = BTermBuilder::simple80x50()
        .with_title("SecBot")
        .build()?;

    main_loop(context, State{})
}
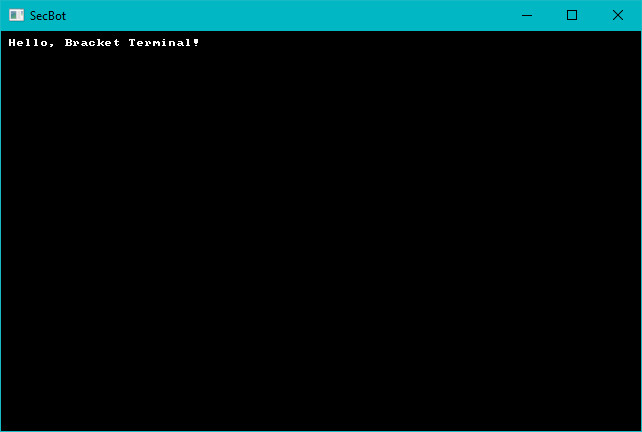
Ok, so that's not very exicting. It gets me a console window on the screen, and Hello, Bracket Terminal! in white on black. It's a necessary start.

You can find the source code for
hello_brackethere.
WASM Building
I knew from the start that I wanted to support Web Assembly as a target. Bracket-lib WASM builds require a tool called wasm-bindgen, so I made sure that was installed by typing: cargo install wasm-bindgen. It takes a while to compile, time for coffee!
Once that was in place, I pulled up a template Windows batch file I use for this:
@ECHO OFF
cargo build --target wasm32-unknown-unknown --release

wasm-bindgen .\target\wasm32-unknown-unknown\release\secbot.wasm --out-dir .\wasm_help\staging --no-modules --no-typescript
copy .\wasm_help\index.html .\wasm_help\staging\index.html

REM Send to server. Not included on Github so I'm not giving you server details. Sorry.
./webglbuild2.bat
The file webglbuild2.bat is excluded from Github so I don't give you access to my server. It's pretty simple: it copies the wasm_help\staging directory to the deployment folder on my server.
Note that you need a web server to serve up your WASM build. Chrome and Firefox really don't like serving WASM builds from a
file://path for security reasons.
If you're using a platform other than Windows, the commands are the same - just replace copy with cp and change @ECHO OFF to #/bin/bash or whatever your platform needs.
Anyway, before this will work you need some helpers. Create a new folder called wasm_help. Inside that folder, make a staging directory - this will hold the build to send to the server. You also need to put an index.html file into your wasm_help folder.
The final structure looks like this:
- project folder
- src
- target
- wasm_help
- staging
- index.html
- Cargo.toml
The contents of the index.html file are:
<html>
  <head>
    <meta content="text/html;charset=utf-8" http-equiv="Content-Type" />
  </head>
  <body style="background-color: black;">
    <h1 style="color: white; font-family: 'Courier New', Courier, monospace; font-size: 10pt;">SecBot (2021 7DRL) - by Herbert Wolverson</h1>
    <canvas id="canvas" width="896" height="496"></canvas>
    <script src="./secbot.js"></script>
    <script>
      window.addEventListener("load", async () => {
        await wasm_bindgen("./secbot_bg.wasm");
      });
    </script>
  </body>
</html>
As you can tell, I'm not great at HTML/CSS. This is designed to be the bare minimum: it creates a canvas, loads the wasm file and runs it. It's derived from the various wasm-bindgen tutorials out there.
Why 896 by 496 for the canvas? I'd decided on a 112x62 console (8x8 font). So I went with the natural size from there. You'll see this in a moment.
With that in place, it was time to start expanding the game's basic structure into the beginnings of something useful.
