This tutorial is free and open source, and all code uses the MIT license - so you are free to do with it as you like. My hope is that you will enjoy the tutorial, and make great games!
If you enjoy this and would like me to keep writing, please consider supporting my Patreon.

Introduction
Game jams have become a significant part of the gamedev community. They offer some great opportunities to meet with people, collaborate if you want to, try out new ideas, and hone your skills. They're more like a group of musicians jamming than a formalized development project; you never quite know what'll come out at the end. Despite the ever growing list of jams, I'm a bit picky about which jams I join. I try to find ones that fit my interests, last long enough to make something without losing too much sleep (as I get older, sleep has become more important!). I also prefer ones that have encouraging communities and aren't hyper-competitive.
My favorite jam is the 7-Day Roguelike Challenge. Quite a few years ago, after lurking in the RoguelikeDev sub-reddit for a while, I decided to jump in. I released "Tech Support - The Roguelike". It wasn't very good, but I had fun making it - and that's the key. I followed that up with Dankest Dungeons, a web-based game in which you designed dungeons or played dungeons designed by other players. Neither are likely to win any prizes, but I enjoyed the feeling of having finished something, learned a lot along the way, and chatted with some awesome people.
This year, I set out to make SecBot. I wanted to make a fun "coffee-break" length game - something you could enjoy in a short burst.
What does this series cover?
Writing a tutorial series about a 7-day game jam is interesting. There really were two options: I could polish everything up and give you a tutorial on how to make the game I created, or I could give you a blow-by-blow from the trenches. I concluded that the latter was more palatable and fun - even if it sometimes feels like I'm showing you my dirty laundry. You'll see bugs, code land-mines, and consternation when things didn't work. You'll also see the joy when the things came together, the sweat when bugs are biting with only a few hours to go, and my slight confusion as to how to actually submit the finished project. It won't be meticulously written good code, but hopefully it will give you a good idea of how jam games come together - and how following a plan can see you across the finish line.
Constraints (Self-Imposed)
In addition to the "you must finish in 7 days", I added a couple more constraints to my development:
- The game must run in a web browser with WASM.
- Because of this, it must be single-threaded.
- The single-threaded requirement lead to "why bother with the Legion scheduler and formal systems?" They are a lot of boilerplate, and in a regular game give you some amazing performance and automatic concurrency. Since I can't use concurrency, why bother with the boilerplate and rigidity of a systems-based setup? I went with functions, instead - and used Legion as a data-store. It's great for that, you can query it easily whenever you want to.
These constraints can be boiled down to "must run in a browser" - which felt important, the web is the lingua franca of the Internet and I didn't have time to test something on every platform out there.
Acknowledgements
I'd like to thank -Mel., my ever-patient wife for letting me work late on this project. I'd also like to thank Tammy at PragProg (my book publisher) for letting me ease-off of writing a bit (Hands-On Rust is on its way to final production, and a new title is in the works) to pursue this. As ever, my coworkers at iZones have been awesome about letting me take the time to do side-projects.
Onwards!
I'm hoping that this tutorial is useful to you. If you'd rather just dive straight into the finished product, the source is up on Github. So let's warp backwards through time a little to the week before the 7-day Roguelike Challenge (7DRL) begun.
This tutorial is free and open source, and all code uses the MIT license - so you are free to do with it as you like. My hope is that you will enjoy the tutorial, and make great games!
If you enjoy this and would like me to keep writing, please consider supporting my Patreon.
Before I Started
The 7DRL rules give you a lot of flexibility. You can start with an existing code base, use engines, even use the week to improve an existing project (so long as you clearly label what you did). Given that leeway, I decided to do a bit of advanced planning.
Tooling Decisions
The first thing I pondered was tooling. I'd largely made up my mind, so this mostly consisted of making sure that the tools I intended to use were in decent shape.
- I was sure I'd be using bracket-lib. I initially put it together as a result of another Roguelike event (/r/roguelikedev makes a Roguelike). I used that event to learn Rust!
- I made sure my shiny new laptop had The Gimp working well.
- I checked that my external hard-drive full of CC0 (free) graphics assets was working, and noted down a few assets (mostly from Kenney) that I thought would be useful.
- I dug into the Rust Roguelike Tutorial to make sure that my WASM build scripts were still going to work. (I find myself in the funny position of sometimes referring back to my own work now!)
- I made sure that my working copy of Hands-On Rust was on the new computer. I wrote it, I should have it all memorized, right? The truth is that while I know what it says - having spent a year writing it - I still find it comforting to be able to pull up examples.
Some Basic Concepts
I knew I'd like to involve Murderbot Diaries and Aliens (I've been loving the Murderbot books recently!) and had a basic idea of what I wanted. I was also painfully aware that with only a week to work, I couldn't introduce more than one or two new ideas into the title. I made a couple of up-front decisions:
- I'd start with pure ASCII (well, Codepage 437), and not introduce tile graphics until the basics were functioning.
- I'd structure everything to try and make my changes visible quickly. I wanted to see/feel progress as I went, and be able to share it with the lovely folks on the RoguelikeDev discord.
With those decisions made, I dived into creating a minimal design document.
This tutorial is free and open source, and all code uses the MIT license - so you are free to do with it as you like. My hope is that you will enjoy the tutorial, and make great games!
If you enjoy this and would like me to keep writing, please consider supporting my Patreon.
Initial Design
I'm a big proponent of scribbing out some basic design notes before you start, so I did this ahead of time. I used a template similar to that found in Hands-On Rust, in particular focusing on the "minimum viable product" (enough of a game that I wouldn't be ashamed to share it) and lots of "stretch goals". I didn't meet all of the stretch goals - and that's ok. It's a timed game jam, there's only so much I could squeeze in! I do think it's important to have a plan when you start a time trial - and its important to structure it so that you can see regular progress. There's nothing worse than trying to implement all of a giant design and not seeing much functionality until near the end - inevitably accompanied by a panic as you realize what doesn't work, or worse - the game isn't fun to play.
Here are my design notes, following the template I presented in my book.
Project Name
SecBot. I originally went with Murderbot, but I didn't want to infringe upon copyrights.
Short Description
A coffee-break Roguelike with 4 procedurally generated levels. Rescue colonists, fight monsters, and explore the dungeon. Emphasis on ranged combat. 4-way turn-based movement on a gridded map.
Story
SecBot is a human/robot hybrid. Employed by Bracket Corporation, he is sent to a mining outpost that has ceased communicating with its parent company. Upon arrival, it becomes clear that things have gone horribly wrong. Colonists beg for help, and flee to SecBot's ship. Nasty aliens crawl around the base, threatening both SecBot and the colonists. SecBot searches the colony, battles the Alien Queen, and saves the day.
Basic Game Loops
Primary loop:
- Enter dungeon level.
- Explore, revealing the map and activating entities.
- Encounter enemies and battle them.
- Encounter colonists who greet the player and flee to their space ship.
- Find things like healing stations.
- Locate the exit to the next level, and go to 1.
- At any time, SecBot can choose to fly away. Report the rescue progress.
Minimum Viable Product
- Create 4 basic dungeon map levels.
- Top-level, the colony on the surface.
- Mine top, the beginning of the mine with rooms around it.
- Mine center, a mine shaft surrounded by natural looking cavern.
- Cavern, holding alien eggs and the queen.
- Place the player and let them walk around.
- Make doors automatic.
- Spawn colonists.
- Colonists activate when the player sees them.
- Active colonists path to the game exit, including across map levels.
- Spawn monsters.
- Monsters inflict melee damage.
- Player can shoot monsters.
- Monsters can shoot back if they have a ranged attack.
- Monsters path towards the player, killing any colonists or player they can see.
- End-game screen for dying.
- End-game screen for leaving via the space ship.
- Score and progress display.
Stretch Goals
- Colonists can talk to you, giving the game flavor.
- Spawn props to make it feel like a living colony.
- Rooms with themed content, to give some consistency to the randomness.
- Tiles that heal you.
- Monster variety.
- Explosions.
- Timed-explosions for grenades.
- A nice, complicated projectile sytem.
- End the game by shooting out windows.
- Colonists with weapons who fight back.
- Another SecBot who helps you.
- A really pretty looking planetary surface.
- Something better than hit points for representing health.
- Weaponry variety.
- Eggs that turn into monsters after a count-down.
- Fun rooms like a colonist shouting "game over" and dropping a grenade. Should be a way to save them.
Wrap-Up
That's quite the list! I didn't achieve all of the stretch goals, but most of them made it in. I'm glad I made a plan up-front; I referred to it a lot during development, and scratching items off of the list was very satisfying. I'm also glad I didn't write a huge, super-detailed design document. Particularly in a game jam, life happens - something doesn't work as expected, and you wind up writing some odd code to patch around it.
Up next: a starting template.
This tutorial is free and open source, and all code uses the MIT license - so you are free to do with it as you like. My hope is that you will enjoy the tutorial, and make great games!
If you enjoy this and would like me to keep writing, please consider supporting my Patreon.
Day One
The first day of a jam is really special. Brimming with ideas, excited to get started, and wondering how Murphy will find ways to ensure that things don't work. I sat down early in the morning and started typing...
The first day was focused on building a good structure on which to build the rest of the game. I also delved a little into building the initial map.
This tutorial is free and open source, and all code uses the MIT license - so you are free to do with it as you like. My hope is that you will enjoy the tutorial, and make great games!
If you enjoy this and would like me to keep writing, please consider supporting my Patreon.
Starting Template and Build
At the very start of the jam, I grabbed a handy template I like to keep around for basic ASCII/CodePage 437 based roguelikes. I wound up modifying it a bit to fit the "no systems, no threads" constraints - but the basic template lets me get started quickly. This section will go over the template and how it got me started.
Creating a project and building dependencies
I started the project by finding my home directory, and running cargo init secbot. This creates the usual "Hello, World" command-line program and makes a basic Cargo.toml file. Very basic stuff, but a necessary start.
I then opened up Cargo.toml and added in the dependencies I knew I'd need, set the project name, and cleaned up the default comments. Cargo.toml looks like this, now:
[package]
name = "secbot"
version = "0.1.0"
authors = ["Herbert Wolverson <herberticus@gmail.com>"]
edition = "2018"

[dependencies]
bracket-lib = { git = "https://github.com/amethyst/bracket-lib.git" }
legion = { version = "0.3.1", default-features = false, features = ["wasm-bindgen"] }
lazy_static = "1.4.0"
If you read the early commits in the repo, you'll notice that I goofed and committed a local path to my
bracket-libsource code rather than the Git repo. The two are the same, and I've fixed it in the tutorial. If you're wondering why I used the git version rather than the published crate, it's because of a bug in random number generation in WASM. I have a fix for this ready to go, but didn't have time to publish the crate before the 7-day challenge started.
Hello, Bracket-lib!
Next up was opening src/main.rs and pasting in "Hello, Bracket" from the Flappy Dragon chapter of my book. I've written this so many times now that I can do it in my sleep; one of the perks of writing a book and the library it uses. The "hello bracket" source looks like this:
use bracket_lib::prelude::*;

struct State {}

impl GameState for State {
    fn tick(&mut self, ctx: &mut BTerm) {
        ctx.cls();
        ctx.print(1, 1, "Hello, Bracket Terminal!");
    }
}

fn main() -> BError {
    let context = BTermBuilder::simple80x50()
        .with_title("SecBot")
        .build()?;

    main_loop(context, State{})
}
Ok, so that's not very exicting. It gets me a console window on the screen, and Hello, Bracket Terminal! in white on black. It's a necessary start.
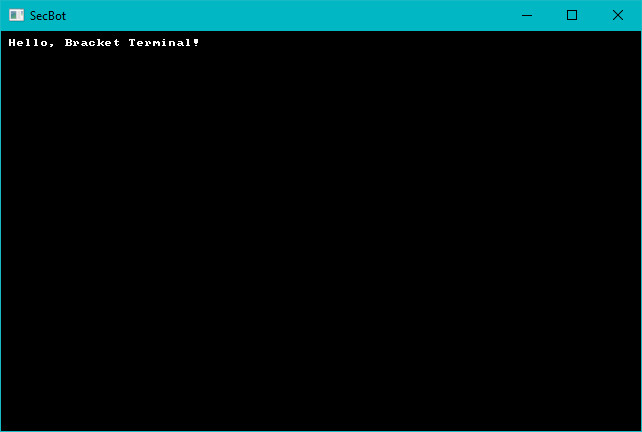
You can find the source code for
hello_brackethere.
WASM Building
I knew from the start that I wanted to support Web Assembly as a target. Bracket-lib WASM builds require a tool called wasm-bindgen, so I made sure that was installed by typing: cargo install wasm-bindgen. It takes a while to compile, time for coffee!
Once that was in place, I pulled up a template Windows batch file I use for this:
@ECHO OFF
cargo build --target wasm32-unknown-unknown --release

wasm-bindgen .\target\wasm32-unknown-unknown\release\secbot.wasm --out-dir .\wasm_help\staging --no-modules --no-typescript
copy .\wasm_help\index.html .\wasm_help\staging\index.html

REM Send to server. Not included on Github so I'm not giving you server details. Sorry.
./webglbuild2.bat
The file webglbuild2.bat is excluded from Github so I don't give you access to my server. It's pretty simple: it copies the wasm_help\staging directory to the deployment folder on my server.
Note that you need a web server to serve up your WASM build. Chrome and Firefox really don't like serving WASM builds from a
file://path for security reasons.
If you're using a platform other than Windows, the commands are the same - just replace copy with cp and change @ECHO OFF to #/bin/bash or whatever your platform needs.
Anyway, before this will work you need some helpers. Create a new folder called wasm_help. Inside that folder, make a staging directory - this will hold the build to send to the server. You also need to put an index.html file into your wasm_help folder.
The final structure looks like this:
- project folder
- src
- target
- wasm_help
- staging
- index.html
- Cargo.toml
The contents of the index.html file are:
<html>
  <head>
    <meta content="text/html;charset=utf-8" http-equiv="Content-Type" />
  </head>
  <body style="background-color: black;">
    <h1 style="color: white; font-family: 'Courier New', Courier, monospace; font-size: 10pt;">SecBot (2021 7DRL) - by Herbert Wolverson</h1>
    <canvas id="canvas" width="896" height="496"></canvas>
    <script src="./secbot.js"></script>
    <script>
      window.addEventListener("load", async () => {
        await wasm_bindgen("./secbot_bg.wasm");
      });
    </script>
  </body>
</html>
As you can tell, I'm not great at HTML/CSS. This is designed to be the bare minimum: it creates a canvas, loads the wasm file and runs it. It's derived from the various wasm-bindgen tutorials out there.
Why 896 by 496 for the canvas? I'd decided on a 112x62 console (8x8 font). So I went with the natural size from there. You'll see this in a moment.
With that in place, it was time to start expanding the game's basic structure into the beginnings of something useful.
This tutorial is free and open source, and all code uses the MIT license - so you are free to do with it as you like. My hope is that you will enjoy the tutorial, and make great games!
If you enjoy this and would like me to keep writing, please consider supporting my Patreon.
Building the superstructure
In my mental design sketches, the map was going to be 80 tiles wide by 60 characters tall. That's probably larger than I actually needed, but it worked. I needed room for a UI, so I went with 112x62 for my initial window size. I opened up src/main.rs and modified the initializer:
fn main() -> BError {
    let context = BTermBuilder::simple(112, 62)?
        .with_title("Secbot - 2021 7DRL")
        .with_fps_cap(30.0)
        .build()?;

    main_loop(context, State::new())
}
Notice that:
- I've modified
mainto return aBError, just like in Hands-on Rust. This lets me use the question mark operator rather than throwingexpecteverywhere. - I added a window title.
- I capped the frame rate at 30 FPS. This keeps the game from eating too much CPU, and gives a consistent render speed.
- I've added a
newfunction toState. We'll get there in a second.
This is a pretty tried-and-true setup, so testing consisted of cargo run - yup, it works.
Implementing State and Initializing Legion
I was sure that I'd be using Legion, so I extended the use statements at the top of main.rs to include it:
#![allow(unused)]
fn main() {
use bracket_lib::prelude::*;
pub use legion::*;
}
I then extended State to include an Entity-Component System world:
#![allow(unused)]
fn main() {
struct State {
    ecs: World,
}
}
Finally, I added a new function to act as a constructor for State:
#![allow(unused)]
fn main() {
impl State {
    fn new() -> Self {
        Self {
            ecs: World::default()
        }
    }
}
}
Once again, a quick cargo run was enough to see that it didn't explode.
Finding the Map
With a pretty solid idea for how the map should work, it was clear that I'd need one. I extended the use statements in main.rs to include one:
#![allow(unused)]
fn main() {
mod map;
use map::Map;
}
Then I created a directory called map (src is the parent) and made a file called mod.rs. I like to keep my mod.rs files relatively clean - mostly just importing other things and setting module-wide constants. The mod.rs files looks like this:
#![allow(unused)]
fn main() {
pub const WIDTH: usize = 80;
pub const HEIGHT: usize = 60;
const TILES: usize = WIDTH * HEIGHT;
pub const NUM_LAYERS: usize = 5;

mod tile;
use tile::*;
mod layer;
use layer::*;
mod map;
pub use map::Map;
//mod layerbuilder;
}
The top part is pretty self-explanatory: it sets the WIDTH and HEIGHT constants to the map dimensions. It calculates TILES to be the number of tiles this requries (80x60 = 4,800). These are constants to make it easy to change them if I change my mind on some design elements later on.
The rest refers to a bunch of modules we haven't created yet! I had a good idea of what I wanted (I've used this template before), so it served as a signpost for development. It won't compile at this point.
Notice that
LAYERSis equal to 5. It really should have read4, but I missed it when I was setting this up. I've left the bug in place so that you can see the progression of development under a time crunch.
Making Tiles
My map is going to be tile-based, so a good starting point was "what is a tile?". In the map directory, I created a file named tile.rs and created a Tile structure:
#![allow(unused)]
fn main() {
use bracket_lib::prelude::*;

#[derive(Clone)]
pub struct Tile {
    pub glyph: FontCharType,
    pub color: ColorPair,
    pub blocked: bool,
    pub opaque: bool,
}

impl Tile {
    pub fn default() -> Self {
        Self {
            glyph: to_cp437('.'),
            color: ColorPair::new(GREY, BLACK),
            blocked: false,
            opaque: false,
        }
    }
}
}
That's pretty much the minimum for a tile:
glyphtells the game what codepage-437 character to render for the tile.colordefines a foreground and background color.blockedandopaquewill be used when movement and field-of-view come into play. If a tile isblocked, you can't walk into it. If itsopaque, you can't see through it.
Layering the Cake
I'd decided up-front that I was going to have multiple levels, and entities other than the player needed to be able to navigate them. That required that I have all the map layers available when the world was created - I couldn't lazily make them as needed. I also knew that the overall game map would consist of several layers (4, even though I wrote 5 in the definition file!). So I created a layer.rs file in the map directory and added in a basic description of a Layer type:
#![allow(unused)]
fn main() {
use super::{Tile, HEIGHT, TILES, WIDTH};
use bracket_lib::prelude::*;
use legion::*;

pub struct Layer {
    pub tiles: Vec<Tile>,
    pub starting_point: Point,
}
}
I haven't written layerbuilder yet, but it's coming. We'll get to that in a second. Otherwise, the layer is pretty simple: a vector of Tile types, and a Point defining where the player starts on the level. I wanted some functionality, so I started implementing things for Layer. First up, a constructor:
#![allow(unused)]
fn main() {
impl Layer {
    pub fn new(depth: usize, ecs: &mut World) -> Self {
        let layer = match depth {
            _ => Self {
                tiles: vec![Tile::default(); TILES],
                starting_point: Point::new(WIDTH / 2, HEIGHT / 2),
            },
        };
        layer
    }
}
}
This is a little odd at first glance. It takes the depth (layer number) and a mutable reference to the ECS as parameters (so we can add stuff to the game when we build the map). It just makes an empty level with no entities on it (you'll get a warning for not using the ecs at this point).
I also wanted some rendering code. Note that I'm offsetting all the positions by 1 - I wanted to put a border around the map. Here's the render function; it should look familar, it's very similar to that found in Hands-On Rust:
#![allow(unused)]
fn main() {
impl Layer {
    // The `new` function goes here

    pub fn render(&self, ctx: &mut BTerm) {
        let mut y = 0;
        let mut idx = 0;
        while y < HEIGHT {
            for x in 0..WIDTH {
                let t = &self.tiles[idx];
                ctx.set(x+1, y+1, t.color.fg, t.color.bg, t.glyph);
                idx += 1;
            }
            y += 1;
        }
    }
}
}
It iterates the map, and draws each tile. Very simple stuff.
The Map - A structure of layers
The map is a collection of layers, with some helpers to access it. Create a new file, map.rs inside the map directory. The basic structure is:
#![allow(unused)]
fn main() {
use super::{Layer, NUM_LAYERS};
use bracket_lib::prelude::*;
use legion::World;

pub struct Map {
    pub current_layer: usize,
    layers: Vec<Layer>,
}
}
So there's an index to the currently active layer, and a vector of Layer types. Now, let's implement a constructor for it:
#![allow(unused)]
fn main() {
impl Map {
    pub fn new(ecs: &mut World) -> Self {
        let mut layers = Vec::with_capacity(NUM_LAYERS);
        for i in 0..NUM_LAYERS {
            layers.push(Layer::new(i, ecs));
        }
        Self {
            current_layer: 0,
            layers,
        }
    }
}
Note that the implementation continues, keep adding to the
implblock.
The constructor creates a vector with capacity for the number of layers we defined in mod.rs. It then iterates from 0 to the number of layers, pushing a new layer - and passing in the layer number and the ECS.
I wanted a quick way to render the current layer, so the next implemented function is render:
#![allow(unused)]
fn main() {
    pub fn render(&self, ctx: &mut BTerm) {
        self.layers[self.current_layer].render(ctx);
    }
}
Very straightforward - it just calls render for the current map layer. I also needed to be able to access the individual layers:
#![allow(unused)]
fn main() {
    pub fn get_current(&self) -> &Layer {
        &self.layers[self.current_layer]
    }

    pub fn get_current_mut(&mut self) -> &mut Layer {
        &mut self.layers[self.current_layer]
    }
}
}
These just return a pointer to the requested layer.
Minimal map drawing
Now that the map exists (albeit as a set of empty maps, consisting of just floors), we can update the src/main.rs function to use it. Start by adding to the main.rs include list:
#![allow(unused)]
fn main() {
use bracket_lib::prelude::*;
pub use legion::*;
pub mod map;
pub use map::*;
}
Then extend State to hold a map and initialize it:
#![allow(unused)]
fn main() {
struct State {
    ecs: World,
    map: map::Map,
}

impl State {
    fn new() -> Self {
        let mut ecs = World::default();
        let map = map::Map::new(&mut ecs);
        Self { ecs, map }
    }
}
}
Drawing the Map
I adjusted the tick function in main.rs to render the map and draw a border around it:
#![allow(unused)]
fn main() {
impl GameState for State {
    fn tick(&mut self, ctx: &mut BTerm) {
        ctx.cls();
        use map::{HEIGHT, WIDTH};
        ctx.draw_hollow_box(0, 0, WIDTH+1, HEIGHT+1, GRAY, BLACK);
        ctx.print_color(2, 0, WHITE, BLACK, "┤ SecBot 2021 7DRL ├");
        ctx.draw_hollow_box(WIDTH+1, 0, 30, HEIGHT+1, GRAY, BLACK);
        ctx.set(WIDTH+1, 0, GRAY, BLACK, to_cp437('┬'));
        ctx.set(WIDTH+1, HEIGHT+1, GRAY, BLACK, to_cp437('┴'));
        self.map.render(ctx);
    }
}
}
You can run the game now, and see a field of . characters. Map rendering is working!
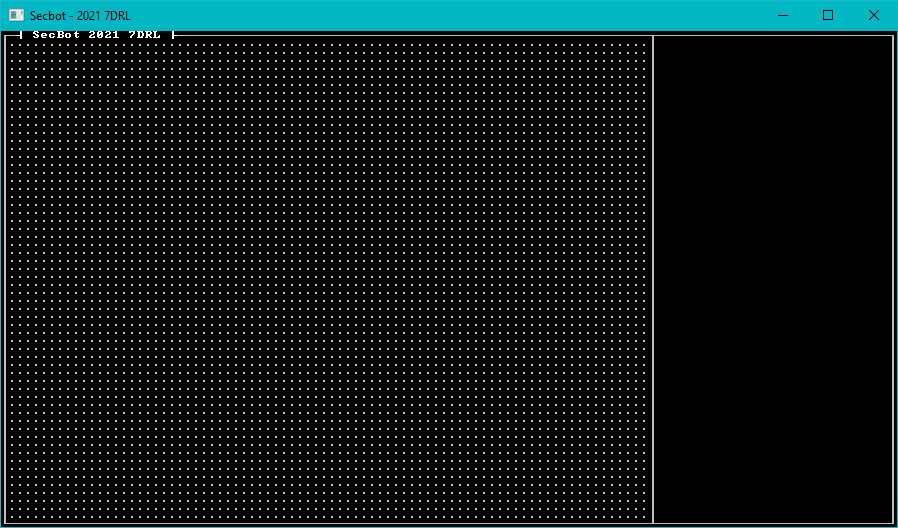
Next-Up: Entities
That's not the most impressive game ever, but getting a field of dots onto the console is a great start.
You can find the source code for
sea_of_dotshere.
This tutorial is free and open source, and all code uses the MIT license - so you are free to do with it as you like. My hope is that you will enjoy the tutorial, and make great games!
If you enjoy this and would like me to keep writing, please consider supporting my Patreon.
Adding a Player Entity
Now that we have a rendered map - albeit one showing just open spaces - it's time to add SecBot onto it. It's a good idea to get this in early; it forces you to make the basic game structure, implement turn-based movement, and setup the infrastructure to render and move entities.
Components
We're using an ECS for a data-store (Legion), so SecBot will be the sum of their parts - described by a series of components. Create a new folder, src/components and add a mod.rs file to it. Once again, I went with a slim mod file that describes the components found in other files. The initial mod.rs file looks like this:
#![allow(unused)]
fn main() {
mod description;
mod glyph;
mod position;
mod tags;

pub use description::Description;
pub use glyph::Glyph;
pub use position::Position;
pub use tags::*;
}
Now open src/main.rs and add mod components; to the include list. It's really easy to forget to do this and wonder why nothing works.
The Description Component
I wanted a text description of entities for tooltips. It also gives me a creative outlet, letting me write some text! I really enjoy writing, so that helps keep me happy. Anyway, create a file called description.rs. It contains a one-line component:
#![allow(unused)]
fn main() {
pub struct Description(pub String);
}
That's it. Just a string.
Why didn't I just add
Stringas a component (that works withLegion)? It makes it really tricky to differentiate between what string is serving what purpose. Names are also string-like! So I wrapped it in astruct. It has the nice side-effect of making accessing the contents easier; Legion likes to return&ComponentTypereferences, and it's easier to rememberdesc.0than*descand dealing withStringnot being copyable.
The Glyph Component
Make another file, components/glyph.rs. This is where you store the information required to know what the entity looks like. It's pretty simple:
#![allow(unused)]
fn main() {
use bracket_lib::prelude::*;

pub struct Glyph {
    pub glyph: FontCharType,
    pub color: ColorPair,
}
}
The Position Component
Another file, this time named components/position.rs. Again, it's relatively straightforward:
#![allow(unused)]
fn main() {
use bracket_lib::prelude::Point;

pub struct Position {
    pub pt: Point,
    pub layer: u32,
}

impl Position {
    pub fn with_pt(pt: Point, layer: u32) -> Self {
        Self { pt, layer }
    }
}
}
The Position component contains a Point (an x/y position) and the current layer. I made the layer a u32, and regretted it later due to the number of u32 to usize conversions I wound up using. I figured I'd be making a lot of positions, so I added a constructor.
Tag Components
Legion used to require that you have a tag component for every entity. It doesn't do that anymore, but I still find them useful. A "tag" component is a component with no data - it's mere existence tells you something useful. I started out with a single tag, Player. Create the components/tags.rs file:
#![allow(unused)]
fn main() {
pub struct Player;
}
Now that we have some component types, lets put them to use.
Building SecBot
Open up main.rs. Extend State's new function to call a new_game function on creation:
#![allow(unused)]
fn main() {
impl State {
    fn new() -> Self {
        let mut ecs = World::default();
        let map = map::Map::new(&mut ecs);
        let mut state = Self { ecs, map };
        state.new_game();
        state
    }
}
Then add (implemented as part of State) the new function:
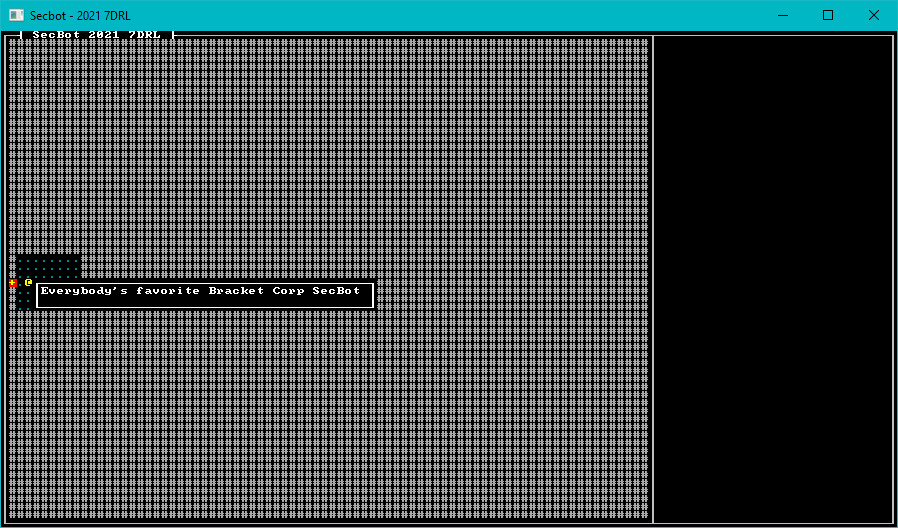
#![allow(unused)]
fn main() {
    fn new_game(&mut self) {
        use components::*;
        self.ecs.clear();

        // Spawn the player
        self.ecs.push((
            Player {},
            Position::with_pt(self.map.get_current().starting_point, 0),
            Glyph {
                glyph: to_cp437('@'),
                color: ColorPair::new(YELLOW, BLACK),
            },
            Description("Everybody's favorite Bracket Corp SecBot".to_string()),
        ));
    }
}
}
The new_game function clears the ECS (in case we are starting over), and spawns a single entity with one of each of the components we created. I wrote about push a lot in Hands-On Rust, so I won't repeat all of that here. Think of it as being like push for a vector - but in this case you are adding to the game world. It adds all of the components contained in the tuple you push to a single entity (and returns the entity, but I didn't use that here).
Render the Bot
Now that you have a player entity, you have everything you need to render it. We'll make a render_glyphs function to find all entities on the map and render them. Add this to the State implementation:
#![allow(unused)]
fn main() {
fn render_glyphs(&self, ctx: &mut BTerm) {
    use components::{Glyph, Position};
    let mut query = <(&Position, &Glyph)>::query();
    query.for_each(&self.ecs, |(pos, glyph)| {
        if pos.layer == self.map.current_layer as u32 {
            ctx.set(
                pos.pt.x + 1,
                pos.pt.y + 1,
                glyph.color.fg,
                glyph.color.bg,
                glyph.glyph,
            );
        }
    });
}
}
Now you need to call it. Find your tick function (in main.rs) and after self.map.render add:
#![allow(unused)]
fn main() {
self.render_glyphs(ctx);
}
Run the game now - and you'll see a field of open space with an @ on it.
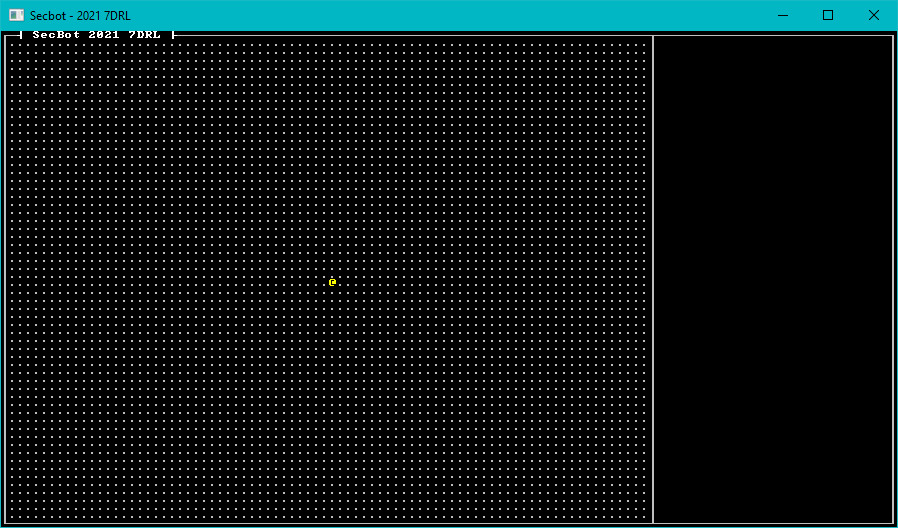
You can find the source code for
hello_entityhere.
This tutorial is free and open source, and all code uses the MIT license - so you are free to do with it as you like. My hope is that you will enjoy the tutorial, and make great games!
If you enjoy this and would like me to keep writing, please consider supporting my Patreon.
Initial Mapping
Now that you have a field of open space and a player entity, let's make something more interesting for SecBot to stand on.
The Layer Builder Module
Open up src/map/mod.rs and uncomment mod layerbuilder. Then make a directory, src/map/layerbuilder and create a new mod.rs file in it. It's very much a skeleton for all the builders to reside in:
#![allow(unused)]
fn main() {
mod entrance;
use super::{Layer, Tile};
pub use entrance::build_entrance;

fn all_space(layer: &mut Layer) {
    layer.tiles.iter_mut().for_each(|t| {
        *t = Tile::empty();
    });
}
}
I added a helper function, all_space that iterates an existing layer and turns every tile into an empty tile. You'll implement the empty funtion next.
Add Some Tiles
Open map/tiles.rs and create a bunch of constructors for different tile types we'll need:
#![allow(unused)]
fn main() {
impl Tile {
    pub fn default() -> Self {
        Self {
            glyph: to_cp437('.'),
            color: ColorPair::new(GREY, BLACK),
            blocked: false,
            opaque: false,
        }
    }

    pub fn empty() -> Self {
        Self {
            glyph: to_cp437('#'),
            color: ColorPair::new(DARK_GRAY, BLACK),
            blocked: true,
            opaque: false,
        }
    }

    pub fn capsule_floor() -> Self {
        Self {
            glyph: to_cp437('.'),
            color: ColorPair::new(DARK_CYAN, BLACK),
            blocked: true,
            opaque: false,
        }
    }

    pub fn game_over() -> Self {
        Self {
            glyph: to_cp437('+'),
            color: ColorPair::new(YELLOW, RED),
            blocked: true,
            opaque: false,
        }
    }
}
}
This is pretty tedious, but I find it helpful when designing a map to have a nicely named function for whatever it is that I'm making. The functions are:
defaultandemptyboth make an open space. I changed the color slightly so I could see if I'd remembered to useempty.capsule_floormakes a cyan floor. This will form floor tiles in SecBot's spaceship.game_overdraws a red plus sign with a yellow background. This will be the game's exit. Entering this tile will end the game and show you how far you progressed.
Make SecBot's Ship
Back in map/layerbuilder make a new file, entrance.rs. This is where we will construct the first game level - layer zero. Start by using various things we're likely to need:
#![allow(unused)]
fn main() {
use super::all_space;
use crate::{
    components::{Description, Position},
    map::{Layer, Tile, HEIGHT, TILES, WIDTH},
};
use bracket_lib::prelude::*;
use legion::*;
}
Now create a public function called build_entrance to initialize the layer:
#![allow(unused)]
fn main() {
pub fn build_entrance(ecs: &mut World) -> Layer {
    let mut layer = Layer::new(std::usize::MAX, ecs); // Gets a default layer

    all_space(&mut layer);
    add_docking_capsule(&mut layer, ecs);

    layer
}
}
We'll get to the functions it calls in a moment, first you need to pop back into map/layer.rs and extend it to use the layer builder:
#![allow(unused)]
fn main() {
use super::{layerbuilder::*, Tile, HEIGHT, TILES, WIDTH};
use bracket_lib::prelude::*;
use legion::*;

pub struct Layer {
    pub tiles: Vec<Tile>,
    pub starting_point: Point,
}

impl Layer {
    pub fn new(depth: usize, ecs: &mut World) -> Self {
        let layer = match depth {
            0 => build_entrance(ecs),
            _ => Self {
                tiles: vec![Tile::default(); TILES],
                starting_point: Point::new(WIDTH / 2, HEIGHT / 2),
            },
        };
        layer
    }
    ...
}
If depth comes into the layer constructor as zero, it will call the build_entrance function in the layer builder. Otherwise, it makes a default map.
Building SecBot's Docking Bay
The build_entrance function starts by making a new layer. Note that it calls it with the "depth" set to the maximum usize value:
#![allow(unused)]
fn main() {
let mut layer = Layer::new(std::usize::MAX, ecs); // Gets a default layer
}
This prevents the layer from calling build_entrance - crashing the program when the stack overflows because the two functions are calling each other over and over.
It then calls all_space to set the entire map to open space. You don't really need this (initializing the layer clears it) - but I find it clearer to be explicit about it.
The next function it calls is add_docking_capsule. Add the following function to entrance.rs:
#![allow(unused)]
fn main() {
fn add_docking_capsule(map: &mut Layer, ecs: &mut World) {
    const MIDDLE: usize = HEIGHT / 2;
    const TOP: usize = MIDDLE - 3;
    const BOTTOM: usize = MIDDLE + 3;
    const LEFT: usize = 1;
    const RIGHT: usize = 8;

    for y in TOP..=BOTTOM {
        for x in LEFT..=RIGHT {
            let idx = map.point2d_to_index(Point::new(x, y));
            map.tiles[idx] = Tile::capsule_floor();
        }
    }

    // Spawn the game exit
    add_game_exit(map, ecs, Point::new(LEFT - 1, MIDDLE));

    map.starting_point = Point::new(LEFT + 1, MIDDLE);
}
}
This starts by doing a little constant math (calculated at compile time). The y axis middle of the map, and the position of the docking capsule. There's nothing random here; it will always be the same. Armed with these constants, it fills the region defined by these coordinates with capsule_floor tiles.
Adding the exit
The docking capsule function calls another function. Let's add it:
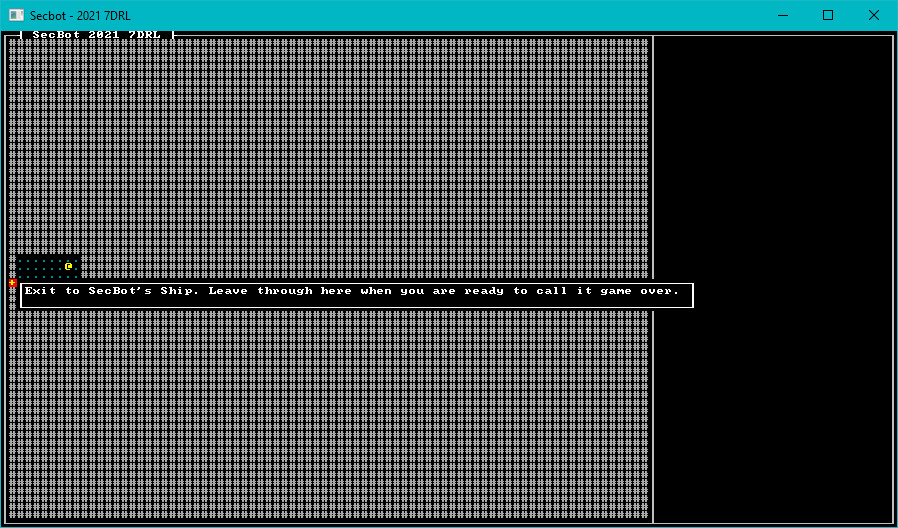
#![allow(unused)]
fn main() {
fn add_game_exit(map: &mut Layer, ecs: &mut World, pt: Point) {
    let exit_idx = map.point2d_to_index(pt);
    map.tiles[exit_idx] = Tile::game_over();

    ecs.push((
        Position::with_pt(pt, 0),
        Description(
            "Exit to SecBot's Ship. Leave through here when you are ready to call it game over."
                .to_string(),
        ),
    ));
}
}
This adds the exit tile to the map, and creates a new entity to display a tool-tip (when we have that in!) to show you that the tile represents an exit.
Next, open up mod.rs and uncomment the line that imports layerbuilder.
You'll notice that the game still doesn't compile. That's because we used point2d_to_index - which is provided by bracket-lib's trait system.
Trait Implementation
Open map/layer.rs, and we'll cover all of the boilerplate required to use bracket_lib's map helpers. We'll be using these a lot during development, so it's worth the effort. We'll go ahead and make the changes required for path-finding while we're here.
Defining Algorithm2D
At the bottom of the layer.rs file, add an implemenetation for Algorithm2D:
#![allow(unused)]
fn main() {
impl Algorithm2D for Layer {
    fn dimensions(&self) -> Point {
        Point::new(WIDTH, HEIGHT)
    }

    fn in_bounds(&self, pos: Point) -> bool {
        pos.x >= 0 && pos.x < WIDTH as i32 && pos.y > 0 && pos.y < HEIGHT as i32
    }
}
}
dimensions specifies the size of the layer. in_bounds checks that a tile is within those boundaries. This is straight out of Hands-On Rust and is a good starting point for all of bracket-lib's mapping algorithms. Implementing these provides point2d_to_index and the reciprocal index_to_point2d. We're not trying anything clever with our map tile striding, so these work perfectly for our needs.
Testing Exits
Inside the implementation of Layer, add a function:
#![allow(unused)]
fn main() {
impl Layer {
    ...
    fn test_exit(&self, pt: Point, delta: Point, exits: &mut SmallVec<[(usize, f32); 10]>) {
        let dest_pt = pt + delta;
        if self.in_bounds(dest_pt) {
            let dest_idx = self.point2d_to_index(pt + delta);
            if !self.tiles[dest_idx].blocked {
                exits.push((dest_idx, 1.0));
            }
        }
    }
}
}
This function takes a point and a delta (desired movement) and checks that the reuslt is on the map. If the tile is on the map, and isn't blocked, it adds the exit to the exits list with a cost of 1.
Implement BaseMap
You now have everything you need to make BaseMap work. BaseMap is a handy trait. It's enough to make Dijkstra maps, A-Star searches and Field-of-View queries work. Add the following to the bottom of layer.rs:
#![allow(unused)]
fn main() {
impl BaseMap for Layer {
    fn is_opaque(&self, idx: usize) -> bool {
        self.tiles[idx].opaque
    }

    fn get_available_exits(&self, idx: usize) -> SmallVec<[(usize, f32); 10]> {
        let mut exits = SmallVec::new();
        let pt = self.index_to_point2d(idx);
        self.test_exit(pt, Point::new(-1, 0), &mut exits);
        self.test_exit(pt, Point::new(1, 0), &mut exits);
        self.test_exit(pt, Point::new(0, -1), &mut exits);
        self.test_exit(pt, Point::new(0, 1), &mut exits);
        exits
    }
}
}
Wrap-Up
If you run the program now, you'll see a docking capsule (without walls!) sitting on a field of open space.
You can find the source code for
hello_capsulehere.
Next up - adding some more elements that I'll need throughout development.
Adding a Global RNG
Roguelikes use a lot of random numbers, so it was a good bet that I'd need an RNG. Since I wasn't using Legion's scheduler, I didn't feel there would be much advantage to using its resources system. With hindsight, that was probably a mistake - but it worked, so I'm not grumbling too much.
bracket-lib includes a RandomNumberGenerator. It's based on xor-shift, with some ease-of-use changes applied. It has one downside: it's stateful. Generating a random number requires mutable access to the RNG. So it's not enough to keep it around, you have to keep it around mutably - and accessing a single RNG becomes a bottleneck whenever you use threads. "Aha", I thought! I'm not using threads, so I don't need to worry about that.
There's definite benefits to having the RNG be a global resource; you can "seed" it and get the same results each time. Rust requires that global variables be protected by in case of concurrency. There isn't a way to say "I promise not to use threads, honest!" - you can't bypass the Sync+Send requirement without using unsafe code blocks. I didn't really want to do that. So, I wrapped up my RNG in a lazy_static (a fantastic crate that handles the boilerplate of making a safe mutable static for your program).
I also decided not to use parking_lot and just go with Rust's default Mutex. I probably should have gone with parking lot; its structures are not only faster, but they are a little easier to work with. It works with WASM. I persuaded myself that it wasn't worth the overhead for a single static - so here we are, using the default Mutex.
Import lazy_static and Mutex
At the top of src/main.rs, add:
#![allow(unused)]
fn main() {
use lazy_static::*;
use std::sync::Mutex;
}
Create a Lazy RNG
Immediately after the import statements, add the following to create a global RNG:
#![allow(unused)]
fn main() {
lazy_static! {
    pub static ref RNG: Mutex<RandomNumberGenerator> = Mutex::new(RandomNumberGenerator::new());
}
}
This is pretty self-explanatory if you're familiar with Rust. RNG is a RandomNumberGenerator wrapped in a Mutex. Mutexes are "locked" when you access them - no other thread can access it, and unlocked when you are done with it. Since there's no chance of contention, and Mutex is really fast - there's very little penalty for using this, other than some boilerplate code to access the RNG when you need it.
If you check the real project source code, you'll see that I had an atomic variable called
REDRAW. That was a terrible idea, and I removed it almost immediately. The idea was to limit redrawing the screen to when something needs it. Bracket-lib already does some of that, so I'm not at all sure why I thought that adding extra bookkeeping to the system was a good idea. I didn't include it in the tutorial because it was removed so early in day one that it might as well have never existed beyond a brief head-scratching moment wondering why nothing happened when I changed game sate.
Onwards!
Next up: a little cleaning.
This tutorial is free and open source, and all code uses the MIT license - so you are free to do with it as you like. My hope is that you will enjoy the tutorial, and make great games!
If you enjoy this and would like me to keep writing, please consider supporting my Patreon.
Cleaning Up the Sandbox
The template was written really quickly, and that tends to result in poor code choices. A couple of things bugged me, so I took a moment to clean them up.
Creating a Render Module
I didn't like having my render code mixed in with my turn state in main.rs. So I created a new module called render. To do this:
- Create a new directory,
src/render. - Create a new file,
src/render/mod.rs. - In the imports in
main.rs, addmod render;.
This leaves the following directory structure:
- src
- components
description.rsglyph.rsmod.rsposition.rstags.rs
- map
- layerbuilder
mod.rsentrance.rs
layer.rsmap.rsmod.rstile.rs
- layerbuilder
- render
mod.rs
main.rs
- components
- wasm_help
index.html
Cargo.toml
Populating the Render Module
In the render/mod.rs file, I started out with some imports:
#![allow(unused)]
fn main() {
use bracket_lib::prelude::*;
use legion::*;
use crate::map::{ Map, WIDTH, HEIGHT };
use crate::components::{Position, Glyph};
}
I actually cheated a bit, and let rust-analyzer help me with this. I then copied the render_glyphs function from main.rs and turned it into a stand-alone function in render/mod.rs:
#![allow(unused)]
fn main() {
pub fn render_glyphs(ctx: &mut BTerm, ecs: &World, map: &Map) {
    let mut query = <(&Position, &Glyph)>::query();
    query.for_each(ecs, |(pos, glyph)| {
        if pos.layer == map.current_layer as u32 {
            ctx.set(
                pos.pt.x + 1,
                pos.pt.y + 1,
                glyph.color.fg,
                glyph.color.bg,
                glyph.glyph,
            );
        }
    });
}
}
No real changes, other than it doesn't access self - and takes the ECS and map as parameters.
I then grabbed the ugly box drawing code from main.rs and put it into another stand-alone function:
#![allow(unused)]
fn main() {
pub fn render_ui_skeleton(ctx: &mut BTerm) {
    ctx.draw_hollow_box(0, 0, WIDTH+1, HEIGHT+1, GRAY, BLACK);
    ctx.print_color(2, 0, WHITE, BLACK, "┤ SecBot 2021 7DRL ├");
    ctx.draw_hollow_box(WIDTH+1, 0, 30, HEIGHT+1, GRAY, BLACK);
    ctx.set(WIDTH+1, 0, GRAY, BLACK, to_cp437('┬'));
    ctx.set(WIDTH+1, HEIGHT+1, GRAY, BLACK, to_cp437('┴'));
}
}
Updating the Main File
I opened up main.rs and cleaned it up to use these functions rather than containing the logic itself. The tick function became:
#![allow(unused)]
fn main() {
impl GameState for State {
    fn tick(&mut self, ctx: &mut BTerm) {
        ctx.cls();
        render::render_ui_skeleton(ctx);
        self.map.render(ctx);
        render::render_glyphs(ctx, &self.ecs, &self.map);
    }
}
}
Then delete the render_glyphs function from main.rs.
This doesn't change any functionality, so I didn't include an example or screenshot for it.
Adding a LICENSE and README
I went ahead and added a LICENSE file to the root of the project. It's the standard MIT license, allowing you to do whatever you like with the code. I also created a minimal README.md file for the Github front page:
# SecBot - 7 Day Roguelike Challenge (2021)

This is my 7DRL entry. I'll keep adding to it here as I work on it. I'll keep a playable [WASM/WebGL Version](http://bfnightly.bracketproductions.com/secbot2021/) updated as well.
I can my webglbuild.bat file, and uploaded the resulting minimal program to my server - and tested that I had a working program in WASM land.
Pushing to Github
Finally, I connected my local repo to the Github Repo I'd made for the project and pushed everything upstream.
Onwards!
With the cleaning done, it was time to add some turn state and modal rendering.
This tutorial is free and open source, and all code uses the MIT license - so you are free to do with it as you like. My hope is that you will enjoy the tutorial, and make great games!
If you enjoy this and would like me to keep writing, please consider supporting my Patreon.
Turn State and Modal Announcements
It's a funny old world. It took me a couple of hours to hammer out the tutorial thus-far, including screenshots and examples. In Jam-time, I was about 30 minutes in! The template code is based on code I had available, and it didn't take long to cut and paste everything together.
Pretty much every game I write with bracket-lib has a TurnState enumeration. You can find it in the Rust Roguelike Tutorial, in Hands-on Rust and in pretty much every example. It really is the best way I've found to manage global state in simple projects with a game loop that ticks over and over again (I sometimes use a stack of states for really complicated projects).
Initial Turn State
In main.rs, I added an enumeration:
#![allow(unused)]
fn main() {
enum TurnState {
    WaitingForInput,
    PlayerTurn,
    EnemyTurn,
    Modal{title: String, body: String},
}
}
These states are intended to work as follows:
WaitingForInputis just that - spinning, checking for user input and deciding where to go next.PlayerTurn- the player is doing something.EnemyTurn- the other entities are doing something.Modal- I'm announcing something to the player. I decided that announcements needed a title and a body text.
Tracking Turn State
Having an enum isn't enough, you need to store it and initialize it. I added it to State:
#![allow(unused)]
fn main() {
struct State {
    ecs: World,
    map: map::Map,
    turn: TurnState
}
}
In State's new function, I added initialization for the state:
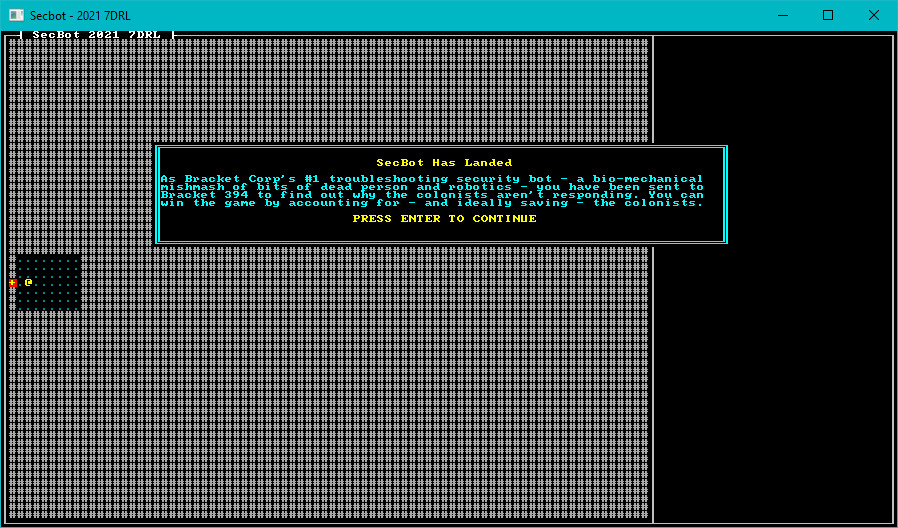
#![allow(unused)]
fn main() {
let mut state = Self { ecs, map, turn: TurnState::Modal{title: "SecBot Has Landed".to_string(), body: text::INTRO.to_string()} };
}
Wait - what's this? INTRO hasn't been defined!
Storing Text
I didn't want to fill up my main module with stored body text. With hindsight, I should have done more of this! Anyway, in the src directory, I created a new file: text.rs. The entire body of the file is:
#![allow(unused)]
fn main() {
pub const INTRO : &str = "As Bracket Corp's #1 troubleshooting security bot - a bio-mechanical mishmash of bits of dead person and robotics - you have been sent to Bracket 394 to find out why the colonists aren't responding. You can win the game by accounting for - and ideally saving - the colonists.";
}
It defines a constant called INTRO - storing my greeting text. I went back to main.rs and added mod text to the imports list.
Rendering Modal Dialogs
I wanted a bit of flexibility in rendering modal text. I honestly thought that I'd use it more frequently (it ended up barely used). So I added the following to render/mod.rs:
#![allow(unused)]
fn main() {
pub fn modal(ctx: &mut BTerm, title: &String, body: &String) {
    let mut draw_batch = DrawBatch::new();
    draw_batch.draw_double_box(Rect::with_size(19, 14, 71,12), ColorPair::new(CYAN, BLACK));
    let mut buf = TextBuilder::empty();
    buf.ln()
        .fg(YELLOW)
        .bg(BLACK)
        .centered(title)
        .fg(CYAN)
        .bg(BLACK)
        .ln()
        .ln()
        .line_wrap(body)
        .ln()
        .ln()
        .fg(YELLOW)
        .bg(BLACK)
        .centered("PRESS ENTER TO CONTINUE")
        .reset();

    let mut block = TextBlock::new(20, 15, 70, 11);
    block.print(&buf).expect("Overflow occurred");
    block.render_to_draw_batch(&mut draw_batch);
    draw_batch.submit(0).expect("Batch error");
    render_draw_buffer(ctx).expect("Render error");
}
}
That's a bit of a mouthful! It starts by creating a DrawBatch. These are primarily a multi-threading tool in bracket-lib: you can start and submit a batch in any thread. As long as you remember to render_draw_buffer in the render thread, everything is applied. You don't really need it, but there are some performance advantages to doing it all in a batch. The TextBuilder functionality in bracket-lib works best when applied to a batch, so I pretty much had to have one. TextBuilder is a really handy utility for batching large amounts of text, applying word-wrapping, and placing the nicely formatted result on the screen.
The function starts by creating a new batch and TextBuilder. Then it goes line-by-line setting colors, formatting text, and finally calling reset to clear any state back to its original value. Then it makes a block - I had to play with the dimensions/location a bit until it looked right - and renders it.
Applying Turn State
In main.rs, go back to the tick function. We'll add a match function to use TurnState to direct program flow:
#![allow(unused)]
fn main() {
impl GameState for State {
    fn tick(&mut self, ctx: &mut BTerm) {
        ctx.cls();
        render::render_ui_skeleton(ctx);
        self.map.render(ctx);
        render::render_glyphs(ctx, &self.ecs, &self.map);

        match &self.turn {
            TurnState::Modal { title, body } => render::modal(ctx, title, body),
            _ => {} // Do nothing
        }
    }
}
}
The tick function now clears the screen, renders the UI skeleton, renders the map and glyphs, and queries turn (the turn state) to see what to do. At this point, it only knows how to draw the modal we've built.
Run the program now, and you'll be greeted with a game starting modal dialog:
You can find the source code for
hello_modalhere.
Onwards!
Next, we'll start supporting some tool-tips.
This tutorial is free and open source, and all code uses the MIT license - so you are free to do with it as you like. My hope is that you will enjoy the tutorial, and make great games!
If you enjoy this and would like me to keep writing, please consider supporting my Patreon.
Tooltips
Whenever I play a pure-ASCII roguelike, I need a "look" function. It's all very well to turn a corner and find yourself facing a see of g characters, but that triggers my brain into trying to remember what g stands for! It could be a goblin, a gnu, a ghost, a gargoyle or all manner of other uses of the letter g. I'd much rather be able to glance (ugh, another "g"!) at it and know what I'm up against!
Some games - I'm looking at you, Nethack - take this a little too far in my opinion. You can use a look at command to identify things, read the manual, or the in-game help. It's great that the options are all there - but looking at Medusa can be really bad for your health. That's a good joke, but terrible design: the first time you encounter Medusa, you may not remember what the glyph means. Instantly turning the player to stone because they didn't memorize the (huge) list of possible symbols is funny the first time. It's downright annoying the second, especially if you don't have players with eidetic memory (and limiting your player-base to those with perfect memories is just mean!).
So, I wanted tooltips. Mouse over a glyph and see a description. It also gives me a chance to do some writing (you may have noticed by now that I love writing).
Escaping from the Modal
The first thing I wanted to do was to let the player get out of the modal we created in the last section. I was certain that I'd need some game logic (it wouldn't be much of a game without it), so I created a game module:
- Create a new directory,
src/game. - Create a new file
src/game/mod.rs. - Try to keep
mod.rsas a directory of other content.
I wanted to start adding player logic, so I added the following to game/mod.rs:
#![allow(unused)]
fn main() {
pub mod player;
pub use player::player_turn;
}
Then I created another new file: src/game/player.rs and added some really simple player code to it:
#![allow(unused)]
fn main() {
use crate::{components::*, render::tooltips::render_tooltips};
use crate::{
    map::{Map, HEIGHT, WIDTH},
    NewState,
};
use bracket_lib::prelude::*;
use legion::*;

pub fn player_turn(ctx: &mut BTerm, ecs: &mut World, map: &mut Map) -> NewState {
    render_tooltips(ctx, ecs, map);
    NewState::Wait
}
}
I hadn't made NewState yet, but the idea is that game functions can return an enumeration indicating where the game should go next. Open up main.rs and add:
#![allow(unused)]
fn main() {
mod game;
}
This adds the new game module to the program. Add a new enum for NewState:
#![allow(unused)]
fn main() {
pub enum NewState {
    NoChange,
    Wait,
    Player,
    Enemy,
}
}
Finally, replace the tick function as follows:
#![allow(unused)]
fn main() {
impl GameState for State {
    fn tick(&mut self, ctx: &mut BTerm) {
        ctx.cls();
        render::render_ui_skeleton(ctx);
        self.map.render(ctx);
        render::render_glyphs(ctx, &self.ecs, &self.map);

        let new_state = match &self.turn {
            TurnState::Modal { title, body } => render::modal(ctx, title, body),
            TurnState::WaitingForInput => game::player_turn(ctx, &mut self.ecs, &mut self.map),
            _ => NewState::NoChange,
        };
        match new_state {
            NewState::NoChange => {}
            NewState::Wait => self.turn = TurnState::WaitingForInput,
            NewState::Player => self.turn = TurnState::PlayerTurn,
            NewState::Enemy => self.turn = TurnState::EnemyTurn,
        }
    }
}
}
We now have a solid pattern for game state progression: it renders dependent upon the turn state, and calls game logic. The game logic can indicate that a new mode is necessary (or return NoChange to keep spinning) and trigger the new mode.
The game won't quite compile. The new_state matcher is expecting every arm to return a NewState. The modal renderer doesn't do that yet. So open up render/mod.rs and adjust the modal rendering code:
#![allow(unused)]
fn main() {
use crate::NewState;

pub fn modal(ctx: &mut BTerm, title: &String, body: &String) -> NewState {
    let mut draw_batch = DrawBatch::new();
    draw_batch.draw_double_box(Rect::with_size(19, 14, 71, 12), ColorPair::new(CYAN, BLACK));
    let mut buf = TextBuilder::empty();
    buf.ln()
        .fg(YELLOW)
        .bg(BLACK)
        .centered(title)
        .fg(CYAN)
        .bg(BLACK)
        .ln()
        .ln()
        .line_wrap(body)
        .ln()
        .ln()
        .fg(YELLOW)
        .bg(BLACK)
        .centered("PRESS ENTER TO CONTINUE")
        .reset();

    let mut block = TextBlock::new(21, 15, 69, 11);
    block.print(&buf).expect("Overflow occurred");
    block.render_to_draw_batch(&mut draw_batch);
    draw_batch.submit(0).expect("Batch error");
    render_draw_buffer(ctx).expect("Render error");

    if let Some(key) = ctx.key {
        match key {
            VirtualKeyCode::Return => NewState::Wait,
            VirtualKeyCode::Space => NewState::Wait,
            _ => NewState::NoChange,
        }
    } else {
        NewState::NoChange
    }
}
}
The new code is all at the bottom. If checks to see if a key is pressed, and if its Return or Space returns NewState::Wait - indicating that it should move the game state to WaitingForInput. Otherwise, it returns NoChange and keeps spinning.
If you run the game now (you'd need to comment out render_tooltips in player.rs), you can see the modal popup from before - but pressing enter dismisses it (and the game then does nothing of much at all).
Adding tooltips
Create a new file, src/render/tooltips.rs:
#![allow(unused)]
fn main() {
use bracket_lib::prelude::*;
use legion::*;
use crate::{components::{Description, Position}, map::{HEIGHT, Map, WIDTH}};

pub fn render_tooltips(ctx: &mut BTerm, ecs: &World, map: &Map) {
    let (mx, my) = ctx.mouse_pos();
    let map_x = mx -1;
    let map_y = my - 1;
    if map_x >= 0 && map_x < WIDTH as i32 && map_y >= 0 && map_y < HEIGHT as i32 {
        let mut lines = Vec::new();
        let mut query = <(&Position, &Description)>::query();
        query.for_each(ecs, |(pos, desc)| {
            if pos.layer == map.current_layer as u32 && pos.pt.x == map_x && pos.pt.y == map_y {
                lines.push(desc.0.clone());
            }
        });

        if !lines.is_empty() {
            let height = lines.len() + 1;
            let width = lines.iter().map(|s| s.len()).max().unwrap() + 2;
            let tip_x = if map_x < WIDTH as i32/2 {
                mx+1
            } else {
                mx - (width as i32 +1)
            };
            let tip_y = if map_y > HEIGHT as i32/2 {
                my - height as i32
            } else {
                my
            };
            ctx.draw_box(tip_x, tip_y, width, height, WHITE, BLACK);
            let mut y = tip_y + 1;
            lines.iter().for_each(|s| {
                ctx.print_color(tip_x+1, y, WHITE, BLACK, s);
                y += 1;
            });
        }
    }
}
}
This is a messy function, but quite straightforward:
- It obtains the mouse position as
(mx, my)withmouse_pos()from the context. - It sets
map_xandmap_ytomx-1andmy-1respectively. This offsets the mouse position into the map's coordinates - we have a 1 tile border around the map. - It checks that the map coordinates are within the map boundaries. With hindsight,
in_boundswould have done this with less typing. - It runs a Legion ECS query for all entities with a
PositionandDescriptioncomponent. If they are on the current layer, and at the currentmap_x/may_ycoordinates it adds their descriptions to alinesvector. - If lines isn't empty:
- Calculate the total length of the tooltip in lines. Add 2 to support the box around the tip.
- Calculate the width by looking the longest string. Add 2 to support the box around the tip.
- If the mouse is on the left half of the screen, set
tip_xto be just to the right of the cursor. Otherwise, set it to be (length+1) tiles left of the cursor. - Draw a box around the total tooltip.
- Iterate the lines vector, and draw each line.
Still messy (and replaced later), but it works. :-)
Using the Tooltips
In render/mod.rs add the following line:
#![allow(unused)]
fn main() {
pub mod tooltips;
}
You can run the game now and see a tooltip for the player:
You can find the source code for
hello_tooltiphere.
Onwards!
Next, we'll let SecBot's @ walk around the map.
This tutorial is free and open source, and all code uses the MIT license - so you are free to do with it as you like. My hope is that you will enjoy the tutorial, and make great games!
If you enjoy this and would like me to keep writing, please consider supporting my Patreon.
Walking Around
Now that we have a map and tooltips, it's time to make the player respond to some input - and walk around the map. We've done most of the back-end work for this, it's largely a matter of receiving player input, parsing it, and implementing movement logic. Unlike Hands-on Rust, I didn't do a lot of clever systems work here - I went with something quick and functional.
Receiving input
I wanted to support W/A/S/D as well as cursor keys, so I included that from the start. Open up src/game/player.rs. Extend the player_turn function to include input handling:
#![allow(unused)]
fn main() {
pub fn player_turn(ctx: &mut BTerm, ecs: &mut World, map: &mut Map) -> NewState {
    render_tooltips(ctx, ecs, map);

    // Check for input
    if let Some(key) = ctx.key {
        match key {
            VirtualKeyCode::Up | VirtualKeyCode::W => try_move(ecs, map, 0, -1),
            VirtualKeyCode::Down | VirtualKeyCode::A => try_move(ecs, map, 0, 1),
            VirtualKeyCode::Left | VirtualKeyCode::S => try_move(ecs, map, -1, 0),
            VirtualKeyCode::Right | VirtualKeyCode::D => try_move(ecs, map, 1, 0),
            _ => NewState::Wait,
        }
    } else {
        NewState::Wait
    }
}
}
Can you spot the bug? I didn't, until I pushed a WASM build and let some people on the Discord try it out! I transposed
AandS, causing some confusion about how to move around.
This uses the try_move function, which we haven't written yet. Let's fix that.
Moving Around
The try_move function takes delta_x and delta_y to represent the direction in which the player is trying to move. It takes the player's current position, applies the delta and - if the move is possible - applies it. Add this after player_turn in player.rs:
#![allow(unused)]
fn main() {
fn try_move(ecs: &mut World, map: &mut Map, delta_x: i32, delta_y: i32) -> NewState {
    let mut find_player = <(&Player, &mut Position)>::query();
    let mut result = NewState::Wait;
    find_player.iter_mut(ecs).for_each(|(_, pos)| {
        let new_pos = pos.pt + Point::new(delta_x, delta_y);
        let new_idx = map.get_current().point2d_to_index(new_pos);
        if !map.get_current().tiles[new_idx].blocked {
            pos.pt = new_pos;
            result = NewState::Enemy;
        }
    });
    result
}
}
The function creates a query that looks for an entity with the Player and Position components. SecBot should be the only entity to ever match this. It sets a result variable, and iterates the players (hopefully, there's only one - more than one would be a bug!). It constructs new_pos to be the existing position plus the delta. If the current map layer doesn't have blocked set for this location, it applies the move.
Can you see the other bug here? There's no bounds checking, and the game will crash spectacularly if you walk off the edge of the map.
Extending Turn State, Again
Now that we are returning NewState::Enemy if the player moved - we need that to do something. Otherwise, the game will last precisely one move - and sit spinning until you find ctrl+c to kill it. In main.rs, open the tick function once more. For now, we'll stub out EnemyTurn - it just skips straight back to waiting for input:
#![allow(unused)]
fn main() {
let new_state = match &self.turn {
    TurnState::Modal { title, body } => render::modal(ctx, title, body),
    TurnState::WaitingForInput => game::player_turn(ctx, &mut self.ecs, &mut self.map),
    TurnState::EnemyTurn => NewState::Wait,
    _ => NewState::NoChange,
};
match new_state {
    NewState::NoChange => {}
    NewState::Wait => self.turn = TurnState::WaitingForInput,
    NewState::Enemy => self.turn = TurnState::EnemyTurn,
}
}
Fixing the Capsule Floor
Open map/tile.rs and locate the capsule_floor() tile. Change blocked to false (instead of true). This lets SecBot navigate the escape capsule floor.
This is why the game doesn't crash because we skipped bounds-checking! SecBot doesn't have the opportunity to leave the map, so we squeaked by without bounds-checking.
Fixing WASD
I've shown you the silly mistake I made, let's fix WASD before I forget. In player.rs, reverse A and S:
#![allow(unused)]
fn main() {
VirtualKeyCode::Up | VirtualKeyCode::W => try_move(ecs, map, 0, -1),
VirtualKeyCode::Down | VirtualKeyCode::S => try_move(ecs, map, 0, 1),
VirtualKeyCode::Left | VirtualKeyCode::A => try_move(ecs, map, -1, 0),
VirtualKeyCode::Right | VirtualKeyCode::D => try_move(ecs, map, 1, 0),
}
Oops, I Cleared the ECS at the Wrong Time
You may have noticed that the escape capsule door doesn't have a tooltip (or any other components). There was a bug in main.rs. In new_game, remove the line that says self.ecs.clear(). I just made a new World - it's empty. Clearing it after the map adds to it was a poor life choice.
Leaving the Game
One core mechanic from the game design was the idea that if you enter the exit airlock, the game ends. Let's go ahead and make that happen.
Decorate Position
I wanted to be able to compare Position components. I also thought it might be useful to be able to print debugging information for them. Open components/position.rs and add a derive to accomplish this:
#![allow(unused)]
fn main() {
...

#[derive(Debug, Clone, Copy, PartialEq)]
pub struct Position {
    ...
}
Add a TileTrigger component
I thought it might be useful to have tiles that do something when the player enters them. Let's create a new component to indicate this. Create a new file: src/components/tile_trigger.rs and insert the following contents:
#![allow(unused)]
fn main() {
pub enum TriggerType {
    EndGame,
}

pub struct TileTrigger(pub TriggerType);
}
Also include mod tile_trigger; pub use tile_trigger::*; in components/mod.rs.
Update the game exit
Open up map/layerbuilder/entrance.rs. Add an import for TileTrigger (or just use components::*). Then, in the add_game_exit function, add a TileTrigger to the components you are creating for the exit:
#![allow(unused)]
fn main() {
ecs.push((
        Position::with_pt(pt, 0),
        Description(
            "Exit to SecBot's Ship. Leave through here when you are ready to call it game over."
                .to_string(),
        ),
        TileTrigger(crate::components::TriggerType::EndGame),
    ));
}
The exit now has a TileTrigger component. Open up map/tile.rs and fix the exit tile:
#![allow(unused)]
fn main() {
pub fn game_over() -> Self {
    Self {
        glyph: to_cp437('+'),
        color: ColorPair::new(YELLOW, RED),
        blocked: false,
        opaque: false,
    }
}
}
Notice the change? blocked is now false, allowing SecBot to walk into the tile.
Detecting Tile Triggers
Now that we support triggers and have one, the player needs to fire the trigger when they enter a trigger tile. Let's extend the player_turn function (in game/player.rs) some more to include an exit check. Entering an exit can change the game state, so we have to do a little dance. The code after render_tooltips looks like this:
#![allow(unused)]
fn main() {
pub fn player_turn(ctx: &mut BTerm, ecs: &mut World, map: &mut Map) -> NewState {
    render_tooltips(ctx, ecs, map);

    // Check for input
    let mut new_state = if let Some(key) = ctx.key {
        match key {
            VirtualKeyCode::Up | VirtualKeyCode::W => try_move(ecs, map, 0, -1),
            VirtualKeyCode::Down | VirtualKeyCode::A => try_move(ecs, map, 0, 1),
            VirtualKeyCode::Left | VirtualKeyCode::S => try_move(ecs, map, -1, 0),
            VirtualKeyCode::Right | VirtualKeyCode::D => try_move(ecs, map, 1, 0),
            _ => NewState::Wait,
        }
    } else {
        NewState::Wait
    };

    // Check for tile trigger effects
    tile_triggers(&mut new_state, ecs, map);

    new_state
}
}
See the difference? We store the result of the input match in a mutable variable called new_state. Then we call tile_triggers, passing it the new_state mutably so it has a chance to override it if it needs to.
The tile_triggers function needs to be added to the end of the game/player.rs file:
#![allow(unused)]
fn main() {
fn tile_triggers(new_state: &mut NewState, ecs: &mut World, map: &mut Map) {
    if *new_state != NewState::Wait {
        return;
    }
    let mut find_player = <(&Player, &Position)>::query();
    let player_pos = find_player.iter(ecs).map(|(_, pos)| *pos).nth(0).unwrap();

    let mut find_triggers = <(&TileTrigger, &Position)>::query();
    find_triggers
        .iter(ecs)
        .filter(|(_, pos)| **pos == player_pos)
        .for_each(|(tt, _)| match tt.0 {
            TriggerType::EndGame => *new_state = NewState::LeftMap,
        });
}
}
The function works like this:
- If the new state isn't waiting for input, exit. This will change later - for now, I wanted to let it render once after you move into the exit tile, to help me with some debugging.
- It runs a query to find the player's location. The "iter->map->nth->unwrap" pattern is ugly, but worked really well in Hands-on Rust - so I used it.
- It iterates tile triggers, and if the trigger matches the new location, it matches on the trigger type. There's only one for now, which ends the game. So if the game is ending, we return a new
NewStatetype -LeftMap.
Implement LeftMap
In main.rs, add a PartialEq derivation and LeftMap to NewState:
#![allow(unused)]
fn main() {
#[derive(PartialEq)]
pub enum NewState {
    NoChange,
    Wait,
    Enemy,
    LeftMap,
}
}
I forgot to add PartialEq earlier. It's handy. Also, extend TurnState to include an additional GameOverLeft option:
#![allow(unused)]
fn main() {
enum TurnState {
    WaitingForInput,
    PlayerTurn,
    EnemyTurn,
    Modal{title: String, body: String},
    GameOverLeft,
}
}
Now down in the tick function, the matchers need updating to include the new LeftMap state:
#![allow(unused)]
fn main() {
impl GameState for State {
    fn tick(&mut self, ctx: &mut BTerm) {
        ctx.cls();
        render::render_ui_skeleton(ctx);
        self.map.render(ctx);
        render::render_glyphs(ctx, &self.ecs, &self.map);

        let new_state = match &self.turn {
            TurnState::Modal { title, body } => render::modal(ctx, title, body),
            TurnState::WaitingForInput => game::player_turn(ctx, &mut self.ecs, &mut self.map),
            TurnState::EnemyTurn => NewState::Wait,
            TurnState::GameOverLeft => render::game_over_left(ctx),
            _ => NewState::NoChange,
        };
        match new_state {
            NewState::NoChange => {}
            NewState::Player => self.turn = TurnState::EnemyTurn,
            NewState::Wait => self.turn = TurnState::WaitingForInput,
            NewState::Enemy => self.turn = TurnState::EnemyTurn,
            NewState::LeftMap => self.turn = TurnState::GameOverLeft,
        }
    }
}
}
Notice the new changes? TurnState::GameOverLeft calls a new game_over_left function. The NewState::LeftMap state puts the game into GameOverLeft mode.
Rendering the End
I added the following function to render/mod.rs:
#![allow(unused)]
fn main() {
pub fn game_over_left(ctx: &mut BTerm) -> NewState {
    ctx.cls();
    ctx.print(
        1,
        1,
        "Game over. You left the map. Haven't written the stuff to show here.",
    );
    ctx.print(
        1,
        2,
        "You need to refresh or reload. Haven't done restarting yet.",
    );
    NewState::NoChange
}
}
Notice that the game basically apologizes that I haven't written any more functionality, yet. I do that a lot. It's good to have a place-holder for when I write the real version!
Give it a whirl
You can walk around with WASD or the cursor keys. The escape pod airlock door has a tooltip, and ends the game. Life is good.
You can find the source code for
hello_secbothere.
Onwards!
The basic skeleton of the game is now in place. We've implemented:
- A basic map.
- Turn-state.
- Modal dialogs.
- Moving around the map.
- Ending the game.
- Tooltips.
That's a pretty good start, but I still had some day remaining. So, onwards to building the basic map.
This tutorial is free and open source, and all code uses the MIT license - so you are free to do with it as you like. My hope is that you will enjoy the tutorial, and make great games!
If you enjoy this and would like me to keep writing, please consider supporting my Patreon.
Building an Asteroid
I knew that SecBot was landing on an asteroid outpost, a mining colony run by the not-so-pleasant Bracket Corporation (I like making myself the bad guy in games!). The landscape is interesting: it needs to be pretty, because you can see it out of the window. It also doesn't do anything beyond looking pretty. Fortunately, I had an idea for making it quickly.
Simplex Noise
I love noise functions. I implemented Auburn's FastNoise library in Rust as part of bracket-lib, simply because I use noise functions so much. Simplex Noise is a great way to get a height-map that looks a lot like a landscape, with very little effort. I wrote a tutorial on how to build a globe a while back, and shamelessly borrowed some of my code from there.
Simplex noise takes some parameters, and gives you a set of density or altitude numbers for given coordinates. In this case, I went with the number representing altitude. I wanted large numbers to be brighter, indicating high ground. Low numbers are darker, and really low numbers render as a deep maroon. Open map/tile.rs and add a new tile constructor to the implementation block:
#![allow(unused)]
fn main() {
pub fn alien_landscape(height: f32) -> Self {
    let fg = if height < 0.0 {
        if height < -0.25 {
            (40, 20, 0)
        } else {
            GRAY
        }
    } else {
        (
            (height * 128.0) as u8 + 128,
            ((height * 128.0) as u8 + 128) / 2,
            0
        )
    };

    Self {
        glyph: to_cp437('~'),
        color: ColorPair::new(fg, BLACK),
        blocked: false,
        opaque: false,
    }
}
}
I played around with this until I liked the results. I encourage you to do the same.
Now open map/layerbuilder/entrance.rs and add a call to a new function to the builder routine:
#![allow(unused)]
fn main() {
all_space(&mut layer);
add_landscape(&mut layer, ecs);
add_docking_capsule(&mut layer, ecs);
}
add_landscape is actually quite straightforward if you are familiar with noise functions:
#![allow(unused)]
fn main() {
fn add_landscape(map: &mut Layer, ecs: &mut World) {
    let mut rng_lock = crate::RNG.lock();
    let rng = rng_lock.as_mut().unwrap();
    let mut noise = FastNoise::seeded(rng.next_u64());
    noise.set_noise_type(NoiseType::SimplexFractal);
    noise.set_fractal_type(FractalType::FBM);
    noise.set_fractal_octaves(10);
    noise.set_fractal_gain(0.5);
    noise.set_fractal_lacunarity(3.5);
    noise.set_frequency(0.02);

    for y in 0..HEIGHT {
        for x in 0..WIDTH {
            let h = noise.get_noise(x as f32, y as f32);
            let idx = map.point2d_to_index(Point::new(x, y));
            map.tiles[idx] = Tile::alien_landscape(h);
        }
    }
}
}
It starts by obtaining a lock on the RNG mutex. Again, I wish I'd used parking_lot - instead of two lines, it could just be let mut rng = crate::RNG.lock(). It's not too bad to use two lines of code, I guess.
The function then generates a seeded FastNoise structure, using a random seed. It sets the noise type to SimplexFractal - which generates continuous noise (you can zoom in), using the simplex noise system - which basically merges gradients to give smoothly transitioning scenery. I coped the parameters from the world building example. It then iterates the whole map, grabs a noise value for the map coordinate and sets that tile to alien_landscape with the generated height.
Since the remainder of the level is generated after the landscape, I let it cover the whole map - and then overwrite the parts that will be used for gameplay.
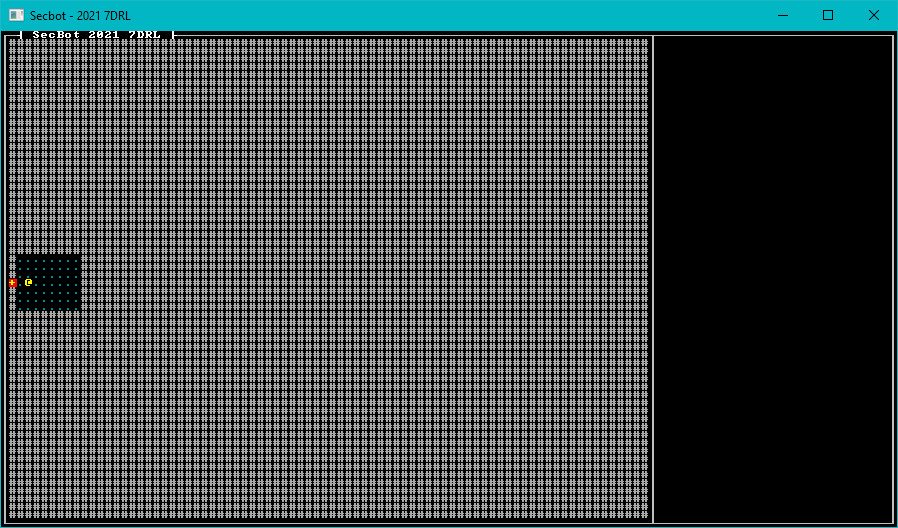
Give it a Spin
If you run the program now, you have generated an asteroid surface:

You can find the source code for
hello_asteroidhere.
Up Next
Next, we'll add some walls around SecBot's capsule. We'll add windows and a field-of-view system to let SecBot peek out the window to see the world.
This tutorial is free and open source, and all code uses the MIT license - so you are free to do with it as you like. My hope is that you will enjoy the tutorial, and make great games!
If you enjoy this and would like me to keep writing, please consider supporting my Patreon.
Walls, Windows and Field-of-View
Now that we have a nice landscape, intended to be viewed out of the window - lets add some walls, a window, and the ability to look through the window. We've already done the hard part for this, so it's relatively plain sailing.
Add some tile types
I went ahead and fleshed out a bunch of tile types. In map/tile.rs, the constructors look like this now:
#![allow(unused)]
fn main() {
use bracket_lib::prelude::*;

#[derive(Clone)]
pub struct Tile {
    pub glyph: FontCharType,
    pub color: ColorPair,
    pub blocked: bool,
    pub opaque: bool,
}

impl Tile {
    pub fn default() -> Self {
        Self {
            glyph: to_cp437('.'),
            color: ColorPair::new(GREY, BLACK),
            blocked: false,
            opaque: false,
        }
    }

    pub fn empty() -> Self {
        Self {
            glyph: to_cp437('#'),
            color: ColorPair::new(DARK_GRAY, BLACK),
            blocked: true,
            opaque: false,
        }
    }

    pub fn floor() -> Self {
        Self {
            glyph: to_cp437('.'),
            color: ColorPair::new(DARK_GRAY, BLACK),
            blocked: false,
            opaque: false,
        }
    }

    pub fn wall() -> Self {
        Self {
            glyph: to_cp437('#'),
            color: ColorPair::new(DARK_GRAY, BLACK),
            blocked: true,
            opaque: true,
        }
    }

    pub fn capsule_floor() -> Self {
        Self {
            glyph: to_cp437('.'),
            color: ColorPair::new(DARK_CYAN, BLACK),
            blocked: false,
            opaque: false,
        }
    }

    pub fn capsule_wall() -> Self {
        Self {
            glyph: to_cp437('#'),
            color: ColorPair::new(DARK_CYAN, BLACK),
            blocked: true,
            opaque: true,
        }
    }

    pub fn capsule_window() -> Self {
        Self {
            glyph: to_cp437('%'),
            color: ColorPair::new(DARK_CYAN, BLACK),
            blocked: true,
            opaque: false,
        }
    }

    pub fn game_over() -> Self {
        Self {
            glyph: to_cp437('+'),
            color: ColorPair::new(YELLOW, RED),
            blocked: false,
            opaque: false,
        }
    }

    pub fn alien_landscape(height: f32) -> Self {
        let fg = if height < 0.0 {
            if height < -0.25 {
                (40, 20, 0)
            } else {
                GRAY
            }
        } else {
            (
                (height * 128.0) as u8 + 128,
                ((height * 128.0) as u8 + 128) / 2,
                0,
            )
        };

        Self {
            glyph: to_cp437('~'),
            color: ColorPair::new(fg, BLACK),
            blocked: height <= -0.255,
            opaque: false,
        }
    }
}
}
Flesh out the Docking Capsule
Open map/layerbuilder/entrance.rs. Replace the add_docking_capsule function as follows:
#![allow(unused)]
fn main() {
fn add_docking_capsule(map: &mut Layer, ecs: &mut World) {
    const MIDDLE: usize = HEIGHT / 2;
    const TOP: usize = MIDDLE - 3;
    const BOTTOM: usize = MIDDLE + 3;
    const LEFT: usize = 1;
    const RIGHT: usize = 8;

    // Floor
    for y in TOP..=BOTTOM {
        for x in LEFT..=RIGHT {
            let idx = map.point2d_to_index(Point::new(x, y));
            map.tiles[idx] = Tile::capsule_floor();
        }
    }

    // Encasing Walls
    for x in LEFT - 1..=RIGHT + 1 {
        let idx = map.point2d_to_index(Point::new(x, TOP - 1));
        map.tiles[idx] = Tile::capsule_wall();
        let idx = map.point2d_to_index(Point::new(x, BOTTOM + 1));
        map.tiles[idx] = Tile::capsule_wall();
    }
    for y in TOP - 1..=BOTTOM + 1 {
        let idx = map.point2d_to_index(Point::new(LEFT - 1, y));
        map.tiles[idx] = Tile::capsule_wall();
        let idx = map.point2d_to_index(Point::new(RIGHT + 1, y));
        map.tiles[idx] = Tile::capsule_wall();
    }

    // Add some windows
    let x_middle = (LEFT + RIGHT) / 2;
    let idx = map.point2d_to_index(Point::new(x_middle - 2, TOP - 1));
    map.tiles[idx] = Tile::capsule_window();
    let idx = map.point2d_to_index(Point::new(x_middle - 2, BOTTOM + 1));
    map.tiles[idx] = Tile::capsule_window();
    let idx = map.point2d_to_index(Point::new(x_middle + 2, TOP - 1));
    map.tiles[idx] = Tile::capsule_window();
    let idx = map.point2d_to_index(Point::new(x_middle + 2, BOTTOM + 1));
    map.tiles[idx] = Tile::capsule_window();

    // Spawn the game exit
    add_game_exit(map, ecs, Point::new(LEFT - 1, MIDDLE));

    map.starting_point = Point::new(LEFT + 1, MIDDLE);
}
}
There's a lot in this function, so I commented the sections. It draws the floor as it did previously, and then encases that region with walls. I added some windows (the window tile being blocked but not opaque - so you can't walk through it, but it doesn't block vision), and then call the existing game exit, door and starting point code.
Adding a Field-of-View
I didn't feel like reinventing any wheels, so I used bracket-lib's built-in field of view system. That's part of why I implemented the BaseMap and Algorithm2D traits when defining the map: so I wouldn't have to write a full recursive shadow-casting function from scratch. This is pretty much the same as the way Hands-on Rust implements FoV.
Map Memory
Open map/layer.rs. The definition of Layer is extended to include a list of visible and revealed tiles. (A "visible" tile is currently in view. A "revealed" tile is one we've seen at some point, so the player knows what's there):
#![allow(unused)]
fn main() {
pub struct Layer {
    pub tiles: Vec<Tile>,
    pub revealed: Vec<bool>,
    pub visible: Vec<bool>,
    pub starting_point: Point,
}
}
The new function needs to be expanded to set these vectors to be false, with an entry for each map tile:
#![allow(unused)]
fn main() {
pub fn new(depth: usize, ecs: &mut World) -> Self {
    let layer = match depth {
        0 => build_entrance(ecs),
        _ => Self {
            tiles: vec![Tile::default(); TILES],
            starting_point: Point::new(WIDTH / 2, HEIGHT / 2),
            visible: vec![false; TILES],
            revealed: vec![false; TILES],
        },
    };
    layer
}
}
Add a new implemented function to clear the visible set (we'll do this each time we calculate field-of-view, so tiles don't remain visible from our previous position):
#![allow(unused)]
fn main() {
impl Layer {
    ...

    pub fn clear_visible(&mut self) {
        self.visible.iter_mut().for_each(|b| *b = false);
    }
}
Add a FoV Component
Create a new file, src/components/fov.rs and add the following to it:
#![allow(unused)]
fn main() {
use std::collections::HashSet;

use bracket_lib::prelude::Point;

pub struct FieldOfView {
    pub radius: i32,
    pub visible_tiles: HashSet<Point>
}
}
Now add mod fov; pub use fov::*; to src/components/mod.rs to make the component available.
Adding FoV to the Player Entity
In main.rs, find the part where you push the player entity. Add a new FieldOfView component, making the player construction look like this:
#![allow(unused)]
fn main() {
// Spawn the player
self.ecs.push((
    Player {},
    Position::with_pt(self.map.get_current().starting_point, 0),
    Glyph {
        glyph: to_cp437('@'),
        color: ColorPair::new(YELLOW, BLACK),
    },
    Description("Everybody's favorite Bracket Corp SecBot".to_string()),
    FieldOfView{radius: 20, visible_tiles: HashSet::new()},
));
}
We're giving the player a very large view range. That will be useful later on, I promise. At the top of the file, add a line to include the HashSet type:
#![allow(unused)]
fn main() {
use std::collections::HashSet;
}
Updating the Player Game Logic
Open game/player.rs. After the call to tile_triggers (and before returning new_state) add:
#![allow(unused)]
fn main() {
update_fov(&new_state, ecs, map);
}
Now add an update_fov function to the module:
#![allow(unused)]
fn main() {
fn update_fov(new_state: &NewState, ecs: &mut World, map: &mut Map) {
    if *new_state != NewState::Wait {
        return;
    }

    let mut query = <(&Player, &Position, &mut FieldOfView)>::query();
    query.for_each_mut(ecs, |(_, pos, fov)| {
        fov.visible_tiles = field_of_view_set(pos.pt, fov.radius, map.get_current());
        let current_layer = map.get_current_mut();
        current_layer.clear_visible();
        fov.visible_tiles.iter().for_each(|pt| {
            let idx = current_layer.point2d_to_index(*pt);
            current_layer.revealed[idx] = true;
            current_layer.visible[idx] = true;
        });
    });

}
}
Once again, if we aren't waiting - we bail out. Then we query entities with a Player, Position and FieldOfView component (which should be one entity). We call field_of_view_set to build the visibility list, and store it in the FieldOfView component's visible_tiles list. We clear the existing visible list. Then we iterate the set, making every tile we can see both visible and revealed.
Render the FoV
Still in map/layer.rs, we amend the render function to not display tiles we have never seen - and grey out tiles we remember but can't currently see:
#![allow(unused)]
fn main() {
pub fn render(&self, ctx: &mut BTerm) {
    let mut y = 0;
    let mut idx = 0;
    while y < HEIGHT {
        for x in 0..WIDTH {
            if self.visible[idx] {
                let t = &self.tiles[idx];
                ctx.set(x + 1, y + 1, t.color.fg, t.color.bg, t.glyph);
            } else if self.revealed[idx] {
                let t = &self.tiles[idx];
                ctx.set(x + 1, y + 1, t.color.fg.to_greyscale(), t.color.bg, t.glyph);
            }
            idx += 1;
        }
        y += 1;
    }
}
}
Give it a Spin
If you run the program now, you can peek out of the windows.
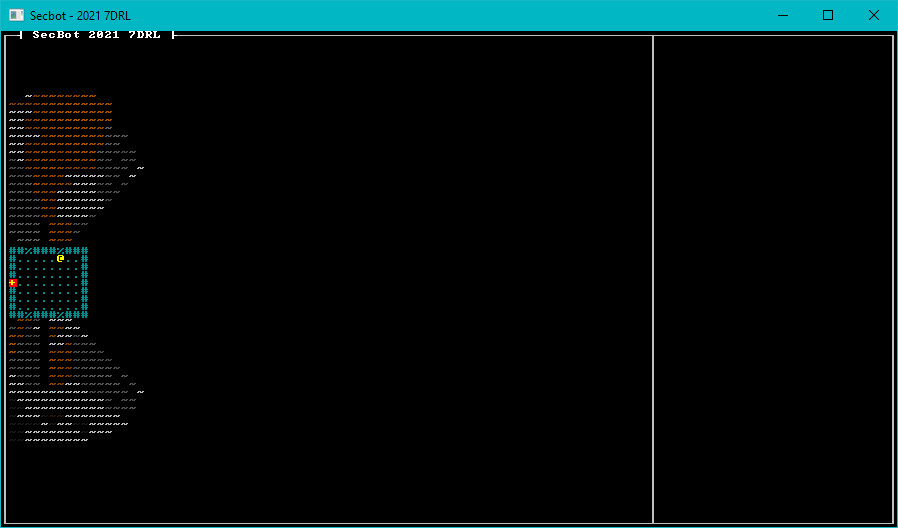
You can find the source code for
hello_asteroidhere.
Up Next
Next, we're going to add some basic buildings to the mining colony.
This tutorial is free and open source, and all code uses the MIT license - so you are free to do with it as you like. My hope is that you will enjoy the tutorial, and make great games!
If you enjoy this and would like me to keep writing, please consider supporting my Patreon.
Building the Colony
I had some definite ideas for how I wanted the mining colony to work. I wanted it to look like modules, bolted together - separated by bulkheads and walls. That made sense to me: you're on a hostile world, you build your base to withstand sections failing. That also implied that I didn't want corridors everywhere - why build fragile umbilicals between buildings? That seems like it's asking for trouble.
Introducing TileType
At this point, I realized that I needed a little more information about my tiles. A tile might be alien landscape, but checking to see if its glyph was a ~ symbol is unwieldy. I might want walls to have different appearances - but they are still a wall. So in map/tile.rs I added a new enum:
#![allow(unused)]
fn main() {
#[derive(Clone, Copy, PartialEq, Eq, Debug)]
pub enum TileType {
    Empty,
    Capsule,
    Wall,
    Floor,
    Outside,
}
}
I extended the Tile type to include it:
#![allow(unused)]
fn main() {
#[derive(Clone)]
pub struct Tile {
    pub glyph: FontCharType,
    pub color: ColorPair,
    pub blocked: bool,
    pub opaque: bool,
    pub tile_type: TileType,
}
}
I then went through every tile constructor ensuring that they set a TileType:
#![allow(unused)]
fn main() {
impl Tile {
    pub fn default() -> Self {
        Self {
            glyph: to_cp437('.'),
            color: ColorPair::new(GREY, BLACK),
            blocked: false,
            opaque: false,
            tile_type: TileType::Floor,
        }
    }

    pub fn empty() -> Self {
        Self {
            glyph: to_cp437('#'),
            color: ColorPair::new(DARK_GRAY, BLACK),
            blocked: true,
            opaque: false,
            tile_type: TileType::Empty,
        }
    }

    pub fn floor() -> Self {
        Self {
            glyph: to_cp437('.'),
            color: ColorPair::new(DARK_GRAY, BLACK),
            blocked: false,
            opaque: false,
            tile_type: TileType::Floor,
        }
    }

    pub fn wall() -> Self {
        Self {
            glyph: to_cp437('#'),
            color: ColorPair::new(DARK_GRAY, BLACK),
            blocked: true,
            opaque: true,
            tile_type: TileType::Wall,
        }
    }

    pub fn window() -> Self {
        Self {
            glyph: to_cp437('#'),
            color: ColorPair::new(DARK_CYAN, BLACK),
            blocked: true,
            opaque: false,
            tile_type: TileType::Wall,
        }
    }

    pub fn capsule_floor() -> Self {
        Self {
            glyph: to_cp437('.'),
            color: ColorPair::new(DARK_CYAN, BLACK),
            blocked: false,
            opaque: false,
            tile_type: TileType::Capsule,
        }
    }

    pub fn capsule_wall() -> Self {
        Self {
            glyph: to_cp437('#'),
            color: ColorPair::new(DARK_CYAN, BLACK),
            blocked: true,
            opaque: true,
            tile_type: TileType::Capsule,
        }
    }

    pub fn capsule_window() -> Self {
        Self {
            glyph: to_cp437('%'),
            color: ColorPair::new(DARK_CYAN, BLACK),
            blocked: true,
            opaque: false,
            tile_type: TileType::Capsule,
        }
    }

    pub fn game_over() -> Self {
        Self {
            glyph: to_cp437('+'),
            color: ColorPair::new(YELLOW, RED),
            blocked: false,
            opaque: false,
            tile_type: TileType::Capsule,
        }
    }

    pub fn alien_landscape(height: f32) -> Self {
        let fg = if height < 0.0 {
            if height < -0.25 {
                (40, 20, 0)
            } else {
                GRAY
            }
        } else {
            (
                (height * 128.0) as u8 + 128,
                ((height * 128.0) as u8 + 128) / 2,
                0,
            )
        };

        Self {
            glyph: to_cp437('~'),
            color: ColorPair::new(fg, BLACK),
            blocked: height <= -0.255,
            opaque: false,
            tile_type: TileType::Outside,
        }
    }
}
}
Add a use crate::map::TileType; to map/layerbuilder/entrance.rs to import the type. You'll need it later.
Adding a door into the colony
The game is going to have a lot of doors, but I wanted them to be low-friction for the player. Walk into a door, and it opens. Some games add a separate "open" command - and while that's realistic, I didn't want to add to the complexity of the game with separate commands.
Door Components
The first step was to designate a new tag component, the Door. Open components/tags.rs and add a single-line structure:
#![allow(unused)]
fn main() {
pub struct Door;
}
You're already including tags, so no need to add any mod or use statements. Save yourself a little pain, however. Add use crate::components::* to the top of layerbuilder/entrance.rs. You'll use a lot of components there.
Storing Doors
In map/layer.rs, add another vector to the layer:
#![allow(unused)]
fn main() {
pub struct Layer {
    pub tiles: Vec<Tile>,
    pub revealed: Vec<bool>,
    pub visible: Vec<bool>,
    pub starting_point: Point,
    pub is_door: Vec<bool>,
}
}
And don't forget to initialize it in new:
#![allow(unused)]
fn main() {
impl Layer {
    pub fn new(depth: usize, ecs: &mut World) -> Self {
        let layer = match depth {
            0 => build_entrance(ecs),
            _ => Self {
                tiles: vec![Tile::default(); TILES],
                starting_point: Point::new(WIDTH / 2, HEIGHT / 2),
                visible: vec![false; TILES],
                revealed: vec![false; TILES],
                is_door: vec![false; TILES],
            },
        };
        layer
    }
}
I went with this approach so I could render doors differently. With hindsight, it wasn't the greatest idea. This gets changed around a bit on a later develoment day.
Building a Door
Open map/layerbuilder/entrance.rs and add a new function:
#![allow(unused)]
fn main() {
fn add_door(map: &mut Layer, ecs: &mut World, pt: Point) {
    let idx = map.point2d_to_index(pt);
    ecs.push((
        Position::with_pt(pt, 0),
        Description("A heavy, steel door.".to_string()),
        Glyph {
            glyph: to_cp437('+'),
            color: ColorPair::new(CYAN, BLACK),
        },
        Door {},
    ));
    map.tiles[idx] = Tile::wall();
    map.is_door[idx] = true;
}
}
This is nice and generic. It sets the door tile to be a wall, and then adds a component with a + glyph and a description to represent the door.
The add_docking_capsule function needs to always add a door into the main colony. Before map.starting_point = , add the following:
#![allow(unused)]
fn main() {
// Start adding in building complex features
add_door(map, ecs, Point::new(RIGHT + 1, MIDDLE));
}
If you play the game now, you'll see a door - but you can't open it.
Opening Doors
When the player tries to move onto a door, we want it to transform into a floor - the door is now permanently open. I imagine that SecBot pries it open and leaves a mess. Open game/player.rs and replace the try_move function:
#![allow(unused)]
fn main() {
// At the top
use legion::systems::CommandBuffer;
use std::collections::HashSet;

// The function
fn try_move(ecs: &mut World, map: &mut Map, delta_x: i32, delta_y: i32) -> NewState {
    let mut find_player = <(&Player, &mut Position)>::query();
    let mut result = NewState::Wait;
    let mut doors_to_delete = HashSet::new();
    find_player.iter_mut(ecs).for_each(|(_, pos)| {
        let new_pos = pos.pt + Point::new(delta_x, delta_y);
        let new_idx = map.get_current().point2d_to_index(new_pos);
        if !map.get_current().tiles[new_idx].blocked {
            pos.pt = new_pos;
            result = NewState::Enemy;
        } else if map.get_current().is_door[new_idx] {
            map.get_current_mut().is_door[new_idx] = false;
            map.get_current_mut().tiles[new_idx].blocked = false;
            map.get_current_mut().tiles[new_idx].opaque = false;
            map.get_current_mut().tiles[new_idx].glyph = to_cp437('.');
            doors_to_delete.insert(map.get_current().index_to_point2d(new_idx));
        }
    });

    if !doors_to_delete.is_empty() {
        let mut commands = CommandBuffer::new(ecs);
        let mut q = <(Entity, &Position, &Door)>::query();
        q.for_each(ecs, |(entity, pos, _)| {
            if pos.layer == map.current_layer as u32 && doors_to_delete.contains(&pos.pt) {
                commands.remove(*entity);
            }
        });
        commands.flush(ecs);
    }

    result
}
}
The movement portion remains the same, but we create a new vector named doors_to_delete. If a tile is blocked, we check to see if it is a door. If it is, we transform the tile into a floor and insert the door's location into doors_to_delete. Then at the end of the function, if doors_to_delete isn't empty we iterate it - finding entities that match the door's location (and are doors) and delete them.
I used Legion's CommandBuffer system for this. Hands-on Rust teaches you to use them. They provide a means to queue up changes to the ECS and apply them all at once. It also nicely works around borrow checker issues - you aren't trying to use the ECS more than once at a time, so it's borrow-checker friendly.
You can now open the door into the wider world - but still not go anywhere, because there is nowhere go go.
Building the base's entryway
I started the base's entry way system (in map/layerbuilder/entrance.rs) with a pattern that should be familiar to Hands-on Rust readers: a list of rooms. Immediately after the call to add_door, I added the following function call:
#![allow(unused)]
fn main() {
let start_room = add_entryway(map, ecs, Point::new(RIGHT + 1, MIDDLE));
}
Then at the bottom of the file, I added a the add_entryway function:
#![allow(unused)]
fn main() {
fn add_entryway(map: &mut Layer, _ecs: &mut World, entrance: Point) -> Rect {
    let room = Rect::with_size(entrance.x + 1, entrance.y - 5, 20, 10);
    fill_room(map, &room);

    room
}
}
This in turn calls a function called fill_room - so I added that, too:
#![allow(unused)]
fn main() {
// Function
fn fill_room(map: &mut Layer, room: &Rect) {
    room.for_each(|pt| {
        if map.in_bounds(pt) {
            let idx = map.point2d_to_index(pt);
            map.tiles[idx] = Tile::floor();
        }
    });
    for x in i32::max(0, room.x1 - 1)..=i32::min(WIDTH as i32 - 1, room.x2 + 1) {
        try_wall(map, Point::new(x, room.y1 - 1));
        try_wall(map, Point::new(x, room.y2 + 1));
    }
    for y in i32::max(room.y1, 0)..=i32::min(room.y2, HEIGHT as i32 - 1) {
        try_wall(map, Point::new(room.x1 - 1, y));
        try_wall(map, Point::new(room.x2 + 1, y));
    }
}
}
The fill_room function sets every tile inside the rectangle representing the room to be a floor, and then sets every tile surrounding the room to be a wall. I didn't want to overrwrite existing doors - or write beyond the bounds of the map, so I added a try_wall function:
#![allow(unused)]
fn main() {
fn try_wall(map: &mut Layer, pt: Point) {
    if map.in_bounds(pt) {
        let idx = map.point2d_to_index(pt);
        if !map.is_door[idx] {
            map.tiles[idx] = Tile::wall();
        }
    }
}
}
If the wall point is within the bounds of the map, and isn't a door - it places a wall.
Running the game now presents a usable door, leading into a boring rectangular room. It's a start.
Just Add Rooms
Going back to my add_entryway call, I then created a list of existing rooms:
#![allow(unused)]
fn main() {
let mut rooms = vec![start_room];
}
I'd like to keep going until I have 24 rooms. (Note that I didn't keep that number - its too many). So I added a loop immediately afterwards:
#![allow(unused)]
fn main() {
 while rooms.len() < 24 {
    try_random_room(map, ecs, &mut rooms);
}
}
Finally, I called a new function called edge_filler to ensure that there are no unintended ways to leave the map:
#![allow(unused)]
fn main() {
// Fill in the edges
edge_filler(map);
}
Add this to the end of entrance.rs:
#![allow(unused)]
fn main() {
fn edge_filler(map: &mut Layer) {
    for y in 0..HEIGHT {
        let idx = map.point2d_to_index(Point::new(0, y));
        if map.tiles[idx].tile_type == TileType::Floor {
            map.tiles[idx] = Tile::wall();
        }
        let idx = map.point2d_to_index(Point::new(WIDTH - 1, y));
        if map.tiles[idx].tile_type == TileType::Floor {
            map.tiles[idx] = Tile::wall();
        }
    }
    for x in 0..WIDTH {
        let idx = map.point2d_to_index(Point::new(x, 0));
        if map.tiles[idx].tile_type == TileType::Floor {
            map.tiles[idx] = Tile::wall();
        }
        let idx = map.point2d_to_index(Point::new(x, HEIGHT - 1));
        if map.tiles[idx].tile_type == TileType::Floor {
            map.tiles[idx] = Tile::wall();
        }
    }
}
}
Add Some Rooms
Now that we're calling try_random_room, we need to write it. Add the following overly-large function to map/layerbuilder/entrance.rs:
#![allow(unused)]
fn main() {
fn try_random_room(map: &mut Layer, ecs: &mut World, rooms: &mut Vec<Rect>) {
    let mut rng_lock = crate::RNG.lock();
    let rng = rng_lock.as_mut().unwrap();
    if let Some(parent_room) = rng.random_slice_entry(&rooms) {
        let x;
        let y;
        let next_x;
        let next_y;

        // Decide where to consider an exit
        if rng.range(0, 2) == 0 {
            // Take from the horizontal walls
            x = parent_room.x1 + rng.range(0, parent_room.width() + 1);
            next_x = x;
            if rng.range(0, 2) == 0 {
                // Take from the north side
                y = parent_room.y1 - 1;
                next_y = y - 1;
            } else {
                // Take from the south side
                y = parent_room.y2 + 1;
                next_y = y + 1;
            }
        } else {
            // Take from the vertical walls
            y = parent_room.y1 + rng.range(0, parent_room.height() + 1);
            next_y = y;
            if rng.range(0, 2) == 0 {
                x = parent_room.x1 - 1;
                next_x = x - 1;
            } else {
                x = parent_room.x2 + 1;
                next_x = x + 1;
            }
        }
        let dx = next_x - x;
        let dy = next_y - y;

        // Try to place it
        let next_pt = Point::new(next_x, next_y);
        if !map.in_bounds(next_pt) {
            return;
        }
        let next_idx = map.point2d_to_index(next_pt);
        if map.tiles[next_idx].tile_type == TileType::Outside {
            let new_room = if dx == 1 {
                Rect::with_size(x + 1, y, rng.range(4, 10), rng.range(3, 6))
            } else if dy == 1 {
                Rect::with_size(x, next_y, rng.range(3, 6), rng.range(4, 10))
            } else if dx == -1 {
                let w = 5;
                Rect::with_size(x - w, y, rng.range(4, 10), rng.range(3, 6))
            } else {
                let h = 5;
                Rect::with_size(x, y - h, rng.range(3, 6), rng.range(4, 10))
            };

            let mut can_add = true;
            new_room.for_each(|p| {
                if map.in_bounds(p) {
                    let idx = map.point2d_to_index(p);
                    if map.tiles[idx].tile_type != TileType::Outside {
                        can_add = false;
                    }
                } else {
                    can_add = false;
                }
            });

            if can_add {
                add_door(map, ecs, Point::new(x, y));
                fill_room(map, &new_room);
                rooms.push(new_room);
            }
        }
    }
}
}
It's not pretty: I was writing on a time deadline, and dinner was calling my name! The algorithm works as follows:
- Obtain the RNG.
- Pick a random room from the rooms list, using
random_sliceto pick a vector entry at random. This is the parent room. - Flip some coins to determine to which wall we will try and add a door. It picks one of the four walls, and sets
xandyto a random wall tile that might be a door candidate. It also setsnext_xandnext_yto the location you'd reach if you went through the door. So if we're adding to the east, it's one tile east of the door candidate. If we were going north, it would be one tile north of the door candidate. - If the
next_x/next_ylocation is out of the map, bail out. - Check that the new tile is outside (unclaimed landscape).
- Build a
Rectrepresenting where we'd like to put the new room. This will continue in the direction we are traveling, and aim to be longer in the axis we are traveling than it is wide. - Check that the entirety of the new rectangle is outside. If it isn't bail out.
- If it's addable, create the door and push the new room to the rooms list.
As with all procedural generation, I had to run this through quite a few iterations before I was happy with it.
Adding some Windows
I wanted more windows onto the surface - so the colonists could enjoy the view, too. After the call to edge_filler in map/layerbuilder/entrance.rs, add another function call:
#![allow(unused)]
fn main() {
add_windows(map);
}
The rules for adding a window are simple: it must be an exterior wall that isn't a door, and one adjacent tile must be on the asteroid's surface (rather than inside a room or bulkhead). Not every tile that meets these criteria should get a window. Add the following function to your layerbuilder/entrance.rs file:
#![allow(unused)]
fn main() {
fn add_windows(map: &mut Layer) {
    let mut rng_lock = crate::RNG.lock();
    let rng = rng_lock.as_mut().unwrap();

    for y in 1..HEIGHT-1 {
        for x in 1..WIDTH-1 {
            let pt = Point::new(x, y);
            let idx = map.point2d_to_index(pt);
            if map.tiles[idx].tile_type == TileType::Wall {
                if map.tiles[idx-1].tile_type == TileType::Outside ||
                    map.tiles[idx+1].tile_type == TileType::Outside ||
                    map.tiles[idx-WIDTH].tile_type == TileType::Outside ||
                    map.tiles[idx-WIDTH].tile_type == TileType::Outside
                {
                    if rng.range(0, 10) == 0 {
                        map.tiles[idx] = Tile::window();
                    }
                }
            }
        }
    }
}
}
This iterates every tile, and determines if its elible for a window. If it is, it rolls a dice - and with a 1:10 chance might add a window by setting the tile type to Tile::window().
Add an exit to the next layer
I wanted one room in the colony to contain a staircase to the next level. I didn't really mind where it appeared; rescuing colonists gives you a reason to explore the whole level anyway. The first thing to do was to support down stairs as a tile type. In map/tile.rs, modify the TileType enum:
#![allow(unused)]
fn main() {
#[derive(Clone, Copy, PartialEq, Eq, Debug)]
pub enum TileType {
    Empty,
    Capsule,
    Wall,
    Floor,
    Outside,
    StairsDown,
}
}
I also added a constructor type to Tile's implementation:
#![allow(unused)]
fn main() {
pub fn stairs_down() -> Self {
    Self {
        glyph: to_cp437('>'),
        color: ColorPair::new(YELLOW, BLACK),
        blocked: false,
        opaque: false,
        tile_type: TileType::StairsDown,
    }
}
}
Now open layerbuilder/entrance.rs. After the call to edge_filler, add another function call:
#![allow(unused)]
fn main() {
add_exit(&mut rooms, map, ecs);
}
As you probably guessed, you need to insert add_exit to the end of your entrance.rs file:
#![allow(unused)]
fn main() {
fn add_exit(rooms: &mut Vec<Rect>, map: &mut Layer, ecs: &mut World) {
    let mut rng_lock = crate::RNG.lock();
    let rng = rng_lock.as_mut().unwrap();
    let room = rng.random_slice_entry(&rooms).unwrap();
    let exit_location = room.center();
    let idx = map.point2d_to_index(exit_location);
    map.tiles[idx] = Tile::stairs_down();

    ecs.push((
        Position::with_pt(exit_location, 0),
        Description("Stairs further into the complex".to_string()),
    ));
}
}
This randomly picks a room from the rooms list, finds it middle point and turns that tile into an exit.
Giving Windows Tooltips
I decided that windows should include a snarky comment about the wisdom of adding windows to a bulkhead structure on a hostile world. Amend the add_windows function as follows:
#![allow(unused)]
fn main() {
if rng.range(0, 10) == 0 {
    map.tiles[idx] = Tile::window();
    ecs.push((
        Position::with_pt(Point::new(x, y), 0),
        Description("A window. Not sure who thought that was a good idea.".to_string())
    ));
}
}
You also need to amend the function signature to read:
#![allow(unused)]
fn main() {
fn add_windows(map: &mut Layer, ecs: &mut World) {
}
And change the call to the function to include the new parameter:
#![allow(unused)]
fn main() {
add_windows(map, ecs);
}
Escape pod windows should have comments, too. In the add_docking_capsule function, add the following code (right after you add the last capsule_window):
#![allow(unused)]
fn main() {
ecs.push((
    Position::with_pt(Point::new(x_middle - 2, TOP - 1), 0),
    Description("A window. It doesn't look fun outside.".to_string())
));
ecs.push((
    Position::with_pt(Point::new(x_middle - 2, BOTTOM + 1), 0),
    Description("A window. It doesn't look fun outside.".to_string())
));
ecs.push((
    Position::with_pt(Point::new(x_middle + 2, TOP - 1), 0),
    Description("A window. It doesn't look fun outside.".to_string())
));
ecs.push((
    Position::with_pt(Point::new(x_middle + 2, BOTTOM + 1), 0),
    Description("A window. It doesn't look fun outside.".to_string())
));
}
Bug-Time: Overly Revealing Tooltips
Playing at this point revealed a bug. Tooltips were showing me more than they should. I could hover the mouse around and learn about the base without visiting it!
Open render/tooltips.rs and find the if pos.layer == ... part. Amend that to read:
#![allow(unused)]
fn main() {
let mut query = <(&Position, &Description)>::query();
query.for_each(ecs, |(pos, desc)| {
    if pos.layer == map.current_layer as u32 && pos.pt.x == map_x && pos.pt.y == map_y {
        let idx = map.get_current().point2d_to_index(pos.pt);
        if map.get_current().visible[idx] {
            lines.push(desc.0.clone());
        }
    }
});
}
You will no longer be able to spy on the rest of the level without seeing it.
Another Bug: Rendering Invisible Entities
Open up render/mod.rs and replace render_glyphs:
#![allow(unused)]
fn main() {
pub fn render_glyphs(ctx: &mut BTerm, ecs: &World, map: &Map) {
    let mut query = <(&Position, &Glyph)>::query();
    query.for_each(ecs, |(pos, glyph)| {
        if pos.layer == map.current_layer as u32 {
            let idx = map.get_current().point2d_to_index(pos.pt);
            if map.get_current().visible[idx] {
                ctx.set(
                    pos.pt.x + 1,
                    pos.pt.y + 1,
                    glyph.color.fg,
                    glyph.color.bg,
                    glyph.glyph,
                );
            }
        }
    });
}
}
That's better! We no longer show all the entities on the map when we land.
Give it a Spin
If you run the program now, you can wander around a base and peek out of windows.
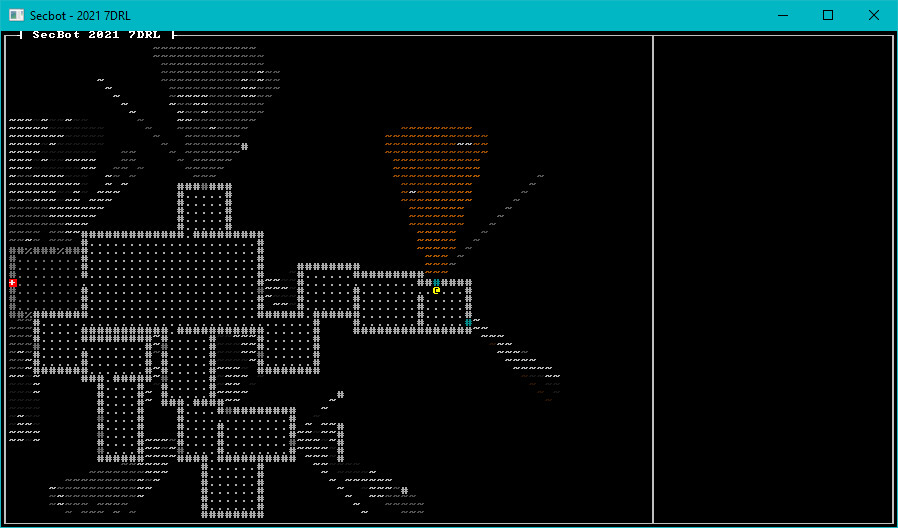
You can find the source code for
hello_colonyhere.
Onwards!
That concluded my first day of development. I was ready for a big nap, some food and family time. The next part will walk you through the second day of jamming.
This tutorial is free and open source, and all code uses the MIT license - so you are free to do with it as you like. My hope is that you will enjoy the tutorial, and make great games!
If you enjoy this and would like me to keep writing, please consider supporting my Patreon.
Day Two
I started day-two all bright-eyed and bushy tailed. I even achieved most of my day's goals, but real-life kept intervening. My day-job had some network issues, and fixing them became my priority #1. That happens, and it's part of the downside of jams: you are dedicating time on top of eveything else in your life.
Still, I achieved enough on day two to call it a success.
This tutorial is free and open source, and all code uses the MIT license - so you are free to do with it as you like. My hope is that you will enjoy the tutorial, and make great games!
If you enjoy this and would like me to keep writing, please consider supporting my Patreon.
Adding a colonist
A central theme of SecBot is locating the colonists who live in and around the mining facility. That makes adding them a top priority! So I started day #2 by trying to do just that.
Create a Colonist Tag
There needs to be a way to indicate that an Entity is a Colonist. The easy way to accomplish this is with another tag component - a component that doesn't contain data, but just indicates a flag is set by existing.
Open components/tag.rs and add the following tag component:
#![allow(unused)]
fn main() {
pub struct Colonist;
}
Spawning Colonists
We're going to be adding colonists all over the map. We'll eventually have some variation in colonists, too. Let's create a new module to hold the colonist spawning logic. Create a new file: src/map/layerbuilder/colonists.rs. Paste the following into it:
#![allow(unused)]
fn main() {
use bracket_lib::prelude::*;
use legion::*;
use crate::components::*;

pub fn spawn_random_colonist(ecs: &mut World, location: Point, layer: u32) {
    ecs.push((
        Colonist{},
        Position::with_pt(location, layer),
        Glyph{ glyph: to_cp437('☺'), color: ColorPair::new( LIME_GREEN, BLACK ) },
        Description("A squishy friend. You are here to rescue your squishies.".to_string())
    ));
}
}
This should look familar. It pushes a new entity, and gives them a Colonist tag as well as a Position (where they are on the map), a Glyph (how to render them), and a Description for tool-tips.
Activate the module and make it available by adding mod colonists; use colonists::*; to src/map/layerbuilder/mod.rs.
Adding the First Colonist
Open layerbuilder/entrance.rs. Add an import for the spawn_random_colonist function, modifying the previous use super::all_space import.
#![allow(unused)]
fn main() {
use super::{all_space, spawn_random_colonist};
}
Now scroll down to where we call add_exit in the add_docking_capsule function. Immediately after add_exit(...), add the following:
#![allow(unused)]
fn main() {
// Populate rooms
populate_rooms(&mut rooms, map, ecs);
}
Then, at the end of entrance.rs add the following function:
#![allow(unused)]
fn main() {
fn populate_rooms(rooms: &mut Vec<Rect>, map: &mut Layer, ecs: &mut World) {
    // The first room always contains a single colonist
    spawn_random_colonist(ecs, rooms[0].center(), 0);

    // Each room after that can be random
}
}
Give it a Go
The entry room now contains a colonist! They don't do anything other than exist and have a tool-tip, but it's good to see that the entity/component system we setup is working.
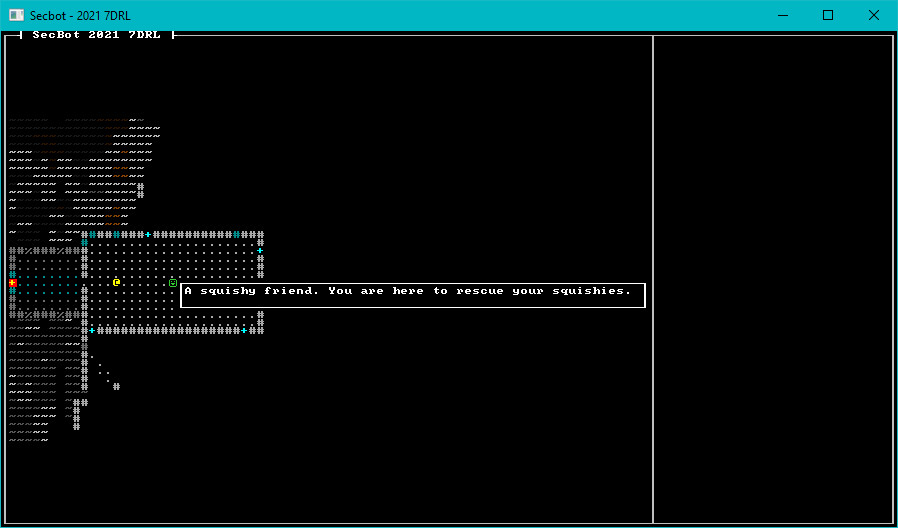
You can find the source code for
hello_colonisthere.
Up Next
In the next section, we'll be adding more colonists - and adding some UI to count them, and categorize their status.
This tutorial is free and open source, and all code uses the MIT license - so you are free to do with it as you like. My hope is that you will enjoy the tutorial, and make great games!
If you enjoy this and would like me to keep writing, please consider supporting my Patreon.
Tracking Colonists
It would help the player to know how many colonists need rescue (as well as how many have been rescued, found dead, etc.). It would also help to have more than one colonist - otherwise, it's a rather easy game.
Colonist Status
Note that I ended up changing this a little towards the end. It'll serve for now, but this isn't final code.
Create a new file: components/colonist_status.md. In this file, we'll add an enum to act as the colonists' current status. (You can add enum types as components in Legion, that's nifty!) The status looks like this:
#![allow(unused)]
fn main() {
#[derive(Debug, Clone, Copy, PartialEq)]
pub enum ColonistStatus {
    Unknown,
    Alive,
    StartedDead,
    DiedAfterStart,
    Rescued
}
}
In components/mod.rs add mod colonist_status; and pub use colonist_status::*; to activate the new component type.
Extending Colonists
Open up map/layerbuilder/colonists.rs. In the list of components that you add to the colonist, add a new one:
#![allow(unused)]
fn main() {
ecs.push((
    Colonist{},
    Position::with_pt(location, layer),
    Glyph{ glyph: to_cp437('☺'), color: ColorPair::new( LIME_GREEN, BLACK ) },
    Description("A squishy friend. You are here to rescue your squishies.".to_string())
    ColonistStatus::Unknown,
));
}
This marks the colonist as being "unknown" - you haven't found them yet, and aren't sure of their status. However, for the purpose of totals - they exist.
Spawn More Colonists
Open up map/layerbuilder/entrance.rs and go to the populate_rooms function you added in the previous section. Extend it to add colonists to roughly 1 in 5 rooms:
#![allow(unused)]
fn main() {
fn populate_rooms(rooms: &Vec<Rect>, map: &mut Layer, ecs: &mut World) {
    let mut rng_lock = crate::RNG.lock();
    let rng = rng_lock.as_mut().unwrap();

    // The first room always contains a single colonist
    spawn_random_colonist(ecs, rooms[0].center(), 0);

    // Each room after that can be random. This is an initial, very boring spawn to get
    // the colonist functionality going.
    rooms
        .iter()
        .skip(1)
        .for_each(|r| {
            if rng.range(0, 5) == 0 {
                spawn_random_colonist(ecs, r.center(), 0);
            }
        }
    );
}
}
If you play the game now, you'll find colonists all over the place.
An Initial Colonist UI
Open main.rs, and in the tick function find where you call render_ui_skeleton. Add another call beneath it:
#![allow(unused)]
fn main() {
render::render_colonist_panel(ctx, &self.ecs, self.map.current_layer);
}
Now add a new file to src/render, named src/render/colonist_panel.rs. The file contains the following code:
#![allow(unused)]
fn main() {
use bracket_lib::prelude::*;
use legion::*;
use crate::components::{Colonist, Position, ColonistStatus};

use super::WIDTH;

pub fn render_colonist_panel(ctx: &mut BTerm, ecs: &World, current_layer: usize) {
    let mut query = <(&Colonist, &Position, &ColonistStatus)>::query();
    let mut total_colonists = 0;
    let mut colonists_on_layer = 0;
    let mut located_alive = 0;
    let mut located_dead = 0;
    let mut died_in_rescue = 0;
    let mut rescued = 0;

    query.for_each(ecs, |(_, pos, status)| {
        total_colonists += 1;
        if pos.layer == current_layer as u32 && *status != ColonistStatus::Rescued {
            colonists_on_layer += 1;
        }
        match *status {
            ColonistStatus::Alive => located_alive += 1,
            ColonistStatus::StartedDead => located_dead += 1,
            ColonistStatus::DiedAfterStart => died_in_rescue += 1,
            ColonistStatus::Rescued => rescued += 1,
            _ => {}
        }
    });

    let x = WIDTH + 3;
    let mut y = 2;
    ctx.print_color(x, y, LIME_GREEN, BLACK, format!("Total Colonists   : {}", total_colonists));
    y += 1;
    ctx.print_color(x, y, LIME_GREEN, BLACK, format!("   (On this level): {}", colonists_on_layer));
    y += 1;
    ctx.print_color(x, y, LIME_GREEN, BLACK, format!(" (Located & Alive): {}", located_alive));
    y += 1;
    ctx.print_color(x, y, HOT_PINK, BLACK,   format!("  (Located & Dead): {}", located_dead));
    y += 1;
    ctx.print_color(x, y, RED, BLACK,        format!("  (Died in Rescue): {}", died_in_rescue));
    y += 1;
    ctx.print_color(x, y, GREEN, BLACK,      format!("         (Rescued): {}", rescued));
}
}
In src/render/mod.rs add pub mod colonist_panel; pub use colonist_panel::*; to include it in your project.
This function works as follows:
- Create a query that finds entities with
Colonist,PositionandColonistStatus. - Set several variables to 0.
- Iterate the query.
- Add one to
total_colonists- the colonist counts, regardless of their status. - If the colonist is on the current map layer, add one to
colonists_on_layer. - Match on the status, incrementing
located_alive,located_dead,died_in_rescueorrescueddepending upon the colonist's status.
- Add one to
- Set
xto the left-hand side of the UI panel (to the right of the map).let x = WIDTH + 3. - Print status lines for each of the variables we have calculated.
Try it Out
Run the program now, and there are colonists all over the place! The UI shows the beginnings of a real colonist counter. You can't actually find or save anyone yet, but the counter is in place. That's a good start.
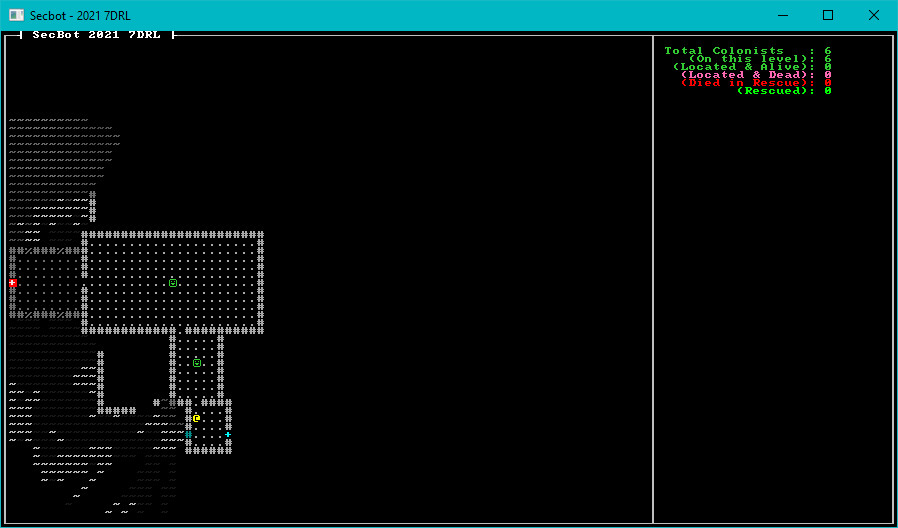
You can find the source code for
hello_colonistshere.
Up Next
In the next section, we'll be adding more colonists - and adding some UI to count them, and categorize their status.
This tutorial is free and open source, and all code uses the MIT license - so you are free to do with it as you like. My hope is that you will enjoy the tutorial, and make great games!
If you enjoy this and would like me to keep writing, please consider supporting my Patreon.
Finding Colonists
Having colonists on the map is a great start. Being able to find them (and adjust the counter to show that you've located them) would be a logical next step.
We want the player to spot the colonist, and mark them as found. We'll be building a more complicated system in a bit, but this serves as a good start. Open game/player.rs and amend update_fov:
#![allow(unused)]
fn main() {
fn update_fov(new_state: &NewState, ecs: &mut World, map: &mut Map) {
    if *new_state != NewState::Wait {
        return;
    }

    let mut visible = None;

    // Build the player FOV
    let mut query = <(&Player, &Position, &mut FieldOfView)>::query();
    query.for_each_mut(ecs, |(_, pos, fov)| {
        fov.visible_tiles = field_of_view_set(pos.pt, fov.radius, map.get_current());
        let current_layer = map.get_current_mut();
        current_layer.clear_visible();
        fov.visible_tiles.iter().for_each(|pt| {
            if current_layer.in_bounds(*pt) {
                let idx = current_layer.point2d_to_index(*pt);
                current_layer.revealed[idx] = true;
                current_layer.visible[idx] = true;
            }
        });
        visible = Some(fov.visible_tiles.clone());
    });

    if let Some(vt) = visible {
        let mut colonists_on_layer = <(&Colonist, &mut ColonistStatus, &Position)>::query();
        colonists_on_layer.for_each_mut(ecs, |(_, status, pos)| {
            if pos.layer == map.current_layer as u32 &&
                vt.contains(&pos.pt)
                {
                    // TODO: All the other possibilities including being dead
                    match *status {
                        ColonistStatus::Unknown => *status = ColonistStatus::Alive,
                        _ => {}
                    }
                }
        });
    }
}
}
Whew, that's a long function. Let's go through it in steps:
- We create a new variable called
visible. It's anOption- we set it to none. - Once we've obtained the field-of-view, we set
visibletoSome(fov.visible_tiles.clone)- a copy of the visible tiles list. - If the visible tiles list has been retrieved:
- Run a query of colonists (entities with
Colonist,ColonistStatusandPosition). MarkColonistStatusas mutable - we want to be able to change it. - If the colonist is on the current layer and their position is in the visible tile set...
- Change the colonist's status to
ColonistStatus::Alive.
- Run a query of colonists (entities with
Give it a Go
That's all we need to mark colonists as "alive" when we see them. Run the program now, and when you spot a colonist your colonist located counter goes up.
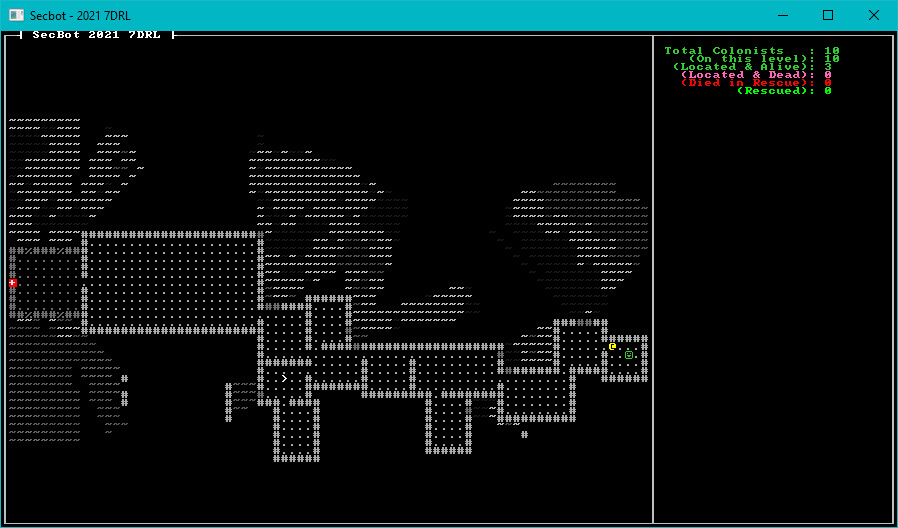
You can find the source code for
hello_colonist_finderhere.
Up Next
In the next section, we'll teach SecBot to rescue colonists.
This tutorial is free and open source, and all code uses the MIT license - so you are free to do with it as you like. My hope is that you will enjoy the tutorial, and make great games!
If you enjoy this and would like me to keep writing, please consider supporting my Patreon.
Rescuing Colonists
It's time to make the colonists do something! Now that you've found them, it's time to make them path to the exit. If they make it, they becomes "rescued" - and you can start achieving your objective of rescuing all of them.
Giving the Colonists a Path to Follow
We're going to expand the Colonist component a bit to include a navigation path to the exit.
Delete Colonist from components/tags.rs - it isn't a tag component anymore, and I like to keep things somewhat consistent. Then create components/colonist.rs and add the following expanded component:
#![allow(unused)]
fn main() {
use bracket_lib::prelude::Point;

pub struct Colonist {
    pub path: Option<Vec<usize>>,
}
}
The path is an option - by default, there won't be one. It's there for when the colonist needs to generate a path; rather than run a full path-finding query every turn, we'll have them follow whatever path they found.
Don't forget to open components/mod.rs and add mod colonist; and pub use colonist::*; to it.
Adjusting the Colonist Spawner
Since we've changed the Colonist component, we need to adjust the colonist spawner to include the new data. Open src/map/layerbuilder/colonists.rs and ament spawn_random_colonist:
#![allow(unused)]
fn main() {
pub fn spawn_random_colonist(ecs: &mut World, location: Point, layer: u32) {
    ecs.push((
        Colonist{ path: None },
        Position::with_pt(location, layer),
        Glyph{ glyph: to_cp437('☺'), color: ColorPair::new( LIME_GREEN, BLACK ) },
        Description("A squishy friend. You are here to rescue your squishies.".to_string()),
        ColonistStatus::Unknown,
    ));
}
}
All that changed there was adding path to the Colonist component. There is no path defined when the colonist spawns, so it is set to None.
Updating the Map
I realized that I needed a way to gain access to map layers other than the current one. Colonists might be trying to path to the exit, having been activated and then left to do their own thing - and they may not be on the same level as the player. Open src/map/map.rs and add two functions to the implementation of Map:
#![allow(unused)]
fn main() {
impl Map {
    ...

    pub fn get_layer(&self, layer: usize) -> &Layer {
        &self.layers[layer]
    }

    pub fn get_layer_mut(&mut self, layer: usize) -> &mut Layer {
        &mut self.layers[layer]
    }
}
}
These are pretty simple: they return a reference or mutable reference to a layer, accessed by index. Returning mutable references always requires a bit of borrow-checker care and feeding - so be careful using get_layer_mut. I was thrilled to see that this works without introducing lifetime parameters; when I got started with Rust, this would have at least one ugly 'a or similar in there. No need for that, anymore!
I also realized that I needed each layer to document the exit to which colonists should navigate. This isn't always the same as the starting point; SecBot starts a few tiles away from the actual exit on the first layer. On other layers, this will generally be the "up" staircase. Open up src/map/layer.rs and add a new field to Layer:
#![allow(unused)]
fn main() {
pub colonist_exit: Point,
}
You also need to add this to Layer's default constructor:
#![allow(unused)]
fn main() {
is_door: vec![false; TILES],
colonist_exit: Point::zero()
}
Mark the Colony Exit
Now that we support a colonist_exit on layers, we should amend the entrance level to include it. Open src/map/layerbuilder/entrance.rs. In the start of the add_game_exit function, add a new line:
#![allow(unused)]
fn main() {
fn add_game_exit(map: &mut Layer, ecs: &mut World, pt: Point) {
    let exit_idx = map.point2d_to_index(pt);
    map.tiles[exit_idx] = Tile::game_over();
    map.colonist_exit = pt;
}
This sets the layer exit to the point we chose for the exit tile.
Add a Colonist Turn Function
We've gathered a bunch of useful data/places to store it. We know where the colonist wants to go on each level. We have a place to store their path if they are traveling. So now it's time to give the colonists the beginings of some intelligence. They aren't going to be super-smart, but smart enough to make the game function.
Create a new file, src/game/colonists.rs. In src/game/mod.rs you need to tell Rust to include the new module. Immediately after pub use player::player_turn, add:
#![allow(unused)]
fn main() {
pub mod colonists;
pub use colonists::colonists_turn;
}
Now we dive into the Colonist AI. There's a lot of comments describing future functionality in this code. Add the following to your new colonists.rs file:
#![allow(unused)]
fn main() {
use crate::components::*;
use bracket_lib::prelude::{Algorithm2D, a_star_search};
use legion::{*, systems::CommandBuffer};
use crate::map::Map;

pub fn colonists_turn(ecs: &mut World, map: &mut Map) {
    let mut commands = CommandBuffer::new(ecs);
}
We start by making a CommandBuffer. These store batches of changes for Legion to make to the ECS, and apply them all when flush is called. It's both more efficient to batch changes, and avoids borrow checker issues. The borrow-checker makes it tricky to nest queries together, so as we add functionality we'll use the buffer to make changes rather than trying to finagle the borrow-checker to let us mutably access some parts of the world while we query other parts.
#![allow(unused)]
fn main() {
    let mut colonists = <(Entity, &mut Colonist, &mut ColonistStatus, &mut Position)>::query();
}
Now we add an ECS query. We want to retrieve the Entity hosting matching components, and only access entities that have a Colonist, ColonistStatus and Position component attached to them. We request mutable access to these components, so we can change them.
#![allow(unused)]
fn main() {
    colonists
        .iter_mut(ecs)
        .filter(|(_, _, status, _)| **status == ColonistStatus::Alive)
        .for_each(|(entity, colonist, status, pos)| {
}
Then we mutably iterate the colonists, and filter out any colonists who aren't in the Alive status. Then we use for_each to run code on each matching colonist.
#![allow(unused)]
fn main() {
            // Check basics like "am I dead?"

            // Am I at the exit? If so, I can change my status to "rescued"

            // Am I at a level boundary? If so, go up it!
}
I call these "aspirational comments" - they define a roadmap for where I think this system will go in the future. Its up to you if you keep these comments! I find it helpful when I'm working on important functionality to write down what I think it will do in the future.
The next step is some path-finding. It's a little convoluted, so I'll go through it in blocks.
#![allow(unused)]
fn main() {
            // Since I'm activated, I should move towards the exit
            let current_map = map.get_layer(pos.layer as usize);
}
Use the new get_layer to obtain a reference to the map layer on which the colonist is currently standing. Storing the reference once is easier to read than lots of get_layer().do_something... calls.
#![allow(unused)]
fn main() {
            if let Some(path) = &mut colonist.path {
                if !path.is_empty() {
                    let next_step = path[0];
                    path.remove(0);
                    if !current_map.tiles[next_step].blocked {
                        pos.pt = current_map.index_to_point2d(next_step);
                    }
                } else {
                    // We've arrived - status update
                    if pos.layer == 0 {
                        *status = ColonistStatus::Rescued;
                        commands.remove_component::<Glyph>(*entity);
                        commands.remove_component::<Description>(*entity);
                    }
                }
}
If the Colonist component contains a path, we check to see if it contains any steps. If the path isn't empty, then we retrieve the first entry from the path - and remove it from the path vector. If the path isn't blocked (it shouldn't be!), we set the Position component to match the next step on the path.
If that path is empty, but still exists - then there used to be a path, and we've reached the end of it. If the colonist is on layer 0, then congratulations; the colonist has been rescued. We change their status to "Rescued", and remove their Glyph and Description so they won't render or appear in a giant stack of tooltips at the exit.
If no path exists, then we need to make one:
#![allow(unused)]
fn main() {
            } else {
                let start = current_map.point2d_to_index(pos.pt);
                let end = current_map.point2d_to_index(current_map.colonist_exit);
                let finder = a_star_search(start, end, current_map);
                if finder.success {
                    colonist.path = Some(finder.steps);
                } else {
                    println!("Failed to find the path");
                }

            }
        }
    );
}
This uses A-Star pathing. We set the starting point to the colonists' current position, and the end point to the layer exit (the colonist_exit you made earlier). Running a_star_search uses bracket-lib's built-in A-star system to generate a path. It will use the get_available_exits code we built earlier to determine which ways it can go. A Star works by evaluating each exit from a position, and repeating that evaluation for each tile along the way until the exit is reached. It adds a layer of efficiency by keeping an "open list" of untried tiles and a "closed list" of places it's already evaluated - so it won't repeatedly evaluate the same tile. It also sorts the "open list" by distance from the destination; it will try the most direct paths first. It will return a very-close-to-optimal path to the final destination.
Once we've run a_star_search, if the path-finding succeeded - we set the Colonist path to the path it generated. If it failed, we print a warning to the console. This should never happen - but will warn you that you messed up your Algorithm2D, BaseMap exit-finding, or map generation.
#![allow(unused)]
fn main() {
    // Execute the command buffer
    commands.flush(ecs);
}
}
Finally, we execute any commands we queued up.
The AI code won't run until we call it, so let's add it to the turn structure.
Setup the Scheduler
Open up main.rs. Find the let new_state = match &self.turn block, and amend the EnemyTurn handler to call the colonist logic:
#![allow(unused)]
fn main() {
let new_state = match &self.turn {
    TurnState::Modal { title, body } => render::modal(ctx, title, body),
    TurnState::WaitingForInput => game::player_turn(ctx, &mut self.ecs, &mut self.map),
    TurnState::EnemyTurn => {
        game::colonists_turn(&mut self.ecs, &mut self.map);
        NewState::Wait
    }
    TurnState::GameOverLeft => render::game_over_left(ctx),
    _ => NewState::NoChange,
};
}
You are now calling the new logic.
Try it Out
Run the game now (cargo run). When you find a colonist, their status changes to Alive - and the HUD updates. The colonist then begins to path to the layer exit, and becomes Rescued when they reach it. One core game mechanic is now working!
You can find the source code for
pathing_colonists_flathere.
Next Up
Next up, we'll give the colonists soem lines to speak as you find them. This isn't strictly necessary, but it can really help build up the mood of the game.
This tutorial is free and open source, and all code uses the MIT license - so you are free to do with it as you like. My hope is that you will enjoy the tutorial, and make great games!
If you enjoy this and would like me to keep writing, please consider supporting my Patreon.
Colonist Chat
One of the core ideas when I was imaging what SecBot would look like included the colonists saying useless - but flavorful - things to you as you encounter them. Seeing a green smiley face is great; having the smiley face tell you something adds a layer of immersion at little cost to the game.
I wanted colonists to have the option of saying more than one thing, to allow them to build a narrative. I also didn't want to overdo it; speech everywhere can get cumbersome.
Adding a Dialog Component
The first step was to make a Dialog component. (You may notice in the git source that I went with "dialogue" a few times at first; I sometimes forget whether I'm speaking UK or US English. Sorry!)
Make a new file: src/components/dialog.rs. It contains a vector of strings for things the colonist can say:
#![allow(unused)]
fn main() {
pub struct Dialog {
    pub lines : Vec<String>
}
}
As with all new components, you need to add mod dialog; pub use dialog::*; to your components/mod.rs file to tell Rust that it is part of your project.
Adding a Speech Component
I also wanted to make a second component, which I named Speech. Why have both a Speech and a Dialog component? My idea was that Dialog contains everything the entity can say, and Speech indicates that they are currently saying it.
Make another new component file, src/components/speech.rs:
#![allow(unused)]
fn main() {
pub struct Speech {
    pub lifetime: u32,
}
}
A lifetime field? My idea was that speech would appear when the colonist says it, and stay on the screen for a limited period of time (so as to not obscure the map). So when a colonist starts speaking, a new entity is made with a Description holding the current line of speech - and a Speech indicating how long it should remain on the screen.
Modify the First Colonist
Let's change the first colonist we encounter (who will always be in the first room) a bit. Open src/map/layerbuilder/colonists.rs and add a new function:
#![allow(unused)]
fn main() {
pub fn spawn_first_colonist(ecs: &mut World, location: Point, layer: u32) {
    ecs.push((
        Colonist{ path: None },
        Position::with_pt(location, layer),
        Glyph{ glyph: to_cp437('☺'), color: ColorPair::new( LIME_GREEN, BLACK ) },
        Description("A squishy friend. You are here to rescue your squishies.".to_string()),
        ColonistStatus::Unknown,
        Dialog{lines: vec![
            "Bracket Corp is going to save us?".to_string(),
            "I'll head to your ship.".to_string(),
            "Comms are down, power is iffy.".to_string(),
            "No idea where the others are.".to_string()
            ]
        }
    ));
}
}
This creates a new colonist. They are mostly the same as previous colonists, but they have a big list of dialog entries. Let's also modify spawn_random_colonist to make default colonists polite:
#![allow(unused)]
fn main() {
pub fn spawn_random_colonist(ecs: &mut World, location: Point, layer: u32) {
    ecs.push((
        Colonist{ path: None },
        Position::with_pt(location, layer),
        Glyph{ glyph: to_cp437('☺'), color: ColorPair::new( LIME_GREEN, BLACK ) },
        Description("A squishy friend. You are here to rescue your squishies.".to_string()),
        ColonistStatus::Unknown,
        Dialog{lines: vec![
            "Thanks, SecBot!".to_string()
            ]
        }
    ));
}
}
Again, the only change is adding a Dialog component - in this case with a single line of available text, "Thanks, SecBot!".
Now open up src/map/layerbuilder/entrance.rs and we'll modify it to spawn the first colonist in the first room. Add a use super::colonists::* entry to make it easy to pull in colonist spawn code. In populate_rooms, change the following code:
#![allow(unused)]
fn main() {
// The first room always contains a single colonist, who must be alive.
spawn_first_colonist(ecs, rooms[0].center(), 0);
}
Spawning Speech
Now that the colonists know what to say, we need to make them speak. Open src/game/colonists.rs. You want to add Dialog to the list of queried components - which means including it in the filter and for_each calls as well:
#![allow(unused)]
fn main() {
use crate::components::*;
use bracket_lib::prelude::{Algorithm2D, a_star_search};
use legion::{*, systems::CommandBuffer};
use crate::map::Map;

pub fn colonists_turn(ecs: &mut World, map: &mut Map) {
    let mut commands = CommandBuffer::new(ecs);

    let mut colonists = <(Entity, &mut Colonist, &mut ColonistStatus, &mut Position, &mut Dialog)>::query();
    colonists
        .iter_mut(ecs)
        .filter(|(_, _, status, _, _)| **status == ColonistStatus::Alive)
        .for_each(|(entity, colonist, status, pos, dialog)| {
}
The next section is unchanged:
#![allow(unused)]
fn main() {
            // Check basics like "am I dead?"

            // Am I at the exit? If so, I can change my status to "rescued"

            // Am I at a level boundary? If so, go up it!

            // Since I'm activated, I should move towards the exit
            let current_map = map.get_layer(pos.layer as usize);
            if let Some(path) = &mut colonist.path {
                if !path.is_empty() {
                    let next_step = path[0];
                    path.remove(0);
                    if !current_map.tiles[next_step].blocked {
                        pos.pt = current_map.index_to_point2d(next_step);
                    }
                } else {
                    // We've arrived - status update
                    if pos.layer == 0 {
                        *status = ColonistStatus::Rescued;
                        commands.remove_component::<Glyph>(*entity);
                        commands.remove_component::<Description>(*entity);
                    }
                }
            } else {
                let start = current_map.point2d_to_index(pos.pt);
                let end = current_map.point2d_to_index(current_map.colonist_exit);
                let finder = a_star_search(start, end, current_map);
                if finder.success {
                    colonist.path = Some(finder.steps);
                } else {
                    println!("Failed to find the path");
                }

            }
}
Immediately after path-finding, add a dialog spawner. It checks to see if there are any dialog lines remaining, grabs the first one and removes it from the list. It then creates a new entity with a Speech, Position (the location of the colonist) and Description component. The Description contains the line of speech to emit.
#![allow(unused)]
fn main() {
            // If the actor has dialogue, emit it
            if !dialog.lines.is_empty() {
                let line = dialog.lines[0].clone();
                dialog.lines.remove(0);
                commands.push((
                    Speech{lifetime: 20},
                    pos.clone(),
                    Description(line)
                ));
            }
        }
    );

    // Execute the command buffer
    commands.flush(ecs);
}
}
Rendering Speech
Now that we have Speech entities, we need to render them. In main.rs, add an import for the code we are about to write:
#![allow(unused)]
fn main() {
use render::speech::render_speech;
}
Now find your render code, and add a call to render_speech:
#![allow(unused)]
fn main() {
render::render_colonist_panel(ctx, &self.ecs, self.map.current_layer);
self.map.render(ctx);
render::render_glyphs(ctx, &self.ecs, &self.map);
render::speech::render_speech(ctx, &mut self.ecs, &self.map); // This is new
}
Open render/mod.rs and add an import for the speech module we're going to create:
#![allow(unused)]
fn main() {
pub mod speech;
}
Finally, we can write the render code! Create a new file, src/game/speech.rs and add the following to it:
#![allow(unused)]
fn main() {
use crate::{components::*, map::Map, map::WIDTH};
use bracket_lib::prelude::*;
use legion::*;

pub fn render_speech(ctx: &mut BTerm, ecs: &mut World, map: &Map) {
    let mut commands = legion::systems::CommandBuffer::new(ecs);
    let mut query = <(Entity, &mut Speech, &Position, &Description)>::query();
    query.for_each_mut(ecs, |(entity, speech, pos, desc)| {
        if pos.layer == map.current_layer as u32 {
            let x = if pos.pt.x < WIDTH as i32 / 2 {
                pos.pt.x - 1
            } else {
                pos.pt.x + 1
            };

            ctx.print_color(x, pos.pt.y - 2, GREEN, BLACK, &desc.0);

            speech.lifetime -= 1;
            if speech.lifetime == 0 {
                commands.remove(*entity);
            }
        }
    });
    commands.flush(ecs);
}
}
This creates a CommandBuffer and then queries all entities that have a Speech, Position and Description component. If they are on the current layer, it prints the speech to the screen. It then decrements the lifetime, and removes the entity if lifetime has reached zero.
Try it Out
You can find the source code for
pathing_colonists_chathere.
Up Next
Next, we'll add a monster and let you target it.
This tutorial is free and open source, and all code uses the MIT license - so you are free to do with it as you like. My hope is that you will enjoy the tutorial, and make great games!
If you enjoy this and would like me to keep writing, please consider supporting my Patreon.
Targeting
Now that you can rescue colonists, and they can tell you about their awful day - it's time to start adding an element of risk to the game. I very much see the game as a "bug hunt" - you find monsters and shoot them.
Let's Start by Fixing a Bug
A "bug hunt" is a good description of most time-trial projects. You spend a surprising amount of time finding bugs and mistakes you made in your hasty rush to enter some code!
In the player logic, we'd carefully only run systems like field-of-view is the game state was not equal to Wait. In other words, only if the player was executing an action. Events weren't firing in quite the order I wanted, so I changed all instances of if *new_state != NewState::Wait to if *new_state == NewState::Wait in player.rs - to make them fire when the user has stopped mashing keys.
Create a Name Component
We want to start naming things, so we have a name to display in the targeting panel. Create a new component file named src/components/name.rs:
#![allow(unused)]
fn main() {
#[derive(Debug)]
pub struct Name(pub String);
}
Don't forget to add mod name; pub use name::*; to components/mod.rs.
In map/layerbuilder/colonists.rs add a Name component to each of the colonists you are spawning:
#![allow(unused)]
fn main() {
Name("Colonist".to_string()),
}
It belongs in the push statement for both spawn_random_colonist and spawn_first_colonist.
You also want to open main.rs and give SecBot a name:
#![allow(unused)]
fn main() {
self.ecs.push((
    Player {},
    Name("SecBot".to_string()),
    ...
}
Adding a Monster
The first thing we need is a way to tell the game that a monster is, in fact, a hostile entity. Open up src/components/tags.rs and add another blank structure:
#![allow(unused)]
fn main() {
pub struct Hostile;
}
We're already including tags::* in the module file, so we don't need to add any includes.
Now we want to be able to spawn a monster. We're not going to give it much detail yet, just make it exist. Create a new file, src/map/layerbuilder/monsters.rs. This will contain our monster spawning code:
#![allow(unused)]
fn main() {
use crate::components::*;
use bracket_lib::prelude::*;
use legion::*;

pub fn spawn_face_eater(ecs: &mut World, location: Point, layer: u32) {
    ecs.push((
        Name("Face Eater".to_string()),
        Hostile {},
        Position::with_pt(location, layer),
        Glyph {
            glyph: to_cp437('f'),
            color: ColorPair::new(RED, BLACK),
        },
        Description("Nasty eight-legged beastie that likes to eat faces.".to_string()),
    ));
}
}
The monster shares a lot of functionality with other game elements - it has a position, render information, a description, and a name. It also has the new Hostile tag component, to indicate that it is a baddie. Open src/map/layerbuilder/mod.rs and include pub mod monsters; - this includes the module in the game.
Open src/map/layerbuilder/entrance.rs. In your includes, add use super::monsters::* to include everything from the monsters file. Then find the populate_rooms function and change the random colonist spawner to sometimes spawn a monster instead:
#![allow(unused)]
fn main() {
ooms.iter().skip(1).for_each(|r| {
    if rng.range(0, 5) == 0 {
        spawn_random_colonist(ecs, r.center(), 0);
    } else {
        spawn_face_eater(ecs, r.center(), 0);
    }
});
}
That's enough that if you run the game you'll sometimes find a monster in a room. You can't interact with it, but it's there. The nasty f at least looks menacing!
Targeting
I decided that the next step was to support a targeting system, ready for slaying monsters. Let's start that process.
Create a Targeting Component
Create a new file, src/components/targeting.rs. Add the following code to it:
#![allow(unused)]
fn main() {
use legion::Entity;

pub struct Targeting {
    pub targets: Vec<(Entity, f32)>, // (entity / distance)
    pub current_target: Option<Entity>,
    pub index: usize,
}
}
What we're doing here is storing a vector of all possible targets; it contains tuples of the entity itself and the distance to the entity. Then we store an option for current_target - there might not be one, if there is we'll store its Entity entry. Finally, index stores the index of the current target in the targeting list. We'll be using that for target cycling.
Don't forget to add mod targeting; pub use targeting::*; to your components/mod.rs file.
Rendering Target Information
Make another new file, this time named src/render/targeting_panel.rs. It's contains a large blob of code, so let's walk through each chunk.
#![allow(unused)]
fn main() {
use crate::components::*;
use bracket_lib::prelude::*;
use legion::*;

use super::WIDTH;

pub fn render_targeting_panel(
    mut y: i32,
    ctx: &mut BTerm,
    ecs: &World,
    _current_layer: usize,
) -> (i32, Option<Point>) {
}
This imports necessary modules, and sets up the function. We're accepting y to indicate where we should start rendering in the right panel. Note that y is mutable - but it isn't a reference. This allows us to change our copy of y inside the function without changing the original that was passed in.
We're also ignoring the current_layer variable. I was pretty sure I'd need it later.
The function returns a tuple containing an i32 (which will specify where we are on the vertical axis, since targeting may be of variable size) and an Option<Point> which will specify where the target is - if one exists.
#![allow(unused)]
fn main() {
    let mut target_point = None;
    let x = WIDTH + 3;
    let mut tq = <(&Player, &Targeting)>::query();
    let current_target = tq.iter(ecs).map(|(_, t)| t.current_target).nth(0).unwrap();
}
Here we set target_point to None. We don't know if there is one, yet. Then we set x to WIDTH plus three - the x coordinate at which we can start adding to the panel. Then we query the ECS for entities that have both a Player and a Targeting component (we'll add that to the player soon). There should only be one, so we iterate the query, use map to extract just the current_target field, and retrieve the 1st (0) result. So now current_target contains either None or the Entity we are targeting.
#![allow(unused)]

fn main() {
    ctx.print_color(x, y, GREY, BLACK, "----------------------------");
    y += 1;

}
Print a line to break up the panel a bit, and increment y.
#![allow(unused)]

fn main() {
    if let Some(target_entity) = current_target {
}
Use if let (it's a single option form of match) to extract target_entity if there is one. If there isn't, this block of code won't run at all.
#![allow(unused)]
fn main() {
        // TODO: Retrieve target details here
        if let Ok(entry) = ecs.entry_ref(target_entity) {
            if let Ok(name) = entry.get_component::<Name>() {
}
Use if let once more, to see if entry_ref and get_component return information about our target. entry_ref is Legion's method of saying "I want to inspect this entity" - and returns a handle you can use to access the entity's components. get_component will return a reference to the Name component if there is one.
#![allow(unused)]
fn main() {
                ctx.print_color(
                    x,
                    y,
                    RED,
                    BLACK,
                    format!("Target: {}", name.0.to_uppercase()),
                );
                y += 1;
            }
            if let Ok(pos) = entry.get_component::<Position>() {
                target_point = Some(pos.pt);
            }
        }
}
Armed with the name, we can print the target's name (if there is one). We then use the same get_component setup (using the entry) to see if the target has a position. If it does, we set target_point to that location.
#![allow(unused)]
fn main() {
        ctx.print_color(x, y, GOLD, BLACK, "T to cycle targets");
        y += 1;
        ctx.print_color(x, y, GOLD, BLACK, "F to fire");
        y += 1;
    } else {
        ctx.print_color(x, y, GREEN, BLACK, "No current target");
        y += 1;
    }

    (y, target_point)
}
}
Lastly, we print some helpful information for the user - and return y and the target_point.
Don't forget to add pub mod targeting_panel; pub use targeting_panel::*; to src/render/mod.rs.
Note that I initially went with
TABfor target cycling. Running the game in Chrome showed why this was a bad idea. It would work, but also sometimes change the currently highlighted UI element to the browser navigation bar - which made pressing keys a bad idea. I changed it toT.
Rendering the UI, Redux
Now that we've created our targeting panel, we need to use it. We've started down the road of creating dynamically positioned panel elements, so let's build on that. Open main.rs and find the tick function. We're going to modify the UI so that each element returns position information when it finishes - allowing the UI to flow smoothly by itself:
#![allow(unused)]
fn main() {
impl GameState for State {
    fn tick(&mut self, ctx: &mut BTerm) {
        ctx.cls();
        render::render_ui_skeleton(ctx);
        let y = render::render_colonist_panel(ctx, &self.ecs, self.map.current_layer);
        let (y, target_pt) = render::render_targeting_panel(y, ctx, &self.ecs, self.map.current_layer);
        self.map.render(ctx);
}
This requires that we modify the render_colonist_panel to return a y value. Open src/render/colonist_panel.rs. There are two changes to make. The first tells the function to return an i32 (the y value):
#![allow(unused)]
fn main() {
pub fn render_colonist_panel(ctx: &mut BTerm, ecs: &World, current_layer: usize) -> i32 {
}
Then as the last line of the function, you want to return the y value we used when rendering the panel:
#![allow(unused)]
fn main() {
    y
}
}
Giving the Player a Target
Also in main.rs, we want to expand the Player initialization to include a Targeting list:
TODO: Expand this snippet
#![allow(unused)]
fn main() {
fn new_game(&mut self) {
    use components::*;

    // Spawn the player
    self.ecs.push((
        Player {},
        Position::with_pt(self.map.get_current().starting_point, 0),
        Glyph {
            glyph: to_cp437('@'),
            color: ColorPair::new(YELLOW, BLACK),
        },
        Description("Everybody's favorite Bracket Corp SecBot".to_string()),
        FieldOfView{radius: 20, visible_tiles: HashSet::new()},
        Targeting {
            targets: Vec::new(),
            current_target: None,
            index: 0,
        },
    ));
}
}
We also want to correct an issue that would prevent the visible area from rendering in the first turn. Immediately after you push the new player, call:
#![allow(unused)]
fn main() {
// Trigger FOV for the first round
game::player::update_fov(&NewState::Enemy, &mut self.ecs, &mut self.map);
}
Pop into game/player.rs and change fn update_fov to pub fn update_fov to allow you to call it from main.
Finding a Target when you Move
Now we need to modify player behavior to include targeting. The first step is to pick a target when the player moves; new targets may become available, and the player probably wants to shoot one. We'll start by storing some data we need when we query the player:
#![allow(unused)]
fn main() {
let mut visible = None;
let mut player_pos = Point::zero();
let mut player_entity = None;

// Build the player FOV
let mut query = <(Entity, &Player, &Position, &mut FieldOfView)>::query();
query.for_each_mut(ecs, |(e, _, pos, fov)| {
    player_pos = pos.pt;
    player_entity = Some(*e);
    ...
}
When we query the player's information, we store the entity and position for use further along in the function. There's no point in finding it twice! Next, find the update_fov function, and we'll add some new behavior:
#![allow(unused)]
fn main() {
 if let Some(vt) = visible {
    // Update colonist status
    ...

    // Targeting system
    let mut possible_targets = <(Entity, &Hostile, &Position)>::query();
    let mut targets = possible_targets
        .iter(ecs)
        .filter(|(_, _, pos)| pos.layer == map.current_layer as u32 && vt.contains(&pos.pt))
        .map(|(e, _, pos)| (*e, DistanceAlg::Pythagoras.distance2d(player_pos, pos.pt)))
        .collect::<Vec<(Entity, f32)>>();

    targets.sort_by(|a, b| a.1.partial_cmp(&b.1).unwrap());
    let mut commands = legion::systems::CommandBuffer::new(ecs);
    let current_target = if targets.is_empty() {
        None
    } else {
        Some(targets[0].0)
    };
    commands.add_component(
        player_entity.unwrap(),
        Targeting {
            targets,
            current_target,
            index: 0,
        },
    );
    commands.flush(ecs);
}
}
This works by querying the ECS for possible targets - those with a Hostile and Position components. It then filters them to only include entities on the current map layer, and whose position is in the player's visible tiles list. It then maps the query, transforming it into a list of (Entity, Distance From Target) lines. These are then "collected" into a vector.
Next, we sort the vector by distance. We'd like to default to targeting the closest hostile. To avoid borrow-checker issues, it then uses a CommandBuffer to replace the player's Targeting component with a new one containing the new target list, current target and sets the index to 0. You'll see why we use the index in a moment.
Cycling Targets
Next, we move up to the player_turn function (still in player.rs). Let's add a new command to cycle targets:
#![allow(unused)]
fn main() {
pub fn player_turn(ctx: &mut BTerm, ecs: &mut World, map: &mut Map) -> NewState {
    render_tooltips(ctx, ecs, map);

    // Check for input
    let mut new_state = if let Some(key) = ctx.key {
        match key {
            VirtualKeyCode::Up | VirtualKeyCode::W => try_move(ecs, map, 0, -1),
            VirtualKeyCode::Down | VirtualKeyCode::S => try_move(ecs, map, 0, 1),
            VirtualKeyCode::Left | VirtualKeyCode::A => try_move(ecs, map, -1, 0),
            VirtualKeyCode::Right | VirtualKeyCode::D => try_move(ecs, map, 1, 0),
            VirtualKeyCode::T | VirtualKeyCode::Tab => cycle_target(ecs),
            _ => NewState::Wait,
        }
    } else {
        NewState::Wait
    };
    ...
}
We haven't written cycle_target yet. It's a new function, add it to the bottom of the player.rs file:
#![allow(unused)]
fn main() {
fn cycle_target(ecs: &mut World) -> NewState {
    let mut pq = <(&Player, &mut Targeting)>::query();
    pq.for_each_mut(ecs, |(_, targeting)| {
        if targeting.targets.is_empty() {
            targeting.current_target = None;
        } else {
            targeting.index += 1;
            if targeting.index > targeting.targets.len() - 1 {
                targeting.index = 0;
            }
            targeting.current_target = Some(targeting.targets[targeting.index].0);
        }
    });
    NewState::Wait
}
}
This function retrieves the player's Targeting component. If there are no targets, it sets current_target to None. Otherwise, it adds one to the index. If the index exceeds the length of the list, it resets back to zero. Then it sets the current target to the targets list entry at the index.
You can run the game now and see targeting information when you approach monsters.
Debugging the Targeting Data
To help prove to myself that the targeting was valid, I decided to draw a line between the player and their current target. This is a useful tip in general: sometimes decorating the map can make bugs jump out at you.
We returned a target point from the rendering information for this purpose. Let's modify tick in main.rs to send this information to the glyph rendering system:
#![allow(unused)]
fn main() {
impl GameState for State {
    fn tick(&mut self, ctx: &mut BTerm) {
        ctx.cls();
        render::render_ui_skeleton(ctx);
        let y = render::render_colonist_panel(ctx, &self.ecs, self.map.current_layer);
        let (y, target_pt) =
            render::render_targeting_panel(y, ctx, &self.ecs, self.map.current_layer);
        self.map.render(ctx);
        render::render_glyphs(ctx, &self.ecs, &self.map, target_pt);
}
You probably guessed that the next step is to open render/mod.rs and make use of the target_pt we are sending. Replace the function as follows:
#![allow(unused)]
fn main() {
pub fn render_glyphs(ctx: &mut BTerm, ecs: &World, map: &Map, target_pt: Option<Point>) {
    let mut player_point = Point::zero();
    let mut query = <(&Position, &Glyph)>::query();
    query.for_each(ecs, |(pos, glyph)| {
        if pos.layer == map.current_layer as u32 {
            let idx = map.get_current().point2d_to_index(pos.pt);
            if map.get_current().visible[idx] {
                ctx.set(
                    pos.pt.x + 1,
                    pos.pt.y + 1,
                    glyph.color.fg,
                    glyph.color.bg,
                    glyph.glyph,
                );
                if glyph.glyph == to_cp437('@') {
                    player_point = pos.pt;
                }
            }
        }
    });

    if let Some(pt) = target_pt {
        line2d_bresenham(player_point, pt)
            .iter()
            .skip(1)
            .for_each(|pt| {
                ctx.set_bg(pt.x + 1, pt.y + 1, GOLD);
            });
        ctx.set(pt.x, pt.y + 1, DARK_RED, BLACK, to_cp437('['));
        ctx.set(pt.x + 2, pt.y + 1, DARK_RED, BLACK, to_cp437(']'));
        ctx.set_bg(pt.x + 1, pt.y + 1, GOLD);
    }
}
}
This is essentially the same, but when we render the @ - we store the player position for future use. Then, if there is a target_pt - we plot a line from the player to the point. We skip the first tile (it will be the player) and set the background to be gold on each tile along the way.
Then we add a [ and ] around the target.
It turned out that my code worked. :-) I didn't really need the debug data - but I found it useful to prove to myself that it wasn't terrible!
Try it Out
Run the game now. You can move around, and when you encounter monsters they are targeted - with a line showing the current targeting path. Sometimes, you can see more than one monster at a time. Press T (or tab) and you can switch targets.
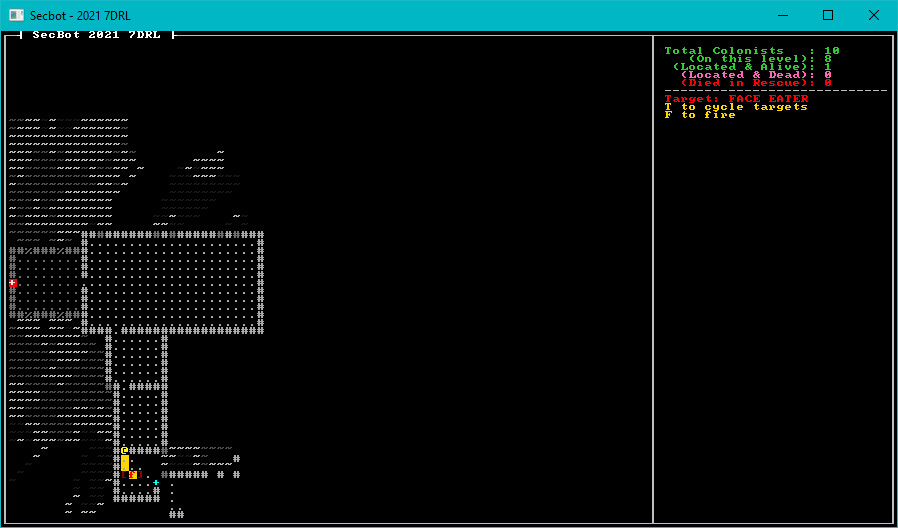
You can find the source code for
hello_monstershere.
Next up
This concluded my second day of development. On the third day, we'll dive into shooting things, props, and starting to make staircases functional.
Day Three
Day 3 of Secbot's development was a shorter one than usual, due to day-job concerns. I still managed to achieve most of my goals - but I was starting to feel the pressure!
The third day of development focused on extending targeting to allow non-hostiles to be targeted, building out the basics of each of the major map levels, and starting to get staircases working.
Targetable Component
I really wanted the player to be able to interact with (shoot!) scenery, friendlies - everything. I had a vague idea that the corporation behind SecBot's adventure would fine him/her (it?) for property damage, and complain if they killed too many friendlies. As a result, having the targeting system just look for Hostile tag components wasn't going to cut it.
Create a New Component
Open src/components/tags.rs and let's add a new component indicating that an entity can be targeted:
#![allow(unused)]
fn main() {
pub struct Targetable;
}
That's all there is to creating a new component; Legion really is great about that. Let's make some entities targetable.
Making Entities Targetable
The obvious candidates for being targetable at this point are colonists and monsters. Open up src/map/layerbuilder/colonists.rs and find the function spawn_random_colonist. At the end of the push statement listing components, add the new component:
#![allow(unused)]
fn main() {
    ...
    Name("Colonist".to_string()),
    Targetable{},
));
}
Now repeat that for spawn_first_colonist.
Now open src/map/layerbuilder/monsters.rs and do the same for spawn_face_eater(..):
#![allow(unused)]
fn main() {
    ...
    Name("Face Eater".to_string()),
    Hostile{},
    Targetable{},
    ...
}
Your colonists and monsters are now on the list of valid targets. The next step is to adjust the targeting code to make use of the new component.
Targeting Entities
The final change required to the targeting system is to make Targetable entities available to the targeting system, rather than just Hostile entities. Fortunately, this isn't a large job. Open up src/game/player.rs. Find the Targeting system comment and amend the query to find Targetable entities rather than Hostile ones:
#![allow(unused)]
fn main() {
let mut possible_targets = <(Entity, &Targetable, &Position)>::query();
}
Try it out
And that's it! You can now target colonists as well as monsters, should you wish to go on a killing spree. When we get scenic items in (useless decorations that provide flavor), they can be included in the targeting system too. Anything else we decide is worth shooting can also be included. Here's a colonist being targeted:
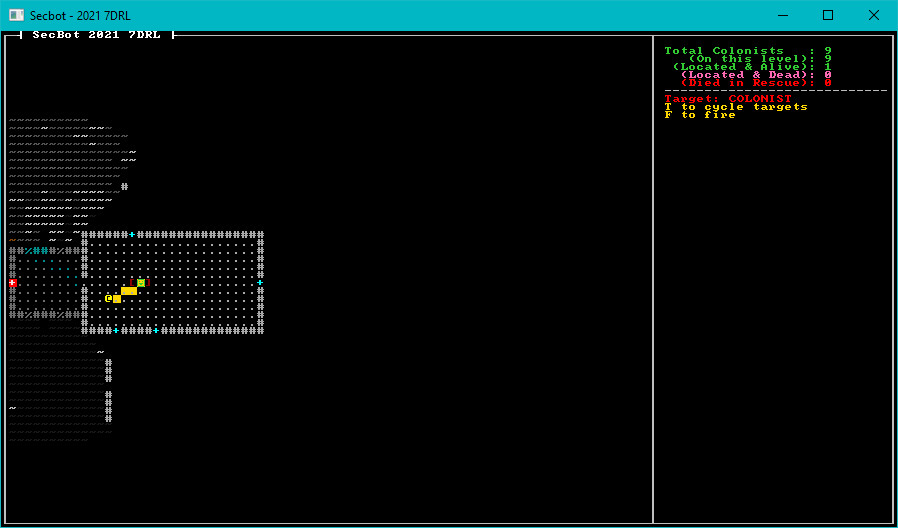
You can find the source code for
targetable_colonistshere.
Next up, we'll start building additional map layers.
Mapping the Mine pt 1
I visualized the mining colony as having several layers. We've built the top layer - a series of habitation and work modules. My thoughts for the second layer were a mine shaft surrounded by work areas. The next layer down was meant to be a more active mine - a central shaft and winding tunnels. Then the bottom was meant to be a surprise - the miners had breached a series of underground caverns, the source of the monster problem.
Setup Placeholders
We're going to be fleshing out the layer construction system, so let's put some placeholders in to solidify the skeleton of what we're doing. We want to add two layers, so we'll add them to the layer constructor. Open src/map/layer.rs and change the new function to include build_mine_top and build_mine_middle:
#![allow(unused)]
fn main() {
impl Layer {
    pub fn new(depth: usize, ecs: &mut World) -> Self {
        let layer = match depth {
            0 => build_entrance(ecs),
            1 => build_mine_top(ecs),
            2 => build_mine_middle(ecs),
            _ => Self {
                tiles: vec![Tile::default(); TILES],
                ...
}
Obviously, this won't compile yet - but it serves as an outline for what we're doing. Next up, we want to create the new functions we referenced. Create a new file, src/map/layerbuilder/mine_top.rs. Paste in a basic skeleton:
#![allow(unused)]
fn main() {
use super::{all_wall, colonists::spawn_first_colonist, spawn_face_eater, spawn_random_colonist};
use crate::{
    components::{Description, Door, Glyph, Position, TileTrigger},
    map::{tile::TileType, Layer, Tile, HEIGHT, WIDTH},
};
use bracket_lib::prelude::*;
use legion::*;

pub fn build_mine_top(ecs: &mut World) -> Layer {
    let mut layer = Layer::new(std::usize::MAX, ecs); // Gets a default layer
    all_wall(&mut layer);
    let center_pt : Point = Point::new(WIDTH/2, HEIGHT/2);
    layer
}
}
Now that you've created the framework for mine_top, create another file named src/map/layerbuilder/mine_middle.rs. Paste in a similar skeleton:
#![allow(unused)]
fn main() {
use super::{all_wall, colonists::spawn_first_colonist, spawn_face_eater, spawn_random_colonist};
use crate::{
    components::{Description, Door, Glyph, Position, TileTrigger},
    map::{tile::TileType, Layer, Tile, HEIGHT, WIDTH},
};
use bracket_lib::prelude::*;
use legion::*;

pub fn build_mine_middle(ecs: &mut World) -> Layer {
    let mut layer = Layer::new(std::usize::MAX, ecs); // Gets a default layer
    all_wall(&mut layer);
    let center_pt : Point = Point::new(WIDTH/2, HEIGHT/2);
    layer
}
}
These don't produce a useful map yet (it's all walls) - but it serves as a framework on which we can build. The last bit of the framework is to include the new files in the project. Open src/map/layerbuilder/mod.rs and add the following to the top:
#![allow(unused)]
fn main() {
mod mine_top;
mod mine_middle;
pub use mine_top::build_mine_top;
pub use mine_middle::build_mine_middle;
pub use monsters::*;
}
Let's also add a convenience function to the same file. all_wall replaces the whole map with solid walls:
#![allow(unused)]
fn main() {
fn all_wall(layer: &mut Layer) {
    layer.tiles.iter_mut().for_each(|t| {
        *t = Tile::wall();
    });
}
}
Starting on Other Layers (For Debugging)
While we're developing our new maps, it would be helpful to start the game on the new levels instead of having to navigate the entire top level just to see our progress each time we run the game. Open src/map/map.rs. In the constructor, change current_layer to the level on which you wish to start; 0 for the planet surface, 1 for the mine top, 2 for the mine middle.
#![allow(unused)]
fn main() {
Self {
    current_layer: 1, // REMEMBER TO CHANGE THIS BACK
    layers,
}
}
Fixing a Bug
It was at this point I noticed that I'd described five layers in the code - and only planned to make four. It's a quick fix. Open src/map/mod.rs and adjust NUM_LAYERS:
#![allow(unused)]
fn main() {
pub const NUM_LAYERS: usize = 4;
}
There's no point in building levels that will never be used. With that in place, let's adjust some tile types ready for the actual map generation.
You also need to open src/main.rs and find Position::with_pt(self.map.get_current().starting_point, 0), in the player creation code. Replace that with:
#![allow(unused)]
fn main() {
Position::with_pt(self.map.get_current().starting_point, self.map.current_layer as u32),
}
This allows the player to spawn on later levels while we debug the game.
Adjusting Tile Types
At this point, I wanted to make a few adjustments to the overall look/feel of the game - and add some tile types that will be used on later levels. All changes in this section take place in src/map/tile.rs, so open it up.
Empty Tiles
The first change was changing empty tiles to display as blank space, rather than a # symbol. Empty tiles aren't a wall - and making them look like open space gives a much better overall appearance. In the empty function, adjust the glyph:
#![allow(unused)]
fn main() {
pub fn empty() -> Self {
    Self {
        glyph: to_cp437(' '),
        color: ColorPair::new(DARK_GRAY, BLACK),
        ...
}
Floor Tiles
I didn't really like using . for floors. It's towards the bottom of the tile, making it harder to judge exactly where the tile boundaries are. I replaced it with ∙ - a centered dot. In thefloor function, adjust the glyph:
#![allow(unused)]
fn main() {
pub fn floor() -> Self {
    Self {
        glyph: to_cp437('∙'),
        color: ColorPair::new(DARK_GRAY, BLACK),
        ...
}
Repeat the change in the capsule_floor function:
#![allow(unused)]
fn main() {
pub fn capsule_floor() -> Self {
    Self {
        glyph: to_cp437('∙'),
        color: ColorPair::new(DARK_CYAN, BLACK),
        ...
}
Upwards Stairs
We already added down stairs - time to add the reciprocal, stairs going up. Create a new function:
#![allow(unused)]
fn main() {
pub fn stairs_up() -> Self {
    Self {
        glyph: to_cp437('<'),
        color: ColorPair::new(YELLOW, BLACK),
        blocked: false,
        opaque: false,
        tile_type: TileType::StairsDown,
    }
}
}
Yes, that should read StairsUp - but that's not defined yet, so we'll fix it later. Running the program now gives a slightly improved look:
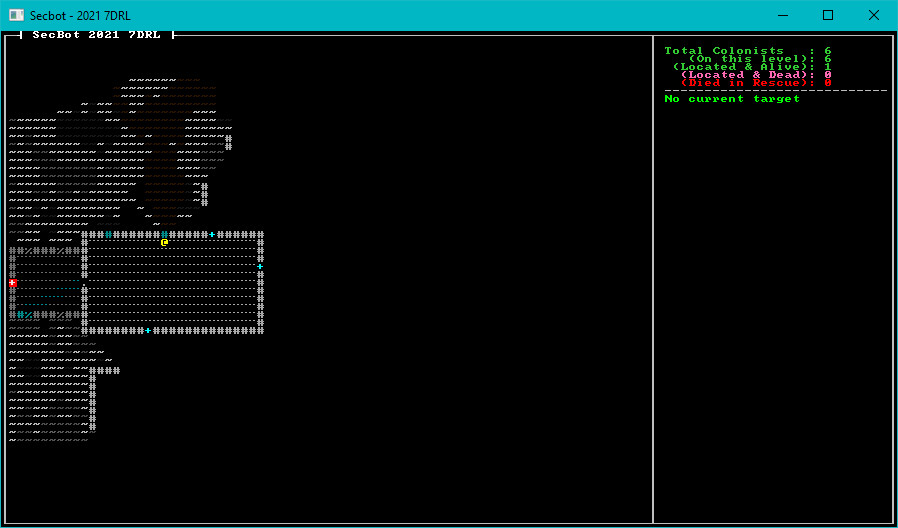
Now for the fun part - designing some maps.
Building the Mine Top
The idea behind the mine top is to have a central mine head, surrounded by somewhat orderly - but still chaotic - work areas. The work areas have been carved out of already-mined rock, so they are regular - but irregularly spaced. Open src/map/layerbuilder/mine_top.rs and we'll start fleshing out the builder.
We'll start with a circular section defining the mine head itself, with floor tiles across the middle:
#![allow(unused)] fn main() { pub fn build_mine_top(ecs: &mut World) -> Layer { let mut layer = Layer::new(std::usize::MAX, ecs); // Gets a default layer all_wall(&mut layer); let center_pt : Point = Point::new(WIDTH/2, HEIGHT/2); // Start by building a platform with a mining hole around it for y in center_pt.y-10..=center_pt.y+10 { for x in center_pt.x-10..=center_pt.x+10 { let pt = Point::new(x,y); let idx = layer.point2d_to_index(pt); layer.tiles[idx] = Tile::empty(); let d = DistanceAlg::Pythagoras.distance2d(center_pt, pt); if d >= 9.0 { layer.tiles[idx] = Tile::floor(); } if y == center_pt.y || y == center_pt.y+1 || y == center_pt.y - 1 { layer.tiles[idx] = Tile::floor(); } } } }
This provides a decent start. It would be a good idea to have access to the level, so let's place some stairs:
#![allow(unused)] fn main() { // Place the up and down stairs let up_pt = center_pt + Point::new(-1, 0); let down_pt = center_pt + Point::new(1, 0); let up_idx = layer.point2d_to_index(up_pt); let down_idx = layer.point2d_to_index(down_pt); layer.tiles[up_idx] = Tile::stairs_up(); layer.tiles[down_idx] = Tile::stairs_down(); layer.starting_point = up_pt; layer.colonist_exit = down_pt; }
Let's finish up the builder with a placeholder for room generation:
#![allow(unused)] fn main() { // Start building rooms and corridors let mut rooms = vec![Rect::with_size((WIDTH/2)-10, (HEIGHT/2)-10, 20, 20)]; layer } }
Run the game now, and we're off to a great start - the mine head is built:
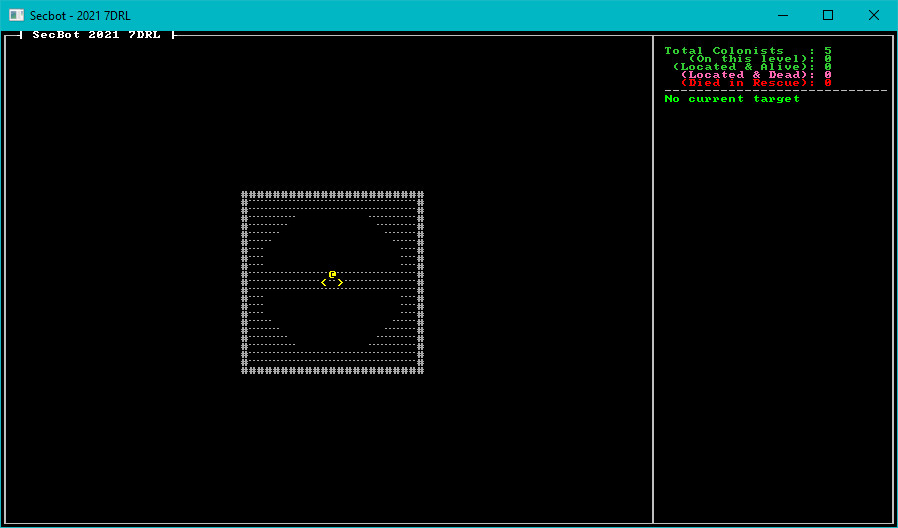
Building the Mine Middle
The middle mine layer starts out pretty much the same as the mine-head. Fill out the src/map/layerbuilder/mine_middle.rs file:
#![allow(unused)] fn main() { pub fn build_mine_middle(ecs: &mut World) -> Layer { let mut layer = Layer::new(std::usize::MAX, ecs); // Gets a default layer all_wall(&mut layer); let center_pt : Point = Point::new(WIDTH/2, HEIGHT/2); // Start by building a platform with a mining hole around it for y in center_pt.y-10..=center_pt.y+10 { for x in center_pt.x-10..=center_pt.x+10 { let pt = Point::new(x,y); let idx = layer.point2d_to_index(pt); layer.tiles[idx] = Tile::empty(); let d = DistanceAlg::Pythagoras.distance2d(center_pt, pt); if d >= 9.0 { layer.tiles[idx] = Tile::floor(); } if y == center_pt.y || y == center_pt.y+1 || y == center_pt.y - 1 { layer.tiles[idx] = Tile::floor(); } } } // Place the up and down stairs let up_pt = center_pt + Point::new(-1, 0); let down_pt = center_pt + Point::new(1, 0); let up_idx = layer.point2d_to_index(up_pt); let down_idx = layer.point2d_to_index(down_pt); layer.tiles[up_idx] = Tile::stairs_up(); layer.tiles[down_idx] = Tile::stairs_down(); layer.starting_point = up_pt; layer.colonist_exit = down_pt; // Start building rooms and corridors let mut rooms = vec![Rect::with_size((WIDTH/2)-10, (HEIGHT/2)-10, 20, 20)]; layer } }
Wrap-Up
You can find the source code for
mining_map1here.
Next, we'll continue adding details to the maps.
Mapping the Mine pt 2
Let's start fleshing out the top level of the mine, and add a bit more of the mapping system.
Adding Empty Rooms to the Mine Head
We ended the previous tutorial with a mysterious "rooms" array in the mine_top.rs system. The intent was hopefully clear - we're going to use a room generation algorithm on this level. It's very similar to the one in Hands-on Rust, but biased to create rooms outside of the existing mine-head. Open src/map/layerbuilder/mine_top.rs and let's get started.
Carving Tunnels
We'll start with a couple of functions that are straight out of Hands-on Rust - functions to build vertical and horizontal tunnels:
#![allow(unused)] fn main() { fn apply_horizontal_tunnel(map: &mut Layer, x1:i32, x2:i32, y:i32) { use std::cmp::{min, max}; for x in min(x1,x2) ..= max(x1,x2) { let idx = map.point2d_to_index(Point::new(x, y)); if map.tiles[idx as usize].tile_type == TileType::Wall { map.tiles[idx as usize] = Tile::floor(); } } } fn apply_vertical_tunnel(map: &mut Layer, y1:i32, y2:i32, x:i32) { use std::cmp::{min, max}; for y in min(y1,y2) ..= max(y1,y2) { let idx = map.point2d_to_index(Point::new(x, y)); if map.tiles[idx as usize].tile_type == TileType::Wall { map.tiles[idx as usize] = Tile::floor(); } } } }
These do what it says on the label - they carve either a vertical or a horizontal tunnel between two points. There are no diagonals because it's often tricky to navigate diagonals with a 4-way movement scheme.
Building Rooms
Next up is the try_room function. This function creates a random location for a potential room. If the room is possible (it only contains wall tiles, so it doesn't overlap any existing rooms) then it adds it to the provided rooms list:
#![allow(unused)] fn main() { fn try_room(rooms: &mut Vec<Rect>, map: &Layer) { let mut rng_lock = crate::RNG.lock(); let rng = rng_lock.as_mut().unwrap(); let w = rng.range(4,10); let h = rng.range(4,10); let x = rng.range(1, WIDTH - w); let y = rng.range(1, HEIGHT - h); let room_rect = Rect::with_size(x, y, w, h); let mut ok = true; room_rect.for_each(|pt| { let idx = map.point2d_to_index(pt); if map.tiles[idx].tile_type != TileType::Wall { ok = false; } }); if ok { rooms.push(room_rect); } } }
With the infrastructure in place, we can extend the mine_top function to actually build rooms. Add this to the function, starting with the rooms declaration:
#![allow(unused)] fn main() { ... // Start building rooms and corridors // Using the Hands-On Rust rooms/corridors builder slightly modified to go towards the middle let mut rooms = vec![Rect::with_size((WIDTH/2)-10, (HEIGHT/2)-10, 20, 20)]; while rooms.len() < 14 { try_room(&mut rooms, &layer); } let mut rng_lock = crate::RNG.lock(); let rng = rng_lock.as_mut().unwrap(); rooms .iter() .skip(1) .for_each(|r| { r.for_each(|pt| { let idx = layer.point2d_to_index(pt); layer.tiles[idx] = Tile::floor(); }); let room_center = r.center(); if rng.range(0,2) == 1 { apply_horizontal_tunnel(&mut layer, room_center.x, center_pt.x, room_center.y); apply_vertical_tunnel(&mut layer, room_center.y, center_pt.y, center_pt.x); } else { apply_vertical_tunnel(&mut layer, room_center.y, center_pt.y, room_center.x); apply_horizontal_tunnel(&mut layer, room_center.x, center_pt.x, center_pt.y); } } ); layer } }
Run the program now, and take a look at a mine-head level:
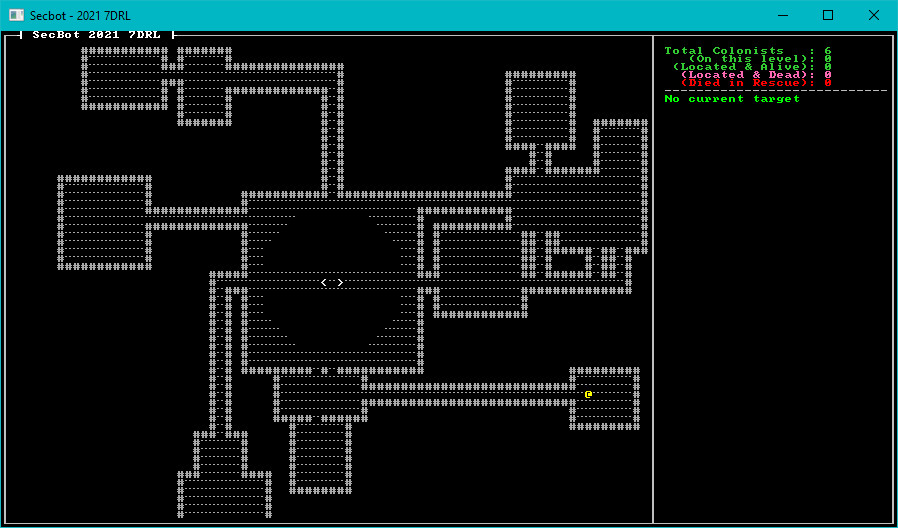
Wrap-Up
You can find the source code for
mining_map2here.
The mine-head is looking pretty decent, now. Let's move on to even more mapping!
Mapping the Mine pt 3
I visualized the second layer of the mine as being sprawling, cramped tunnels - surrounding the mine shaft proper. Drunkard's Walk (from Hands-on Rust) seemed like a good candidate for organically building the mine.
Implementing Drunkard's Walk
I've written heavily about Drunkard's Walk in Hands-on Rust and the Roguelike tutorial - so I won't belabor the details here. Basically, imagine that someone gave a LOT of alcohol to an Umber Hulk and built a level around the tunnels it carved. It works in a similar fashion: diggers randomly move, and carve out walls they run into.
Open src/map/layerbuilder/mine_middle.rs.
Start by adding TILES to the list of imported code:
#![allow(unused)] fn main() { use crate::{ components::{Description, Door, Glyph, Position, TileTrigger}, map::{tile::TileType, Layer, Tile, HEIGHT, WIDTH, TILES}, }; }
Find the line that defines let mut rooms = ... and delete it; replace it with the following:
#![allow(unused)] fn main() { layer.colonist_exit = down_pt; // Start using drunkard's walk to dig outwards while layer.tiles .iter() .filter(|t| t.tile_type == TileType::Floor).count() < TILES / 3 { drunkard(&mut layer); } layer } fn drunkard(map: &mut Layer) { let mut rng_lock = crate::RNG.lock(); let rng = rng_lock.as_mut().unwrap(); let possible_starts : Vec<usize> = map .tiles .iter() .enumerate() .filter(|(_, t)| t.tile_type == TileType::Floor) .map(|(i,_)| i) .collect(); let start = rng.random_slice_entry(&possible_starts).unwrap(); let mut drunkard_pos = map.index_to_point2d(*start); let mut distance_staggered = 0; loop { let drunk_idx = map.point2d_to_index(drunkard_pos); if map.tiles[drunk_idx].tile_type == TileType::Wall { map.tiles[drunk_idx] = Tile::floor(); } match rng.range(0, 4) { 0 => drunkard_pos.x -= 1, 1 => drunkard_pos.x += 1, 2 => drunkard_pos.y -= 1, _ => drunkard_pos.y += 1, } if !map.in_bounds(drunkard_pos) { break; } distance_staggered += 1; if distance_staggered > 200 { break; } } } }
Run the game and navigate to layer 2 (or modify map.rs to start there). You'll have a nice, organic mine surrounding the mine-shaft:
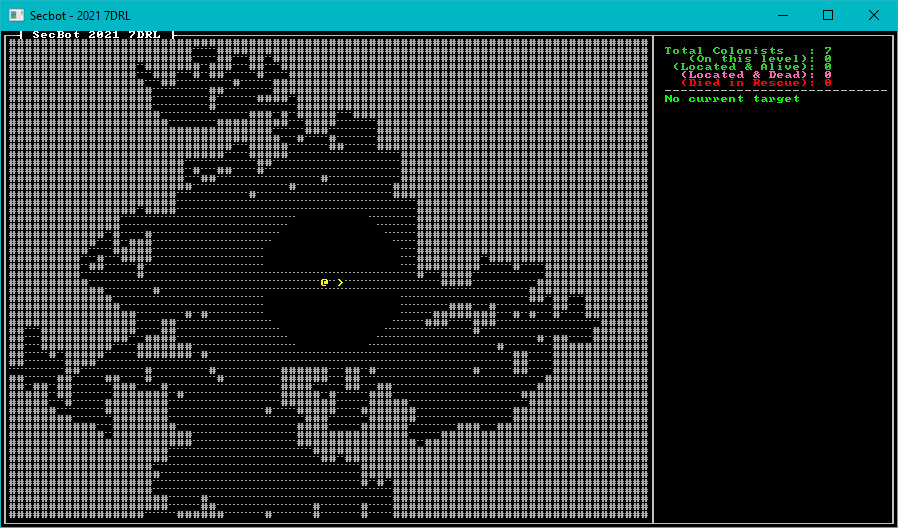
Wrap-Up
Next, we'll work on adding the caverns to the bottom of the map.
You can find the source code for
mining_map3here.
Mapping the Mine pt 4
The bottom level of the map is meant to be a winding cavern, into which the hapless colonists drilled. They drilled too deep, monsters ate them - you know the drill. For this map, I decided to use Cellular Automata - also from Hands-on Rust (and the Roguelike tutorial).
Filling in the Edges
The entrance builder module includes a handy edge_filler function for preventing gaps at the edge of the map. This function is generally useful - and solves a problem with the Drunkard's Walk maps we made in the previous section. Sometimes, the edge of the map is open - and it's confusing that you can't walk off of it. So let's promote edge_filler to be a generally available function.
In src/map/layerbuilder/entrance.rs, delete the entire edge_filler function (or cut it into your clipboard). Then open src/map/layerbuilder/mod.rs and paste the function into there:
#![allow(unused)] fn main() { fn edge_filler(map: &mut Layer) { for y in 0..HEIGHT { let idx = map.point2d_to_index(Point::new(0, y)); if map.tiles[idx].tile_type == TileType::Floor { map.tiles[idx] = Tile::wall(); } let idx = map.point2d_to_index(Point::new(WIDTH - 1, y)); if map.tiles[idx].tile_type == TileType::Floor { map.tiles[idx] = Tile::wall(); } } for x in 0..WIDTH { let idx = map.point2d_to_index(Point::new(x, 0)); if map.tiles[idx].tile_type == TileType::Floor { map.tiles[idx] = Tile::wall(); } let idx = map.point2d_to_index(Point::new(x, HEIGHT - 1)); if map.tiles[idx].tile_type == TileType::Floor { map.tiles[idx] = Tile::wall(); } } } }
Going back to entrance.rs, add a use super::edge_filler to the imports. You also need to add use bracket_lib::prelude::{Point, Algorithm2D}; and use super::{HEIGHT, WIDTH, tile::TileType};.
We can now use edge_filler on all of our generators.
Adding Edge Filling to the Mine Middle
Open src/map/layerbuilder/mine_middle.rs and add a use super::edge_filler; line to the import declarations. Then find the end of the build_mine_middle function and right before you return layer add a call to the new function:
#![allow(unused)] fn main() { drunkard(&mut layer); } edge_filler(&mut layer); // <-- This is new layer } }
The drunkard's walk map now won't have gaps at the edges. We'll use this function again when building the caverns.
Framework
The first thing to do is to open src/map/layer.rs and add a build_caverns call to the layer builder's match statement. Just like before, this will be a placeholder for a minute - but we'll dive straight into making it. So open the file, and adjust the match statement as follows:
#![allow(unused)] fn main() { impl Layer { pub fn new(depth: usize, ecs: &mut World) -> Self { let layer = match depth { 0 => build_entrance(ecs), 1 => build_mine_top(ecs), 2 => build_mine_middle(ecs), 3 => build_caverns(ecs), ... }
You may also want to open map.rs and force the starting layer to 3 while you develop the level. That way, you'll start on the new level - and won't have to navigate much to see the fruits of your labor. Change src/map/map.rs:
#![allow(unused)] fn main() { impl Map { pub fn new(ecs: &mut World) -> Self { let mut layers = Vec::with_capacity(NUM_LAYERS); for i in 0..NUM_LAYERS { layers.push(Layer::new(i, ecs)); } Self { current_layer: 3, // REMEMBER TO CHANGE ME BACK layers, } } ... }
Now that we have the placeholder built, let's construct the caverns.
Building the caverns
We'll be making a new file inside the layerbuilder module, so we need to remember to tell the module to include the file in the project. Open src/map/layerbuilder/mod.rs and add:
#![allow(unused)] fn main() { mod caverns; pub use caverns::build_caverns; }
Create a new file, src/map/layerbuilder/caverns.rs. Add a header, containing what we will need for the module:
#![allow(unused)] fn main() { use super::{all_wall, edge_filler, colonists::spawn_first_colonist, spawn_face_eater, spawn_random_colonist}; use crate::{ components::{Description, Door, Glyph, Position, TileTrigger}, map::{tile::TileType, Layer, Tile, HEIGHT, WIDTH}, }; use bracket_lib::prelude::*; use legion::*; }
Cellular Automata
I adapted the Cellular Automata algorithm from Hands-on Rust to suit my needs. The first step for CA is to start with a completely random map. Add the following function:
#![allow(unused)] fn main() { fn random_noise_map(map: &mut Layer) { let mut rng_lock = crate::RNG.lock(); let rng = rng_lock.as_mut().unwrap(); map.tiles.iter_mut().for_each(|t| { let roll = rng.range(0, 100); if roll > 55 { *t = Tile::floor(); } else { *t = Tile::wall(); } }); } }
This creates a random soup of walls and floors, with a slight bias towards floors. It's a good starting point for CA iterations. Each iteration needs a way to count neighbors, so add the following function:
#![allow(unused)] fn main() { fn count_neighbours(map: &Layer, x:i32, y:i32) -> usize { let mut neighbors = 0; for iy in -1 ..= 1 { for ix in -1 ..= 1 { let idx = map.point2d_to_index(Point::new(x+ix, y+iy)); if !(ix==0 && iy == 0) && map.tiles[idx].tile_type == TileType::Wall { neighbors += 1; } } } neighbors } }
Finally, the iterations themselves. Each cell counts the number of neighboring walls, and adjusts the cell based on that count - just like in Hands-on Rust and the Roguelike Tutorial. Add the following function:
#![allow(unused)] fn main() { fn iteration(map: &mut Layer) { let mut new_tiles = map.tiles.clone(); for y in 1 .. HEIGHT-1 { for x in 1 .. WIDTH-1 { let neighbors = count_neighbours(map, x as i32, y as i32); let idx = map.point2d_to_index(Point::new(x, y)); if neighbors > 4 || neighbors == 0 { new_tiles[idx] = Tile::wall(); } else { new_tiles[idx] = Tile::floor(); } } } map.tiles = new_tiles; } }
Now that we've implemented the basics of a cellular automata generator, we can create the build_caverns function to actually use it:
#![allow(unused)] fn main() { pub fn build_caverns(ecs: &mut World) -> Layer { let mut layer = Layer::new(std::usize::MAX, ecs); // Gets a default layer // We're using Cellular Automata here, straight out of Hands-On Rust. random_noise_map(&mut layer); for _ in 0..15 { iteration(&mut layer); } edge_filler(&mut layer); layer } }
This is pretty much direct CA: it creates a random map, iterates the CA algorithm over it 15 times, and then fills in the edges. You have a passable cavern:
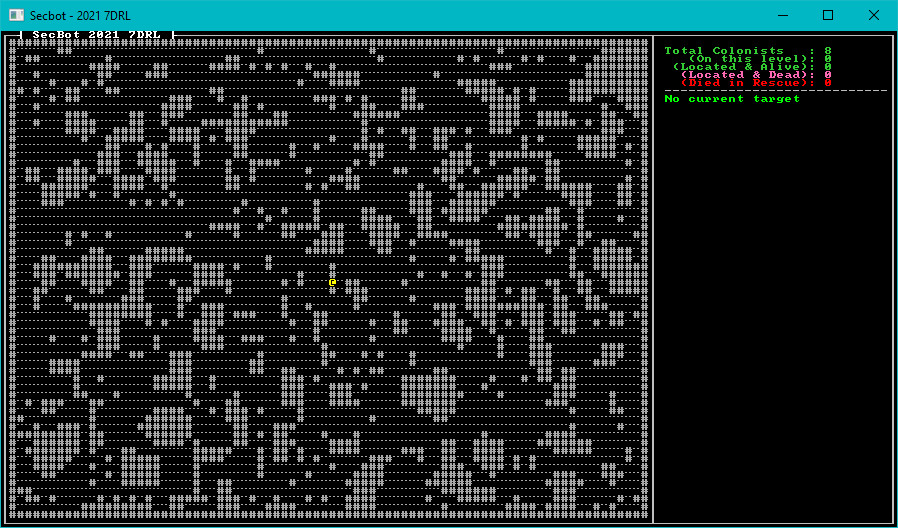
Adding a Staircase and Fixing some Bugs
The caverns need an exit - an upwards staircase. Otherwise, poor SecBot will venture in to the caverns and never return. After the call to edge_filler in build_caverns, add the following:
#![allow(unused)] fn main() { edge_filler(&mut layer); // Start here let desired_start = Point::new(2, HEIGHT/2); let mut possible_starts : Vec<(usize, f32)> = layer .tiles .iter() .enumerate() .filter(|(_, t)| t.tile_type == TileType::Floor) .map(|(idx, _)| (idx, DistanceAlg::Pythagoras.distance2d(desired_start, layer.index_to_point2d(idx)))) .collect(); possible_starts.sort_by(|a,b| a.1.partial_cmp(&b.1).unwrap()); layer.starting_point = layer.index_to_point2d(possible_starts[0].0); layer.colonist_exit = layer.starting_point; layer.tiles[possible_starts[0].0] = Tile::stairs_up(); ... // End here layer } }
This works by finding the closest tile to the center that doesn't contain a wall, and inserts a staircase there.
Fixing Up Stairs on Other Levels
I made a mistake in my staircase code in previous iterations, so now's a good time to fix it. In src/map/layerbuilder/mine_middle.rs find layer.colonist_exit = down_pt and change it to read layer.colonist_exit = up_pt. It makes more sense for the colonists to exit via the UP stairs that leads towards the escape capsule.
The same error appears in src/map/layerbuilder/mine_top.rs. Once again, find layer.colonist_exit = down_pt and change it to read layer.colonist_exit = up_pt.
Finally, open src/map/tile.rs and fix the stairs_up function:
#![allow(unused)] fn main() { pub fn stairs_up() -> Self { Self { glyph: to_cp437('<'), color: ColorPair::new(YELLOW, BLACK), blocked: false, opaque: false, tile_type: TileType::StairsUp, } } }
Run the game now, and the caverns now feature an exit:

Wrap-Up
You can find the source code for
mining_map4here.
Next, we're going to start work on making staircases functional.
Vertical Navigation
As day three drew to a close, I decided to make a start on getting staircases working. It won't be completed on day 3, but it's a good start.
Command Placeholders
A good start to allowing SecBot to climb/descend stairs is to support the commands.
Open up src/game/player.rs and look at the player_turn function. There's a large match statement handling possible key-presses. You want to add two more commands to the list:
#![allow(unused)] fn main() { VirtualKeyCode::Comma => go_up(ecs, map), VirtualKeyCode::Period => go_down(ecs, map), }
You haven't written these functions yet, so it won't compile - but now you have the skeleton of making the comma key (< with shift) indicate a desire to go up, and > (period/full stop) indicate a desire to go down.
Let's drop-in some placeholder commands to allow the game to compile. Add two new functions to the player.rs file:
#![allow(unused)] fn main() { fn go_up(ecs: &mut World, map: &mut Map) -> NewState { NewState::Wait } fn go_down(ecs: &mut World, map: &mut Map) -> NewState { NewState::Wait } }
Update the Instructions
It's always a good idea to give your player some idea of how to play the game. When we setup the WASM build, we included some instructions in the HTML. Now that we've added some commands, let's include them in the instructions. Open wasm_help/index.html. Add one more sentence to the instruction text:
<p style="color: #55ff55; font-family: 'Courier New', Courier, monospace; font-size: 10pt;">< and > go up and down levels if you are on an appropriate staircase.</p>
Now that we're able to catch the up and down commands, and have told the player what to do - let's start making them do something.
Implementing Up Stairs
Open src/map/tile.rs. In the TileType enum, we want to add one more type of tile:
#![allow(unused)] fn main() { #[derive(Clone, Copy, PartialEq, Eq, Debug)] pub enum TileType { Empty, Capsule, Wall, Floor, Outside, StairsDown, StairsUp, } }
We also need to make a function to build a tile of this type. In the same file, add the following builder function:
#![allow(unused)] fn main() { pub fn stairs_up() -> Self { Self { glyph: to_cp437('<'), color: ColorPair::new(YELLOW, BLACK), blocked: false, opaque: false, tile_type: TileType::StairsUp, } } }
Finally, we need to make TileType public---we're using it outside of the map module, now. Open src/map/mod.rs and add one line:
#![allow(unused)] fn main() { pub use tile:TileTYpe; }
Finding Stairs
Up and Down commands only work when the player (or other entity that uses stairs) is standing on a stair-case. That means we need a quick way to find out where the stairs are for a level. Open src/map/layer.rs. Add TileType to the list of types you are importing from super:
#![allow(unused)] fn main() { use super::{layerbuilder::*, Tile, TileType, HEIGHT, TILES, WIDTH}; }
The layer now knows what to do with the TileType type. Finding the downward staircase map location can be done with an iterator call. Add the following function to the layer.rs file, as an implemented method for Layer:
#![allow(unused)] fn main() { impl Layer { ... pub fn find_down_stairs(&self) -> Point { let idx = self .tiles .iter() .enumerate() .filter(|(_, t)| t.tile_type == TileType::StairsDown) .map(|(idx, _)| idx) .nth(0) .unwrap(); self.index_to_point2d(idx) } } }
This works by iterating through the tiles list, adding an enumeration (for the tile index). It filters the iterator, only accepting down staircases. It then takes the first occurrence, and transforms the result to a Point listing the staircases' map location. It would be more efficient to calculate this once and cache it - but the speed benefits are negligible, so I stuck with this method.
Setting the Current Layer
We also need a way to change the current in-play layer. Open src/map/map.rs and add one more function to the Map implementation:
#![allow(unused)] fn main() { pub fn set_current_layer(&mut self, new_layer: usize) { self.current_layer = new_layer; } }
You can call this function when the player changes layer, and since we're already tracking the current layer---the game will move to rendering the current map level.
Player Movement
We need a few extra mechanisms to support player movement between levels.
Going Up
In src/game/player.rs, we can now flesh out the go_up function. We want to check that the player is actually standing on an up staircase, and if they are change their position to the upwards-level's down staircase---and update their map position. Flesh out the function as follows:
#![allow(unused)] fn main() { fn go_up(ecs: &mut World, map: &mut Map) -> NewState { let mut find_player = <(&Player, &mut Position)>::query(); find_player.for_each_mut(ecs, |(_, pos)| { let idx = map.get_current().point2d_to_index(pos.pt); if map.get_current().tiles[idx].tile_type == TileType::StairsUp { // It really is an up staircase let new_layer = pos.layer - 1; map.set_current_layer(new_layer as usize); pos.layer = new_layer; pos.pt = map.get_current().find_down_stairs(); } }); NewState::Player } }
Going Down
We can do the same for the go_down function stub in player.rs. We check that the player is standing on a down staircase, and update the player's position to the layer's starting point:
#![allow(unused)] fn main() { fn go_down(ecs: &mut World, map: &mut Map) -> NewState { let mut find_player = <(&Player, &mut Position)>::query(); find_player.for_each_mut(ecs, |(_, pos)| { let idx = map.get_current().point2d_to_index(pos.pt); if map.get_current().tiles[idx].tile_type == TileType::StairsDown { // It really is a down staircase let new_layer = pos.layer + 1; map.set_current_layer(new_layer as usize); pos.layer = new_layer; pos.pt = map.get_current().starting_point; } }); NewState::Player } }
Turn Structure Adjustments
We're going to subtly change the turn structure, to give the game a chance to spend a tick processing player instructions before moving on to other tasks. Our basic flow will become:
Waiting -> PlayerTurn -> EnemyTurn -> Waiting
Open src/main.rs and adjust TurnState to include a new PlayerTurn entry:
#![allow(unused)] fn main() { enum TurnState { WaitingForInput, PlayerTurn, EnemyTurn, Modal { title: String, body: String }, GameOverLeft, ... }
Since we're doing a dance of returning a NewState and using it to set the TurnState at the right time, you also need to add a Player entry to NewState in the same file:
#![allow(unused)] fn main() { pub enum NewState { NoChange, Wait, Player, Enemy, LeftMap, } }
Now scroll down to where we are handling turn states in main.rs. You want to add two lines (the program won't compile until you do):
#![allow(unused)] fn main() { NewState::Wait } TurnState::GameOverLeft => render::game_over_left(ctx), + TurnState::PlayerTurn => NewState::Enemy, // Placeholder }; match new_state { NewState::NoChange => {} NewState::Wait => self.turn = TurnState::WaitingForInput, NewState::Enemy => self.turn = TurnState::EnemyTurn, NewState::LeftMap => self.turn = TurnState::GameOverLeft, + NewState::Player => self.turn = TurnState::PlayerTurn, } } } }
Now when it's the player's turn, we switch to Enemy mode, and if its Player time in NewState we set the player appropriately.
The game is coming along nicely! You can now find up/down staircases and use them to change level, allowing you to visit the whole map. You may run into issues with the stairs being obscured by a monster---but we'll worry about that on day 4.
Wrap-Up
That concludes day 3's development. It mostly focused on map generation, with a bit of gameplay (to start using levels) thrown in. As day 4 approached, I was starting to feel the pressure - so we'll dive into a smorgasboard of game changes.
You can find the source code for
hello_modalhere.
Day Four
On 7-day challenge products, I always think of day 4 as a milestone. The basics need to be working very soon, because there isn't a lot of time left for polish and niceties! With SecBot, I felt like I was doing pretty well. Maps and monsters are spawning, and you can navigate between levels. Basic field-of-view and path-finding are functional, and the beginnings of combat are in place.
So day four will consist of a lot of minor changes:
- Changing how colonist behavior works a little.
- Allowing colonists to path between levels, so you can rescue colonists from later map stages.
- Name the colonists for flavor, and allow friendly-fire.
- Allow SecBot to shoot things!
- Allow monsters to fight back.
- Death and game failure.
- Try to make the player feel bad about killing colonists.
So let's dive into the fourth day of development.
Active/Idle Colonists
I wasn't very happy with the way colonists were being activated---and needed a way to also activate monsters. The logical way to do this seemed to be to add an Active tag component. Thinking further about it, i realized that a CanBeActivated tag component would also be helpful---allowing me to make the code for activating an entity when it is discovered a bit more generic. In this section, we'll switch away from the Unknown colonist status and start using ECS tags to keep track of state.
Legion makes it expensive to rearrange tags, but not that expensive. You aren't activating things all that often in the grand scheme of things, so the performance penalty when Legion rearranges archetypes because of an insertion isn't really a problem for this game. If the game were changing states a lot, we'd probably use an
Optioncomponent.
Defining the New Tags
The new tag components are like other tags---just an empty struct. Open src/components/tags.rs and add the new components:
#![allow(unused)] fn main() { pub struct Active; pub struct CanBeActivated; }
That's straightforward enough. Now open src/components/colonist_status.rs and remove the Unknown enumeration option:
#![allow(unused)] fn main() { #[allow(dead_code)] #[derive(Debug, Clone, Copy, PartialEq)] pub enum ColonistStatus { Alive, StartedDead, }
The game won't compile yet, now we need to start adjusting the systems that consume the components.
Adjusting Colonist Spawn
The first thing to do is change the colonist spawns to include the new CanBeActivated component. Open src/map/layerbuilder/colonists.rs and change the spawn_random_colonist function to list ColonistStatus as Alive and include the new component.
One of the few things that really bugs me about Legion is that once you try and add too many components at a time, the World's push function stops working. Rust really needs proper variadics, so I understand why this is the case (Legion only implemented so many template interfaces)---but it would be nice if a macro were in place to work around it. Anyway, we're planning on having a lot of varied colonists. That means it's time to split colonist spawning into a "base colonist" (with the minimum required to be a colonist) and functions for spawning individual colonists. The idea is that as we add rooms/levels, we'll add in some variable behavior.
Open /src/map/layerbuilder/colonists.rs and add a new function:
#![allow(unused)] fn main() { fn build_base_colonist(ecs: &mut World, location: Point, layer: u32) -> Entity { ecs.push(( Colonist { path: None }, Position::with_pt(location, layer), Glyph{ glyph: to_cp437('☺'), color: ColorPair::new(LIME_GREEN, BLACK) }, Description("A squishy friend. You are here to rescue your squishies.".to_string()), ColonistStatus::Alive, Name("Colonist".to_string()), Targetable {}, CanBeActivated {}, )) } }
Notice how build_base_colonist return an Entity. We'll call it as a base, and then use Legion's command system to modify the individual's components as-needed. That's not the fastest code in the world, but we call it so rarely that it doesn't matter.
Now we update spawn_random_colonist to use the new pattern:
#![allow(unused)] fn main() { pub fn spawn_random_colonist(ecs: &mut World, location: Point, layer: u32) { // Using this pattern because Legion has a limit to how many components it takes in a push let entity = build_base_colonist(ecs, location, layer); let mut commands = CommandBuffer::new(ecs); commands.add_component( entity, Dialog { lines: vec!["Thanks, SecBot!".to_string()], }, ); commands.flush(ecs); } }
First, the function retrieves a new entity from build_base_colonist. Then it constructs a CommandBuffer---a set of commands for Legion to execute in a batch. It adds a Dialog component for the random colonist, and flushes the commands. This builds the colonist, and then gives them dialog to present to the player.
We want the first colonist to have different dialog. They act as an introduction, so its our chance to add a bit of flavor to the game. Update the spawn_first_colonist function as follows. Notice how the function is following the same pattern, but adding different dialog:
#![allow(unused)] fn main() { pub fn spawn_first_colonist(ecs: &mut World, location: Point, layer: u32) { let entity = build_base_colonist(ecs, location, layer); let mut commands = CommandBuffer::new(ecs); commands.add_component( entity, Dialog { lines: vec![ "Bracket Corp is going to save us?".to_string(), "No idea where the others are.".to_string(), ], }, ); commands.flush(ecs); } }
Now that the colonists' components are sorted out, let's move on to the activation system.
Colonist Activation AI
The first thing to do is to change the criteria for which colonists wake up. We only want them to process a turn if they have the Active tag component attached to their entity, and if they are alive (we're keeping dead ones around for counting purposes). Open src/game/colonists.rs and change the system query to include Active. You also want to adjust the iterator to include a filter for living colonists:
#![allow(unused)] fn main() { &mut ColonistStatus, &mut Position, &mut Dialog, &Active, )>::query(); colonists .iter_mut(ecs) .filter(|(_, _, status, _, _, _)| **status == ColonistStatus::Alive) .for_each(|(entity, colonist, status, pos, dialog, _)| { let idx = map.get_layer(pos.layer as usize).point2d_to_index(pos.pt); // Check basics like "am I dead?" // Am I at the exit? If so, I can change my status to "rescued" }
Now that colonists only function when activated, it's time to adjust the Player system to activate entities.
Player System
Whenever the player sees an inactive entity, we want to check if it has a CanBeActivated tag. If it can, then we activate it. Open src/game/player.rs. Make the following changes (the new lines have a + next to them):
#![allow(unused)] fn main() { if let Some(vt) = visible { + let mut commands = legion::systems::CommandBuffer::new(ecs); // Update colonist status + let mut can_be_activated = <(Entity, &CanBeActivated, &Position)>::query(); + can_be_activated.for_each_mut(ecs, |(entity, _, pos)| { if pos.layer == map.current_layer as u32 && vt.contains(&pos.pt) && DistanceAlg::Pythagoras.distance2d(player_pos, pos.pt) < 6.0 { + commands.remove_component::<CanBeActivated>(*entity); + commands.add_component(*entity, Active {}); } }); }
This builds a command buffer, and looks to see if a visible entity can be activated. If it can, we check that it is within 6 tiles and visible. If all of that is true, then we add an Active component to it.
Lastly for this section, we can update the heads-up display a bit.
Update the HUD
We've changed how we're counting colonists, so replace render_colonist_panel in src/render/colonist_panel.rs as follows:
#![allow(unused)] fn main() { pub fn render_colonist_panel(ctx: &mut BTerm, ecs: &World, current_layer: usize) -> i32 { let mut query = <(Entity, &Colonist, &Position, &ColonistStatus)>::query(); let mut total_colonists = 0; let mut colonists_on_layer = 0; let mut located_alive = 0; let mut located_dead = 0; let mut died_in_rescue = 0; let mut rescued = 0; query.for_each(ecs, |(entity, _, pos, status)| { total_colonists += 1; if pos.layer == current_layer as u32 && *status != ColonistStatus::Rescued { colonists_on_layer += 1; } if let Ok(entry) = ecs.entry_ref(*entity) { if let Ok(_) = entry.get_component::<Active>() { match *status { ColonistStatus::Alive => located_alive += 1, ColonistStatus::StartedDead => located_dead += 1, ColonistStatus::DiedAfterStart => died_in_rescue += 1, ColonistStatus::Rescued => rescued += 1, _ => {} } } } }); }
There are still some problems with the HUD, and these will be resolved in later updates---it wasn't a big priority at the time, I just wanted a vague idea of what's going on. Ignoring this now caused a few heartaches later!
Wrap-up
(Screenshot)
You can find the source code for
active_componentshere.
This was a relatively small set of changes, but has smoothed over how entity activation works. Next up, we'll make colonists path properly across levels.
Colonist Cross-Layer Navigation
In this sprint, we'll give colonists the ability to path upwards and exit the game---even if you discover them on later map levels. This is important to the overall game-play: you need to be able to rescue colonists you encounter on deeper map layers.
Cleaner Targeting
I was finding the big targeting lines annoying. They were great for debugging the targeting system, but giant yellow lines everywhere was really distracting. So I opened up src/render/mod.rs and adjusted the render_glyphs function to instead add brackets around a target:
I replaced the code:
#![allow(unused)] fn main() { if let Some(pt) = target_pt { line2d_bresenham(player_point, pt) .iter() .skip(1) .for_each(|pt| { ctx.set_bg(pt.x + 1, pt.y + 1, GOLD); }); ctx.set(pt.x, pt.y + 1, DARK_RED, BLACK, to_cp437('[')); ctx.set(pt.x + 2, pt.y + 1, DARK_RED, BLACK, to_cp437(']')); ctx.set_bg(pt.x + 1, pt.y + 1, GOLD); } }
With:
#![allow(unused)] fn main() { if let Some(pt) = target_pt { ctx.set(pt.x, pt.y + 1, RED, BLACK, to_cp437('[')); ctx.set(pt.x + 2, pt.y + 1, RED, BLACK, to_cp437(']')); //ctx.set_bg(pt.x + 1, pt.y + 1, GOLD); }
There's some issues when the targeting glyph is off-screen, but these get resolved later. The result looks quite a bit nicer---definitely less distracting.
Add Some Colonists to the Mine Top
It's not easy to create/debug cross-layer navigation if there is nobody to rescue on the lower levels! So I opened up src/map/layerbuilder/mine_top.rs and replaced the layer return with the following:
#![allow(unused)] fn main() { edge_filler(&mut layer); std::mem::drop(rng); rooms.iter().for_each(|r| { spawn_random_colonist(ecs, r.center(), 1); }); layer } }
This adds a random colonist to each room. Now you have test colonists, ready to try out the cross-layer pathfinding for you. Why the drop on rng? I needed to ensure that it was unlocked before the random colonists function acquires its own lock on the RNG. Not the most efficient way to do things, but it got the job done.
At the top of mine_top.rs, add edge_filler to the list of imports from super:
#![allow(unused)] fn main() { use super::{all_wall, colonists::spawn_first_colonist, spawn_face_eater, spawn_random_colonist, edge_filler}; }
If you run the game now, you'll find colonists on the lower levels---but they don't know how to escape. Let's fix that.
Adding a Wait Action
In src/game/player.rs add a wait action---press space to do nothing. This lets you sit and wait while colonists path home, to see if the pathing code works.
#![allow(unused)] fn main() { VirtualKeyCode::T | VirtualKeyCode::Tab => cycle_target(ecs), VirtualKeyCode::Comma => go_up(ecs, map), VirtualKeyCode::Period => go_down(ecs, map), + VirtualKeyCode::Space => NewState::Player, // Wait action _ => NewState::Wait, } } else { }
Pathing Colonists
Now for the tricky bit! Our colonist AI right now is a decent start---you can activate a colonist and they path to the exit on the same level. That's a good start, but we need to add a couple of things to it: pathing to the exit on the current level (and then keeping going), and removing themselves when they reach the exit. The latter is how you "win" the game, getting colonists to safety. The "saved colonist" count really is the player's score.
Open /src/game/colonists.rs. Around line 21, you'll find let idx = map.get_layer(pos.layer as usize).point2d_to_index(pos.pt);. Delete that line, and replace it with:
#![allow(unused)] fn main() { let mut should_move = true; }
We'll use this flag to determine if the colonist should abort their movement for some reason. After the "check basics like..." comment block, we need to handle the colonist being on an exit point:
#![allow(unused)] fn main() { let mut should_move = true; // Am I at a level boundary? If so, go up it! if pos.pt == map.get_layer(pos.layer as usize).colonist_exit { should_move = false; if pos.layer == 0 { *status = ColonistStatus::Rescued; commands.remove_component::<Glyph>(*entity); commands.remove_component::<Description>(*entity); } else { pos.layer = pos.layer - 1; pos.pt = map.get_layer(pos.layer as usize).find_down_stairs(); colonist.path = None; } } }
This works by checking to see if the colonists' position is the same as the layer's exit boundary. If it is, and the colonist is on layer 0---then they've reached the escape pod. Their status becomes rescued, and we remove their glyph and description components. They won't be rendered anymore, but still exist because we need to count them as a success. If the colonist isn't on the top level, we move them up a layer---and set their position to the new layer's downwards staircase (because they just came up it). We also remove their path, so they will calculate a new exit path next turn.
Next, we replace the activated movement code. We're caching the path to the exit so we don't have to generate it each turn. The following code (replacing the existing code) is as follows:
#![allow(unused)] fn main() { // Since I'm activated, I should move towards the exit if should_move { let current_map = map.get_layer(pos.layer as usize); if let Some(path) = &mut colonist.path { if !path.is_empty() { let next_step = path[0]; path.remove(0); pos.pt = current_map.index_to_point2d(next_step); } } else { let start = current_map.point2d_to_index(pos.pt); let end = current_map.point2d_to_index(current_map.colonist_exit); let finder = a_star_search(start, end, current_map); if finder.success { colonist.path = Some(finder.steps); } else { println!("Failed to find the path"); } } // If the actor has dialogue, emit it if !dialog.lines.is_empty() { let line = dialog.lines[0].clone(); dialog.lines.remove(0); commands.push((Speech { lifetime: 20 }, pos.clone(), Description(line))); } } }); }
Ignoring Doors
Colonists really should be able to handle doors. The doors are mostly there to keep the player guessing about the contents of each room---they don't do much. Open up src/map/layer.rs and change the test_exit function to allow doors to be traversed:
#![allow(unused)] fn main() { fn test_exit(&self, pt: Point, delta: Point, exits: &mut SmallVec<[(usize, f32); 10]>) { let dest_pt = pt + delta; if self.in_bounds(dest_pt) { let dest_idx = self.point2d_to_index(pt + delta); if !self.tiles[dest_idx].blocked || self.is_door[dest_idx] { exits.push((dest_idx, 1.0)); } } } }
A Little Bit of Test Code
It's easier to test this code if you make two changes. You'll want to undo them before you proceed. In map/layers.rs, change the map to reveal everything:
#![allow(unused)] fn main() { revealed: vec![true; TILES], }
And then in the colonist spawner in map/layerbuilder/colonists.rs add Active to the list of components added instead of CanBeActivated. This makes the colonists immediately active, and you can sit and wait while they all go to the escape pod.
Wrap-Up
Now you can activate colonists and watch them go to the escape pod. That's a huge portion of game-play working.

You can find the source code for
stairs2here.
Don't forget to disable the test code before you proceed! Next up, we'll give colonists names and make things a little prettier.
Naming Colonists
Giving colonists names and details isn't all that important to the overall gameplay, but it gives a feeling of depth. Hopefully, SecBot will see that colonists' have names and be less inclined to reduce them to constituent atoms. Unless SecBot is in a bad mood, I guess. I'm a big fan of using names as "cheap flavor"---it helps with immersion when you see "Joe Bob" rather than "Colonist 12".
Capitalizing Words
I didn't feel like writing code to handle putting words into proper-noun case, so I added a crate to Cargo.toml. Add the following dependency:
Inflector = "0.11.4"
It's an amusing feature that the crate requires a capitalized name. Irritating when it just won't compile, but a nice touch.
Please don't do this with your crates. Lower-case works everywhere else, and consistency is more important than being clever!
Generating Names
Years ago, while working on Black Future (later renamed Nox Futura) I downloaded a list of names from the US Census. I made a list of male and female first names, and last names (surnames). I've re-used these files in countless projects---it's a really cheap way to make names that sound real without having to try and come up with them myself.
You can find these files as first_names_female.txt, first_names_male.txt and last_names.txt in the accompanying source. You'll want to place them in your src/map/layerbuilder directory. TODO: Linky
Now open src/map/layerbuilder/colonists.rs. Go to the bottom, and we'll build some infrastructure for naming the colonists. The first step is to include the name lists in the program (embedded to make it easier to use WASM). Add the following three lines:
#![allow(unused)] fn main() { const FIRST_NAMES_1 : &str = include_str!("first_names_female.txt"); const FIRST_NAMES_2 : &str = include_str!("first_names_male.txt"); const LAST_NAMES : &str = include_str!("last_names.txt"); }
This embeds the name files in your binary. Now we're going to create a Names structure, which we will use to turn these lists into random names. Append the following:
#![allow(unused)] fn main() { #[derive(Clone, Debug)] struct Names { male_first: Vec<String>, female_first: Vec<String>, last_names: Vec<String>, } }
The names are separated, one to a line. So turning the list of names into a vector is a relatively simple split/map/collect iterator call. Let's make a constructor for the Names structure:
#![allow(unused)] fn main() { impl Names { fn new() -> Self { Self { male_first: FIRST_NAMES_1.split("\n").map(|n| n.to_string()).collect(), female_first: FIRST_NAMES_2.split("\n").map(|n| n.to_string()).collect(), last_names: LAST_NAMES.split("\n").map(|n| n.to_string()).collect(), } } }
Keep the impl block open, we aren't done with it yet. We still need to create the code to randomly generate names. Add a new function to the block, and give it its own RNG (to avoid locking issues; chances are, we're locking the RNG already while we build the map):
#![allow(unused)] fn main() { fn random_human_name(&self) -> String { use inflector::Inflector; let mut rng = RandomNumberGenerator::new(); // Avoiding locking issues }
Next, we need to decide if we're pulling from the male or female first name list. It makes no difference, but since the lists are separated we should pick one. So we'll roll a dice, and have a 50/50 chance of either---and store a reference to the appropriate list:
#![allow(unused)] fn main() { let male = rng.range(0, 100) < 50; let first_source = match male { true => &self.male_first, false => &self.female_first, }; }
Next, we'll pick a random slice entry from first and last names---and apply title case to it using Inflector:
#![allow(unused)] fn main() { let first_name = rng .random_slice_entry(first_source) .unwrap() .to_title_case(); let last_name = rng .random_slice_entry(&self.last_names) .unwrap() .to_title_case(); }
Lastly, we format it in a (first) (last) pattern and return the resulting string. Note that we're finally closing the impl block:
#![allow(unused)] fn main() { format!("{} {}", first_name, last_name).to_string() } } }
Now that the Names structure is done, we need to store it somewhere. I got lazy, and used a lazy_static. Yes, I know that global variables and singletons are bad---but they are also really useful if you are careful with them. Finish up the naming system with the following:
#![allow(unused)] fn main() { lazy_static! { static ref NAMES: Mutex<Names> = Mutex::new(Names::new()); } }
Also at the top of layerbuilder/colonists.rs add one line to include lazy_static and the Mutex:
#![allow(unused)] fn main() { use lazy_static::*; use std::sync::Mutex; }
Taking Names
We're still in layerbuilder/colonists.rs. Find the build_base_colonist function, and amend it to give the colonist a random name using the system we just created:
#![allow(unused)] fn main() { fn build_base_colonist(ecs: &mut World, location: Point, layer: u32) -> Entity { + let name_lock = NAMES.lock(); + let name = name_lock.unwrap().random_human_name(); ecs.push(( ... Name(name), ... }
That's all it takes to give every colonist a random name. We aren't trying to de-duplicate---you might get two John Smiths. That doesn't really matter, and with the huge names lists it's pretty unlikely.
Displaying Names in the Targeting Panel
Open src/render/targeting_panel.rs. Find the block that starts with if let Some(target_entity) = current_target { (around line 21 if you're using the example code). Replace:
#![allow(unused)] fn main() { if let Some(target_entity) = current_target { // TODO: Retrieve target details here if let Ok(entry) = ecs.entry_ref(target_entity) { if let Ok(name) = entry.get_component::<Name>() { ctx.print_color( x, y, RED, BLACK, format!("Target: {}", name.0.to_uppercase()), ); }
with:
#![allow(unused)] fn main() { if let Some(target_entity) = current_target { // TODO: Retrieve target details here if let Ok(entry) = ecs.entry_ref(target_entity) { let color = if let Ok(g) = entry.get_component::<Glyph>() { g.color.fg } else { RGBA::named(RED) }; if let Ok(name) = entry.get_component::<Name>() { ctx.print_color( x, y, color, BLACK, format!("Target: {}", name.0.to_uppercase()), ); }
This retrieves the target's color from the rendering description, and uses it to display the target in that color. This keeps hostiles red and friendlies green. It then prints the name in upper-case, to make it more obvious.
Wrap-Up
This was a short sprint, but we now have named colonists.
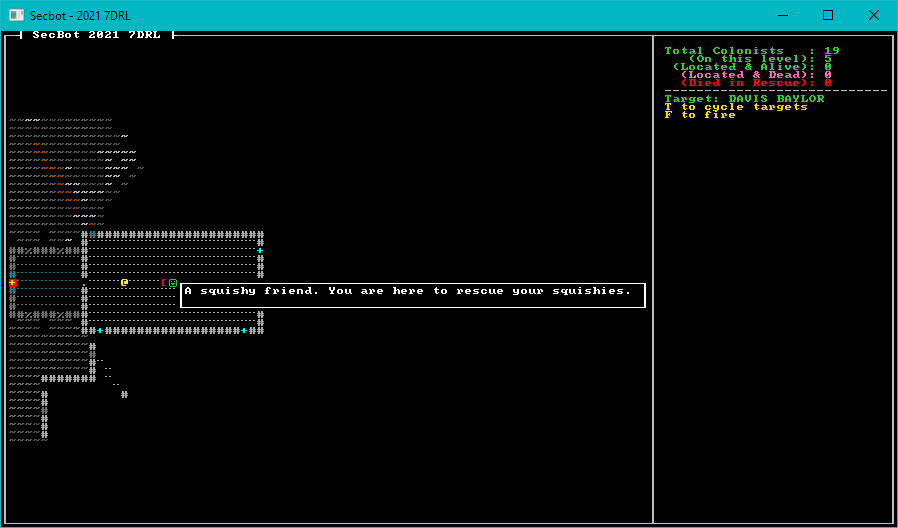
You can find the source code for
taking_nameshere.
Up next... hit points. I originally wanted a complex beast with body parts, and detailed injuries---but that wasn't going to work in a 7-day sprint. So, hit points it is!
Hit Points
In preparation for getting combat working, we need a way to track if entities are injured/dead. The traditional approach in most RPGs and roguelikes is the venerable hit point---run out of hit points, and you die.
Health Component
The first thing we need is a component to represent current health status. We need to track both the maximum and the current level of hit points---that way, if we add healing later we know the ceiling at which to cap improvements. We can also use it as a range when displaying health bars.
Create a new file named src/components/health.rs. Add the new component to it:
#![allow(unused)] fn main() { pub struct Health { pub max: i32, pub current: i32 } }
The component file won't do anything until we include it in the project. Open src/components/mod.rs and add the two lines highlighted with plus symbols:
#![allow(unused)] fn main() { mod tags; mod targeting; mod tile_trigger; +mod health; pub use colonist::*; pub use colonist_status::*; pub use speech::*; pub use tags::*; pub use targeting::*; pub use tile_trigger::*; +pub use health::*; }
The health component is now part of the component system, so it's time to start giving entities some hit points.
Giving the Player Some Health
Open src/main.rs and find the code that sets up the player entity. At the end of the component push, add the following:
#![allow(unused)] fn main() { Health{max: 10, current: 10}, }
The player now has a health component.
Giving Colonists Health
We also want colonists to have some health. Open src/map/layerbuilder/colonists.rs. Now we run into a problem. Legion's push command doesn't make it easy to add a large number of components at once, so I had to work around it by using commands to add more to the basic entity. The following code block shows you where to add the new code (marked with + symbols):
#![allow(unused)] fn main() { fn build_base_colonist(ecs: &mut World, location: Point, layer: u32) -> Entity { let name_lock = NAMES.lock(); let name = name_lock.unwrap().random_human_name(); + let entity = ecs.push(( ... )); // Add here + let mut rng = RandomNumberGenerator::new(); + let hp = rng.roll_dice(1, 6) + 3; + let mut commands = CommandBuffer::new(ecs); + commands.add_component(entity, Health{max: hp, current: hp}); + commands.flush(ecs); entity } }
All base colonists now have a random number of hit points. About this time, I took a quick detour and decided to change the description of the first colonist. Since we're in the file already, let's do that. Find the spawn_first_colonist function, and add a new description.
#![allow(unused)] fn main() { commands.add_component(entity, Description("Colonist senior manager.".to_string())); commands.flush(ecs); } }
Now that colonists have hit points, let's give some to the monsters too.
Monstrous Health
Monsters are created in src/map/layerbuilder/monsters.rs, so open that file. In the list of components given to face eaters (spawn_face_eater function) add:
#![allow(unused)] fn main() { Health{max: 3, current: 3}, }
Now that monsters, colonists and the player all have hit points---we need to update the user interface to show this.
UI Updates
We're going to be adding more lines to the UI panel, so first we need to make a quick change to colonist_panel. Adjust the function signature to take mut y: i32 as a parameter, and remove let mut y=2 from the function. Open src/render/colonist_panel.rs and make the following changes:
#![allow(unused)] fn main() { pub fn render_colonist_panel(ctx: &mut BTerm, ecs: &World, current_layer: usize, mut y: i32) -> i32 { .. // let mut y = 2; }
A New Status Panel
We want to show SecBot's hit points, and not look too incredibly ugly doing it. Open src/render/mod.rs and add two new lines:
#![allow(unused)] fn main() { pub mod status_panel; pub use status_panel::*; }
Now that we've told Rust to use our new file, create a new file named src/render/status_panel.rs.
#![allow(unused)] fn main() { use bracket_lib::prelude::*; use legion::*; use crate::components::*; use crate::map::WIDTH; pub fn render_status(ctx: &mut BTerm, ecs: &World, mut y: i32) -> i32 { let x = WIDTH + 3; let mut hp_query = <(&Player, &Health)>::query(); hp_query.for_each(ecs, |(_, hp)| { ctx.print_color(x, y, WHITE, BLACK, format!{"Hit Points : {} / {}", hp.current, hp.max}); y += 1; }); ctx.print_color(x, y, GREY, BLACK, "----------------------------"); y += 1; y } }
This is pretty straightforward: we display the player's health and a separator, and update the panel's y position.
Tooltips that Show Health
Now open src/render/tooltips.rs. We're going to add a health display to the tooltips. At the top, change the components import to components::*. It makes life easier, even if it slightly slower to compile. Then find the let map_y = my - 1 line, and adjust the entity details query a bit:
#![allow(unused)] fn main() { let map_y = my - 1; if map_x >= 0 && map_x < WIDTH as i32 && map_y >= 0 && map_y < HEIGHT as i32 { let mut lines = Vec::new(); let mut query = <(Entity, &Position, &Description, &Name)>::query(); query.for_each(ecs, |(entity, pos, desc, name)| { if pos.layer == map.current_layer as u32 && pos.pt.x == map_x && pos.pt.y == map_y { let idx = map.get_current().point2d_to_index(pos.pt); if map.get_current().visible[idx] { lines.push((CYAN, name.0.clone())); lines.push((GRAY, desc.0.clone())); if let Ok(er) = ecs.entry_ref(*entity) { if let Ok(hp) = er.get_component::<Health>() { lines.push((GRAY, format!("{}/{} hp", hp.current, hp.max))); } } } } }); }
See how we now retrieve the Entity as part of the query? Not everything has health, so we don't just require a Health component. Then we check to see if the entity has a Health component, and print the hit points details if they are present.
We've slightly changed the format of the line information. It's now a tuple, containing color and text---rather than just the text. We need to adjust the width calculation for each line:
#![allow(unused)] fn main() { if !lines.is_empty() { let height = lines.len() + 1; let width = lines.iter().map(|s| s.1.len()).max().unwrap() + 2; let tip_x = if map_x < WIDTH as i32 / 2 { mx + 1 } else { }
Finally, we tweak the render code a little:
#![allow(unused)] fn main() { } else { my }; ctx.draw_box(tip_x, tip_y- (lines.len()/2) as i32, width, height, WHITE, BLACK); let mut y = tip_y + 1 - (lines.len()/2) as i32; lines.iter().for_each(|s| { ctx.print_color(tip_x + 1, y, s.0, BLACK, &s.1); y += 1; }); } }
Calling the new code
In src/main.rs, we need to adjust our code that calls the UI rendering to make use of the new y calculation:
#![allow(unused)] fn main() { fn tick(&mut self, ctx: &mut BTerm) { ctx.cls(); render::render_ui_skeleton(ctx); + let y = render::render_status(ctx, &self.ecs, 2); + let y = render::render_colonist_panel(ctx, &self.ecs, self.map.current_layer, y); let (_y, target_pt) = render::render_targeting_panel(y, ctx, &self.ecs, self.map.current_layer); self.map.render(ctx); }
Wrap-Up
If you play the game now, colonists have hit points and nicer looking tooltips---and SecBot's health is visible in the status panel.
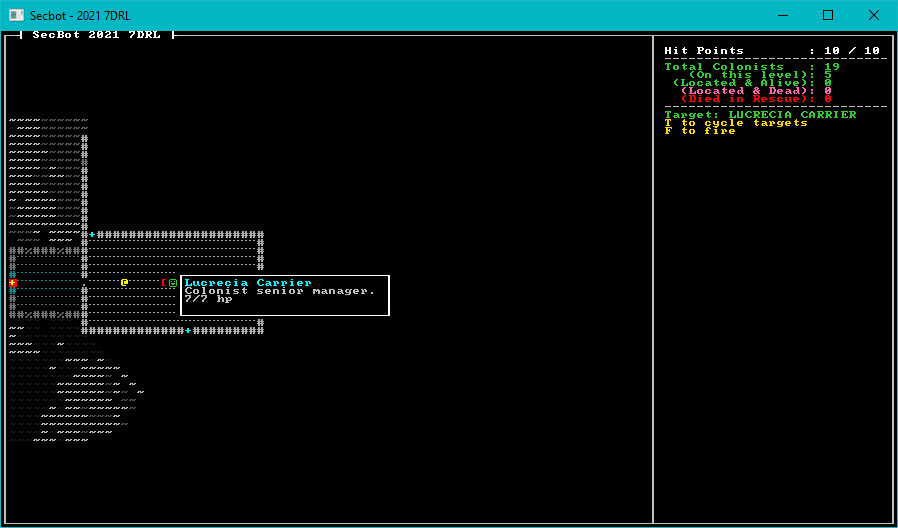
You can find the source code for
hit_pointshere.
Next up: shooting things!
Shooting Things
Combat is central to most roguelikes, and SecBot is no exception. So we'll revisit the combat system a few times as we race towards the finish line. In this section, we'll get the basics working. This is a smorgasboard of a section---there's a lot to process.
Hit Probability Estimate
You'll be referencing the game module from places other than main.rs in this section. Open src/main.rs and change mod game; to pub mod game;. That makes it available everywhere in the project.
I ended up not keeping this in the final game, but I decided to display an approximation of success for hitting your target.
Open src/game/player.rs, and add a new function:
#![allow(unused)] fn main() { // Returns (probability, range) pub fn hit_probability(ecs: &World, target: Entity) -> (u32, u32) { let mut target_pos = Point::zero(); if let Ok(entry) = ecs.entry_ref(target) { if let Ok(pos) = entry.get_component::<Position>() { target_pos = pos.pt; } } let player_pos = <(&Player, &Position)>::query() .iter(ecs) .map(|(_, pos)| pos) .nth(0) .unwrap() .pt; let range = DistanceAlg::Pythagoras.distance2d(player_pos, target_pos) as u32; // TODO: More complexity here let mut hit_chance = 90; if range > 5 { hit_chance -= (range - 5) * 5; } (hit_chance, range) } }
The function calculates the range to the target, and calculates a probability based on this. Since we'll be removing this again in a few sections, I've left it as an after-thought.
Now that we have targeting probability, let's display it. Open src/render/targeting_panel.rs, and add an import for a new module at the top:
#![allow(unused)] fn main() { use crate::game::player::hit_probability; }
Now in the targeting code, add the following:
#![allow(unused)] fn main() { let (probability, range) = hit_probability(ecs, target_entity); ctx.print_color(x, y, WHITE, BLACK, format!("Hit probability: {}%", probability)); y += 1; ctx.print_color(x, y, WHITE, BLACK, format!("Range : {}", range)); y += 1; }
More Dependencies: Ultraviolet
I like ultraviolet. It provides a very thorough set of vector and matrix math libraries, and does an amazing job (via the wide crate) of turning them into really fast SIMD code. We'll use it later, so open Cargo.toml and add a dependency:
ultraviolet = "0.7.5"
We'll make use of ultraviolet's fast vector processing in the shooting section. So add it for now, and you'll be ready for when we need it.
New Components
We're going to require a few new component types for this section. I've gathered them together, so you aren't jumping around too much while you add them.
Bloodstains
I wanted it to be obvious that a fight had occurred in an area. One way to do this is to make wounded entities leave blood stains. That way, when you return to an area you have immediate feedback that a fight took place here. It would also be nice to have different types of critter leave varying colors of blood. To accomplish that, create a new file src/components/blood.rs. The file contains a simple component:
#![allow(unused)] fn main() { use bracket_lib::prelude::RGB; #[derive(Debug)] pub struct Blood(pub RGB); }
Now open src/components/mod.rs and include a mod blood; pub use blood::*; statement to include it in your project.
Projectiles
Since we're going to be firing projectiles, it's a good idea to represent them. Projectiles will be their own entity, with a pre-defined path. They will act like a particle, following the path until they expire. This lets us give good visual feedback that we're shooting, without slowing the game down as a whole. Create another new component file named src/components/projectile.rs. The file contains:
#![allow(unused)] fn main() { use bracket_lib::prelude::{ColorPair, FontCharType, Point}; pub struct Projectile { pub path: Vec<Point>, pub layer: usize, } }
Once again, you need to add a mod projectile; pub use projectile::*; to src/components/mod.rs.
Found Component
I wasn't happy with how we were storing colonist statuses, so I made a new tag component to indicate that we'd found a colonist. This differs from "active" in that its possible to locate a colonist---but they are already dead. Open src/components/tags.rs and add another component to it:
#![allow(unused)] fn main() { pub struct Found; }
Shooting Things
I know you've been waiting for this. It's time to implement some death and destruction!
The Fire Commands
Open src/game/player.rs and we'll add a placeholder command to the list of keys to process. Pressing F calls the new open_fire_at_target function:
#![allow(unused)] fn main() { VirtualKeyCode::F => open_fire_at_target(ecs, map), }
Now find the can_be_activated.for_each code, and replace it as follows:
#![allow(unused)] fn main() { can_be_activated.for_each_mut(ecs, |(entity, _, pos)| { if pos.layer == map.current_layer as u32 && vt.contains(&pos.pt) { commands.add_component(*entity, Found {}); if DistanceAlg::Pythagoras.distance2d(player_pos, pos.pt) < 6.0 { commands.remove_component::<CanBeActivated>(*entity); commands.add_component(*entity, Active {}); } } }); }
The changes are that if an entity is visible, we add Found to it. It's been located, so even if it is dead it counts on the colonist count. Then, if you are close enough to the target we remove its CanBeActivated and substitute an Active component.
Now it's time for open_fire_at_target! This function is added to the very end of player.rs. Let's start with a function signature and obtain the player entity and current target:
#![allow(unused)] fn main() { fn open_fire_at_target(ecs: &mut World, map: &mut Map) -> NewState { let mut commands = CommandBuffer::new(ecs); let mut player_pos = Point::zero(); let mut target = None; let mut current_layer = map.current_layer as u32; <(&Player, &Position, &Targeting)>::query() .iter(ecs) .for_each(|(_, pos, targeting)| { player_pos = pos.pt; target = targeting.current_target; }); // If there's nothing to fire at, return to waiting if target.is_none() { return NewState::Wait; } }
Next we'll build a set named pos_map that lists everything with a Position and Health component on the map. We'll use this to determine if the projectile passes through anything that can be damaged.
#![allow(unused)] fn main() { let pos_map = <(&Position, &Health)>::query() .iter(ecs) .map(|(pos, _)| pos.pt) .collect::<HashSet<Point>>(); }
Next, we determine where the target is. We'll create some variables for use later on, too:
#![allow(unused)] fn main() { if let Some(target) = target { if let Ok(target_ref) = ecs.entry_ref(target) { if let Ok(target_position) = target_ref.get_component::<Position>() { let target_pos = target_position.pt; let mut power = 20; let mut range = 0; let mut projectile_path = Vec::new(); let mut splatter = None; }
We're storing the target's position in target_pos for easy access. Power represents how much energy is left in the projectile as it travels. We want the chance to shoot through targets and damage whatever is behind them. Range tracks how far the projectile has travelled so far. We make an empty vector to store the intended trajectory (we'll use this for the projectile particle effect) and set a variable called splatter to None. If we make a bloody mess en route, we'll store the bloody mess information in here.
Now we use line2d_bresenham to plot a line between the starting position and the target. We call skip(1) to miss the first tile---we don't want to allow the player to accidentally shoot themselves. Then we embark on a long for_each block. For each tile in the target line, we:
- Push it into the
projectile_pathvector, tracking where the bullet went. - If the
pos_mapset we made earlier contains the current tile, we callhit_tile_contents(we'll write that in a moment) and reduce the projectile's power by the returned amount. The projectile weakens as it passes through solid objects. - If the
splattervariable has contents, then we we darken the stored blood splatter. - We add 1 to
range, indicating that the projectile has traveled 1 tile. - If
rangeis greater than 5, we reduce its power by 1.
Here's the code for the this section:
#![allow(unused)] fn main() { line2d_bresenham(player_pos, target_pos) .iter() .skip(1) .for_each(|pt| { projectile_path.push(*pt); if pos_map.contains(&pt) { power -= hit_tile_contents( ecs, *pt, current_layer, &mut commands, &mut splatter, ); } if let Some(bsplatter) = &mut splatter { let idx = map.get_current().point2d_to_index(*pt); map.get_current_mut().tiles[idx].color.bg = bsplatter.to_rgba(1.0); bsplatter.r = f32::max(0.0, bsplatter.r - 0.1); bsplatter.g = f32::max(0.0, bsplatter.g - 0.1); bsplatter.b = f32::max(0.0, bsplatter.b - 0.1); if bsplatter.r + bsplatter.g + bsplatter.b < 0.1 { splatter = None; } } range += 1; if range > 5 { power -= 1; } }); }
When we get to the end of following the line's path, the projectile has traveled from the shooter to the intended victim. We want over-penetration to be a thing, so we need to figure out where the projectile will go next. The next two lines calculates a slope for the existing trajectory, allowing us to continue the projectile's travel:
#![allow(unused)] fn main() { use ultraviolet::Vec2; let mut projectile_pos: Vec2 = Vec2::new(target_pos.x as f32, target_pos.y as f32); let slope = (projectile_pos - Vec2::new(player_pos.x as f32, player_pos.y as f32)) .normalized(); }
We're making use of Ultraviolet's normalize function, and using its Vec2 types for speed. It probably didn't make a big difference, but I'm always happy to use someone else's vector math library!
Now, we continue the bullet's path while it has traveled fewer than 25 tiles and still has any power. Notice that it's basically the same steps as we used for the first part of the trajectory:
#![allow(unused)] fn main() { while range < 25 && power > 0 { projectile_pos += slope; let pt = Point::new(projectile_pos.x as i32, projectile_pos.y as i32); projectile_path.push(pt); if pos_map.contains(&pt) { power -= hit_tile_contents(ecs, pt, current_layer, &mut commands, &mut splatter); } if let Some(bsplatter) = &mut splatter { let idx = map.get_current().point2d_to_index(pt); map.get_current_mut().tiles[idx].color.bg = bsplatter.to_rgba(1.0); bsplatter.r = f32::max(0.0, bsplatter.r - 0.1); bsplatter.g = f32::max(0.0, bsplatter.g - 0.1); bsplatter.b = f32::max(0.0, bsplatter.b - 0.1); if bsplatter.r + bsplatter.g + bsplatter.b < 0.1 { splatter = None; } } let idx = map.get_current().point2d_to_index(pt); if map.get_current().tiles[idx].tile_type == TileType::Wall { range += 100; power = 0; } if !map.get_current().tiles[idx].opaque && power > 5 { // TODO: End the game because you broke a window } range += 1; if range > 5 { power -= 1; } } }
Next, we use the command buffer to create a new projectile with the path we determined. We also close out our if statements, handling the cases in which the shooter couldn't pull the trigger.
#![allow(unused)] fn main() { commands.push(( Projectile { path: projectile_path, layer: current_layer as usize, }, Glyph { glyph: to_cp437('*'), color: ColorPair::new(RED, BLACK), }, )); } else { // Unable to fire return NewState::Wait; } } else { // Unable to fire return NewState::Wait; } } commands.flush(ecs); NewState::Player } }
We used the hit_tile_contents function several times. It also gets added to the end of src/game/player.rs. Once again, let's start with the function header:
#![allow(unused)] fn main() { fn hit_tile_contents( ecs: &mut World, pt: Point, layer: u32, commands: &mut CommandBuffer, splatter: &mut Option<RGB>, ) -> i32 { }
We need access to the ECS, the target point and layer index, the command buffer we've been building, and the splatter variable. The function returns the power loss from hitting that tile's content.
Next, we obtain a random number generator lock:
#![allow(unused)] fn main() { let mut rng_lock = crate::RNG.lock(); let rng = rng_lock.as_mut().unwrap(); }
We'll need that later. We need to create variables called power_loss (as we total up power loss) and dead_entities (listing entities that were killed):
#![allow(unused)] fn main() { let mut power_loss = 0; let mut dead_entities = Vec::new(); }
Next, we query entity locations and obtain a mutable Health value. If an entity is in the current target square, we reduce its health by a random amount. Then we reduce the projectile's power by the number of hit points they had remaining. If the entity died, we add it to the dead_entities list:
#![allow(unused)] fn main() { <(Entity, &Position, &mut Health)>::query() .iter_mut(ecs) .filter(|(_, pos, _)| pos.layer == layer && pos.pt == pt) .for_each(|(entity, _, hp)| { let damage = rng.range(1, 5) + 10; // TODO: Complexity, please hp.current -= damage; if hp.current < 0 { hp.current = 0; dead_entities.push(*entity); } power_loss += hp.current; }); }
Now that we've potentially hit everything in the tile, we iterate dead_entities. This section removes Health, Active, CanBeActivated, Blood and Targetable components. If the target was a colonist, we turn them into a corpse---retaining their former name.
#![allow(unused)] fn main() { dead_entities.iter().for_each(|entity| { if let Ok(mut er) = ecs.entry_mut(*entity) { if let Ok(_colonist) = er.get_component_mut::<ColonistStatus>() { commands.add_component(*entity, ColonistStatus::DiedAfterStart); } if let Ok(g) = er.get_component_mut::<Glyph>() { g.color.bg = DARK_RED.into(); g.color.fg = DARK_GRAY.into(); } if let Ok(n) = er.get_component_mut::<Name>() { n.0 = format!("Corpse: {}", n.0); } if let Ok(b) = er.get_component::<Blood>() { *splatter = Some(b.0); } } commands.remove_component::<Health>(*entity); commands.remove_component::<Active>(*entity); commands.remove_component::<CanBeActivated>(*entity); commands.remove_component::<Blood>(*entity); commands.remove_component::<Targetable>(*entity); }); power_loss } }
That finishes the first draft of the shooting system! It's pretty messy, both in terms of code and what it does to victims. :-)
Rendering Changes
Open src/main.rs and find the call to render_speech. Add another render call after it:
#![allow(unused)] fn main() { render::speech::render_speech(ctx, &mut self.ecs, &self.map); +render::projectiles::render_projectiles(ctx, &mut self.ecs, &self.map); }
We'll write that function in a moment. While we're in main.rs, let's cap the game's framerate:
fn main() -> BError { let context = BTermBuilder::simple(112, 62)? .with_title("Secbot - 2021 7DRL") .with_fps_cap(60.0) .build()?;
We're doing this to make it easier to time projectile paths. We could read frame_time_ms each time, but I was in a hurry (and really should have done it properly!).
Giving Blood to Colonists and Monsters
While colonists will doubtless need a blood transfusion after this update, we're more concerned with giving them blood at all so they participate in the splatter system. Open src/map/layerbuilder/colonists.rs. In build_base_colonist add one more component to the colonists:
#![allow(unused)] fn main() { commands.add_component(entity, Blood(DARK_RED.into())); }
Monsters should also bleed, an icky dark green. Open src/map/layerbuilder/monsters.rs and add one more component to the face eater:
#![allow(unused)] fn main() { Blood(DARK_GREEN.into()), }
Counting Colonists
Open src/render/colonist_panel.rs and change if let Ok(_) = entry.get_component::<Active>() { to read:
#![allow(unused)] fn main() { if let Ok(_) = entry.get_component::<Found>() { }
This way, we are counting colonists who have been located---alive or dead.
Projectile Rendering
In the file src/render/mod.rs, add pub mod projectiles;. Then (predictably!), create a new file named src/render/projectiles.rs. It's contents are as follows:
#![allow(unused)] fn main() { use crate::{components::*, map::Map, map::WIDTH}; use bracket_lib::prelude::*; use legion::*; pub fn render_projectiles(ctx: &mut BTerm, ecs: &mut World, map: &Map) { let mut commands = legion::systems::CommandBuffer::new(ecs); let mut query = <(Entity, &Glyph, &mut Projectile)>::query(); query.for_each_mut(ecs, |(entity, glyph, projectile)| { if projectile.layer == map.current_layer { if projectile.path.is_empty() { commands.remove(*entity); } else { let pt = projectile.path[0]; projectile.path.remove(0); ctx.set( pt.x + 1, pt.y + 1, glyph.color.fg, glyph.color.bg, glyph.glyph, ); } } }); commands.flush(ecs); } }
This works by rendering the projectile's first path location each frame, and then removing that from the path list---so next frame it renders the next one. When there are no path entries remaining, the projectile ceases to exist. This is very similar to how particles are generally implemented.
Wrap-Up
Whew! That was a lot of steps. The good news is that you can now lay waste to colonists and monsters alike.
You can find the source code for
shooting1here.
Up next, we'll clean up some code warnings---and start to let the mobs fight back.