This tutorial is free and open source, and all code uses the MIT license - so you are free to do with it as you like. My hope is that you will enjoy the tutorial, and make great games!
If you enjoy this and would like me to keep writing, please consider supporting my Patreon.

Building the superstructure
In my mental design sketches, the map was going to be 80 tiles wide by 60 characters tall. That's probably larger than I actually needed, but it worked. I needed room for a UI, so I went with 112x62 for my initial window size. I opened up src/main.rs and modified the initializer:
fn main() -> BError {
    let context = BTermBuilder::simple(112, 62)?
        .with_title("Secbot - 2021 7DRL")
        .with_fps_cap(30.0)
        .build()?;

    main_loop(context, State::new())
}
Notice that:
- I've modified
mainto return aBError, just like in Hands-on Rust. This lets me use the question mark operator rather than throwingexpecteverywhere. - I added a window title.
- I capped the frame rate at 30 FPS. This keeps the game from eating too much CPU, and gives a consistent render speed.
- I've added a
newfunction toState. We'll get there in a second.
This is a pretty tried-and-true setup, so testing consisted of cargo run - yup, it works.
Implementing State and Initializing Legion
I was sure that I'd be using Legion, so I extended the use statements at the top of main.rs to include it:
#![allow(unused)]
fn main() {
use bracket_lib::prelude::*;
pub use legion::*;
}
I then extended State to include an Entity-Component System world:
#![allow(unused)]
fn main() {
struct State {
    ecs: World,
}
}
Finally, I added a new function to act as a constructor for State:
#![allow(unused)]
fn main() {
impl State {
    fn new() -> Self {
        Self {
            ecs: World::default()
        }
    }
}
}
Once again, a quick cargo run was enough to see that it didn't explode.
Finding the Map
With a pretty solid idea for how the map should work, it was clear that I'd need one. I extended the use statements in main.rs to include one:
#![allow(unused)]
fn main() {
mod map;
use map::Map;
}
Then I created a directory called map (src is the parent) and made a file called mod.rs. I like to keep my mod.rs files relatively clean - mostly just importing other things and setting module-wide constants. The mod.rs files looks like this:
#![allow(unused)]
fn main() {
pub const WIDTH: usize = 80;
pub const HEIGHT: usize = 60;
const TILES: usize = WIDTH * HEIGHT;
pub const NUM_LAYERS: usize = 5;

mod tile;
use tile::*;
mod layer;
use layer::*;
mod map;
pub use map::Map;
//mod layerbuilder;
}
The top part is pretty self-explanatory: it sets the WIDTH and HEIGHT constants to the map dimensions. It calculates TILES to be the number of tiles this requries (80x60 = 4,800). These are constants to make it easy to change them if I change my mind on some design elements later on.
The rest refers to a bunch of modules we haven't created yet! I had a good idea of what I wanted (I've used this template before), so it served as a signpost for development. It won't compile at this point.
Notice that
LAYERSis equal to 5. It really should have read4, but I missed it when I was setting this up. I've left the bug in place so that you can see the progression of development under a time crunch.
Making Tiles
My map is going to be tile-based, so a good starting point was "what is a tile?". In the map directory, I created a file named tile.rs and created a Tile structure:
#![allow(unused)]
fn main() {
use bracket_lib::prelude::*;

#[derive(Clone)]
pub struct Tile {
    pub glyph: FontCharType,
    pub color: ColorPair,
    pub blocked: bool,
    pub opaque: bool,
}

impl Tile {
    pub fn default() -> Self {
        Self {
            glyph: to_cp437('.'),
            color: ColorPair::new(GREY, BLACK),
            blocked: false,
            opaque: false,
        }
    }
}
}
That's pretty much the minimum for a tile:
glyphtells the game what codepage-437 character to render for the tile.colordefines a foreground and background color.blockedandopaquewill be used when movement and field-of-view come into play. If a tile isblocked, you can't walk into it. If itsopaque, you can't see through it.
Layering the Cake
I'd decided up-front that I was going to have multiple levels, and entities other than the player needed to be able to navigate them. That required that I have all the map layers available when the world was created - I couldn't lazily make them as needed. I also knew that the overall game map would consist of several layers (4, even though I wrote 5 in the definition file!). So I created a layer.rs file in the map directory and added in a basic description of a Layer type:
#![allow(unused)]
fn main() {
use super::{Tile, HEIGHT, TILES, WIDTH};
use bracket_lib::prelude::*;
use legion::*;

pub struct Layer {
    pub tiles: Vec<Tile>,
    pub starting_point: Point,
}
}
I haven't written layerbuilder yet, but it's coming. We'll get to that in a second. Otherwise, the layer is pretty simple: a vector of Tile types, and a Point defining where the player starts on the level. I wanted some functionality, so I started implementing things for Layer. First up, a constructor:
#![allow(unused)]
fn main() {
impl Layer {
    pub fn new(depth: usize, ecs: &mut World) -> Self {
        let layer = match depth {
            _ => Self {
                tiles: vec![Tile::default(); TILES],
                starting_point: Point::new(WIDTH / 2, HEIGHT / 2),
            },
        };
        layer
    }
}
}
This is a little odd at first glance. It takes the depth (layer number) and a mutable reference to the ECS as parameters (so we can add stuff to the game when we build the map). It just makes an empty level with no entities on it (you'll get a warning for not using the ecs at this point).
I also wanted some rendering code. Note that I'm offsetting all the positions by 1 - I wanted to put a border around the map. Here's the render function; it should look familar, it's very similar to that found in Hands-On Rust:
#![allow(unused)]
fn main() {
impl Layer {
    // The `new` function goes here

    pub fn render(&self, ctx: &mut BTerm) {
        let mut y = 0;
        let mut idx = 0;
        while y < HEIGHT {
            for x in 0..WIDTH {
                let t = &self.tiles[idx];
                ctx.set(x+1, y+1, t.color.fg, t.color.bg, t.glyph);
                idx += 1;
            }
            y += 1;
        }
    }
}
}
It iterates the map, and draws each tile. Very simple stuff.
The Map - A structure of layers
The map is a collection of layers, with some helpers to access it. Create a new file, map.rs inside the map directory. The basic structure is:
#![allow(unused)]
fn main() {
use super::{Layer, NUM_LAYERS};
use bracket_lib::prelude::*;
use legion::World;

pub struct Map {
    pub current_layer: usize,
    layers: Vec<Layer>,
}
}
So there's an index to the currently active layer, and a vector of Layer types. Now, let's implement a constructor for it:
#![allow(unused)]
fn main() {
impl Map {
    pub fn new(ecs: &mut World) -> Self {
        let mut layers = Vec::with_capacity(NUM_LAYERS);
        for i in 0..NUM_LAYERS {
            layers.push(Layer::new(i, ecs));
        }
        Self {
            current_layer: 0,
            layers,
        }
    }
}
Note that the implementation continues, keep adding to the
implblock.
The constructor creates a vector with capacity for the number of layers we defined in mod.rs. It then iterates from 0 to the number of layers, pushing a new layer - and passing in the layer number and the ECS.
I wanted a quick way to render the current layer, so the next implemented function is render:
#![allow(unused)]
fn main() {
    pub fn render(&self, ctx: &mut BTerm) {
        self.layers[self.current_layer].render(ctx);
    }
}
Very straightforward - it just calls render for the current map layer. I also needed to be able to access the individual layers:
#![allow(unused)]
fn main() {
    pub fn get_current(&self) -> &Layer {
        &self.layers[self.current_layer]
    }

    pub fn get_current_mut(&mut self) -> &mut Layer {
        &mut self.layers[self.current_layer]
    }
}
}
These just return a pointer to the requested layer.
Minimal map drawing
Now that the map exists (albeit as a set of empty maps, consisting of just floors), we can update the src/main.rs function to use it. Start by adding to the main.rs include list:
#![allow(unused)]
fn main() {
use bracket_lib::prelude::*;
pub use legion::*;
pub mod map;
pub use map::*;
}
Then extend State to hold a map and initialize it:
#![allow(unused)]
fn main() {
struct State {
    ecs: World,
    map: map::Map,
}

impl State {
    fn new() -> Self {
        let mut ecs = World::default();
        let map = map::Map::new(&mut ecs);
        Self { ecs, map }
    }
}
}
Drawing the Map
I adjusted the tick function in main.rs to render the map and draw a border around it:
#![allow(unused)]
fn main() {
impl GameState for State {
    fn tick(&mut self, ctx: &mut BTerm) {
        ctx.cls();
        use map::{HEIGHT, WIDTH};
        ctx.draw_hollow_box(0, 0, WIDTH+1, HEIGHT+1, GRAY, BLACK);
        ctx.print_color(2, 0, WHITE, BLACK, "┤ SecBot 2021 7DRL ├");
        ctx.draw_hollow_box(WIDTH+1, 0, 30, HEIGHT+1, GRAY, BLACK);
        ctx.set(WIDTH+1, 0, GRAY, BLACK, to_cp437('┬'));
        ctx.set(WIDTH+1, HEIGHT+1, GRAY, BLACK, to_cp437('┴'));
        self.map.render(ctx);
    }
}
}
You can run the game now, and see a field of . characters. Map rendering is working!
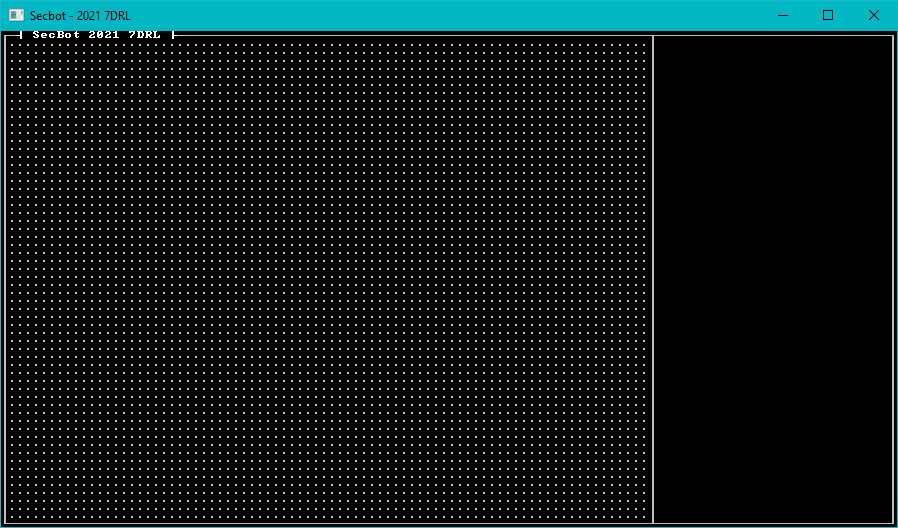
Next-Up: Entities
That's not the most impressive game ever, but getting a field of dots onto the console is a great start.
You can find the source code for
sea_of_dotshere.